

Page 1
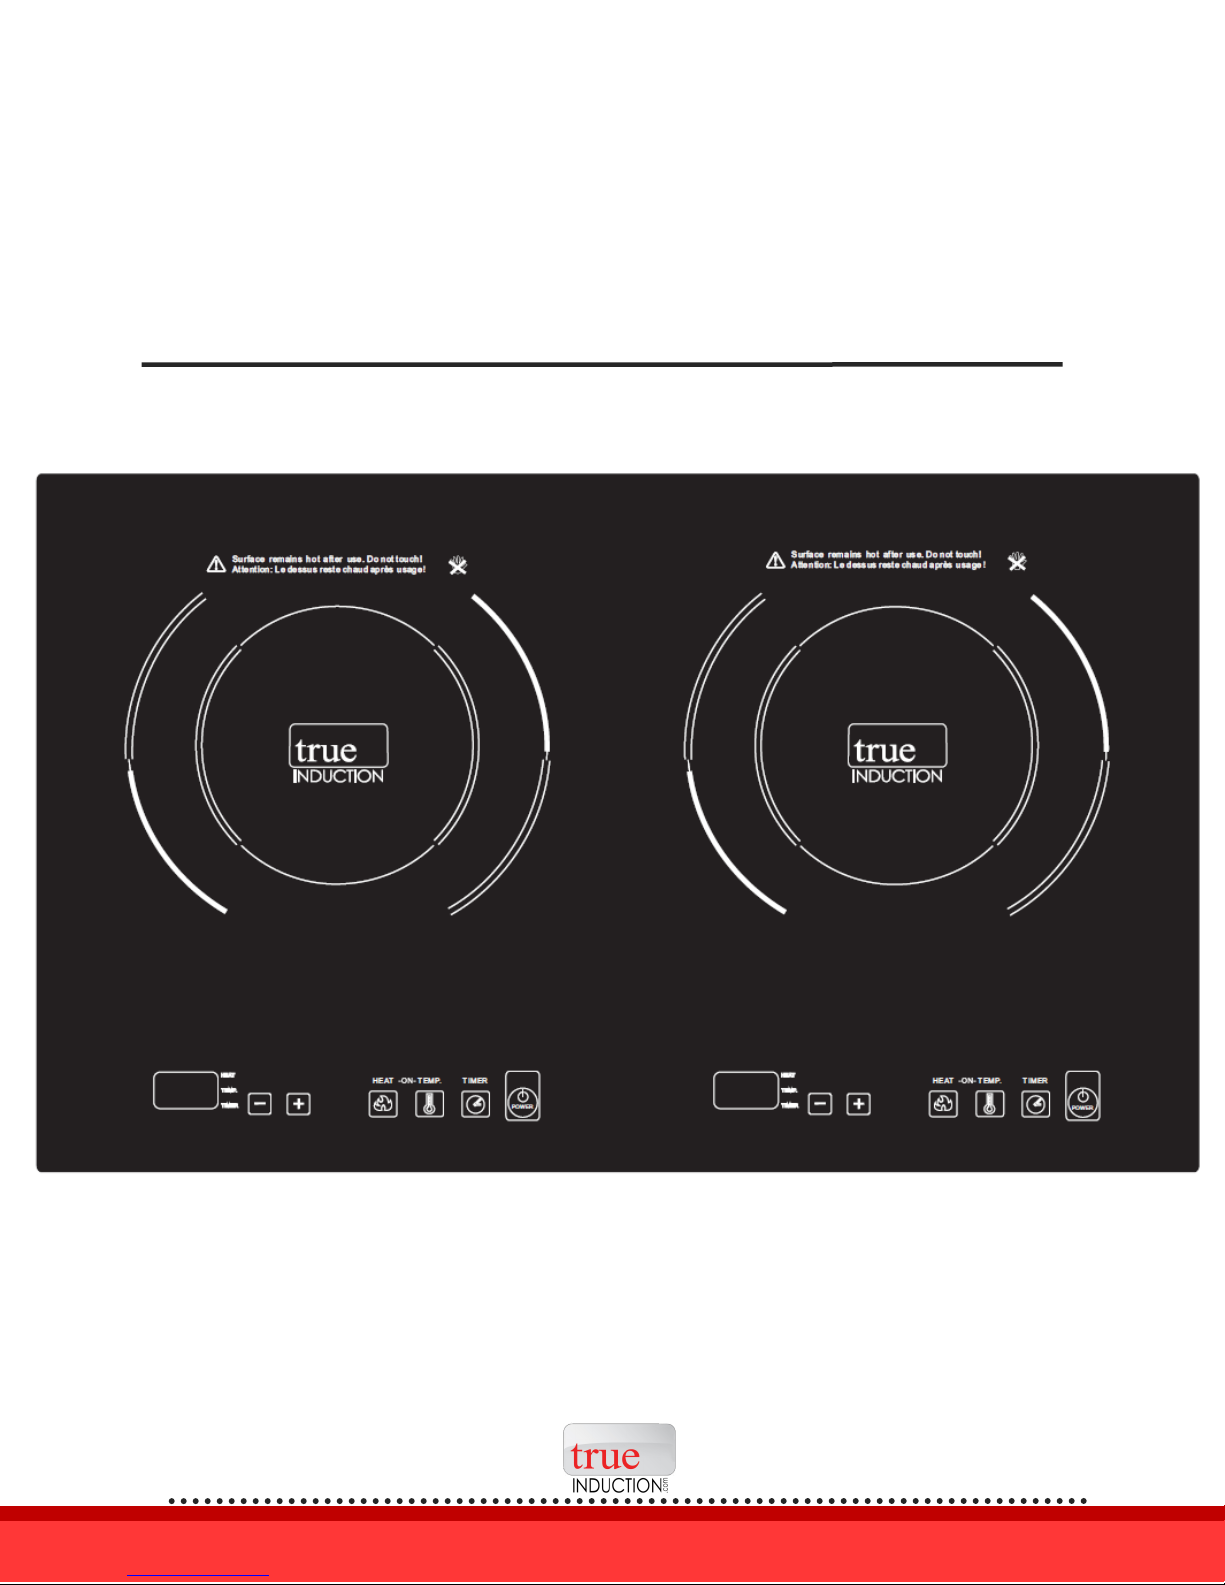
TRUE INDUCTION DOUBLE BURNER
TI-2B COUNTER INSET
INDUCTION COOKTOP MANUAL
1
DOUBLE BURNER TI-2B INDUCTION COOKTOP MANUAL *Previous model# S2F3
Page 2

TABLE OF CONTENTS
I.
II.
III.
IV.
V.
VI.
VII.
Cooktop Installation
Important safety Information
Product Specications
How to Use
> Power Invariance Technology
> Using the Temperature Setting
> Using the Timer Function
> Built-In Safety Shut O
> Turning O Unit
Compatible Cookware
Cleaning & Maintenance
Troubleshooting Error Codes
1-4
5-6
6
7
7
7
8
8
8
9
9
10
Thank you for purchasing the True Induction Double Burner Counter
Inset TI-2B cooktop. Please read the entire instruction manual prior to
using your unit. If you have any questions regarding the True Induction
cooktop please visit http://www.Truelnduction.com or call: 1-877-862-
7049.
DOUBLE BURNER TI-2B INDUCTION COOKTOP MANUAL
2
Page 3

I. Cooktop Installation
Dimensions and Placement for Cut-out in Countertop
• Cut a rectangle hole in the countertop where the cook top is to be placed. The dimensions
for the cut-out are 14 1/4'' x 23 3/4''
• The cut-out must be placed at least 2 1/2" from any side of the countertop.
• To achieve ush mounting installation, use a router tool to round the corners of the hole cut
into the countertop.
2 1/2’’ min
*Outside Radius .4''
23 3/4''
14 1/4''
2 1/2’’ min
3
DOUBLE BURNER TI-2B COUNTER INSETINDUCTION COOKTOP MANUAL P.1
Page 4

I. Cooktop Installation Continued...
Building of supports for cooktop below the counter
Any thickness of the countertop can be utilized, however, the thickness will determine if sup-
ports are built into the walls of the cut-out, placed below the cut-out, or be built out from the
bottom of the cut-out.
Two support beams between½'' and l" in width and 2" in depth should be placed lengthwise
(spanning 23 11/16") 2 ¼" below the surface of the cut-out. In order to achieve this depth it
may be necessary to add a build out to the 14 ¼" sides of the bottom of the countertop.
The supports should be spaced center line in from the rear 1 ¼" and the centerline in from
the front 2 ½''.
1/2 - 1’’
2’’
1/2 - 1’’
2’’
Back of surface
1 1/4’’
2 1/4’’
2 1/2’’
4
DOUBLE BURNER TI-2B COUNTER INSETINDUCTION COOKTOP MANUAL P.2
Page 5
I. Cooktop Installation Continued...
First feed the power wire through the hole and to the location of the power receptacle un-
derneath the cabinet.
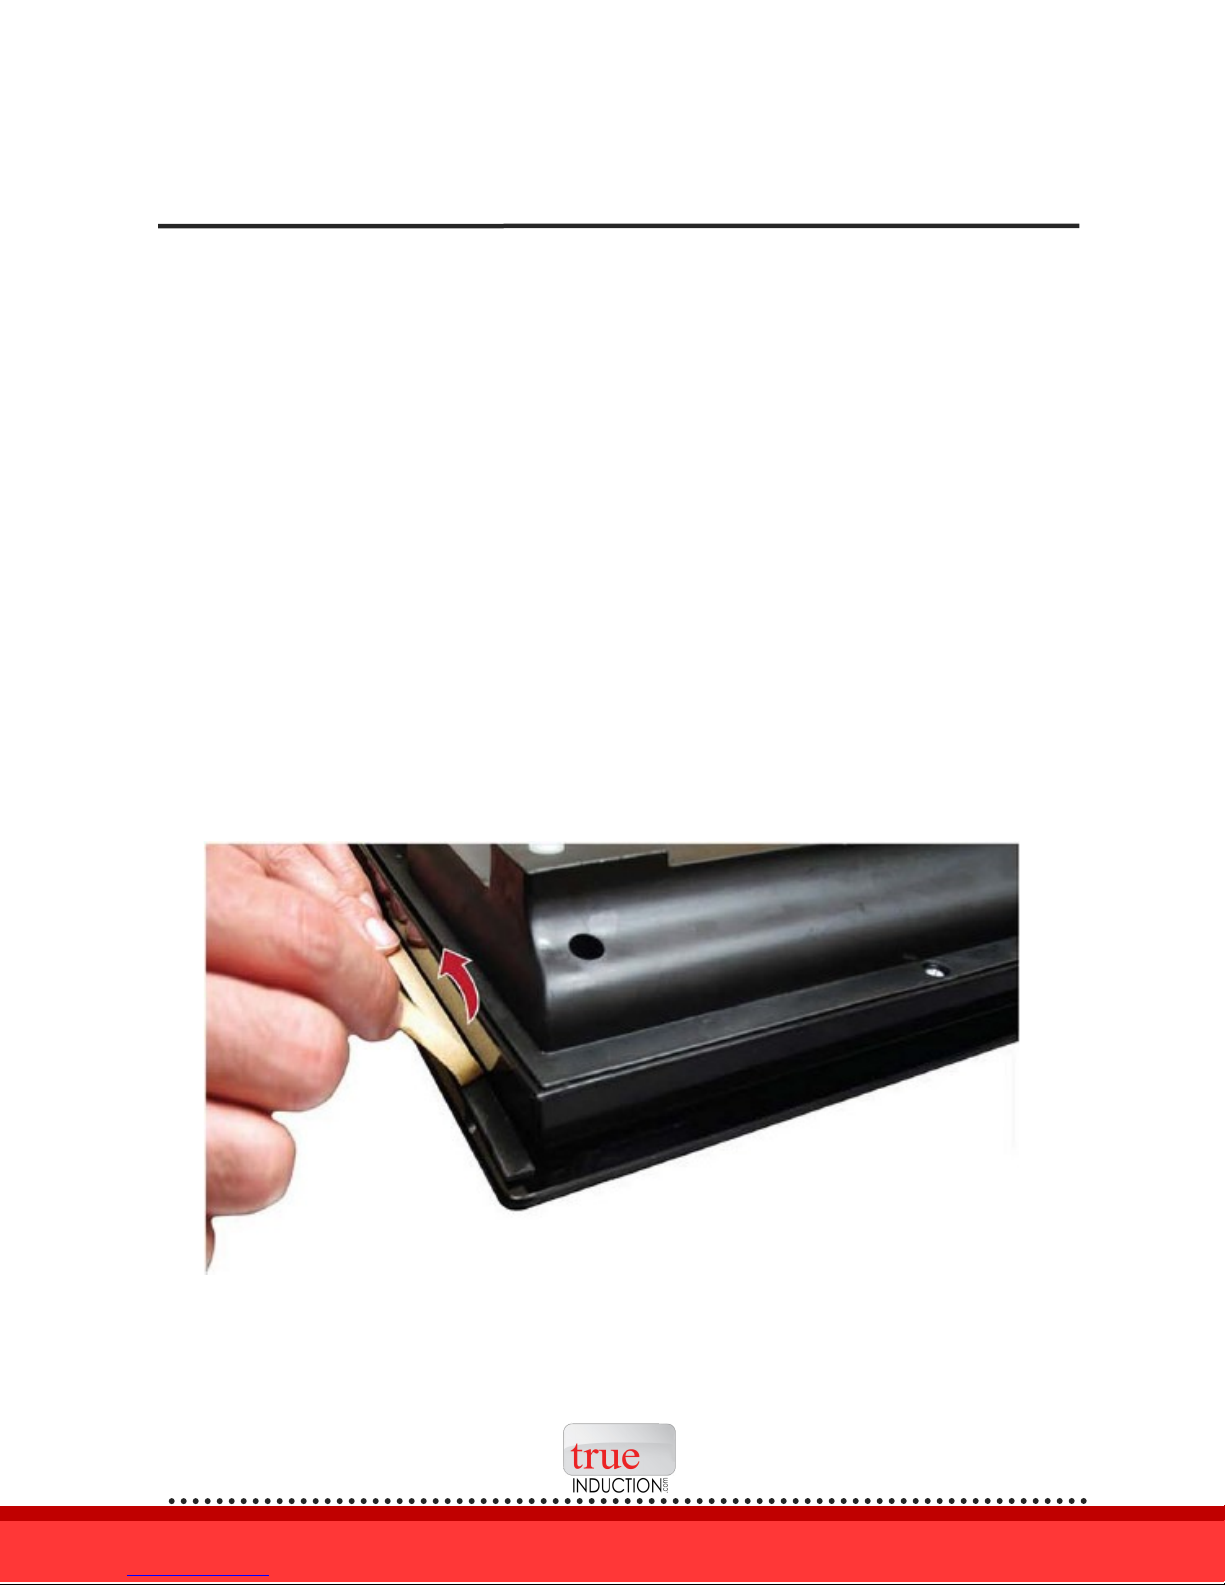
The 'h'' overhang on the induction cooker comes with pre-installed foam gasket. Peel o the
adhesive protector on the bottom of the gasket and set the induction cooker into the cutout. Gently press down on the induction cook top to secure the adhesive gasket to the countertop. The cook top should be sitting on the supports previously installed.
For RV use, apply butyl tape instead of the supplied foam tape. Butyl tape will provide ade-
quate adhesion and still allow for removal if the unit needs to be serviced.
5
DOUBLE BURNER TI-2B COUNTER INSETINDUCTION COOKTOP MANUAL P.3
Page 6
I. Cooktop Installation Continued...
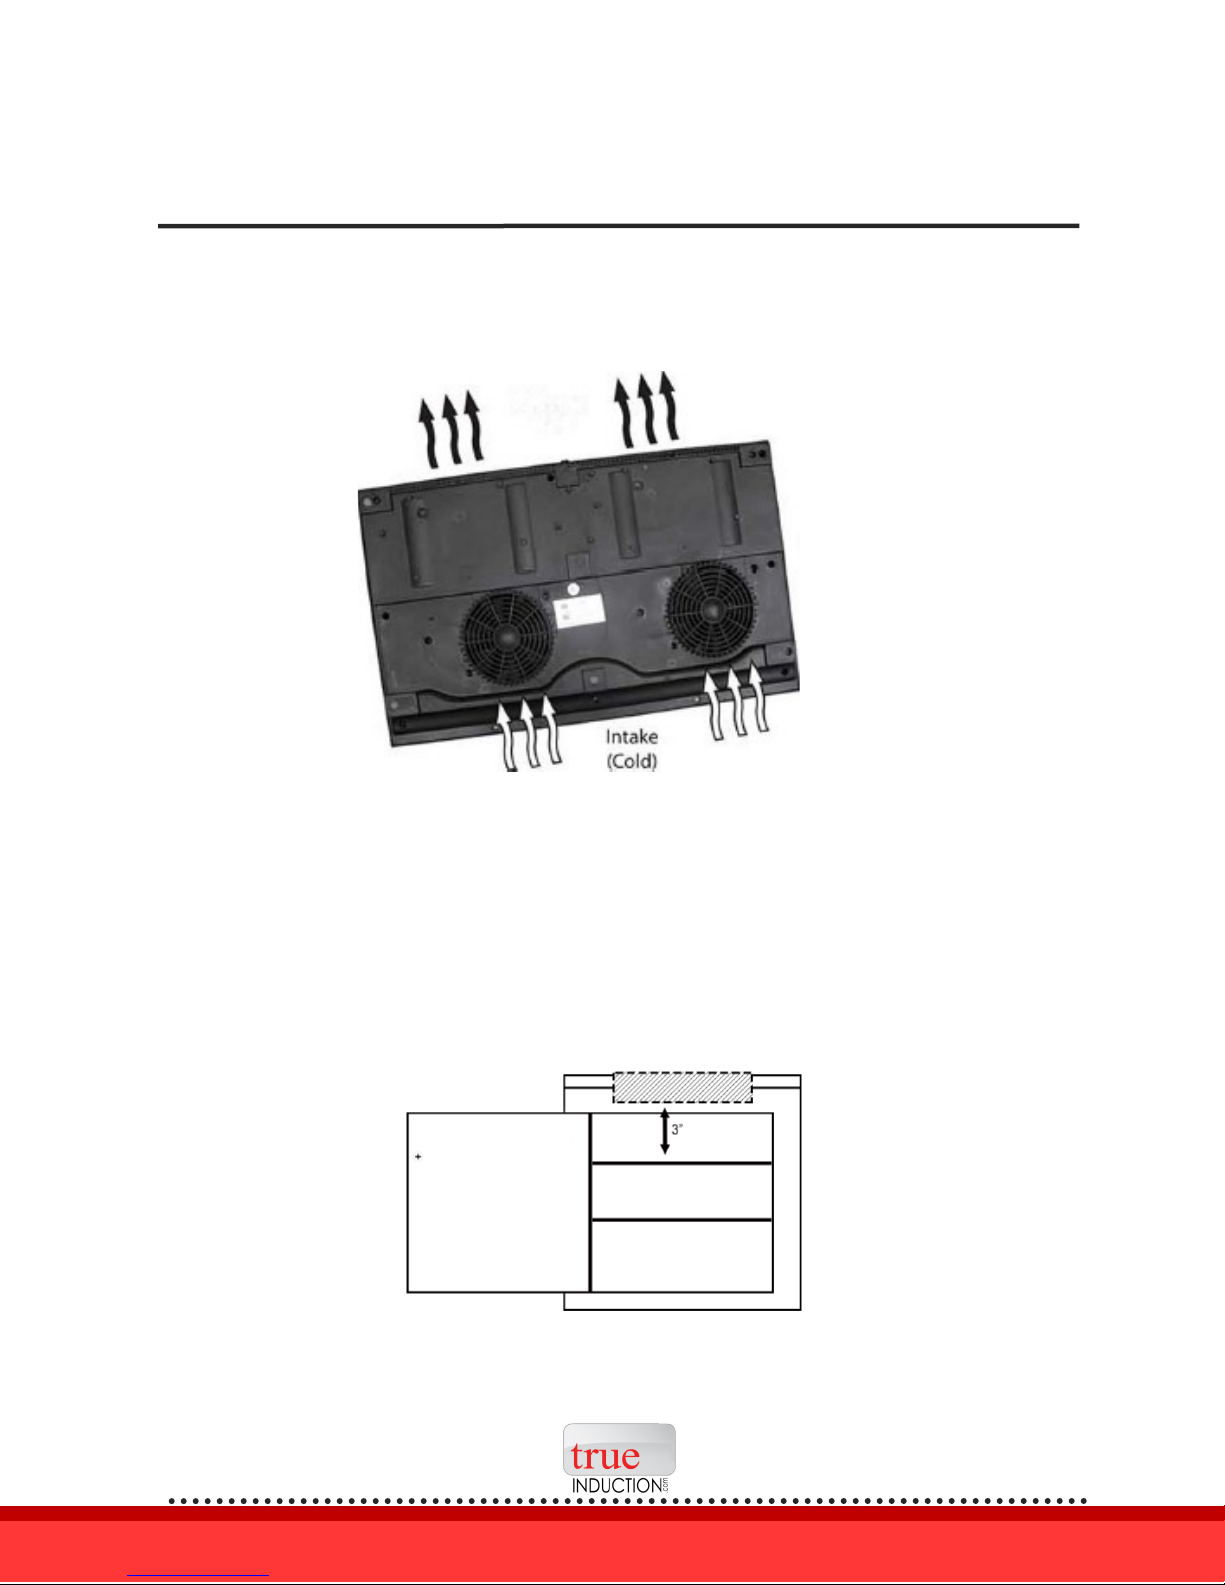
Clearance Needed for Air Circulation
Below you will see a diagram of the air ow. Be sure not to block either the intake or exhaust
For proper air circulation, allow at least 3" of clearance from the bottom of the induction
cooker to any shelving or storage. The underside of the countertop should not be closed o
from the cabinetry underneath for better air ow.
6
DOUBLE BURNER TI-2B COUNTER INSETINDUCTION COOKTOP MANUAL P.4
Page 7

II. Important Safety Information
When using electrical appliances, basic safety precautions should always be followed. For the True
Induction cooker, even with built-in safety features, it is essential to heed all precautions:
When the unit is on, do not touch outside the control panel as the surface may contain residual
heat.
To protect against electric shock, do not immerse cord plugs or cooker in water (or other liquid
substances).
When using any electric appliance used around children, close supervision is strongly suggested.
Do not operate any appliance with a damaged cord or plug, after a malfunction or if it has been
damaged in any manner. Read the seller's guidelines for warranty repairs and returns.
Do not cook on a broken or damaged cooktop as spillovers may penetrate the surface and cre-
ate a risk of electric shock.
To avoid potential injury, do not use accessory attachments which aren't recommended by the
manufacturer.
Do not let the cord dangle over the edge of the table or counter. Keep the cord away from hot
surfaces.
Do not place cooktop on or near: hot gas, electric burner or heated oven.
To prevent accidents and achieve optimal fan ventilation, allow for sucient space around the
cooking area.
Items with a magnetic eld such as: radios, televisions, credit cards, cassette tapes etc., can
aect the unit.
The power cord provided has been sized accordingly, however, with caution and care extension
cords may be used.
a.The marked electrical rating should be at least as great as the electrical rating of the
appliance.
b.The cord should be arranged so that it will not drape over the countertop or tabletop
where it can be pulled on by children or tripped over.
Do not use with empty pans/pots.
Do not place metallic objects such a knives, forks, spoons, lids, cans or aluminum foil on the
cooktop.
To prevent accidents and achieve optimal ventilation, allow for sucient space around the cook-
ing area.
7
DOUBLE BURNER TI-2B COUNTER INSETINDUCTION COOKTOP MANUAL P.5
Page 8

II. Important Safety Information Continued...
This appliance has a polarize plug (one blade is wider than the other). To reduce the risk of
electric shock, the plug will t on the outlet only one way. If the prongs do not t fully, re-
verse the plug. If it still does not t, contact the seller for warranty support; do not attempt
to modify the plug in anyway.
To properly turn o unit press the Power button.
It is important to be aware that the unit's surface will remain hot for a short period of time
after use.
Disconnect power and allow to cool before performing any maintenance or repairs.
Clean cooktop with caution - do not clean while unit is still hot, some cleaners produce
steam or fumes if applied to a heated surface.
Do not use cooktop for any other use then directed by the manufacturer.
III. Product Specifications
Power
Voltage
Temperature Range
Level Selection
Max Time
Material
Unit Measurement
1800 Watts
120v/ 60Hz
150°F - 450°F (exact temp settings)
Selecting settings 1—10
Set timer up to 150 minutes
Glass ceramic top
Base Measurement: 23 5/8’’ W x 14 1/8’’ L x 2 3’’ H
Glass Top Measurement: 24 3/8” W x 14 15/16”L
8
DOUBLE BURNER TI-2B COUNTER INSETINDUCTION COOKTOP MANUAL P.6
Page 9

IV. How to Use
Plug the power plug into a standard outlet.
The Power button will light up and the unit will sound to indicate on.
The device will remain in standby mode, awaiting user direction.
Place ferromagnetic cookware (with water, oil or food already inside) on the center of the
glass-ceramic top center.
Now press the Power button on the control panel, this will turn the cooktop on. The power
display will blink and sound another indicator.
Press the Heat function key once. The pre-set power level "5" is the default selection as the
device turns on.
Using the +/ - keys you can change the settings at any time, ranging from 1- 10. This is con-
sidered to be the HEAT function.
Power Invariance Technology
The maximum power of an individual burner level is at setting 10. But, when operating both
burners their combined total is level 10, meaning that when operating the two burners at the
same time they'll self adjust levels accordingly:
When you increase the power of one side, the power output of the other side will reduce au-
tomatically (i.e., one side is at 6, the other burner automatically reduces power to level 4 cre-
ating a total of max 10 setting).
If one side of the double burner is using the HEAT function and the other side uses the TEMP
settings, the maximum HEAT setting is "5."
Using the Temperature Setting
Using the +/ - keys you can change the temperature settings at any time. Settings range from
150-450 degrees Fahrenheit. (Exact temperatures: 150, 180, 210, 240, 270, 300, 330, 360, 390,
420 and 450 F).
9
DOUBLE BURNER TI-2B COUNTER INSETINDUCTION COOKTOP MANUAL P.7
Page 10

IV. How to Use Continued...
Using the Timer Function
After selecting the HEAT or TEMP mode, press the TIMER button once. The display will show
the number "0." Using the +/ - keys you can select the operating time in 5-minute intervals
(up to max 150 min.) and reducing 1 minute.
The display will count down the duration in minutes. Once the time is up, the unit sounds
and automatically goes into standby mode. To continue cooking, press the Power button
and Heat button to restart.
During the timer operation, you can change the timer duration at any time with the arrow
keys. The device's built-in memory maintains the HEAT or TEMP setting previously entered.
You can also change the HEAT or TEMP settings without aecting the current timer setting.
Built-In Safety Shut Off
The True Induction cooktop is designed to automatically shut o after 150 minutes of use.
This built-in auto shut o is a safety feature.
This function occurs for both the HEAT and TEMP settings. The panel displays EE code and
sounds indicating this auto-o setting.
In the event your food requires further cooking, the unit can easily be turned back on and
re-set to the desired setting
Turning Off Unit
When you are nished cooking, simply press the Power button to turn o the machine.
Upon completion of cooking, the fan may remain on until the unit is cool.
10
DOUBLE BURNER TI-2B COUNTER INSETINDUCTION COOKTOP MANUAL P.8
Page 11

V. Compatible Cookware
Induction requires pots and pans that are made of ferrous (meaning magnetic) materials. Check
your cookware's retail box for the induction symbol. To tell if your current cookware is compatible with the induction technology, grab a magnet and see if it holds. If your magnet stays then
your cookware is ready to be used on the True Induction double burner induction portable
cooktop!
Optimal cookware has a at bottom and a diameter of 4.5" - 10" inches. Round, at bottom
pans give the best results. Pans with warped or curved bottoms will not heat evenly. For wok
cooking, use a at-bottom wok. Do not use a wok with a support ring. Look for this induction
image on the retail box:
The following are NOT COMPATIBLE:
Heat-resistant glass, ceramic, copper, aluminum pan/pots, round bottomed cookware, or
cookware with a base less than 4.5 inches.
VI. Cleaning & Maintenance
Please follow these directions along with important safety steps for cleaning advised at the beginning of the manual:
Before cleaning always switch OFF the device and wait for it to be completely cool. Clean the unit
after each use to remove food residues.
Wipe o the glass-ceramic plate and the plastic surface with a slightly damp cloth (mico-ber
works best). Dishwashing soap may be used when necessary.
Make sure that no water seeps into the device. Never use abrasive cleaners (i.e. metal pads) or
oil-based liquids. Never run the cooktop under water.
A vacuum cleaner attachment may be used to suck up dirt from the air intake and exhaust vent.
11
DOUBLE BURNER TI-2B COUNTER INSETINDUCTION COOKTOP MANUAL P.9
Page 12

VII. Compatible Cookware
If the display shows an error code, please reference this sheet for a potential solution:
Error Code
Cause and Potential Solution
E1
Voltage is under 95V
E2
Voltage is over 145V
E3
The unit may be damaged, contact the seller for support.
E4
The unit may be damaged, contact the seller for support.
E5
The unit may be damaged, contact the seller for support.
E6
The cooking temperature is over 450 degrees Fahrenheit in the
EG TEMP mode. After 3 minutes in standby the unit will switch
o and can then be restarted.
E7
The ventilation area is blocked and heat cannot blow out of the
machine smoothly. This can cause the internal device to overheat. Please keep a minimum distance of 2 to 4 inches from the
unit to E7 walls or other barriers. To x the error code, turn o
the power, remove plug from outlet and allow the unit to cool
fully. Allowing for plenty of ventilation space, plug unit back into
outlet and restart.
EE
The built-in safety function indicates that the unit has been on
for EE 150 minutes. The induction cooker will display "EE," make
an alert sound and then go into standby mode. Simply press
the ON/OFF button to restart and resume cooking.
Unit is on standby mode
but displays no error code
on panel, making an alert
sound.
The cookware you are using doesn't have ferromagnetic qualities but displays no error code or the bottom of the pot is too
small. After suitable cookware is on panel, making an used on
the True Induction cooktop, the device will automatically alert
sound. restart.
12
DOUBLE BURNER TI-2B COUNTER INSETINDUCTION COOKTOP MANUAL REVISED 2.28.17 P.10
 Loading...