

Page 1
User Manual
SB-CUSTOM-TVB
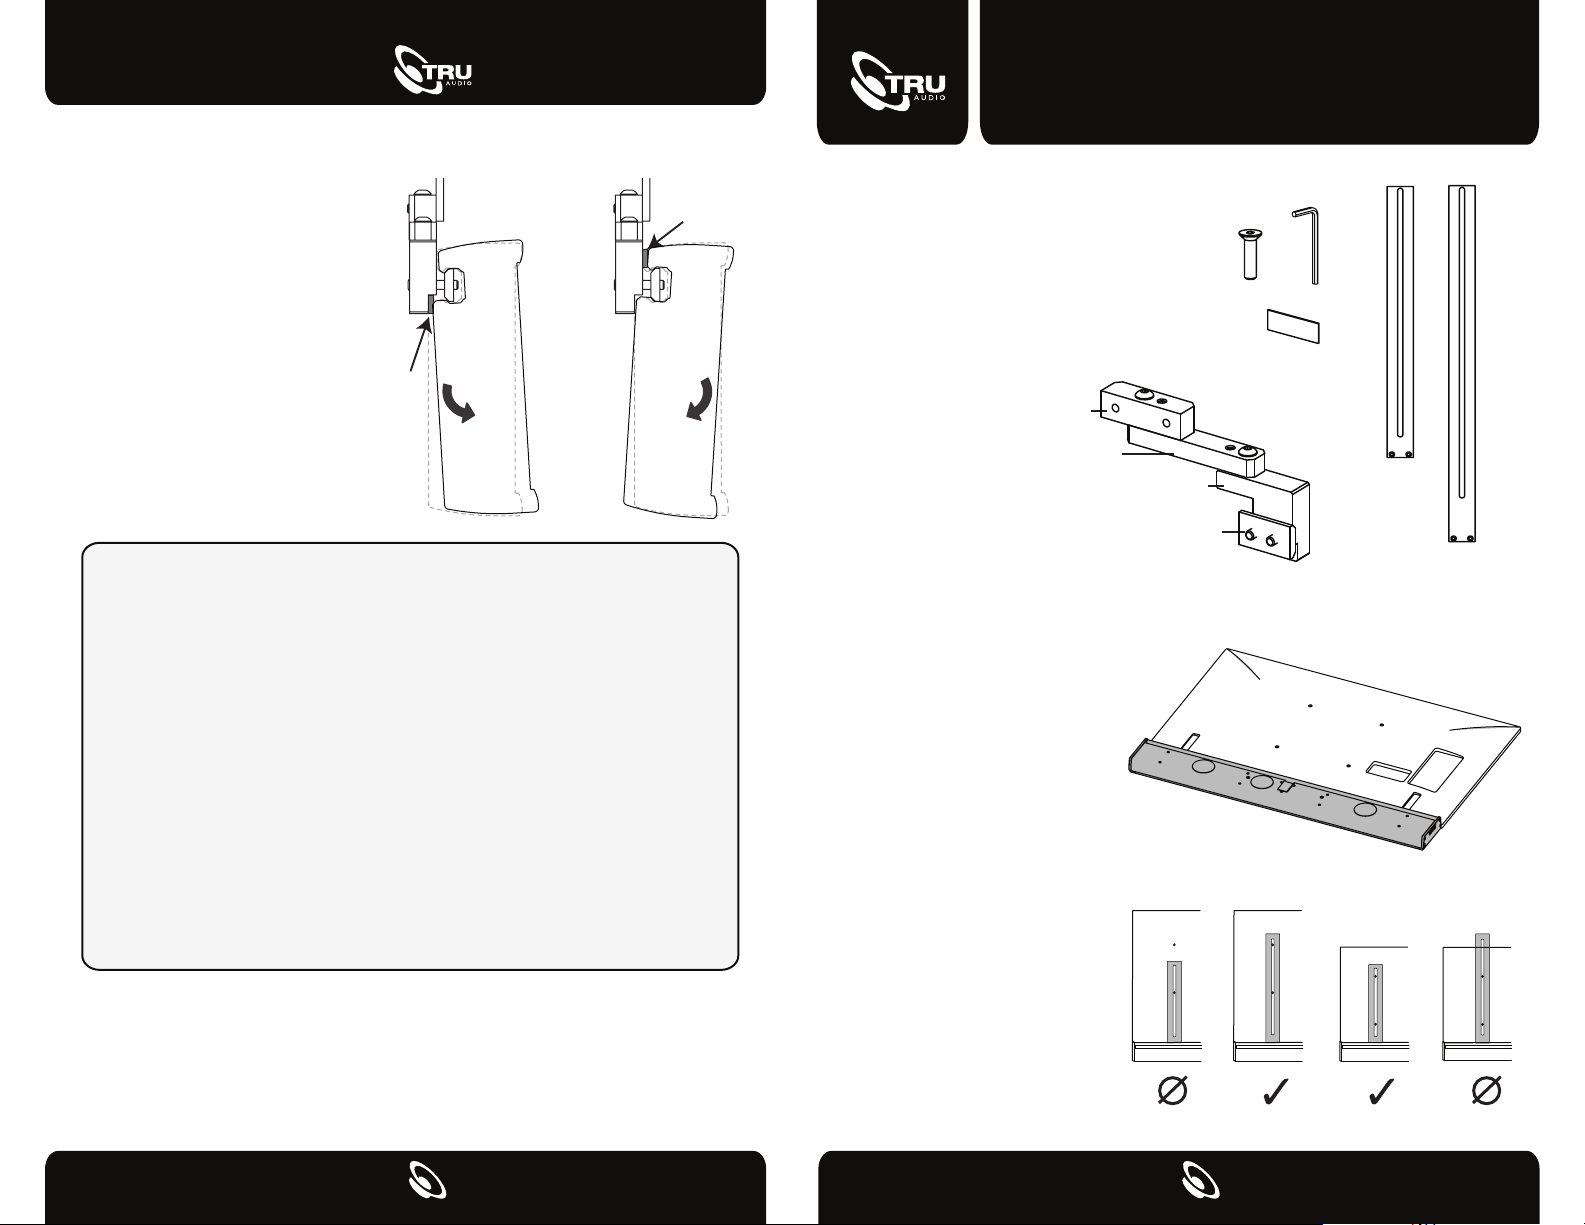
4) If the pitch needs adjusting,
loosen slotted screws in block
SHIM
"C" and install the provided
shims between block “C” and
CC
the soundbar. To tilt soundbar
forward, place shims above the
slotted screws or below to tilt
backward.
SoundVision Technologies dba TRUAUDIO
SHIM
SPEAKER PRODUCT WARRANTY
All in-ceiling, in-wall, in-room speakers and volume controls have a
limited lifetime warranty. This warranty includes lifetime parts and
repair labor on all components. The warranty extends only to the
original purchaser of the product and not to any subsequent owner.
TRUAUDIO’s obligation under these warranties is limited to
repairing or replacing any component found defective in material or
workmanship under normal conditions of use with an equal and/or
current product. These warranties shall not apply to products
which have been abused, modified, or disassembled. Products to
be repaired or returned under this warranty must be returned to the
factory through an authorized TruAudio dealer with all
transportation and insurance charges prepaid.
It is the policy of TRUAUDIO to continuously incorporate improvements into
our products. All specifications are subject to change without notice. If you
have any questions regarding this or any other TRUAUDIO products, please
visit www.TruAudio.com or contact us:
Office: 1-888-858-1555, Monday-Friday 7 am - 6 pm MST
Email: [email protected]
TruAudio
198 N. Old Highway 91
Hurricane, UT 84737 USA
CONTENTS
(2) Swivel Brackets (Left, Right)
(2) Short Vertical Bar
(2) Long Vertical Bar
(4) Flat Head Mounting Screw
(4) Rectangular Shims
(1) 3mm Hex Key
“A”
“B”
INSTALLATION
1) Carefully lay the TV face
down on a non-marring surface.
Position the custom length
soundbar face down, with the
grill attached, along the desired
edge of the TV. This will help
ensure that the final mounted
position of the soundbar is
flush/even with the TV.
2) To determine which Vertical
Bars to use, place a bar even
with the edge of the TV where
the soundbar will be mounted.
The slot in the bar should cover
both VESA holes, but not extend
beyond the TV.
“C”
CLEAT
Swivel Bracket
Shim
Short
Vertical Bar
Long
Vertical Bar
14
Page 2
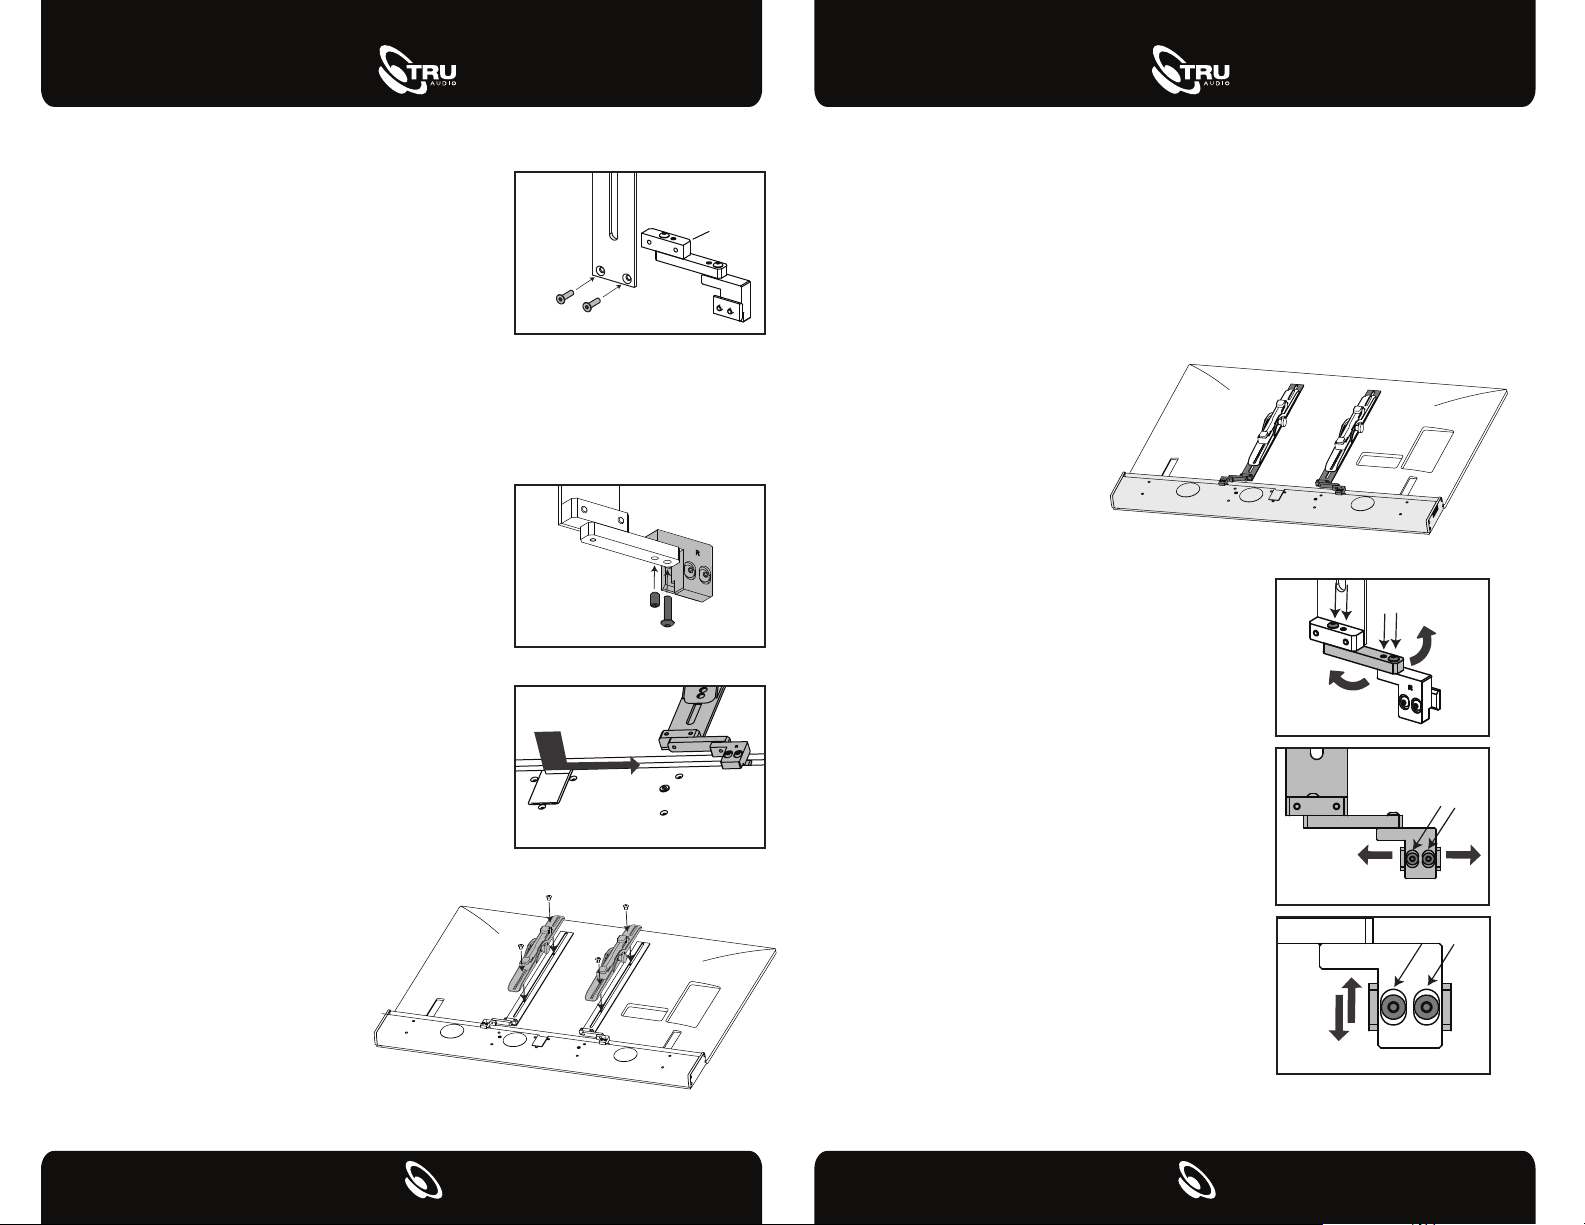
3) Attach the swivel bracket to the selected vertical
bars using the included flat head screws. The
beveled edges of block “A” should face away from
the vertical bar.
Beveled
Edge
8) Loosely tighten the mount hardware. Begin with the screws closest to the
soundbar and work towards the TV mount. Keep the screw heads centered in their
slots in block “C” for now.
9) Make any final adjustments to the position of the soundbar relative to the TV
and tighten the hardware (including setscrews), starting at the soundbar and
working towards the TV mount. Tighten the screws holding the TV mount.
4) If the TV has any protruding logos or controls that do not allow the soundbar to fit
closely to the TV you can use the foam strip included with your soundbar to block
any light leakage. For best results attach the foam strip directly to the soundbar, just
behind the protrusion.
5) For TV’s that are thicker than the soundbar itself,
it may be necessary to reconfigure the swivel
brackets to the underside of the arm on block C.
This will make it easier to keep the soundbar close
to the TV and still allow you to tighten the necessary
screws. When reconfiguring the bracket remember
to also install the set screw from the underside of
the arm.
6) Install the right and left swivel brackets onto the
soundbar. Loosen the screws in block “C” so that
the ends are flush with the cleat. Insert the cleat at
an angle into the channel, beginning at the center
of the soundbar, and slide to the appropriate side.
Repeat with the other side.
7) Align the soundbar to the TV.
Place the Vertical Bar over the
VESA mounting holes in the TV.
The swivel bracket assemblies
should be oriented outwards. Lay
the TV mount over the top of the
Vertical Bars and thread (but do
not tighten) the TV mount
hardware into place.
10) Mount and level the TV and
soundbar according to the TV
mount instructions. Visually
inspect the alignment of the TV
and soundbar, and make any
adjustments as needed. Check
for tightness of all hardware.
ADJUSTMENTS:
1) If in/out needs adjusting, loosen setscrews at
both ends of block "B", make adjustments and
retighten.
2) If side/side needs adjusting, loosen slotted
screws on both "C" blocks, taking care not to let
either end of the soundbar rise or lower before
retightening.
3) If up/down needs adjusting, reposition
slotted screws on block "C".
32
 Loading...