

Page 1
Introduction
Thank you for ordering this aerator attachment for your
tiller/edger. We know that it will perform to your satisfaction if installed and used properly as described in the following instructions.
The shipping carton contains four aerator tines (see Figure
1). If any tines are missing or damaged, be sure to contact
your authorized tiller/edger dealer or the factory.
To help ensure the proper installation and safe operation of
this attachment, read and carefully follow these instructions. If you have any questions or concerns, please contact your authorized tiller/edger dealer or the factory.
SINGLE TINE ORDERING INFORMATION: In case of wear
or damage, a single aerator tine can be ordered by requesting Part Number 1915054.
TO AVOID INJURY:
• Read the owner’s manual.
• Know the location and function of all controls.
• Keep all safety devices and shields in place.
• Never allow children or uninstructed adults to operate
the machine.
• Shut off engine and disconnect spark plug wire before
unclogging tines or making repairs.
• Keep bystanders away from machine.
• Keep away from rotating parts.
Safety
Before installing or using this attachment, carefully review
the “Safety Rules” and “Operation” instructions in your
Tiller/Edger Owner’s Manual. Doing so will refresh your
memory concerning safe operating practices that must be
followed at all times.
Tools/Supplies Needed
• No tools are needed.
• Fine-grade sandpaper (to remove rust from tine shaft).
• General purpose oil (to lubricate tine shafts).
Figure 1: Four aerator tines are included in the kit.
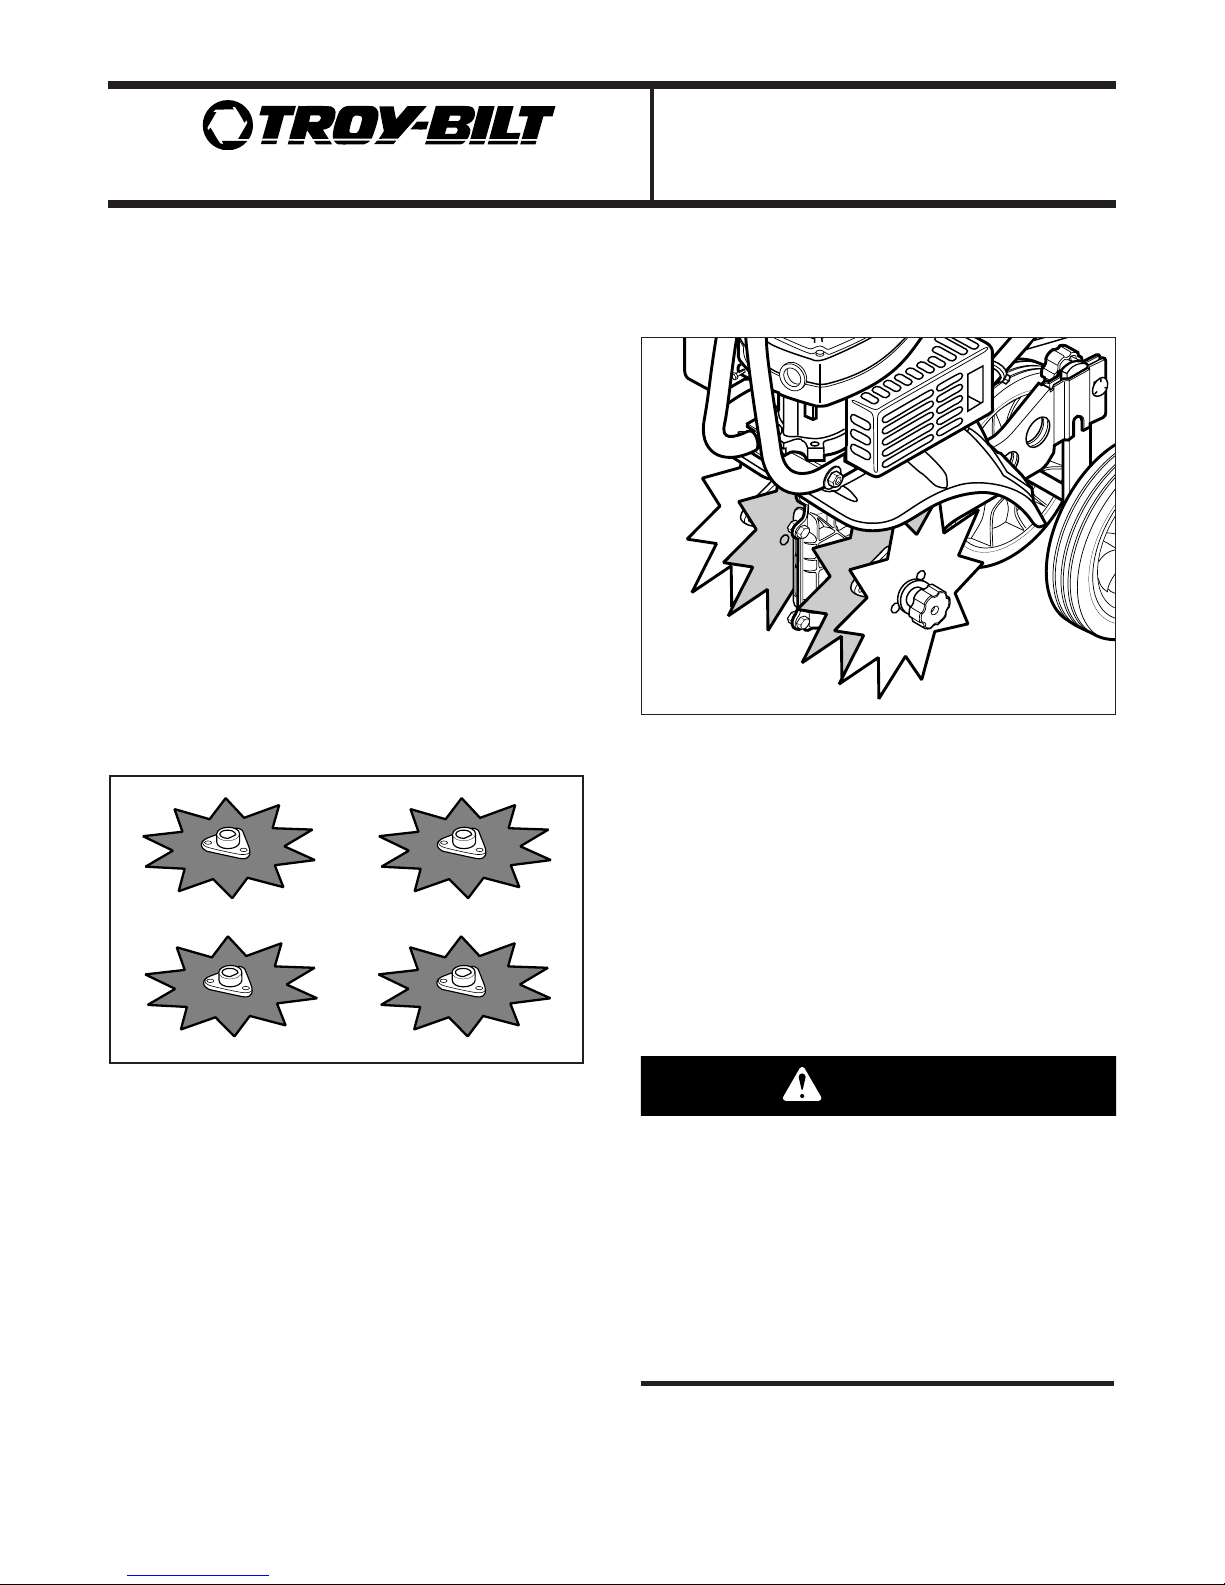
Figure 2: The aerator tines are easily mounted on the tine shaft.
The aerator tine attachment hardware (hairpin cotters, threaded
knobs or ring lock pins) will vary depending upon which tiller
model you have.
Aerator Attachment
OEM-290-264 / 290-264-081
TILLER/EDGER
®
INSTALLATION AND USE INSTRUCTIONS
CAUTION
Page 2

2
• The four aerator tines are identical. Place one aerator tine on
either the right-side or left-side tine shaft. The hub (see “F”,
Figures 3 and 4) on the tine must face to the outside.
• Add a second aerator tine. The hub (“G”, Figures 3 and 4) on
this tine must face to the inside. If installed correctly, the tine
hubs will be facing each other.
• Reinstall the tine mounting hardware (refer to Figures 3 and 4).
• Repeat this procedure on the other side. After all four aerator
tines are installed (refer to Figures 6 and 7), return the
machine to its normal operating position.
• FOR MODELS WITH A DEPTH ADJUSTMENT KNOB (G,
FIGURE 5): Loosen the depth adjustment knob (G) and move
the wheel bracket (H) up to its highest position in relation to
the height adjustment bar (J). (See the “OPERATION” section
in your Owner’s Manual for detailed instructions on how to
adjust the wheel bracket.) Retighten the depth adjustment
knob securely.
IMPORTANT: DO NOT MOVE THE WHEEL BRACKET ANY
HIGHER THAN THE TOP OF THE HEIGHT ADJUSTMENT BAR.
Figures 3 and 4: Depending upon your tiller/edger model, the tines may be secured with two hairpin cotters (A), two ring lock pins (B) or two
threaded knobs (C). The plain washer (D) and star washer (E) are used only with the threaded knob.
Installation Instructions
NOTE: References to Left and Right sides are from the operator’s
position behind the handlebars. The instructions apply to more
than one model of tiller/edger — be sure to use the information
that applies to your particular model.
• Shut the engine off, allow it to cool, then disconnect the spark
plug wire and bend it away to prevent it from touching the
spark plug.
• Place the machine on a hard, level surface.
• Tilt the machine forward until it rests on the front of the engine,
or until it rests on the two carrying handle tubes (if equipped)
at the front of the engine.
• Remove and save the hardware (refer to Figures 3 and 4) that
secures the four tines to the tine shafts.
• Slide off and save the four tines. For easier reinstallation, keep
the left-side and right-side tine sections separated from each
other and mark them LEFT and RIGHT. If necessary, refer to
the Maintenance Section in your Owner’s Manual for more
detailed information on tine removal.
• Clean the steel tine shafts and inspect for any rust or burrs
(use fine-grade sandpaper to remove rust or burrs). Apply a
thin coating of general purpose oil to the tine shafts.
Figure 5: Some models are equipped with a depth adjustment knob
and wheel bracket assembly.
G
H
J
C
E
D
B
A
G
F
F
G
TO AVOID INJURY:
• Before installing or removing any attachment, shut the
engine off, allow it to cool, and disconnect the spark plug
wire and prevent it from touching the spark plug.
• The tines may have sharp edges – wear heavy work gloves
when handling the tines.
CAUTION
Page 3

3
Operation Tips
• The aerator attachment helps develop healthy, dense lawns by
loosening the soil to contribute to better root growth. The typical lawn should be aerated once or twice a year, usually in the
spring and fall. Lawns with heavily compacted soil, or lawns
with very hard soil may benefit from additional aeration during
the year.
• For best results:
- Mow and rake the lawn before aeration.
- The soil should be somewhat moist, rather than very dry and
hard.
- You may wish to dethatch your lawn before aeration. The
Power Rake attachment (available from your dealer or the
factory) works well for this purpose.
• The depth of cut is determined by a number of factors, including: soil conditions; the height setting of the wheel bracket (if
equipped) or the drag stake (if equipped); the ground travel
speed; the engine speed; and the amount of pressure applied
to the handlebars. Be patient while learning to use your aerator
attachment – you may have to experiment to find that “just
right” combination for your particular lawn.
Operation
• Move the machine outdoors and start the engine (see the
“OPERATION” section in your Owner’s Manual for specific
starting instructions).
IMPORTANT: USE SLOWER ENGINE SPEEDS AND A
SHALLOW DEPTH OF CUT WHEN FIRST LEARNING TO
USE THE AERATOR ATTACHMENT.
• The depth of cut is primarily controlled by the amount of
upward or downward pressure applied to the handlebar.
Upward pressure will result in a deeper cut; downward pressure will result in a more shallow cut.
NOTE: On models equipped with a depth adjustment knob (G,
Figure 5), the height setting of the wheel bracket also helps to
determine the cutting depth. A higher setting will result in a
deeper cut; a lower setting will result in a shallower cut.
NOTE: On models equipped with a drag stake (not illustrated),
the height setting of the drag stake affects cutting depth. Start
with the third hole up from the bottom and adjust the drag
stake from there, as needed. If the unit stays in one spot or if
the handlebars are tipped too far forward, stop the engine and
raise the drag stake. Use slower engine speeds when first
learning to use the aerator attachment.
• Hold the handlebar firmly with both hands and squeeze the
engine throttle lever. When the tines begin turning, slowly lift
up on the handlebars until the tines enter the soil.
• Allow the machine to move forward while the aerator tines slice
into the lawn. Hold the handlebars firmly to prevent the unit
from moving forward too quickly and to allow enough time for
the tines to dig deeply enough. If the unit moves across the
lawn too fast, press down on the handlebars to raise the tines
out of the soil.
• Aerate the lawn by making side-by-side passes (see Figure 8).
For more thorough aeration, make a second series of passes at
a right angle to the first series (see Figure 9).
• After aerating the lawn, rake up any residue.
• A newly aerated lawn may benefit from an application of fertil-
izer (follow recommendations and instructions provided with
fertilizer). Or, if you have particularly troublesome spots, you
may wish to reseed these areas after aeration.
1.
Figure 6: This model tiller/edger uses a threaded knob to secure the
tines.
Figure 7: This model tiller/edger uses a hairpin cotter to secure the
tines. Some models use a ring lock pin instead of a hairpin cotter.
Figure 8
Figure 9
TO AVOID INJURY:
• Do not operate machine when you are barefoot or when
wearing sandals, sneakers, or similar lightweight footwear.
Wear footwear that will protect your feet and improve footing on all surfaces.
• Do not carry the machine when the engine is running.
Always stop the engine before transporting the machine.
• Stop engine, allow it to cool, and disconnect the spark plug
wire before unclogging the tines or performing any repairs
or maintenance.
3.
4.
2.
CAUTION
Page 4

For customer assistance, visit www.troybilt.com, contact your nearest authorized dealer or:
TROY-BILT LLC, P.O. BOX 361131, CLEVELAND, OHIO 44136-0019, 1-866-840-6483
Printed in U.S.A. Form 769-00130 (03/2002)
 Loading...