

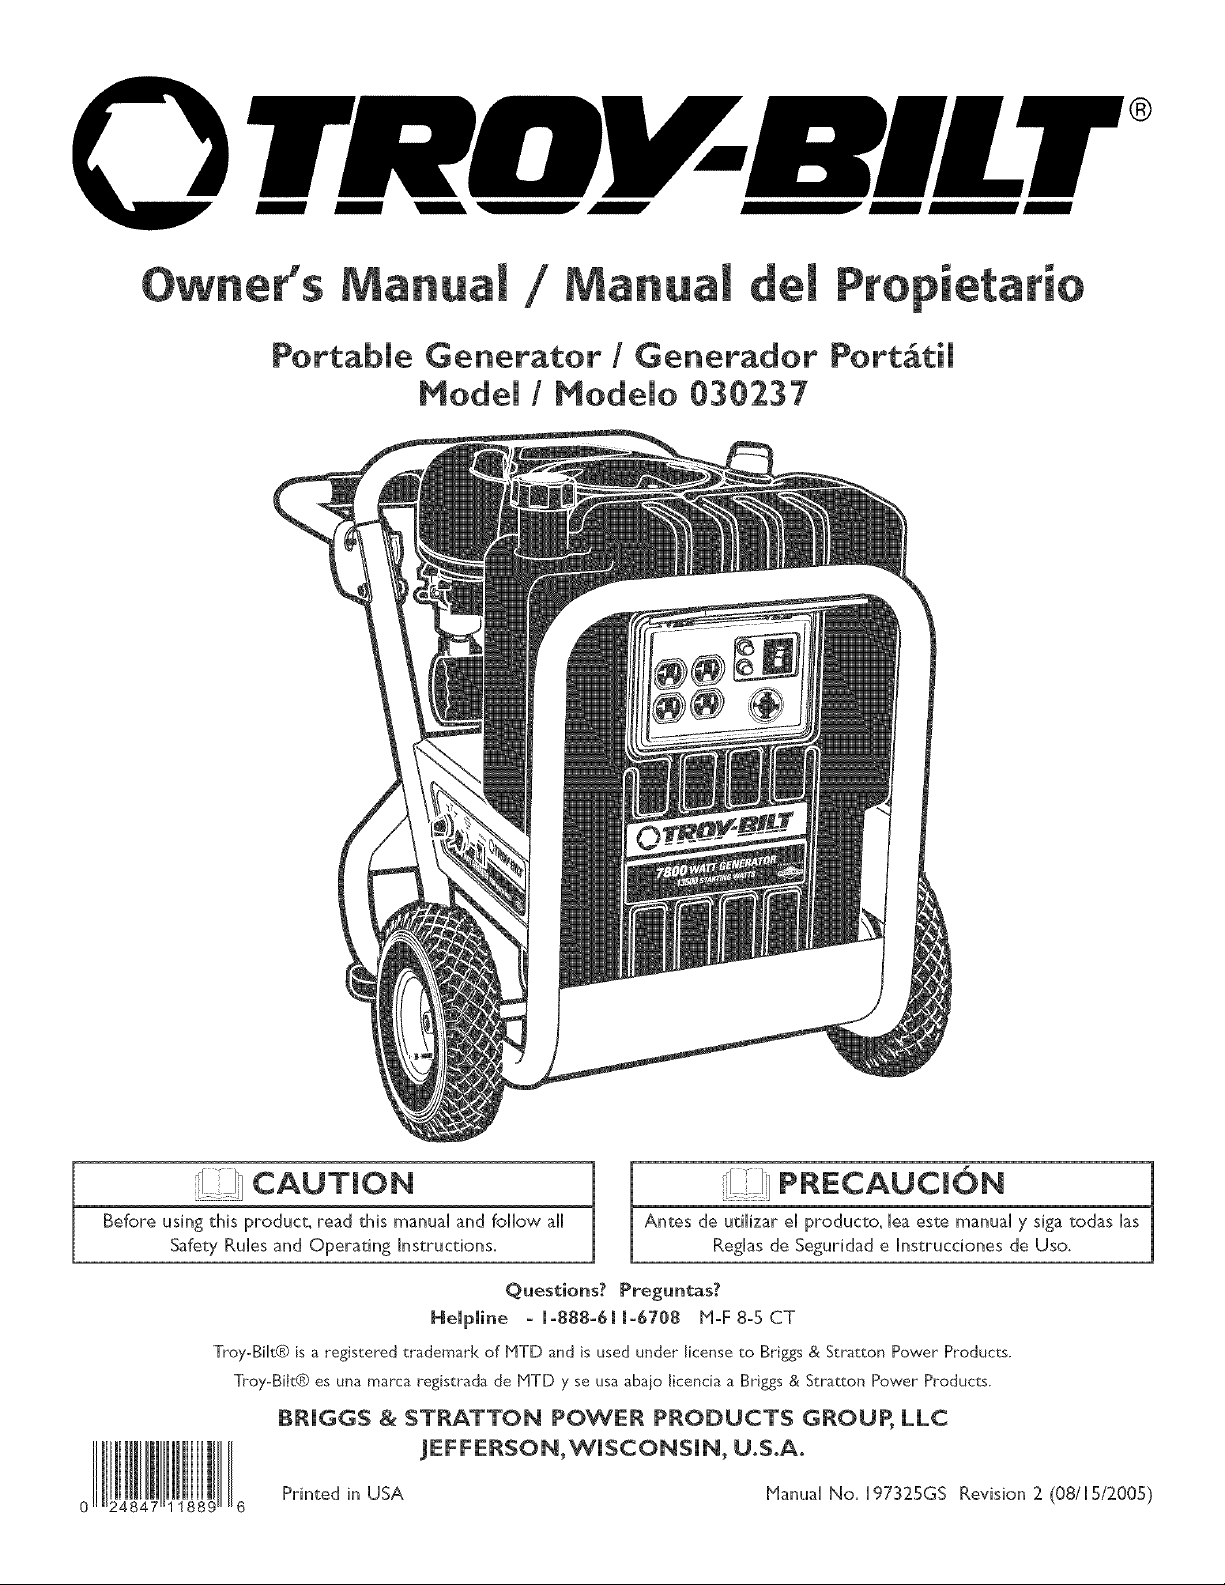
Troybilt 030237 Owner’s Manual
O
r®
d
Portabme Generator/Generador Port_tii
Model / Modeio 030237
CAO'rmON
Beforeusingthisproduct_read thismanuaH and followaH
Safet7 RuHesand Operating Instructions.
Quesdons? Preguntas?
- 1-888-611-6708 H=F8=5CT
Troy-Bilt® is a registered trademark of blTD and is used under license to Brigs & Str_tton Power Products.
Troy-Bilt® es una marca registrada de blTD y se usa abaio licencia a Brigs &Strat_on Power Products.
BPJGG$ & STRATTON POWER PRODUCTS GROUP, LLC
JEFFERSON,WiSCONSiN, U.S.A.
Printed in USA
PReCAUCmON
Antes de utiHizareHproducto_HeaestemanuaH 7 sigatodasHas
Reghs de Seguridade Instruccionesde Uso.
Manual No. 197325GS Revision 2 (08/15/2005)
Safety Rules
SAVE THESE mNSTRUCTmONS
TABLE OF CONTENTS
Section HoSafety Rules .......................... 2-4
Section 2 - Features and Controis ................... S
Section 3 oAssembiy ............................ 6-7
Section 4 o Operation .......................... 8- i4
Section 5 o Maintenance ........................ i S°i 6
Section 6 o Storage .............................. i7
Section 7 oTroubieshooting ........................ i8
VVarranty ...................................... i9
EQUmPNENT
,j----] Read this manuam carefummy and become
iI--:!---I famimiar with your generator. Know its
appmications, its mimitations and any hazards
involved.
This manuai describes an engine-driven, revoiving fieid,
aHternating current (AC) generator designed to supply
electrical power for operating compatible electrical lighting,
appiiances, toois and motor ioads.The generator's revoiving
field is driven at about 3,600 rpm by a singleocylinder
engine.
SAFETY RULES
This is the safety amert symbol it is used to
amert you to potentiam personam iniury hazards.
Obey atomsafety messages that fommow this
symbom to avoid possibmeiniuryor death.
The safety alert symbol (_k) is used with a signal word
(DANGER, CAUTION,WARNING), a pictorial and/or a
safety message to alert you to hazards. DANGER indicates
a hazard which, if not avoided, wilt resuit in death or serious
injury. WARNING indicates a hazard which, if not avoided,
couid result in death or serious injury. CAUTmON
indicates a hazard which, if not avoided, might result in
minor or moderate injury. CAUTION, when used
without the alert symbol, indicates a situation that could
result in equipment damage. Follow safety messages to
avoid or reduce the risk of injury or death.
{
CAUTION! DO NOT exceed the generator's
wattage/amperage capacity. See "Don't Overload
Generator".
Every effort has been made to ensure that information in
this manual is accurate and current. However, we reserve
the right to change, alter or otherwise improve the product
and this document at any time without prior notice.
The Emission Control System for this generator is
warranted for standards set by the Environmental
Protection Agency. For warranty information refer to the
engine owner's manual
Copyright @ 2005 Briggs & Stratton Power Products
Group, LLC. AHHrights reserved. No part of this materiai
may be reproduced or transmitted in any form by any
means without the express written permission of Briggs &
Stratton Power Products Group, LLC.
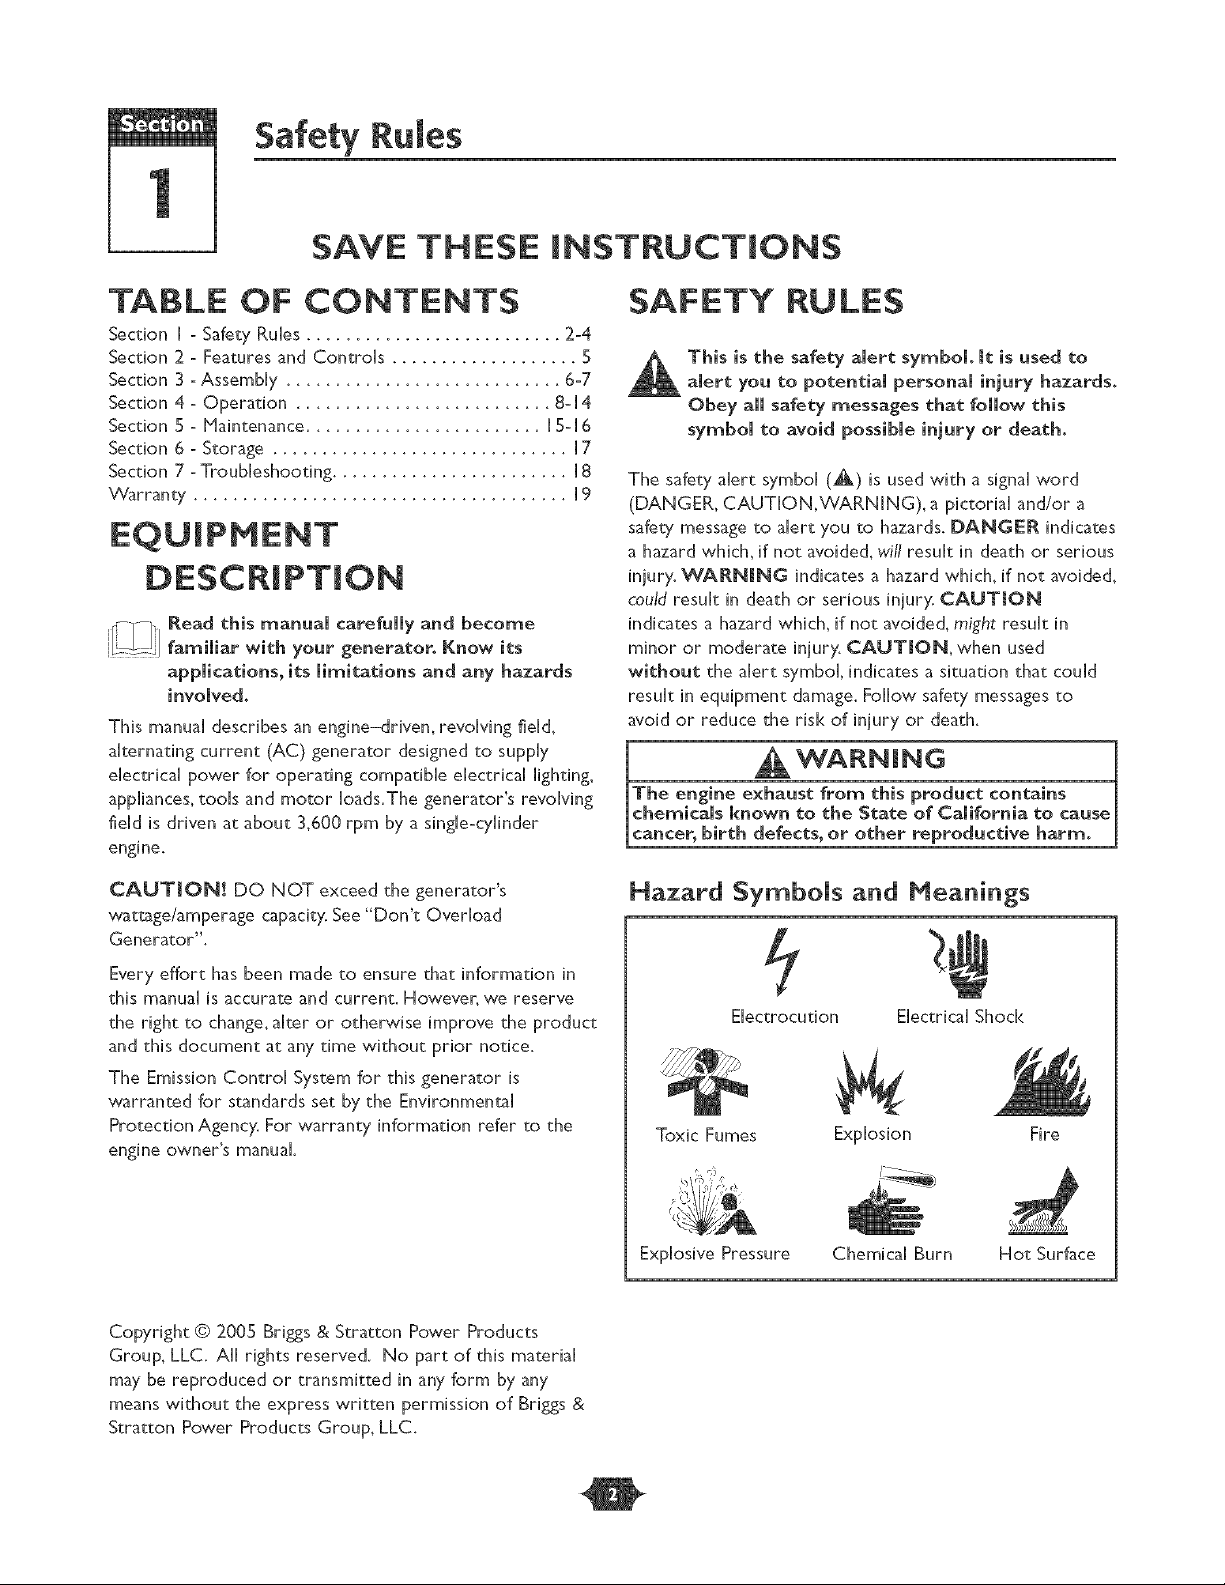
Hazard Symbols and Meanings
Electrocution Electrical Shock
Toxic Fumes Fire
Explosive Pressure Chemical Burn Hot Surface
Explosion
Section 1: Safety Rules
DANGER
DO NOT aiIow any open flame, spark, heat, or lit cigarette
during and for several minutes after charging a battery.
Wear protective go_Jes, rubber apron, and rubber gloves.
WANNING
Operate generator ONLY outdoors.
Keep exhaust gas from entering a confined area through
windows, doors, ventilation intakes or other openings.
DO NOT operate generator inside any building or enclosure
(even if doors or windows are open), including the generator
compartment of a recreational vehicle (RV).
WARNING
WHEN ADDING OR DRAINING FUEL
Turn generator OFF and let it cool at least 2 minutes before
removing fuel cap. Loosen cap slowly to relieve pressure in
tank.
Fill or drain fuet tank outdoors.
DO NOT overfill tank.AIIow space for fuel expansion.
Keep fuel away from sparks, open flames, pilot lights, heat, and
other ignition sources.
DO NOT light a cigarette or smoke.
_fHEN STARTING EQUiPHENT
Ensure spark plug, muffier_ fuel cap and air cleaner are in place.
• DO NOT crank engine with spark plug removed.
If fuel spills, wait until it evaporates before starting engine.
WHEN OPERATING EQUIPNENT
Do not tip engine or equipment at angle which causes fuel to
spill.
This generator is not for use in mobile equipment or marine
applications.
VHEN TRANSPORTING OR REPAiRiNG
EQUIPNENT
WARNING
When using generator for backup power, notify utility
company. Use approved transfer equipment to isolate
generator from electric utility.
Use a ground circuit fault interrupter (GFCI) in any damp or
highly conductive area, such as metal decking or steel work.
DO NOT touch bare wires or receptacles.
DO NOT use generator with electrical cords which are worn,
frayed, bare or otherwise damaged.
DO NOT operate generator in the rain.
DO NOT handle generator or electrical cords while standing
in waten while barefoot, or while hands or feet are wet.
DO NOT allow unqualified persons or children to operate or
service generator.
iN TANK
Store away from furnaces, stoves, water heaters, clothes
dryers or other appliances that have pilot light or other
ignition source because they can ignite fuel vapors.
This generator does not meet U. S. Coast Guard Regulation
33CFR-183 and should not be used on marine applications.
Failure to use the appropriate U. S.Coast Guard approved
generator could result in bodily injury and/or property
damage,
0
Section 1: Safety Rules
WARNING
WHEN ADJUSTING OR MAKING REPAiRSTOYOUR
GENERATOR
Disconnect the spark piug wh_e from the spark plug and place
the w@e where it cannot contact spark plug.
WNENTESTmNG FOR ENGINE SPARK
Use approved spark plug tester:
DO NOT check for spark with spark plug removed,
WARMING
DO NOT touch hot surfaces,
Allow equipment to coot before touching.
The generator must be at least S feet from structures having
combustible wails and/or other combustible materials.
Keep at least 3 feet of clearance on all sides of generator for
adequate coding, maintenance and servicing.
Reflective exhaust heat may damage fuel tank causing fire.
Code of Federal Regulation (CFR) Tide 36 Parks, Forests, and
Public Property require equipment powered by an internal
combustion engine to have a spark arrested; maintained in
effective working order, complying to USDA Forest service
standard SI00-IC or later revision. In the State of California a
spark arrester is required under section 4442 of the California
Public resources code. Other states may have similar Jaws,
CAUTION
DO NC)T tamper with governed speed, Generator supplies
correct rated frequency and voltage when running at governed
speed.
DO NOT modify generator in any way.
See "Don't Overload Generator _.
Start generator and let engine stabilize before connecting
electrical loads,
Connect electrical loads in OFF posidon, then turn ON for
operation,
Turn electrical loads OFF and disconnect from generator
before stopping generator,
Use generator only for intended uses,
If you have questions about intended use, ask dealer or call
1-888-61 1-6708.
Operate generator only on level surfaces.
DO NOT expose generator to excessive moisture, dust, dirt,
or corrosive vapors.
DO NOT insert any objects through cooling slots,
If connected devices overheat_ turn them off and disconnect
them from generator:
Shut off generator if:
-electrical output is lost;
-equipment sparks, smokes, or emits flames;
-unit vibrates excessively.

Features and Controls
KNOWYOUR GENERATOR
Read this owner's manual and safety rules before operating your generator,
Compare this H[ustration with your generator to familiarize yourseff with the locations of various controls and
ad]ustments. Save this manual for future reference.
Oil Fill Cap Fuel Tan[<
Air Cleaner Circuit Breakers (AC)
Spar[<Arrester Muffler Duplex Receptacles
-_ Rocker Switch Circuit
Breaker
[20Vok AC, 20 Amp
[20/240 Vok AC, 30 Amp
Locking Receptacle
Choke Lever
Battery
[2Volt DC Receptacle -- Use this receptacle with
battery charge cables to charge a [ 2Volt battery.
[20 Volt AC, 20 Amp Duplex Receptacles -- Hay be
used to supply electrical power for the operation of [20Volt
AC, 20 Amp, single phase, 60 Hz electrical lighting appliance,
tool and motor loads.
[ 20/240 Volt AC, 30 Amp Locking Receptacle- Hay
be used to supply electrical power for the operation of
120 and/or 240VoltAC, 30 Amp, single phase, 60 Hz
electrical lighting, appliance, tool and motor loads.
Air Cleaner -- Uses a dry type filter element and foam
pre-deaner to limit the amount of dirt and dust sucked
into the engine.
Battery- Located behind plastic cover. 12Vok DC sealed
battery provides power to start the engine.
Choke Lever -- Used when starting a cold engine.
Data Tag
[2Volt DC
Receptacle
/
Start Switch
Grounding
Fastener
Circuit Breakers (AC) --The [20Vo[tAC, 20A duplex
receptacles are provided with "push to reset" circuit
breakers to protect the generator against electrical overload.
DataTag - Provides model, revision and serial number of
generator. Please have these readily available if calling for
assistance.
Pue[ Tank -- Capacity of seven (7) U.S.gallons.
Start Switch --Turn to start the engine.
Grounding Pastener -- Consult your local agency having
]ur[sdiction for grounding requirements in your area.
Oil Pill Cap --Add oil to engine here.
Spark Attester Muffler -- Exhaust muffler lowers engine
noise and is equipped with a spark attester screen.
Rocker Switch Circuit Breaker --The 120/240VokAC_
30A locking receptacle is provided with a rocker switch circuit
breaker to protect the generator against electrical oveHoad.
This switch also controls all receptacles.
ASSEMBLY
Your generator requires some assembHyand is ready for
use after it has been properHy serviced with the
recommended oiHand fuel
mfyou have any probmerns with the assernbmy of your
generator, please car the generator helpiine at
l=888=61 l =6708. if caHHingfor assistance_pHeasehave the
model revision_ and seriaHnumber from the data tag available.
See "KnowYour Generator" for data tag Hocation.
Remove Generator From Carton
H. Set carton on a rigid fiat surface with "This Side Up"
arrows pointing upward.
2. CarefuHHyopen top flaps of shipping carton.
3. Cut down corners of carton from top to bottom and
Haythat side of carton down fiat.
4. Remove aHHpacking material carton fiHHers_etc.
5. RoHHgenerator out of shipping carton.
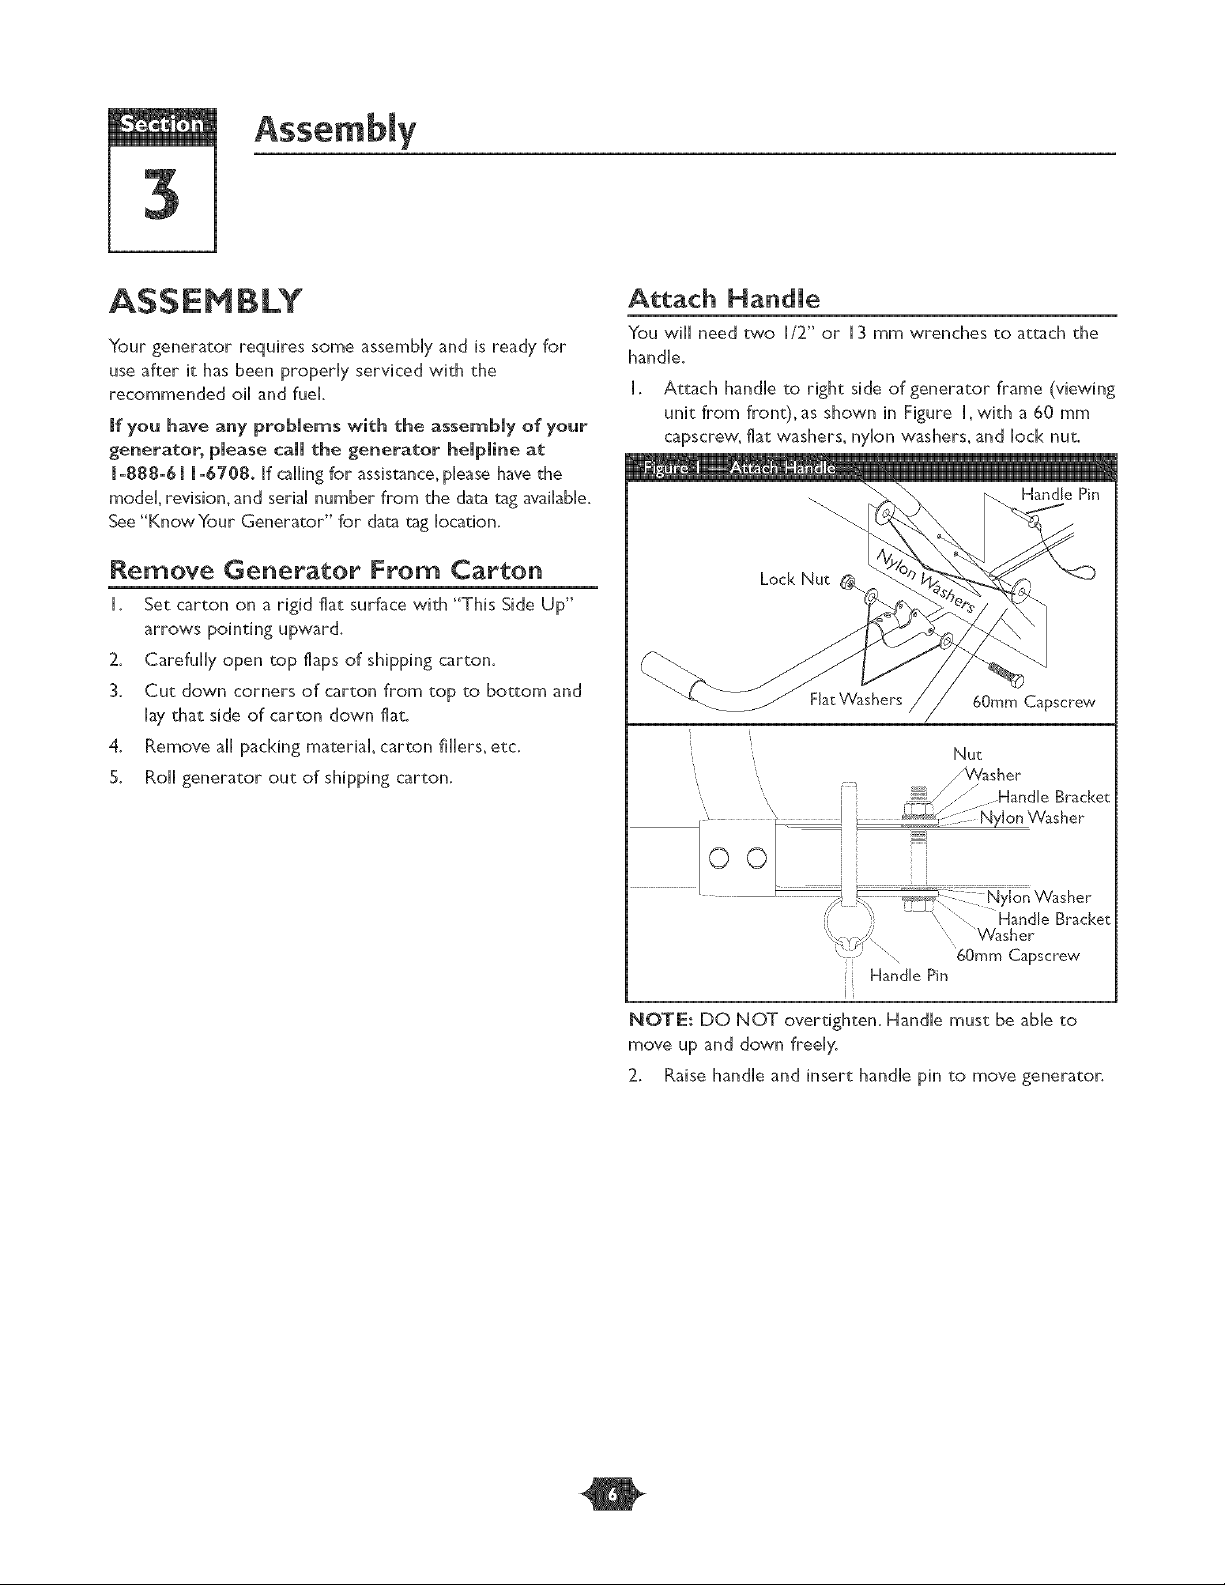
A ach Handle
You wiHHneed two H/2"or H3 mm wrenches to attachthe
handHe.
H. Attach handHeto right side of generator frame (viewing
unit from front), as shown in Figure H,with a 60 mm
capscrew, fiat washers, nyHon washers, and Hock nut.
60ram Capscrew
li
Nut
' /Vqasher
: i Handle Bracke_
Handle Pin
I
NOTE: DO NOT overtighten. Handle must be able to
move up and down freely.
2. Raise handHe and insert handHe pin to move generator.
O
Section 3: Assembly
BEFORE STARTmNG THE
ENGmNE
Add Engine Oil
° Place genera[or on a level surface.
[
• Refer to engine manuaIfor oil fill information.
• Damage to equipment resuking from failure to follow this
instruction will void warranty.
° Refer to engine owner's manuaHand follow oiH
recommendations and instructions.
[NOTE: Check oil often during engine break-in. Refer to
engine owner's manual for recommendations.
[NOTE: The generator assembly rotates on a prehbricated
and sealed ball bearing that requires no additional
lubrication for the life of the bearing.
Add Fuel
I. Use clean, fresh, regular UNLEADED fuel with a
minimum of 85 octane. DO NOT use fuel which
contains Hethanol. DO NOT mix oil with fuel.
2. Clean area around fuel fill cap, remove cap.
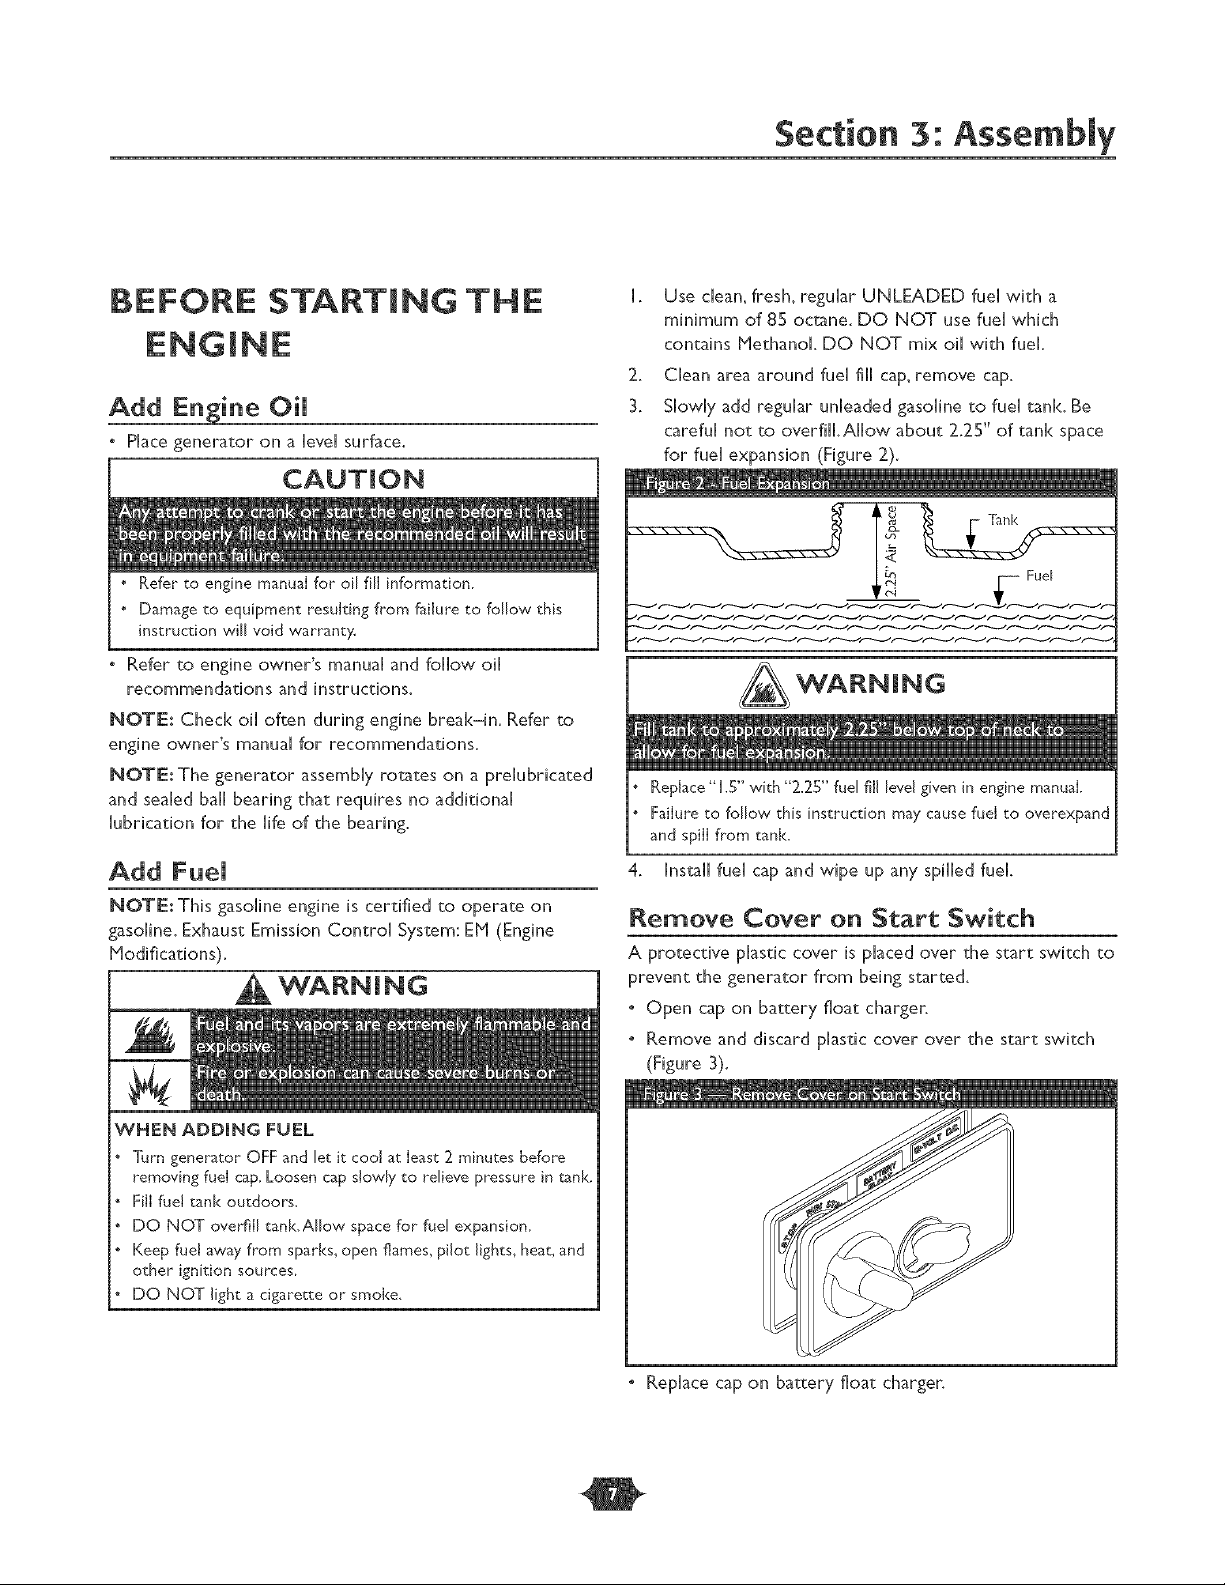
3. Slowly add regular unleaded gasoline to fuel tank. Be
careful not to overfill.Allow about 2.25" of tank space
for fuel expansion (Figure 2).
Fuel
Replace"1.5" with "2.25" fuel fill levelgiven in enginemanual
Failureto follow this instruction may cause fuel to overexpand
and spill from tank.
Install fuel cap and wipe up any spilled fuel.
NOTE:This gasoline engine is certified to operate on
gasoline.Exhaust Emission Control System:EH (Engine
Hodifications).
_WARNING
WHEN ADDING FUEL
Turn generator OFF and let it cool at Ieast 2 minutes before
removing fuel cap_Loosen cap s!owly to relieve p_ssure in _nk.
Fill fuel tank outdoors,
DO NOT overfill tank.Allow space for fuel expansion_
Keep fuel away from sparks, open flames, pilot lights, heat, and
other ignition sources
DO NOT light a cigarette or smoke,
Remove Cover on Start Switch
A protective plastic cover is placed over the start switch to
prevent the generator from being started.
* Open cap on battery float charger.
° Remove and discard plastic cover over the start switch
(Figure 3).
° Replace cap on battery float charger.
O
Operation
USmNG THE GENERATOR
System Ground
The generator has a system ground that connects the
generator frame components to the ground terminals on
the AC output receptacles.The system ground is connected
to the AC neutral wire (see "Equipment Description",
earlier in this manual).
Special Requirements
There may be Federal or State Occupational Safety and
Health Administration (OSHA) regulations, local codes, or
ordinances that apply to the intended use of the generator.
Please consult a qualified electrician, electrical inspector, or
the local agency having jurisdiction.
" In some areas, generators are required to be registered
with local utility companies.
° If the generator is used at a construction site, there may
be additional regulations which must be observed.
Connecting to a Building's Electrical
System
Connections for standby power to a building's electrical
system must be made by a qualified electrician.The
connection must isolate the generator power from utility
power, and must comply with all applicable laws and
electrical codes.
Operate generator ONLY outdoors.
Keep exhaust gas from entering a confined area through
windows, doors, ventilation intakes or other openings_
DO NOT operate generator inside any building or enclosure
(even if doors or windows are open), including the generator
compartment of a recreational vehicle (RV).
The generator must be at least 5 ft. (I 52 cm) from
structures having combustible walls and/or other
combustible materials. Leave at least 3 ft. (92 cm) all around
generator including overhea& for adequate cooling,
maintenance and servicing.
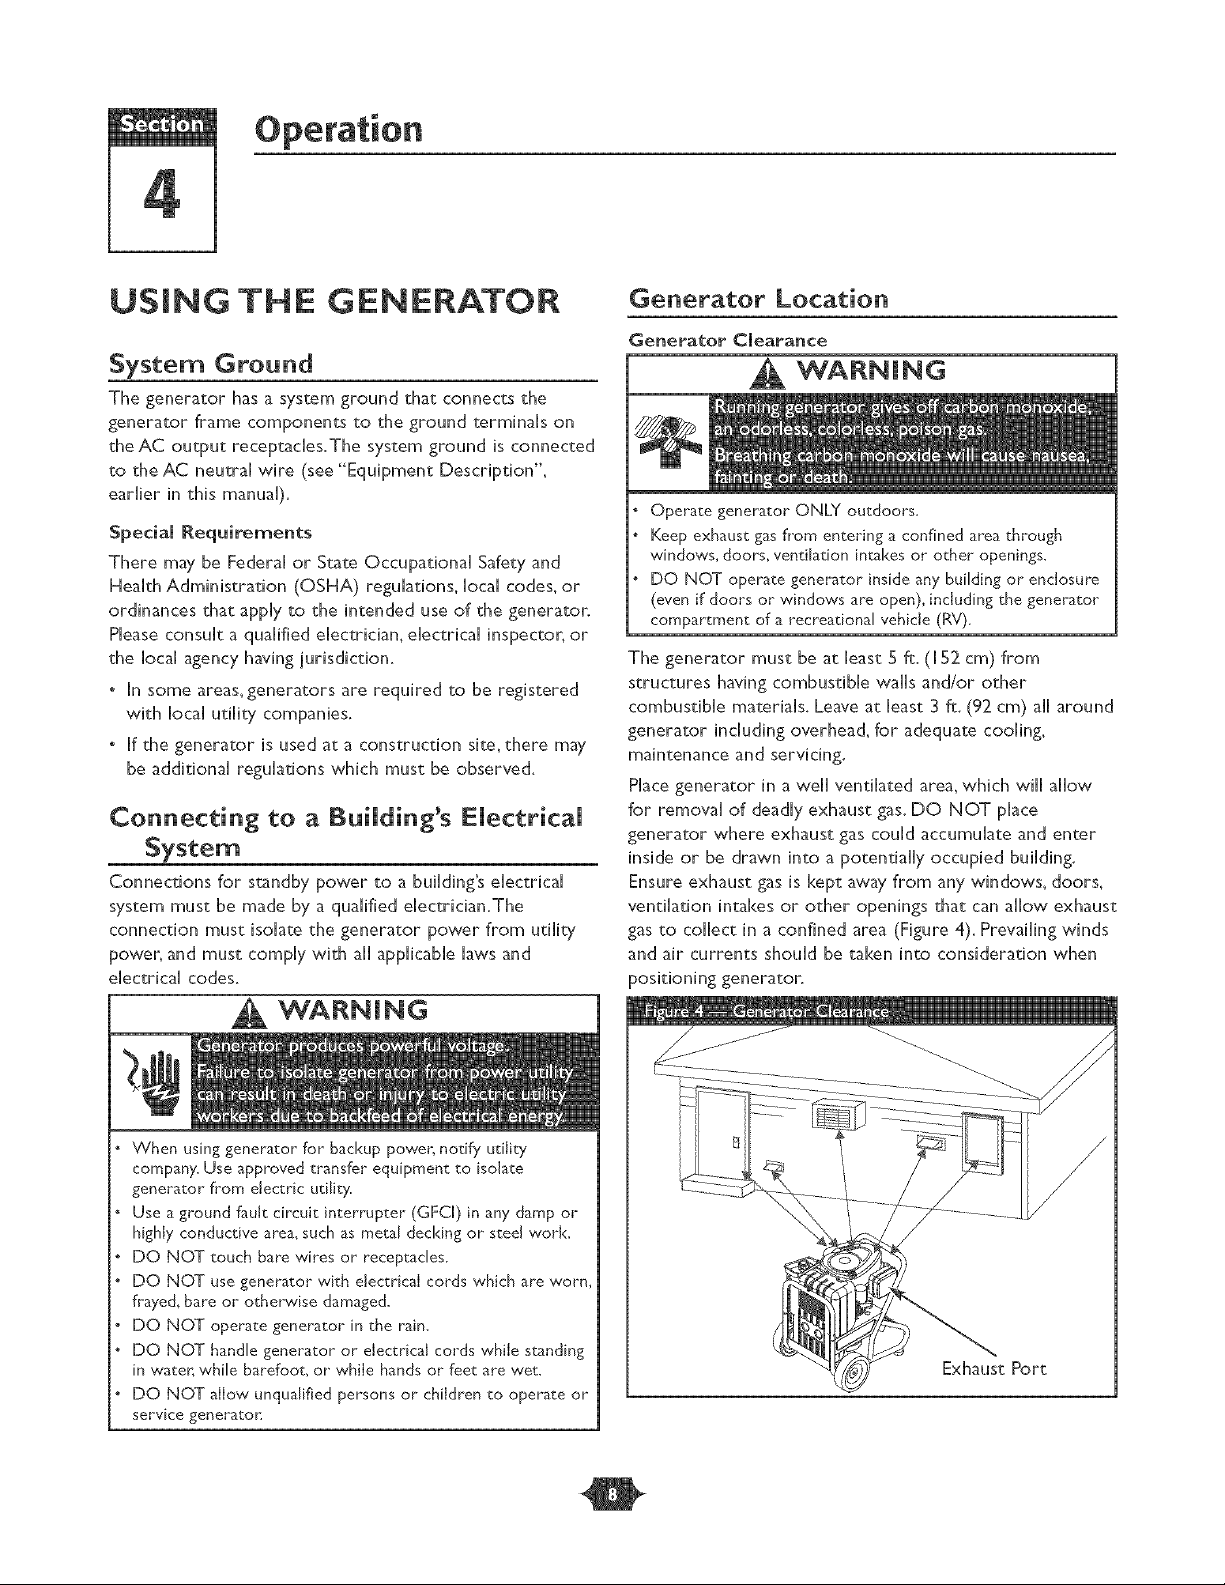
Place generator in a well ventilated area, which will allow
for removal of deadly exhaust gas. DO NOT place
generator where exhaust gas could accumulate and enter
inside or be drawn into a potentially occupied building.
Ensure exhaust gas is kept away from any windows, doors,
ventilation intakes or other openings that can allow exhaust
gas to collect in a confined area (Figure 4). Prevailing winds
and air currents should be taken into consideration when
positioning generaton
WARNING
When using generator for backup power, notify utility
company. Use approved transfer equipment to isolate
generator from electric utility.
Use a ground fault circuit interrupter (GFCI) in any damp or
highly conductive area_ such as metal decking or steel work_
DO NOT touch bare wires or receptacles_
DO NOT use generator with electrical cords which are worn,
frayed, bare or otherwise damaged.
DO NOT operate generator in the rain.
DO NOT handle generator or electrical cords while standing
in water, while barefoot, or while hands or feet are wet_
DO NOT allow unqualified persons or children to operate or
service generato_i
Exhaust Port
0
Section 4: Operation
OPERATmNG THE
G EN E RATO R
Startin the En
Disconnectallelectricalloadsfrom thegenerator.Follow
start instruction steps in numerical order:
IMPORTANT:Always unplug the battery float charger
before starting the generator.
I. Hake sure unit is on a level surface.
iMPORTANT: Failure to start and operate unit on a level
surface will cause the unit not to start or shut down during
operation.
2. Follow start instructions given in engine owner's manual
and turn start switch on generator to "Start" position
(Figure S).To prolong life of starter components, DO
NOT hold starter switch in "Start" position for more
than 15 seconds_and pause for I minute.
Jump Start Procedure
If generator's starting battery fails, use following instructions
to jump start generatonYou can jump start generator using
any 12Vok automotive or utility style storage battery.
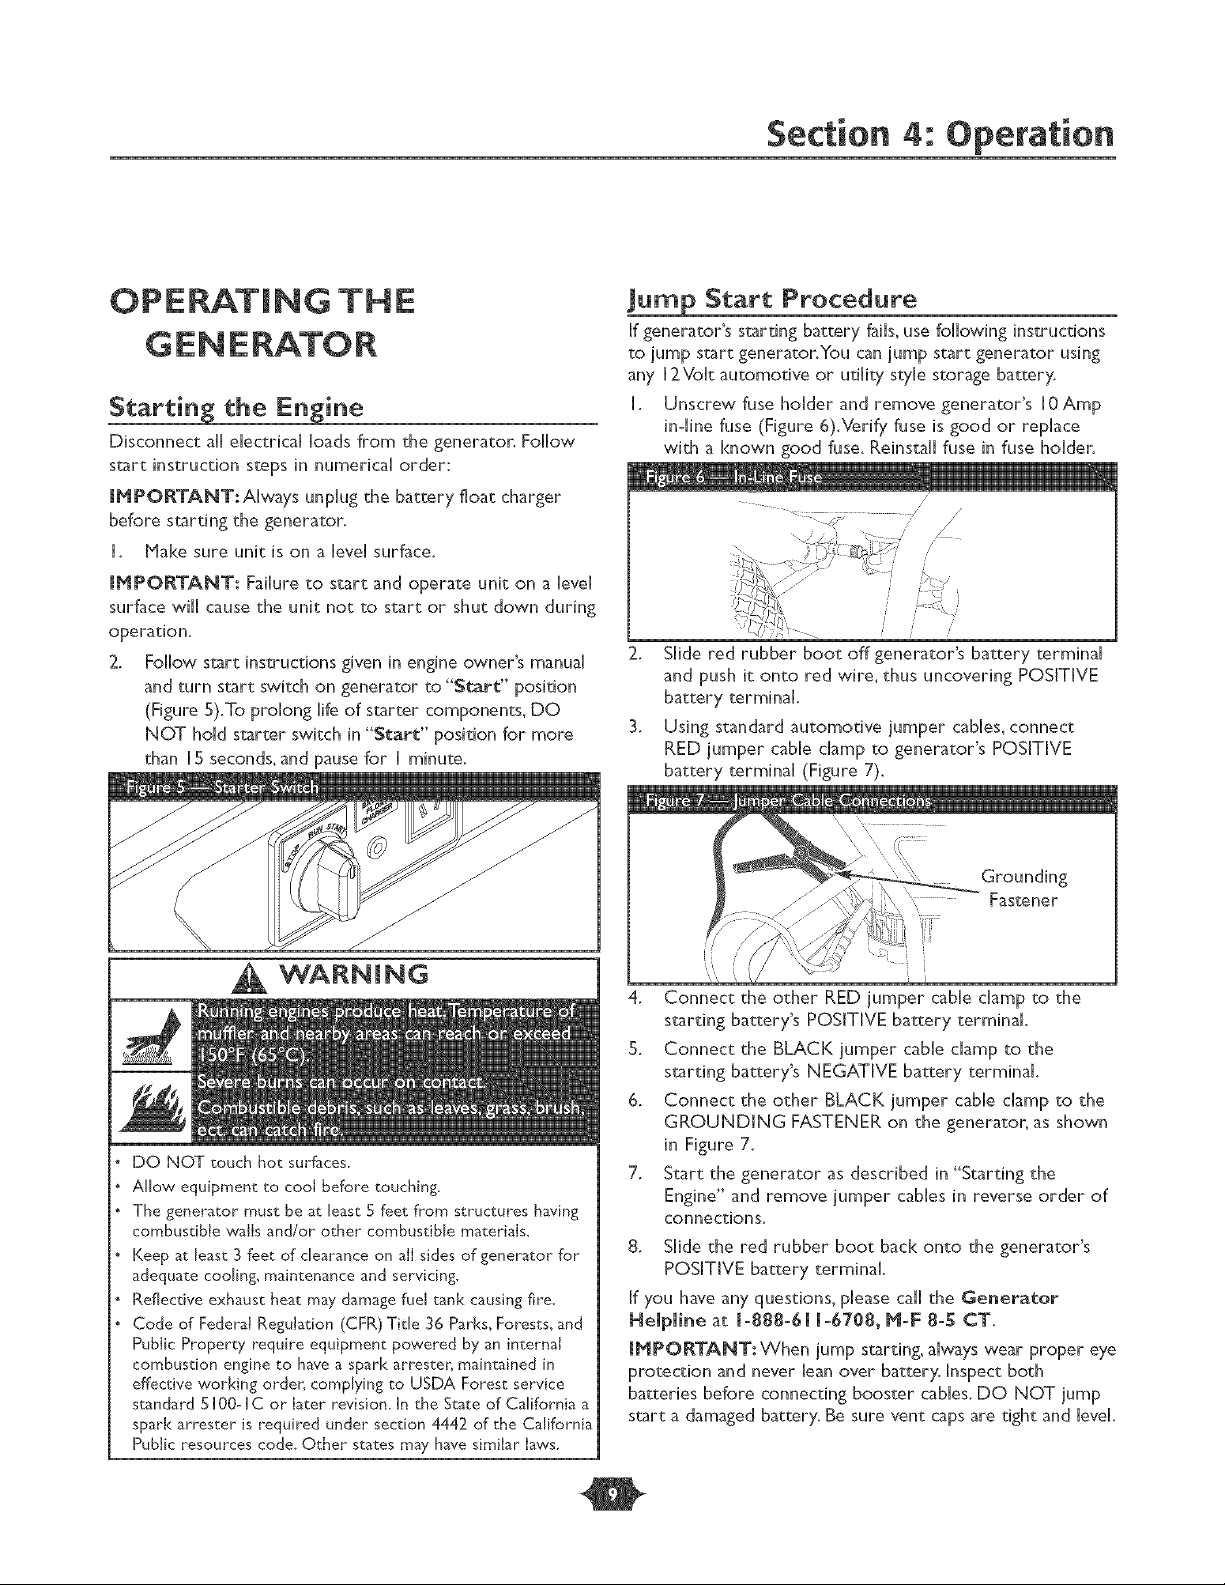
I. Unscrew fuse holder and remove generator's 10Amp
in4ine fuse (Figure 6).Verify fuse is good or replace
with a known good fuse. Reinstall fuse in fuse holder.
/
/
/
2. Slide red rubber boot off generator's battery terminal
and push it onto red wire, thus uncovering POSITIVE
battery terminal.
3. Using standard automotive jumper cables, connect
RED jumper cable clamp to generator's POSITIVE
battery terminal (Figure 7).
WARNING
DO NOT touch hot surfaces.
Allow equipment to cool before touching.
The generator must be at least 5 feet from structures having
combustible walls and/or other combustible materials.
Keep at least 3 feet of clearance on all sides of generator for"
adequate cooling, maintenance and servicing.
Reflective exhaust heat may damage fuel tank causing fire.
Code of Federal Regulation (CFR) Tide 36 Parks, Forests, and
Public Property require equipment powered by an internal
combustion engine to have a spark arresten maintained in
effective working order, complying to USDA Forest service
standard 5100-IC or later revision. In the State of California a
spark attester is required under section 4442 of the California
Public resources code. Other states may have similar laws,
Fastener
ii
i!
4. Connect the other RED jumper cable damp to the
starting battery's POSITIVE battery terminal.
S. Connect the BLACK jumper cable clamp to the
starting battery's NEGATIVE battery terminal.
6. Connect the other BLACK jumper cable clamp to the
GROUNDING FASTENER on the generator, as shown
in Figure 7.
7. Start the generator as described in "Starting the
Engine" and remove jumper cables in reverse order of
connections.
8. Slide the red rubber boot back onto the generator's
POSITIVE battery terminal.
If you have any questions, please call the Generator
Helpline at l =888=61 l =6708, M=F 8=5 CT.
iMPORTANT: When jump starting, always wear proper eye
protection and never lean over battery. Inspect both
batteries before connecting booster cables. DO NOT jump
start a damaged battery. Be sure vent caps are tight and level.
O
Section 4: Operation
Connectin_ Fiectrica[ Loads
" Let engine stabiHize and warm up for a few minutes after
starting.
° PHug in and turn on the desired [20 and/or 240 VokAC,
singHe phase, 60 Hz eHectricaH Hoads.
° DO NOT connect 240VoHt Hoads to the H20Vok dupHex
receptacles.
° DO NOT connect 3-phase Hoads to the generator.
° DO NOT connect 50 Hz [oads to the generator.
. DO NOT OVERLOAD GENEP_ATOR. See "Don't
OveHoad Generator".
See"Don't Overload Generator".
Start generator and let engine stabilize before connecting
electrical loads.
Connect electrical loads in OFF position, then turn ON for
operatiom
Turn electrical loads OFF and disconnect from generator
before stopping generatol_
Sto_ the Engine
I. Turn OFF and unplug aSSelectrical loads from
generator panel receptacles. NEVER start or stop engine
with electrical devices plugged in and turned ON.
2. Let engine run at no-load for several minutes to
stabilize internal temperatures of engine and generator.
3. Turn start switch to "Stop" position.
DANGER
DO NOT allow any open flame, spark, heat, or lit cigarette
during and for several minutes after charging a batteD;
Wear protective goggles, rubber apron, and rubber gJoves_
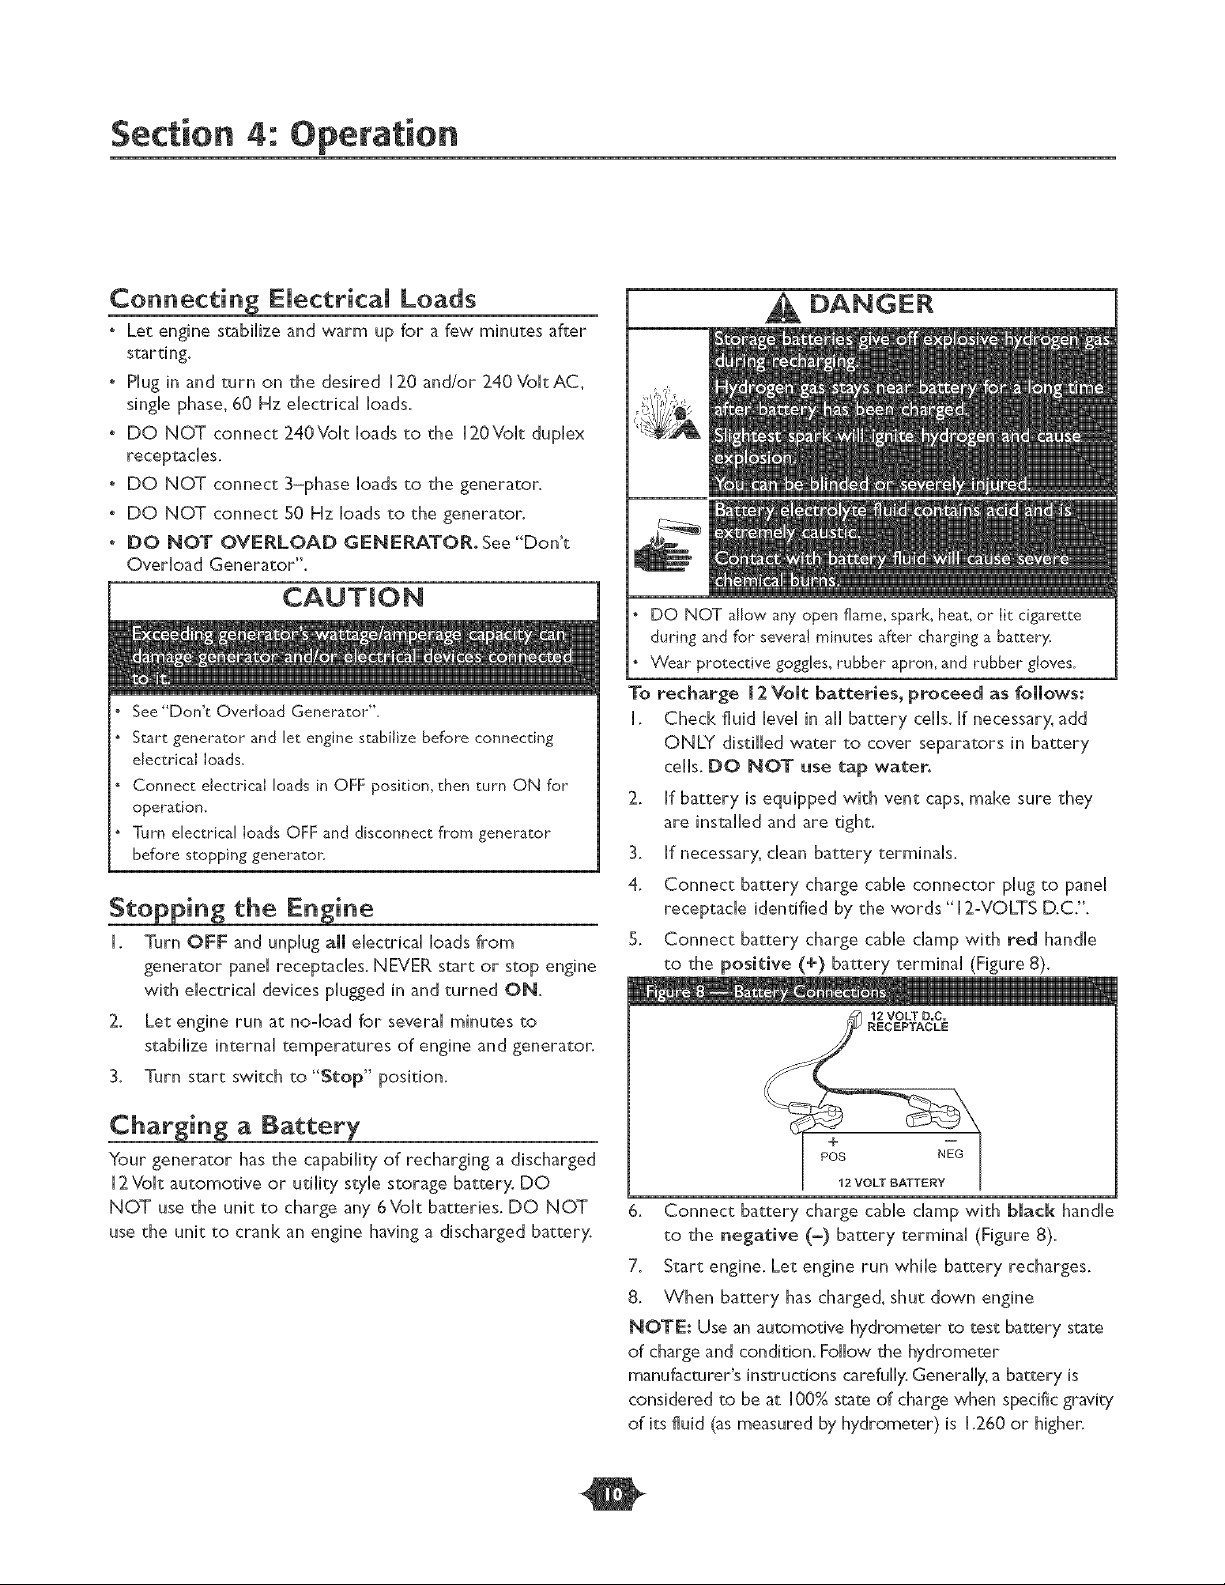
To recharge [ 2 Volt batteries, proceed as follows:
I. Check fluid level in all battery cells. If necessary, add
ONLY distilled water to cover separators in battery
cells. DO NOT use tap water.
2. ff battery is equipped with vent caps, make sure they
are installed and are tight.
3. [f necessary, clean battery terminals.
4. Connect battery charge cable connector plug to panel
receptacle identified by the words "12:VOLTS D.C.".
5. Connect battery charge cable clamp with red handle
to the positive (+) battery terminal (Figure 8).
12 VOLT D,C.
RECEPTACLE
Charging a Battery
Your generator has the capability of recharging a discharged
i2Voit automotive or utility style storage battery. DO
NOT use the unit to charge any 6Volt batteries. DO NOT
use the unit to crank an engine having a discharged battery.
+
POS NEG
i2 VOLT BATTERY
6. Connect battery charge cable clamp with bmack handle
to the negative (-) battery terminal (Figure 8).
7. Start engine. Let engine run while battery recharges.
8. When battery has charged_ shut down engine
NOTE: Use an automotive hydrometer to test battery state
of charge and condition. Follow the hydrometer
manufacturer's instructions carefully. Generally, a battery is
considered to be at 100% state of charge when specific gravity
of its fluid (as measured by hydrometer) is 1.260 or higher.
Section 4: Operation
blow to Use the Battery Char er
Use batteryfloatchargerjackto keep the startingbattery
charged and ready for use. Battery charging should be done
in a dry location, such as inside agarage.
I. Plug charger into unit's "Battery Float Charger" jack,
whch is located next to starter switch (Figure 9). Plug
battery charger into a 120Vok AC wall receptacle.
2. Unplug charger from unit and wall outlet when
generator is being started and while in operation.
3. Keep this charger plugged in when generator is not in
use to prolong battery life.The charger has a built in
float equalizer and will not overcharge the battery,
even when plugged in for an extended period of time.
iMPORTANT: See "Battery Haintenance" on page 15 for
additional information.
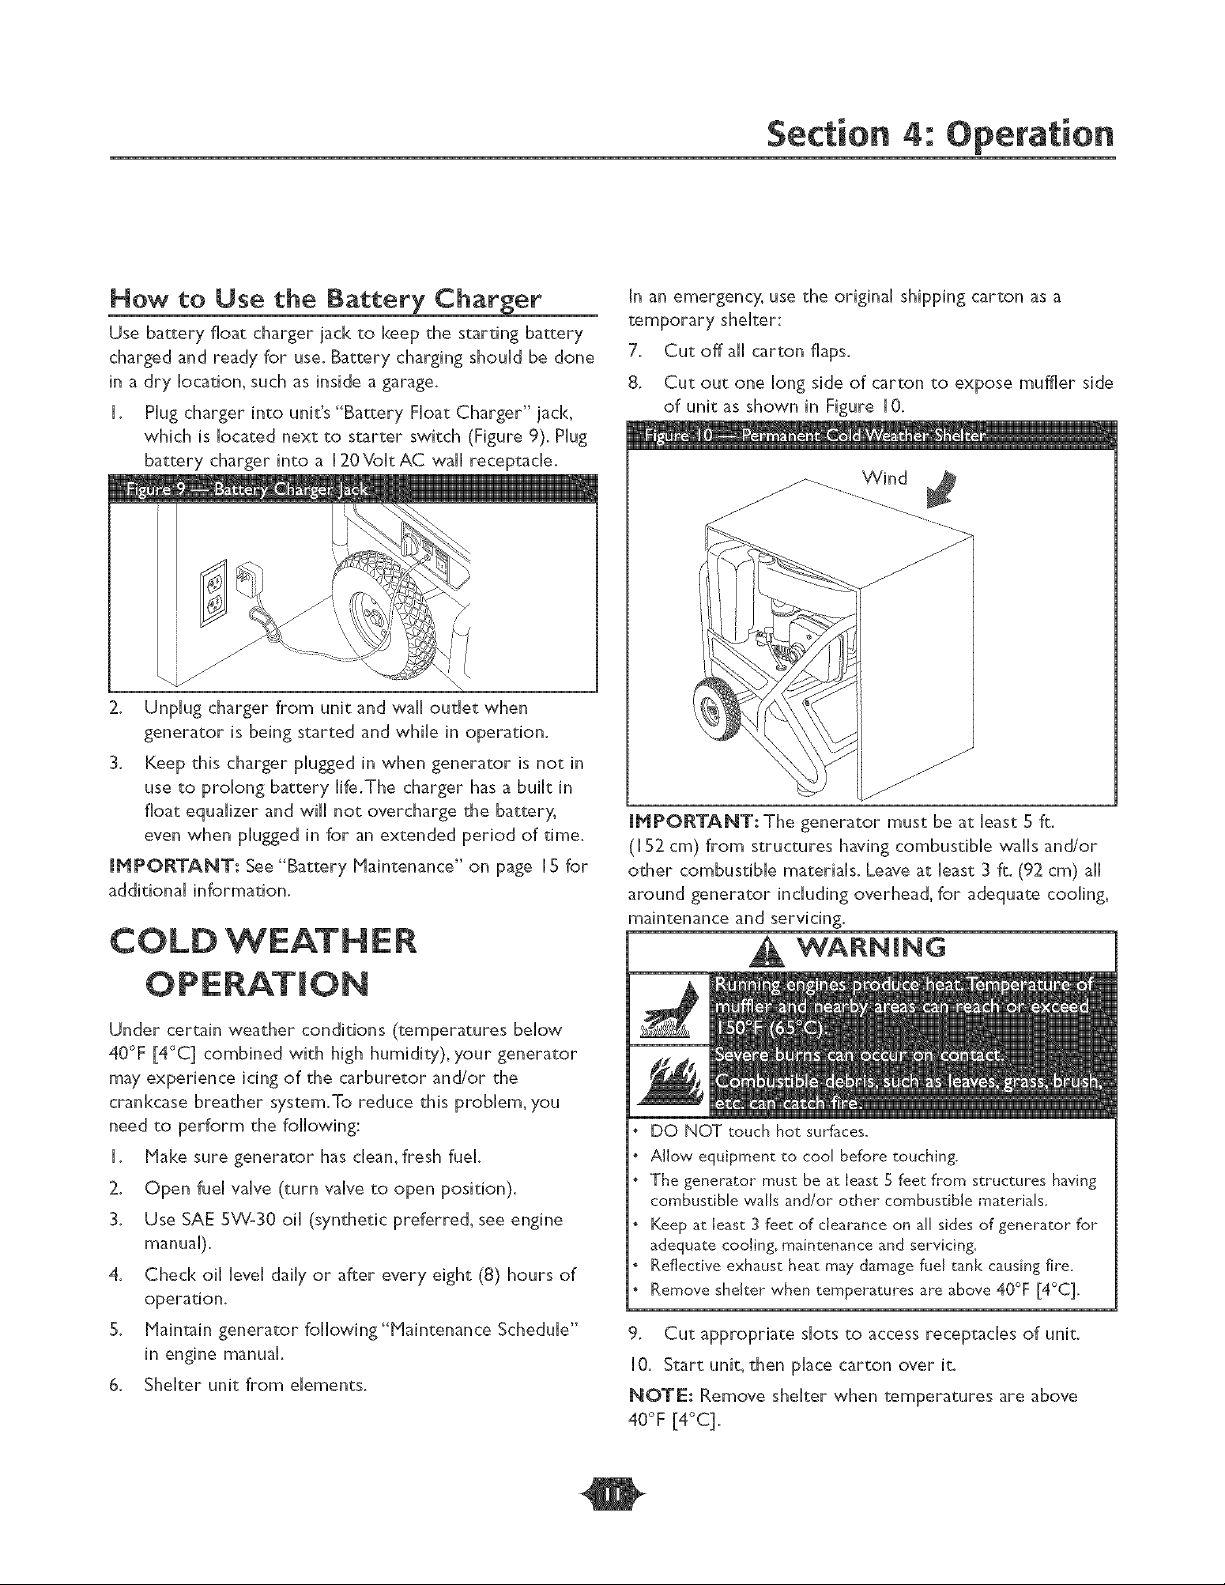
COLD WEATHER
[n an emergency, use the original shipping carton as a
temporary shelter:
7. Cut off ail carton flaps.
8. Cut out one long side of carton to expose muffler side
of unit as shown in Figure I O.
Wind
[MPORTANT: The generator must be at least 5 ft.
(152 cm) from structures having combustible wails and/or
other combustible materials. Leave at least 3 ft. (92 cm) all
around generator including overhead, for adequate cooling,
maintenance and servicing.
WARNING
Under certain weather conditions (temperatures below
40°F [4°C] combined with high humidity), your generator
may experience icing of the carburetor and/or the
crankcase breather system.To reduce this problem_ you
need to perform the following:
I. Hake sure generator has dean, fresh fuel.
2. Open fuel valve (turn valve to open position).
3. Use SAE 5_Azo30oil (synthetic preferred_ see engine
manual).
4. Check oil level daily or after every eight (8) hours of
operation.
5. Maintain generator following "Maintenance Schedule"
in engine manual.
6. Shelter unit from elements.
DO NOT touch hot surfaces_
Allow equipment to cool before touching.
The generator must be at least 5 feet from structures having
combustible walls and/or other combustible materials.
Keep at least 3 feet of clearance on all sides of generator for
adequate cooling, maintenance and servicing_
Reflective exhaust heat may damage fuel tank causing fire.
Remove shelter when temperatures are above 40°F [4°C].
9. Cut appropriate slots to access receptacles of unit.
10. Start unit, then place carton over it.
NOTE: Remove shelter when temperatures are above
40°F {4°C].
 Loading...