

Page 1

TROTEC® GmbH & Co. KG • Grebbener Straße 7 • D-52525 Heinsberg
Te l.: +49 (0) 24 52 / 962 - 400 • Fax: +49 (0) 24 52 / 962 - 200
www.trotec.de • E-Mail: info@trotec.de
TRO-TR-BA-BZ05-HS-001-INT
Bedienungsanleitung – Raum-Thermo-Hygrometer ....
A - 1
G
Operating instructions - room thermo-hygrometer . . . .
B - 1
F
Notice d’emploi – Thermohygromètre d’intérieur ......
C - 1
I
Istruzioni per l’uso – Termoigrometro per ambienti . . . .
D - 1
O
Bedieningshandleiding – Ruimte-thermo-hygrometer . .
E - 1
E
Manual de instrucciones: Termohigrómetro ambiental .
F - 1
P
Manual de instruções – Termohigrómetro para interiores . .
G - 1
T
Kullanım kılavuzu – Oda tipi termik higrometre ........
H - 1
Q
Instrukcja obsługi – Termohigrometr pokojowy .........
I - 1
o
. .
J - 1
c
Betjeningsvejledning – Indendørs termohygrometer . . .
K - 1
o
Käyttöohje – Sisätilojen termohygrometri . . . . . . . . . . . .
L - 1
N
Brukerveiledning – Termohygrometer . . . . . . . . . . . . . . .
M - 1
S
Bruksanvisning – Rumstermohygrometer . . . . . . . . . . . .
N - 1
FIN
RUS
Page 2

A - 1 Bedienungsanleitung – Raum-theRmo-hygRometeR BZ05
INHALTSANGABE
1.0 Sicherheitshinweise ...................A - 1
2.0 Technische Spezifikationen .............A - 2
3.0 Funktionen ..........................A - 3
3.1 Uhrzeit und Datum einstellen . . . . . . . . . . . . . A - 3
3.2 Datum anzeigen .......................A - 4
3.3 Reset ...............................A - 4
3.4 Temperaturanzeige in °C oder °F ..........A - 4
4.0 Alarmfunktion . . . . . . . . . . . . . . . . . . . . . . . A - 4
4.1 Alarm aktivieren .......................A - 5
4.2 Alarm ausschalten . . . . . . . . . . . . . . . . . . . . . A - 5
4.3 Alarm deaktivieren .....................A - 5
5.0 Maximum-/Minimumwert-Anzeige [ MEMO ] . .A - 5
6.0 Wohlfühl-Indikator ....................A - 6
7.0 Batteriewechsel ......................A - 6
Diese Veröffentlichung ersetzt alle vorhergehenden. Kein Teil dieser Veröffentlichung
darf in irgendeiner Form ohne unsere schriftliche Genehmigung reproduziert oder
unter Verwendung elektronischer Systeme verarbeitet, vervielfältigt oder verbreitet
werden. Technische Änderungen vorbehalten. Alle Rechte vorbehalten. Warennamen
werden ohne Gewährleistung der freien Verwendbarkeit und im Wesentlichen der
Schreibweise der Hersteller folgend benutzt. Die verwendeten Warennamen sind
eingetragene und sollten als solche betrachtet werden. Konstruktionsveränderungen
im Interesse einer laufenden Produktverbesserung sowie Form-/Farbveränderungen
bleiben vorbehalten. Lieferumfang kann von den Produktabbildungen abweichen.
Das vorliegende Dokument wurde mit der gebotenen Sorgfalt erarbeitet. Wir übernehmen keinerlei Haftung für Fehler oder Auslassungen. © TROTEC®
Lesen Sie bitte die nachfolgenden Hinweise und Anweisungen sorgfältig durch und sorgen Sie dafür, dass dieses Handbuch sich immer in Reichweite Ihres Messgerätes befindet.
1.0 SICHERHEITSHINWEISE
Das Gerät ist ausschließlich für den Einsatz in Innenräumen konzipiert und nicht für den Außeneinsatz geeignet!
Setzen Sie es niemals Temperaturen bzw. Luftfeuchtigkeiten außerhalb der im Folgenden gelisteten Bereiche aus,
da dadurch die Funktionstüchtigkeit des Gerätes beeinflusst oder dieses sogar nachhaltig zerstört werden kann.
Das Gerät wurde vor seiner Auslieferung umfangreichen Material-, Funktions- und Qualitätsprüfungen unterzogen. Trotzdem können von diesem Gerät Gefahren ausgehen, wenn es
unsachgemäß eingesetzt wird! Beachten Sie die folgenden
Hinweise: Bei Schäden, die durch Nichtbeachten dieser An-
Page 3

Bedienungsanleitung – Raum-theRmo-hygRometeR BZ05 A - 2
leitung verursacht werden, erlischt der Garantieanspruch!
Für Folgeschäden übernehmen wir keine Haftung! Bei Sachoder Personenschäden, die durch unsachgemäße Handhabung oder Nichtbeachten der Sicherheitshinweise verursacht
wurden, übernehmen wir keine Haftung! In solchen Fällen
erlischt jeder Garantieanspruch. Aus Zulassungsgründen ist
das eigenmächtige Umbauen und/oder Verändern des Gerätes nicht gestattet. Das Gehäuse darf, bis auf das Öffnen des
Batteriefachdeckels, nicht zerlegt werden. Messgeräte sind
kein Spielzeug und gehören nicht in Kinderhände! Schalten
Sie das Messgerät niemals gleich dann ein, wenn dieses von
einem kalten in einen warmen Raum gebracht wird. Das
dabei entstandene Kondenswasser kann unter Umständen
Ihr Gerät zerstören. Lassen Sie das Gerät ausgeschaltet auf
Zimmertemperatur kommen. Lassen Sie das Verpackungsmaterial nicht achtlos liegen. Dieses könnte für Kinder zu
einem gefährlichen Spielzeug werden.
m Ein Standortwechsel von kalten zu warmen Um gebungsbedingungen (und umgekehrt) kann zu
Kondensatbildung auf der Messelektronik des
Gerätes führen. Dieser physikalische Effekt, der
sich konstruktionsseitig bei keinem Messgerät
verhindern lässt, führt zu Messwertabwei chungen. In Abhängigkeit der Höhe der Tempe raturdifferenzen benötigt das Gerät eine „Akkli matisierungszeit“ von ca. 15 - 30 Minuten, bevor
der Messvorgang fortgesetzt werden kann.
2 .0 TECHNISCHE SPEZIFIKATIONEN
Einsatzbereiche: Wohn-/Büroräume, Lager und Räumlichkeiten mit nicht-korrosiver Atmosphäre
Anzeige / Display:
Temperatur
Messbereich: 0°C bis 50°C (32°F bis 120°F)
Messgenauigkeit: ± 1.0 °C (1.8 °F)
Auflösung: 0.1 °C (0.1 °F)
Luftfeuchtigkeit
Messbereich: 10% rel. Feuchtigkeit ~ 90% rel. Feuchtigkeit (nicht kondensierend)
Messgenauigkeit: ± 5% (40% rel. Feuchtigkeit ~ 80%
rel. Feuchtigkeit) sonst ± 8%
Sonstiges: Batterie: AAA 1.5V
Page 4

A - 3 Bedienungsanleitung – Raum-theRmo-hygRometeR BZ05
3 .0 FUNKTIONEN
3 .1 DATUM UND UHRZEIT EINSTELLEN
Mode – Taste:
(Für die Einstellungsänderung die Mode Taste kurz
gedrückt halten)
1 x drücken: Minuten
2 x drücken: Stunden
3 x drücken: 12/24h Anzeige
4 x drücken: Monat
5 x drücken: Tag
ADJ – Taste
Memo – Taste
Uhrzeit und Datum einstellen
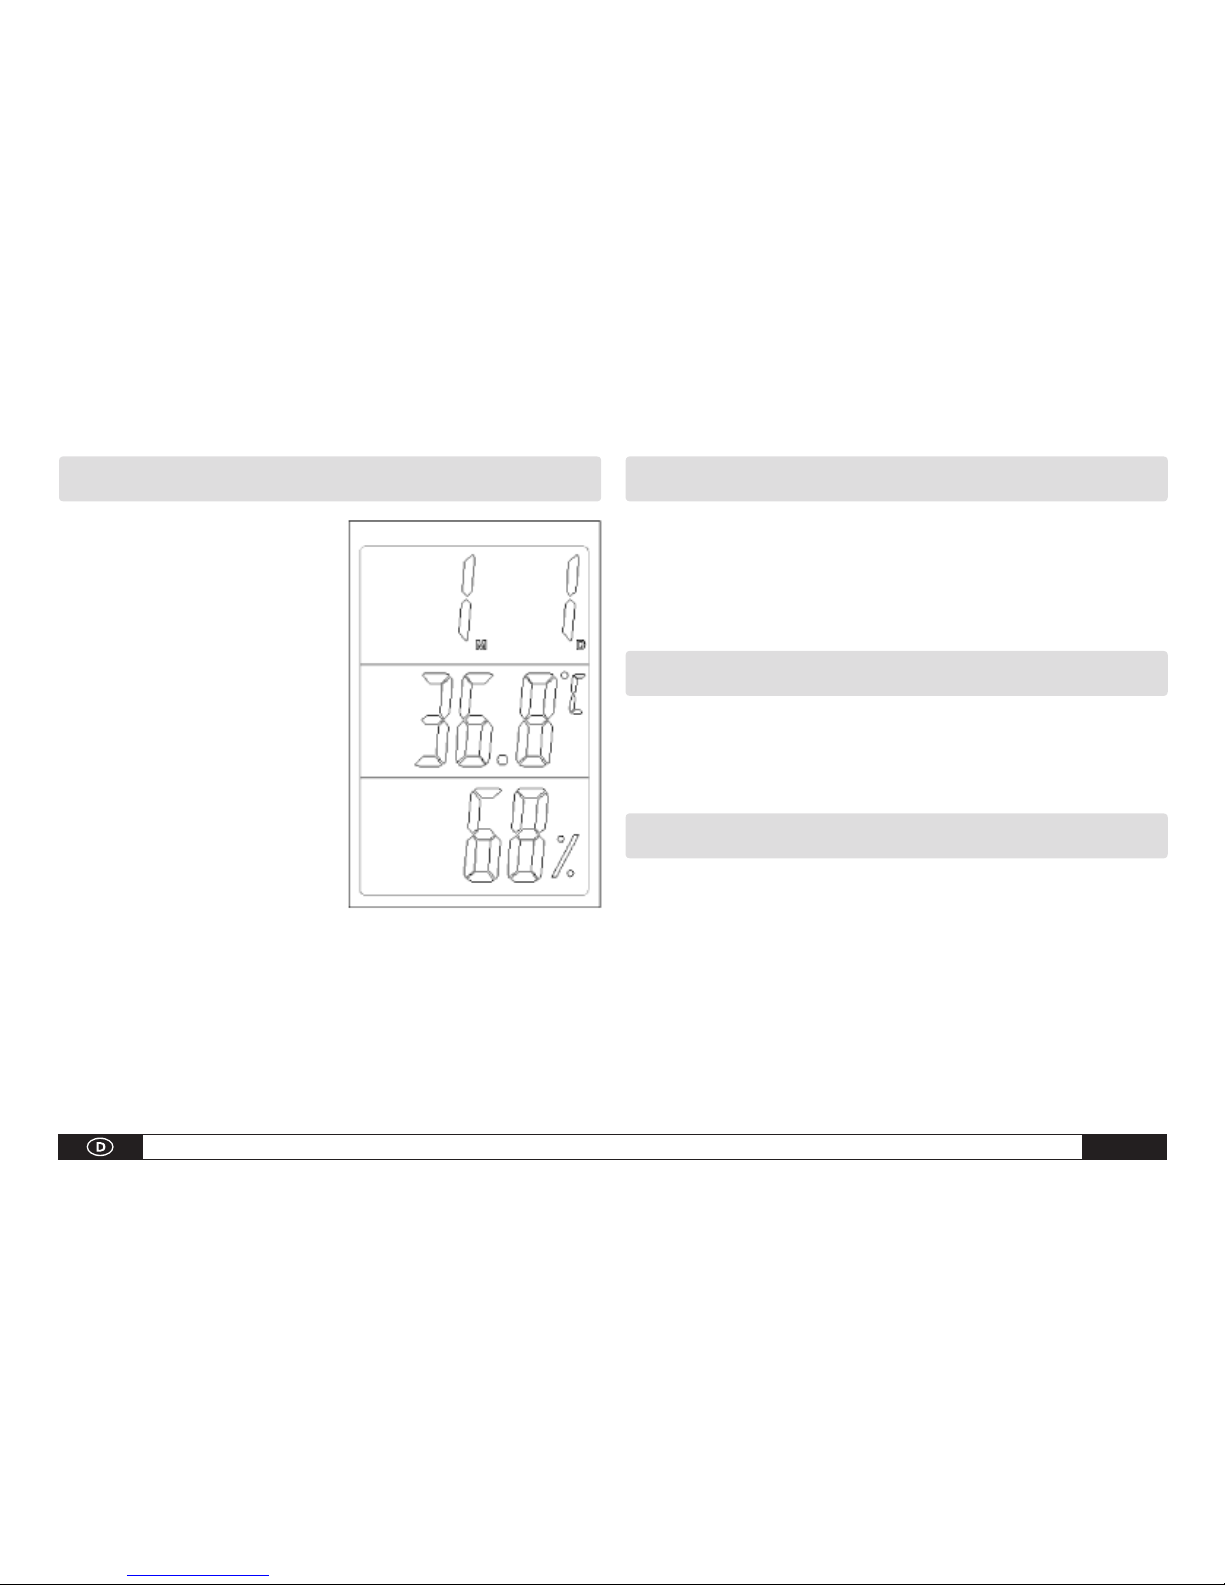
Sie können sowohl die Uhrzeit als auch das Datum an
Ihrem Hygrometer ablesen. Die Uhrzeit erscheint dauerhaft im oberen Drittel des Displays. Durch ein kurzes
Drücken der [ADJ]-Taste wechselt diese Anzeige: es erscheint das Datum mit Monat (links) und Tag (rechts).
Um die Uhr und/oder das Datum neu einzustellen, gehen
Sie wie folgt vor:
Drücken Sie die [MODE]-Taste und halten Sie sie kurz gedrückt. Die Minutenanzeige fängt an zu blinken. Drücken
Sie die [ADJ]-Taste, um die Minutenanzeige zu ändern.
Drücken Sie die [ADJ]-Taste 1x, um die Minutenanzeige
um jeweils eine Minute zu verändern, oder halten Sie die
Taste gedrückt, um schneller zu einer bestimmten Minutenzahl zu gelangen. Drücken Sie danach die [MODE]Taste 1x, um zur Einstellung der Stunden und des Datums
zu gelangen. Diese erfolgt nach der gleichen Vorgehensweise. Nachdem alle Werte (Min/Std/Mon/Tag) einmal
durchlaufen wurden, ist der neue Wert gespeichert.
Ihr Gerät verfügt sowohl über eine 12-Stunden als auch eine
24-Stunden Anzeige. Bei der 12-Stunden Anzeige erscheinen
links neben der Uhrzeit zusätzlich das Kürzel „AM“ (englisch
für vormittags, d.h. von 00:00 bis 12:00) und „PM“ (englisch
für nachmittags, abends, d.h. von 12:00 Uhr bis 24:00 Uhr).
m Der neue Wert wird nach einer Minute auto-
matisch gespeichert. Die Anzeige hört auf
zu blinken.
Page 5
Bedienungsanleitung – Raum-theRmo-hygRometeR BZ05 A - 4
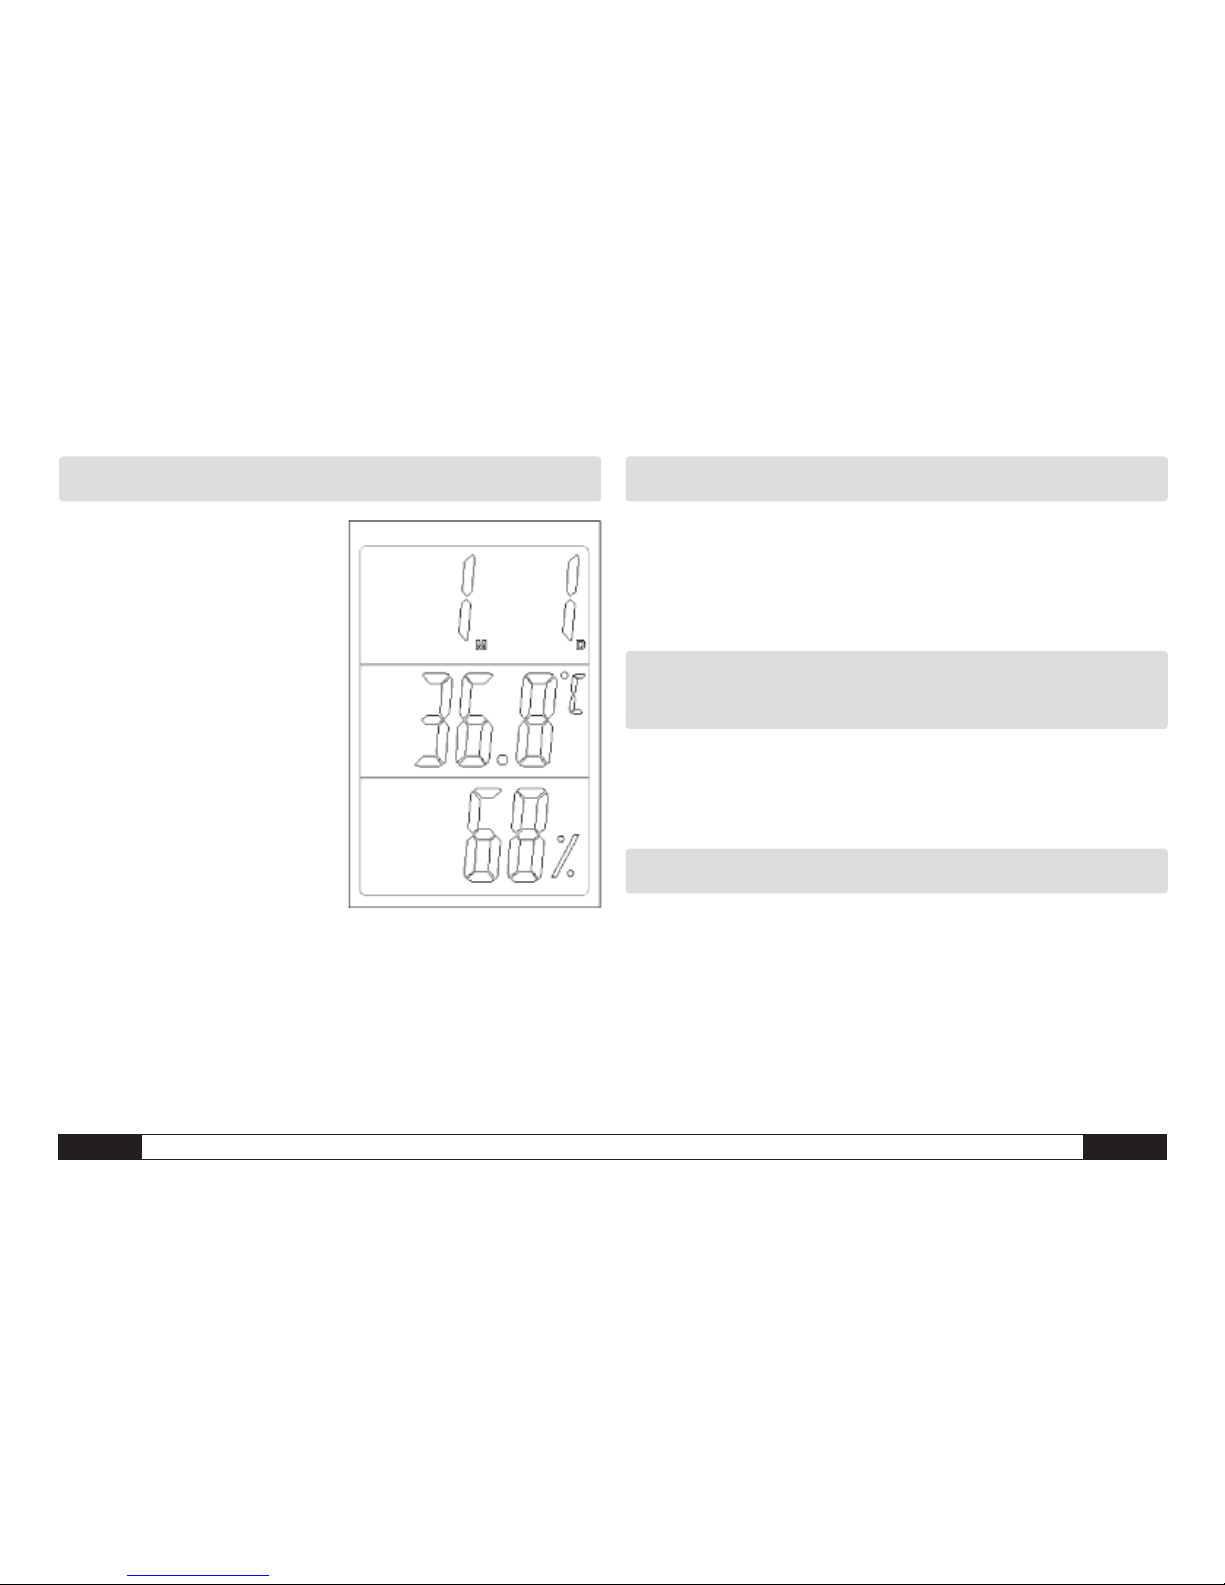
3.2 DATUM ANZEIGEN
Drücken Sie die [ADJ]-Taste.
Im oberen Drittel des Displays erscheint das Datum
anstelle der Uhrzeit. Links
erscheint der Monat, rechts
der Tag. Die Anzeige kehrt
nach ca. 2 Sekunden zur
Uhrzeit zurück. Sie können das Datum wahlweise
auch längere Zeit anzeigen lassen, indem Sie die
[ADJ]-Taste länger gedrückt
halten. Die Datumsanzeige
kehrt erst nach dem Loslassen der [ADJ]-Taste zur
Uhrzeit zurück.
3.3 RESET
Um einen Reset aller eingestellten bzw. gespeicherten
Daten durchzuführen, drücken Sie den RESET-Knopf auf
der Rückseite des Gerätes. Das Gerät befindet sich danach wieder im voreingestellten Werksmodus.
3.4 TEMPERATURANZEIGE IN °C ODER °F
Um in der Anzeige der Temperatureinheit zwischen °C
und °F zu wechseln, drücken Sie den °C/°F-Knopf auf
der Rückseite des Gerätes.
4.1 ALARM AKTIVIEREN
Drücken Sie kurz die [MODE]-Taste. Im oberen Drittel des
Displays erscheint anstelle der Uhrzeit die Alarmzeit, der
Doppelpunkt zwischen den Zahlen hört auf zu blinken. Drücken Sie die [MODE]-Taste für ca. 1 Sekunde erneut. Die Minutenanzeige der Alarmzeit fängt an zu blinken. Drücken Sie
die [ADJ]-Taste 1x, um die Minutenanzeige um jeweils eine
Minute zu verändern oder halten Sie die Taste gedrückt, um
schneller zu einer bestimmten Minutenzahl zu gelangen.
Page 6

A - 5 Bedienungsanleitung – Raum-theRmo-hygRometeR BZ05
Drücken Sie kurz die
[MODE]-Taste, um von Minuten zu Stunden zu wechseln.
Die Stundenanzeige fängt
an zu blinken. Drücken Sie
die [ADJ]-Taste 1x, um die
Stundenanzeige um jeweils
eine Stunde zu verändern
oder halten Sie die Taste gedrückt, um schneller zu einer
bestimmten Stundenzahl zu
gelangen.
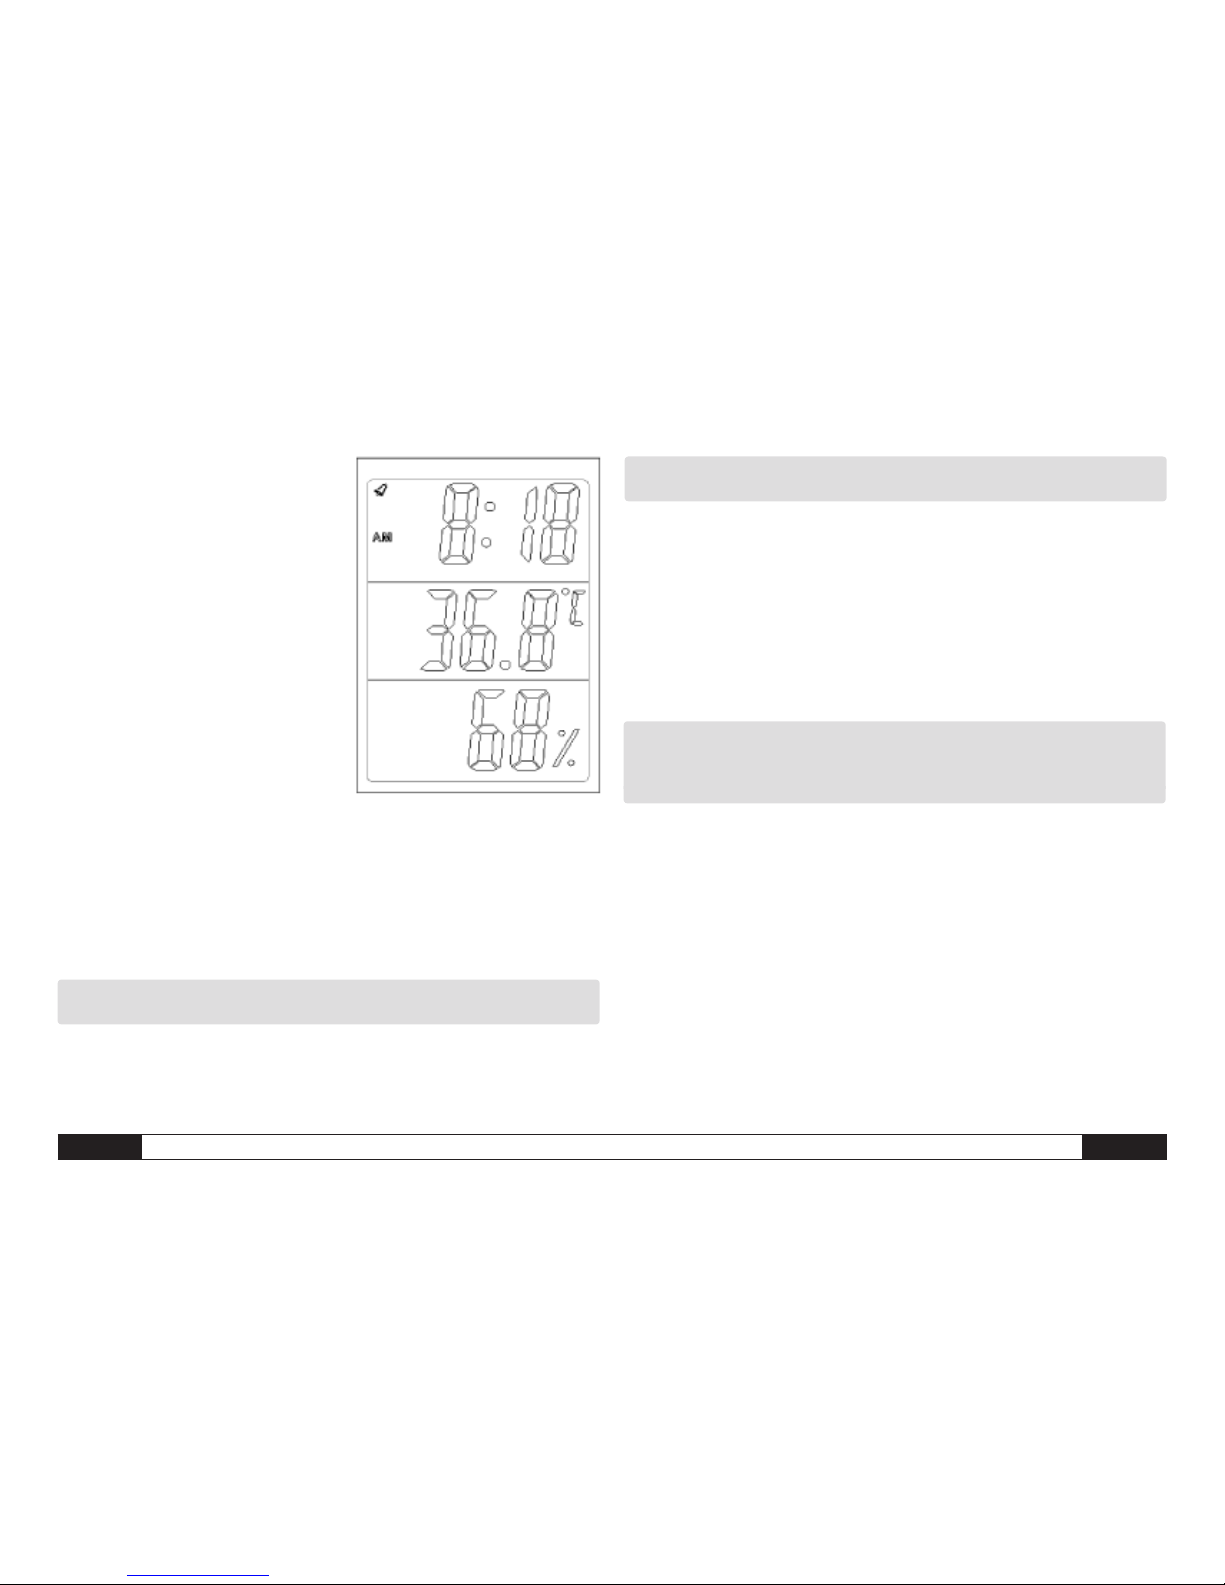
Drücken Sie die [MODE]-Taste erneut. Die Alarmzeit ist
gespeichert. Oben links im oberen Drittel des Displays
erscheint neben der eingestellten Alarmzeit das Symbol
einer Glocke.
4.2 Alarm ausschalten
Drücken Sie eine der Tasten an der Vorderseite des Gerätes, um den Alarmton auszuschalten.
4.3 Alarm deaktivieren
Drücken Sie die [MODE]-Taste. Im oberen Drittel des
Displays erscheint anstelle der Uhrzeit die Alarmzeit. Das
Symbol einer Glocke zeigt an, dass der Alarm aktiviert
ist. Drücken Sie die [ADJ]-Taste 3x, um den Alarm zu
deaktivieren. Das Glockensymbol erscheint nicht mehr
im Display. Der Alarm ist deaktiviert.
5.0 Maximum-/Minimumwert-Anzeige [MEMO]
Um sich die seit dem letzten Reset gemessenen Maximumwerte anzusehen, drücken Sie bitte 1x die MEMOTaste. Um sich die seit dem letzten Reset gemessenen
Minimumwerte anzusehen, drücken Sie bitte 2x die
MEMO-Taste. Drücken Sie die MEMO-Taste ein drittes
Mal und Sie gelangen wieder in den Standard-Anzeigemodus. Wird die MEMO-Taste kein drittes Mal gedrückt,
springt die Anzeige nach 10 Sekunden automatisch wieder in den Standard-Modus zurück.
Page 7

Bedienungsanleitung – Raum-theRmo-hygRometeR BZ05 A - 6
6.0 Wohlfühl-Indikator
Liegt die Umgebungstemperatur zwischen 20°C und
26°C (68°F ~ 78,8°F) und die relative Luftfeuchtigkeit
zwischen 50% und 70% erscheint das „Wohlfühlsymbol“ A im Display.
Beträgt die relative Luftfeuchtigkeit, unabhängig von der
Temperatur, mehr als 70%, erscheint das Symbol F für
zu hohe Luftfeuchtigkeit.
Beträgt die relative Luftfeuchtigkeit, unabhängig von der
Temperatur, weniger als 50%, erscheint das Symbol K
für zu geringe Luftfeuchtigkeit.
Eine zu geringe relative Luftfeuchtigkeit führt oftmals zu
Kopfschmerzen und zum Austrocknen der Schleimhäute, speziell von Nase und Augen. Diese Reizung macht
wiederum anfälliger für Krankheitserreger und ist damit
oftmals Wegbereiter für Infekte.
Eine zu hohe relative Luftfeuchtigkeit wirkt sich besonders bei Personen mit schlechtem Herz-Kreislaufsystem
negativ auf das Wohlbefinden aus. Zudem besteht in geschlossenen und unzureichend belüfteten Räumen ein
erhöhtes Schimmelrisiko, was gleichzeitig ein weiteres
Gesundheitsrisiko darstellt.
Achten Sie deshalb immer auf eine entsprechend gute/regelmäßige Durchlüftung der Räumlichkeiten und ein „gesundes“
Verhältnis von Temperatur und relativer Luftfeuchtigkeit.
7.0 Batteriewechsel
Wenn die Batterie gewechselt werden muss, öffnen Sie das
Batteriefach. Dafür drücken Sie leicht den rückseitigen Deckel herunter und schieben diesen in Richtung des angezeigten Pfeils weg. Tauschen Sie die leere Batterie gegen
eine neue Batterie aus (1,5V AAA). Befestigen Sie erneut den
Batteriefachdeckel. Das Gerät ist nun wieder betriebsbereit.
Elektronische Geräte gehören nicht in den Hausmüll, sondern müssen in der Europäischen Union
– gemäß Richtlinie 2002/96/EG DES EUROPÄI-
SCHEN PARLAMENTS UND DES RATES vom 27.
Januar 2003 über Elektro- und Elektronik-Altgeräte – einer
fachgerechten Entsorgung zugeführt werden. Bitte entsorgen Sie dieses Gerät am Ende seiner Verwendung entsprechend der geltenden gesetzlichen Bestimmungen.
Page 8

B - 1 opeRating instRuctions - Room theRmo-hygRometeR BZ 05
CONTENTS
1.0 Safety instructions ....................B - 1
2.0 Technical specifications . . . . . . . . . . . . . . . B - 2
3.0 Functions . . . . . . . . . . . . . . . . . . . . . . . . . . . B - 3
3.1 Setting the time and date ................B - 3
3.2 Displaying the date . . . . . . . . . . . . . . . . . . . . B - 4
3.3 Reset ...............................B - 4
3.4 Temperature display in °C or °F . . . . . . . . . . . B - 4
4.0 Alarm function .......................B - 4
4.1 Activating the alarm ....................B - 5
4.2 Switching off the alarm . . . . . . . . . . . . . . . . . B - 5
4.3 Deactivating the alarm ..................B - 5
5.0 Maximum/Minimum value display [MEMO] . . B - 5
6.0 Comfort indicator .....................B - 6
7.0 Battery replacement ....................B - 6
This publication replaces all previous versions. No part of this publication may be
reproduced or processed, copied or distributed via electronic means in any form
whatsoever except with our written permission. We reserve the right to make technical changes. All rights are reserved. Trademarks are used in the following without
any guarantee of their free usability and are basically as the manufacturer describes
them. The trademarks used are registered and should be treated as such. The right
to make design alterations in the interests of continuous product improvement and
alterations to the shape or colour is reserved. The package contents may differ from
the product illustrations. This document has been prepared with the appropriate
care. We can accept no liability for any errors or omissions. © TROTEC®
Please read the following information and instructions carefully and ensure that this manual is always kept near to your
measuring instrument.
1.0 SAFETY INSTRUCTIONS
The appliance is designed exclusively for indoor use and
is not suitable for outdoor use! Never expose it to temperatures or humidities outside the ranges listed below, as
otherwise the function of the appliance can be affected or
the appliance itself can even be permanently destroyed.
The appliance was subjected to extensive material, functional and quality checks before delivery. Nevertheless,
this appliance can be a source of danger if used improperly! Please observe the following information: Warranty
claims are voided in the case of damage caused by failure
to observe these instructions! We will not accept any liability for consequential damage! We will not accept any
Page 9

opeRating instRuctions - Room theRmo-hygRometeR BZ 05 B - 2
liability in the case of damage to property or injuries to
persons caused by incorrect handling or failure to observe the safety instructions! All warranty claims are voided
in such cases. For approval reasons, unauthorised conversion or modification of the appliance is not permitted.
The housing may not be dismantled with the exception
of opening the lid of the battery compartment. Measuring
instruments are not toys and should be kept away from
children! Never switch the measuring instrument on immediately after bringing it from a cold to a warm room.
The resulting condensation could destroy your appliance
under certain circumstances. Leave the appliance switched off until it reaches room temperature. Do not carelessly leave the packaging material lying around, as it
could become a dangerous toy for children.
m Moving the appliance from a cold to a warm
environment (and vice versa) can lead to the
formation of condensation on the measuring
circuitry of the appliance. This physical effect,
which cannot be prevented by structural means
for any measuring instrument, leads to false
measurement values. Depending on the tempe rature difference, the appliance requires an
‚acclimatisation time‘ of approx. 15 - 30 minutes
before the measuring procedure can be resumed.
2 .0 TECHNICAL SPECIFICATIONS
Areas of application: Living areas/offices, warehouses
and premises with non-corrosive atmospheres
Display:
Temperature
Measuring range: 0 - 50 °C (32 - 120 °F)
Measurement accuracy ± 1.0 °C (1.8 °F)
Resolution: 0.1 °C (0.1 °F)
Humidity
Measuring range: 10% rel. humidity ~ 90% rel. humidity
(non-condensing)
Measurement accuracy: ± 5% (40% rel. humidity ~ 80%
rel. humidity) otherwise ± 8%
Miscellaneous: battery: AAA 1.5V
Page 10

B - 3 opeRating instRuctions - Room theRmo-hygRometeR BZ 05
3 .0 FUNCTIONS
3 .1 SETTING THE DATE AND TIME
Mode button:
(keep the mode button pressed for a short while to
change the settings)
Press once: Minutes
Press twice: Hours
Press 3 times: 12/24 hr display
Press 4 times: Month
Press 5 times: Day
ADJ – button
Memo – button
Setting the time and date
You can read both the time and the date on your hygrometer. The time appears permanently in the upper third
of the display. This display is changed by briefly pressing
the [ADJ] button: the date appears with month (left) and
day (right).
In order to reset the time and/or the date, proceed as
follows:
Press and hold the [MODE] button for a short while. The
minute display starts to flash. Press the [ADJ] button to
adjust the minute display.
Press the [ADJ] button once to adjust the minute display
each time by one minute, or keep it pressed in order to
reach a particular number of minutes faster. After that,
press the [MODE] button once to access the hour and
date settings. This is done in the same way. After going
through all values (min/hr/month/day) once, the new value is stored.
Your appliance has both a 12-hr and a 24-hr display. In
the case of the 12 hour display, the abbreviations „AM“
(from 00:00 to 12:00) and „PM“ (from 12:00 to 24:00)
additionally appear to the left of the time.
m The new value is automatically saved after
one minute. The display stops flashing.
Page 11

opeRating instRuctions - Room theRmo-hygRometeR BZ 05 B - 4
3.2 DISPLAYING THE DATE:
Press the [ADJ] button. The
date appears in the upper
third of the display in place
of the time. The month appears on the left; the day
on the right. The display
returns to the time after approximately 2 seconds. You
can also display the date for
a longer period by keeping
the [ADJ] button pressed
longer. The date display only
returns to the time after the
[ADJ] button is released.
3.3 RESET
In order to reset all set or stored data, press the RESET
button on the rear of the appliance. The appliance is then
once again in the factory preset mode.
3.4 TEMPERATURE DISPLAY IN °C OR °F
In order to change the unit of temperature on the display
between °C and °F, press the °C/°F button on the back
of the appliance.
4.1 ACTIVATING THE ALARM
Briefly press the [MODE] button. The alarm time appears in
the upper third of the display in place of the time; the colon
between the numbers stops flashing. Press the [MODE] button
again for approx. 1 second. The minute display of the alarm
time starts to flash. Press the [ADJ] button once to adjust the
minute display each time by one minute, or keep it pressed in
order to reach a particular number of minutes faster.
Briefly press the [MODE] button to change from minutes
to hours. The hour display starts to flash. Press the [ADJ]
Page 12

B - 5 opeRating instRuctions - Room theRmo-hygRometeR BZ 05
button once to adjust the hour
display each time by one hour,
or keep it pressed in order to
reach a particular number of
hours faster.
Press the [MODE] button again.
The alarm time is stored. A bell
symbol appears adjacent to
the set alarm time in the topleft corner in the upper third of
the display.
4.2 Switching off the alarm
Press one of the buttons on the front of the appliance in
order to switch off the alarm sound.
4.3 Deactivating the alarm
Press the [MODE] button. The alarm time appears in
the upper third of the display in place of the time. The
bell symbol indicates that the alarm is activated.
Press the [ADJ] button 3 times to deactivate the
alarm. The bell symbol no longer appears in the
display. The alarm is deactivated.
5.0 Maximum/Minimum value display [MEMO]
Press the MEMO button once to view the maximum values measured since the last reset. Press the MEMO button twice to view the minimum values measured since
the last reset. Press the MEMO button a third time to
return to the standard display mode. If the MEMO button is not pressed a third time, the display automatically
switches back to the standard mode after 10 seconds.
6.0 Comfort indicator
If the ambient temperature lies between 20 °C and 26 °C
(68 °F ~ 78.8 °F) and the relative humidity is between 50%
and 70%, the „Comfort“ symbol A appears on the display.
If the relative humidity is higher than 70%, irrespective
of the temperature, the symbol F for excessively high
humidity appears.
Page 13

opeRating instRuctions - Room theRmo-hygRometeR BZ 05 B - 6
If the relative humidity is lower than 50%, irrespective
of the temperature, the symbol K for excessively low
humidity appears.
If the relative humidity is too low, this often leads to
headaches and drying of the mucous membranes, especially of the nose and the eyes. In turn, this irritation
increases susceptibility to germs and is thus often the
precursor to infections.
An excessively high relative humidity has adverse effects
in particular on people with poor circulation. In addition,
there is a risk of mould in closed and insufficiently aired
rooms, which is at the same time a further health risk.
Therefore, always make sure that rooms are aired well/
regularly and that there is a „healthy“ relationship between temperature and relative humidity.
7.0 Battery replacement
If the battery has to be replaced, open the battery compartment. To do this, gently depress the lid on the rear and slide
it in the direction of the arrow shown. Replace the spent
battery with a new one (1.5V AAA). Fasten the battery compartment lid again. The appliance is now ready for operation
once more.
Electronic equipment may not be disposed of as
domestic waste, but must be correctly dispo-
sed of in accordance with the EUROPEAN PAR-
LIAMENT AND EUROPEAN COUNCIL Directive
2002/96/EC of 27 January 2003 regarding used electrical
and electronic equipment. Please dispose of this equipment
in accordance with the applicable legal regulations when its
service life is ended.
Page 14

C - 1
notice d’emploi – theRmohygRomètRe d’intéRieuR BZ 05
SOMMAIRE
1.0 Consignes de sécurité . . . . . . . . . . . . . . . . . C - 1
2.0 Spécifications techniques ..............C - 2
3.0 Fonctions . . . . . . . . . . . . . . . . . . . . . . . . . . . C - 3
3.1 Réglage de l’heure et de la date ...........C - 3
3.2 Affichage de la date ....................C - 4
3.3 Réinitialisation . . . . . . . . . . . . . . . . . . . . . . . . C - 4
3.4 Affichage de la température en °C ou °F . . . . C - 4
4.0 Fonction d’alarme . . . . . . . . . . . . . . . . . . . . C - 4
4.1 Activation de l’alarme ...................C - 5
4.2 Arrêt de l’alarme . . . . . . . . . . . . . . . . . . . . . . C - 5
4.3 Désactivation de l’alarme ................C - 5
5.0 Affichage des valeurs
maximale/minimale [MEMO] . . . . . . . . . . . C - 5
6.0 Témoin de bien-être ...................C - 6
7.0 Remplacement des piles . . . . . . . . . . . . . . . . C - 6
La présente publication annule et remplace toutes les versions précédentes. Aucune
partie de la présente publication ne peut être reproduite ou traitée, polycopiée ou diffusée
à l‘aide de systèmes électroniques sous quelque forme que ce soit sans notre autorisation écrite. Sous réserve de modifications techniques. Tous droits réservés. Les noms
de produits sont utilisés sans la garantie de la libre utilisation et essentiellement selon
l’orthographe utilisée par le fabricant. Les noms de produits utilisés sont enregistrés
et doivent être considérés comme noms de marques. Sous réserve de modifications
de construction réalisées dans l’intérêt de l’amélioration constante des produits, ainsi
que de modifications de forme et de couleur. Le contenu de la livraison peut différer des
illustrations du produit. Le présent document a été réalisé avec le soin nécessaire. Nous
n’assumons aucune responsabilité quant aux erreurs ou omissions. © TROTEC®
Veuillez lire attentivement les consignes et instructions cidessous et veillez à ce que le présent manuel soit toujours
conservé à proximité de votre appareil de mesure.
1.0 CONSIGNES DE SECURITE
L’appareil est conçu exclusivement pour l’utilisation à
l’intérieur des locaux et n’est pas approprié à un usage
extérieur ! N’exposez jamais l’appareil à des températures
ou taux d’hygrométrie en dehors des plages décrites ciaprès, puisque cela nuit au fonctionnement de l‘appareil
et peut même le détruire définitivement.
Avant sa livraison, l’appareil a subi des contrôles étendus
du matériel, du fonctionnement et de la qualité. Néanmoins, cet appareil peut générer des risques s’il n’est pas
utilisé de manière conforme ! Respectez les consignes suivantes : en cas de dommages dus au non respect de la
Page 15

notice d’emploi – theRmohygRomètRe d’intéRieuR BZ 05
C - 2
présente notice d’emploi, le droit à la garantie est annulé
! Nous refusons toute responsabilité pour des dommages
consécutifs ! Nous déclinons toute responsabilité en cas
de dommages corporels ou matériels dus à une utilisation
non conforme ou au non respect des consignes de sécurité
! Dans de tels cas, tout droit à la garantie est annulé. Pour
des raisons d’homologation, les transformations et/ou modifications arbitraires de l’appareil sont interdites. En dehors
de l’ouverture du cache du compartiment à piles, l’appareil
ne doit pas être désassemblé. Les appareils de mesure ne
sont pas des jouets et doivent être tenus à l’écart des enfants ! N’allumez jamais directement l’appareil de mesure
après l’avoir transporté d’une pièce froide dans un local
chaud. L’eau de condensation qui se forme alors peut éventuellement détruire votre appareil. Laissez l’appareil éteint
jusqu’à ce qu’il se soit adapté à la température de la pièce.
Ne laissez pas traîner les matériels d’emballage, ils pourraient constituer des jouets dangereux pour les enfants.
m Lors du passage d’un environnement froid à un
environnement chaud (et inversement), de la con densation peut se former sur les systèmes élec-
troniques de mesure de l’appareil. Cet effet physique,
qui ne peut être empêché au niveau de la conception
d’un appareil de mesure quel qu’il soit, cause des
erreurs de mesure. En fonction de l’importance des
différences de température, l’appareil requiert un
« temps d’acclimatation » d’env. 15 à 30 minutes avant
de pouvoir poursuivre le processus de mesure.
2 .0 SPECIFICATIONS TECHNIQUES
Domaines d’application : Locaux d’habitation et administratifs, entrepôts et locaux à atmosphère non corrosive
Affichage / écran :
Température
Plage de mesure : 0°C à 50°C (32°F à 120°F)
Précision de mesure : ± 1.0 °C (1.8 °F)
Résolution : 0.1 °C (0.1 °F)
Humidité ambiante
Plage de mesure : 10 % d’humidité relative ~ 90 %
d’humidité relative (sans condensation)
Précision de mesure : ± 5 % (40 % d’humidité relative ~
80 % d’humidité relative), dans les autres cas ± 8 %
Divers : Pile : AAA 1.5V
Page 16

C - 3
notice d’emploi – theRmohygRomètRe d’intéRieuR BZ 05
3 .0 CARACTÉRISTIQUES
3 .1 REGLAGE DE LA DATE ET DE L‘HEURE
Touche Mode :
(Appuyez brièvement sur la touche Mode pour modifier
les paramètres)
Appuyez 1 x : minutes
Appuyez 2 x : heures
Appuyez 3 x : affichage 12/24h
Appuyez 4 x : mois
Appuyez 5 x : jour
Touche ADJ
Touche Mémo
Réglage de l’heure et de la date
Vous pouvez relever la date et l’heure sur votre hygromètre. L’heure s’affiche en continu dans le tiers supérieur de l’écran. Un actionnement bref de la touche [ADJ]
commute cet affichage : la date avec le mois (à gauche)
et le jour (à droite) s’affiche.
Pour régler l’horloge et/ou la date, procédez comme suit :
Appuyez sur la touche [MODE] et maintenez-la appuyée.
L’affichage des minutes commence à clignoter. Appuyez
sur la touche [ADJ] pour modifier l’affichage des minutes.
Appuyez 1x sur la touche [ADJ] pour modifier l‘affichage
des minutes de respectivement une minute, ou maintenez la touche appuyée pour accéder plus rapidement à
un nombre de minutes spécifique. Appuyez ensuite 1x sur
la touche [MODE] pour accéder au réglage des heures et
de la date. Procédez de manière identique pour ces réglages. Après avoir réglé toutes les valeurs (minutes/heures/
mois/jour), la nouvelle valeur est enregistrée.
Votre appareil dispose d’un affichage par 12 heures ou 24
heures. L’affichage par 12 heures est complété par les abréviations « AM » (anglais pour avant-midi, c’est-à-dire de
00:00 à 12:00) et « PM » (anglais pour après-midi, c’est-àdire de 12:00 à 24:00) qui s’affichent à gauche de l’heure.
m La nouvelle valeur est enregistrée automa-
tiquement. L’affichage ne clignote plus.
Page 17

notice d’emploi – theRmohygRomètRe d’intéRieuR BZ 05
C - 4
3.2 AFFICHAGE DE LA DATE :
Appuyez sur la touche
[ADJ]. La date s’affiche à
la place de l’heure dans le
tiers supérieur de l’écran.
Le mois s’affiche à gauche,
le jour à droite. L’affiche recommute sur l’heure après
env. 2 secondes. Au choix,
vous pouvez aussi prolonger l’affichage de la date
en maintenant la touche
[ADJ] appuyée pendant plus
longtemps. L’affichage de
la date ne recommute sur
l’heure qu’après avoir relâché la touche [ADJ].
3.3 REINITIALISATION
Pour réinitialiser toutes les données réglées ou enregistrées, appuyez sur le bouton de réinitialisation au dos de
l’appareil. L’appareil adopte alors de nouveau le réglage
d’usine prédéfini.
3.4 AFFICHAGE DE LA TEMPERATURE EN °C OU °F
Appuyez sur le bouton °C/°F au dos de l’appareil pour commuter l’affichage de l’unité de température entre °C et °F.
4.1 ACTIVATION DE L’ALARME
Appuyez brièvement sur la touche [MODE]. Dans le tiers
supérieur de l’écran, l’heure est remplacée par l’heure
d’alarme ; le double point entre les chiffres cesse de clignoter. Appuyez une nouvelle fois pendant env. 1 seconde sur la
touche [MODE]. L’affichage des minutes de l’heure d’alarme
commence à clignoter. Appuyez 1x sur la touche [ADJ] pour
modifier l‘affichage des minutes de respectivement une minute, ou maintenez la touche appuyée pour accéder plus
rapidement à un nombre de minutes spécifique.
Page 18

C - 5
notice d’emploi – theRmohygRomètRe d’intéRieuR BZ 05
Appuyez brièvement sur la
touche [MODE] pour commuter des minutes aux heures.
L’affichage des heures commence à clignoter. Appuyez 1x
sur la touche [ADJ] pour modifier l‘affichage des heures de
respectivement une heure, ou
maintenez la touche appuyée
pour accéder plus rapidement
à un nombre d’heures spécifique.
Appuyez une nouvelle fois sur la touche [MODE]. L’heure
d’alarme est enregistrée. A gauche dans le tiers supérieur
de l’écran, un symbole de cloche s’affiche à côté de l’heure
d’alarme réglée.
4.2 Arrêt de l’alarme
Appuyez sur une des touches de la face avant de
l’appareil pour arrêter le signal sonore de l’alarme.
4.3 Désactivation de l’alarme
Appuyez sur la touche [MODE]. L’heure d’alarme
s’affiche à la place de l’heure dans le tiers supérieur de
l’écran. Le symbole de cloche indique que l’alarme
est activée. Appuyez 3x sur la touche [ADJ] pour désactiver l’alarme. Le symbole de cloche ne s’affiche plus à
l’écran. L’alarme est désactivée.
5.0 Affichage des valeurs
maximale/minimale [MEMO ]
Pour visualiser les valeurs maximales mesurées depuis
la dernière réinitialisation, veuillez appuyer 1x sur la touche MEMO. Pour visualiser les valeurs minimales mesurées depuis la dernière réinitialisation, veuillez appuyer
2x sur la touche MEMO. Appuyez une troisième fois
sur la touche MEMO pour revenir au mode d’affichage
standard. Si la touche MEMO n’est pas actionnée une
troisième fois, l’affichage revient automatiquement au
mode standard après 10 secondes.
Page 19

notice d’emploi – theRmohygRomètRe d’intéRieuR BZ 05
C - 6
6.0 Témoin de bien-être
Si la température ambiante se situe entre 20 °C et 26 °C
(68 °F ~ 78,8 °F) et l’humidité ambiante relative entre 50 %
et 70 %, le « symbole de bien-être » A s’affiche à l’écran.
Si l’humidité ambiante relative est supérieure à 70 %,
peu importe la température, le symbole F indique une
hygrométrie trop élevée.
Si l’humidité ambiante relative est inférieure à 50 %, peu
importe la température, le symbole K indique une hygrométrie insuffisante.
Une hygrométrie insuffisante entraîne souvent des maux
de tête et une déshydratation des muqueuses, notamment celles du nez et des yeux. Cette irritation rend alors
plus sensible aux germes pathogènes et permet souvent
aux infections de s’installer.
Une humidité ambiante relative trop élevée nuit surtout
au bien-être des personnes souffrant de troubles du système cardio-vasculaire. De plus, le risque de moisissures
s‘accroît dans les locaux fermés et insuffisamment ventilés,
constituant ainsi un risque supplémentaire pour la santé.
Il convient donc de veiller toujours à une ventilation
adéquate/régulière des locaux et à un rapport « sain »
entre la température et l’hygrométrie.
7.0 Remplacement de la pile
Lorsque la pile doit être remplacée, ouvrez le compartiment
à piles. Appuyez à cet effet légèrement sur le cache au dos
et glissez-le dans le sens de la flèche marquée dessus.
Remplacez la pile épuisée par une pile neuve (1,5V AAA).
Refixez le cache du compartiment à piles. L’appareil est de
nouveau opérationnel.
Les appareils électroniques ne doivent pas être
éliminés dans les ordures ménagères ; au sein
de l’Union Européenne, ils doivent être éliminés
conformément à la Directive 2002/96/CE du
parlement Européen et du Conseil du 27 janvier 2003 concernant les appareils électriques et électroniques. Au terme
de son utilisation, veuillez éliminer cet appareil selon les
réglementations légales en vigueur.
Page 20

D - 1
istRuZioni peR l’uso – teRmoigRometRo peR amBienti BZ 05
I
INDICE
1.0 Indicazioni di sicurezza ................D - 1
2.0 Specifiche tecniche . . . . . . . . . . . . . . . . . . . D - 2
3.0 Funzioni . . . . . . . . . . . . . . . . . . . . . . . . . . . . D - 3
3.1 Impostare data e ora . . . . . . . . . . . . . . . . . . . D - 3
3.2 Visualizzare la data . . . . . . . . . . . . . . . . . . . . D - 4
3.3 Reset ...............................D - 4
3.4 Visualizzare la temperatura in °C o in °F . . . . D - 4
4.0 Funzione di allarme . . . . . . . . . . . . . . . . . . . D - 4
4.1 Attivare l’allarme . . . . . . . . . . . . . . . . . . . . . . D - 5
4.2 Spegnere l’allarme .....................D - 5
4.3 Disattivare l’allarme ....................D - 5
5.0 Visualizzare valore minimo/massimo [MEMO] . . D - 5
6.0 Indicatore di benessere ................D - 6
7.0 Sostituzione della batteria ..............D - 6
La presente pubblicazione sostituisce tutte le precedenti. Senza il nostro consenso
scritto, non sono consentite la copia in alcuna forma né l’elaborazione, la duplicazione o la diffusione con sistemi elettronici della presente pubblicazione, o parte di
essa. Il produttore si riserva il diritto di apportare modifiche tecniche. Tutti i diritti
riservati. I nomi commerciali vengono impiegati senza alcuna garanzia della libera
utilizzabilità e sostanzialmente in conformità a quanto stabilito dai produttori. I nomi
commerciali utilizzati sono registrati e devono essere considerati tali. Il produttore si
riserva il diritto di apportare modifiche costruttive nell’interesse del continuo miglioramento del prodotto, nonché modifiche della forma e del colore. La dotazione può
variare rispetto alle immagini del prodotto. Il presente documento è stato elaborato
con la massima accuratezza. Il produttore non si assume alcuna responsabilità per
eventuali errori od omissioni. © TROTEC®
Leggete attentamente le seguenti istruzioni e assicuratevi di
conservare il presente manuale sempre nelle vicinanze dello
strumento.
1.0 INDICAZIONI DI SICUREZZA
Lo strumento è concepito esclusivamente per gli ambienti
chiusi e non è adatto per essere utilizzato all’esterno! Non
impostare mai i valori di temperatura e umidità dell’aria al
di fuori degli intervalli elencati poiché ciò può ripercuotersi
sul buon funzionamento dello strumento e a lungo andare
può persino danneggiare irrimediabilmente il dispositivo.
Prima della consegna lo strumento è stato sottoposto a numerosi controlli del materiale, del funzionamento e della qualità. Inoltre l’uso improprio dello strumento potrebbe essere
fonte di pericolo! Rispettare le seguenti indicazioni: In caso di
danni riconducibili al mancato rispetto delle presenti istruzio-
Page 21

I
istRuZioni peR l’uso – teRmoigRometRo peR amBienti BZ 05
D - 2
ni, non potrà essere riconosciuto alcun diritto alla garanzia! Il
produttore non si assume alcuna responsabilità per eventuali
danni che potrebbero derivarne. Il produttore non si assume
alcuna responsabilità per danni a cose e persone provocati
da un utilizzo scorretto o dal mancato rispetto delle indicazioni di sicurezza. In tali casi decade ogni garanzia. Per motivi
di sicurezza e di omologazione (CE) non è consentito trasformare o modificare arbitrariamente lo strumento. E’ vietato
smontare la scatola esterna dello strumento, fatta eccezione
per l’apertura del coperchio dello scomparto batterie. Gli strumenti di misurazione non sono giocattoli e vanno conservati
lontano dalla portata dei bambini! Non accendere subito lo
strumento se questo è stato spostato da un ambiente freddo
ad uno caldo. L’acqua di condensa che si viene a formare
potrebbe distruggere lo strumento. Lasciare spento lo strumento finché non raggiungere la temperatura dell’ambiente
circostante. Non lasciare il materiale di imballaggio incustodito: potrebbe rivelarsi un gioco pericoloso per i bambini.
m Se lo strumento viene spostato da un ambiente
freddo a uno caldo (e viceversa) è possibile che si
venga a formare della condensa sul gruppo elett ronico di misurazione dello strumento. Questo
effetto fisico, impossibile da evitare in qualsiasi
strumento per ragioni strutturali, causa variazioni dei
valori di misurazione. A seconda dell‘entità di differ enza della temperatura, lo strumento necessita di
un “periodo di acclimatizzazione” di circa 15 – 30
minuti prima che si possa procedere con la misurazione.
2 .0 SPECIFICHE TECNICHE
Ambiti di applicazione: Abitazioni, uffici, magazzini e
ambienti dove l’atmosfera non è corrosiva
Visualizzazione / Display:
Temperatura
Intervallo di misurazione: da 0°C a 50°C (da 32°F a 120°F)
Precisione di misurazione: ± 1.0 °C (1.8 °F)
Risoluzione: 0 °C (1 °F)
Umidità
Intervallo di misurazione: 10% umidità rel. ~ 90% umidità rel. (non condensante)
Precisione delle misurazioni: ± 5% (40% umidità rel. ~
80% umidità rel.) altrimenti ± 8%
Varie: Batteria: AAA 1.5V
Page 22

D - 3
istRuZioni peR l’uso – teRmoigRometRo peR amBienti BZ 05
I
3 .0 CARATTERISTICHE
3 .1 IMPOSTARE DATA E ORA
Tasto – Mode:
(Per modificare le impostazioni tenere brevemente premuto
il tasto Mode)
premere 1 volta: minuti
premere 2 volta: ore
premere 3 volte: visualizzazione 12/24h
premere 4 volta: mese
premere 5 volta: giorno
Tasto – ADJ
Tasto – Memo
Impostare data e ora
L’igrometro è in grado di visualizzare ora e data. L’ora
appare in permanenza nel terzo superiore del display.
Premendo brevemente il tasto [ADJ] appare la data con
l’indicazione del mese (a sinistra) e del giorno (a destra).
Per reimpostare ora e/o data procedere come segue:
esercitare una breve pressione sul tasto [MODE].
L’indicazione dei minuti comincia a lampeggiare. Premere il tasto [ADJ] per modificare l’indicazione dei minuti.
Premere 1 volta il tasto [ADJ] per modificare l’indicazione
dei minuti di un minuto alla volta oppure tenerlo premuto
per arrivare più velocemente a un determinato valore. Successivamente premere 1 volta il tasto [MODE] per accedere
all’impostazione dell’ora e della data. Questa impostazione
si esegue con la stessa procedura. Il nuovo valore viene
memorizzato dopo che tutti i valori sono stati visualizzati
uno dopo l’altro (Min/Ora/Mese/Giorno) sul display.
Lo strumento dispone di una doppia visualizzazione in
formato 12 e 24 ore. Con la visualizzazione in 12 ore
le abbreviazioni „AM“ (inglese per antimeridiane, vale a
dire dalle 00:00 alle 12:00) e „PM“ (inglese per pomeriggio, sera, vale a dire dalle 12:00 alle 24:00) appaiono
a sinistra accanto all’ora).
m Il nuovo valore è memorizzato automatica-
mente dopo un minuto. L’indicazione smette
di lampeggiare..
Page 23
I
istRuZioni peR l’uso – teRmoigRometRo peR amBienti BZ 05
D - 4
3.2 VISUALIZZARE LA DATA
Premere il tasto [ADJ]. La
data appare al posto dell’ora
nel terzo superiore del display. Il mese è visualizzato
a sinistra, il giorno a destra. Dopo circa 2 secondi il
display torna a visualizzare
l’ora. È possibile impostare
una visualizzazione più lunga dell’ora tenendo premuto
più a lungo il tasto [ADJ]. Il
display torna dalla visualizzazione della data a quella
dell’ora solo dopo che il tasto [ADJ] viene rilasciato.
3.3 RESET
Per fare il reset di tutti i dati impostati o memorizzati
premere il pulsante RESET sul lato posteriore dello strumento. Dopo questa pressione l’apparecchio torna alla
modalità predefinita nelle impostazioni di fabbrica.
3.4 VISUALIZZAZIONE DELLA
TEMPERATURA IN °C O IN °F
Per la commutazione dell’unità di misurazione della
temperatura da °C a °F, premere il pulsante °C/°F sul
lato posteriore dell’apparecchio.
4.1 ATTIVARE L’ALLARME
Premere brevemente il tasto [MODE]. L’ora di attivazione
dell’allarme appare al posto dell’ora attuale sul terzo superiore del display; i due punti tra i numeri smettono di lampeggiare. Premere nuovamente il tasto [MODE] per circa 1 secondo.
L’indicazione dei minuti dell’ora di attivazione dell’allarme
comincia a lampeggiare. Premere 1 volta il tasto [ADJ] per
modificare l’indicazione dei minuti di un minuto alla volta
Page 24
D - 5
istRuZioni peR l’uso – teRmoigRometRo peR amBienti BZ 05
I
oppure tenerlo premuto per
arrivare più velocemente a un
determinato valore.
Premere brevemente il tasto
[MODE] per passare dai minuti alle
ore. L’indicazione delle ore comincia a lampeggiare. Premere
1 volta il tasto [ADJ] per modificare l’indicazione delle ore di
un’ora alla volta oppure tenerlo
premuto per arrivare più velocemente a un determinato valore.
Premere di nuovo il tasto [MODE]. L’ora di attivazione
dell’allarme è memorizzata. Il simbolo di una campana appare
in alto a sinistra nella parte terza terzo superiore del display accanto all’ora in cui è stata impostata l’attivazione dell’allarme.
4.2 Spegnere l’allarme
Per silenziare il suono dell’allarme premere uno dei tasti
sul lato anteriore dello strumento.
4.3 Disattivare l’allarme
Premere il tasto [MODE]. L’ora di attivazione dell’allarme
appare al posto dell’ora attuale sul terzo superiore del
display. Il simbolo della campana indica che l’allarme
è attivo. Premere 3 volte il tasto [ADJ] per disattivare
l’allarme. Il simbolo della campana scompare dal display. L’allarme è disattivato.
5.0 Visualizzazione valore
massimo/minimo [MEMO]
Premere 1 volta il tasto MEMO per visualizzare i valori massimi misurati dall’ultimo reset. Premere 2 volte
il tasto MEMO per visualizzare i valori minimi misurati
dall’ultimo reset. Premere una terza volta il tasto MEMO
per tornare alla visualizzazione standard. Se il tasto
MEMO non viene premuto per la terza volta, la visualizzazione torna automaticamente alla modalità standard
dopo 10 secondi.
Page 25

I
istRuZioni peR l’uso – teRmoigRometRo peR amBienti BZ 05
D - 6
6.0 Indicatore di benessere
Se la temperatura ambiente è tra 20°C e 26°C (68°F ~
78,8°F) e l’umidità relativa tra il 50% e il 70% sul display
appare il simbolo A „Benessere“.
Se l’umidità relativa è superiore al 70% indipendentemente dalla temperatura, appare il simbolo F di umidità
troppo alta °F.
Se l’umidità relativa è inferiore al 70% indipendentemente dalla temperatura, appare il simbolo di umidità
troppo bassa K.
Quando è troppo bassa, l’umidità relativa provoca spesso mal di testa e secchezza delle mucose, specialmente
del naso e degli occhi. Questa irritazione, a sua volta,
rende più vulnerabili agli agenti patogeni e quindi apre
spesso la strada alle infezioni.
Un’umidità relativa troppo alta si ripercuote negativamente
soprattutto su persone con problemi del sistema cardiovascolare. Inoltre, negli ambienti chiusi e insufficientemente
aerati, aumenta il rischio della formazione di muffe, le quali
rappresentano a loro volta un altro pericolo per la salute.
Accertatevi quindi sempre che gli ambienti siano aerati
bene/regolarmente e che il rapporto tra temperatura e
umidità relativa sia “sano”.
7.0 Sostituzione della batteria
Quando occorre cambiare la batteria, aprire lo scomparto
batterie. A questo scopo, premere leggermente verso il basso il coperchio sul lato posteriore e spingerlo nella direzione
indicata dalla freccia. Sostituire la batteria scarica con un
nuova (1,5V AAA). Rimontare il coperchio scomparto batterie. Adesso lo strumento è pronto all’uso.
E’ vietato gettare gli apparecchi elettronici nei rifiuti domestici; è invece necessario provvedere ad
un corretto smaltimento nell’ambito dell’Unione
Europea – in conformità alla Direttiva 2002/96/CE
DEL PARLAMENTO EUROPEO E DEL CONSIGLIO del 27 gennaio 2003 sugli apparecchi elettrici ed elettronici usati. Una
volta terminato l’utilizzo, provvedere allo smaltimento dello
strumento in conformità alle disposizioni di legge in materia.
Page 26

E - 1
Bedieningshandleiding – Ruimte-theRmo-hygRometeR BZ 05
O
INHOUDSOPGAVE
1.0 Veiligheidsaanwijzingen . . . . . . . . . . . . . . . A - 1
2.0 Technische specificaties . . . . . . . . . . . . . . . A - 2
3.0 Functies . . . . . . . . . . . . . . . . . . . . . . . . . . . . A - 3
3.1 Tijd en datum instellen ..................A - 3
3.2 Datum weergeven . . . . . . . . . . . . . . . . . . . . . A - 4
3.3 Reset ...............................A - 4
3.4 Temperatuurweergave in °C of °F . . . . . . . . . A - 4
4.0 Alarmfunctie .........................A - 4
4.1 Alarm activeren . . . . . . . . . . . . . . . . . . . . . . . A - 5
4.2 Alarm uitschakelen. . . . . . . . . . . . . . . . . . . . . A - 5
4.3 Alarm deactiveren . . . . . . . . . . . . . . . . . . . . . A - 5
5.0 Maximale/minimale
waarde-weergave [MEMO] .................A - 5
6.0 Gevoelsindicator ..........................A - 6
7.0 Batterijverwisseling ....................A - 6
Deze publicatie vervangt alle voorafgaande publicaties. Geen deel van deze publicatie mag in welke vorm dan ook zonder onze schriftelijke goedkeuring gereproduceerd of met gebruik van elektronische systemen verwerkt, vermenigvuldigd of verspreid worden. Technische wijzigingen voorbehouden. Alle rechten voorbehouden.
Productnamen worden zonder garantie van het vrije gebruik en in principe de schrijfwijze van de fabrikanten overeenkomstig gebruikt. De gebruikte productnamen zijn
geregistreerde productnamen en moeten als zulke beschouwd worden. Constructieveranderingen in het interesse van een lopende productverbetering alsmede vorm-/
kleurveranderingen blijven voorbehouden. Leveringsomvang kan afwijken van de
productafbeeldingen. Dit document werd met de grootste zorgvuldigheid opgesteld.
Wij zijn niet aansprakelijk voor fouten of weglatingen. © TROTEC®
Lees a.u.b. de volgende aanwijzingen en opmerkingen
zorgvuldig door en zorg ervoor, dat dit handboek altijd in
de buurt van uw meetinstrument is.
1.0 VEILIGHEIDSAANWIJZINGEN
Het apparaat is uitsluitend voor het gebruik in binnenruimtes
ontworpen en is niet geschikt voor het gebruik buiten! Stel
het nooit bloot aan temperaturen resp. luchtvochtigheden buiten de in het volgende gedeelte opgesomde bereiken, omdat
daardoor de functiedegelijkheid van het apparaat beïnvloed
of het apparaat zelfs blijvend beschadigd kan worden.
Het instrument werd voor levering onderworpen aan omvangrijke materiaal-, functie- en kwaliteitscontroles. Toch
kunnen er van dit apparaat gevaren uitgaan, wanneer het
ondeskundig wordt gebruikt! Neem de volgende aanwijzingen in acht: Bij schade, die door de niet-naleving van
deze handleiding wordt veroorzaakt, vervalt de aanspraak
Page 27

O
Bedieningshandleiding – Ruimte-theRmo-hygRometeR BZ 05
E - 2
op garantie! Voor gevolgschade zijn wij niet aansprakelijk! Voor materiële schade of lichamelijk letsel, dat door
ondeskundige hantering of niet in acht nemen van de
veiligheidsinstructies wordt veroorzaakt, zijn wij niet aansprakelijk! In dergelijke gevallen vervalt elke aanspraak
op garantie. Uit toelatingsoverwegingen is het eigenhandig ombouwen en/of veranderen van het apparaat niet
toegestaan. De behuizing mag tot op het openen van
het batterijvakdeksel na niet uit elkaar worden gehaald.
Meetinstrumenten zijn geen speelgoed en dienen buiten
het bereik van kinderen te worden gehouden! Schakel het
meetinstrument nooit gelijk aan, wanneer deze van een
koude in een warme ruimte wordt gebracht. Het daarbij
ontstane condenswater kan soms uw instrument beschadigen. Laat het apparaat uitgeschakeld op kamertemperatuur komen. Laat het verpakkingsmateriaal niet achteloos liggen, dit zou gevaarlijk voor kinderen kunnen zijn.
m Bij wisseling van standplaats van koude naar
warme omgevingsvoorwaarden (en omgekeerd)
kan dit tot condensvorming op de meetelektronica
van het instrument leiden. Dit fysische effect,
dat wat betreft constructie bij geen meetinstrument
voorkomen kan worden, leidt tot meetwaardeaf wijkingen. Afhankelijk van de hoogte van de tem peratuurverschillen heeft het apparaat een „Accli matiseringstijd“ van ca. 15 - 30 minuten, voordat
met het meetproces kan worden verder gegaan.
2 .0 TECHNISCHE SPECIFICATIES
Toepassingsgebieden: Woon-/kantoorruimten, opslag
en ruimten met niet-corrosieve atmosfeer
Weergave / display:
Temperatuur
Meetbereik: 0°C tot 50°C (32°F tot 120°F)
Meetnauwkeurigheid: ± 1.0 °C (1.8 °F)
Resolutie: 0.1 °C (0.1 °F)
Luchtvochtigheid
Meetbereik: 10% rel. vochtigheid ~ 90% rel. vochtigheid
(niet condenserend)
Meetnauwkeurigheid: ± 5% (40% rel. vochtigheid ~
80% rel. vochtigheid) anders ± 8%
Overig: Batterij: AAA 1.5V
Page 28

E - 3
Bedieningshandleiding – Ruimte-theRmo-hygRometeR BZ 05
O
3 .0 FUNCTIES
3 .1 DATUM EN TIJD INSTELLEN
Mode – knop:
(voor de instellingswijziging de Mode knop kort ingedrukt houden)
1 x drukken: minuten
2 x drukken: uren
3 x drukken: 12/24h-weergave
4 x drukken: maand
5 x drukken: dag
ADJ – knop
Memo – knop
Tijd en datum instellen
Zowel de tijd als de datum kunnen op de thermo-hygrometer
worden afgelezen. De tijd verschijnt continue op het bovenste
derde deel van het display. Door het kort indrukken van de
[ADJ]-knop wisselt deze weergave: de datum met maand
(links) en dag (rechts) verschijnt.
Om het uur en/of de datum opnieuw in te stellen, gaat u als
volgt te werk:
druk op de [MODE]-knop en houd deze kort ingedrukt. De
minutenweergave begint te knipperen. Druk de [ADJ]-knop
in om de minutenweergave te veranderen.
Druk 1x op de [ADJ]-knop om de minutenweergave telkens
met een minuut te veranderen of houd de knop ingedrukt om
sneller naar en bepaald aantal minuten te gaan. Druk daarna
1x op de [MODE]-knop om naar de instelling van de uren en
de datum te gaan. Dit vindt plaats volgens dezelfde werkwijze. Nadat alle waarden (Minuut/Uur/Maand/Dag) eenmaal
werden doorlopen, is de nieuwe waarde opgeslagen.
Uw apparaat beschikt zowel over een 12-uurs- als over een
24-uurs-weergave. Bij de 12-uurs-weergave verschijnen
links naast de tijd de afkorting „AM“ (Engels voor ochtend,
m.a.w. van 00:00 tot 12:00) en „PM“ (Engels voor middag,
avond, m.a.w. van 12:00 uur tot 24:00 uur).
m De nieuwe waarde wordt na een minuut auto-
matisch opgeslagen. De weergave stopt
met knipperen.
Page 29

O
Bedieningshandleiding – Ruimte-theRmo-hygRometeR BZ 05
E - 4
3.2 DATUM WEERGEVEN:
Druk op de [ADJ]-knop. In
het bovenste derde deel van
het display verschijnt de
datum in plaats van de tijd.
Links verschijnt de maand,
rechts de dag. De weergave
keert na ca. 2 seconden naar
de tijd terug. U kunt de datum naar keuze ook langere
tijd laten weergeven door
de [ADJ]-knop langer ingedrukt te houden. De datumweergave keert pas na het
loslaten van de [ADJ]-knop
naar de tijd terug.
3.3 RESET
Om een reset van alle ingestelde resp. opgeslagen
gegevens uit te voeren, druk op de RESET-knop op de
achterzijde van het apparaat. Het apparaat bevindt zich
daarna weer in de vooringestelde werkmodus.
3.4 TEMPERATUURWEERGAVE IN °C OF °F
Om in de weergave van de temperatuureenheid tussen
°C en °F te wisselen, druk op de °C/°F-knop op de achterzijde van het apparaat.
4.1 ALARM ACTIVEREN
Druk kort op de [MODE]-knop. In het bovenste derde deel
van het display verschijnt in plaats van de tijd de alarmtijd,
de dubbele punt tussen de getallen stopt met knipperen.
Druk voor ca. 1 seconde opnieuw op de [MODE]-knop. De
minutenweergave van de alarmtijd begint te knipperen.
Druk 1x op de [ADJ]-knop om de minutenweergave telkens
met een minuut te veranderen of houd de knop ingedrukt
om sneller naar en bepaald aantal minuten te gaan.
Page 30

E - 5
Bedieningshandleiding – Ruimte-theRmo-hygRometeR BZ 05
O
Druk kort op de [MODE]-knop
om van minuten naar uren te
wisselen. De urenweergave
begint te knipperen. Druk 1x
op de [ADJ]-knop om de urenweergave telkens met een uur
te veranderen of houd de knop
ingedrukt om sneller naar en
bepaald aantal uren te gaan.
Druk opnieuw op de [MODE]knop. De alarmtijd is opgeslagen. Linksboven in het bovenste derde deel van het display verschijnt naast de ingestelde
alarmtijd het symbool van een klok.
4.2 Alarm uitschakelen
Druk een van de knoppen aan de voorkant van het apparaat in om de alarmtoon uit te schakelen.
4.3 Alarm deactiveren
Druk op de [MODE]-knop. In het bovenste derde deel van
het display verschijnt in de plaats van de tijd de alarmtijd. Het symbool van een klok geeft weer dat het alarm
geactiveerd is. Druk 3x op de [ADJ]-knop om het alarm
te deactiveren. Het kloksymbool verschijnt niet meer op
het display. Het alarm is gedeactiveerd.
5.0 Maximum-/minimumwaar
de-weergave [MEMO]
Om de sinds de laatste reset gemeten maximale waarden te bekijken, druk a.u.b. 2x op de MEMO-knop. Om
de sinds de laatste reset gemeten minimale waarden te
bekijken, druk a.u.b. 2x op de MEMO-knop. Druk een derde maal op de MEMO-knop en u keert weer terug in de
standaard-weergavemodus. Wordt de MEMO-knop geen
derde maal ingedrukt, springt de weergave na 10 seconden automatisch weer in de standaard-modus terug.
Page 31

O
Bedieningshandleiding – Ruimte-theRmo-hygRometeR BZ 05
E - 6
6.0 Gevoelsindicator
Ligt de omgevingstemperatuur tussen 20°C en 26°C
(68°F ~ 78,8°F) en de relatieve luchtvochtigheid tussen
50% en 70% verschijnt het „Gevoelssymbool“ A op
het display.
Bedraagt de relatieve luchtvochtigheid, onafhankelijk
van de temperatuur, meer dan 70%, verschijnt het symbool F voor te hoge luchtvochtigheid.
Bedraagt de relatieve luchtvochtigheid, onafhankelijk
van de temperatuur, minder dan 50%, verschijnt het
symbool K voor te lage luchtvochtigheid.
Een te geringe relatieve luchtvochtigheid leidt vaak tot
hoofdpijn en tot het uitdrogen van slijmvliezen, voornamelijk van neus en ogen. Deze prikkeling zorgt ervoor dat
men gevoeliger is voor ziektekiemen en is daarmee vaak
een oorzaak van infecties.
Een te hoge relatieve luchtvochtigheid is voornamelijk bij
personen met een slecht cardiovasculair systeem negatief voor de gezondheid. Daarnaast bestaat in geslote en
onvoldoende geluchte ruimten een verhoogd schimmelri-
sico, wat tegelijkertijd een verder gezondheidsrisico met
zich meebrengt.
Let daarom altijd op een overeenkomstig goede/regelmatige beluchting van de ruimten en een „gezonde“ verhouding tussen temperatuur en relatieve luchtvochtigheid.
7.0 Batterijverwisseling
Wanneer de batterij vervangen moet worden, open dan het
batterijvak. Druk daarvoor licht het deksel aan de achterzijde
naar beneden en schuif deze in de richting van de weergegeven pijl weg. Vervang de lege batterij door een nieuwe
batterij (1,5V AAA). Bevestig het batterijvakdeksel weer. Het
apparaat is nu weer gebruiksklaar.
Elektronische apparaten horen niet in het huis-
vuil, maar moeten in de Europese Unie - conform
richtlijn 2002/96/EG VAN HET EUROPESE PAR-
LEMENT EN DE RAAD van 27 januari 2003 over
elektrische- en elektronische oude apparatuur - deskundig
als afval worden verwerkt. Dit instrument moet aan het einde van zijn gebruik in overeenstemming met de geldende
wettelijke bepalingen als afval worden verwijderd.
Page 32

F - 1
manual de instRucciones – teRmohigRómetRo amBiental BZ 05
E
ÍNDICE
1.0 Indicaciones de seguridad . . . . . . . . . . . . . F - 1
2.0 Especificaciones técnicas ..............F - 2
3.0 Funciones ...........................F - 3
3.1 Ajuste de la fecha y la hora . . . . . . . . . . . . . . F - 3
3.2 Visualización de la fecha . . . . . . . . . . . . . . . . F - 4
3.3 Reinicio . . . . . . . . . . . . . . . . . . . . . . . . . . . . . F - 4
3.4 Visualización de la temperatura en °C o °F ...F - 4
4.0 Función de alarma ....................F - 4
4.1 Activación de la alarma . . . . . . . . . . . . . . . . . F - 5
4.2 Apagado de la alarma . . . . . . . . . . . . . . . . . . F - 5
4.3 Desactivación de la alarma. . . . . . . . . . . . . . . F - 5
5.0 Visualización del valor
máximo/mínimo [MEMO ] ..................F - 5
6.0 Indicador de bienestar .....................F - 6
7.0 Cambio de las pilas ........................F - 6
Esta versión sustituye a todas las anteriores. Ninguna parte de esta publicación puede
ser en forma alguna reproducida o procesada, copiada o difundida mediante el empleo
de sistemas electrónicos sin nuestro consentimiento por escrito. Reservado el derecho
a introducir modificaciones técnicas. Todos los derechos reservados. Los nombres de
los artículos son utilizados sin garantía de libre uso y siguiendo en lo esencial la grafía
del fabricante. Los nombres de los artículos utilizados están registrados y deben considerarse como tales. Queda reservado el derecho a introducir modificaciones técnicas
en interés de una mejora constante del producto, así como a modificar forma y color.
El material suministrado puede diferir con respecto a las ilustraciones del producto. El
presente documento ha sido elaborado con el mayor cuidado. No asumimos ningún
tipo de responsabilidad por errores u omisiones. © TROTEC®
Lea con atención las siguientes indicaciones e instrucciones
y procure que el presente manual se encuentre siempre al
alcance de su instrumento de medición.
1.0 INDICACIONES DE SEGURIDAD
El instrumento está concebido exclusivamente para la
utilización en espacios interiores y no es apto para exteriores. No lo someta a temperaturas o humedades del aire
que excedan los márgenes indicados en la lista siguiente
ya que esto puede influir sobre el funcionamiento del instrumento e incluso provocar una avería duradera.
Antes de su entrega, el aparato ha sido sometido a numerosas pruebas de material, funcionamiento y calidad. A
pesar de todo, este instrumento puede ser fuente de riesgos si se utiliza de forma inapropiada. Tenga en cuenta las
siguientes indicaciones: En caso de daños causados por el
Page 33

E
manual de instRucciones – teRmohigRómetRo amBiental BZ 05
F - 2
incumplimiento de este manual, se extinguirá el derecho a
garantía. No asumimos ninguna responsabilidad por daños
consecuenciales. No asumimos ninguna responsabilidad
por lesiones o daños materiales causados por un manejo
inadecuado o por no haber observado las indicaciones de
seguridad. En estos casos se pierden todos los derechos de
garantía. Por motivos de homologación, no está permitida
la transformación ni la modificación del instrumento sin la
debida autorización. La carcasa no debe desmontarse excepto para abrir la tapa del compartimento de la pila. Los
instrumentos de medición no son un juguete, por lo que no
deben llegar a las manos de los niños. No conecte nunca el
instrumento de medición inmediatamente si se va a utilizar
desde una habitación fría a una caliente. En determinadas
circunstancias, los condensados que se puedan formar
pueden estropear el instrumento. Deje que el instrumento,
apagado, se ponga a temperatura ambiente. No deje el material de embalaje descuidado en cualquier lado: éste podría
convertirse en un juguete peligroso para los niños.
m Un cambio del lugar de emplazamiento de unas
condiciones ambientales frías a otras cálidas
(o viceversa) puede provocar la formación de
condensado en la electrónica de medición del
instrumento. Este efecto físico, que no se pue-de
evitar constructivamente en ningún instrumento
de medición, provoca desviaciones en el valor
de medición. En función de las diferencias de
temperatura, el instrumento requiere un „tiempo
de aclimatación“ de aprox. 15 - 30 minutos antes
de poder continuar con el proceso de medición.
2 .0 ESPECIFICACIONES TÉCNICAS
Ámbitos de aplicación: Viviendas/edificios de oficinas,
almacenes y locales con atmósfera no corrosiva
Visualización / display:
Temperatura
Margen de medición: de 0 °C a 50 °C (de 32 °F a 120 °F)
Precisión de medición: ± 1,0 °C (1,8 °F)
Resolución: 0,1 °C (0,1 °F)
Luftfeuchtigkeit
Messbereich: 10% rel. Feuchtigkeit ~ 90% rel. Feuchtigkeit (nicht kondensierend)
Page 34

F - 3
manual de instRucciones – teRmohigRómetRo amBiental BZ 05
E
Messgenauigkeit: ± 5% (40% rel. Feuchtigkeit ~ 80%
rel. Feuchtigkeit) sonst ± 8%
Sonstiges: Batterie: AAA 1.5V
3 .0 CARACTERÍSTICAS
3 .1 AJUSTE DE LA FECHA Y LA HORA
Tecla Mode:
(Para el cambio de ajuste mantener brevemente
pulsada la tecla Mode)
Pulsar 1 vez: minutos
Pulsar 2 vez: horas
Pulsar 3 veces: visualización 12/24 h
Pulsar 4 vez: mes
Pulsar 5 vez: día
Tecla ADJ
Tecla Memo
Ajuste de la fecha y la hora
Puede consultar tanto la hora como la fecha en su higrómetro. La hora aparece de forma continua en el tercio superior
del display. Mediante una breve pulsación de la tecla [ADJ]
se cambia esta visualización: se muestra la fecha con el mes
(izquierda) y el día (derecha).
Para volver a ajustar la hora o la fecha proceda como se indica
a continuación: Pulse la tecla [MODE] y manténgala así brevemente. El indicador de minutos comienza a parpadear. Pulse
la tecla [ADJ] para cambiar el indicador de minutos.
Pulse una vez la tecla [ADJ] para cambiar el indicador de minutos un minuto cada vez o manténgala pulsada para acceder
más rápido a un determinado número de minutos. A continuación, pulse 1 vez la tecla [MODE] para acceder al ajuste de
la hora y de la fecha. Estas se realizan con el mismo procedimiento. Cuando se ha pasado una vez por todos los valores
(min/hor/mes/día) se ha guardado el nuevo valor.
Su instrumento dispone tanto de una visualización de 12 horas como de una de 24. En la visualización de 12 horas se
muestra a la izquierda de la hora la abreviatura „AM“ (del inglés, antes de mediodía, es decir, de 00:00 a 12:00) y „PM“ (del
inglés después de mediodía, es decir, de 12:00 a 24:00).
m Tras un minuto se guarda automáticamente
el nuevo valor. La indicación deja de parpadear.
Page 35

E
manual de instRucciones – teRmohigRómetRo amBiental BZ 05
F - 4
3.2 INDICACIÓN DE LA FECHA
Pulse la tecla [ADJ]. En el
tercio superior del display se
muestra la fecha en lugar de
la hora. A la izquierda aparece el mes y a la derecha el
día. Tras aprox. 2 segundos
la indicación vuelve a la
hora. De forma alternativa,
también puede visualizar la
fecha más tiempo manteniendo pulsada más tiempo
la tecla [ADJ]. La indicación
de la fecha no retorna a la
hora hasta que se suelta la
tecla [ADJ].
3.3 REINICIO
Para llevar a cabo el reinicio de todos los datos ajustados
o guardados pulse el botón RESET situado en la parte
posterior del instrumento. A continuación, el instrumento
vuelve encontrarse en el modo ajustado de fábrica.
3.4 INDICACIÓN DE TEMPERATURA EN °C O °F
Para cambiar la indicación de la unidad de temperatura
entre °C y °F pulse el botón °C/°F situado en la parte
posterior del instrumento.
4.1 ACTIVACIÓN DE LA ALARMA
Pulse brevemente la tecla [MODE]. En el tercio superior del
display, en lugar de la hora aparece la hora de la alarma, los
dos puntos entre los números dejan de parpadear. Vuelva a
pulsar la tecla [MODE] durante aprox. 1 segundo. El indicador de minutos de la hora de la alarma comienza a parpadear. Pulse una vez la tecla [ADJ] para cambiar el indicador
de minutos un minuto cada vez o manténgala pulsada para
acceder más rápido a un determinado número de minutos.
Page 36

F - 5
manual de instRucciones – teRmohigRómetRo amBiental BZ 05
E
Pulse brevemente la tecla
[MODE] para cambiar de
minutos a horas. El indicador
de horas comienza a parpadear. Pulse una vez la tecla
[ADJ] para cambiar el indicador de horas una hora cada
vez o manténgala pulsada
para acceder más rápido a
un determinado número de
horas.
Vuelva a pulsar la tecla [MODE]. La hora de la alarma
se ha guardado. En la parte superior izquierda del tercio
superior del display aparece junto a la hora de la alarma
ajustada el símbolo de una campana.
4.2 Apagado de la alarma
Pulse una de las teclas de la parte delantera del instrumento para apagar la alarma acústica.
4.3 Desactivación de la alarma
Pulse la tecla [MODE]. En el tercio superior del display en
lugar de la hora se muestra la hora de la alarma. El símbolo de una campana indica que la alarma está activada. Pulse 3 veces la tecla [ADJ] para desactivar la
alarma. El símbolo de la campana deja de mostrarse
en el display. La alarma está desactivada.
5.0
Visualización del valor maximo/mínimo [MEMO]
Para consultar los valores máximos medidos desde
el último reinicio del instrumento, pulse 1 vez la tecla MEMO. Para consultar los valores mínimos medidos
desde el último reinicio del instrumento, pulse 2 veces la
tecla MEMO. Pulse una tercera vez la tecla MEMO para
retornar al modo de visualización estándar. Si no se pulsa la tecla MEMO una tercera vez, la visualización salta
automáticamente tras 10 segundos de vuelta al modo
estándar.
Page 37

E
manual de instRucciones – teRmohigRómetRo amBiental BZ 05
F - 6
6.0 Indicador de bienestar
Si la temperatura ambiental se encuentra entre 20 °C y
26 °C (68 °F ~ 78,8 °F) y la humedad relativa del aire
entre el 50% y el 70% aparece el „Símbolo del bienestar“ A en el display.
Si, independientemente de la temperatura, la humedad
relativa es superior al 70%, se muestra el símbolo F
que indica que la humedad es demasiado alta.
Si, independientemente de la temperatura, la humedad
relativa es inferior al 50%, se muestra el símbolo K que
indica que la humedad es demasiado baja.
Una humedad relativa del aire demasiado baja provoca
frecuentes dolores de cabeza y sequedad en las mucosas,
en especial en la nariz y los ojos. Por su parte, esta irritación nos hace más sensibles a los agentes patógenos por
lo que es con frecuencia el paso previo para infecciones.
Una humedad relativa del aire demasiado alta afecta negativamente en especial al bienestar de las personas con
un sistema circulatorio débil. Asimismo, en los espacios
cerrados y mal ventilados incrementa el riesgo de moho
que, a su vez, supone otro riesgo para la salud.
Por ello, preste especial atención a que los locales estén
bien ventilados y mantenga una relación „saludable“
entre la temperatura y la humedad relativa del aire.
7.0 Cambio de la pila
Para cambiar la pila, abra el compartimento de ésta. Para
ello presione ligeramente la tapa posterior hacia abajo y
desplácela en la dirección de la flecha para retirarla. Cambie
la pila vacía por una nueva (1,5 V AAA). Vuelva a sujetar la
tapa del compartimento de la pila. El instrumento vuelve a
estar operativo.
En la Unión Europea los equipos electrónicos
no pueden acabar en la basura doméstica:
deben ser eliminados debidamente conforme
a la Directiva 2002/96/CE DEL PARLAMENTO
EUROPEO Y EL CONSEJO del 27 de enero de 2003 sobre
residuos de aparatos eléctricos y electrónicos. Al final de
su vida útil, elimine este aparato en conformidad con la
normativa legal en vigor.
Page 38

G - 1
manual de instRuções – teRmohigRómetRo paRa inteRioRes BZ 05
P
ÍNDICE
1.0 Aviso de segurança . . . . . . . . . . . . . . . . . . . G - 1
2.0 Especificações técnicas . . . . . . . . . . . . . . . G - 2
3.0 Funções . . . . . . . . . . . . . . . . . . . . . . . . . . . . G - 3
3.1 Configurar a hora e data .................G - 3
3.2 Apresentar data .......................G - 4
3.3 Reiniciar .............................G - 4
3.4 Unidade de temperatura em °C ou °F .......G - 4
4.0 Função de alarme . . . . . . . . . . . . . . . . . . . . G - 4
4.1 Activar alarme . . . . . . . . . . . . . . . . . . . . . . . . G - 5
4.2 Desligar alarme . . . . . . . . . . . . . . . . . . . . . . . G - 5
4.3 Desactivar alarme . . . . . . . . . . . . . . . . . . . . . G - 5
5.0 Indicação do valor máximo/mínimo[MEMO] . . G - 5
6.0 Indicador „sentir-se bem“ . . . . . . . . . . . . . . . G - 6
7.0 Troca de pilha. . . . . . . . . . . . . . . . . . . . . . . . . G - 6
Esta publicação substitui todas as anteriores. Nenhuma parte desta publicação pode
ser reproduzida, redigida, copiada ou divulgada de qualquer forma ou através de
sistemas electrónicos sem nossa autorização por escrito. Alterações técnicas reservadas. Todos os direitos reservados. As marcas registradas são citadas sem garantia
nenhuma, como se faz por hábito, e são geralmente escritos conforme os fabricantes. As marcas citadas são registradas e devem também ser consideradas como registradas. Alterações de construção no interesse da melhoria contínua da produção
e alterações de forma e cores são reservadas. O conteúdo da entrega pode divergir
das fotos do produto. Este documento foi elaborado com toda a diligência necessária. Não nos responsabilizamos por quaisquer enganos ou falhas. © TROTEC®
Favor ler absolutamente com muita atenção estas informações e instruções abaixo e manter este manual sempre perto
de seu aparelho de medição.
1.0 AVISO DE SEGURANÇA
Este aparelho foi projectado para ser usado somente em
ambientes interiores, e não é destinado para ambientes
exteriores! Não deve nunca ser exposto a temperatura ou
humidade do ar fora das seguintes faixas listadas, que
podem prejudicar a capacidade de funcionamento do
aparelho ou mesmo danificá-lo gravemente.
Antes da entrega foram efectuados extensos testes funcionais, de material e de qualidade no equipamento Não
obstante, há riscos ligados a este equipamento se for utilizado de maneira inapropriada! Devem ser consideradas
as seguintes observações: Em caso de danos causados
pelo não cumprimento a este manual de instruções fica
expirado o direito à garantia! Não nos responsabilizamos
Page 39

P
manual de instRuções – teRmohigRómetRo paRa inteRioRes BZ 05
G - 2
por quaisquer danos consequentes Não nos responsabilizamos por danos materiais ou pessoais resultantes do
manuseamento inapropriado ou da não consideração dos
avisos de segurança! Nestes casos fica expirado qualquer
direito à garantia. Devido a razões de certificação não é
permitido modificar o equipamento e/ou alterar a construção pessoalmente. O aparelho não pode ser desfeito,
pode-se somente abrir a tampa do compartimento de
pilhas. Aparelhos de medição não são brinquedos e não
devem ficar nas mãos de crianças! Nunca ligue imediatamente o aparelho de medição após tê-lo trazido de um
quarto mais frio em um quarto mais quente. A água condensada produzida em esta circunstância pode eventualmente destruir seu aparelho. Deixe o aparelho desligado
até atingir a temperatura ambiente. Não perca o material
de embalagem de vista, este pode-se tornar um brinquedo perigoso para as crianças.
m Quando se desloca o aparelho de um ambiente
frio para um ambiente aquecido (e vice-versa)
pode resultar na condensação de água na parte
electrónica. Este efeito físico, inevitável em
qualquer construção de aparelhos de medição,
altera os valores de medição. Dependendo da
diferença de temperatura, o “tempo de aclima tação“ do aparelho varia entre aprox. 15 - 30
min., antes que se possa continuar o procedi mento de medição.
2 .0 ESPECIFICAÇÕES TÉCNICAS
Campos de acção: Aposentos/escritórios, armazéns e
ambientes com atmosfera não-corrosiva
Indicação / ecrã:
Temperatura
Faixa de medição: 0°C até 50°C (32°F até 120°F)
Precisão de medição: ± 1.0 °C (1.8 °F)
Escala: 0.1 °C (0.1 °F)
Humidade do ar
Faixa de medição: 10% humidade relativa ~ 90% humidade relativa (sem condensação)
Precisão de medição: ± 5% (40% Humidade relativa ~
80% Humidade relativa) em geral ± 8%
Outras informações: Bateria: AAA 1.5V
Page 40

G - 3
manual de instRuções – teRmohigRómetRo paRa inteRioRes BZ 05
P
3 .0 CARACTERÍSTICAS
3 .1 CONFIGURAR A DATA E HORA
Tecla Modo:
(Premir brevemente a tecla Mode para ajustar a configuração)
Premir 1 x: Minutos
Premir 2 x: Horas
Premir 3 x indicação 12/24h
Premir 4 x: Mês
Premir 5 x: Dia
Tecla ADJ
Tecla Memo
Configurar a hora e data
No seu higrómetro são apresentadas a hora e a data. A
hora é constantemente apresentada na terça parte superior do ecrã. Ao premir brevemente a tecla [ADJ] esta
indicação muda e é apresentada a data com o mês (à
esquerda) e o dia (à direita).
Proceda da seguinte maneira para ajustar de novo a
hora e/ou a data:
Premir a tecla [MODE] durante um curto tempo A indicação minuto começa a piscar. Premir a tecla [ADJ] para
ajustar a indicação dos minutos.
Premir 1x a tecla [ADJ], para acrescentar um minuto na
indicação minuto ou premir constantemente esta tecla
para obter mais rápido a determinada quantidade de minutos desejada. Em seguida, premir 1x a tecla [MODE]
para entrar na configuração de hora e data. É o mesmo
procedimento. Após ter percorrido uma vez todos os valores (minuto/hora/mês/dia), o novo valor é memorizado.
Seu aparelho dispõe de uma indicação para 12 ou 24
horas. Na indicação 12 horas é também apresentada à
esquerda ao lado da hora a abreviação „AM“ (em inglês
para antes do meio-dia, ou seja, de 00:00 até 12:00) e
„PM“ (em inglês para depois do meio-dia, ou seja, de
12:00 até 24:00).
m Após um minuto, o novo valor é automaticamente
memorizado. A indicação não pisca mais.
Page 41

P
manual de instRuções – teRmohigRómetRo paRa inteRioRes BZ 05
G - 4
3.2 APRESENTAR DATA
Premir a tecla [ADJ]. Na terça parte superior do ecrã é
apresentada a data em vez
da hora. À esquerda é apresentado o mês, à direita o
dia. A indicação volta após
aprox. 2 segundos para a
hora. A data pode ser apresentada durante mais
tempo ao premir durante
mais tempo a tecla [ADJ].
A indicação da data volta
somente para a indicação
da hora após ter soltada a
tecla [ADJ].
3.3 REINICIAR
Premir o botão RESET no verso do aparelho para reiniciar sem dados seleccionados ou memorizados. Em
seguida serão restabelecidos os valores já memorizados
na fábrica.
3.4 UNIDADE DE TEMPERATURA EM °C OU °F
Premir o botão °C/°F no verso do aparelho para trocar
entre °C e °F da indicação da unidade de temperatura.
4.1 ACTIVAR ALARME
Premir brevemente a tecla [MODE]. Na terça parte superior do ecrã é apresentada, em vez da hora, a hora de
alarme, os dois pontos entre os dígitos não piscam mais.
Premir de novo a tecla [MODE] durante aprox. 1 segundo.
A indicação minuto da hora de alarme começa a piscar.
Premir 1x a tecla [ADJ], para acrescentar um minuto na
indicação minuto ou premir constantemente esta tecla
para obter mais rápido a determinada quantidade de minutos desejada.
Page 42

G - 5
manual de instRuções – teRmohigRómetRo paRa inteRioRes BZ 05
P
Premir brevemente a tecla [MODE] para seleccionar
minutos ou horas. A indicação hora começa a piscar.
Premir 1x a tecla [ADJ], para
acrescentar uma hora na
indicação minuto ou premir
constantemente esta tecla para obter mais rápido a
determinada quantidade de
horas desejada.
Premir de novo a tecla [MODE]. A hora de alarme é memorizada. Na terça parte superior à esquerda do ecrã é
apresentado o símbolo Sino ao lado da hora de alarme
seleccionada.
4.2 Desligar alarme
Premir uma das teclas no lado frontal do aparelho para
desligar o alarme acústico.
4.3 Desactivar alarme
Premir a tecla [MODE]. Na terça parte superior do ecrã é
apresentada, em vez da hora, a hora de alarme. O símbolo Sino indica, que o alarme está activado. Premir 3x a
tecla [ADJ] para desactivar o alarme. O símbolo Sino não
é mais apresentado no ecrã. O alarme é desactivado.
5.0 Indicação do valor máximo/mínimo[MEMO]
Favor premir 1x a tecla MEMO para ver os valores máximos
a partir da última vez que reiniciou. Favor premir 2x a tecla
MEMO para ver os valores mínimos a partir da última vez
que reiniciou,. Premir a tecla MEMO uma terceira vez para
voltar no modo padrão de apresentação de menu. Se a tecla
MEMO não for accionada uma terceira vez, a Indicação volta
automaticamente ao modo padrão após 10 segundos.
6.0 Indicador „sentir-se bem
Se a temperatura ambiente estiver entre 20°C e 26°C (68°F
~ 78,8°F) e a humidade relativa do ar entre 50% e 70% é
apresentado o „símbolo sentir-se bem“ A no ecrã .
Page 43

P
manual de instRuções – teRmohigRómetRo paRa inteRioRes BZ 05
G - 6
Se a humidade relativa do ar, independente da temperatura, estiver acima de 70%, é apresentado o símbolo F
Se a humidade relativa do ar, independente da temperatura, estiver acima de 70%, é apresentado o símbolo F
para humidade do ar alta demais.
Se a humidade relativa do ar, independente da temperatura, estiver abaixo de 50%, é apresentado o símbolo K
para humidade do ar baixa demais.
Uma humidade relativa do ar muito baixa é muitas vezes
a causa de dores de cabeça e mucosas secas, especialmente do nariz e dos olhos. Esta irritação diminui
em consequência a resistência imunológica e assim
aumentam as infecções.
Uma humidade relativa do ar muito alta interfere especialmente no bem-estar das pessoas com problemas
cardio-vasculares. Além de, em ambientes fechados e
mal arejados existir um maior risco de bolor que traz, ao
mesmo tempo, outros riscos para a saúde.
Assim areje sempre bem/regularmente o ambiente e
verifique que haja uma proporção „saudável“ entre a
temperatura e Humidade relativa do ar.
7.0 Troca de pilha
Abra a tampa do compartimento de pilhas quando a bateria deve ser trocada,. Aperte cuidadosamente a tampa que
se encontra no verso do aparelho tirando-a na direcção da
flecha Substitua a pilha descarregada por uma nova (1,5V
AAA). Feche novamente a tampa do compartimento de
pilhas. O aparelho está agora de novo pronto para operar.
Na União Europeia, os aparelhos electrónicos
não deverão ser eliminados juntamente com o
lixo doméstico, mas sim através de um processo
de eliminação especializado, segundo a directiva
2002/96/CE DO PARLAMENTO E CONSELHO EUROPEUS de
27 de Janeiro de 2003 sobre aparelhos eléctricos e electrónicos antigos. No final da utilização do equipamento, elimine
o mesmo segundo as disposições legais em vigor.
Page 44

H - 1
Kullanim KilavuZu – oda tipi teRmiK higRometRe BZ 05
T
İÇERİK BİLGİSİ
1.0 Güvenlik uyarıları .....................H - 1
2.0 Teknik özellikler ......................H - 2
3.0 Fonksiyonlar .........................H - 3
3.1 Saat ve tarih ayarı . . . . . . . . . . . . . . . . . . . . . H - 3
3.2 Tarihi göster ..........................H - 4
3.3 Reset ...............................H - 4
3.4 °C veya °F olarak sıcaklık göstergesi .......H - 4
4.0 Alarm fonksiyonu .....................H - 4
4.1 Alarmı etkinleştirme ....................H - 5
4.2 Alarmı kapatma . . . . . . . . . . . . . . . . . . . . . . . H - 5
4.3 Alarmı devre dışı bırakma ................H - 5
5.0
Maksimum/Minimum değer göstergesi [MEMO]
H - 5
6.0 Rahat hissetme indikatörü ...............H - 6
7.0 Batarya değişimi . . . . . . . . . . . . . . . . . . . . . . H - 6
Bu kılavuz bundan evvelki tüm kılavuzları geçersiz kılar. Bu kılavuz, yazılı onayımız
olmadan, kısmen de olsa herhangi bir şekilde kopyalanamaz veya elektronik sistemler yolu ile işleme tabi tutulamaz, çoğaltılamaz ve dağıtılamaz. Teknik değişiklik
yapma hakkımız saklıdır. Her hakkı mahfuzdur. Ürün markaları, üreticinin uyguladığı
yazım şekline uygun olarak ve serbest kullanım garantisi olmaksızın kullanılır.
Kullanılan markalar tescillidir ve bu durum böylece dikkate alınmalıdır. Devamlı ürün
iyileştirme sürecinin sonucu olarak biçim ve renk değişikliği gibi ürün yapısında
yapılabilecek değişiklik hakkımız saklıdır. Teslimat kapsamında ürün resminden sapmalar olabilir. Elinizdeki bu belge gerekli titizlikle hazırlanmıştır. Hata veya eksiklikler
sorumluluğumuz dışıdır. © TROTEC®
Aşağıdaki uyarıları ve talimatları dikkatlice okuyun ve bu el
kitabının her zaman ölçüm cihazının yakınında bulunmasını
sağlayın.
1.0 GÜVENLİK UYARILARI
Cihaz yalnızca kapalı mekanlarda kullanılmak üzere
tasarlanmıştır ve dışarıda kullanılmaya uygun değildir!
Cihazı asla aşağıda listelenmiş aralıkların dışındaki
sıcaklık veya hava nemine maruz bırakmayın; aksi takdirde cihazın işlevleri sınırlanabilir veya cihaz tamamen
zarar görebilir.
Cihaz, teslimatından önce ayrıntılı bir şekilde malzeme,
işlev ve kalite açısından kontrol edilmiştir. Buna rağmen cihaz, amacının dışında kullanıldığında tehlike meydana getirebilir. Aşağıdaki uyarıları lütfen dikkate alın: Bu kullanım
kılavuzunun dikkate alınmamasından dolayı oluşan hasarlarda garanti hakkı kaybolur! Bu nedenle oluşan zararlar
sorumluluğumuz dışıdır! Uygunsuz kullanım veya güvenlik
Page 45

T
Kullanim KilavuZu – oda tipi teRmiK higRometRe BZ 05
H - 2
uyarılarını dikkate almama sonucu doğabilecek maddi hasar
veya bedensel yaralanmalar sorumluluğumuz dışındadır!
Böyle durumlarda her türlü garanti hakkıkaybolur. Yetkilendirme nedenlerinden dolayı cihaz üzerinde dönüşüm
ve/veya değişim yapmak yasaktır. Pil yuvasının kapağının
açılması hariç, mahfaza sökülüp dağıtılmamalıdır. Ölçüm
cihazları oyuncak değildir ve çocukların yakınında
bulunmamalıdır! Ölçüm cihazını soğuk bir yerden sıcak bir
odaya getirdiğinizde hemen çalıştırmayın. Meydana gelecek yoğuşum suyu cihaza zarar verebilir. Cihazın kapalı
durumda oda sıcaklığına gelmesini bekleyin. Ambalaj malzemesini dikkatsizce ortalıkta bırakmayın, çocuklar için
tehlikeli bir oyuncağa dönüşebilir.
m Soğuk ortam koşullarından sıcak ortam
koşullarına geçtiğinizde (ve tersinde de) cihazın
elektronik aksamında su yoğuşması olabilir. Hiçbir
ölçüm cihazında yapısal olarak önlenemeyen bu
fiziksel etki, ölçüm değerlerinin sapmasına neden
olur. Sıcaklık farklılığı büyüklüğüne bağlı olarak
ölçüm işlemi yapılmadan önce cihaz yakl. 15 - 30
dakika boyunca çevreye alıştırılmalıdır.
2 .0 TTEKNİK ÖZELLİKLER
Kullanım bölgeleri: Ev/ofis, depo ve aşındırıcı atmosfere sahip olmayan odalar
Ekran / gösterge:
Sıcaklık
Ölçüm aralığı:: 0°C ila 50°C (32°F ila 120°F)
Ölçüm doğruluğu: ± 1.0 °C (1.8 °F)
Çözünürlük: 0.1 °C (0.1 °F)
Hava nemi
Ölçüm aralığı: 10% bağıl nem ~ 90% bağıl nem
(yoğuşmayan)
Ölçüm hassasiyeti: ± 5% (40% bağıl nem ~ 80% bağıl nem)
diğer durumlarda ± 8%
Diğer hususlar: Batarya: AAA 1.5V
Page 46

H - 3
Kullanim KilavuZu – oda tipi teRmiK higRometRe BZ 05
T
3 .0 ÖZELLIKLERI
3 .1 TARİH VE SAAT AYARI
Mode tuşu:
(Ayarlarda değişiklik yapmak için Mode tuşunu kısaca
basılı tutun)
1 x basın: Dakika
2 x basın: Saat
3 x basın: 12/24saat gösterge
4 x basın: Ay
5 x basın: Gün
ADJ tuşu
Memo tuşu
Tarih ve saat ayarı
Saati ve tarihi higrometrenizde okuyabilirsiniz. Saat kalıcı
olarak ekranın üst üçte birlik kısmında görünür. [ADJ] tuşuna
kısaca basarak bu gösterim değiştirilir: ay (sol) ve gün (sağ)
ile birlikte tarih ekrana gelir.
Tarihi ve/veya saati yeniden ayarlamak için aşağıdaki şekilde
hareket edin:
[MODE] tuşuna basın ve kısaca basılı tutun. Dakika göstergesi yanıp sönmeye başlar. Dakika göstergesini değiştirmek için
[ADJ] tuşuna basın.
Dakika göstergesinin bir dakikalık değişikliği için [ADJ] tuşuna
1 kez basın veya belirli bir dakika sayısınahızla gelmek için
tuşu basılı tutun. Saat ve tarih ayarına gelmek için [MODE]
tuşuna 1 kez basın. Bu işlem de aynı şekilde gerçekleşir. Tüm
değerler (dak/saat/ay/gün) bir kez geçtikten sonra yeni değer
kaydedilmiştir.
Cihazınız hem 12 saatlik, hem de 24 saatlik göstergeye
sahiptir. 12 saatlik göstergede saatin sol yanında ayrıca
„AM“ kısaltması (öğleden öncenin İngilizcesi, yani saat 00:00
ila 12:00) ve „PM“ kısaltması (öğleden sonranın İngilizcesi,
yani saat 12:00 ila 24:00).
m Yeni değer birkaç dakika sonra otomatik
kaydedilir. Ekran yanıp sönmeyi durdurur.
Page 47

T
Kullanim KilavuZu – oda tipi teRmiK higRometRe BZ 05
H - 4
3.2 TARİH GÖSTER:
[ADJ] tuşuna basın. Ekranın
üst üçte birlik kısmında
saatin yerine tarih görünür.
Solda ay, sağda gün
görünür. Ekran yakl. 2 saniye sonra saate geri döner.
[ADJ] tuşunu basılı tutarak
tarihi daha uzun bir süre de
ekranda tutabilirsiniz. [ADJ]
tuşu bırakıldıktan sonra
tarih göstergesi saate geri
döner.
3.3 RESET
Ayarlanan veya kayıtlı tüm değerleri sıfırlamak için
cihazın arka tarafındaki RESET düğmesine basın. Cihaz
daha sonra önceden ayarlanmış fabrika moduna geçer.
3.4 °C VEYA °F OLARAK SICAKLIK GÖSTERGESİ
Göstergede °C ile °F sıcaklık birimi arasında geçiş yapmak
için, cihazın arka tarafındaki °C/°F düğmesine basın.
4.1 ALARMI ETKİNLEŞTİRME
[MODE] tuşuna kısaca basın. Ekranın üst üçte birlik kısmında
saatin yerine alarm zamanı görünür; sayılar arasındaki iki
nokta yanıp sönmez artık. [MODE] tuşuna yakl. 1 saniyeliğine
yeniden basın. Alarmın dakika göstergesi yanıp sönmeye
başlar. Dakika göstergesini bir dakika değiştirmek için [ADJ]
tuşuna 1 kez basın veya belirli bir dakika sayısına hızla gelmek için tuşu basılı tutun.
Dakikadan saate geçmek için [MODE] tuşuna kısaca basın.
Saat göstergesi yanıp sönmeye başlar. Saat göstergesini bir
saat değiştirmek için [ADJ] tuşuna 1 kez basın veya belirli
Page 48

H - 5
Kullanim KilavuZu – oda tipi teRmiK higRometRe BZ 05
T
bir saate hızla gelmek için tuşu
basılı tutun.
[MODE] tuşuna yeniden basın.
Alarm zamanı kaydedilmiştir.
Ekranın solunda üst üçte birlik kısmında, ayarlanan alarm
zamanın yanında çan sembolü
görünür.
4.2 Alarmı kapatma
Alarm sesini kapatmak için cihazın ön kısmındaki
tuşlardan birine basın.
4.3 Alarmı devre dışı bırakma
[MODE] tuşuna basın. Ekranın üst üçte birlik kısmında
alarm zamanın yerine saat görünür. Bir çan sembolü
alarmın devre dışı olduğunu gösterir. Alarmı devre dışı
bırakmak için [ADJ] tuşuna 3 kez basın. Çan sembolü
artık ekranda görünmez. Alarm devre dışıdır.
5.0
Maksimum/Minimum değer göstergesi [MEMO]
Son sıfırlamadan beri ölçülen maksimum değerleri
görmek için lütfen 1 kez MEMO tuşuna basın. Son
sıfırlamadan beri ölçülen minimum değerleri görmek
için lütfen 2 kez MEMO tuşuna basın. MEMO tuşuna üç
kez basarsanız, tekrar standart ekran moduna gelirsiniz.
MEMO tuşuna üçüncü kez basılmazsa, ekran 10 saniye
sonra otomatik olarak standart moda geri gelir.
6.0 Rahat hissetme indikatörü
Ortam sıcaklığı 20°C ile 26°C (68°F ~ 78,8°F) arasındaysa
ve bağıl hava nemi 50% ile 70% arasındaysa ekranda
„Rahat hissetme sembolü“ A görünür.
Sıcaklıktan bağımsız olarak bağıl hava nemi %70‘den
fazlaysa, hava neminin yüksek olduğunu gösteren F
fsembolü görünür.
Sıcaklıktan bağımsız olarak bağıl hava nemi %50‘den azsa,
hava neminin düşük olduğunu gösteren K sembolü görünür.
Bağıl nemin çok düşük olması çoğu zaman baş ağrılarına
ve mukoza tabakasının kurumasına yol açar (özellikle
Page 49

T
Kullanim KilavuZu – oda tipi teRmiK higRometRe BZ 05
H - 6
burun ve gözler). Bu durum mikroplar için ortam hazırlar
ve enfeksiyonlara neden olabilir.
Özellikle kalp ve dolaşım sistemi sorunlu olan kişilerde
bağıl nemin yüksek olması olumsuz etkiye yol açar.
Bunun dışında kapalı ve yeterince havalandırılmamış
odalarda yüksek bir küf riski söz konusudur; bu da
başka bir sağlık riski demektir.
Bu nedenle odaların iyice/düzenli havalandırılmasına
ve sıcaklıkla bağıl nemin „sağlıklı“ bir oranda olmasına
dikkat edin.
7.0 Batarya değişimi
Bataryanın değişmesi gerekiyorsa, batarya yuvasını
açın. Bunun için arka taraftaki kapağı aşağı bastırın ve
ok yönünde itin. Kullanılmış bataryayı yeni bataryayla
değiştirin (1,5V AAA). Batarya kapağını yeniden takın.
Cihaz artık tekrar çalışmaya hazırdır.
Elektronik cihazlar normal ev çöpüne
atılamazlar ve Avrupa Birliği ülkelerinde
(elektrik ve elektronik eski eşyaların 27 Ocak
2003 tarihli AVRUPA PARLAMENTOSUNUN VE
BİRLİĞİNİN 2002/96/EG sayılı yönergesine göre) uygun
bir atık imha merkezine verilmelidir. Lütfen bu cihazı
kullandıktan sonra geçerli yasal düzenlemelere göre
imha edin.
İthalatçı:
TROTEC Endüstri Ürünleri Ticaret Limited ¸Sirketi
Turgut Reis Mah.
Barbaros Cad. E4 Blok. No. 61 / Giyimkent
34235 Esenler/Ístanbul
Tel: 0212 438 56 55
E-posta: info@trotec.com.tr
Marka: Trotec
Page 50

I - 1
instRuKcja oBsługi – teRmohigRometR poKojowy BZ 05
Q
SPIS TREŚCI
1.0 Zasady bezpieczeństwa .................I - 1
2.0 Specyfikacja techniczna . . . . . . . . . . . . . . . .I - 2
3.0 Funkcje ..............................I - 3
3.1 Ustawianie godziny i daty .................I - 3
3.2 Wyświetlanie daty . . . . . . . . . . . . . . . . . . . . . .I - 4
3.3 Reset ................................I - 4
3.4 Wskazanie temperatury w °C lub °F .........I - 4
4.0 Funkcja alarmu . . . . . . . . . . . . . . . . . . . . . . .I - 4
4.1 Aktywowanie alarmu . . . . . . . . . . . . . . . . . . . .I - 5
4.2 Wyłączenie alarmu ......................I - 5
4.3 Dezaktywowanie alarmu . . . . . . . . . . . . . . . . .I - 5
5.0 Wskazanie wartości
maksymalnej/minimalnej [MEMO] .......... I - 5
6.0 Wskaźnik komfortu ........................I - 6
7.0 Wymiana baterii ........................I - 6
Niniejsza wersja instrukcji zastępuje wszystkie wcześniejsze. Bez naszej pisemnej
zgody żadna część niniejszej publikacji nie może być w jakiejkolwiek formie reprodukowana lub przetwarzana, powielana bądź rozpowszechniana przy użyciu systemów
elektronicznych. Zmiany techniczne zastrzeżone. Wszelkie prawa zastrzeżone.
Nazwy produktów używane są bez gwarancji swobodnego rozporządzania nimi i
stosowane są zasadniczo zgodnie z pisownią producenta. Użyte nazwy produktów
są zastrzeżonymi znakami handlowymi i powinny być traktowane jako takie znaki.
Zastrzegamy sobie prawo do zmian konstrukcyjnych, służących bieżącemu udoskonalaniu produktu, a także prawo do zmian kształtu i kolorów. Dostar czony produkt
może odbiegać od przedstawionego na ilustracjach. Niniejsza dokumentacja została
opracowana z wymaganą starannością. Nie ponosimy odpowiedzialności za błędy i
przeoczenia. © TROTEC®
Prosimy o dokładne przeczytanie wskazówek i zasad podanych w niniejszej instrukcji oraz przechowywanie jej zawsze
w pobliżu przyrządu pomiarowego.
1.0 ZASADY BEZPIECZEŃSTWA
Urządzenie służy wyłącznie do użytku wewnątrz pomieszczeń
i nie jest przeznaczone do użycia na wolnym powietrzu! W
żadnym wypadku nie narażać urządzenia na oddziaływanie
temperatury i wilgotności powietrza przekraczającej zakresy
podane w dalszej części instrukcji, ponieważ może to obniżyć
sprawność działania urządzenia, a nawet trwale je zniszczyć.
Przed opuszczeniem zakładu urządzenie zostało poddane
wnikliwej kontroli materiałowej, testowi funkcjonowania i badaniu jakości. Mimo to urządzenie może stwarzać zagrożenie,
jeśli będzie używane w nieodpowiedni sposób! Należy
przestrzegać następujących zasad: W przypadku szkód, spo-
Page 51

Q
instRuKcja oBsługi – teRmohigRometR poKojowy BZ 05
I - 2
wodowanych nieprzestrzeganiem niniejszej instrukcji wygasa
możliwość dochodzenia roszczeń gwarancyjnych! Nie ponosimy odpowiedzialności za szkody następcze! Nie ponosimy
odpowiedzialności za szkody materialne i uszkodzenia ciała,
które zostały spowodowane nieprawidłową obsługą przyrządu
lub nieprzestrzeganiem zasad bezpieczeństwa! W takich przypadkach wygasa prawo do wszelkich roszczeń gwarancyjnych. Z powodu dopuszczenia urządzenia do użytku zabrania
się samowolnej przebudowy i/lub dokonywania zmian w
urządzeniu. Nie wolno otwierać obudowy za wyjątkiem otwarcia przykrywki schowka na baterię. Przyrządy pomiarowe nie
są zabawkami i nie wolno dopuścić, aby znalazły się w rękach
dzieci! W żadnym wypadku nie włączać przyrządu pomiarowego bezpośrednio po przeniesieniu go z otoczenia zimnego do
ciepłego. Powstające wtedy skropliny mogą w niektórych przypadkach zniszczyć urządzenie. Przed włączeniem urządzenia
należy odczekać, aż osiągnie temperaturę pokojową. Materiału
opakowaniowego nie pozostawiać bez nadzoru, ponieważ
może stać się niebezpieczną zabawką dla dzieci.
m W przypadku zmiany warunków otoczenia ze
środowiska zimnego do ciepłego (lub odwrotnie może
dojść do powstania skroplin w układzie elektronicznym
urządzenia. To fizyczne zjawisko, którego nie można
wyeliminować konstrukcyjnie w żadnym przyrządzie
pomiarowym zmniejsza dokładność pomiaru. W
zależności od wielkości
różnicy temperatur
urządzenie przed rozpoczęciem
pomiaru wymaga
„czasu aklimatyzacji“ ok. 15 - 30 minut.
2 .0 SPECYFIKACJA TECHNICZNA
Obszar zastosowania: pomieszczenia mieszkalne/biurowe,
magazyny i pomieszczenia z atmosferą niekorozyjną
Wyświetlacz / wskazania:
Temperatura
Zakres pomiaru: od 0°C do 50°C (od 32°F do 120°F)
Dokładność pomiaru: ± 1.0 °C (1.8 °F)
Rozdzielczość: 0.1 °C (0.1 °F)
Wilgotność powietrza
Zakres pomiaru: 10% wilgotności wzgl. ~ 90%
wilgotności wzgl. (bez kondensacji)
Dokładność pomiaru: ± 5% (40% wilgotności wzgl. ~
80% wilgotności wzgl.), w pozostałym zakresie ± 8%
Inne: Bateria: AAA 1.5V
Page 52

I - 3
instRuKcja oBsługi – teRmohigRometR poKojowy BZ 05
Q
3 .0 OPIS
3 .1 USTAWIANIE DATY I GODZINY
Przycisk Mode:
(W celu zmiany ustawienia należy krótko przytrzymać
naciśnięty przycisk Mode)
Naciśnięcie 1 raz: minuty
Naciśnięcie 2 raz: godziny
Naciśnięcie 3 razy: wskazanie 12/24h
Naciśnięcie 4 raz: miesiąc
Naciśnięcie 5 raz: dzień
Przycisk ADJ
Przycisk Memo
Ustawianie godziny i dat
Na higrometrze można odczytać zarówno godzinę, jak i datę.
Godzina wskazywana jest stale w górnej części wyświetlacza.
Krótkie naciśnięcie przycisku [ADJ] powoduje zmianę tego
wskazania: wyświetla się wtedy data obejmująca miesiąc
(po lewej stronie) i dzień (po prawej stronie).
Aby zmienić godzinę i/lub datę należy postępować
następująco:
Nacisnąć przycisk [MODE] i przytrzymać przez chwilę
naciśnięty. Zaczyna pulsować wskazanie minut. Nacisnąć
przycisk [ADJ], aby zmienić wskazanie minut.
Nacisnąć 1 raz przycisk [ADJ], aby zmienić wskazanie minut
o jedną minutę lub przytrzymać dłużej naciśnięty przycisk, aby
przyśpieszyć zmianę wartości minutowych. Następnie nacisnąć
1 raz przycisk [MODE], aby przejść do ustawienia godziny i daty.
Zmiany ustawienia tych wartości dokonuje się analogicznie jak
minut. Po przejściu przez wszystkie wskazania (min./godz./
msc./dzień) nowe wartości są zapisywane w pamięci.
Przyrząd może wskazywać godziny w trybie 12-godzinnym
lub 24-godzinnym. W trybie 12-godzinnym z lewej strony
wskazania godziny wyświetla się dodatkowo angielski skrót
„AM“ (oznaczający czas przed południem, tj. od godz. 00:00
do godz. 12:00) lub „PM“ (oznaczający czas po południu, tj.
od godz. 12:00 do godz. 24:00).
m Nowa wartość zapamiętywana jest automa-
tycznie po jednej minucie. Wskazanie
przestaje pulsować.
Page 53

Q
instRuKcja oBsługi – teRmohigRometR poKojowy BZ 05
I - 4
3.2 WYŚWIETLANIE DATY
Nacisnąć przycisk [ADJ]. W
górnej części wyświetlacza w
miejscu godziny ukazuje się
data. Z lewej strony wskazywany jest miesiąc, z prawej
dzień. Po ok. 2 sekundach
ponownie wyświetla się godzina. Możliwe jest również
dłuższe wyświetlenie daty
poprzez dłuższe przytrzymanie naciśniętego przycisku
[ADJ]. Wskazanie daty z
powrotem zmienia się na wskazanie godziny dopiero po
zwolnieniu przycisku [ADJ].
3.3 RESET
Aby skasować wszystkie wprowadzone zmiany i zapisane dane należy nacisnąć przycisk RESET znajdujący się
z tyłu przyrządu. W przyrządzie zostaną wówczas przywrócone domyślne ustawienia fabryczne.
3.4 WSKAZANIE TEMPERATURY W °C LUB °F
Aby zmienić wskazywaną jednostkę temperatury z °C
na °F lub odwrotnie należy nacisnąć przycisk °C/°F
znajdujący się z tyłu przyrządu.
4.1 AKTYWOWANIE ALARMU
Nacisnąć krótko przycisk [MODE]. W górnej części
wyświetlacza zamiast aktualnej godziny ukaże się godzina
alarmu i przestanie pulsować dwukropek między cyframi.
Na ok. 1 sekundę ponownie nacisnąć przycisk [MODE]. Zaczyna pulsować wskazanie minut czasu alarmu. Nacisnąć 1
raz przycisk [ADJ], aby zmienić wskazanie minut o jedną
minutę lub przytrzymać dłużej naciśnięty przycisk, aby
przyśpieszyć zmianę wartości minutowych.
Page 54

I - 5
instRuKcja oBsługi – teRmohigRometR poKojowy BZ 05
Q
Nacisnąć krótko przycisk
[MODE], aby przejść ze wskazania minut do wskazania
godziny. Zaczyna pulsować
wskazanie godziny. Nacisnąć 1
raz przycisk [ADJ], aby zmienić
wskazanie godziny o jedną
godzinę lub przytrzymać
dłużej naciśnięty przycisk, aby
przyśpieszyć zmianę wartości
godziny.
Ponownie nacisnąć przycisk [MODE]. Czas alarmu jest zapisany w pamięci. W górnej części wyświetlacza z lewej strony nastawionego czasu alarmu ukaże się symbol dzwonka.
4.2 Wyłączenie alarmu
Aby wyłączyć dźwięk alarmu należy nacisnąć dowolny
przycisk, znajdujący z przodu przyrządu.
4.3 Dezaktywowanie alarmu
Nacisnąć przycisk [MODE]. W górnej części wyświetlacza
zamiast aktualnej godziny ukaże się godzina alarmu.
Symbol dzwonka oznacza, że alarm jest aktywny. Aby
dezaktywować alarm należy 3 razy nacisnąć przycisk
[ADJ]. Na wyświetlaczu zgaśnie symbol dzwonka. Alarm
nie jest aktywny.
5.0 Wskazanie wartości
maksymalnej/minimalnej [MEMO]
Jednokrotne naciśnięcie przycisku MEMO powoduje
wyświetlenie wartości maksymalnych zmierzonych od
ostatniego resetu. Dwukrotne naciśnięcie przycisku
MEMO powoduje wyświetlenie wartości minimalnych
zmierzonych od ostatniego resetu. Naciśnięcie przycisku po raz trzeci powoduje przejście do trybu wskazań
wartości standardowych. Jeśli przycisk MEMO nie
zostanie naciśnięty po raz trzeci, powrót do trybu standardowego nastąpi automatycznie po 10 sekundach.
Page 55

Q
instRuKcja oBsługi – teRmohigRometR poKojowy BZ 05
I - 6
6.0 Wskaźnik komfortu
Jeśli temperatura otoczenia mieści się w przedziale od
20°C do 26°C (68°F ~ 78,8°F) a względna wilgotność
powietrza leży w przedziale od 50% do 70% wówczas
na wyświetlaczu widoczny jest „symbol komfortu“ A.
Jeśli względna wilgotność powietrza niezależnie od temperatury przekracza 70%, to na wyświetlaczu widoczny jest F
oznaczający zbyt wysoką wilgotność powietrza.
Jeśli względna wilgotność powietrza niezależnie od temperatury wynosi poniżej 50%, wówczas na wyświetlaczu
widoczny jest Symbol K oznaczający zbyt niską wilgotność
powietrza.
Zbyt niska względna wilgotność powietrza skutkuje
często bólami głowy i wysuszeniem śluzówek, zwłaszcza
nosa i oczu. Podrażnienia te zwiększają z kolei podatność
na zarazki i torują drogę infekcjom.
Zbyt wysoka względna wilgotność powietrza wpływa
negatywnie na samopoczucie zwłaszcza osób, które mają problemy z układem krążenia. Ponadto w
zamkniętych i niedostatecznie wietrzonych pomieszcze-
niach występuje zwiększone ryzyko rozwoju pleśni, co
jednocześnie stanowi ryzyko dla zdrowia.
Z tego względu należy mieć zawsze na uwadze odpowiednie/regularne wietrzenie pomieszczeń oraz „zdrowy“ stosunek temperatury do względnej wilgotności powietrza.
7.0 Wymiana baterii
Jeśli konieczna jest wymiana baterii należy otworzyć schowek na baterię. W tym celu należy lekko nacisnąć przykrywkę
schowka znajdującą się z tyłu urządzenia i przesunąć ją w kierunku wskazywanym przez strzałkę. Zużytą baterię wymienić
na nową (1,5V AAA). Z powrotem przymocować przykrywkę
schowka na baterię. Urządzenie jest wtedy gotowe do użytku.
W Unii Europejskiej nie wolno traktować urządzeń
elektrycznych jak zwykłych odpadów, lecz muszą
być one właściwie utylizowane zgodnie z Dyrektywą
2002/96/WE PARLAMENTU EUROPEJSKIEGO I
RADY z dnia 27. stycznia 2003 dotyczącą zużytego sprzętu
elektrycznego i elektronicznego. Po zakończeniu użytkowania
przyrządu należy dokonać jego właściwej utylizacji zgodnie z
obowiązującymi przepisami prawnymi.
Page 56

J - 1
ИнструкцИя по эксплуатацИИ – комнатный термогИгрометр BZ 05
RUS
1.0
Указания по технике безопасности J - 1
20 Технические спецификации J - 2
30 Функции
. . . . . . . . . . . . . . . . . . . . . . . . . . .J - 3
3.1
Настроить время и дату J - 3
32 Показать дату J - 4
33 Сброс J - 4
34 Показание температуры в °C или °F
. . . . .J - 4
4.0
Функция тревоги
....................J - 4
4.1
Активировать сигнал тревоги J - 5
42 Выключить сигнал тревоги J - 5
43 Деактивировать сигнал тревоги
.........J - 5
5.0
Показание максимального/
минимального значения[MEMO] J - 5
60 Индикатор комфорта J - 6
70 Замена батарейки
....................J - 6
Данное издание заменяет все предыдущие Запрещается воспроизводить
или обрабатывать, размножать или распространять с использованием
электронных систем любую часть данного издания в какой-либо форме без
нашего письменного согласия Оставляем за собой право на технические
изменения Все права защищены Наименования товаров используются без
гарантии свободной возможности использования и в основном соответствуют
стилю производителя Использованные наименования товаров являются
зарегистрированными и должны рассматриваться как таковые Оставляем
за собой право на конструктивные изменения в интересах постоянного
улучшения продукта, а также изменения формы / цвета Объем поставки
может отличаться от изображения продукта Настоящий документ
разработан с особой тщательностью Мы ни в коем случае не берем на себя
ответственность за ошибки и пропуски
© TROTEC®
Прочтите, внимательно следующие указания и инструкции и
позаботьтесь о том, чтобы эта инструкция всегда находилась
в пределах досягаемости вашего измерительного прибора.
1.0
Прибор разработан исключительно для использования во
внутренних помещениях и не подходит для использования
на открытом воздухе! Никогда не измеряйте температуру
и влажность воздуха вне перечисленных дальше зон,
т к это может повлиять на пригодность прибора к
эксплуатации или даже совсем испортить его
Прибор перед поставкой прошел многочисленные
тесты на качество материалов, изготовления а также
функциональные проверки Кроме того, от этого прибора
может исходить опасность, если использовать его не по
назначению! Соблюдайте следующие указания: При
повреждениях, вызванных несоблюдением данной
Page 57

ИнструкцИя по эксплуатацИИ – комнатный термогИгрометр BZ 05
J - 2
RUS
инструкции, гарантийное требование теряет силу!
Мы не берем на себя ответственность за косвенные
убытки! За ущерб, причиненный предметам или
лицам в результате неправильного обращения или
несоблюдения указаний по технике безопасности,
мы не несем никакой ответственности! В подобных
случаях любое гарантийное требование теряет силу!
По причине допуска к эксплуатации самовольная
переделка и/или изменение прибора запрещены Не
разрешается разбирать корпус за исключением снятия
крышки отделения для батареи Измерительные
приборы – не игрушки, держите их вдали от детей!
Никогда не включайте измерительный прибор сразу
после того, как он перенесен из холодного в теплое
помещение Возникший при этом конденсат может
разрушить прибор Оставьте прибор выключенным,
пока он не нагреется до комнатной температуры Не
оставляйте упаковочный материал без присмотра, он
может стать опасной игрушкой для детей
.
m
2 .0
Области применения: может
-/Büroräume, Lager und
Räumlichkeiten mit nicht-korrosiver Atmosphäre
Показание / дисплей
:
Температура
Диапазон измерения: от 0°C до 50°C (от 32°F до 120°F)
Точность измерения: ± 10 °C (18 °F)
Разрешение: 01 °C (01 °F)
Влажность воздуха
Диапазон измерения: 10% относительной влажности ~ 90%
относительной влажности (без образования конденсата)
Точность измерения: ± 5% (40% относительной
влажности ~ 80% относительной влажности) в
противном случае ± 8%
Прочее: Батарейка
: AAA 1.5B
Page 58

J - 3
ИнструкцИя по эксплуатацИИ – комнатный термогИгрометр BZ 05
RUS
3 .0
3 .1
Клавиша Mode
:
(для изменения настроек коротко нажать клавишу Mode)
Нажать 1 раз: Минуты
Нажать 2 раз: Часы
Нажать 3 раза: показание 12/24 ч
Нажать 4 раз: Месяц
Нажать 5 раз: День
Клавиша ADJ
Клавиша Memo
Настроить время и дату
Вы можете считать с гигрометра как время, так и
дату Время отображается постоянно в верхней
трети дисплея Коротким нажатием клавиши [ADJ]
это показание меняется: появляется дата с месяцем
(слева) и днем (справа)
Чтобы заново настроить часы и/или дату, действуйте
следующим образом:
Нажмите клавишу[MODE] и несколько секунд держите
ее нажатой Показание минут начнет мигать Нажмите
клавишу [ADJ], чтобы изменить показание минут
Нажмите клавишу [ADJ] один раз, чтобы изменить
показание минут на одну минуту или держите клавишу
нажатой, чтобы быстрее получить определенное
количество минут Затем один раз нажмите
клавишу[MODE], чтобы перейти к настройке часов и
даты Порядок действий такой же После того, как все
значения (минуты/часы/месяц/день) пройдены, новое
значение сохраняется
Прибор имеет как 12-часовую, так и 24-часовую
индикацию При 12-часовой индикации слева рядом со
временем дополнительно появляется сокращение AM2
(по-английски до обеда, те от 00:00 до 12:00) и PM (по-
английски после обеда, вечером, те от 12:00 до 24:00)
.
m
.
Page 59

ИнструкцИя по эксплуатацИИ – комнатный термогИгрометр BZ 05
J - 4
RUS
3.2
Нажмите клавишу[ADJ]
В верхней трети дисплея
появится дата вместо
времени Слева появится
месяц, справа день
Индикация времени
возвращается через 2
секунды Вы можете по
выбору сделать так, чтобы
время отображалось
дольше, удерживая
клавишу [ADJ] нажатой
дольше Показание даты
возвращается к индикации
времени только после
отпускания клавиши [ADJ]
.
3.3
Чтобы провести сброс всех настроенных или сохраненных
данных, нажмите клавишу RESET на задней стенке прибора
После этого прибор снова будет находиться в режиме,
предварительно настроенном заводом-изготовителем
.
3.4
Чтобы изменить единицу измерения с °C на °F, нажмите
клавишу °C/°F на задней стенке прибора
.
4.1
Нажмите коротко клавишу [MODE] В верхней трети дисплея
вместо отображения часов появляется время сигнала
тревоги, двоеточие между числами перестает мигать
Снова нажмите клавишу [MODE] примерно на 1 секунду
Индикация минут времени сигнала тревоги начинает
мигать Нажмите 1 раз клавишу[ADJ], чтобы изменить
показание минут на минуту, или держите клавишу нажатой,
чтобы быстрее установить определенное количество минут
Нажмите коротко клавишу [MODE], чтобы поменять минуты
на часы Индикация часов начинает мигать Нажмите 1
Page 60

J - 5
ИнструкцИя по эксплуатацИИ – комнатный термогИгрометр BZ 05
RUS
раз клавишу [ADJ], чтобы
изменить показание часов
на час, или держите клавишу
нажатой, чтобы быстрее
установить определенное
количество часов
Снова нажмите клавишу
[MODE] Время сигнала тревоги
сохранено Сверху слева в
верхней трети дисплея рядом
с настроенным временем
сигнала тревоги появится
символ колокольчика
.
4.2
Нажмите одну из клавиш на задней стенке прибора, чтобы
выключить сигнал тревоги
.
4.3
Нажмите клавишу [MODE] В верхней трети дисплея вместо
индикации часов появится время сигнала тревоги Символ
колокольчика показывает, что сигнал тревоги активирован
Нажмите клавишу [ADJ] 3 раза, чтобы деактивировать
сигнал тревоги Символ колокольчика больше не появляется
на дисплее Сигнал тревоги деактивирован
.
5.0
Чтобы посмотреть измеренное максимальное значение
с момента последнего сброса, нажмите клавишу MEMО 1
раз Чтобы посмотреть измеренное минимальное значение
с момента последнего сброса, нажмите клавишу MEMО
2 раза Нажмите клавишу MEMO третий раз, и вы снова
войдете в стандартный режим показаний Если не нажать
клавишу MEMO третий раз, показание через 10 секунд
автоматически вернется в стандартный режим
.
6.0
Если окружающая температура находится в диапазоне от
20°C до 26°C (68°F ~ 78,8°F) и относительная влажность
воздуха составляет 50-70%, на дисплее появляется
«символ комфорта
A .
Page 61

ИнструкцИя по эксплуатацИИ – комнатный термогИгрометр BZ 05
J - 6
RUS
Если относительная влажность воздуха, независимо от
температуры, больше 70%, появляется символ
F
для
слишком высокой влажности воздуха
Если относительная влажность воздуха, независимо от
температуры, меньше 50%, появляется симво
K
для
слишком маленькой влажности воздуха
Слишком маленькая относительная влажность воздуха
часто приводит к головным болям и к высыханию слизистых
оболочек, особенно носа и глаз Это раздражение в свою
очередь делает более уязвимым к возбудителям заболеваний
и поэтому часто является предшественником инфекций
Слишком высокая относительная влажность воздуха
негативно влияет на самочувствие, особенно у людей с
нарушениями в системе кровообращения Кроме того, в
закрытых и недостаточно проветриваемых помещениях
имеется повышенный риск возникновения плесени, что
одновременно представляет дополнительный риск для
здоровья
Поэтому всегда хорошо/регулярно проветривайте
помещение и следите за «здоровым» соотношением
температуры и относительной влажности воздуха
.
7.0
Если надо заменить батарейку, откройте отделение для
батарейки Для этого слегка нажмите вниз крышку на
задней стенке и сдвиньте ее в направлении, указанном
стрелкой Замените разряженную батарейку новой (1,5В
AAA) Снова закрепите крышку отделения для батарейки
Прибор снова готов к работе
Электронные приборы не выбрасывать вместе
с бытовыми отходами, а утилизировать в
Европейском Союзе согласно директиве 2002/96/
EG ЕВРОПЕЙСКОГО ПАРЛАМЕНТА И СОВЕТА
от 27 012003 г об электрических и электронных приборах,
отслуживших свой срок Пожалуйста, сдайте в утилизацию
этот прибор по окончании пользования в соответствии с
действующим законодательством
.
Page 62

K - 1
Betjeningsvejledning – indendøRs teRmohygRometeR BZ 05
c
INDHOLDSFORTEGNELSE
1.0 Sikkerhedshenvisninger . . . . . . . . . . . . . . . K - 1
2.0 Tekniske specifikationer . . . . . . . . . . . . . . . K - 2
3.0 Funktioner . . . . . . . . . . . . . . . . . . . . . . . . . . K - 3
3.1 Indstilling af klokkeslæt og dato ...........K - 3
3.2 Visning af dato ........................K - 4
3.3 Nulstilling ............................K - 4
3.4 Visning af temperatur i °C eller °F . . . . . . . . . K - 4
4.0 Alarmfunktion . . . . . . . . . . . . . . . . . . . . . . . K - 4
4.1 Aktivering af alarm . . . . . . . . . . . . . . . . . . . . K - 5
4.2 Slukning af alarm ......................K - 5
4.3 Deaktivering af alarm ...................K - 5
5.0 Visning af maksimum-/minimumværdi
[MEMO] .................................K - 5
6.0 Indikator for behageligt indeklima . . . . . . . . . . .K - 6
7.0 Udskiftning af batteri . . . . . . . . . . . . . . . . . . . K - 6
Denne publikation erstatter alle forudgående. Publikationen må hverken helt eller delvist på nogen måde reproduceres uden vores forudgående samtykke eller
forarbejdes, mangfoldiggøres eller distribueres ved hjælp af elektroniske systemer.
Tekniske ændringer forbeholdes. Alle rettigheder forbeholdes. Varenavne anvendes
uden garanti for fri anvendelse og følger i væsentlige dele producentens skrivemåde.
De anvendte varenavne er registrerede og skal betragtes som sådanne. Med forbehold for konstruktionsændringer med henblik på løbende produktforbedringsamt
ændringer i form og farve. Leveringsomfanget kan afvige fra produktafbildningerne.
Det foreliggende dokument er udarbejdet med den nødvendige omhu. Vi er ikke ansvarlige for fejl og udeladelser. © TROTEC®
Læs følgende henvisninger og vejledninger grundigt igennem,
og sørg for altid at have denne håndbog inden for rækkevidde
af måleapparatet.
1.0 SIKKERHEDSHENVISNINGER
Apparatet er udelukkende konciperet til brug indendørs
og er ikke egnet til udendørs brug! Udsæt aldrig apparatet
for temperaturer eller luftfugtighed, der ligger uden for det
angivne område, da dette kan påvirke og endog skade
apparatets funktionsdygtighed.
Inden levering har apparatet gennemgået omfangsrige
materiale-, funktions- og kvalitetstests. Alligevel kan der
udgå farer fra apparatet, såfremt det benyttes på en usagkyndig måde! Overhold følgende henvisninger: Ved skader, der opstår pga. af manglende overholdelse af denne
vejledning bortfalder alle garantikrav! Vi hæfter ikke for
Page 63

c
Betjeningsvejledning – indendøRs teRmohygRometeR BZ 05
K - 2
følgeskader! Vi hæfter ikke for ting- og personskader, der
forårsages af ukorrekt håndtering eller tilsidesættelse af
sikkerhedshenvisningerne! I så fald bortfalder alle garantikrav. Af godkendelsesmæssige årsager er egenrådig
ombygning og/eller ændring af apparatet ikke tilladt. Bortset fra åbning af batterilåget, må kabinettet ikke skilles
ad. Måleapparater er ikke legetøj og skal holdes utilgængelige for børn! Tænd aldrig for måleapparatet straks efter,
at det er bragt fra kolde omgivelser ind i et varmt rum.
Det opstående kondensvand kan ødelægge dit apparat.
Varm apparatet op til stuetemperatur i frakoblet tilstand.
Lad ikke emballage ligge uden opsyn, da det kan være et
farligt legetøj for børn.
m Ved skift fra varme til kolde omgivelser (og om vendt) kan der opstå kondensatdannelse på måle apparatets måleelektronik. Denne fysiske effekt,
som konstruktionsmæssigt ikke kan forhindres ved
nogen måleapparater, medfører måleafvigelser.
Alt afhængigt af hvor store temperaturforskellene er,
skal apparatet have en ”akklimatiseringstid” på ca.
15 - 30 minutter, inden målingen kan fortsættes.
2 .0 TEKNISKE SPECIFIKATIONER
Anvendelsesområder: Boliger og kontorer, lagre og lokaler med ikke-korrosiv atmosfære
Indikator/display:
Temperatur
Måleområde: 0 °C til 50 °C (32 °F til 120 °F)
Målenøjagtighed: ± 1,0 °C (1,8 °F)
Opløsning: 0,1 °C (0,1 °F)
Luftfugtighed
Måleområde: 10% rel. fugtighed ~ 90% rel. fugtighed
(ikke-kondenserende)
Målenøjagtighed: ± 5% (40% rel. fugtighed ~ 80% rel.
fugtighed) ellers ± 8%
Yderligere information: batteri: AAA 1.5V
Page 64

K - 3
Betjeningsvejledning – indendøRs teRmohygRometeR BZ 05
c
3 .0 FUNKTIONER
3 .1 INDSTILLING AF DATO OG KLOKKESLÆT
Mode – tast:
(Tryk kort på Mode-tasten for at ændre indstilling)
Tryk 1 gang: Minutter
Tryk 3 gange Timer
Tryk 3 gange: 12/24h-visning
Tryk 4 gange Måned
Tryk 5 gange Dag
ADJ – tast
Memo – tast
Indstilling af klokkeslæt og dato
Både klokkeslæt og dato kan aflæses på hygrometret. Klokkeslættet vises konstant i den øverste tredjedel af displayet.
Ved at trykke kort på [ADJ]-tasten skifter denne visning: nu
vises dato med måned (til venstre) og dag (til højre).
Klokkeslættet ændres på følgende måde:
Tryk på [MODE]-tasten, og hold den nede i et kort øjeblik.
Minutvisningen begynder at blinke. Minutterne stilles vha.
[ADJ]-tasten.
Tryk på [ADJ]-tasten 1x for at ændre visningen med ét minut
ad gangen, eller hold tasten nede for at komme hurtigere til
et bestemt minuttal. Tryk derefter på [MODE]-tasten 1x for at
indstille time og dato. Dette gøres efter samme fremgangsmåde. Når alle værdierne er løbet igennem én gang (min/tim/
md/dag), er den nye værdi gemt.
Apparatet har både en 12-timers og en 24-timers visning.
Ved 12-timers visningen vises forkortelsen ”AM” (engelsk for
formiddag, dvs. fra kl. 00:00 til 12:00) og ”PM” (engelsk for
eftermiddag og aften, dvs. fra kl. 12:00 til 24:00).
m Den nye værdi gemmes automatisk efter et
minut. Visningen holder op med at blinke.
Page 65

c
Betjeningsvejledning – indendøRs teRmohygRometeR BZ 05
K - 4
3.2 VISNING AF DATO
Tryk på [ADJ]-tasten. I
øverste tredjedel af displayet vises datoen i stedet
for klokkeslættet. Måneden
vises til venstre, dagen til
højre. Visningen vender efter ca. 2 sekunder tilbage til
klokkeslættet. Hvis det ønskes, kan datoen også vises i
længere tid ved at trykke på
[ADJ]-tasten i længere tid.
Datovisningen vender først
tilbage til klokkeslættet,
når der gives slip på [ADJ]tasten.
3.3 RESET (nulstilling)
For at gennemføre en nulstilling af alle indstillede og
gemte data trykkes på RESET-knappen bag på apparatet. Apparatet vender derefter tilbage til den forindstillede fabriksmodus.
3.4 TEMPERATURVISNING I °C ELLER °F
Temperaturenheden skiftes mellem °C og °F ved at trykke på °C/°F-knappen bag på apparatet.
4.1 AKTIVERING AF ALARM
Tryk kort på [MODE]-tasten. I øverste tredjedel af displayet
vises nu alarmtiden i stedet for klokkeslættet, og kolonet
mellem tallene holder op med at blinke. Tryk en gang til på
[MODE]-tasten i ca. 1 sekund. Alarmens minutvisning begynder at blinke. Tryk på [ADJ]-tasten 1x for at ændre minutvisningen med ét minut ad gangen, eller hold tasten nede for
at komme hurtigere til et bestemt minuttal.
Tryk kort på [MODE]-tasten for at skifte fra minutter til timer.
Timevisningen begynder at blinke. Tryk på [ADJ]-tasten 1x
Page 66

K - 5
Betjeningsvejledning – indendøRs teRmohygRometeR BZ 05
c
for at ændre timevisningen
med én time ad gangen, eller
hold tasten nede for at komme
hurtigere til et bestemt timetal.
Tryk en gang til på [MODE]tasten. Alarmtiden er gemt.
Øverst til venstre i displayets
øverste tredjedel vises et symbol med en klokke ved siden af
den indstillede alarmtid.
4.2 Afbrydelse af alarm
Tryk på én af tasterne foran på apparatet for at slukke
for alarmtonen.
4.3 Deaktivering af alarm
Tryk på [MODE]-tasten. I øverste tredjedel af displayet
vises nu alarmtiden i stedet for klokkeslættet. Klokkesymbolet indikerer, at alarmen er aktiveret. Tryk på
[ADJ]-tasten 3x for at deaktivere alarmen. Klokkesymbolet vises ikke længere på displayet. Alarmen er deaktiveret.
5.0 Visning af maksimum-/
minimumværdi [MEMO]
For at se de målte maksimumværdier, der er målt siden sidste nulstilling, trykkes 1x på MEMO-tasten. For
at se de målte minimumværdier, der er målt siden sidste
nulstilling, trykkes 2x på MEMO-tasten. Hvis der trykkes
på MEMO-tasten en tredje gang, kommer man tilbage
til standardvisningen. Hvis MEMO-tasten ikke trykkes
en tredje gang, vender visningen automatisk tilbage til
standardmodus efter 10 sekunder.
Page 67

c
Betjeningsvejledning – indendøRs teRmohygRometeR BZ 05
K - 6
6.0 Indikator for behageligt indeklima
Hvis omgivelsestemperaturen ligger mellem 20 °C og 26
°C (68 °F ~ 78,8 °F), og den relative luftfugtighed ligger
mellem 50% og 70%, vises symbolet for behageligt indeklima A på displayet.
Hvis den relative luftfugtighed er højere end 70%, uafhængigt af temperaturen, vises symbolet F for en for
høj luftfugtighed.
Hvis den relative luftfugtighed er lavere end 50%, uafhængigt af temperaturen, vises symbolet K for en for
lav luftfugtighed.
En for lav relativ luftfugtighed medfører ofte hovedpine
og udtørring af slimhinder, særligt i næse og øjne. Denne
irritation kan igen være sygdomsfremkaldende og giver
ofte anledning til infektioner.
En for høj relativ luftfugtighed har især en negativ indvirkning på menneskers velbefindende, hvis de har et
svagt hjertekredsløb. Desuden er der i lukkede lokaler
med utilstrækkelig udluftning forhøjet risiko for mug,
hvilket udgør yderligere sundhedsfare.
Sørg derfor altid for god/regelmæssig udluftning af lokaler og et ”sundt” forhold mellem temperaturen og den
relative luftfugtighed.
7.0 Udskiftning af batteri
Åbn batteriholderen, når batteriet skal skiftes ud. For at gøre
dette trykkes dækslet bagpå forsigtigt nedad og skubbes
væk i pilens retning. Skift batteriet ud med et nyt (1,5V AAA).
Fastgør igen låget på batteriholderen. Apparatet er nu igen
driftsklart.
Elektronisk materiel må ikke bortskaffes med dagrenovationen, men skal inden for den Europæiske Union – iht. RÅDETS OG KOMMISSIONENS
DIREKTIV 2002/96/EF af 27. januar 2003 vedrørende affald af elektrisk og elektronisk udstyr – bortskaffes
korrekt. Bortskaf dette produkt efter endt brugstid i henhold
til gældende love.
Page 68

L - 1
Käyttöohje – sisätilojen teRmohygRometRi BZ 05
FIN
SISÄLLYS
1.0 Turvallisuusohjeet . . . . . . . . . . . . . . . . . . . . L - 1
2.0 Tekniset erittelyt . . . . . . . . . . . . . . . . . . . . . L - 2
3.0 Toiminnot . . . . . . . . . . . . . . . . . . . . . . . . . . . L - 3
3.1 Kellonajan ja päivämäärän asetus . . . . . . . . . L - 3
3.2 Päivämäärän näyttö . . . . . . . . . . . . . . . . . . . . L - 4
3.3 Nollaus ..............................L - 4
3.4 Lämpötilan näyttö yksiköinä °C tai °F .......L - 4
4.0 Hälytystoiminto . . . . . . . . . . . . . . . . . . . . . . L - 4
4.1 Hälytyksen aktivointi . . . . . . . . . . . . . . . . . . . L - 5
4.2 Hälytyksen kytkeminen pois ..............L - 5
4.3 Hälytyksen deaktivointi ..................L - 5
5.0 Maksimi-/minimiarvon näyttö [MEMO] .......L - 5
6.0 Hyvinvoinnin ilmaisin ..................L - 6
7.0 Pariston vaihtaminen ..................L - 6
Tämä julkaisu korvaa kaikki aikaisemmat versiot. Mitään tämän julkaisun osaa ei
saa kopioida missään muodossa ilman antamaamme kirjallista lupaa tai muokata,
monistaa tai levittää elektronisia järjestelmiä apuna käyttäen. Oikeus teknisiin muutoksiin pidätetään. Kaikki oikeudet pidätetään. Tavaranimikkeitä käytetään takaa-
matta niiden vapaata käyttöä ja noudattaen suurimmaksi osaksi valmistajien omaa
kirjoitusasua. Käytetyt tavaranimikkeet ovat rekisteröityjä ja niitä tulee kohdella sen
mukaisesti. Pidätämme oikeuden muuttaa rakennetta, mikäli jatkuva tuotekehitys
sitä vaatii, sekä muotoa / värejä. Toimituksen laajuus saattaa poiketa tuotteiden kuvista. Tämä dokumentaatio on laadittu asiaankuuluvalla huolella. Emme ota mitään
vastuuta virheistä tai puutteellisuuksista. © TROTEC®
Lue seuraavat ohjeet ja määräykset huolellisesti läpi ja
huolehdi siitä, että tämä ohjekirja on aina mittauslaitteen
lähettyvillä.
1.0 TURVALLISUUSMÄÄRÄYKSET
Laite on suunniteltu käytettäväksi ainoastaan sisätiloissa,
eikä se sovellu ulkokäyttöön! Älä aseta sitä koskaan alttiiksi jäljempänä mainittujen alueiden ulkopuolella oleville
lämpötiloille tai ilmankosteuksille, sillä se voi haitata laitteen toimintakykyä tai laite voi jopa rikkoutua pysyvästi.
Laite on käynyt ennen sen toimittamista läpi laajat materiaali-, toiminta- ja laatutarkastukset. Siitä huolimatta tämä
laite voi aiheuttaa vaaroja, jos sitä käytetään epäasianmukaisesti! Huomioi seuraavat ohjeet: Vahingoista, jotka aiheutuvat tämän käyttöohjeen noudattamatta jättämisestä,
seuraa takuuvaateiden raukeaminen! Seuraamusvaurio-
Page 69

Käyttöohje – sisätilojen teRmohygRometRi BZ 05
L - 2
FIN
ista emme ota mitään vastuuta! Emme vastaa esine- tai
henkilövahingoista, jotka aiheutuvat epäasianmukaisesta
käsittelystä tai turvallisuusohjeiden noudattamatta jättämisestä! Näissä tapauksissa kaikki takuuvaateet raukeavat. Käyttölupaan liittyvistä syistä laitteen omavaltainen
rakenteen muuttaminen ja/tai muuntelu ei ole sallittua.
Koteloa ei saa purkaa lukuun ottamatta paristolokeron
kannen avaamista. Mittauslaitteet eivät ole leikkikaluja
eivätkä ne kuulu lasten käsiin! Älä koskaan kytke mittauslaitetta toimintaan heti, kun se on tuotu kylmästä
lämpimään tilaan. Tällöin syntyvä lauhdevesi saattaa tietyissä olosuhteissa tuhota laitteesi. Anna laitteen sopeutua huonelämpöön ennen sen päällekytkemistä. Älä jätä
pakkausmateriaalia lojumaan varomattomasti, sillä se voi
olla vaaraksi lasten leikeissä.
m Sijoituspaikan vaihtaminen kylmistä lämpimiin
ympäristöolosuhteisiin (ja päinvastoin) voi
aiheuttaa lauhteen muodostumista laitteen mit tauselektroniikkaan. Tämä fysikaalinen vaiku tus, jota ei voida estää rakenteellisin keinoin
missään mittauslaitteessa, johtaa vääriin mit-
tausarvoihin. Lämpötilaerojen suuruudesta ri ippuen laite vaatii n. 15—30 minuutin „sopeu tumisajan“ ennen kuin mittaamista voidaan
jatkaa.
2 .0 TEKNISET ERITTELYT
Käyttöalueet: asuin-/toimistotilat, varastot ja tilat, joiden ilma ei ole syövyttävää
Näyttö:
Lämpötila
Mittausalue: 0 °C – 50 °C (32 °F – 120 °F)
Mittaustarkkuus: ± 1,0 °C (1,8 °F)
Erottelutarkkuus: 0,1 °C (0,1 °F)
Ilmankosteus
Mittausalue: 10 % suht. kosteus ~ 90 % suht. kosteus
(ei kondensoiva)
Mittaustarkkuus: ± 5 % (40 % suht. kosteus ~ 80 %
suht. kosteus) muuten ± 8 %
Muuta: paristo: AAA 1,5V
Page 70

L - 3
Käyttöohje – sisätilojen teRmohygRometRi BZ 05
FIN
3 .0 OMINAISUUDET
3 .1 PÄIVÄMÄÄRÄN JA KELLONAJAN ASETUS
Mode-painike:
(Muuttaaksesi asetuksia pidä Mode-painiketta hetken
painettuna)
1 painallus: minuutit
2 painallus: tunnit
3 painallusta: 12/24h näyttö
4 painallus: kuukausi
5 painallus: päivä
ADJ – painike
Memo – painike
Kellonajan ja päivämäärän asetus
Voit katsoa hygrometrista sekä kellonajan että päivämäärän. Kellonaika näkyy jatkuvasti näytön yläkolmanneksessa. Tämä näkymä vaihtuu painamalla lyhyesti
[ADJ]-painiketta: näkyviin tulee päivämäärä: kuukausi
(vas.) ja päivä (oikea).
Aseta kellonaika ja/tai päivämäärä uudelleen seuraavalla
tavalla:
Paina [MODE]-painiketta ja pidä se hetki painettuna. Minuuttinäyttö alkaa vilkkua. Muuta minuuttinäyttöä painamalla [ADJ]-painiketta.
Paina [ADJ]-painiketta kerran muuttaaksesi minuuttinäyttöä minuutti kerrallaan tai pidä painiketta alas painettuna
päästäksesi nopeammin määrättyyn minuuttilukemaan.
Paina sen jälkeen [MODE]-painiketta kerran päästäksesi tuntien ja päivämäärän asetukseen. Tämä tapahtuu
samalla tavalla. Kun kaikki arvot (min/h/kk/pv) on käyty
kerran läpi, uusi arvo on tallennettu.
Laitteessa on sekä 12 että 24 tunnin näyttö. 12 tunnin
näytössä vasemmalla kellonajan vieressä on lisäksi lyhenne „AM“ (engl. aamupäivä, ts. klo 00:00—12:00) ja
„PM“ (engl. iltapäivä, ilta, ts. klo 12:00—24:00).
m Uusi arvo tallennetaan automaattisesti mi-
nuutin kuluttua. Näyttö lakkaa vilkkumasta.
Page 71

Käyttöohje – sisätilojen teRmohygRometRi BZ 05
L - 4
FIN
3.2 PÄIVÄMÄÄRÄN NÄYTTÖ
Paina [ADJ]-painiketta. Näytön yläkolmannekseen tulee
kellonajan tilalle päivämäärä. Vasemmalla näkyy
kuukausi, oikealla päivä.
Näyttö palaa n. 2 sekunnin
kuluttua takaisin kellonaikaan. Voit saada päivämäärän näkymään valinnaisesti myös pidemmän ajan,
kun pidät [ADJ]-painikkeen
pidempään alas painettuna.
Päivämäärän näyttö palaa
vasta [ADJ]-painikkeen vapauttamisen jälkeen takaisin kellonaikaan.
3.3 NOLLAUS
Nollaa kaikki asetetut tai tallennetut tiedot painamalla
laitteen takasivulla olevaa RESET-nappia. Sen jälkeen
laite on jälleen esiasetetussa tehdastoimintatilassa.
3.4 LÄMPÖTILAN NÄYTTÖ YKSIKÖINÄ °C TAI °F
Vaihtaaksesi lämpötilayksikön näyttöä °C:n ja °F:n välillä
paina laitteen takasivulla olevaa °C/°F-nappia.
4.1 HÄLYTYKSEN AKTIVOINTI
Paina lyhyesti [MODE]-painiketta. Näytön yläkolmannekseen
ilmestyy kellonajan tilalle hälytysaika; lukujen välissä oleva
kaksoispiste lakkaa vilkkumasta. Paina [MODE]-painiketta
uudelleen n. 1 sekunnin ajan. Hälytysajan minuuttinäyttö
alkaa vilkkua. Paina [ADJ]-painiketta kerran muuttaaksesi
minuuttinäyttöä minuutti kerrallaan tai pidä painiketta alas
painettuna päästäksesi nopeammin määrättyyn minuuttilukemaan.
Vaihda minuuteista tunteihin painamalla lyhyesti [MODE]-painiketta. Tuntinäyttö alkaa vilkkua. Paina
Page 72

L - 5
Käyttöohje – sisätilojen teRmohygRometRi BZ 05
FIN
[ADJ]-painiketta kerran muuttaaksesi tuntinäyttöä tunti
kerrallaan tai pidä painiketta
alas painettuna päästäksesi
nopeammin määrättyyn tuntilukemaan.
Paina uudelleen [MODE]-painiketta. Hälytysaika on tallennettu. Näytön vasempaan yläkolmannekseen tulee asetetun
hälytysajan viereen kellon
symboli.
4.2 Hälytyksen kytkeminen pois
Kytke hälytysääni pois painamalla jotain painiketta laitteen etusivulla.
4.3 Hälytyksen deaktivointi
Paina [MODE]-painiketta. Näytön yläkolmannekseen
tulee kellonajan tilalle hälytysaika. Kellon symboli
osoittaa, että hälytys on aktivoitu. Deaktivoi hälytys painamalla [ADJ]-painiketta kolme kertaa.
Näytössä ei enää ole kellon symbolia. Hälytys on
deaktivoitu.
5.0 Maksimi-/minimiarvon näyttö [MEMO]
Voit tarkastella viimeisestä nollauksesta lähtien mitattuja maksimiarvoja painamalla MEMO-painiketta yhden
kerran. Voit tarkastella viimeisestä nollauksesta lähtien
mitattuja minimiarvoja painamalla MEMO-painiketta
kaksi kertaa. Painamalla MEMO-painiketta kolmannen
kerran pääset takaisin vakionäyttötilaan. Jos MEMOpainiketta ei paineta kolmatta kertaa, näyttö palaa 10
sekunnin kuluttua automaattisesti takaisin vakiotilaan.
6.0 Hyvinvoinnin ilmaisin
Mikäli ympäristön lämpötila on 20 °C – 26 °C (68 °F
~ 78,8 °F) ja suhteellinen ilmankosteus 50 % – 70 %,
näyttöön tulee „hyvinvointisymboli“ A.
Page 73

Käyttöohje – sisätilojen teRmohygRometRi BZ 05
L - 6
FIN
Jos suhteellinen ilmankosteus on lämpötilasta riippumatta yli 70 %, symboli F ilmaisee liian suuren ilmankosteuden.
Jos suhteellinen ilmankosteus on lämpötilasta riippumatta alle 50 %, symboli K ilmaisee liian vähäisen
ilmankosteuden.
Liian vähäinen suhteellinen ilmankosteus aiheuttaa
usein päänsärkyä ja limakalvojen, erityisesti nenän ja
silmien, kuivumista. Tämä ärsytys tekee puolestaan alttiimmaksi taudinaiheuttajille, ja on siten usein tiennäyttäjänä infektioille.
Liian suuri suhteellinen kosteus vaikuttaa erityisesti
sydän- ja verenkiertoelimistön heikkoudesta kärsivillä
henkilöillä negatiivisesti hyvinvointiin. Lisäksi suljetuissa
ja riittämättömästi tuuletetuissa tiloissa homeriski kasvaa, mikä on samanaikaisesti lisäuhka terveydelle.
Huolehdi sen vuoksi aina riittävän hyvästä ja säännöllisestä tilojen tuuletuksesta ja lämpötilan ja suhteellisen
ilmankosteuden „terveestä“ suhteesta.
7.0 Pariston vaihtaminen
Kun paristo on vaihdettava, avaa paristolokero. Paina sitä
varten takakantta kevyesti alaspäin ja työnnä se pois nuolen
suuntaan. Vaihda tyhjä paristo uuteen paristoon (1,5 V AAA).
Kiinnitä paristolokeron kansi takaisin paikalleen. Laite on
jälleen käyttövalmis.
Sähkölaitteita ei saa heittää talousjätteisiin, vaan
ne täytyy Euroopan Unionin alueella – EUROO-
PAN PARLAMENTIN JA NEUVOSTON direktiivin
2002/96/EY, päivätty 27. tammikuuta 2003, koskien sähköisiä ja elektronisia käytettyjä laitteita, mukaisesti
– toimittaa asianmukaiseen hävitykseen. Loppuun käytetty
laite on poistettava käytöstä voimassaolevien lainmääräysten mukaisesti.
Page 74

M - 1
BRuKeRveiledning – teRmohygRometeR BZ 05
N
INNHOLDSFORTEGNELSE
1.0 Sikkerhetsinstrukser ..................M - 1
2.0 Tekniske spesifikasjoner ...............M - 2
3.0 Funksjoner . . . . . . . . . . . . . . . . . . . . . . . . . .M - 3
3.1 Innstille klokkeslett og dato . . . . . . . . . . . . . .M - 3
3.2 Vise dato . . . . . . . . . . . . . . . . . . . . . . . . . . . .M - 4
3.3 Reset ...............................M - 4
3.4 Temperaturvisning i °C eller °F ............M - 4
4.0 Alarmfunksjon . . . . . . . . . . . . . . . . . . . . . . .M - 4
4.1 Aktivere alarm . . . . . . . . . . . . . . . . . . . . . . . .M - 5
4.2 Slå av alarm ..........................M - 5
4.3 Deaktivere alarm . . . . . . . . . . . . . . . . . . . . . .M - 5
5.0 Visning av maksimums-/
minimumsverdi [MEMO] ..................M - 5
6.0 Velværeindikator . . . . . . . . . . . . . . . . . . . . .M - 6
7.0 Skifte batteri . . . . . . . . . . . . . . . . . . . . . . . .M - 6
DDenne publikasjonen erstatter alle tidligere versjoner. Ingen del av denne publikasjonen skal reproduseres eller bearbeides, mangfoldiggjøres eller fordeles ved hjelp
av elektroniske systemer i noen som helst form uten vår skriftlige godkjenning. Det
tas forbehold om tekniske endringer. Med forbehold om alle rettigheter. Alle varenavn
brukes av produsenten uten garanti for fri bruk og følgelig med dennes skrivemåte.
Varenavnene som brukes er registrert og skal betraktes som slike. Endringer i konstruksjon på grunn av en løpende produktforbedring samt endringer i form/farge blir
forbeholdt. Leveringsomfanget kan avvike fra produktillustrasjonene. Foreliggende
dokument er blitt utarbeidet med påkrevd omhyggelighet. Vi overtar intet ansvar for
feil eller utelatelser. © TROTEC®
Les nøye gjennom informasjonen og instruksene nedenfor og
sørg for at denne håndboken alltid er i nærheten av måleinstrumentet.
1.0 SIKKERHETSANVISNINGER
Måleren er konstruert utelukkende for bruk innendørs og
egner seg ikke til utendørs bruk! Måleren må aldri utsettes for temperaturer eller luftfuktighet utenfor de områder
som angis nedenfor, da dette kan påvirke funksjonene
eller ødelegge måleinstrumentet.
Apparatet har gjennomgått omfangsrike material-, funksjons- og kvalitetskontroller før det ble utlevert. Likevel
kan denne måleren utgjøre farer dersom den brukes på
ufagmessig måte! Ta hensyn til følgende anvisninger: Garantikravet bortfaller for skader som oppstår fordi denne
bruksanvisningen ikke har vært fulgt! Vi overtar intet ansvar
Page 75

N
BRuKeRveiledning – teRmohygRometeR BZ 05
M - 2
for følgeskader! Vi overtar intet ansvar for materielle skader eller personskader som oppstår på grunn av ukyndig
håndtering eller fordi sikkerhetsanvisningene ikke har
vært fulgt! I slike tilfeller opphører alle krav til garanti. Av
godkjennelsesgrunner er det ikke tillatt å foreta egenmektig
ombygging og/eller forandringer på måleren. Huset må ikke
tas fra hverandre, bortsett fra åpning av batterilokket. Måleinstrumenter er intet leketøy og skal ikke brukes av barn!
Ikke slå på måleinstrumentet med en gang det kommer fra
et kaldt rom inn i et varmt. Kondensvannet som dermed
dan1nes, kan ødelegge 2apparatet. La instrumentet oppnå
romtemperatur før det slås på. Ikke la emballasjen bli liggende upåaktet, det kan utgjøre farlig leketøy for barn.
m Når måleren flyttes fra kalde til varme omgivelser
(og omvendt), kan det oppstå kondens på måle elektronikken. Denne fysikalske effekten, som det
ikke er mulig å unngå ved noen måleinstrumenter,
fører til avvik i måleverdiene. Avhengig av hvor
stor temperaturdifferansen er, trenger måleren
en „akklimatiseringstid“ på ca. 15 - 30 minutter
før målingen kan fortsettes.
2 .0 TEKNISKE SPESIFIKASJONER
Bruksområder: Oppholds-/kontorrom, lager og rom
med ikke-korrosiv atmosfære
Visning / display
Temperatur
Måleområde: 0 °C til 50 °C (32 °F til 120 °F)
Målenøyaktighet: ± 1,0 °C (1,8 °F)
Oppløsning: 0,1 °C (0,1 °F)
Luftfuktighet
Måleområde: 10 % rel. fuktighet ~ 90 % rel. fuktighet
(ikke kondenserende)
Målenøyaktighet: ± 5 % (40 % rel. fuktighet ~ 80 % rel.
fuktighet) ellers ± 8 %
Annet: Batteri: AAA 1,5V
Page 76

M - 3
BRuKeRveiledning – teRmohygRometeR BZ 05
N
3 .0 FUNKSJONER
3 .1 INNSTILLE DATO OG KLOKKESLETT
Mode – knapp:
(For endring av innstillingen, hold Mode-knappen
trykket en kort stund)
Trykk 1 x: Minutter
Trykk 2 x: Timer
Trykk 3 x: 12/24 t visning
Trykk 4 x: Måned
Trykk 5 x: Dag
ADJ – knapp
Memo – knapp
Innstille klokkeslett og dato
På hygrometeret kan du lese av både klokkeslett og dato.
Klokkeslettet vises permanent i øverste tredjedel av displayet. Med et kort trykk på [ADJ]-knappen skifter du til en
annen visning: nå vises dato med måned (til venstre) og dag
(til høyre).
Gå frem på følgende måte for å innstille klokken og/eller dato
på nytt:
Trykk på [MODE]-knappen og hold den trykket et lite øyeblikk. Minuttvisningen blinker. Trykk på [ADJ]-knappen for å
endre minuttvisningen.
Trykk 1 x på [ADJ]-knappen for å forandre minuttvisningen
med ett minutt for hvert trykk, eller hold knappen trykket for
raskere å komme til et bestemt minuttall. Trykk deretter 1 x
på [MODE]-knappen for å komme til time- og datoinnstillingen. Gå frem på samme måte. Når alle verdier (min/t/mnd/
dag) er gjennomgått, er den nye verdien lagret.
Måleren har både en 12-timers og en 24-timers visning. Ved
12-timers visningen vises også forkortelsen „AM“ (betegnelse som brukes på engelsk for formiddag, dvs. fra 00:00
til 12:00) og „PM“ (ettermiddag/kveld, dvs. fra kl 12:00 til
24:00) til venstre for klokkeslettet.
m Den nye verdien lagres automatisk etter et
minutt. Visningen slutter å blinke.
Page 77

N
BRuKeRveiledning – teRmohygRometeR BZ 05
M - 4
3.2 VISE DATO
Trykk på [ADJ]-knappen.
I den øverste tredjedelen
av displayet vises datoen
i stedet for klokkeslettet.
Til venstre vises måned, til
høyre dag. Etter ca. 2 sekunder vises klokkeslettet
igjen. Ved å holde [ADJ]trykket kan du velge å vise
datoen lenger. Datovisningen går tilbake til visning
av klokkeslettet først etter
at du har sluppet [ADJ]knappen.
3.3 RESET
For å tilbakestille alle innstilte eller lagrede data trykker
du på RESET-knappen på baksiden av måleren. Deretter
er måleren tilbake i fabrikkinnstilling.
3.4 TEMPERATURVISNING I °C ELLER °F
For å skifte mellom temperaturenhetene °C og °F trykker du på °C/°F-knappen på baksiden av måleren.
4.1 AKTIVER ALARM
DTrykk kort på [MODE]-knappen. I den øverste tredjedelen
av displayet vises alarmtiden i stedet for klokkeslettet, og
kolonet mellom tallene slutter å blinke. Trykk på [MODE]knappen en gang til i ca. 1 sekund. Minuttvisningen for
alarmtiden blinker. Trykk 1 x på [ADJ]-knappen for å forandre minuttvisningen med ett minutt for hvert trykk, eller
hold knappen trykket for raskere å komme til et bestemt
minuttall.
Trykk kort på [MODE]-knappen for å gå fra minutt til time.
Timevisningen blinker. Trykk 1 x på [ADJ]-knappen for å fo-
Page 78

M - 5
BRuKeRveiledning – teRmohygRometeR BZ 05
N
randre timevisningen med ett
minutt for hvert trykk, eller hold
knappen trykket for raskere å
komme til et bestemt timetall.
Trykk på [MODE]-knappen en
gang til. Alarmtiden er lagret.
Oppe til venstre i den øverste
tredjedelen av displayet vises
et klokkesymbol ved siden av
innstilt alarmtid.
4.2 Slå av alarmen
For å slå av alarmen trykker du på en av knappene på
forsiden av måleren.
4.3 Deaktivere alarmen
Trykk på [MODE]-knappen. I den øverste tredjedelen
av displayet vises alarmtiden i stedet for klokkeslettet.
Klokkesymbolet viser at alarmen er aktivert. Trykk
3 x på [ADJ]-knappen for å deaktivere alarmen. Klokkesymbolet vises ikke på displayet lenger. Alarmen er
deaktivert.
5.0 Visning av maksimums-/
minimumsverdi [MEMO]
For å se maksimumsverdiene som har vært målt siden
siste nullstilling, trykk 1 x på MEMO-knappen. For å se
minimumsverdiene som har vært målt siden siste nullstilling, trykk 2 x på MEMO-knappen. Trykk på MEMOknappen en tredje gang for å komme tilbake til standard
visningsmodus. Trykker du ikke på MEMO-knappen en
tredje gang, går visningen automatisk over til standardmodus etter 10 sekunder.
6.0 Velværeindikator
Ligger omgivelsestemperaturene mellom 20 °C og 26
°C (68 °F ~ 78,8 °F) og relativ luftfuktighet mellom 50 %
og 70 %, vises „velværesymbolet“ A på displayet.
Er relativ luftfuktighet, uavhengig av temperaturene,
over 70 %, vises symbolet F for for høy luftfuktighet.
Page 79

N
BRuKeRveiledning – teRmohygRometeR BZ 05
M - 6
Er relativ luftfuktighet, uavhengig av temperaturene, under 50 %, vises symbolet K for for lav luftfuktighet.
En for lav relativ luftfuktighet fører ofte til hodepine og
til at slimhinnene, spesielt i nese og øyne, tørker. En slik
irritasjon gjør deg mer mottakelig for basiller/viruser og
baner ofte veien for infeksjoner.
For personer med problemer med hjerte-/karsystemet
har for høy relativ luftfuktighet en negativ innvirkning på
velværet. I tillegg stiger faren for mugg i lukkede eller
utilstrekkelig ventilerte rom, hvilket samtidig utgjør nok
en helsefare.
Vær derfor påpasselig med å lufte rommene godt og jevnlig, og påse at det er et ”sunt” forhold mellom temperatur og relativ luftfuktighet.
7.0 Skifte batteri
Åpne batterirommet for å skifte batteriet. Trykk lokket på
baksiden lett ned og skyv det av i pilens retning. Skift ut det
tomme batteriet med et nytt (1,5V AAA). Fest batterilokket
igjen. Måleren er nå klar til bruk igjen.
Elektroniske apparater skal ikke kastes i hushold-
ningsavfallet, men skal i EU – i samsvar med EU-
ROPAPARLAMENTETS RÅDSDIREKTIV 2002/96/
EF av den 27. januar 2003 om elektriske og elektroniske apparater – avfallsbehandles på forskriftsmessig
måte. Ved endt levetid skal dette apparatet avfallsbehandles
i samsvar med gjeldende lovbestemmelser.
Page 80

N - 1
BRuKsanvisning – RumsteRmohygRometeR BZ 05
S
SAMMANFATTNING
1.0 Säkerhetsinformation . . . . . . . . . . . . . . . . . N - 1
2.0 Tekniska specifikationer . . . . . . . . . . . . . . . N - 2
3.0 Funktioner . . . . . . . . . . . . . . . . . . . . . . . . . . N - 3
3.1 Ställa in tid och datum ..................N - 3
3.2 Visa datum ...........................N - 4
3.3 Återställa(Reset) .......................N - 4
3.4 Visa temperatur i °C eller °F ..............N - 4
4.0 Larmfunktion . . . . . . . . . . . . . . . . . . . . . . . . N - 4
4.1 Aktivera larm . . . . . . . . . . . . . . . . . . . . . . . . . N - 5
4.2 Stänga av larm ........................N - 5
4.3 Avaktivera larm . . . . . . . . . . . . . . . . . . . . . . . N - 5
5.0 Visa maximi-/minimivärde [MEMO] . . . . . . . . N - 5
6.0 Välmående-indikator ..................N - 6
7.0 Batteribyte . . . . . . . . . . . . . . . . . . . . . . . . . . N - 6
Denna publikation ersätter samtliga tidigare publicerade Ingen del av denna publikation får reproduceras och spridas på något sätt – elektronisk eller på annat sätt- utan
vårt skriftliga medgivande. Rätten till tekniska ändringar förbehålls Alla rättigheter
förbehålls Varumärken kommer att nämnas fritt utan ersättning i enlighet med den
fria förfoganderätten och skrivas i enlighet med ägarens intentioner Använda varunamn är registrerade och skall behandlas som sådana Vi förbehåller oss rätten
till konstruktionsändringar liksom ändringar när det gäller färg och form i produktionsförbättrande syfte Leveransomfånget kan avvika från det avbildade Föreliggande
dokument har tagits fram med största omsorg Vi åtar oss inget ansvar för ev. fel eller
uteblivna uppgifter. © TROTEC®
Läs igenom följande information och anvisningar noggrant
och se till att denna handbok alltid är placerad i närheten av
mätinstrumentet.
1.0 SÄKERHETSINFORMATION
Instrumentet är uteslutande konstruerat för att användas
i lokaler inomhus och ej för användning utomhus! Ställ
aldrig in temperaturen eller luftfuktigheten utanför de områden som listas nedan, eftersom det kan påverka instrumentets funktionsduglighet eller förstöra instrumentet
helt och hållet.
Apparaten har före leverans genomgått ett omfångsrikt
test vad gäller material, funktion och kvalitet Trots detta
kan instrumentet bli farligt, om det ställs in på ett olämligt
sätt! Beakta följande föreskrifter: Skador som förorsakats av att man inte följt bruksanvisningen, ersätts ej av
Page 81

S
BRuKsanvisning – RumsteRmohygRometeR BZ 05
N - 2
garantin! Vi tar inget ansvar för följdskador! Vid sak- eller
personskador, som förorsakats av felaktigt handhavande
eller på grund av att man inte följt säkerhetsanvisningarna, frånsäger sig tillverkaren allt ansvar! I sådana fall gäller inga garantier. Av licensskäl är egenmäktiga ombyggnationer och/eller förändringar av apparaten ej tillåtna.
Det är förbjudet att öppna höljet med undantag av locket
till batterifacket. Mätinstrument är inga leksaker och skall
hållas borta från barn! Slå aldrig på mätinstrumentet direkt efter att det har förflyttats från ett kallt rum till ett
varmt. Kondensvattnet som då uppstår kan i vissa fall
förstöra instrumentet. Låt apparaten komma upp i rumstemperatuer innan den sätts på. Låt inte emballaget ligga
framme eftersom det kan utgöra en fara för barn som vill
leka med det.
m När apparaten förflyttas från en kall till en
varm lokal (och tvärtom) kan detta medföra
att det bildas kondens på mätelektroniken.
Denna fysikaliska egenskap som inte kan
undvikas på någon mätapparat kan leda till
felaktiga mätvärden. Beroende på höjden och
temperaturskillnaderna behöver instrumentet
en „acklimatiseringstid“ på ca 15 - 30 minuter,
innan mätproceduren kan fortsätta.
2 .0 TEKNISKA SPECIFIKATIONER
Tillämpningar: Vardagsrum/kontorsrum, lager och lokaler med icke-korrosiv atmosfär
Vy / Display:
Temperatur
Mätområde: 0°C till 50°C (32°F till 120°F)
Mätnoggrannhet: ± 1.0 °C (1.8 °F)
Upplösning: 0.1 °C (0.1 °F)
Luftfuktighet
Mätområde: 10 % rel. fuktighet ~ 90 % rel. fuktighet
(inte kondenserande)
Mätnoggrannhet: ± 5 % (40 % rel. fuktighet ~ 80 % rel.
fuktighet) annars ± 8 %
Övrigt: Batteri: AAA 1.5V
Page 82

N - 3
BRuKsanvisning – RumsteRmohygRometeR BZ 05
S
3 .0 FUNKTIONER
3 .1 STÄLLA IN DATUM OCH TID
Mode – knappen:
(För att ändra inställningar håller du Mode-knappen
nertryckt en kort stund)
1 x trycka: Minuter
2 x trycka: Timmar
3 x trycka: Visa 12/24h
4 x trycka: Månad
5 x trycka: Dag
ADJ – knappen
Memo – knappen
Ställa in tid och datum
Du kan läsa av både tid och datum på din hygrometer. Tiden visas permanent i displayens övre tredjedel. Genom att
snabbt trycka på [ADJ]-knappen byter du vy: då visas datum
med månad (till vänster) och dag (till höger).
För att ställa in tiden och/eller datumet på nytt, gör du enligt
följande:
Tryck på [MODE]-knappen och håll den nertryckt en kort
stund. Minutindikatorn börjar blinka. Tryck på [ADJ]-knappen,
för att ändra minuter.
Tryck på [ADJ]-knappen 1x, för att ändra minuter en minut i
taget, eller håll knappen nertryckt, för att gå till det avsedda
minuttalet snabbare. Tryck därefter på [MODE]-knappen 1x,
för att gå till inställningar för timmar och datum. Detta går till
på samma sätt. När du har gått igenom alla värden en gång
(Min/Tim/Mån/Dag), har det nya värdet sparats.
Både en 12-timmars-vy och en 24-timmars-vy är inkluderade i instrumentet. För 12-timmars vyn visas alltid till vänster
om tiden med förkortningen „AM“ (englelska för förmiddag,
dvs. från 00:00 till 12:00) och „PM“ (engelska för eftermiddag, kväll, dvs. från 12:00 till 24:00).
m Det nya värdet sparas automatiskt efter en
minut. Skärmen slutar att blinka.
Page 83

S
BRuKsanvisning – RumsteRmohygRometeR BZ 05
N - 4
3.2 VISA DATUM
Tryck på [ADJ]-knappen.
I övre tredjedelen på displayen visas datum istället
för tid. Till vänster visas
månad, till höger visas dag.
Vyn slår automatiskt om till
tid igen efter 2 sekunder.
Du kan välja att behålla datumet en längre tid genom
att hålla [ADJ]-knappen
nertryckt längre. Datumvyn växlar tillbaka till tid
först när du släpper [ADJ]knappen.
3.3 RESET
För att återställa (Reset) all förinställd eller sparad data,
trycker du på RESET-knappen på instrumentets baksida.
Instrumentet får därmed åter det förinställda fabriksläget.
3.4 VISA TEMPERATUR I °C ELLER °F
För att växla mellan °C och °F i temperaturvyn, trycker
du på °C/°F-knappen på instrumentets baksida.
4.1 AKTIVERA LARM
Tryck snabbt på [MODE]-knappen. I den övre tredjedelen av
displayen visas i stället tid och larmtid, dubbelpunkten mellan talen upphör att blinka. Tryck på [MODE]-knappen i ca 1
sekunder igen. Minutindikatorn för larmtiden börjar blinka.
Tryck på [ADJ]-knappen 1x, för att ändra minuter en minut i
taget, eller håll knappen nertryckt, för att gå till det avsedda
minuttalet snabbare.
Tryck snabbt på [MODE]-knappen, för att växla från minuter till timmar. Timindikatorn börjar blinka. Tryck på [ADJ]knappen 1x, för att ändra timmar en timme i taget, eller håll
Page 84

N - 5
BRuKsanvisning – RumsteRmohygRometeR BZ 05
S
knappen nertryckt, för att gå till
det avsedda timtalet snabbare.
Tryck på [MODE]-knappen
igen. Larmtiden har sparats.
Uppe till vänster i displayens
övre tredjedel visas symbolen
av en klocka bredvid den inställda larmtiden.
4.2 Stänga av larmet
Tryck på knappen på instrumentets framsida, för att
stänga av larmsignalen.
4.3 Avaktivera larm
Tryck på [MODE]-knappen. I övre tredjedelen på displayen visas i stället larmtiden. Symbolen av en klocka
visar att larmet har aktiverats. Tryck på [ADJ]-knappen
3x, för att avaktivera larmet. Klocksymbolen visas inte
längre på displayen. Larmet har avaktiverats.
5.0 Visa maximi-/minimivärde [MEMO]
För att titta på det senast återställda uppmätta maximivärdet, trycker du på 1x MEMO-knappen. För att titta
på det senast återställda uppmätta minimivärdet, trycker
du på 2x MEMO-knappen. Tryck på MEMO-knappen en
tredje gång för att återgå till standard-visningsläget.
Om du inte trycker på MEMO-knappen en tredje gång,
hoppar skärmen automatiskt tillbaka till standardläget
efter 10 sekunder.
6.0 Välmående-indikator
Om den omgivande temperaturen ligger mellan 20°C
och 26°C (68°F ~ 78,8°F) och den relativa luftfuktigheten mellan 50% och 70% visas „Välmåendesymbolen“
A i displayen.
Om den relativa luftfuktigheten är mer än 70%, oavsett
temperatur, visas symbolen F för för hög luftfuktighet.
Om den relativa luftfuktigheten är mindre än 50%, oavsett temperatur, visas symbolen K för för låg luftfuktighet.
Page 85

S
BRuKsanvisning – RumsteRmohygRometeR BZ 05
N - 6
En för låg luftfuktighet leder ofta till huvudvärk samt
uttorkade slemhinnor, speciellt i näsa och ögon. Denna
irritation gör att man blir mer mottaglig för bakterier och
föregår ofta infektioner.
En för hög relativ luftfuktighet är negativt för hälsan i
synnerhet för personer med svagt hjärt-kärlsystem.
Därtill bidrar stängda och ovädrade rum till en förhöjd
mögelrisk, något som samtidigt bidrar till en hälsorisk.
Se till att du alltid luftar lokalerna tillräckligt och regelbundet för att bibehålla en „hälsosam“ balans mellan
temperatur och relativ luftfuktighet.
7.0 Batteribyte
Om batteriet måste bytas öppnar du batterluckan. Tryck locket på baksidan lätt nedåt och tryck det i pilens riktning på
luckan. Byt ut det tomma batteriet mot ett nytt batteri (1,5V
AAA). Sätt fast batterilocket igen. Apparaten är nu klar att
användas igen.
Elektroniska apparater får ej slängas i hushålls-
soporna utan skall enligt EU:s riktlinjer 2002/96/
EG –DET EUROPEISKA PARLAMENTET OCH RÅ-
DET från 27 januari 2003 angående fackmannamässig skrotning av elektriska apparater, elektronik och
förbrukat material. Vänligen skrota apparaten när den tjänat
ut enligt de lagliga föreskrifterna.
Page 86

Page 87

Page 88

TROTEC® GmbH & Co. KG • Grebbener Straße 7 • D-52525 Heinsberg
Tel.: +49 (0) 24 52 / 962 - 400 • Fax: +49 (0) 24 52 / 962 - 200
www.trotec.de • E-Mail: info@trotec.de
 Loading...