

TRONXY XY-3 Instructions Manual
Instructions
Model name:XY-3
SHENZHEN TRONXY TECHNOLOGE CO.,LTD

Notice
Before using this machine, please carefully read this notice and
the following notes:
1. Children should stay away from the machine when using the
machine. Children are forbidden to touch the machine in use.
2. Please put the machine on a stable surface before using the
machine.
3. Please keep this notice for future reference.
4. The open hole of the housing is strictly prohibited to be
covered for ventilation and heat dissipation of the machine to
avoid overheating.
5. Please pay attention to the notice and warning posted on the
machine to avoid danger or injury.
6. It is strictly forbidden to use the machine in the environment
of inflammable and explosive substances.
7. It is strictly prohibited to pour any liquid or dust into the
machine, or it will damage the machine or even cause a
dangerous accident.
8. Please do not disassemble and repair the machine without
permission. In addition to normal quick assembly steps and
common problems, please ask a professional to deal with them.
9. Do not use the machine under high temperature (above 85 ° C)
environment, otherwise may damage to the machine.
10. It is recommended not to run the printer when unattended.
11. The machine is not covered by warranty as follows:
A. Product damage caused by abnormal external force (such as falling, extrusion,
knock, collision);
B. product damage caused by violation of product operation manual;
C. Product damage caused by use of materials that are not compatible with or
have not been recognized by relevant national standards;
D. beyond use under the conditions of use (such as the mainboard working
environment for 5 to 40 ℃, customers in the above 40 ℃ or below 5 ℃ when used
under the condition of damage).
E. damage caused by privately modifying firmware and appearance structure.
F. Damage caused by improper storage (such as dampness, mildew, etc.).
G. Damage caused by irresistible external factors.
H. Use parts normally, such as printing baseplate, nozzle and other accessories.
I. pure artificial condition damage.
J. If the warranty period is exceeded or the valid documents for the warranty
period are not available.

Catalogue
1、Introduction to basic parameters………… 4
2、Packing list ………………………… 5
3、Introduction to machine structure …… 6
4、Installation instructions……………… 7
5 、Connection ………………………… 8
6、Product debugging …………………… 9
7、Print operation………………………… 10
8、Fault cause analysis………………………21
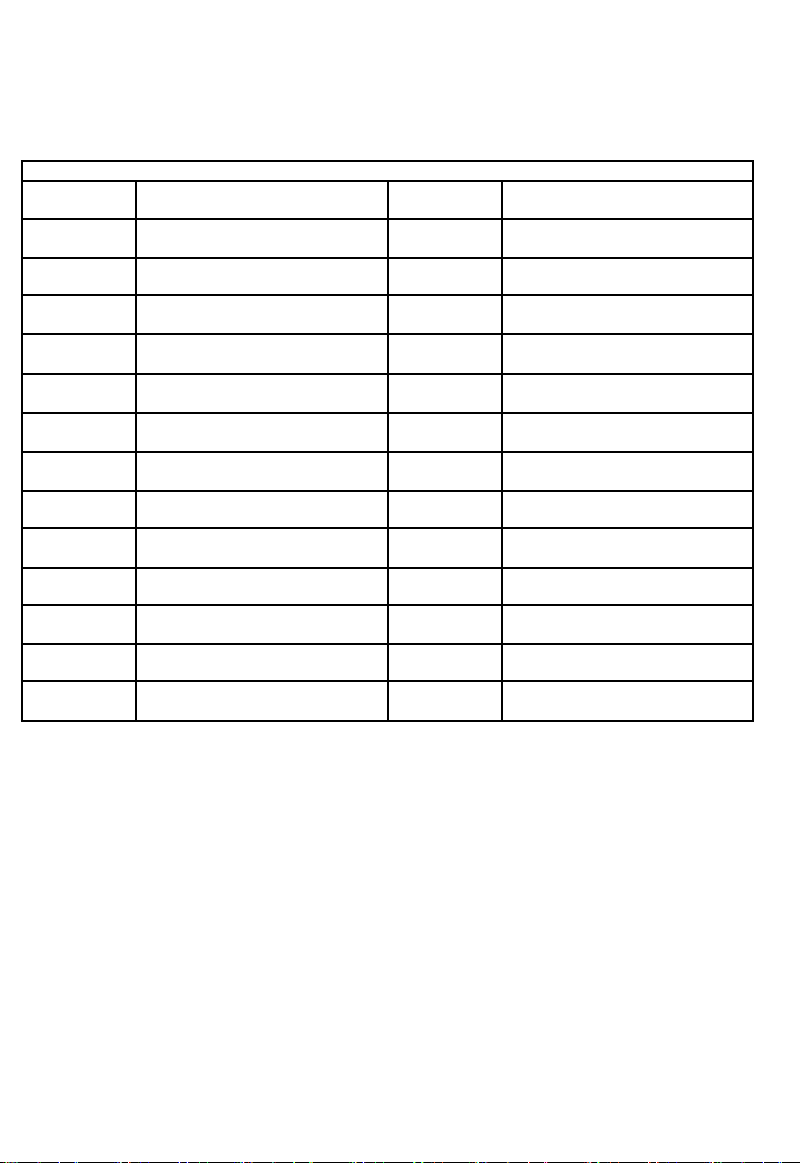
Print size
310*310*330mm
Power inpout
110V/220V AC,50/60Hz
Positioning
accuracy
X/Y0.0125mm,Z0.02mm
Power output
DC 12V 30A
Print speed
20-100mm/s(advs 60mm/s)
Connection
USB interface.SD card
Nozzel size
0.4mm optional
Hotbed
temperature
Support
print color
single color
Nozzle
temperature
≤260°C
Materials
support
PLA.ABS.HIPS.WOOD.PC.PVC
environmental
temperature
8-40°C
print thickness
0.1mm-0.4mm optional
Environmental
humidity
20-80%
Machine
materials
Aluminium and sheet metal
Slicing software
TRONXY exclusive slice software
Machine weight
9.5kg
File format
STL.OBJ.DAE.AMF.G-Code
Packing weight
≈ 11kg
Operate
software
Repetier-Host.Cura
Packing size
630*552*195mm
Operate system
WinXP/Win7/MacOS
Machine size
588*544*529mm
Power failure
resume print
Support
Display
3.5 inches full color touch screen
Certificates
CE FCC
filament runout
detector
optional
1、Machine parameter
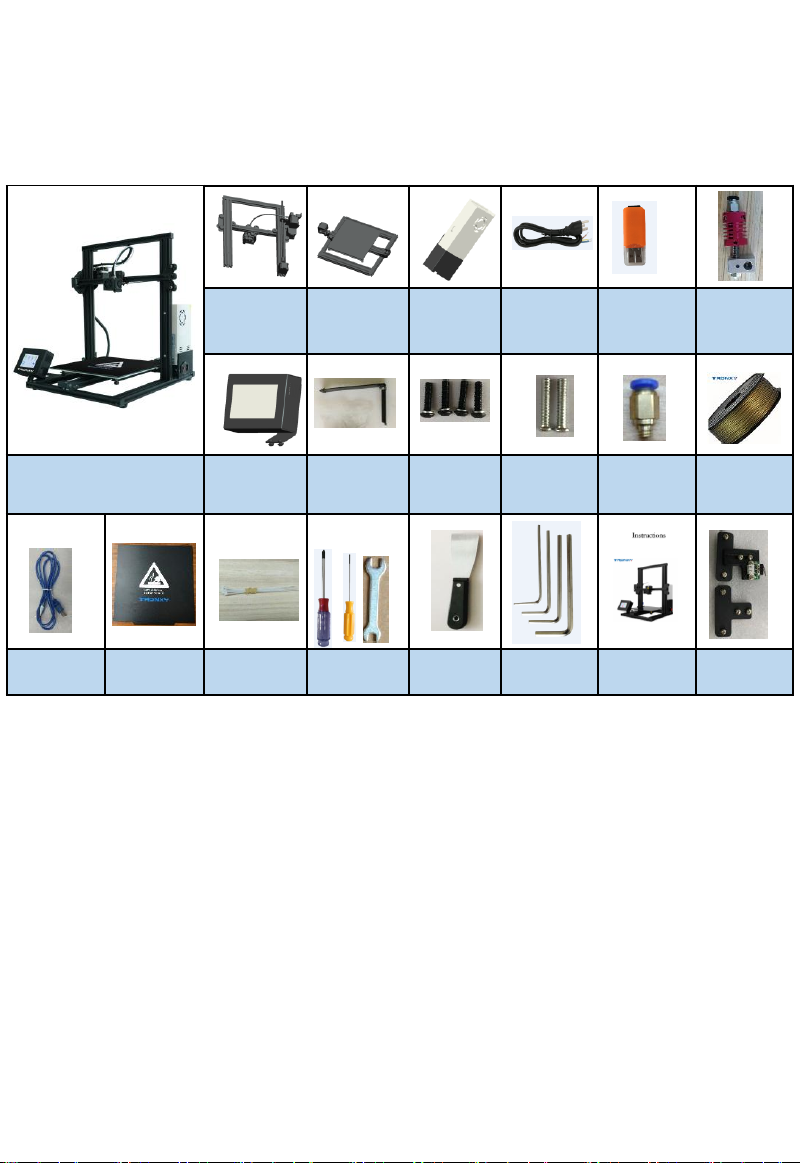
Upper rack Base
Power
supply
Power lines
Reader
(incl SD
card)
printer head
XY-3
Control box
ilament rack
HM5*25
4PCS
PM4*25
2PCS
quick coupling
M6
Filament
USB cable
Hotbed
sticker
Tie
screwdriver
Scrabble
knife
Hexagonal
wrench
Specification
reinforced p
late
2、Packing list
2
17
18
22
23
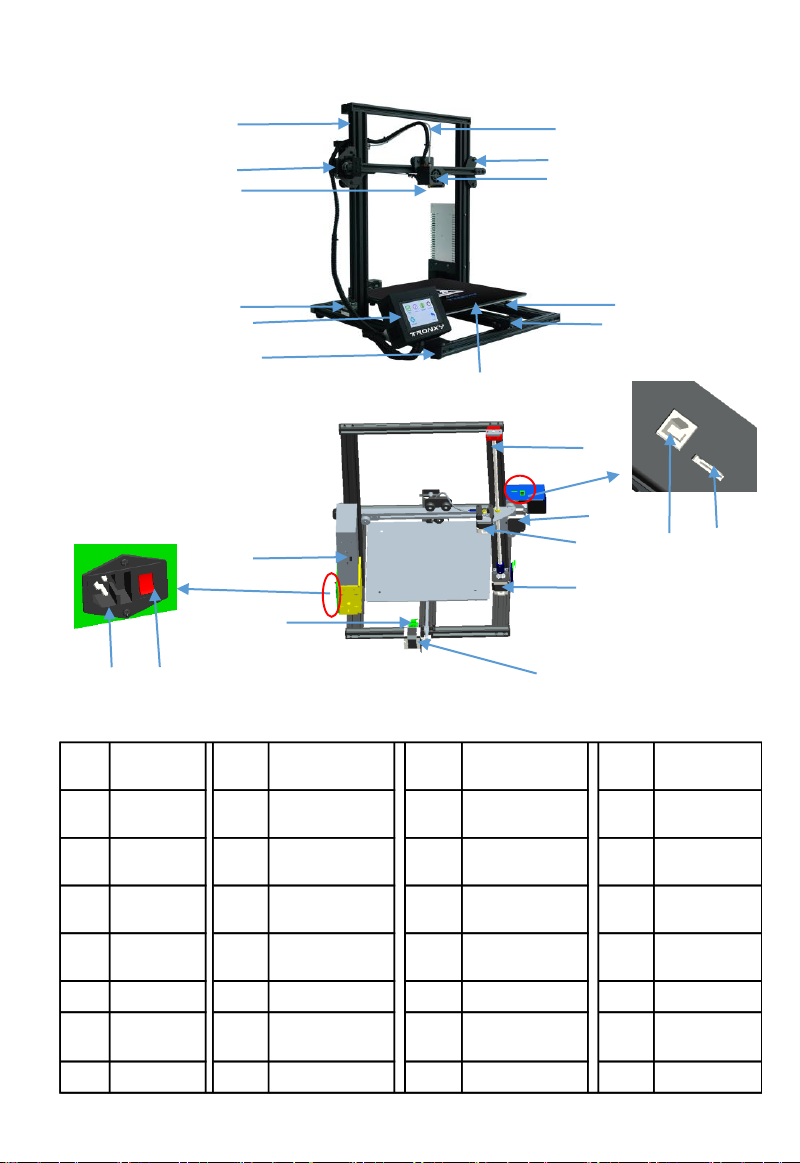
Serial
number
Name
Serial
number
Name
Serial
number
Name
Serial
number
Name
1 Upper rack 8
right slider
assembly
15 feeding motor 22
power
interface
2
Left slider
assembly
9 print head parts 16 Z moto 23
voltage
change-over
3 extruder 10 leveling nuts 17 USB interface 24
4
Z-Endstop
11 Y axis wheel 18
SD card
interface
25
5 control box 12 hotbed 19 Y axis motor 26
6
bottom
frame
13 lead screw 20
Z-Endstop
27
7 teflon tube 14 X axis moto 21 Power switch 28
1
3
4
5
6
7
8
9
10
11
12
13
15
14
16
19
20
21
3、Introduction to machine structure
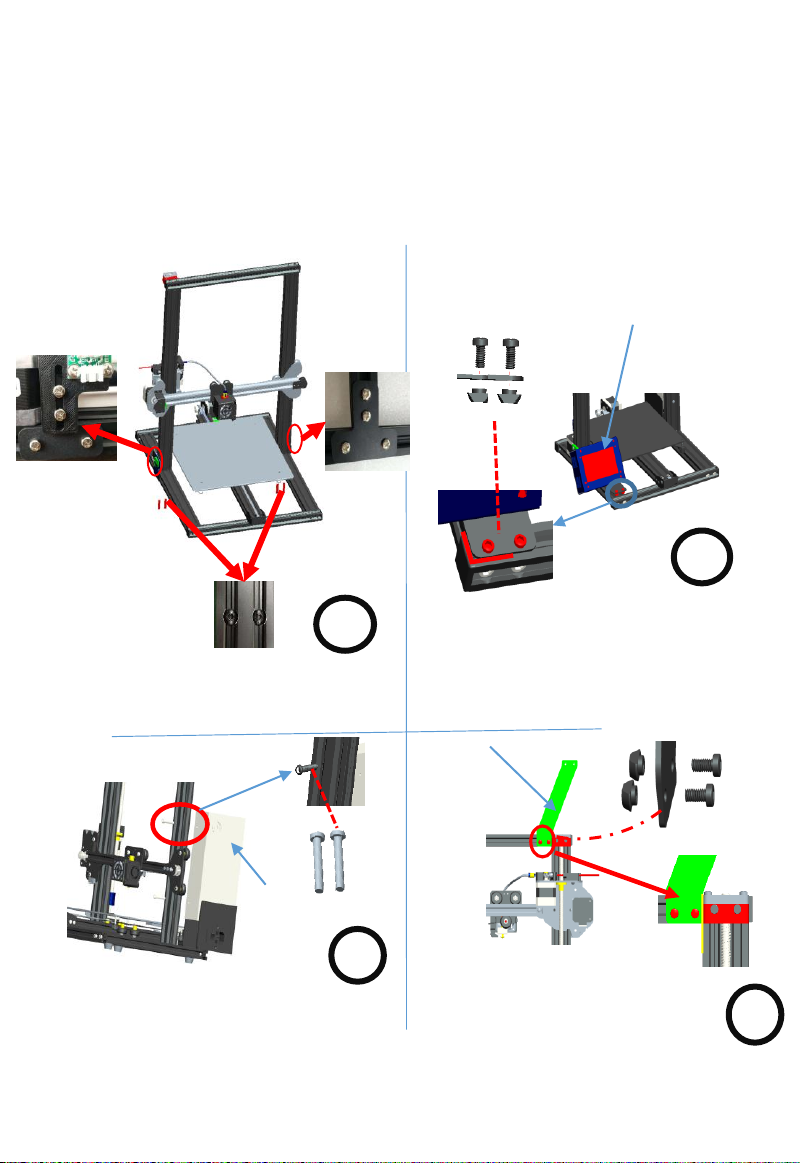
4、Installation instructions
1
Run 2PCS M4*25 screws through the
front z-axis profile and lock the power
on the back of the profile.
Take out the material rack, lock
the boat nut with the screw knife,
and fix the material rack on the
upper beam.
Put the four holes on the base, and lock the four
holes on the base with four PM5*25 screws.
Take left and right reinforced plate, Install on the pr
inter as shown
3
4
Power
supply
Control box
Tighten the boat nuts with a
screwdriver,Fix the control box on
the aluminum of the base.
Pay attention: The control box must be fixed
on the beam, otherwise its easy to hit the
print head.
2
M4*25
Filament rack
left
right
 Loading...