

Page 1
USER MANUAL
(v1.0.0, April 2011)
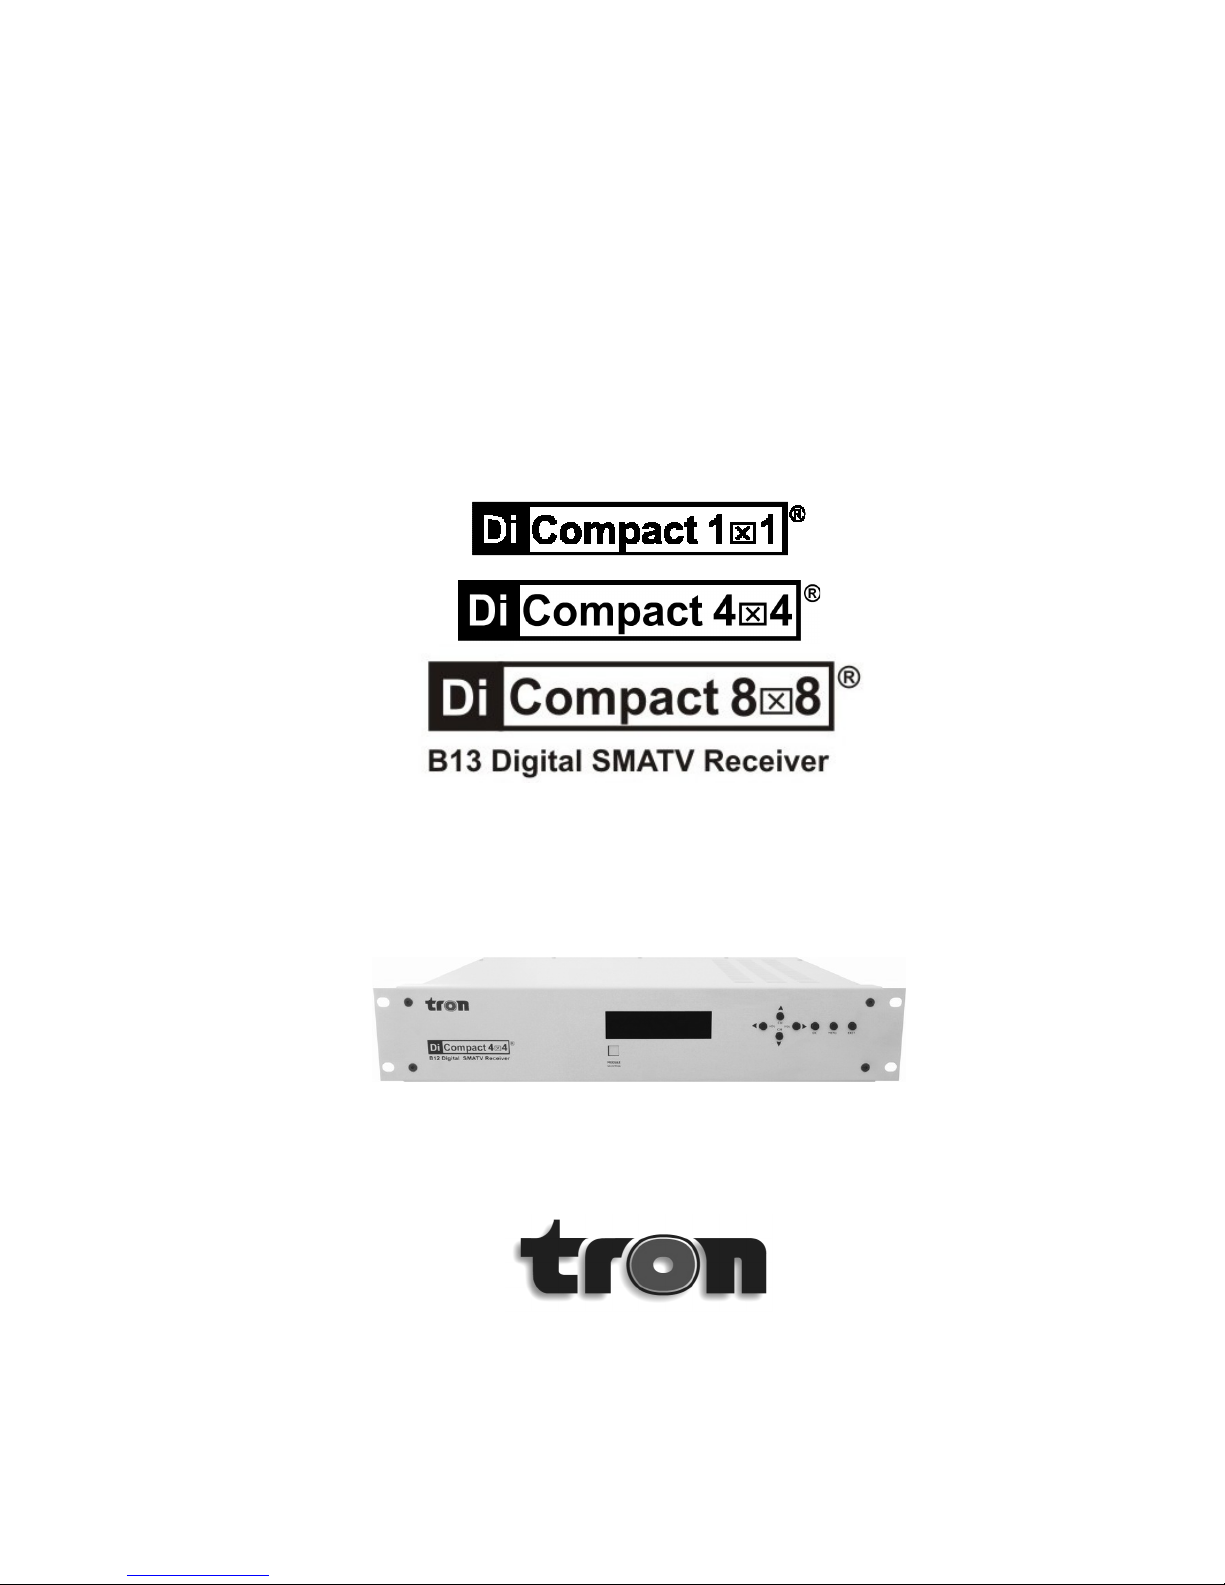
DIGITAL SMATV RECEIVER
(1-4-8 CHANNELS, 19" Rack Mount)
www.tron.com.tr
Page 2

Page 3

Di-Compact B13 Digital SMATV Receiver
3
Contents
Contents ............................................................................................................................. 3
Caution Statements ........................................................................................................... 4
1. Overview .................................................................................................................... 5
2. Features ..................................................................................................................... 5
3. Safety Warnings ........................................................................................................ 5
4. Unpacking .................................................................................................................. 6
5. Front Panel ................................................................................................................ 6
6. Rear Panel ................................................................................................................. 7
7. Installation Steps ...................................................................................................... 8
8. Basic Operations....................................................................................................... 8
9. General Viewing ...................................................................................................... 10
9.1 Key Lock .......................................................................................................... 10
9.2 Channel Control .............................................................................................. 10
9.3 Volume Control ............................................................................................... 10
10. Channel Setup ......................................................................................................... 11
10.1 Satellite Selection ........................................................................................... 11
10.2 Manual Search/Edit ........................................................................................ 11
10.3 LNB Settings ................................................................................................... 12
10.4 Automatic Search ........................................................................................... 14
11. Other Settings ......................................................................................................... 15
11.1 System Settings .............................................................................................. 15
11.2 Information ...................................................................................................... 16
11.3 Biss .................................................................................................................. 17
11.4 Firmware & Channel Information Transfer ................................................... 17
11.5 Factory Reset .................................................................................................. 17
12. Technical Specifications ........................................................................................ 15
13. Contact Information ................................................................................................ 20
Page 4
Di-Compact B13 Digital SMATV Receiver
4
!
Caution Statements
Please observe the following safety cautions before operating the equipment.
Precautions to Avoid
Electric Shock
Avoid Moisture
Thoroughly check your electrical grounding of
your mains network and connectors prior to
power on the device. Make sure that all power
plugs are grounded type to ensure proper
grounding. If the equipment will not be used for
a long time, disconnect the power plug.
Disconnect the power plug from mains outlet
under the following conditions:
1. Damage on power cord or plug,
2. Equipment gets wet or substantial moisture
enters the chassis,
3. Equipment exposed to rain or water,
4. Equipment is dropped or damaged,
5. You detect some irregularity or abnormal
situation on the device.
Do not use this equipment in high moisture
environment.
No Heavy Stacking
Do not stack many equipments without
spacing. Allow proper ventilation.
Do Not Touch with Bare
Hands
Do not touch the equipment which operates
for long time; it may be too hot.
General Cautions
1. Read the entire User Manual prior to
usage.
2. Do not place this equipment on an
unstable support.
3. Do not place objects on top of the
equipment which block the ventilation holes.
4. Do not place any radioactive object on
top, adjacent or near to the equipment.
5. Provide proper room ventilation during
operation of this equipment.
6. After the equipment is serviced, receive
approval from authorized service personnel
for reliability of putting back the equipment
to operation.
Do Not Open
Unless being authorized by the manufacturer:
1. Do not open the chassis of device.
2. Do not try to repair defected device by
yourself.
Also, even though you are entitled by
manufacturer to repair the equipment, do not
use unauthorized part for repairing.
Page 5

Di-Compact B13 Digital SMATV Receiver
5
1. Overview
Di-Compact Digital SMATV Demodulators are QPSK to AV demodulators to be integrated with
TV modulators to built SMATV Broadcasting Systems, which receive and process free (FTA)
digital satellite channels.
2. Features
• MPEG-2 and DVB-S compliant 1-4 or 8 independent modules within modular external
structure housing,
• LED display on front panel; programmed without remote controller over user friendly OSD
interface,
• Remembers last channel on power-up,
• 256 colors OSD menus, supports up to 10 language options, including English,
• EPG function, support PIG (Picture in Graphics) display,
• Stores up to 64 LNBs, 2000 transponders and 5000 channels,
• Auto network or transponder search function, code stream information update,
• Multiple LNB control by DiSEqC 1.2 and band selection with 22 kHz signal,
• Supports Normal, Universal and LNBF types of LNBs,
• SCPC/MCPC receivable from C/Ku band satellite,
• Automatic PAL to NTSC conversion and vice-versa,
• Mono, Dual Mono or Stereo (Left and Right) audio output with level adjustment,
• LNB powering on all ports.
• Supports OSD TV / Teletext VBI (DVB ETS 300 706) and caption function,
• Supports BISS,
• Firmware upgrade and settings installation via RS-232 interface,
• 90-240 VAC SMPS power supply,
• F type RF, RCA type AV connectors.
3. Safety Warnings
1. Di-Compact shall be operated in ventilated environment and away from heat sources.
Ventilation grids should not be blocked by any object.
2. Do not open or disassemble the outer chassis of the device in order to prevent electric shock.
Opening the chassis will also void the warranty.
3. Do not insert anything into the case of the device, otherwise electric shock may occur or fire
danger may depend on short-circuit condition.
4. The satellite antenna connected to the device shall be equipped with anti-shock device from
lightning.
5. Do not unplug the cable connected to the LNB IN connector while the device is operating.
Also, always connect the cable to the LNB IN connector before plugging the power plug of
Di-Compact to the mains.
6. Use only a soft cloth to clean the outer chassis.
Page 6
Di-Compact B13 Digital SMATV Receiver
6
4. Unpacking
Unpack the Di-Compact package and check to make sure that all of the following items are
included in the packaging:
• Di-Compact 11 or 44 or 88 (1 piece),
• Power cord with plug (1 piece),
• AV Cable which consists of 1 audio and 1 video connector pairs .
• User Manual (1 piece).
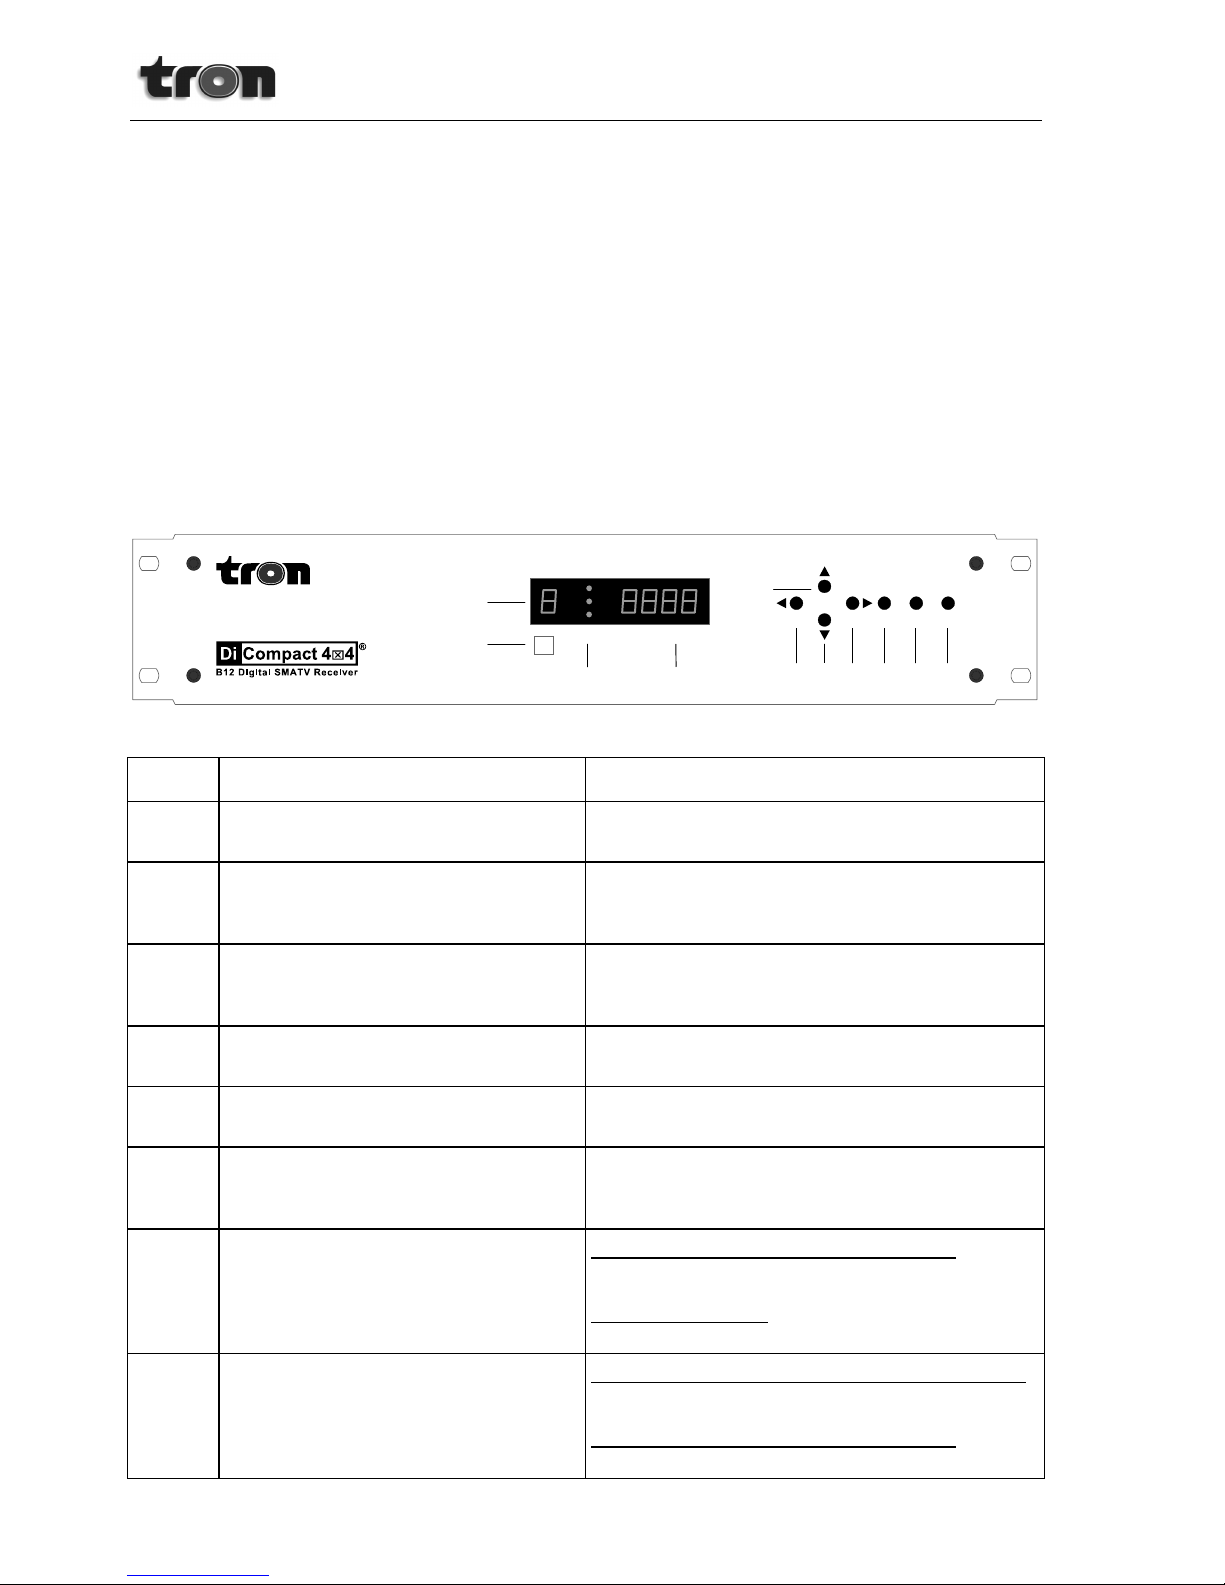
5. Front Panel
VOL VOL
CH
CH
OK MENU EXIT
MODULE
SELECTION
Sign Item Name Description
A1 READY state indicator (Green LED)
Illuminates as long as the selected module is
functionally ready (even no signal).
A2 ERROR indicator (Yellow LED) Illuminates if the selected modul
e can not carry out its
function. Examples are not receiving signal from LNB
or error in the stream.
A3 TOTAL ERROR indicator (Red LED)
Illuminates if there are some reason to illuminate
ERROR indicator, including for the modules that are
not selected.
A4 4 x 7 Segment display
Shows channel number of miscellaneous messages
(e.g. short-circuit state).
A5 1 x 7 Segment display
Shows the number of selected module. Above all
indicators are related to the state of selected module.
A6 MODULE SELECTION button
Performs navigation over 4 modules installed in the
device. The buttons on front panel perform operations
on the module activated with this button.
A7-A10 Function keys When watching TV or listening to the Radio:
▲▼ used for channel choice,
◄► used for volume control.
When inside a menu:
Navigates through menus.
A11 OK button When navigating through or operating inside menus:
Enter highlighted menu or choice. Used to confirm
when user confirmation is requested.
When watching TV or listening to the Radio:
Lists all TV and Radio programs that are stored.
A10 A13 A8 A11 A12
A5
A1, A2, A3
A6
A7
A9
A4
Page 7
Di-Compact B13 Digital SMATV Receiver
7
Sign Item Name Description
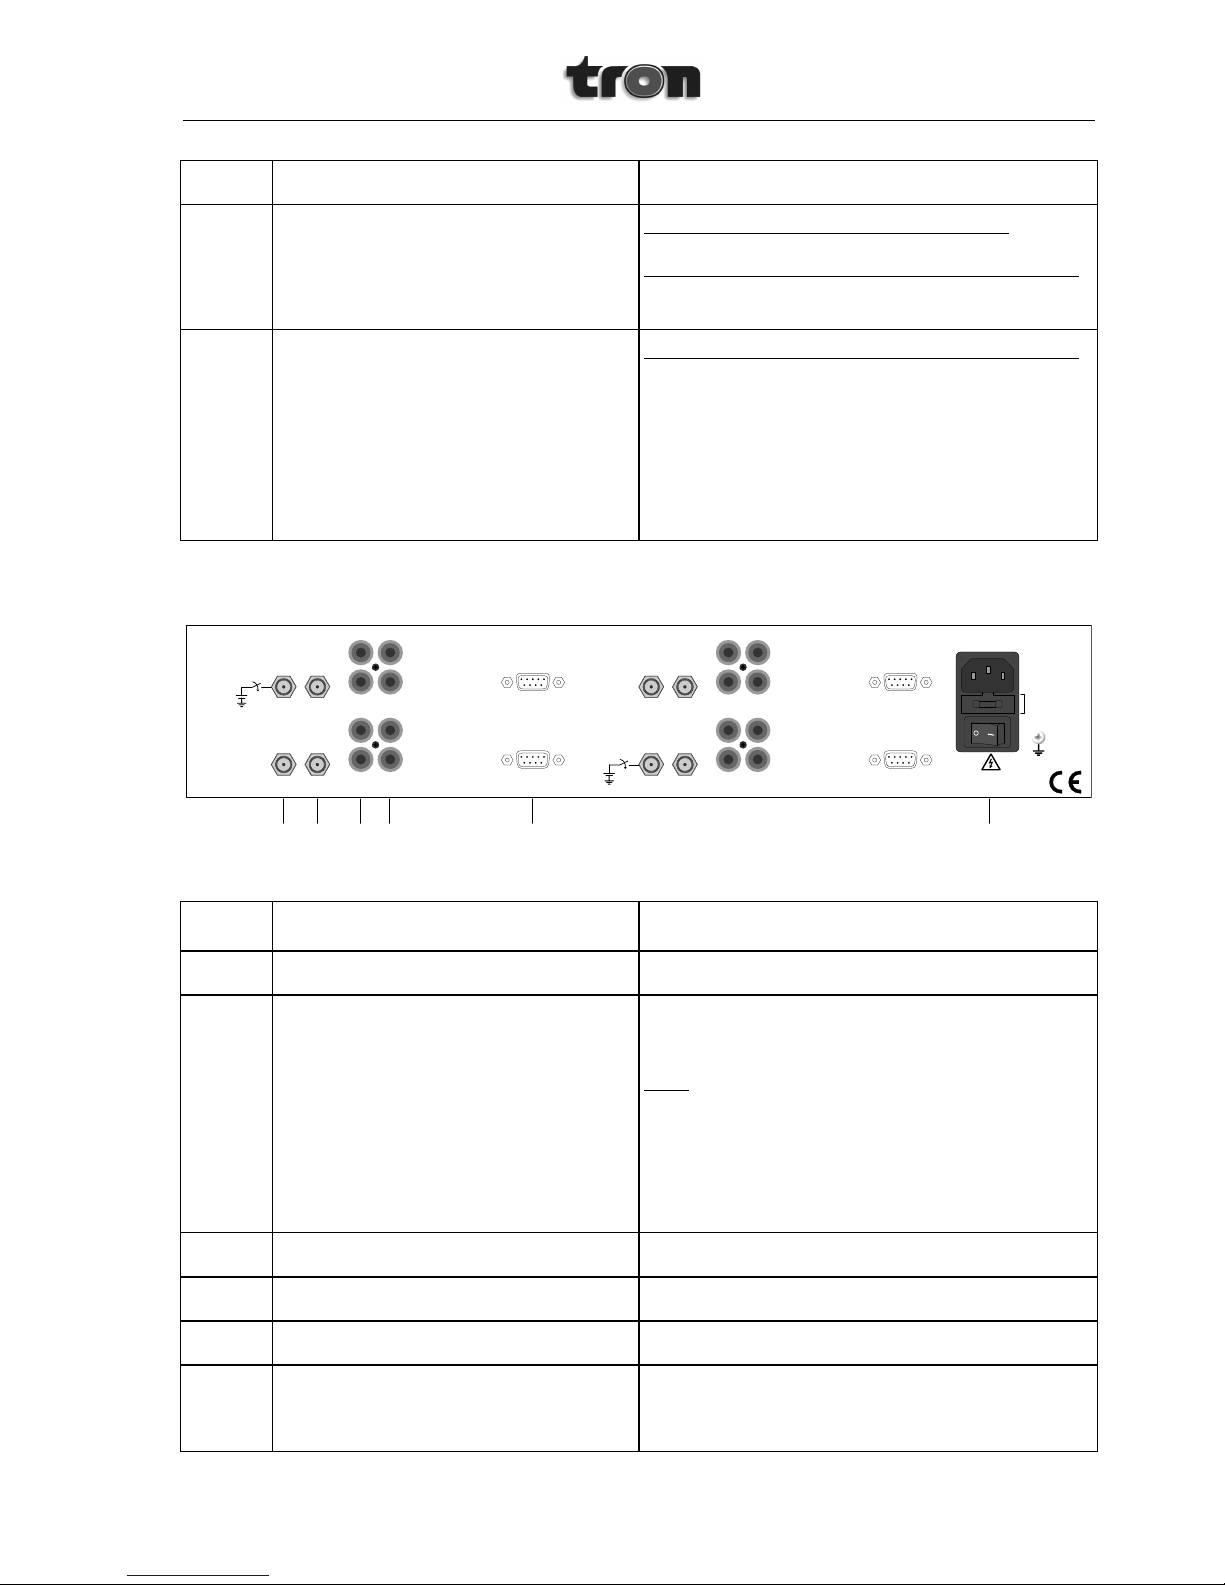
A12 MENU button When watching TV or listening to the Radio:
Shows the OSD menu.
When navigating through or operating inside menus:
Exits all menus and returns to TV watching or
Radio listening (General Viewing) screen.
A13 EXIT button When navigating through or operating inside menus:
Return to previous menu in the hierarchy. Used to
cancel the operation when user confirmation is
requested.
This button alters also the state of keylock if it is
held down during 2 seconds at an
y time. For
operations related to keylock, please observe
the
section 9. General Viewing.
6. Rear Panel
Fuse 2A, 250V
90-240 VAC, 50-60 Hz, 100W
WARNING!
RISK OF ELECTRIC SHOCK!
DO NOT OPEN!
LNB IN LNB OUT AUDIO VIDEO RS-232
Video Out
Monitor Out
R
L
MODULE-1
LNB POWER ON/OFF
+
-
16V
350mA max.
LNB IN LNB OUT AUDIO VIDEO RS-232
Video Out
Monitor Out
R
L
MODULE-2
LNB IN LNB OUT AUDIO VIDEO RS-232
Video Out
Monitor Out
R
L
MODULE-3
LNB IN LNB OUT AUDIO VIDEO RS-232
Video Out
Monitor Out
R
L
MODULE-4
LNB POWER ON/OFF
+
-
16V
350mA max.
Sign Item Name Description
B1 LNB IN * Satellite signal (LNB) input.
B2 LNB OUT *
Satellite signal extension socket (e.g. to be connected
to another module on same device).
Note: In the RF Tuner elements of your Di-
Compact
4x4 device, there are active looping from LNB IN to
LNB OUT and 5 dB
signal level gain is generated.
Therefore, successive loopings more than one time
may cause the RF signal level to shift out of an
acceptable l
imit and related module of the device may
not function correctly.
B3 AUDIO R (sağ kanal) * Right audio channel output.
B4 AUDIO L (sol kanal) * Left audio channel output.
B5 VIDEO OUT * Composite video output for broadcasting system.
B6 MONITOR OUT * A
uxiliary video output for the configuration of the
device w/o disconnecting it from broadcasting system.
Same as VIDEO OUT by its feature and function.
B1 B2
B5
B6
B3
B4
B8 B7
Page 8
Di-Compact B13 Digital SMATV Receiver
8
Sign Item Name Description
B7 RS-232 * 9 pin D-
Sub Male connector for data connection (e.g.
for firmware upgrade, settings installation).
B8 AC Power Input and Power Switch AC power input socket (IEC 320 Compliant -
Male)
and simple power switch. Under the cover in the
middle of this part, there is located the high current
protection fuse of the device and its spare. When
replacing
it with a fuse other than its spare, make
sure that it has the same voltage and current rating.
* Valid for similar inputs and outputs of other modules.
7. Installation Steps
1. Securely mount your Di-Compact device inside a 19" rack carrier (cabin).
2. Connect satellite signal (RF coaxial) cables from antennas to LNB IN connectors of each
module of Di-Compact.
3. Connect the RCA type connectors on the one side of the AV cables to the outputs shown as
B3, B4 and B5 (and to the outputs of the successive modules) on Di-Compact rear panel.
Connect other sides to a TV or a modulator input with same order (especially with same
colors).
4. Connect the power cord with plug to an outlet with appropriate voltage and current and to
Di-Compact, then power on the device via power switch on rear panel. There will be 5
seconds delay during boot-up.
5. After setting the device up with correct satellite signal parameters, Di-Compact could output
analog Audio/Video signal to a TV or to a modulator.
8. Basic Operations
After you have installed and connected the cables of the Di-Compact 44, power on the device
from the power switch located on the rear panel. Normally, Di-Compact 44 will operate stable
forever. This state is called General Viewing. But in order to make some configuration, you have
to use the buttons on the front panel.
Di-Compact includes (1-4 or 8) identical modules which operate independently. The settings of
each module may be changed via buttons on front panel as long as you work on a single module
each time. Use MODULE SELECTION button to choose the module on which the front panel
buttons will operate. The number at the left of the display shows the number of active module. As
you press this button, the number changes and you have been selected another module. Unless
you press other buttons, changing the module doesn’t effect the output of the device to the TV or
modulator. As of this point, it will be assumed that before performing the operations explained in
this manual, you have selected related module via MODULE SELECTION button and you are
watching the channel outputted from this module.
To set the module up that you have selected, press MENU button on the front panel. If the
channel you are watching is being outputted from selected module, Main Menu will be displayed
on the screen. The main menu consists of several sub menus listed vertically. Using the buttons
on the front panel, you can easily navigate through OSD (On Screen Display) menus of
Di-Compact. While some OSD menu is displayed, there are some tips at the bottom of the screen,
showing the functions of the buttons on the front panel.
While operating through OSD, you have to move the cursor over the item you wish to select.
Page 9

Di-Compact B13 Digital SMATV Receiver
9
Press ◄► keys to move cursor right or left, press ▲▼ keys to move cursor up or down. When
cursor is on a menu or some item is selected, its color is orange. Press OK button to confirm or to
enter a sub menu, use EXIT button to cancel or to return previous menu at any time. Use MENU
button to exit all menus.
While navigating through menus, some fields may be text, numeric or combo (multiple choice)
fields. Below is the explanation of how to configure the information in these fields.
8.1 Text Fields
While the cursor is over a text field, press OK button to edit the information in this field. A virtual
keyboard will appear on the screen (QWERTY). On the black field above the virtual keyboard,
there is the text to be edited and a blinking cursor appear at the end of the text. Subjected text is
edited while navigating the cursor through the line and and using the virtual keyboard. However,
the function keys don’t move the cursor on the text, but the orange colored cursor on the
keyboard. To press virtually the key that the cursor is over, OK button is used and so, the
operation is performed where the text cursor is. For the virtual keys on the first 4 line,
corresponding character is inserted at the point where the text cursor is. The explanation of the
elements on the bottom line is as follows:
CL: Alters the capitalization of the letters on the virtual keyboard.
: Deletes the character left to the text cursor.
: Deletes the character right to the text cursor.
SPACE: Inserts a space of one character at the location of text cursor.
◄: Moves the text cursor one character left.
►: Moves the text cursor one character right.
ENTER: Confirms the changements and returns to the previous menu.
When you have completed editing the text field, you can return to the previous menu by
pressing EXIT button. If you want to cancel the changes that you have made, leave also the
previous menu and don’t save the changes while leaving.
8.2 Numeric Fields
While the cursor is on a numeric field, you can use ◄► buttons to increase or decrease
existing numerical value by 1. But if the value that you want to enter is too different, press OK to
enter this new value. In such situation, 0---- expression wil appear on the numeric field. Now you
can alter the expression digit by digit (left to right). When you have completed altering a digit,
press ► button to proceed to next one, so the (-) character on the next digit will turn into the digit 0
and you begin to alter this digit. When you get your desired numeric value as the result of altering,
you can press OK button to confirm, or you can press EXIT button to cancel the change and to
leave old value on the field. In both cases, device will return to previous menu and the cursor
continues to stay on the numeric field.
8.3 Combo Fields
Combo fields are boxes that contain multiple predefined choices and allow you to select that
you want. When you move the cursor over this kind of fields, a red arrow appears at the right edge
of the field. You can use ◄► buttons to alter the selection in combo fields. Each time you press
these buttons, previous or next item will appear on the field and it becomes selected. If you press
OK button when the cursor is over this field, all choices are listed in a vertical box. You can
navigate over these choices using ▲▼ buttons, you can confirm the item that you have selected
by pressing OK button. If you press EXIT button, the box will get closed and the selection remains
same.
Page 10

Di-Compact B13 Digital SMATV Receiver
10
9. General Viewing
The following describes the functions of the front panel buttons of Di-Compact in general
viewing state.
9.1 Key Lock
Di-Compact 44 is equipped with Key Lock mechanism in order to prevent interferences to its
operation during close contact situations such as surface cleaning. While keys are locked, the light
indicated with A3 on the front panel is illuminating and the buttons on the device are dysfunctional.
To make some operation on the device, you have to unlock the keys. For this purpose, press and
hold EXIT button for 2 seconds. At the end of this duration, the keys will get unlocked when the
light A3 blink for very short time. If same operation is performed when the keys are unlocked, they
get locked. Also, if no user operation is performed on the device during 30 minutes, the keys will
get locked automatically.
9.2 Channel Control
If you want to change channel while watching TV or listening to the Radio, use ▲▼ keys on the
front panel. In addition to this function, Di-Compact 44 provides more convenient channel
change and configuration function. In general viewing state, press OK button. There will appear a
vertical list on the left pane with Channel List caption, a small preview of selected channel on the
right-top pane and the parameters of selected channel on the right-bottom pane. You can navigate
through this list and preview the channels using ▲▼ keys. You can jump to next or previous
pages in the list using ◄► buttons. Press OK button to watch permanently the selected channel,
or press EXIT to return to old channel. In both cases, the device will return to General Viewing
state.
You can also delete stored channels or change their orderings within this menu. For this
purpose, press MENU button. A small menu consisting of Delete and Swap items will appear on
the screen. To delete a channel from the list, press OK button while the cursor is over Delete.
Deleting operation will be activated. As of now, move the cursor over the channel that you want to
delete while using ▲▼ buttons and press OK button. You can repeat this operation until there are
no channels that you want to delete. After, press EXIT button to terminate the deleting operation.
The device will return to the channel list menu.
To swap the orderings of channels, move the cursor over Swap in the small menu and press
OK button. Swapping operation will be activated. Now, move the cursor over first channel that will
be swapped and press OK button. The foreground color of the channel will become red. After,
move the cursor over second channel that will be swapped and press OK button again. The
orderings of the channels in the list will be swapped. You can repeat this operation until there are
no channels that you want to swap the orderings. After, press EXIT button to terminate swapping
operation. The device will return to the channel list menu.
Finally, press EXIT button to return to General Viewing state. If you have made some change
on the channel list, a confirmation box will appear on the screen for saving the changes. You can
save the changes while pressing OK button, or discard the changes while pressing EXIT button.
9.3 Volume Control
To increase or decrease volume, you can use ◄► key on the front panel while the device is on
General Viewing state. A volume bar consisting from 32 levels will appear on the screen. You can
use ◄ button to decrease, and ► button to increase the volume. After 2 seconds over your last
pressing to the buttons, the bar will disappear automatically.
Page 11

Di-Compact B13 Digital SMATV Receiver
11
10. Channel Setup
Di-Compact must be configured to a TV channnel or Radio station to be received. Following
steps guide the configuration of the device.
In general, the processing order while setting up channels in Di-Compact 44 device is as
follows: Satellite Definition, Transponder Definition, Search, Channel Selection. In menus, Satellite
and LNB have same meaning. Satellites includes transponders and all channels with search made
through these transponders.
If the Settings Lock mechanism in your device is active, there may appear a numeric field with
PASSWORD caption and may request from you to enter valid password. For detailed information
on Settings Lock, it is recommended that you observe the section 11.1.7 Settings Lock.
10.1 Satellite Selection
When you first use your Di-Compact 44 device, it may have various satellites installed with
predefined configurations. Each satellite includes its own transponders and channels. By selecting
the satellite which corresponds to the LNB that you have connected to your device, you can
access these predefined channels. If the satellite that your LNB is receiving channels from is not
included in this list, you can identify and configure your satellite/LNB through the explanations in
the section 10.3 LNB Settings.
To select your satellite, display the Main Menu and enter Select Satellite sub menu. In the
center of the screen, a vertical list will appear with names of various satellites (with the condition
that they shall be installed before). Select the satellite that you wish and confirm your selection by
pressing OK button. The device will return to main menu and the channel list will be modified
according to the satellite that you have selected. If your desired channel is not included in this list,
you can perform a channel search with 10.2 Manual Search/Edit, 10.3 LNB Settings and 10.4
Automatic Search functions.
Note: In the Satellite Selection list, there is an item named All Satellites. If you select tihs item, the
channel list will include all channels of all satellites installed in the device. Since this number will be
expressed in thousands, it is recommended that you only select the satellite that you need.
10.2 Manual Search/Edit
With Manual Search/Edit, you can enter the parameters of any single channel that you want to
watch on the satellite that you have selected and so you can find it by performing a search. To
enter this menu, display Main Menu and enter Manual Search/Edit sub menu. A structure
consisting of parameter boxes, preview box and signal level bars will appear on the screen. The
descriptions of the items are as follows:
1. Rename: Used to rename the channel that is searched. Text field. This field is
best suitable to use after performing a search.
2. Frequency: Used to enter the frequency of searched channel. Numeric field.
3. Symbol Rate: Used to enter the symbol rate of searched channel. Numeric field.
4. Polarity: Used to select the polarization of searched channel from Horizontal
and Vertical options. Combo field.
5. Satellite: Used to select the satellite from installed satellites that searched
channel belongs to. Combo field.
Note: By default, this field appears as the name of selected satellite and it is
Page 12

Di-Compact B13 Digital SMATV Receiver
12
not recommended to change it. Instead, select the satellite that your desired
channel is included, before entering this menu (define it if necessary).
Otherwise, you will have been deleted the channel of the selected satellite
that you watch currently.
6. PID: This is a sub menu used to enter directly Program ID parameters of
searched channel. When you enter this sub menu by pressing OK
button, a vertical menu consisting of Video Pid, Audio Pid, Pcr Pid
and Prog No numeric fields will appear. You can enter these
parametes if you know them, or you can skip this sub menu.
Discarding these parameters doesn’t prevent the channel from being
found.
7. AUDIO: This is a sub menu to enter audio attributes of searched channel. If
you enter this sub menu by pressing OK button, a vertical menu
consisting of Mod (number of channels) and Audio Offset fields will
appear. You can enter these parameters if you know them, or you
can skip this sub menu. Discarding these parameters doesn’t prevent
the channel from being found.
After entering related ones from these parameters, with the condition that they are valid, there
will be some changements on the bars at bottom of the screen and they will show the level and
quality of the signal received. Now, move the cursor over Search item and press OK button. Your
device will perform transponder search according to the parameters that you have entered and it
will list channels in the transponder (if there are any). If you select the channel that you want to
watch and you press OK button, you return to the previous screen; the name of the channel
appear on the Rename field and you watch it on the preview box. Similarly, if you press EXIT
button, the search performed is discarded and you return to the previous screen.
After finding your desired channel as described above, you can return to Main Menu by
pressing EXIT button. A confirmation box will appear on the screen for saving the changes. If you
press OK, the channel found as the result of the search is saved, or if you press EXIT button, the
operations are discarded.
10.3 LNB Settings
If the satellite (see section 10.1 Satellite Selection) that your desired channel belongs doesn’t
exist in firmware settings of your Di-Compact device or if you use a different type of LNB, you have
to define this satellite/LNB on the system. For this purpose, display main menu and enter LNB
Settings sub menu. A vertical list intended to edit an existing satellite or to add a new satellite will
appear on the screen. The descriptions of the items are as follows:
1. Satellite: Used to select an existing satellite to configure LNB settings. Combo
field. When you adjust this field, below items change also according
to new value.
2. LNB Type: This is a combo field used to select the type of your LNB from these
3 options: Universal, Standard and C-Band. For default satellites,
LNB type is set as Universal and many times, this value is used.
3. Lower Band: Used to set the lower start of satellite stream frequency band. While
varying according to the type of LNB, this value is 9.750 (MHz) for
mostly used type of LNB: Universal.
4. Higher Band: This is a numeric field which is editable only if Universal is selected
as LNB type. Used to set the upper band start of satellite stream
frequency band. This value is usually 10.600 (MHz).
Page 13

Di-Compact B13 Digital SMATV Receiver
13
5. DiSEqC: In cases where a selection should be made within multiple (max. 4)
LNB conforming to DiSEqC 1.1 protocol, this field selects the LNB to
receive the channels from. Combo field.
6. 22 kHz: Controls the generation of the 22 kHz signal for making selection
between Lower and Higher bands in Universal LNBs. If is useful to
leave this combo field as Automatic.
7. Delete: Deletes the selected satellite on the Satellite line. To complete the
deleting operation, you have to press OK button in the confirmation
box which appear. If you are not sure, you can return to the previous
screen by pressing EXIT button.
Attention! All information related to selected satellite is deleted and you have
to redefine all the information.
8. New: This is a functional field to define a new satellite on the system.
When cursor is over this field, Press OK and a satellite such as New
SatelliteXX is defined on the Satellite line and you can configure it
with all other items.
9. Transponder Settings: This is a sub menu to view the transponder in the satellite selected
in Satellite field, to configure it and to add new transponders.
While the cursor is over this field, press OK button and you will
access a sub menu with Transponder List caption, containing
transponders, the channels included in transponders and signal
level bars. Now press again OK button. A vertically listed popup
menu with Add New, Change, Delete and Search items will
appear on the screen. The functions of the items are as follows:
1. Add New: Used to add a new transponder to an existing satellite in the system
with Frequency, Symbol Rate and Polarity parameters. If you alter
the combo field on the Satellite line to a satellite other than currently
selected one, you can not see the transponder that you have added;
because in order to see this transponder, you have to select
corresponding satellite under the LNB Settings menu and you have to
reenter Transponder Settings. After you enter correct parameters,
the signal level bars at the bottom of the screen change and they
show the signal level and quality of received signal. You can press
EXIT button to return to previous screen; you will see the transponder
that you have configured in the list (if it is included in same satellite).
As such, you can add many transponders to your satellite.
2. Change: Just as previous Add New operation, this is used to configure the
parameters of an existing transponder.
3. Delete: This is a function which is used to delete the transponder that the
cursor is over. While the cursor is over this field, press OK and the
transponder selected in previous screen is deleted.
Attention! All information related to selected transponder will be deleted and
you have to redefine all information. But since the channels that are stored
within the satellite don’t depend on the stored transponder, they are not
affected from this operation.
4. Search: This is a function which is used to search the channels in the
transponder that the cursor is over. If you press OK button while the
cursor is over this field, the TV and Radio channels in selected
transponder is searched by the device and they are listed separately
Page 14

Di-Compact B13 Digital SMATV Receiver
14
in left-right columns. If some channels are found as the result of
search operation, a confirmation box will appear on the screen
containing the number of channels found and asks for your
confirmation. You can confirm by pressing OK button, or discard
them by pressin EXIT button. But if no channels are found, a
message that indicates this will appear on the screen and it will ask
you to press EXIT button. After these operations, the device will
return to Transponder List screen.
To leave Transponder Settings menu, press EXIT button. If you
have made some changements other than channel saving by
searching, a confirmation box will appear on the screen for saving
the changes. You can save the changements by pressing OK
button, or discard them by pressing EXIT button. The device will
return to LNB Settings screen.
To leave LNB Settings menu, press EXIT button. If you have made some changements other
than channel saving by searching in the Transponder Settings menu, a confirmation box will
appear on the screen for saving the changes. You can save the changements by pressing OK
button, or discard them by pressing EXIT button. The device will return to Main Menu.
Note: To see a satellite that you have defined with methods described above in the Satellite Selection
menu under Main Menu, you should have been defined at least 1 transponder under this satellite.
10.4 Automatic Search
To search all or many channels on a selected satellite, Automatic Search is used. To access
Automatic Search menu, display Main Menu and enter Automatic Search sub menu. A vertical
listed menu which is intended for setting search parameters will appear on the screen. The
descriptions of the items are as follows:
1. Method: This is a combo field to select the search method within these 3 type:
Transponder, Fixed Symbol Rate and Fast NIT Search. If
Transponder is selected, channels are found by performing search
on the transponders included in the satellite that is selected in next
item. If Fixed Symbol Rate is selected, channels are found by
performing search on the transponders whose symbol rates are
suitable to the value entered in below Symbol Rate field, described
below. Fast NIT Search feature is a fast search method that is valid
only for Turksat satellite.
2. Satellite: This combo field is used to select the satellite that Automatic Search
will be performed on.
3. Symbol Rate: This item is visible only if Fixed Symbol Rate is selected in the
Method field. Numeric field. It is used to enter the fixed symbol rate
that will be used by related search method.
4. TV/Radio: This is a combo field to yield the channels found to be TV, Radio or
all. Select one that you wish from All, Only TV or Only Radio
options.
5. FTA/Encrypted: This is a combo field to yield the channels found to be encrypted or
not. Select one that you wish from All, Only FTA or Only encrypted.
6. Network Search: If you want to perform a network seach, switch this combo field to
Yes, else switch it to No.
Page 15

Di-Compact B13 Digital SMATV Receiver
15
7. Replace existings: If you want that the channels found will replace old channels in the
satellite which is selected on the Satellite line, switch this combo field
to Yes, else if you want to preserve old channels and you want to
append the channels found to the end, leave it as No.
Now, move the cursor over Start field and press OK button. Two columns for listing TV and
Radio channels and at the bottom pane, a progress bar and the details of the search performed
will appear. Search operation may take several minutes and channels may be found in various
times during this period. To return to previous screen at any time by cancelling the search
operation, press EXIT button.
Note: Since many channels may be found through the end of the search operation even though no
channels are found for a long duration, it is recommended to wait until the progress bar gets full with the
condition that you have entered correct parameters.
When the progress bar reaches to 100%, search operation will be completed. If some new
channels are found in TV or Radio lists, you will see a message that states the number of these
channels and asks for your confirmation to save them. To save the channels, press OK button,
and to discard them, press EXIT button. The device will return to Automatic Search menu.
11. Other Settings
There are some additional setting options of Di-Compact 44 to perform additional functionality.
These options are explained below.
11.1 System Settings
You can configure language, display and some other options of your device with System
Settings. To access system settings, display Main Menu and enter System Settings sub menu. A
vertically listed menu intended for the settings to be made will appear on the screen. The
descriptions of the items are as follows:
1. Menu Language: Used to select the language of the texts displayed in OSD menus
that guide you to perform this and all other configurations. Combo
field. You can select any that you wish from 10 different language
options. Just as you alter this field, the language of all texts displayed
on the screen will change.
2. 1. Sound Language: In channels that are received with multiple sound channels and each
has different language, this field is used to select the sound of
language to reflect to the output. Combo field. You can select any
that you wish within 15 different language options.
3. LNB Powering: Di-Compact device has the feature to supply power to the LNB that it
is connected on all ports. If the LNB is not fed from another source,
you can supply power to the LNB by switching this combo field to Yes,
or if your LNB doesn’t need it, you can turn off power supply by
switching the field to No.
Note: Like all other electronic devices, LNBs also need power supply. It is
not possible to receive channels from a LNB without power. Therefore, if you
are not sure from the situation, it is recommended that you leave this field
as Yes.
When you short the LNB input of the device, the LNB powering also
becomes shorted. But all power output ports are equipped with short circuit
protection. When any power output port is shorted, Sh r t text appears on the
front panel display of the device.
Page 16

Di-Compact B13 Digital SMATV Receiver
16
Total LNB power feed is restricted to 2A for 8 channel version; 1A for 4
channnel model and 350ma for single channel model. LNB powering from
any port must not exceed 250ma.
There is short circuit protection at all LNB ports. On case of any short circuit
on the LNB mounting,
S h r t
message on front display will appear. Power
off the device and please correct this short circuit.
4. Brightness: Used to set the brightness of the picture that is outputted from the
device between 0 and 100 values. Numeric field.
5. Contrast: Used to set the contrast (distinguishability) of the colors of the picture
that is outputted from the device between 0 and 100 values. Numeric
field.
6. Color: Used to set the saturation of the colors of the picture that is outputted
from the device between 0 and 100 values. Numeric field.
7. Setting Lock: Your device is equipped with a lock mechanism to protect existing
configurations against unauthorized interference. When this lock
mechanism is active, a password is asked when accessing these
menus: Manual Search/Edit, LNB Settings, Automatic Search,
System Settings and Factory Reset. When you first have the
device, this mechanism is not active. To make the lock mechanism
active, switch this combo field to On. To deactivate an active lock
mechanism, switch this field to Off.
Note: The default password in the factory settings of your device is 0000.
Please observe 11.1.8 Change Password to change this password.
8. Change Password: This is a sub menu to set the password that will be asked when
entering to related menus with the condition that Settings Lock
attribute is On. If you move the cursor over this field and you press
OK, these 3 different numeric fields will appear by order: Enter Old
Password, Enter New Password and Confirm New Password.
Enter your existing password correctly to first field. If you do not enter
it correctly, you will be alerted with Wrong Password message and
the device will wait you to press OK button, then it returns to previous
screen. After entering correct password to first field, enter your
desired new password identically to next two fields. If the passwords
that you enter to these two fields are different, you will be alerted with
Wrong Password message and the device will wait you to press OK
button. If the passwords are same, Password Changed message
will appear and the device will wait you to press OK button. Finally,
the device will return to previous screen. From now on, new
password is valid.
When you are done with System Settings menu, you can return to main menu by pressing EXIT
button. If you have made changements on existing settings, a confirmation box will appear on the
screen for saving the changes. You can save the changes while pressing OK button, or discard
the changes while pressing EXIT button.
11.2 Information
You can enter Information menu to display various settings and parameters stored on your
device. To enter this menu, display Main Menu and enter Information sub menu. There are no
configurations to make within this menu. When you are done with observing information table,
press EXIT to return to Main Menu.
Page 17

Di-Compact B13 Digital SMATV Receiver
17
11.3 Biss
Some TV channels are broadcasted with a special encryption named Biss (Basic Input
Scrambling System). You can watch them normally if you have made correct settings. These
setting parameters may require some subscriptions. To enter BISS key related to the channel that
you watch, display Main Menu and enter Biss sub menu. You will see a numeric field that you can
enter Biss key. On this numeric field, a yellow cursor is displayed under first digit and you can
enter each digit by moving this cursor with ◄► buttons. When done, press EXIT button to return
to Main Menu. The key will be saved automatically. If the channel that you watched is not
encrypted with Biss, entering this key will not affect your normal watching.
Note: BISS keys are obtained mostly as 16 hexadecimal digits. Evaluating this key as 8 pieces of two
digits hex numbers is more understandable. Below is an example of BISS key:
A9 23 13 DF 02 28 B4 DE
If two digit hexadecimal numbers in this key are converted to decimal numbers, following array is
obtained:
169 35 19 223 02 40 180 222
The particularity of the array is that the 4th and 8th numbers are sums of their previous 3 numbers:
169 + 35 + 19 = 223 02 + 40 + 180 = 222
Therefore, 4th and 8th number are like supplementary parts (checksums), rather than being a part of the
array. Your device will calculate checksums automatically and writes to corresponding column after each
update of digits. You device will not permit you to enter 7th, 8th, 15th and 16th hexadecimal digits, you will be
able to enter only remaining 12 hexadecimal digits and this will be enough.
Warning: Acquiring these parameters may require some subscriptions and unauthorized use of these may
cause violation of laws.
11.4 Firmware & Channel Information Transfer
Di-Compact 44 device operates with a firmware and channel informations that this firmware
reads and processes. When a problem is encountered during the operation of the device or when
you want to install the channels automatically from a database, you can update the firmware and
channel informations via a PC. For this purpose, display Main Menu and enter Firmware and
Channel Information Transfer sub menu. A message concerning that the device will go to firmware
transfer mode and it will ask for your confirmation. If you are not sure, you can return to Main
Menu by pressing EXIT button. If you confirm by pressing OK button, your device will stop
receiving and outputting channels, it will be in a state that only it can communicate with a PC. After
completing the firmware and channel information transfer operation, reboot your device by
switching off and on the power switch on the rear panel.
Note: It is not recommended to make firmware transfer to a device which operates without problem.
Please request a confirmation from manufacturer before performing a firmware update, otherwise the repair
of any functionality loss that you cause during this operation will not be covered by warranty.
11.5 Factory Reset
If you think that the channels in your device became too dense or the device became inefficient
due to some changements on parameters that you don’t remember old values, you can revert your
device to the settings at factory output. For this purpose, display Main Menu and enter Factory
Reset sub menu. At this stage, you will be asked for a password with a numeric field regardless
the state of Setting Lock mechanism. After you enter valid password, a confirmation box stating
that all settings will be reverted back to factory output will appear. If you are not sure, you can
Page 18

Di-Compact B13 Digital SMATV Receiver
18
return to Main Menu by pressing EXIT button. If you confirm by pressing OK button, all channels,
the satellites that you have added and transponders related to those will be deleted, and all
settings will be reverted back to factory output states.
When you reboot the device, you will be alerted with a message stating that no channels exist
and you will be asked to perform a channel search. Since your device has various satellites and
transponders related to them, you can easily perform a channel search and you can access the
channels that you wish to watch.
Page 19
Di-Compact B13 Digital SMATV Receiver
19
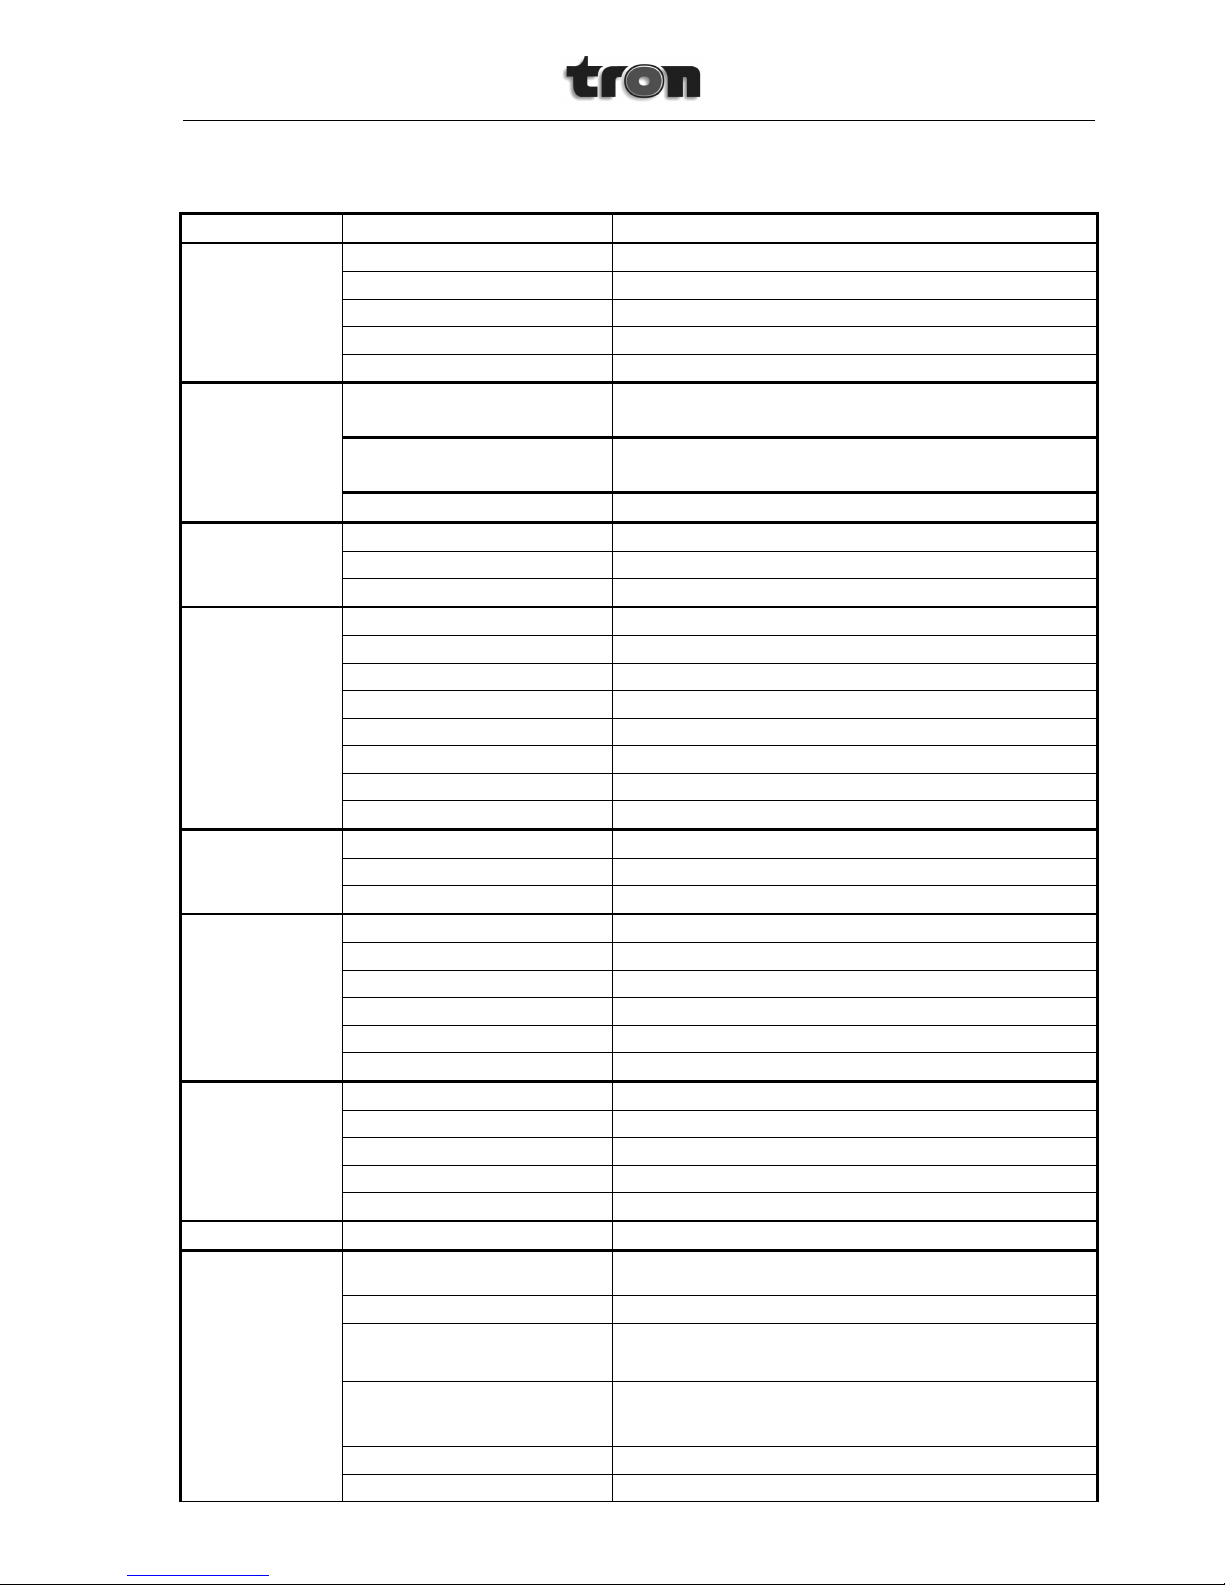
12. Technical Specifications
Feature Sub Feature Specification
Tuner
Input Symbol Rate 1.0...45 Mbps
Packet Length 204, 188
Demodulation Type QPSK
FEC 1/2, 2/3, 3/4, 5/6, 7/8, Automatic
LNB Power 16V (max. 350mA) over 1st and 4th modules
LNB Powering
Dicompact 8*8
13V @ all ports. (max. 250mA any port total is limited to 2A).
Mobil version : Ports 1&2 : 13V (total max. 500mA), Ports 7 and 8.
18V (total max.500mA)
Dicompact 4*4
Tüm modüllerde 13V (en fazla 250mA, toplam maks. 1A).
Mobil version için 1 ve 2. Modüllerden 13V , 3 ve 4. Modüllerden 18V
(toplam maks 500mA)
Dicompact 1*1 Max.350mA
Input
Input Frequency 950-2150 MHz
Input Level -65...-25 dBm
Input Impedance 75Ω
MPEG TS A/V
Decoding
Decoding Standard MPEG-2 ISO / IEC 13818, MPEG-2 MP@ML
Data Input Rate Max. 60 Mbit/s
Aspect Ratio 4:3, 16:9
Output Picture PAL, NTSC
Video Resolution 720 x 576 (PAL), 720 x 480 (NTSC)
Audio Decoding Standard MPEG-1 LAYER I, II
Audio Channels Mono, Dual Mono or Stereo (Left and Right)
Audio Sampling Rate 32, 44.1 ve 48 kHz
Processor &
Memory
Processor SGS-Thomson STi5119
SDRAM Memory 16 MB
Flash Memory 2 MB
Video Output
Output Impedance 75Ω
Output Level 1.0V ± 20mVpp
Frequency Level ± 0.5 dB (4.8 MHz)
Differantial Gain ≤ 5%
Differantial Phase ≤ 5°
C/L Latency ≤ 30ns
Audio Output
Output Impedance 680Ω
Output Level ± 6 dB
Frequency Level ± 0.5 dB (20 Hz...18 kHz)
Audio S/N Ratio ≥ 70 dB
Left and Right Ch. Level Diff. ≤ 0.5 dB (20 Hz...18 kHz)
Data Connection Serial Port RS-232, 9 pin D-Sub (Male), Baud rate 115200 kbps
General
Number of Modules
1/4/8 pcs. of DVB-S and MPEG-2 comp. sat.
demodulators
Configuration Module selectable and independent, over TV/OSD
Dimensions and Weight
483mm x 180mm x 44mm, 2.0 kg. ( Dicompact 1*1)
483mm x 295mm x 88mm, 4.3 kg.( Dicompact 4*4)
483mm x 320mm x 135mm, 6.0 kg. (Dicompact 8*8)
Mechanical Structure
19" 1U Rack Type, IP20 (IEC 60529) (Dicompact 1*1)
19" 2U Rack Type, IP20 (IEC 60529) (Dicompact 4*4)
19" 3U Rack Type, IP20 (IEC 60529) (Dicompact 8*8)
Operating Environment Temp. 5°C...45°C
Relative Humidity %10...%90
Page 20

Di-Compact B13 Digital SMATV Receiver
20
Feature Sub Feature Specification
Connection Elements
RF Inputs/Outputs: F Type (4 Pairs, Rear Panel)
AV Outputs: RCA Jack (16 Pieces, Rear Panel)
Mains Input 90-240 VAC, 50-60 Hz (Mobile versions 11-36VDC)
Mains Connection From rear panel, with IEC 320 campliant power cord
Power Consumption
110W (8 channel( 55W (4 channel9 13W (single
channel)
13. Contact Information
Manufacturer: TRON ELEKTRONIK SISTEMLER SAN. VE TIC. A.S.
General Distributor: TRODIO ELEKTRONIK PAZARLAMA LTD. STI.
Address: 1. Esensehir Mah. Mimar Sinan Cad. No: 33 34776 Yukari Dudullu
Umraniye, Istanbul / TURKEY
Tel: +90 216 313 33 35
Fax: +90 216 313 33 69
WWW: http://www.tron.com.tr
 Loading...