

Trojan DUAL 510 Instruction And Assembly Manual
TROJAN
M Y S PAC E M Y T I M E
®
#
1
HOME
FITNESS
SO
U
TH A
FR
I
C
A
’
S
SI
N
CE
1
9
81
CAUTION
READ ALL PRECAUTIONS AND
INSTRUCTIONS IN THIS MANUAL
BEFORE USING THIS EQUIPMENT
KEEP THIS MANUAL FOR
FUTURE REFERENCE
1 YEAR
warranty
CALL
0861 8765
26
0
8 6
1
T R O J
A
N
WINNER, SHARON HAARHOFF,
USES TROJAN HOME FITNESS
EQUIPMENT AS PART OF
HER DAILY FITNESS
PROGRAM
SHARON HAARHOFF
AS SEEN ON
TV
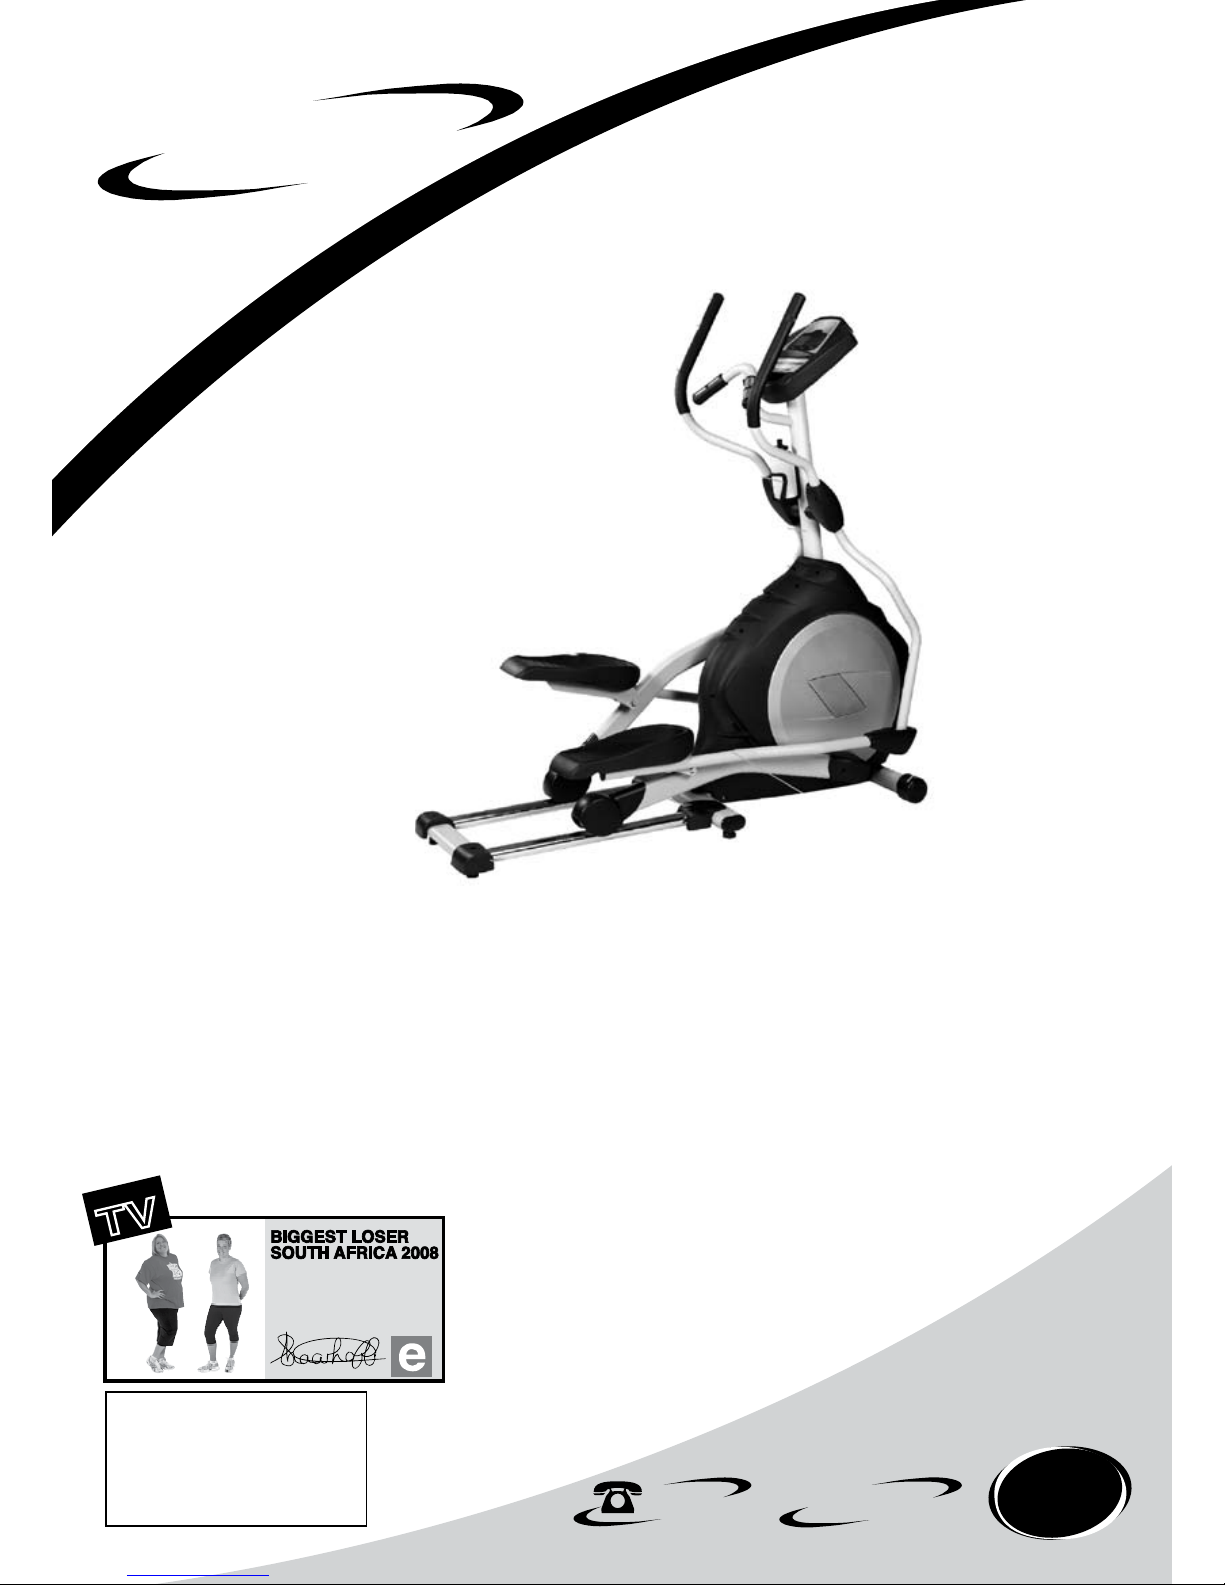
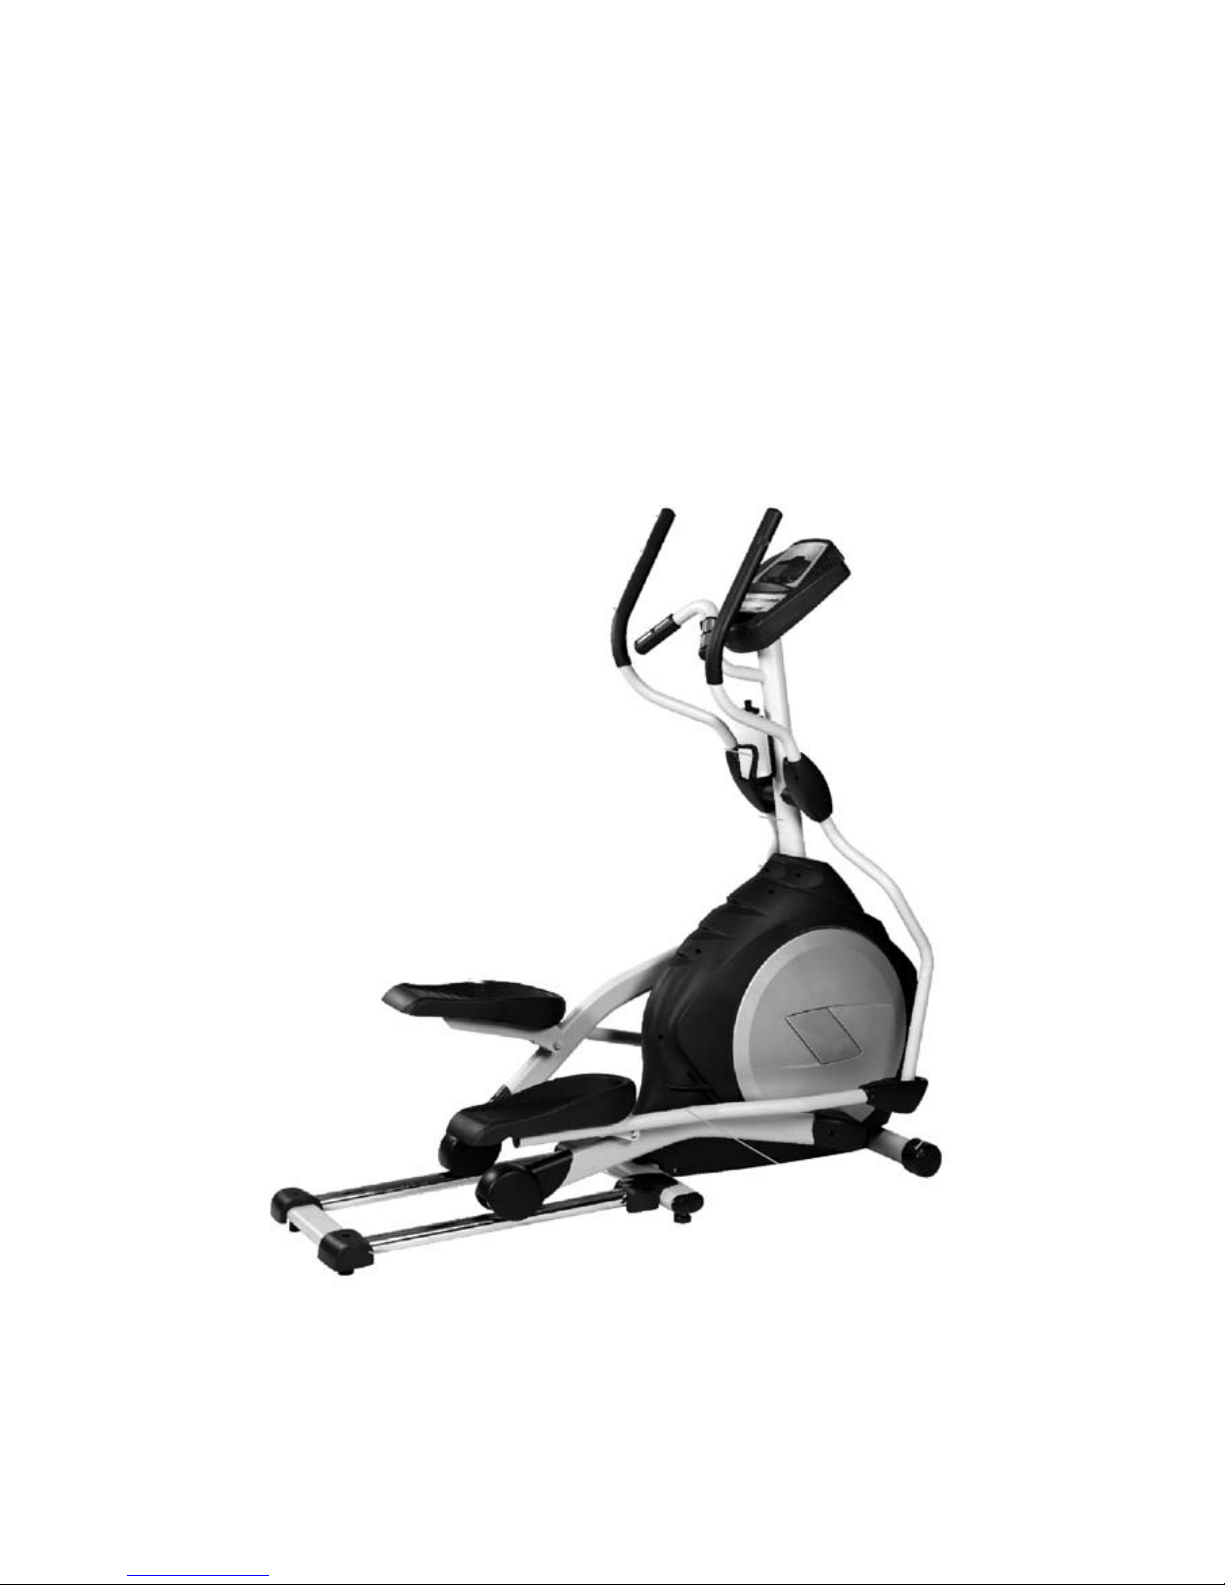
DUAL 510
ELLIPTICAL
ELLIPTICAL CARE
INSTRUCTIONS AND ASSEMBLY MANUAL

INDEX PAGE
1. SAFETY INSTRUCTIONS 3
2. PRE ASSEMBLY CHECK LIST 4
3. HARDWARE LIST 5
4. ASSEMBLY STEPS 7
5. LUBRICATION AND TRANSPORT 8
6. COMPUTER FUNCTIONS 9
7. FITNESS TIPS & TECHNIQUES 19
8. CONDITIONING GUIDELINES 20
9. WARM -UP AND COOL-DOWN 21
10. FREQUENTLY ASKED QUESTIONS 22
11. PARTS LIST 23
12. EXPLODED DRAWING 25
13. TROJAN 1 YEAR LIMITED WARRANTY 26
14. TROJAN REPAIRS PROCEDURE 28

1064M-3
1. SAFETY INSTRUCTIONS
WARNING :
To reduce the risk of serious injury, read the following safety instructions before using the TROJAN DUAL 510
ELLIPTICAL.
IMPORTANT: THIS UNIT IS INTENDED FOR HOUSEHOLD USE ONLY
DANGER: To reduce the risk of electric shock, always unplug the elliptical from the electrical outlet immediately after
using and before cleaning.
1. Use the TROJAN DUAL 510 ELLIPTICAL only on a level surface
2. Keep children and pets away from this equipment at all times.
3. The TROJAN DUAL 510 ELLIPTICAL should not be used by persons weighing more than 120 kgs
4. The TROJAN DUAL 510 ELLIPTICAL should be used by only one person at a time.
5. Be careful to maintain your balance while using, mounting, dismounting, folding, unfolding or assembling the TROJAN
DUAL 510 ELLIPTICAL. Loss of balance may result in a fall and serious bodily injury.
6. Use the TROJAN DUAL 510 ELLIPTICAL only as described in the manual.
7. Before using this equipment to exercise, always do stretching exercises to properly warm up.
8. Always make sure all bolts and nuts are tightened prior to each use.
9. If dizziness, nausea, chest pains, or any other abnormal symptoms are experienced while using this equipment, STOP
the workout at once. CONSULT A PHYSICIAN IMMEDIATELY.
10. Never leave the TROJAN DUAL 510 ELLIPTICAL unattended when plugged in. Unplug from the power outlet when
not in use and before removing or replacing parts.
11. Never operate the TROJAN DUAL 510 ELLIPTICAL if it has a damaged cord or plug, if it is not working properly, if it
has been dropped and damaged, or exposed to water.
12. Do not pull the TROJAN DUAL 510 ELLIPTICAL by the power supply cord or use the cord as a handle. Keep cord
away from heated surfaces and open ames.
13. Handicapped individuals should have medical approval and close supervision when using the TROJAN DUAL 510
ELLIPTICAL
WARNING
Before starting any exercise or conditioning program you should consult with your personal physician to see if you
require a complete physical exam. This is especially important if you are over the age of 35, have never exercised before,
are pregnant, or suffer from any illness.
1064M-4
2. PRE ASSEMBLY CHECK LIST
Thank you for choosing the TROJAN DUAL 510 ELLIPTICAL. We take great pride in producing this quality product and
hope it will provide many hours of quality exercise to make you feel better, look better and enjoy life to its fullest.
Yes, it is a proven fact that a regular exercise program can improve your physical and mental health. Too often, our busy
lifestyles limit our time and opportunity to exercise. The TROJAN DUAL 510 ELLIPTICAL provides a convenient and
simple method to begin your assault on getting your body in shape and achieving a healthier lifestyle.
Before reading further, please familiarise yourself with the parts that are labelled.
Read this manual carefully before using the Trojan Dual 510 Elliptical.
Consol
Water Bottle Holder
Handle Bar
Consol Mast
Wheel
Connecting Arm
Pedal Arm
Rear Stabiliser Cover
Cushion (Foot Pad)
Handpulse
Consol Mast Cover
Pedal
#94. 3/8”x
19 x1.5T
Flat Washer
1064M-5
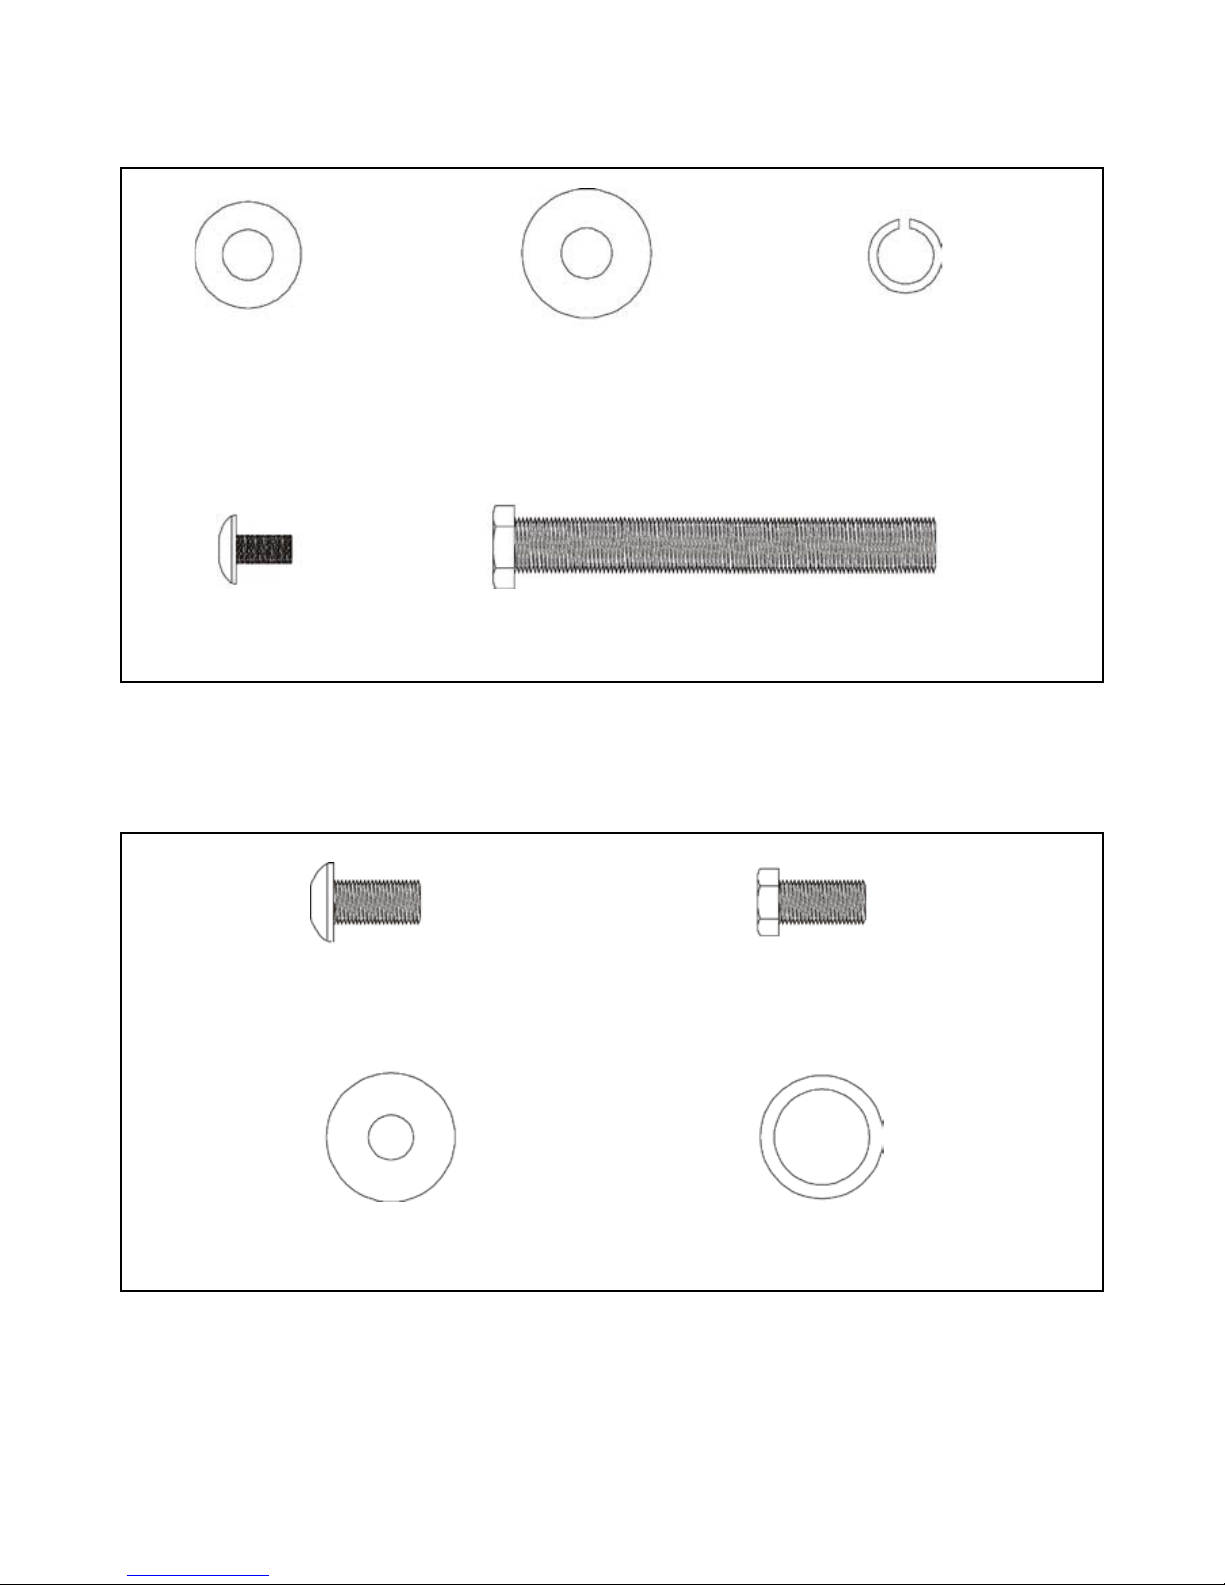
3. HARDWARE LIST
STEP 01
STEP 02
#94. 3/8”x 19 x1.5T
Flat Washer (2pcs)
#78. M5 x 10mm
Phillips Head Screw (4pcs)
#75. 5/16” x 15mm
Button Head Socket Screw (6pcs)
#97. 5/16” x 23 x 1.5T
Flat Washer (2pcs)
#114. 3/8”x 23 x2T
Curved Washer (1pc)
#119. 3/8” x 3”
Hex Head Screw
#70. 5/16” x 15mm
Hex Head Screw (2pcs)
#101. £r17
Wave Washer (2pcs)
#120. 3/8” x2T
Split Washer (3pcs)
1064M-6
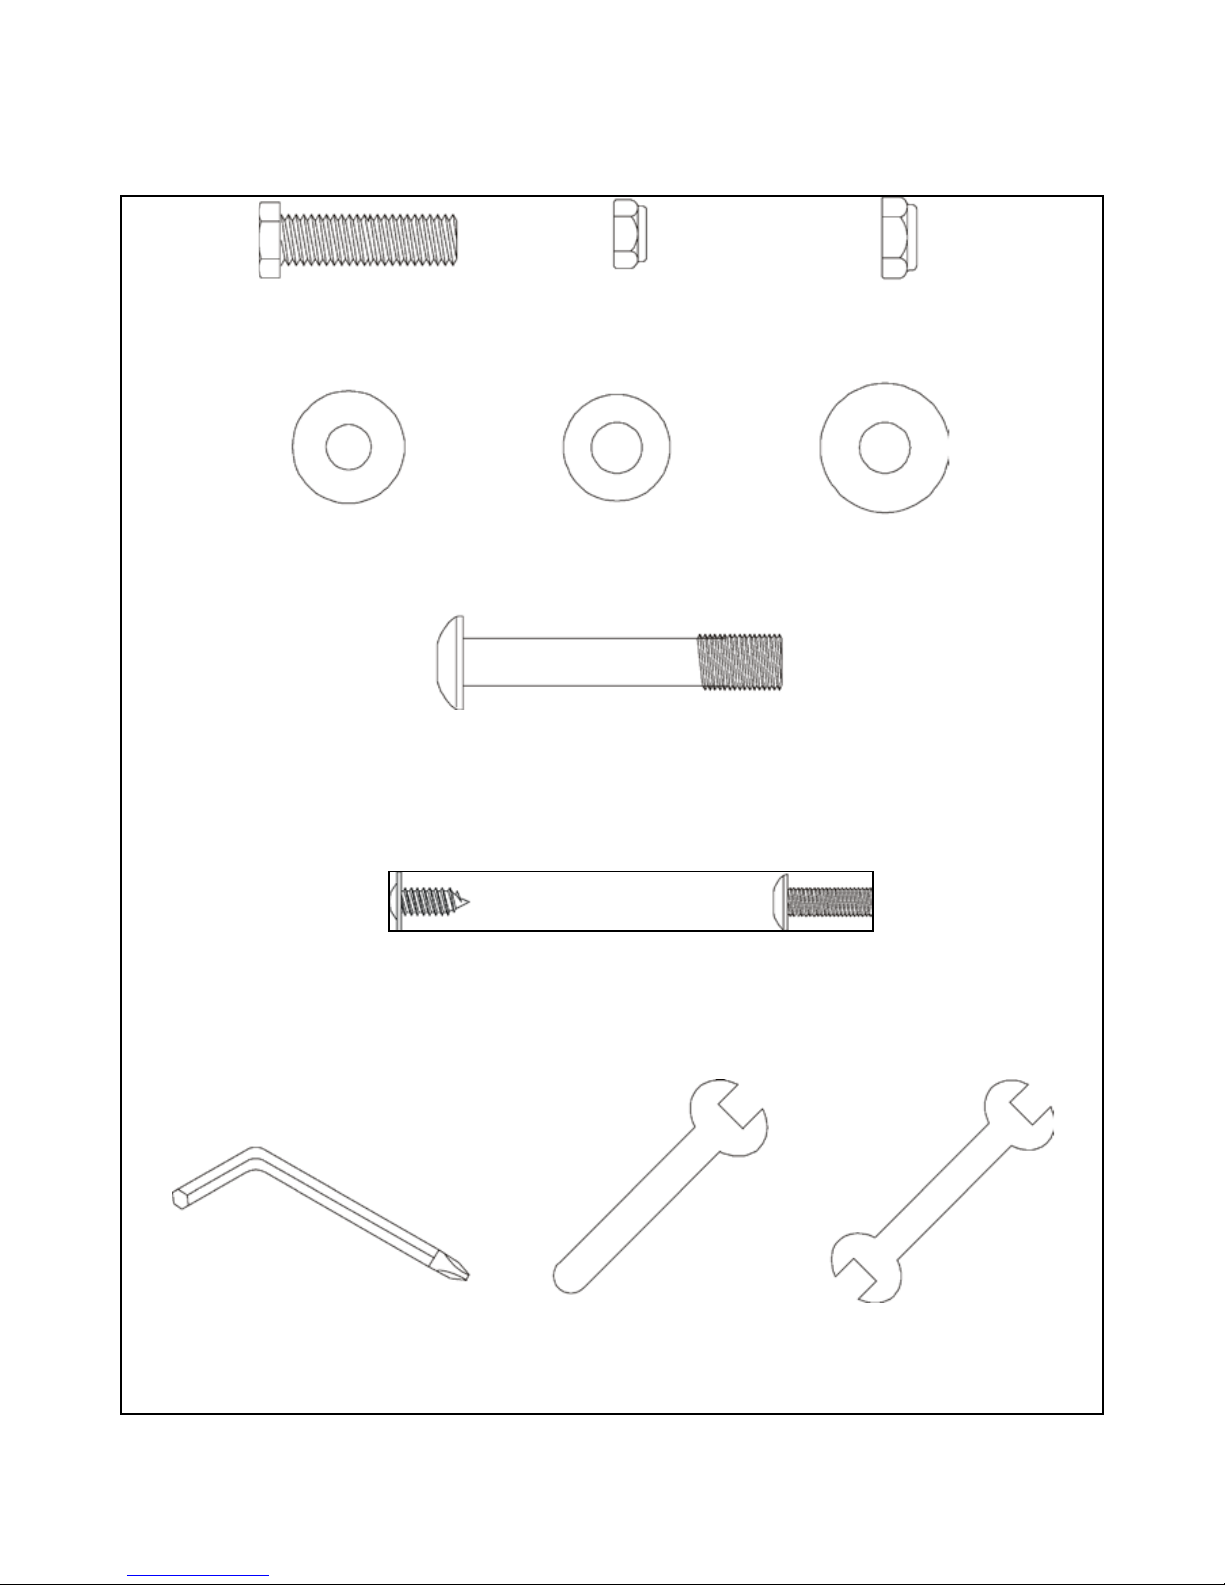
HARDWARE LISTS
STEP 03
#71. 5/16 x 32mm
Hex Head Bolt (2 pcs)
#84. £r3.5x12mm
Self Tapping Screw (8pcs)
#98. 5/16” x 20 x 1.5T
Flat Washer (2pcs)
#108. Combination M5 Allen Wrench
& Phillips Head Screw Driver (1 pc)
#105. 5/16” x 7T
Nyloc Nut (2 pcs)
#79. M5 x 15mm
Phillips Head Screw (12pcs)
#94. 3/8” x 19 x 1.5T
Flat Washer (2pcs)
#110. 12mm Wrench (1pc)
#76. 3/8 x 2-1/4”
Button Head Socket Screw (6pcs)
#89. 3/8” x 7T
Nyloc Nut (2 pcs)
#114. 3/8” x 23 x 2T
Curved Washer (4pcs)
#111. 13/14mm Wrench (2pcs)

1064M-7
4. ASSEMBLY STEPS
Unpacking the unit
1. Using a razor knife (Box Cutter) cut the outside bottom edge of the box along the dotted Line. Lift Box over the
unit and unpack.
2. Carefully remove all parts from carton and inspect for any damage or missing parts. If damaged parts are found, or
parts are missing, contact your dealer immediately.
3. Locate the hardware package. The hardware is separated into steps. Remove the tools rst, then remove the hard-
ware for each step as needed to avoid confusion.
Step 1: Consol Mast assembly
1. Locate the Consol Mast (10) and Consol Mast Cover (41) and slide the Cover onto the Mast as far as it will go.
Make sure the Consol Mast Cover (41) is facing the correct way.
2. At the top opening of the Main Frame (1), there is a Computer Cable (32) tied with a guide wire. Unravel the wire
and feed the Computer Cable (32) it into the bottom of the Consol Mast (10) with the other side coming out of
the top opening.
3. Install the Consol Mast (10) into the receiving bracket on the top of the Main Frame (1). Pull on the Computer
Cable, lightly, at the top of the mast while installing. This will ensure the cable does not get pinched or shorted
during mast assembly.
4. Attach one 3/8” x 2T Split Washer (120) and one 3/8” x 23 x 2T Curved Washer (114) onto one of the 3/8” x 3”
Hex Head Screw (119) and install this into the front of the Consol Mast. Attach two 3/8” x 19 x 1.5T Flat Washers
(94) and two 3/8” x 2T Split Washers (120) onto two 3/8” x 3” Hex Head Screws (119) and install them into the
left side of the receiving bracket of the Consol Mast (10).
NOTE: The Computer Cable runs through the Consol Mast (10). Be careful not to damage or pinch this cable
during this procedure as damage to the Consol Assembly could result.
5. Use the 13/14mm Wrench (111) to tighten the three
screws rmly. These bolts should be tightened as much
as possible. Snap the consol mast cover into place.
6. There are three connectors at the top opening of the
Consol Mast (10), two Hand Pulse Wires (37) and one
Computer Cable (32). Connect these to the mating
connectors on the back of the Consol Assembly (31).
7. Store the excess wiring by pushing it back into the
Consol Mast (10) as you carefully install the Consol
Assembly (31) onto the mounting plate of Consol
Mast (10). Secure the consol with four M5 x 10mm
Phillips Head Screws (78), using the Combination M5
Allen Wrench & Phillips Head Screw Driver (108).
1064M-8
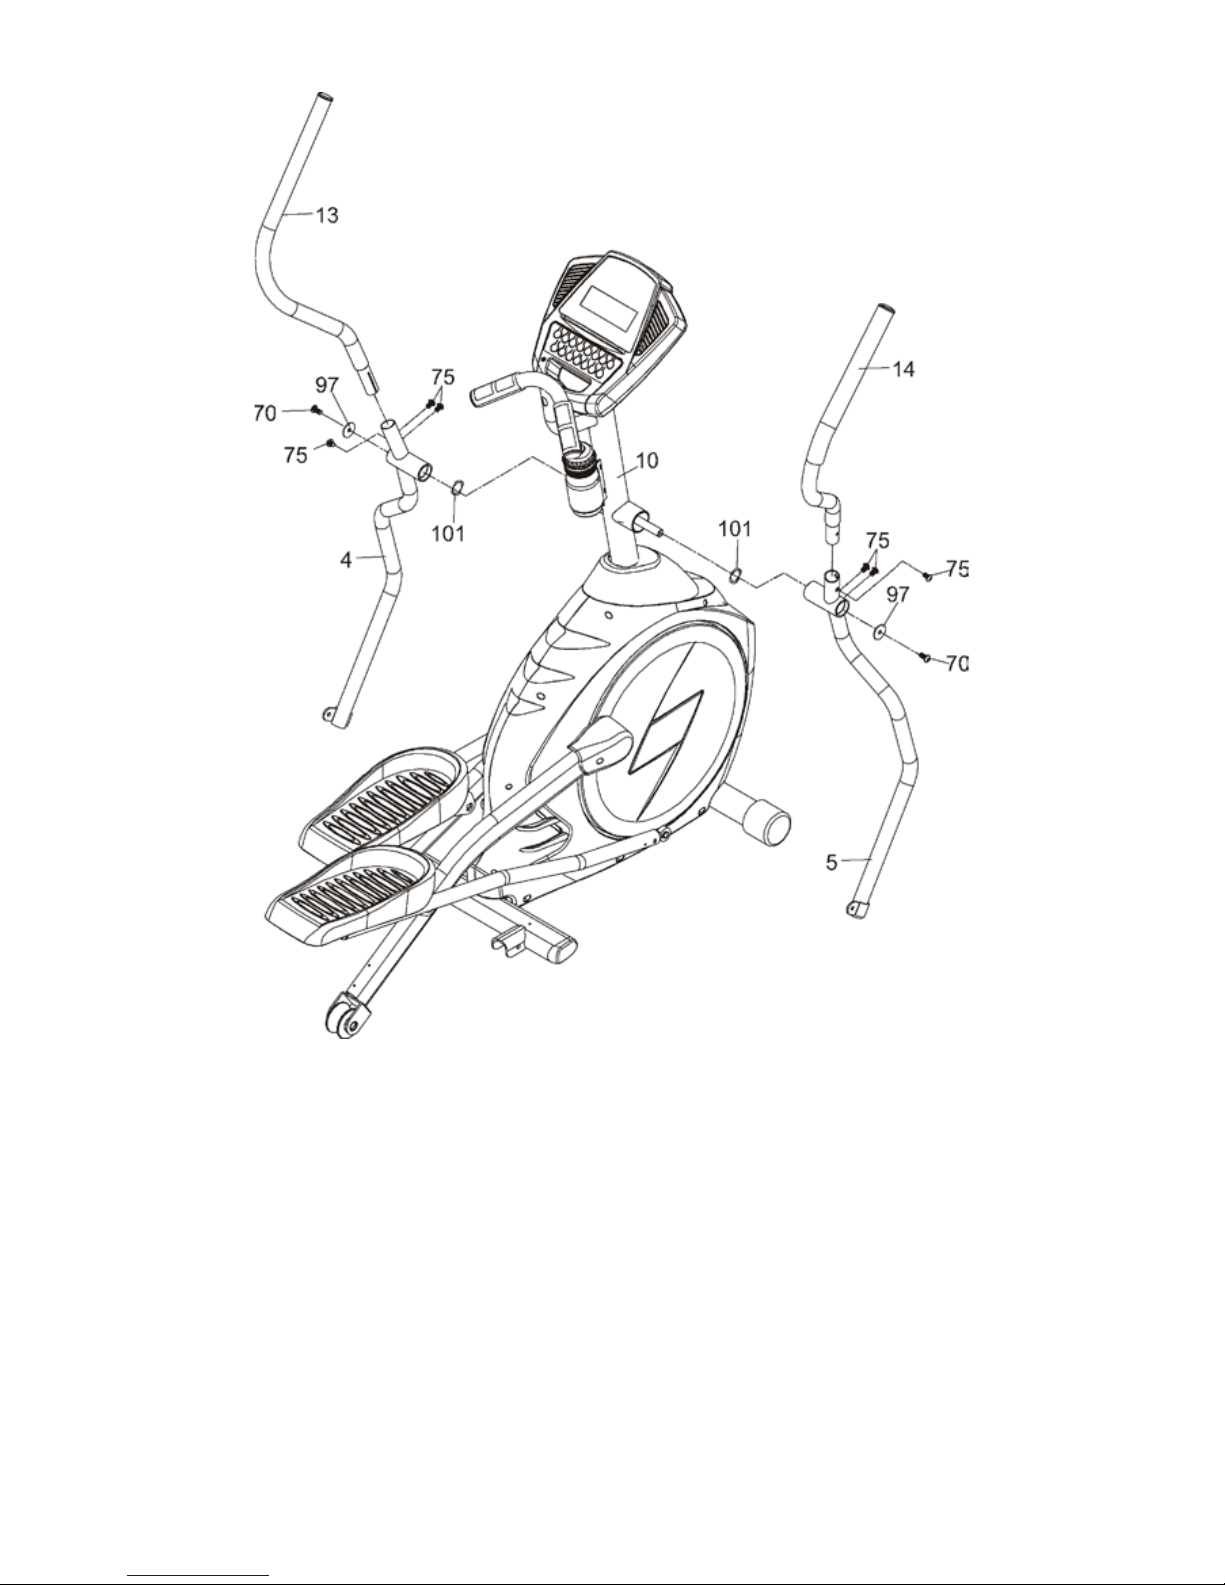
STEP 02
Step 2: Handle Bar assembly
1. Attach two Wave Washers (101) onto the Left and Right sides of the Handle Bar axle.
2. Slide the Lower Left and Right Handle Bars (4&5) onto the appropriate side of the axle. There is a small sticker on
each lower handlebar that shows “L” (Left) or “R” (Right).
3. Attach two 5/16” x 23 x 1.5T Flat Washers (97) onto two 5/16” x 15mm Hex Head Screws (70), and install in the
threaded holes in the ends of the axle.
4. Attach two Handle Bars (13, left) and (14, right), onto the Lower Left and Right Handle Bars (4&5) and fasten with
six 5/16”x 15mm Button Head Socket Screws (75), using the Combination M5 Allen Wrench & Phillips Head Screw
Driver (108).
 Loading...