

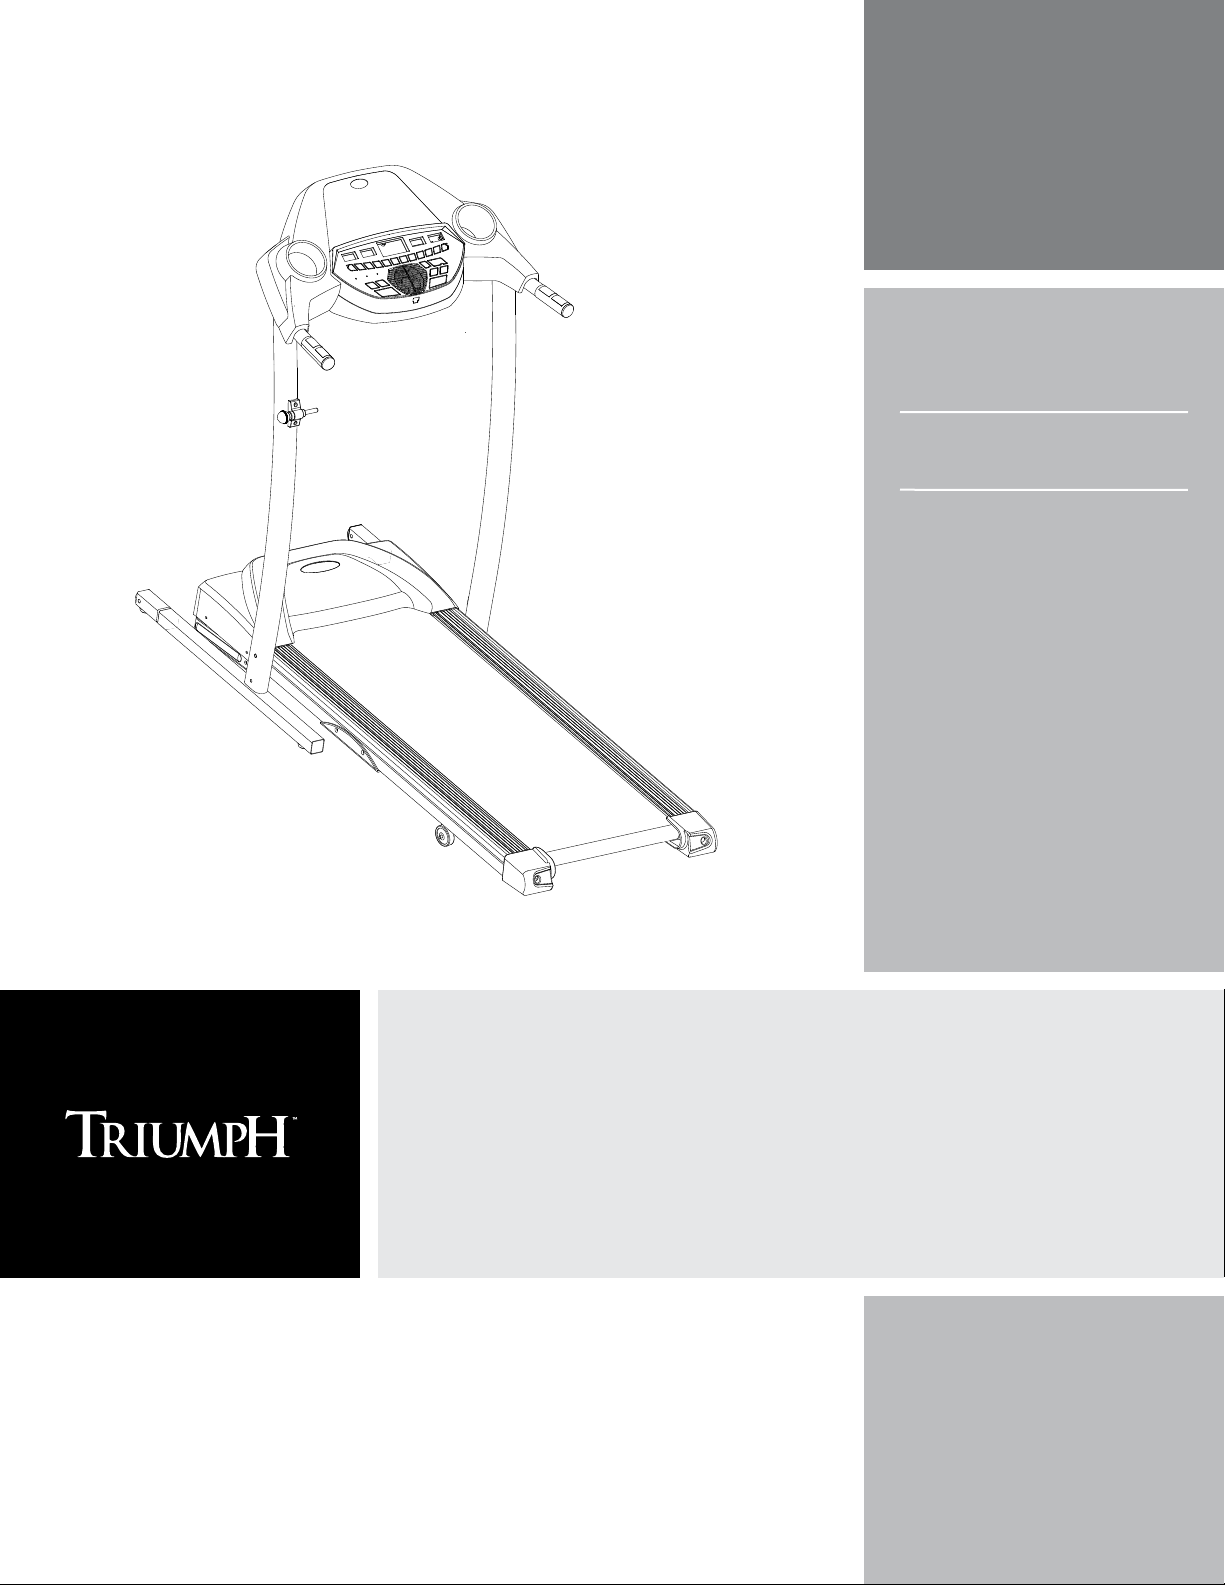
Triumph Plant 700T User Manual
FOR MODEL :
700T
TREADMILL U S E R ’ S GUIDE

IN TRODU CT ION
CONGRATULATIONS! on choosing your treadmill. You’ve taken an important step in developing and
sustaining an exercise program! Your treadmill is a tremendously effective tool for achieving your personal
fitness goals. Regular use of your treadmill can improve the quality of your life in so many ways.
Whether your goal is to win races or simply enjoy a fuller, healthier lifestyle, a Triumph treadmill can
help you attain it – adding club-quality performance to your at-home workouts, with the ergonomics
and innovative features you need to get stronger and healthier, faster. Because we're committed to
designing fitness equipment from the inside out, we use only the highest quality components.
You want exercise equipment that offers the most comfort, the best reliability and the highest quality
in its class.
Triumph delivers.
INTRODUCTION
IMPORTANT
PRECAUTIONS
ASSEMBLY
TA B LE OF CONT E NTS
Important Precautions
Assembly
Before You Begin
Treadmill Operation
Conditioning Guidelines
Troubleshooting & Maintenance
12
15
19
23
BEFORE
YOU BEGIN
4
TREADMILL
OPERATION
6
GUIDELINES
CONDITIONING
Limited Warranty
CONTACT INFORMATION
26
Back Panel
& MAINTENANCE
TROUBLESHOOTING
LIMITED
WARRANTY
3
INTRODUCTION
WARNING
WARNING
3- Pol e Grounded Out let 2- Pol e Outlet in Gr oun ded Box
METAL GROUNDING SCREW
ADAPTER
GROUNDED
TREADMILL
POWER CORD
GROUNDED
TREADMILL
POWER CORD
IM PORTAN T PREC AU TIO NS
PRECAUTIONS
IMPORTANT
ASSEMBLY
YOU BEGIN
BEFORE
SAVE THESE INSTRUCTIONS
Read all instructions before using this treadmill. When using an electrical product, basic precautions
should always be followed, including the following: Read all instructions before using this treadmill. It is the
responsibility of the owner to ensure that all users of this treadmill are adequately informed of all warnings
and precautions. If you have any questions after reading this manual, contact Customer Tech Support at the
number listed on the back panel of this manual.
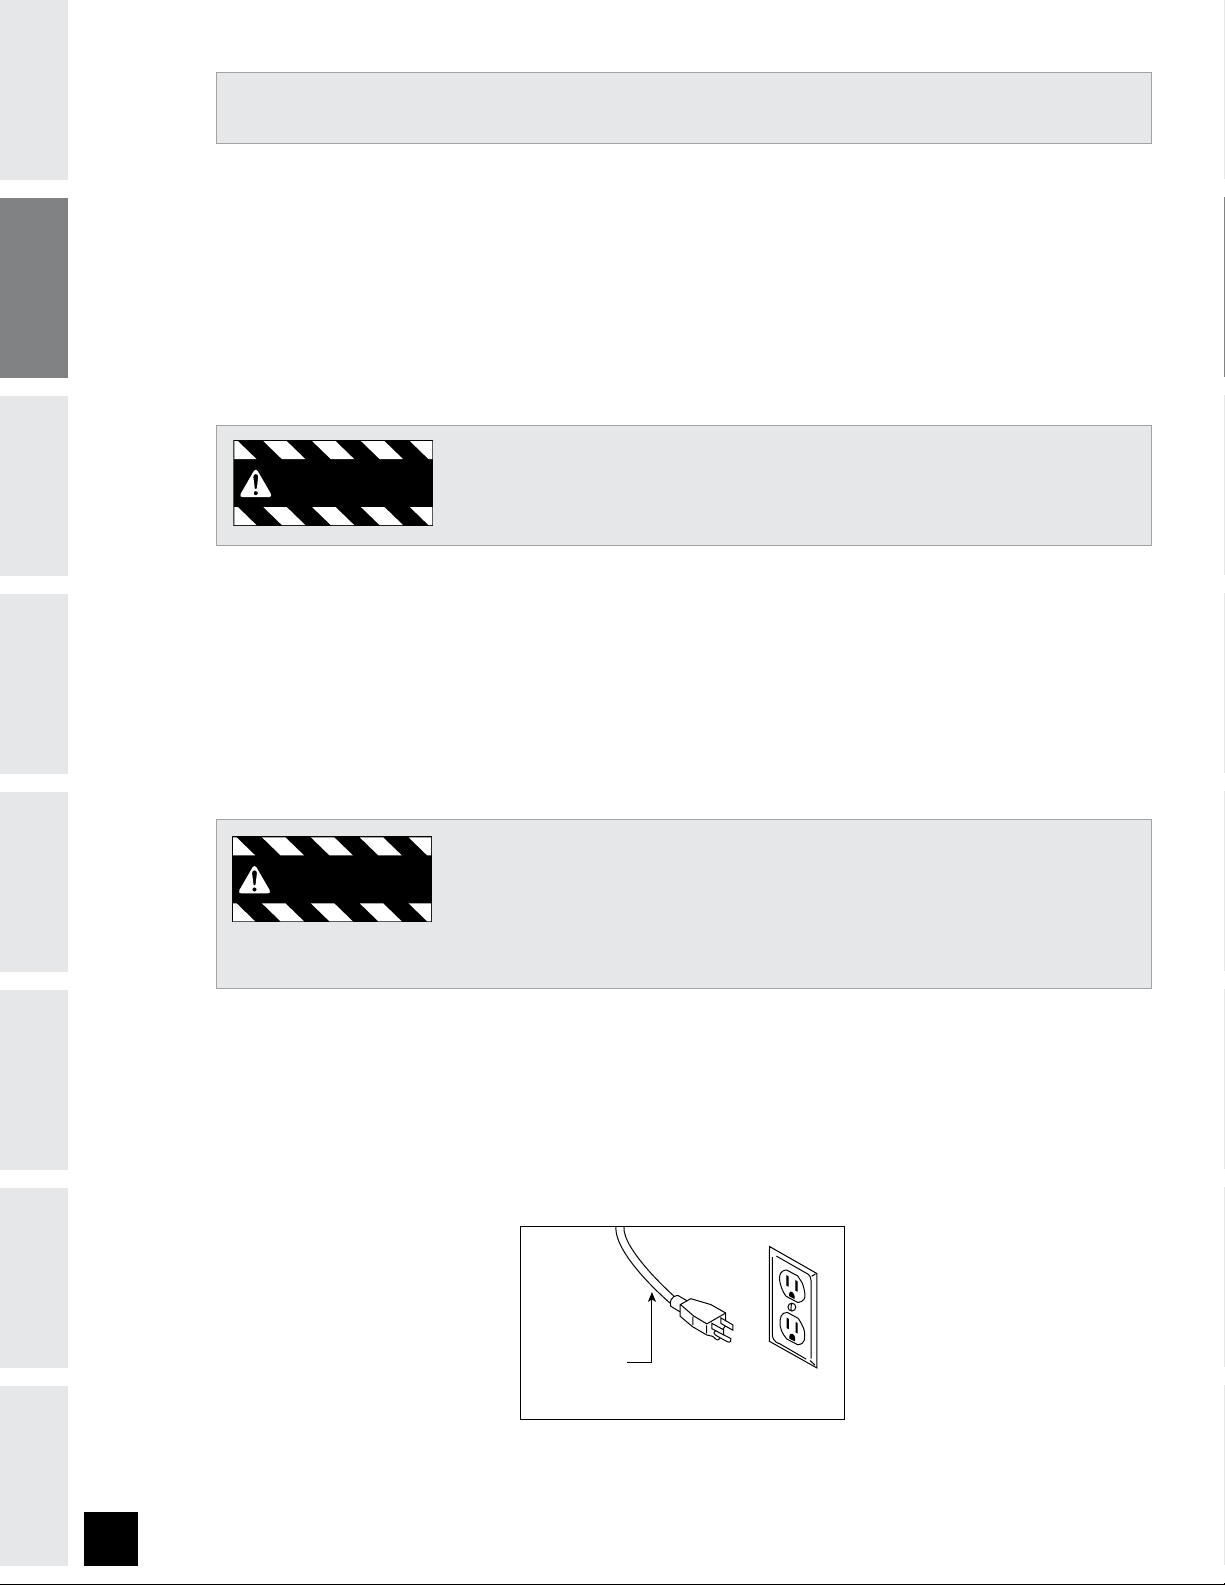
Connect this exercise product to a properly grounded outlet only. See grounding
instructions.
GROUNDING INSTRUCTIONS
This product must be grounded. If a treadmill should malfunction or breakdown, grounding provides a path
of least resistance for electrical current to reduce the risk of electrical shock. This product is equipped with
a cord having an equipment-grounding conductor and a grounding plug. The plug must be plugged into an
appropriate outlet that is properly installed and grounded in accordance with local codes and ordinances.
OPERATION
TREADMILL
CONDITIONING
GUIDELINES
This product is for use on a nominal 110-volt circuit and has a grounding plug that looks like the illustration
below. This product must be used on a dedicated circuit. To determine if you are on a dedicated circuit, shut
off the power to that circuit and observe if any other devices lose power. If so, move devices to a different
circuit. Note: There are usually multiple outlets on one circuit. It is recommended that the treadmill be used
with a 20 amp circuit for optimal performance.
TROUBLESHOOTING
& MAINTENANCE
Improper connection of the equipment-grounding conductor can result in a risk of
electric shock. Check with a qualified electrician or serviceman if you are in doubt
as to whether the product is properly grounded. Do not modify the plug provided
with the product. If it will not fit the outlet, have a proper outlet installed by a
qualified electrician.
WARRANTY
LIMITED
4
To reduce the risk of burns, fire, electrical shock or injury to persons:
WARNI NG
WARNI NG
• Never use the treadmill before securing the safety tether clip to your clothing.
• If you experience any kind of pain, including but not limited to chest pains, nausea, dizziness, or shortness
of breath, stop exercising immediately and consult your physician before continuing.
• Do not wear clothes that might catch on any part of the treadmill.
• Always wear athletic shoes while using this equipment.
• Do not jump on the treadmill.
• Keep power cord away from heated surfaces.
• Do not insert or drop any object into any opening.
• Unplug treadmill before moving or cleaning it. To clean, wipe surfaces down with soap and slightly damp
cloth only; never use solvents. (See MAINTENANCE)
• At no time should more than one person be on treadmill while in operation.
• The treadmills should not be used by persons weighing more than 250 pounds. Failure to comply will
void the warranty.
• The treadmills are intended for in-home use only. Do not use this treadmill in any commercial, rental,
school or institutional setting. Failure to comply will void the warranty.
• Do not use treadmill in any location that is not temperature controlled, such as but not limited to garages,
porches, pool rooms, bathrooms, car ports or outdoors. Failure to comply may void the warranty.
• Use the treadmill only as described in this manual.
INTRODUCTION
IMPORTANT
PRECAUTIONS
ASSEMBLY
BEFORE
YOU BEGIN
At NO time should pets or children under the age of 12 be closer to the treadmill than 10 feet.
At NO time should children under the age of 12 use the treadmill.
Children over the age of 12 should not use the treadmill without adult supervision.
OTHER SAFETY TIPS FOR YOUR TREADMILL
OPERATION
To reduce the risk of damaging important components on your treadmill, it is strongly
recommended that your treadmill is plugged into a dedicated 20 amp circuit, without
the use of an additional extension cord and/or power strip. Failure to comply may void
the warranty.
IMPORTANT: The treadmill is not compatible with GFCI-equipped outlets.
It is essential that your treadmill is used only indoors, in a climate controlled room. If your treadmill has been
exposed to colder temperatures or high moisture climates, it is strongly recommended that the treadmill is
warmed up to room temperature before first time use. Failure to do so may cause premature electronic failure.
TREADMILL
OPERATION
GUIDELINES
CONDITIONING
& MAINTENANCE
TROUBLESHOOTING
LIMITED
WARRANTY
5

INTRODUCTION
WARNI NG
PRECAUTIONS
IMPORTANT
ASSEMBLY
AS SEMBLY
IMPORTANT: READ THESE SAFETY INSTRUCTIONS BEFORE USE!
During the assembly process of the treadmill there are several areas that special attention must be paid.
It is very important to follow the assembly instructions correctly and to make sure all parts are firmly
tightened. If the assembly instructions are not followed correctly, the treadmill could have frame parts that
are not tightened and will seem loose and may cause irritating noises. There should be no side-to-side play
in the console masts or any forward and back play in the console assembly or handlebars. If there is any
play in these areas, the treadmill has not been properly assembled. To prevent damage to the treadmill, the
assembly instructions must be reviewed and corrective actions should be taken.
YOU BEGIN
BEFORE
OPERATION
TREADMILL
CONDITIONING
GUIDELINES
TROUBLESHOOTING
& MAINTENANCE
UNPACKING
Place the treadmill carton on a level flat surface. It is recommended that you place a protective covering on
your floor. Take CAUTION when handling and transporting this unit. Never open box when it is on its side.
Once the banding straps have been removed, do not lift or transport this unit unless it is fully assembled
and in the upright folded position, with the lock latch secure. Unpack the unit where it will be used. The
enclosed treadmill is equipped with high-pressure shocks and may spring open if mishandled. Never grab
hold of any portion of the incline frame and attempt to lift or move the treadmill. FAILURE TO FOLLOW THESE
INSTRUCTIONS COULD RESULT IN INJURY!
Before proceeding, find your treadmill’s serial number
and model name located to the left of the on/off
power switch and power cord and enter it in the space
provided below.
ENTER YOUR SERIAL NUMBER AND
MODEL NAME IN THE BOxES BELOW:
WARRANTY
LIMITED
SERIAL NUMBER :
MODEL NAME:
* Refer to the SERIAL NUMBER and MODEL NAME when calling for service.
* Also enter this serial number on your Warranty Card.
6
INTRODUCTION
TOOLS INCLUDED
5 mm Allen Wrench
6 mm T-Wrench
PARTS INCLUDED
1 Safety Key
1 Console Assembly
1 Water Bottle Pocket
2 Extension Tubes
4 Hardware Bags
2 End Caps
2 Hardware Bags
1 Silicon Oil Bottle
2 Console Masts
1 Deck Lock Latch
If you have questions or if there are any missing parts, contact Customer Tech Support.
Contact information is located on the back panel of this manual.
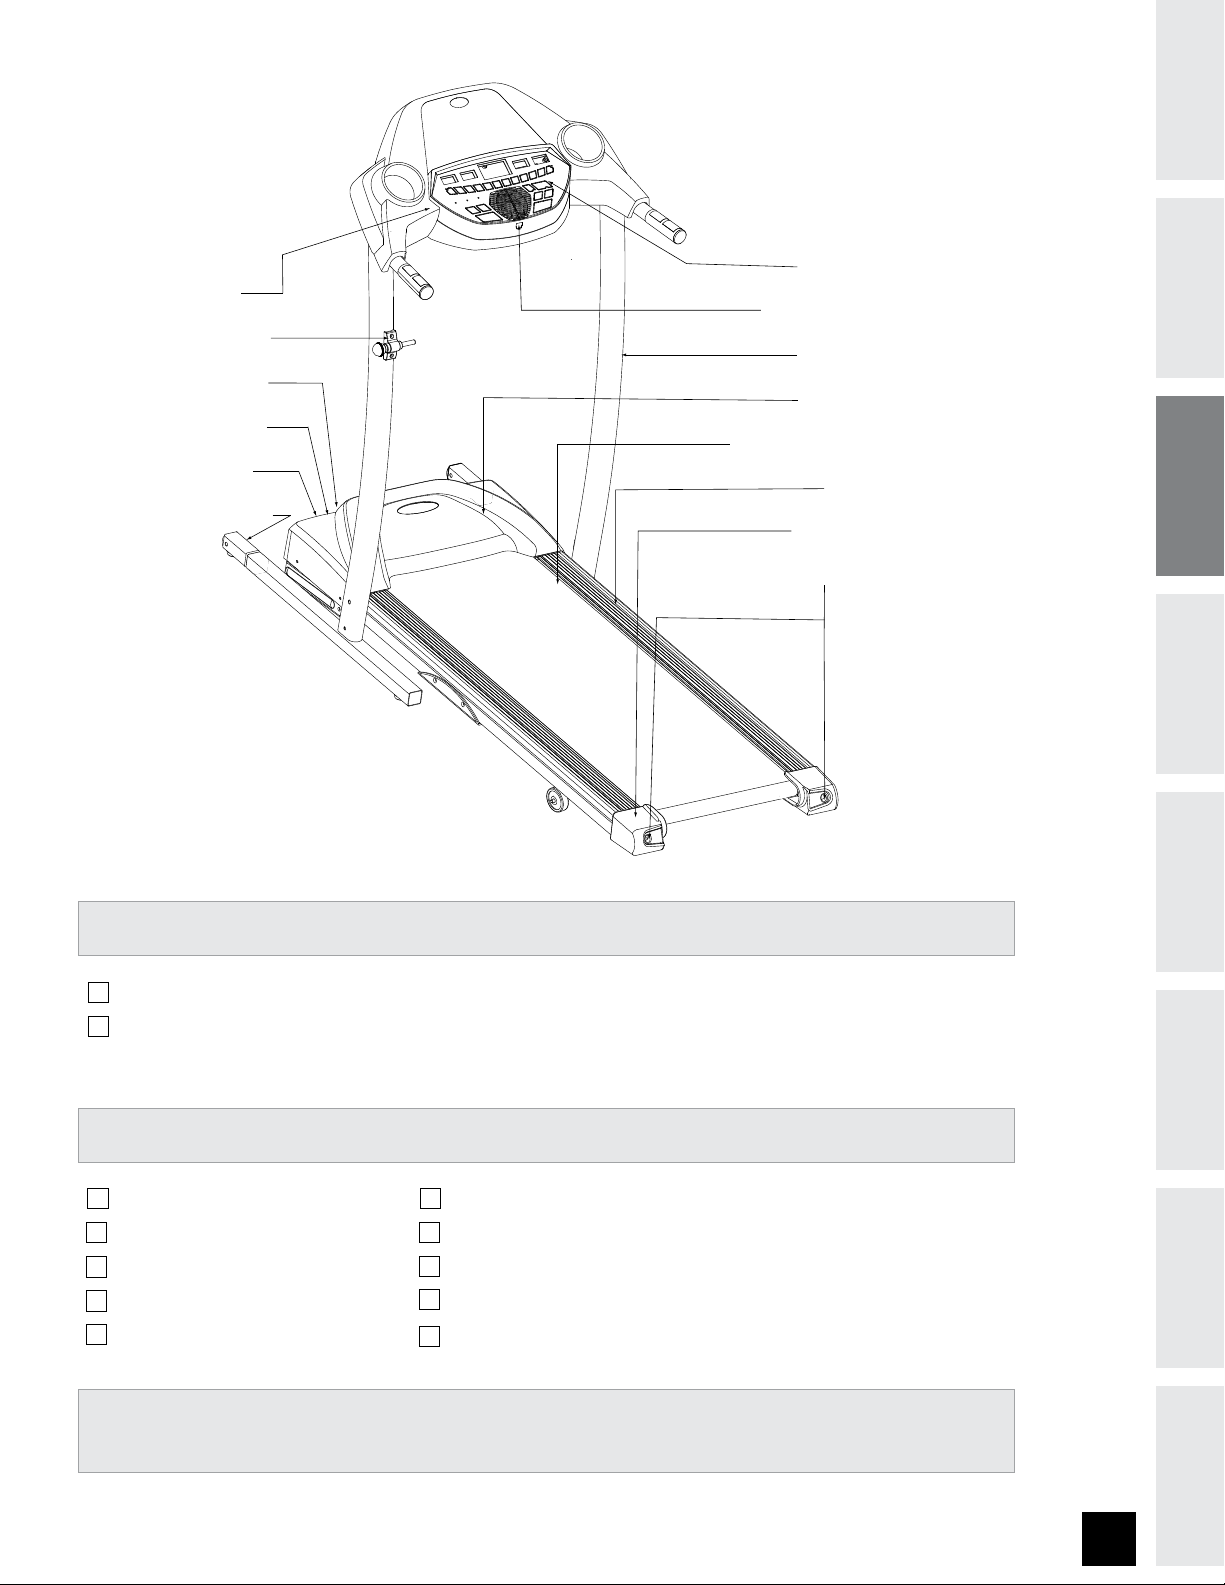
CONSOLE
DECK LOCK LATCH
ON/OFF SWITCH
CIRCUIT BREAKER
POWER CORD
TRANSPORT WHEEL
CONTROL PANEL
SAFTEY KEY PLACEMENT
CONSOLE MAST
MOTOR COVER
RUNNING BELT/RUNNING DECK
SIDE RAIL
ROLLER END CAP
REAR ROLLER
ADJUSTMENT BOLTS
IMPORTANT
PRECAUTIONS
ASSEMBLY
BEFORE
YOU BEGIN
TREADMILL
OPERATION
GUIDELINES
CONDITIONING
& MAINTENANCE
TROUBLESHOOTING
LIMITED
WARRANTY
7

INTRODUCTION
CONSOLE MAST SUPPORT TUBE
TRANSPORT WHEEL
SCREW (F)
SCREW (F)
Qty: 4
PRECAUTIONS
IMPORTANT
ASSEMBLY
PRE- A SSEMB LY
NOTE: During each assembly step, ensure that ALL nuts and bolts are in place and partially threaded in before
completely tightening any ONE bolt. NOTE: A light application of grease may aid in the installation of hardware.
Any grease, such as lithium bike grease is recommended.
ASSEMBLY S T E P 1
HARDWARE BAG 1 CONTENTS :
YOU BEGIN
BEFORE
OPERATION
TREADMILL
CONDITIONING
GUIDELINES
TROUBLESHOOTING
& MAINTENANCE
A
Open HARDWARE BAG 1.
Slide the left transport wheel
B
onto the console mast support
tube. Bolt in place using 2
SCREW (F) on the side.
C
Repeat on the other side.
WARRANTY
LIMITED
8
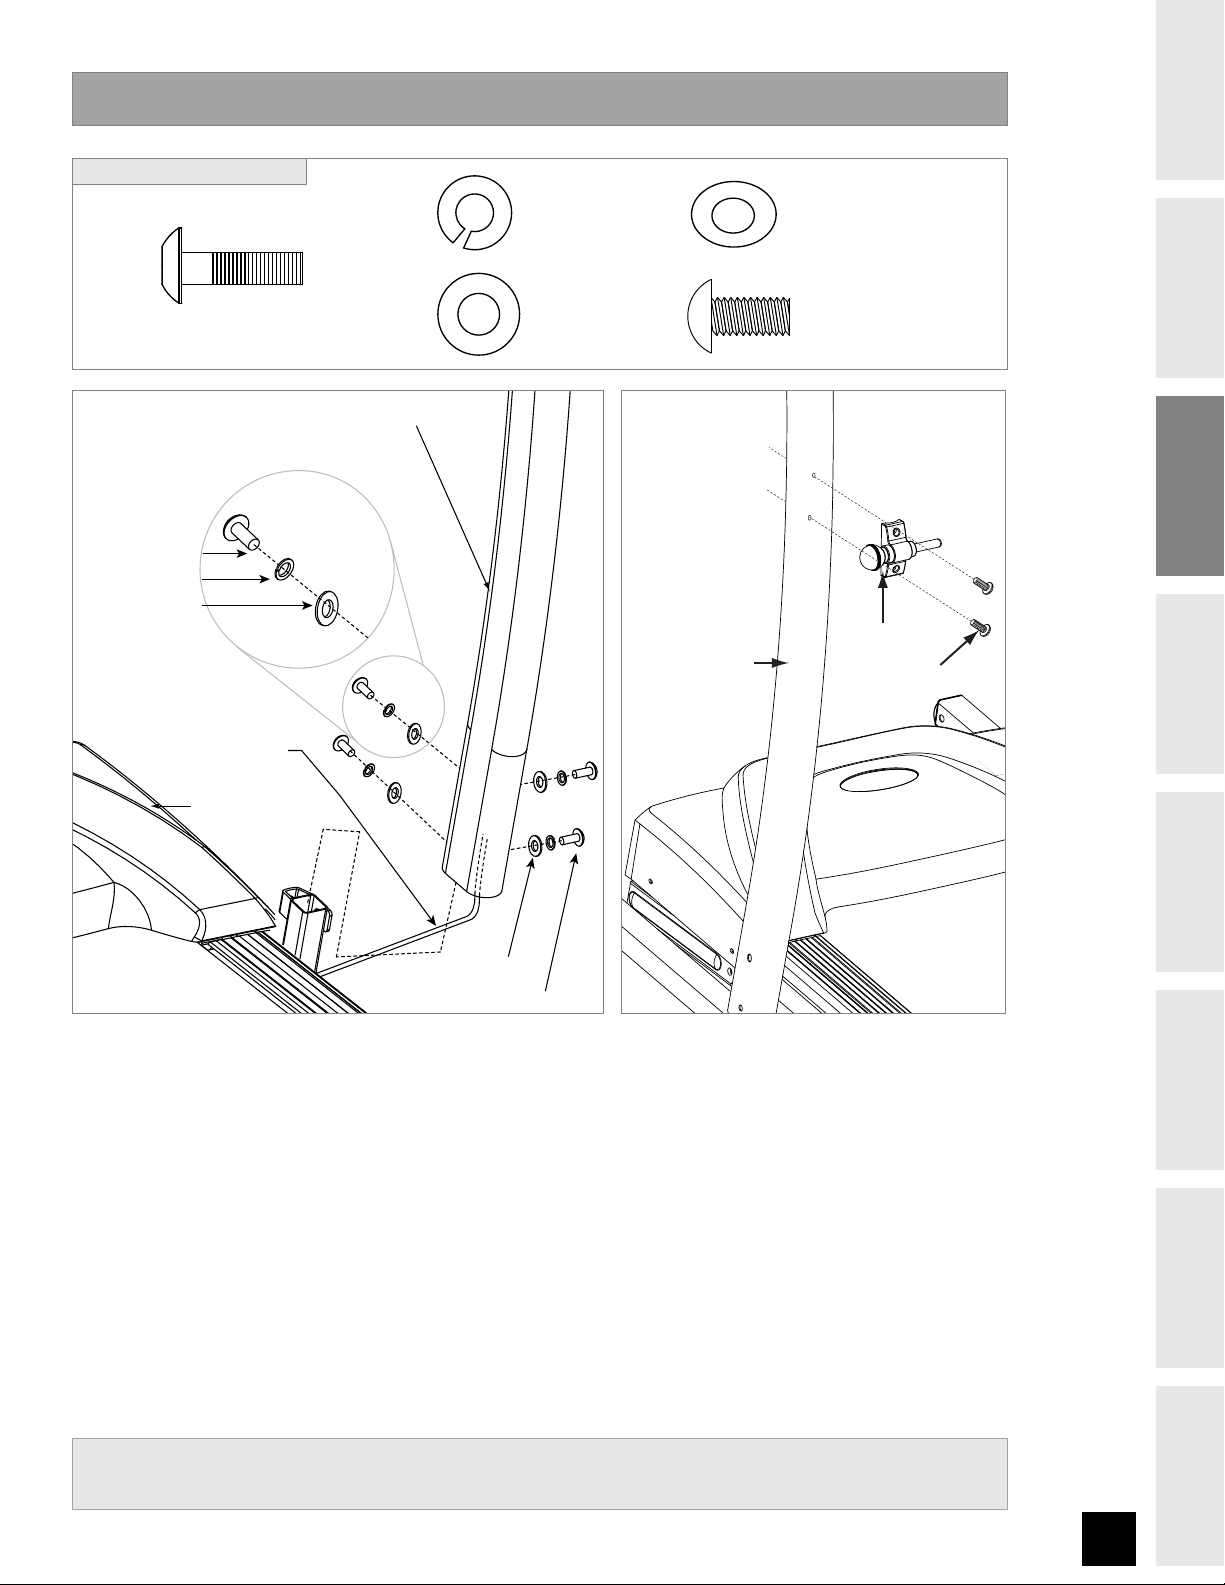
ASSEMBLY S T E P 2
BOLT (A)
Qty: 8
SPRING WASHER (B)
Qty: 8
FLAT WASHER (C)
Qty: 4
ARC WASHER (D)
Qty: 4
BOLT (E)
Qty: 2
BOLT(A)
SPRING WASHER (B)
ARC WASHER (D)
CONSOLE MAST
CONSOLE MAST SUPPORT TUBE
FLAT WASHER (C)
CONSOLE WIRE
BOLT (A)
DECK LOCK LATCH
LEFT CONSOLE MAST
BOLT (E)
HARDWARE BAG 2 CONTENTS :
INTRODUCTION
IMPORTANT
PRECAUTIONS
ASSEMBLY
A
B
Open HARDWARE BAG 2.
Note: On right CONSOLE MAST, the CONSOLE WIRE must be threaded through the MAST.
Slide the right console mast down on to the console mast support tube. Then bolt in place
using 2 BOLTS (A), 2 SPRING WASHERS (B), and 2 ARC WASHERS (D) on the front, then use 2
BOLTS (A), 2 SPRING WASHERS (B), and 2 FLAT WASHERS (C) on the side.
BEFORE
YOU BEGIN
TREADMILL
OPERATION
GUIDELINES
CONDITIONING
C
Repeat on the other side.
D
Attach DECK LOCK LATCH to LEFT CONSOLE MAST using 2 BOLTS (E).
* NOTE: Be careful not to pinch any wires while assembling the masts.
& MAINTENANCE
TROUBLESHOOTING
LIMITED
WARRANTY
9
 Loading...