

Page 1
Foreword
Warning
Caution
FOREWORD
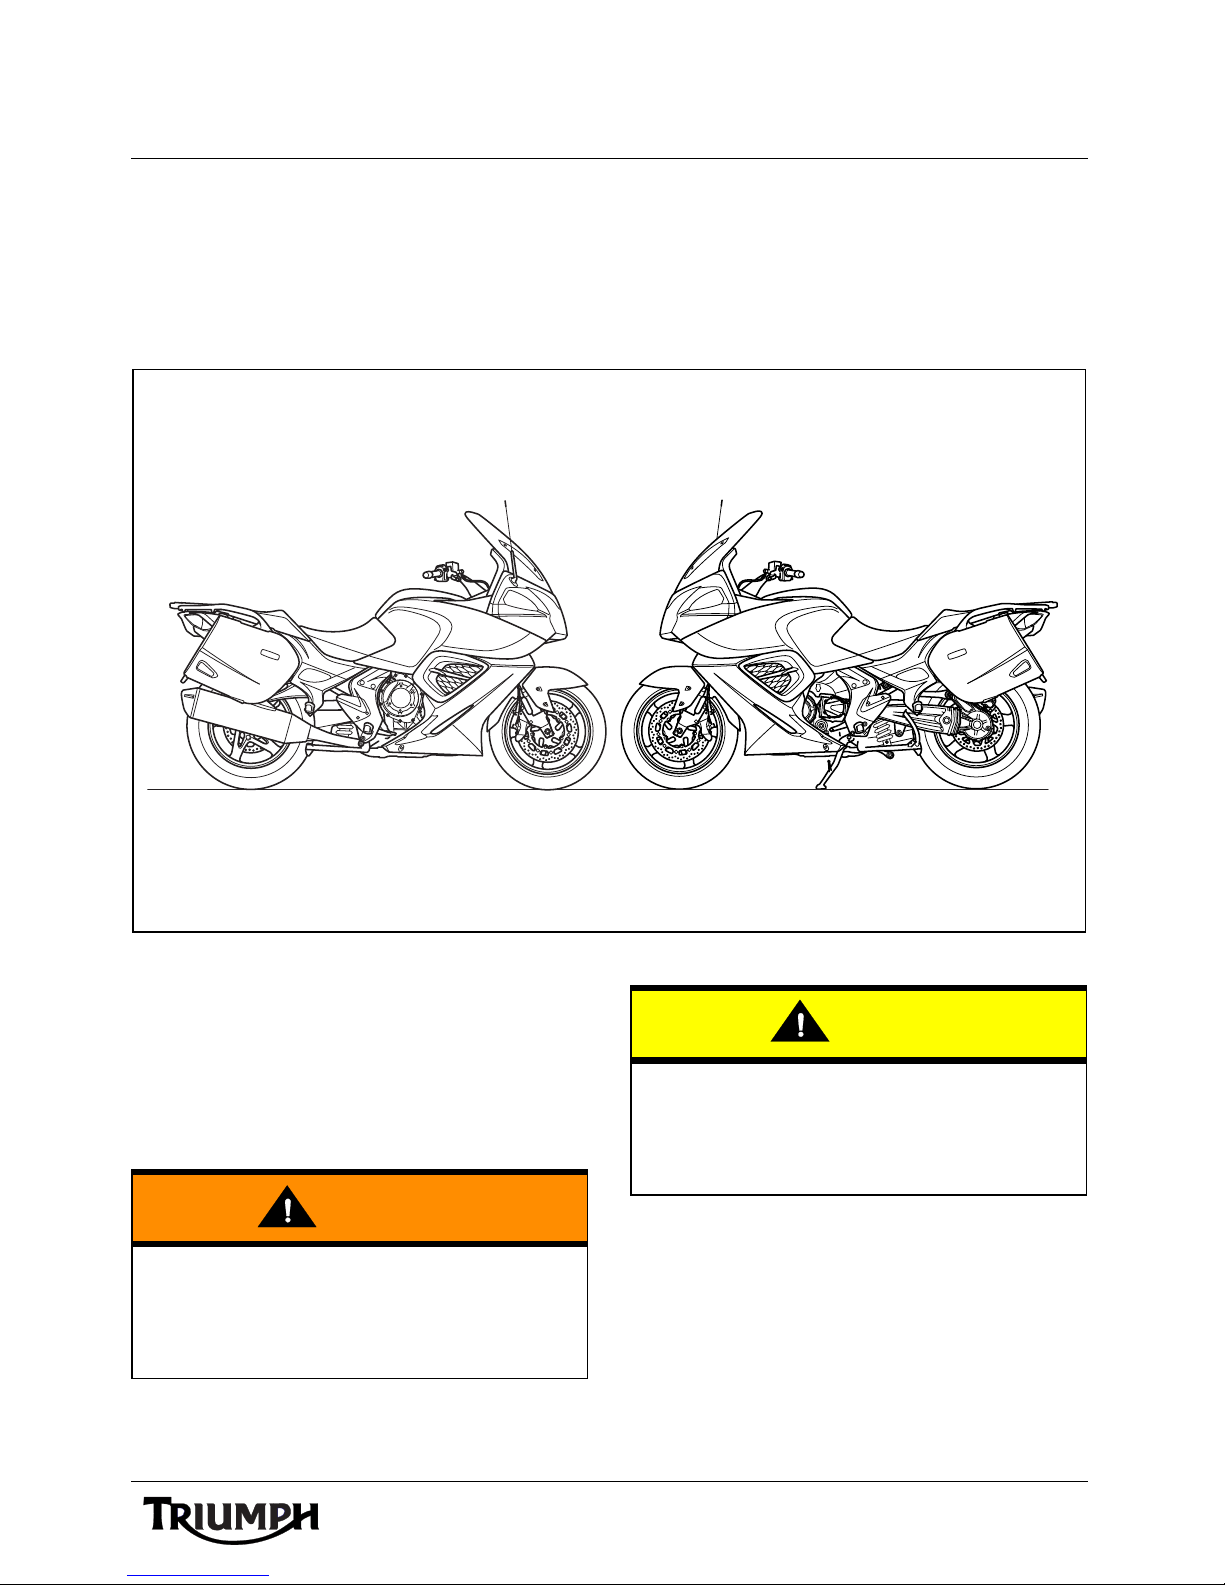
This handbook contains information on the Triumph Trophy SE Audio System. Always store this
Audio System Handbook with the motorcycle and refer to it for information whenever
necessary.
Warnings, Cautions and
Notes
Throughout this Audio System Handbook
particularly important information is
presented in the following form:
This warning symbol identifies special
instructions or procedures, which if not
correctly followed could result in personal
injury, or loss of life.
This caution symbol identifies special
instructions or procedures, which, if not
strictly observed, could result in damage to,
or destruction of, equipment.
Note:
• This note symbol indicates points
of particular interest for more
efficient and convenient operation.
1
Page 2
Foreword
Warning
Audio System Handbook
Thank you for choosing a Triumph
motorcycle. This motorcycle is the product of
Triumph's use of proven engineering,
exhaustive testing, and continuous striving for
superior reliability, safety and performance.
Please read this Audio Handbook before
riding in order to become thoroughly familiar
with the correct operation of your
motorcycle's audio controls, its features,
capabilities and limitations.
This handbook is also available from your
local dealer in:
•Dutch;
• French;
•German;
• Italian;
• Japanese;
•Spanish;
This audio system handbook, and all other
instructions that are supplied with your
motorcycle, should be considered a
permanent part of your motorcycle and
should remain with it even if your
motorcycle is subsequently sold.
All riders must read this audio system
handbook and all other instructions which
are supplied with your motorcycle, before
riding, in order to become thoroughly
familiar with the correct operation of your
motorcycle's audio controls, its features,
capabilities and limitations. Do not lend
your motorcycle to others as riding when
not familiar with your motorcycle's
controls, features, capabilities and
limitations can lead to an accident.
•Swedish.
FCC and Industry Canada
Compliance Statement
This device complies with FCC Rules Part 15
and Industry Canada RSS-210 (Rev. 7).
Operation is subject to the following two
conditions:
• This device may not cause harmful
interference;
• This device must accept any
interference received, including
interference that may cause
undesired operation.
Changes or modifications to the device could
void the user's authority to operate the
equipment.
Talk to Tr i u mph
Our relationship with you does not end with
the purchase of your Triumph. Your feedback
on the buying and ownership experience is
very important in helping us develop our
products and services for you. Please help us
by ensuring your dealership has your E-mail
address and registers this with us. You will
then receive an online customer satisfaction
survey invitation to your E-mail address
where you can give us this feedback.
Your Tri u mp h Tea m.
2
Page 3

Foreword
Information
The information contained in this publication is based on the latest information available at the
time of printing. Triumph reserves the right to make changes at any time without prior notice, or
obligation.
Not to be reproduced wholly or in part without the written permission of Triumph Motorcycles
Limited.
© Copyright 09.2012 Triumph Motorcycles Limited, Hinckley, Leicestershire, England.
Publication part number 3852490 issue 1.
Table of Contents
This audio handbook contains a number of different sections. The table of contents below will
help you find the beginning of each section where, in the case of the major sections, a further
table of contents will help you find the specific subject required.
Foreword . . . . . . . . . . . . . . . . . . . . . . . . . . . . . . . . . . . . . . . . . . . . . . . . . . . . . . . . . . . . . . . . . . . 1
Parts Identification . . . . . . . . . . . . . . . . . . . . . . . . . . . . . . . . . . . . . . . . . . . . . . . . . . . . . . . . . . . . 4
Basic Operation . . . . . . . . . . . . . . . . . . . . . . . . . . . . . . . . . . . . . . . . . . . . . . . . . . . . . . . . . . . . . . 5
Radio - All Markets Except USA and Canada . . . . . . . . . . . . . . . . . . . . . . . . . . . . . . . . . . . . . . 13
Radio - USA and Canada Only . . . . . . . . . . . . . . . . . . . . . . . . . . . . . . . . . . . . . . . . . . . . . . . . . 21
External Media Players and Telephone . . . . . . . . . . . . . . . . . . . . . . . . . . . . . . . . . . . . . . . . . . . 31
®
Bluetooth
Specifications . . . . . . . . . . . . . . . . . . . . . . . . . . . . . . . . . . . . . . . . . . . . . . . . . . . . . . . . . . . . . . . 49
Setup . . . . . . . . . . . . . . . . . . . . . . . . . . . . . . . . . . . . . . . . . . . . . . . . . . . . . . . . . . . . 43
3
Page 4
Parts identification
2 4 5 63 8
12
14
15
10
91
chsc
11
13
7
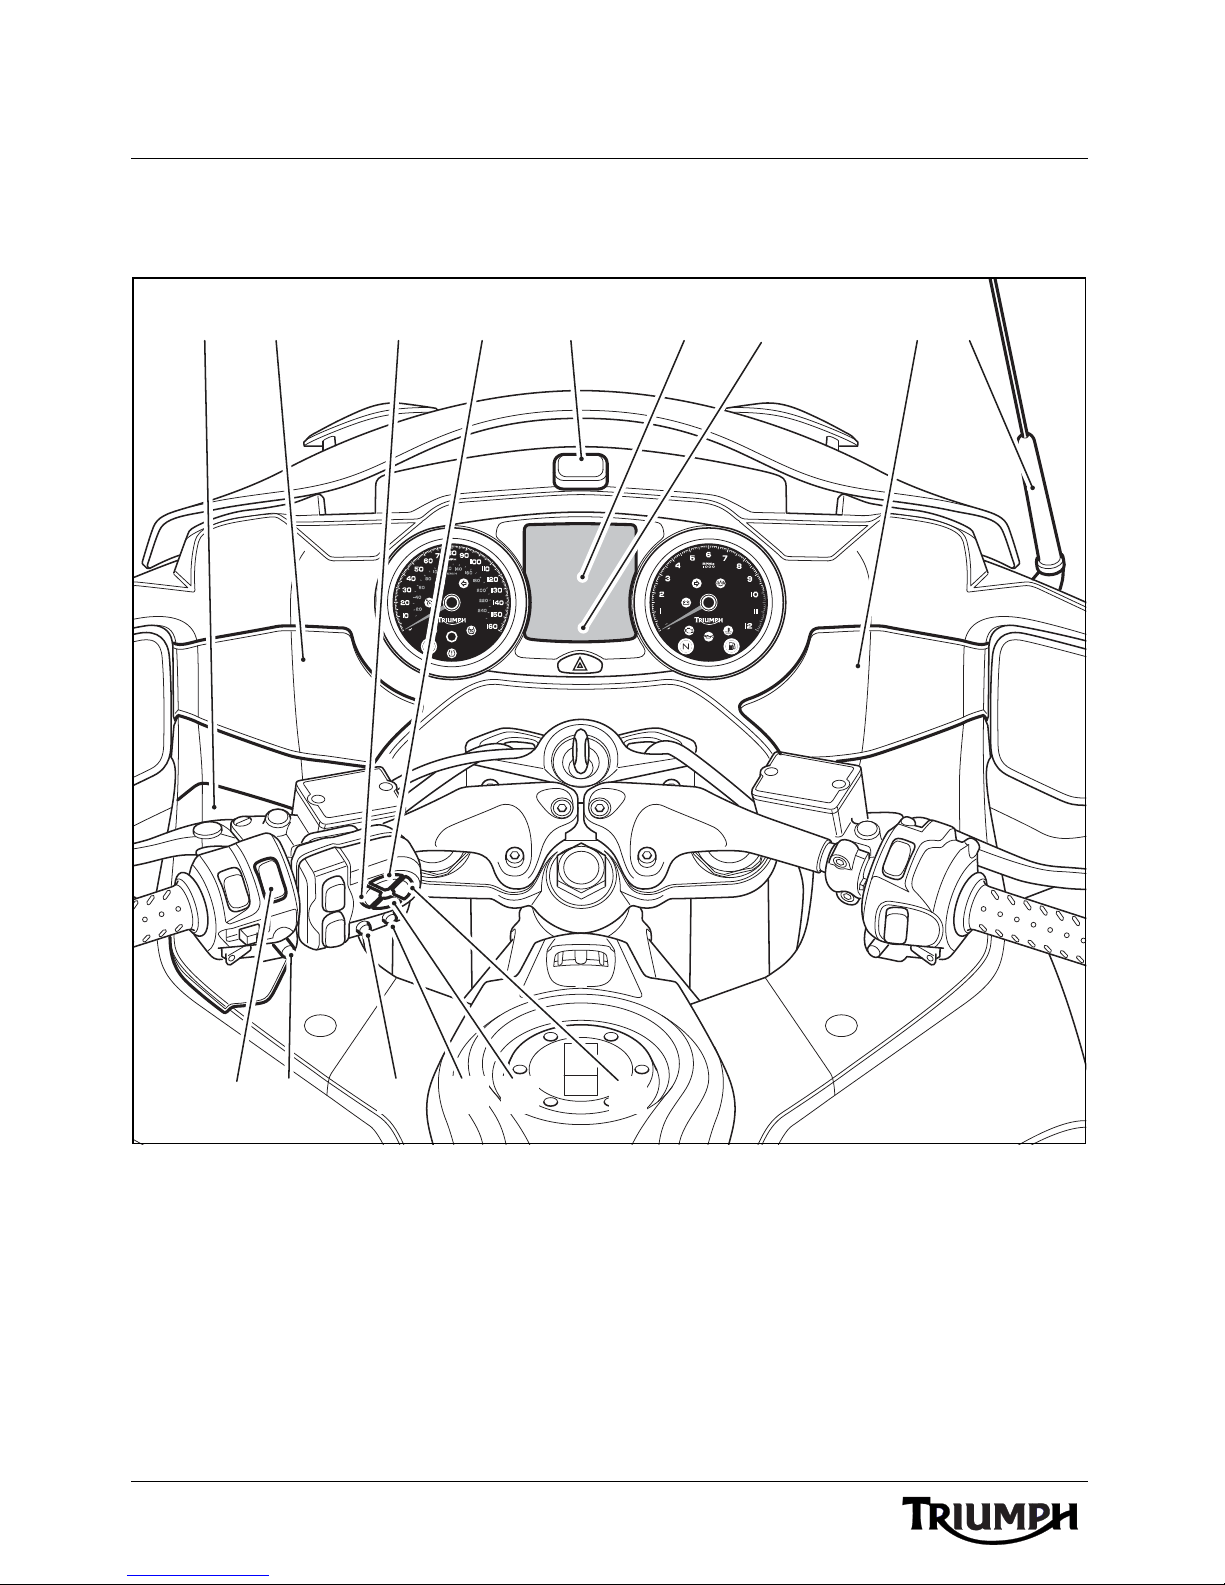
PARTS IDENTIFICATION
1. U S B c o n n e c t o r ( i n cockpit stowage
box)
2. Left hand speaker
3. Tuning down (T-) button
4. Volume up (VOL+) button
5. XM antenna (USA and Canadian
models only)
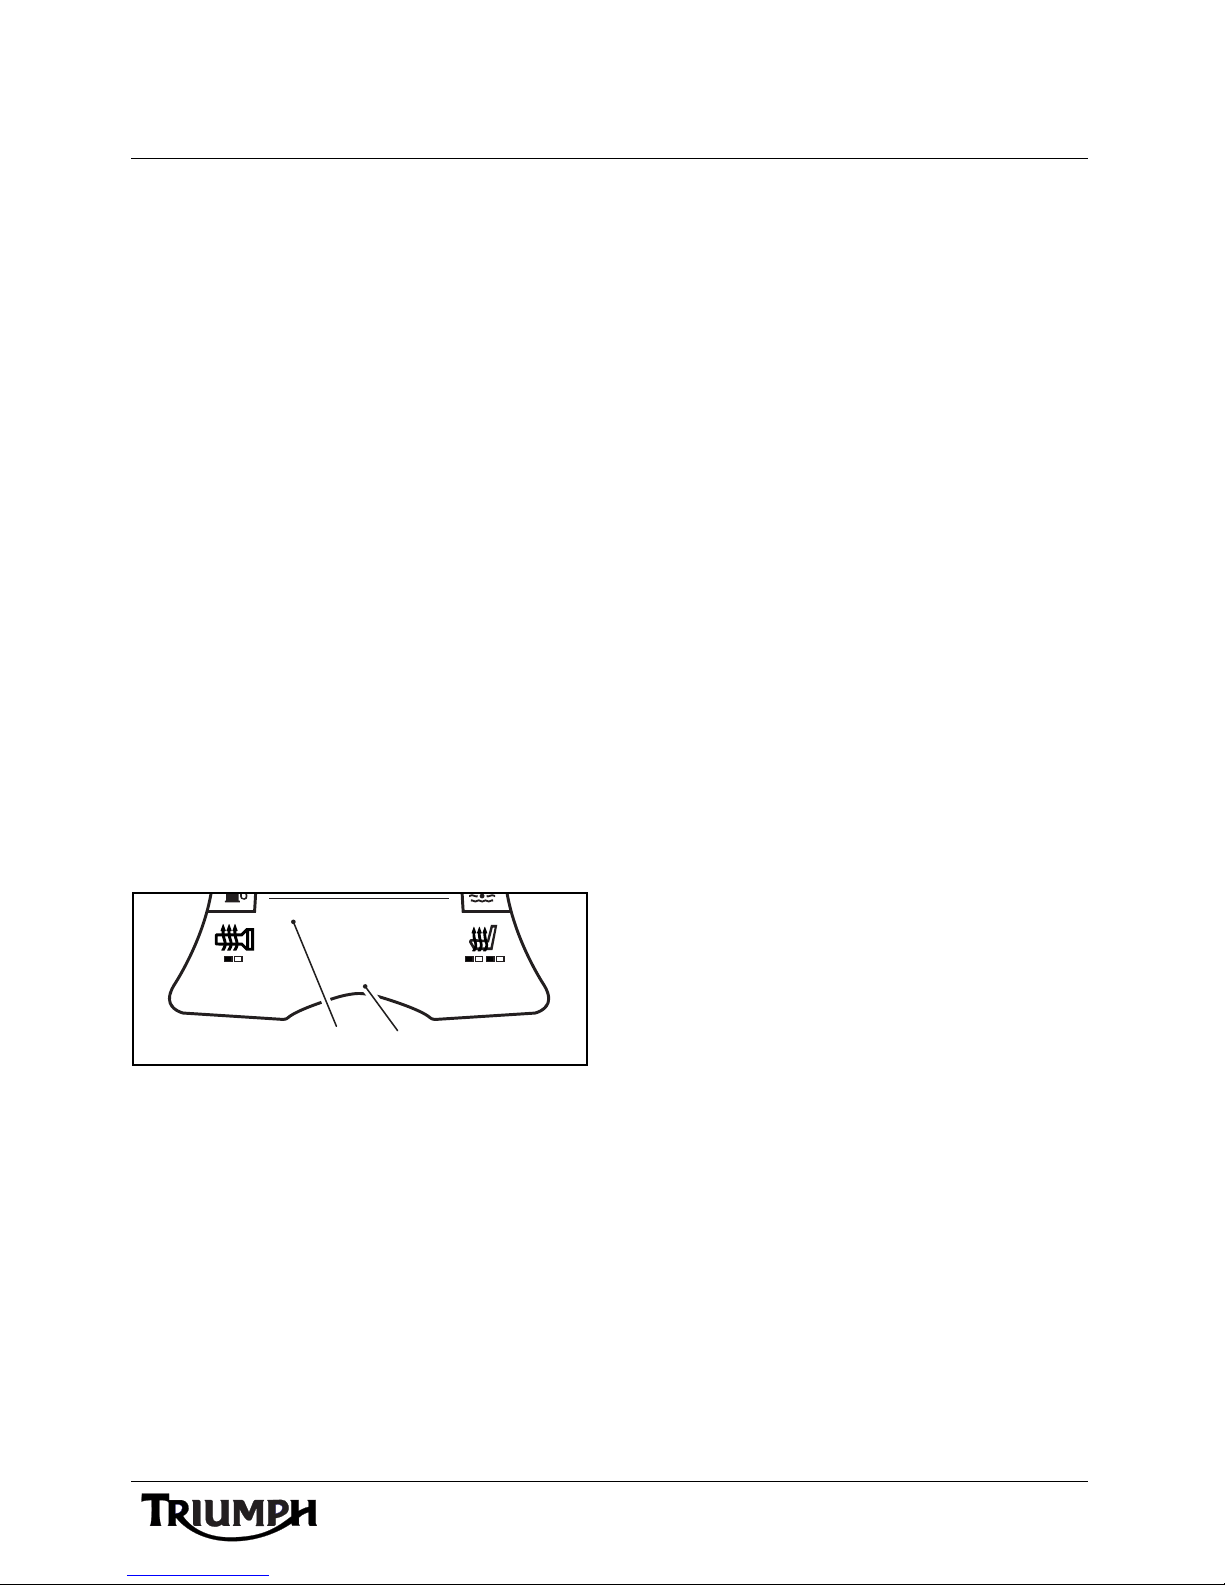
6. Instrument central display area
7. Instrument lower message area
8. Right hand speaker
9. Antenna
10.Tuning up (T+) button
11. Volume down (VOL-) button
12.MODE/MENU button
13.PRESET button
14.Instrument select button
15.Instrument scroll button
4
Page 5

Basic Operation
BASIC OPERATION
Table of Contents
Audio Switch Unit Layout . . . . . . . . . . . . . . . . . . . . . . . . . . . . . . . . . . . . . . . . . . . . . . . . . . . . . . 6
Switching On the Audio System . . . . . . . . . . . . . . . . . . . . . . . . . . . . . . . . . . . . . . . . . . . . . . . . . 6
Switching Off the Audio System . . . . . . . . . . . . . . . . . . . . . . . . . . . . . . . . . . . . . . . . . . . . . . . . . 7
Low Voltage Power Off . . . . . . . . . . . . . . . . . . . . . . . . . . . . . . . . . . . . . . . . . . . . . . . . . . . . . 7
Adjusting the Volume. . . . . . . . . . . . . . . . . . . . . . . . . . . . . . . . . . . . . . . . . . . . . . . . . . . . . . . . . . 8
Muting the Volume . . . . . . . . . . . . . . . . . . . . . . . . . . . . . . . . . . . . . . . . . . . . . . . . . . . . . . . . . . . 8
Radio Settings . . . . . . . . . . . . . . . . . . . . . . . . . . . . . . . . . . . . . . . . . . . . . . . . . . . . . . . . . . . . . . . . 9
Adjustment Range. . . . . . . . . . . . . . . . . . . . . . . . . . . . . . . . . . . . . . . . . . . . . . . . . . . . . . . . . 9
Audio Adjustment . . . . . . . . . . . . . . . . . . . . . . . . . . . . . . . . . . . . . . . . . . . . . . . . . . . . . . . . . 9
5
Page 6
Basic Operation
P
M
chsb
1
7
5
2
3 4
68
RADIO 1
FM
P2
AF TA RG
97.9
ST
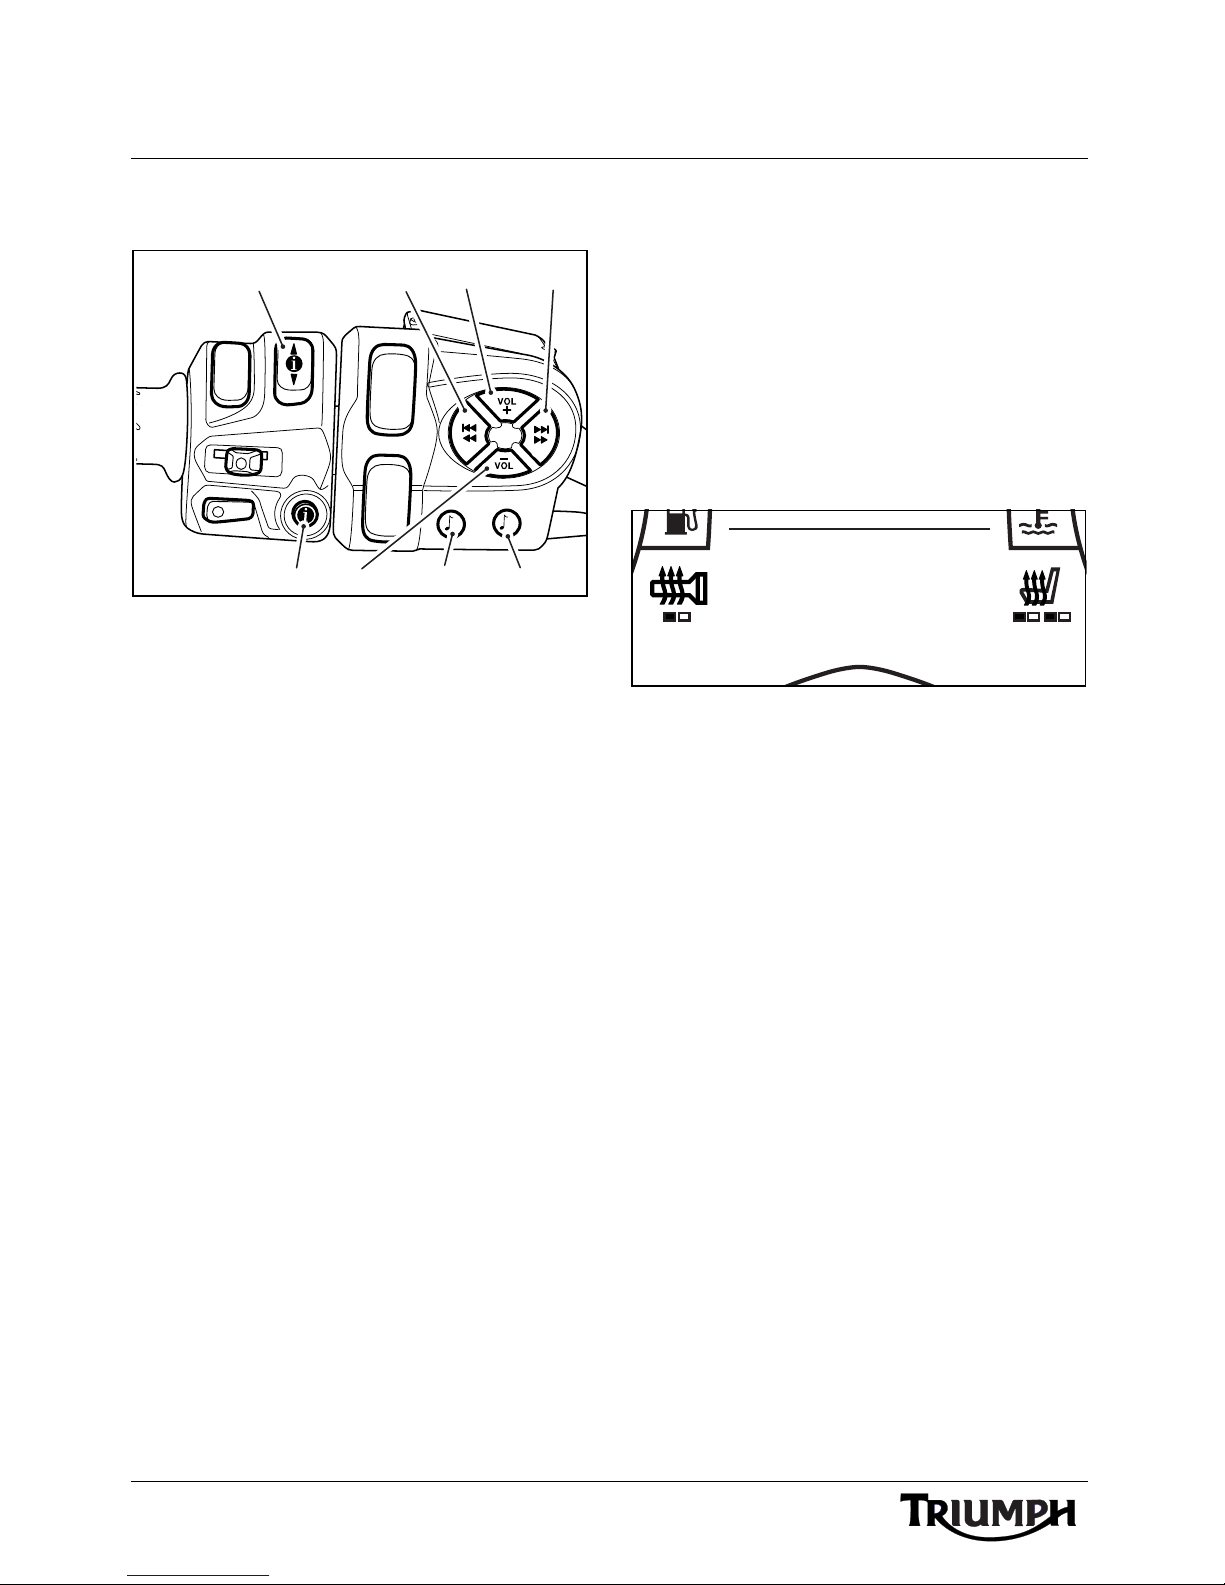
Audio Switch Unit Layout
1. Instrument scroll button
2. Tuning down (T-) button
3. Volume up (VOL+) button
4. Tuning up (T+) button
5. MODE/MENU button
6. PRESET button
7. Volume down (VOL-) button
8. Instrument select button
Switching On the Audio
System
With the motorcycle ignition on, pressing
either the VOL+ or MODE/MENU buttons
on the audio switch unit will turn the audio
system on.
The instruments will display the current audio
source (FM radio, XM Satellite Radio
USB etc.) in the lower display area.
Audio Source - FM Shown
The audio system will return to the same
audio source and volume set before it was
turned off.
The audio system will also be turned back on
when the ignition is turned on, provided it
was on prior to the ignition being turned off.
®
, iPod,
6
Page 7
Basic Operation
1892
ODO
144.2
RADIO OFF
1892
ODO
144.2
LOW VOLTAGE
Switching Off the Audio
System
Radio Off
Press and hold the VOL- button on the audio
switch unit.
The audio will first MUTE (see page 8) and
then turn off.
The instruments will display RADIO OFF in
the lower display area.
The audio system will also be turned off
when the ignition is turned off.
Low Voltage Power Off
Low Voltage Power Off
The on-board electronics will determine if the
battery is sufficiently charged to power the
audio system; if the battery voltage drops too
low the audio system will be turned off and
the instruments will display LOW VOLTAGE
in the lower display area.
Under these circumstances the audio system
can be turned on again once the battery has
been recharged or the engine has been
started.
7
Page 8
Basic Operation
1892
ODO
VOLUME 10
RADIO 1
FM
P2
AF TA RG
97.9
ST
1892
ODO
144.2
MUTE
Adjusting the Volume
Volume Adjustment
Press the VOL- button to decrease the
volume and VOL+ to increase the volume.
The central display area on the instruments
will show the volume set as shown above.
Muting the Volume
Volu me Mute
Press and hold the VOL- button on the audio
switch unit until the VOLUME display on the
instruments reaches zero.
The instruments will display MUTE in the
lower display area.
Pressing either the VOL+ or MODE/MENU
buttons on the audio switch unit will return
the volume to its previous level.
8
Page 9
Basic Operation
10:08
N
22°C
SOURCE SETUP
EXIT
BLUETOOTH
RADIO SETTINGS
AUDIO SETUP
Radio Settings
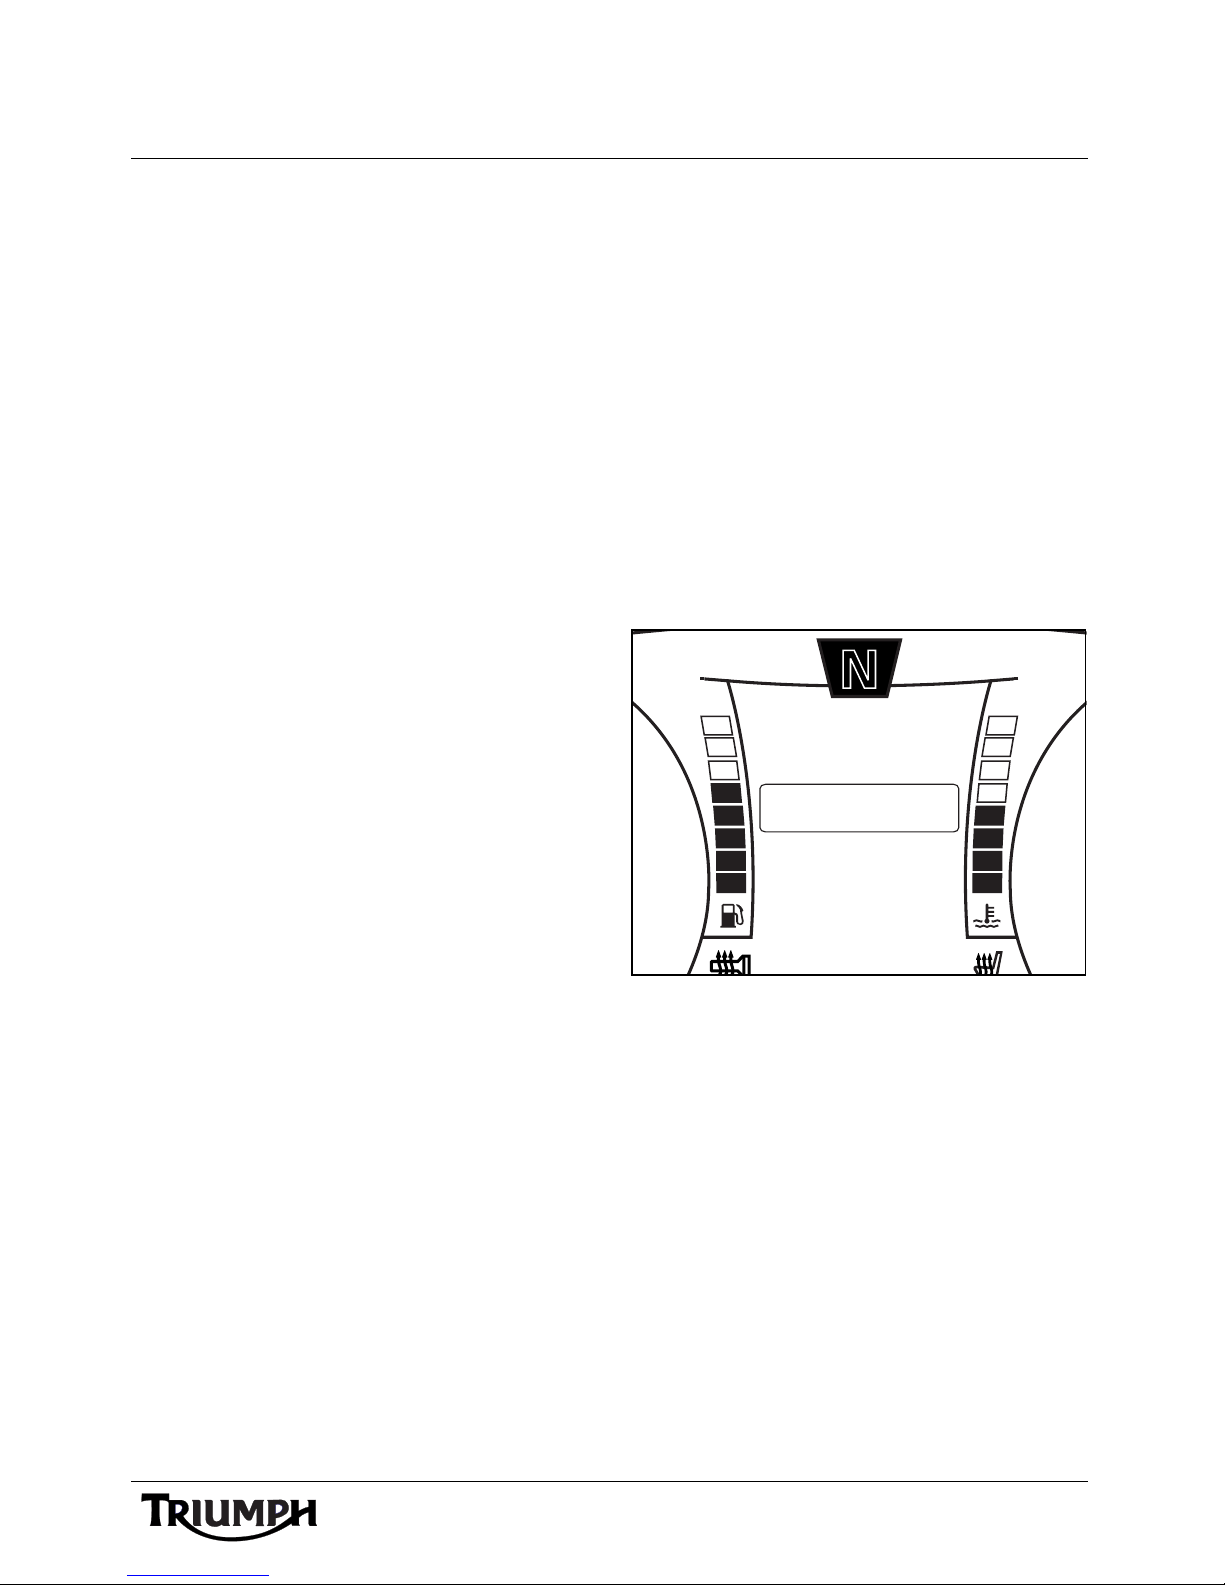
Adjustments are provided for Bass,
Mid-range and Treble, Automatic Volume
Control (AVC) and Audio Output (speakers
or headsets).
Adjustment Range
Bass, Mid-range and Treble
Bass, Mid-range and Treble all have an
adjustment range of plus or minus eight
steps.
Automatic Volume Control (AVC)
Automatic Volume Control (AVC) has four
settings - off, low, medium or high. The audio
system will adapt the audio volume to the
speed of the motorcycle based on the level
set.
The higher the level; the greater the volume
increase for a given speed.
Audio Adjustment
The adjustment method is different,
depending on the speed of the motorcycle.
The two adjustment methods are described
below:
Motorcycle Stationary
To access the AUDIO SETUP menu:
1. With the motorcycle stationary, press and
hold the MODE/MENU button on the
audio switch unit until RADIO
SETTINGS is highlighted in the display
screen.
Audio Output
Audio Output has two settings; SPEAKERS or
HEADSETS. Speakers will play all audio
output through the motorcycle speakers,
headsets will play all audio output through
Headset 1 and/or Headset 2, provided they
are correctly paired and connected (see
page 44).
Radio Settings Screen
9
Page 10
Basic Operation
10:08
N
22 C
MID RANGE
EXIT
TREBLE
BASS
AUDIO SETUP
AVC
AUDIO OUTPUT
MID RANGE
EXIT
BASS
AUDIO SETUP
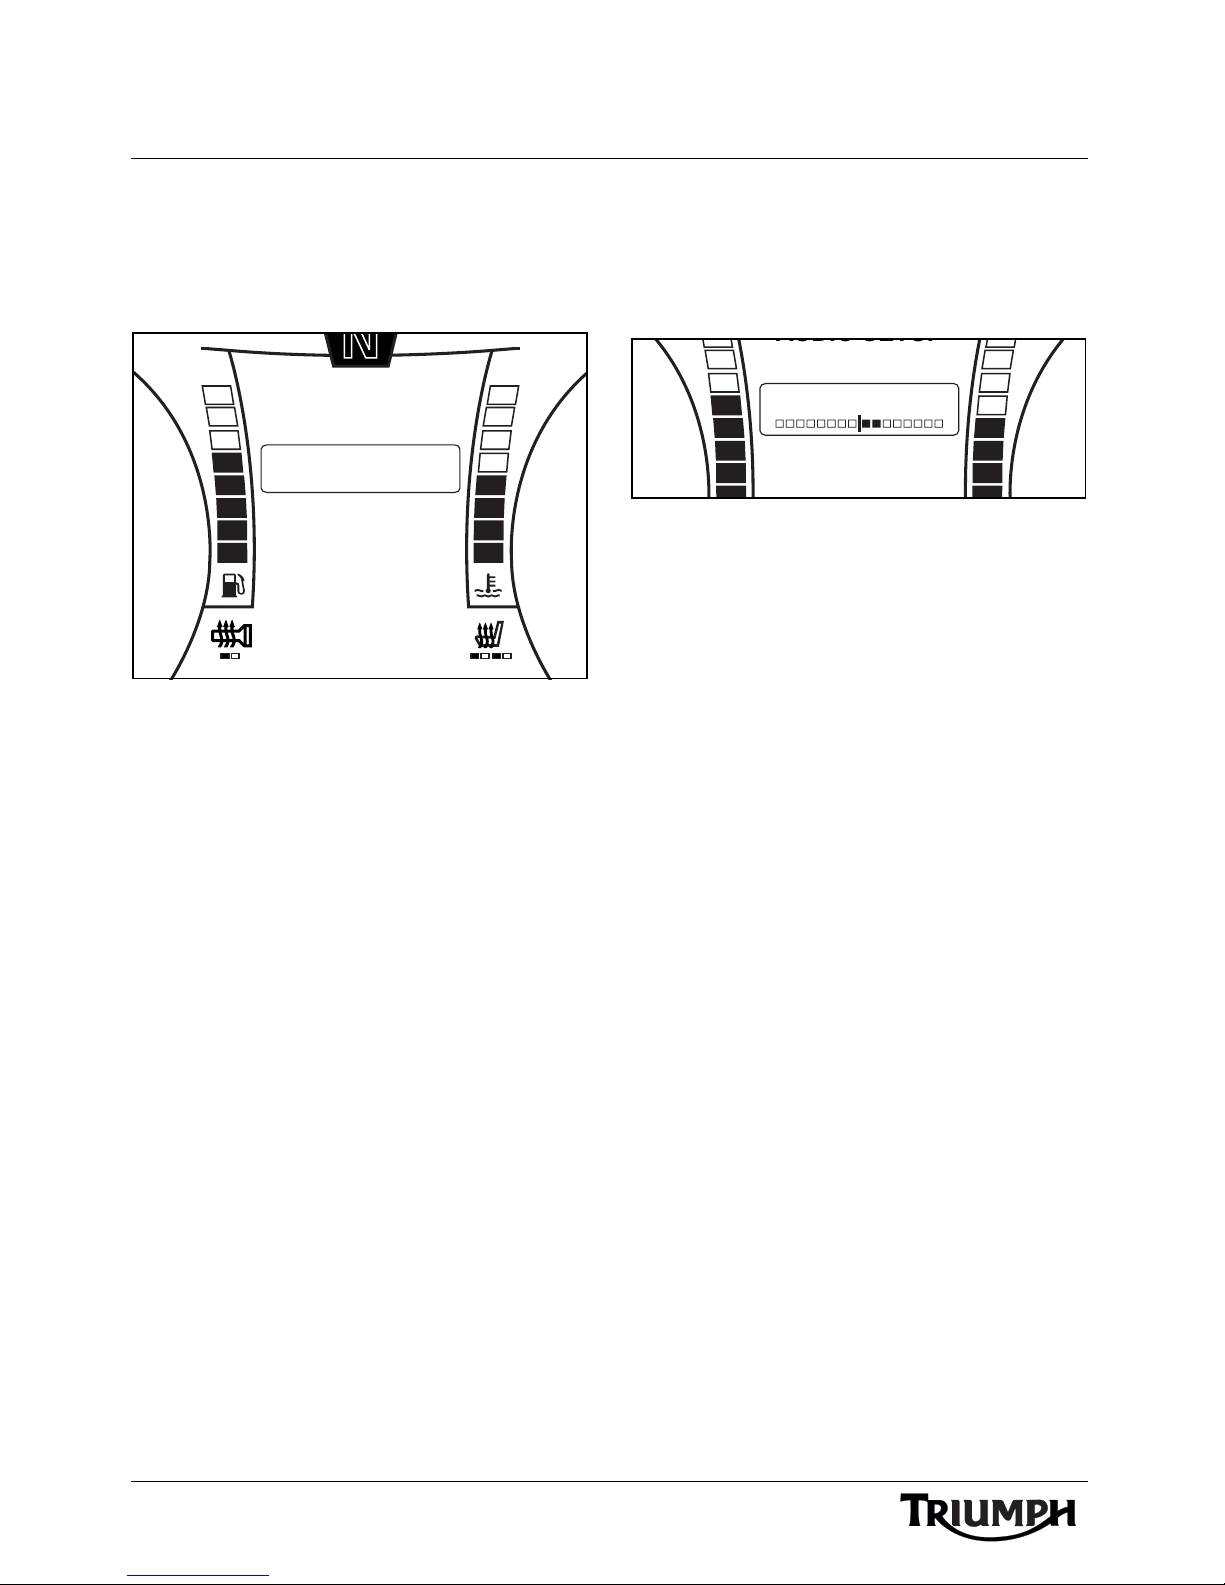
2. Press and release the SCROLL button
until AUDIO SETUP is highlighted. Press
the SELECT button to enter the menu
item.
Audio Setup Screen
3. Press the SCROLL button up or down to
highlight each item and press the
SELECT button to display the
adjustment.
4. Press the SCROLL button up or down to
make the adjustment.
5. Press the SELECT button to save and exit
that adjustment.
Audio Adjustment (Bass
Adjustment Shown)
The display will scroll through in the following
order:
•BASS;
• MID RANGE;
•TREBLE;
• AVC (Automatic Volume Control);
•AUDIO OUTPUT.
The display will return to AUDIO SETUP
once adjustments have been made.
10
To exit the AUDIO SETUP menu, select EXIT
and press the SELECT button.
The menu will automatically exit after five
minutes of inactivity.
Page 11
Basic Operation
Warning
TRIP 1
MPH
62
6
1892
ODO
iPod CATEGORY
TRIP 1
MPH
62
6
1892
ODO
AUDIO OUTPUT
SPEAKERS
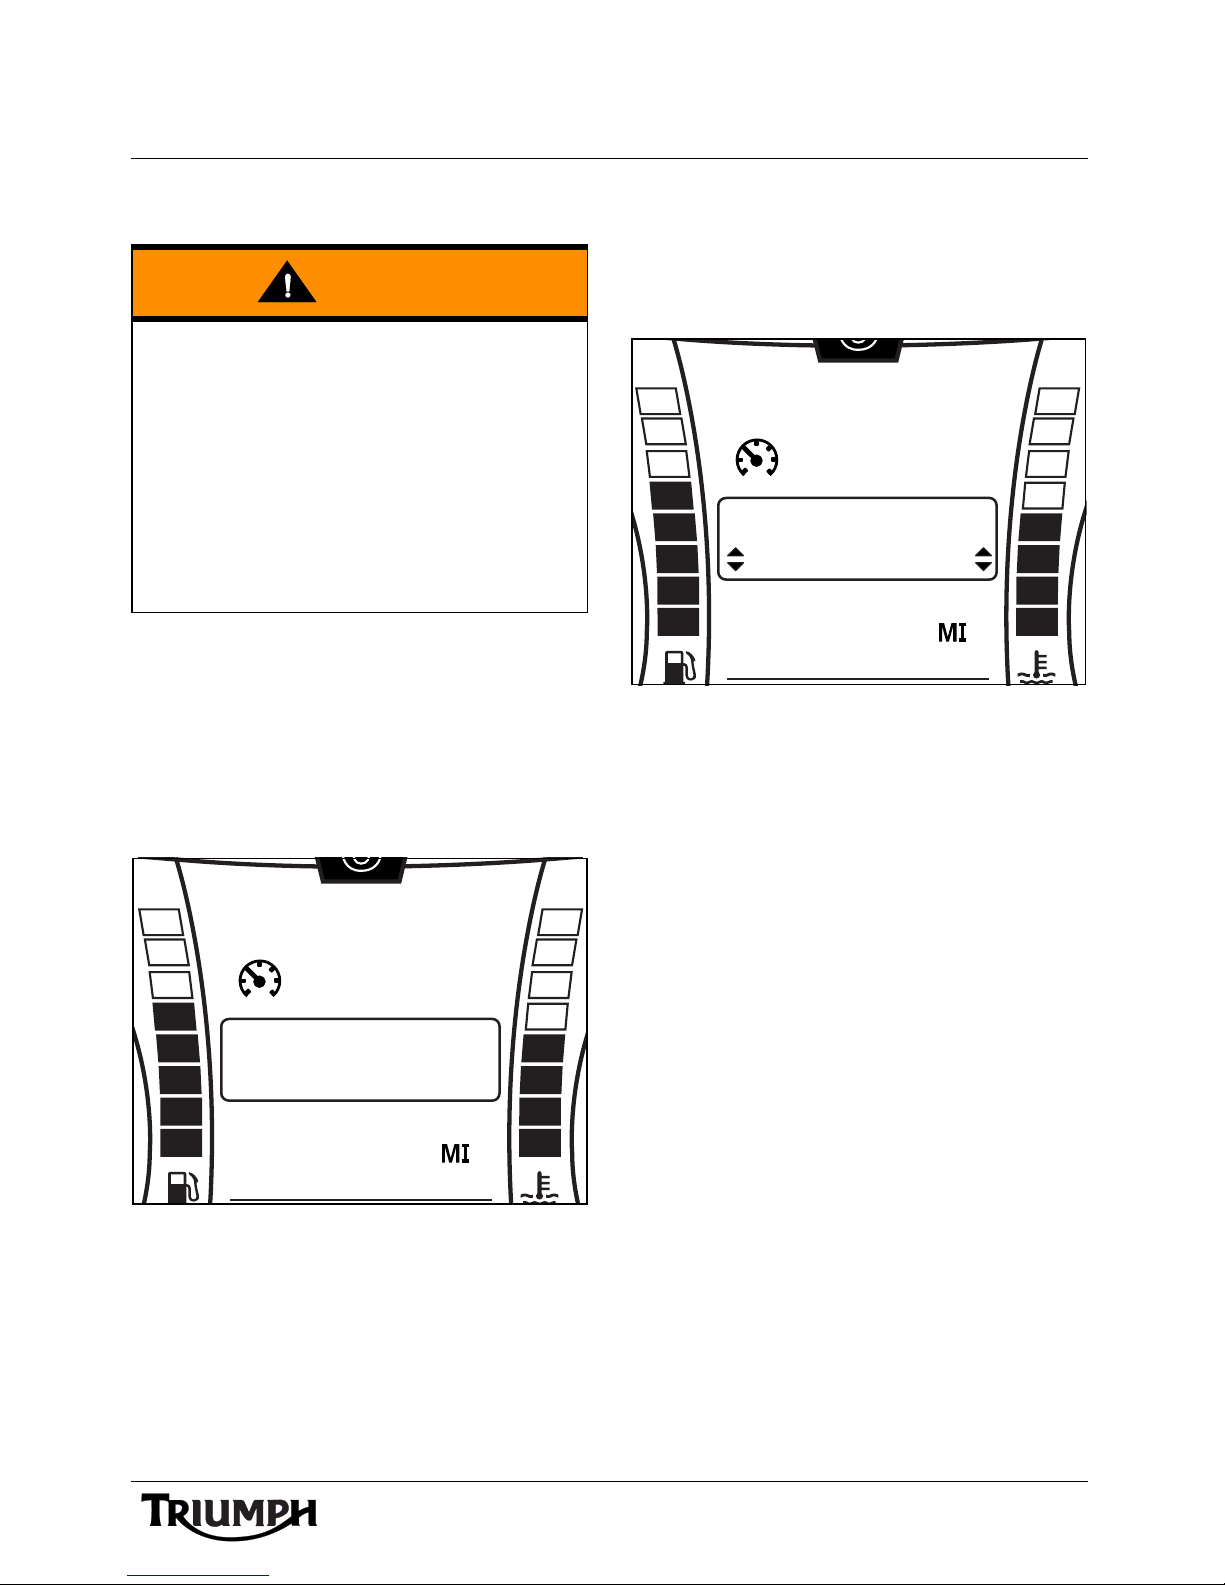
Motorcycle Moving
Any adjustments made to audio system
settings when the motorcycle is moving
must be carried out only when it is safe to
do so.
Making adjustments to audio system
settings while travelling at high speed,
during cornering or braking, or in heavy
traffic or poor visibility, may result is loss of
motorcycle control and an accident.
To access the RADIO SETTINGS menu:
1. Press and hold the MODE/MENU
button on the audio switch unit until iPod
CATEGORY (see page 35) is displayed
in the centre of the instrument display
screen.
3. Press the SCROLL button up or down to
make the adjustment.
4. Press the MODE/MENU button to save
the adjustment and exit.
Audio Adjustment (Audio
Output Shown)
The display will scroll through in the following
order:
• iPod CATEGORY (see page 35);
Audio Adjust (Motorcycle
2. Press and release the SCROLL button
until the desired audio setting is
displayed. Press the SELECT button to
enter the menu item.
Moving)
•XM CATEGORY (USA and
Canadian models only);
• TRAFFIC ALERT (all markets except
USA, Canada and Japan);
• TONE (Bass, Mid Range, Treble);
•AUDIO OUTPUT;
•AVC;
•EXIT.
To exit the menu, select EXIT and press the
SELECT button.
The display will return to the previously
selected Trip Computer once adjustment has
been made.
11
Page 12
Basic Operation
TRIP 1
MPH
62
1892
ODO
BASS
FM
P2
AF TA RG
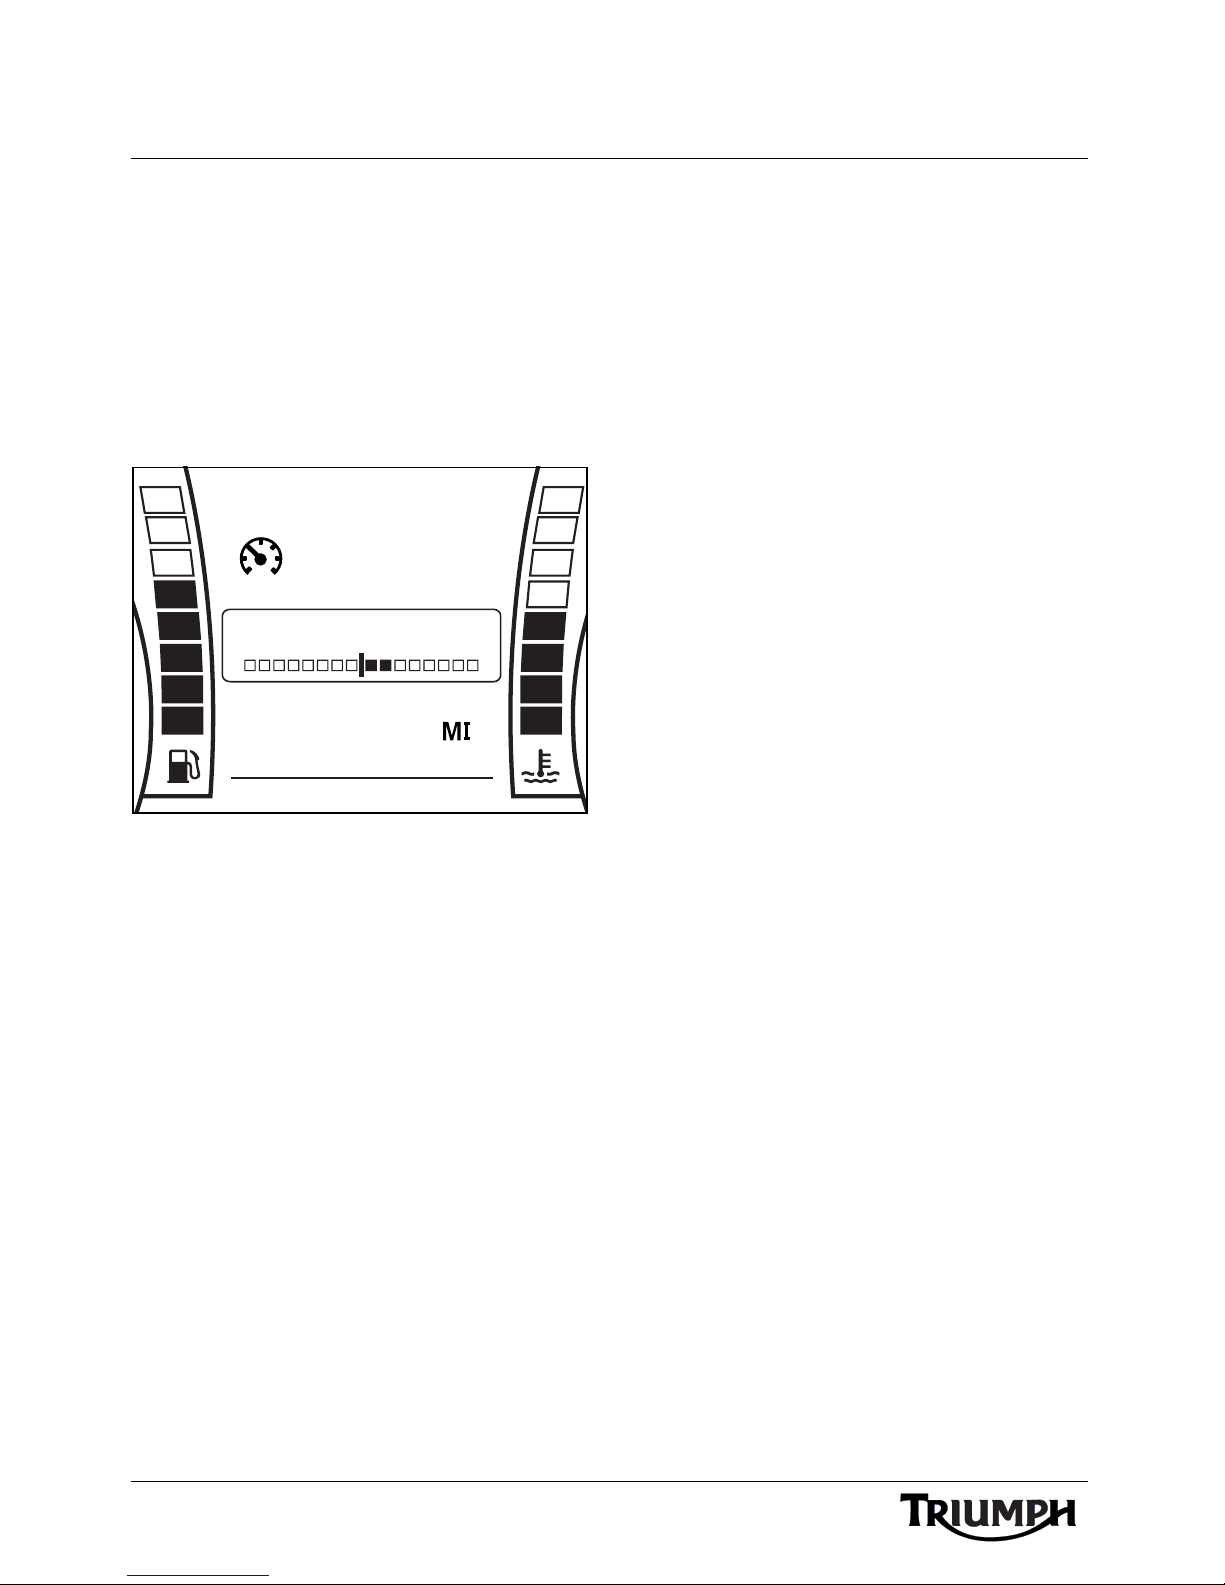
If TONE is selected, options for bass,
mid range and treble will be available.
Press and release the SCROLL button until
the desired tone setting is displayed. Press the
SELECT button to enter the menu item.
Press the SCROLL button up or down to
make the adjustment and press the SELECT
button to save and exit that adjustment.
The display will scroll through in the following
order:
•BASS;
• MID RANGE;
•TREBLE;
•EXIT.
The menu will close automatically after 30
seconds.
The display will return to the previously
selected Trip Computer once adjustment has
been made.
Tone Adjustment (Bass
Adjustment Shown)
12
Page 13

Radio
RADIO
All Markets Except USA and Canada
Table of Contents
Selecting the Source or Waveband . . . . . . . . . . . . . . . . . . . . . . . . . . . . . . . . . . . . . . . . . . . . . . .14
Finding and Saving Radio Stations . . . . . . . . . . . . . . . . . . . . . . . . . . . . . . . . . . . . . . . . . . . . . . .15
Search for a Radio Station. . . . . . . . . . . . . . . . . . . . . . . . . . . . . . . . . . . . . . . . . . . . . . . . . . .15
Save a Radio Station to a Preset . . . . . . . . . . . . . . . . . . . . . . . . . . . . . . . . . . . . . . . . . . . . . .15
Select a Stored Preset . . . . . . . . . . . . . . . . . . . . . . . . . . . . . . . . . . . . . . . . . . . . . . . . . . . . . .16
Erase All Stored Presets. . . . . . . . . . . . . . . . . . . . . . . . . . . . . . . . . . . . . . . . . . . . . . . . . . . . .16
Radio Data System (RDS). . . . . . . . . . . . . . . . . . . . . . . . . . . . . . . . . . . . . . . . . . . . . . . . . . . . . . .17
Alternative Frequency (AF) . . . . . . . . . . . . . . . . . . . . . . . . . . . . . . . . . . . . . . . . . . . . . . . . . .17
Regional Frequency (RG) . . . . . . . . . . . . . . . . . . . . . . . . . . . . . . . . . . . . . . . . . . . . . . . . . . .18
Traffic Announcement (TA) . . . . . . . . . . . . . . . . . . . . . . . . . . . . . . . . . . . . . . . . . . . . . . . . . .18
RDS Options Adjustment . . . . . . . . . . . . . . . . . . . . . . . . . . . . . . . . . . . . . . . . . . . . . . . . . . .18
Programme Type (PTY) . . . . . . . . . . . . . . . . . . . . . . . . . . . . . . . . . . . . . . . . . . . . . . . . . . . . . . . .19
Programme Type Adjustment . . . . . . . . . . . . . . . . . . . . . . . . . . . . . . . . . . . . . . . . . . . . . . . .19
13
Page 14
Radio
MPH
62
1892
ODO
144.2
RADIO 1
FMP2AF TA RG
97.9
ST
1
Selecting the Source or
Waveband
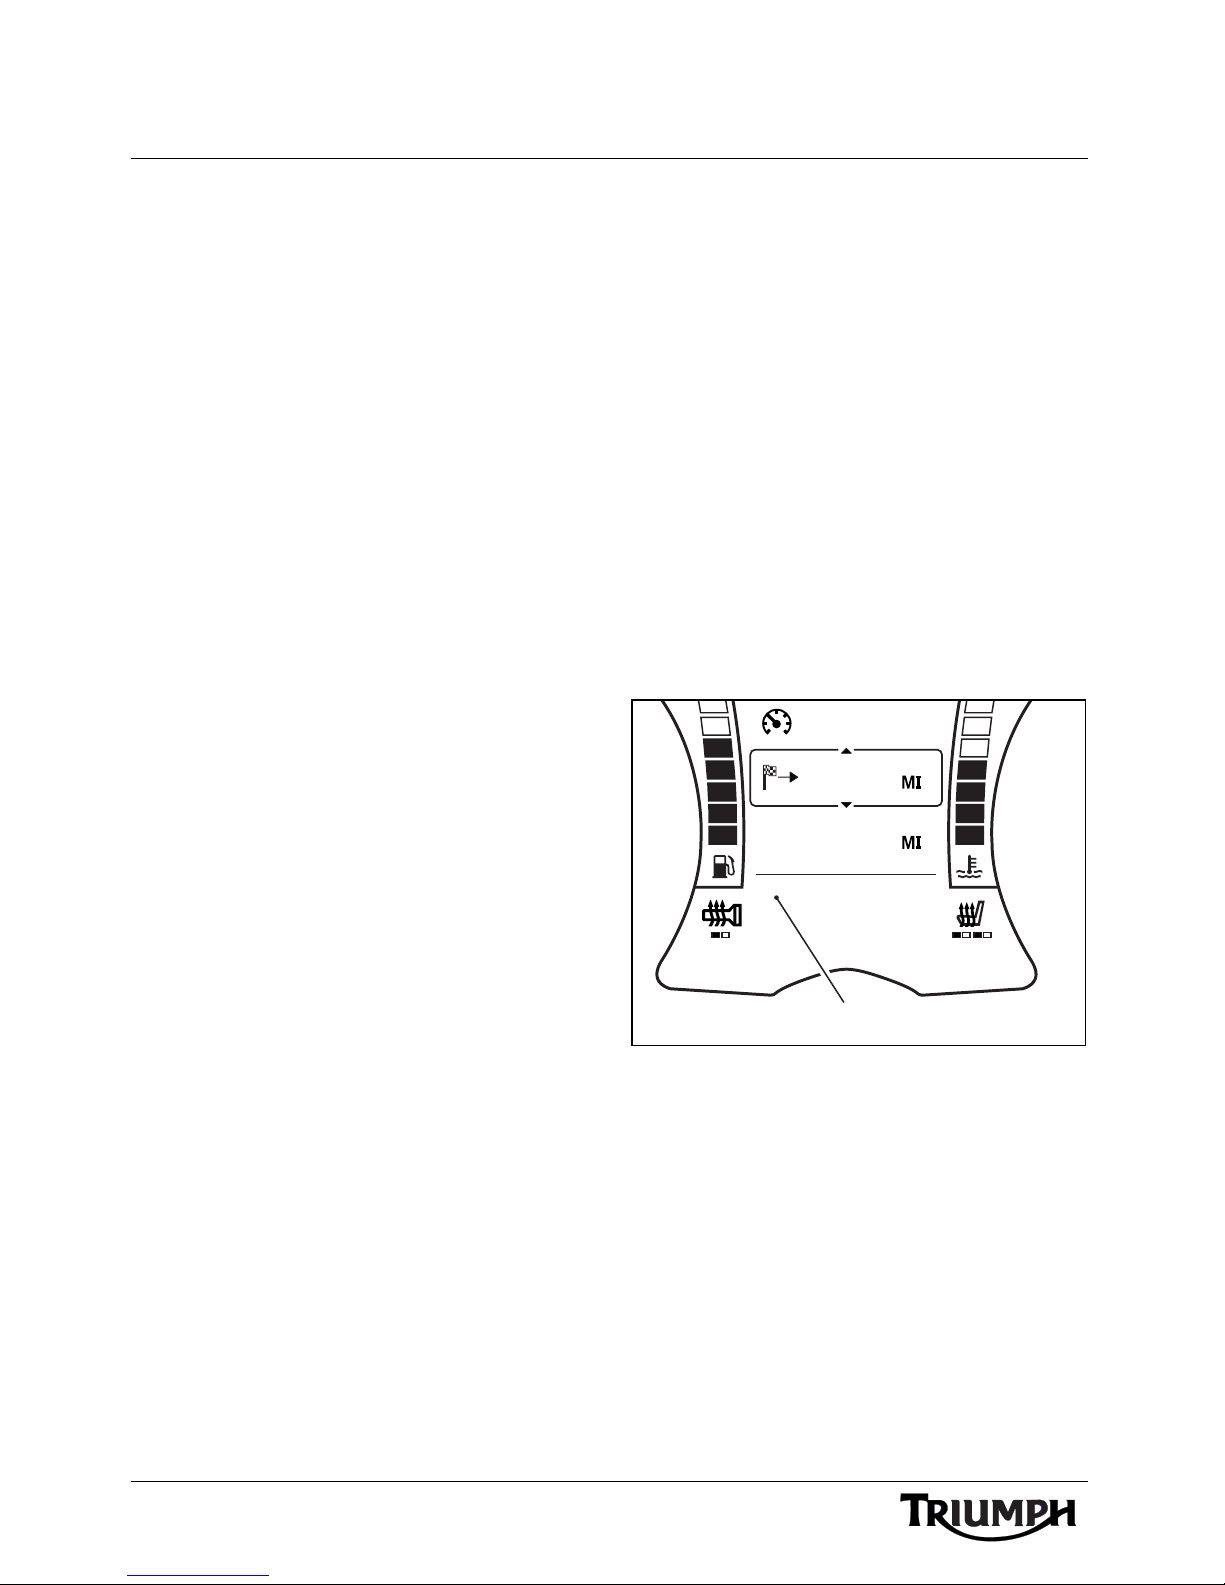
Press and release the MODE/MENU button
to cycle through the available input sources
or radio wavebands. The audio system will
scroll through in the following order:
Europe Only
•FM;
• MW (medium wave);
• LW (long wave);
• USB or iPod (iPod will display only if
an iPod or iPhone device is
connected, otherwise the display will
show USB) (see page 33);
• NAV (only if NAV audio is enabled,
see page 39);
• BLUETOOTH AUDIO (only if
BLUETOOTH AUDIO is enabled
(see page 38) and a compatible
device is paired and active) (see
page 44).
All Markets Except Europe, USA and
Canada
•FM;
•AM;
• USB or iPod (iPod will display only if
an iPod or iPhone device is
connected, otherwise the display will
show USB) (see page 33);
• NAV (only if NAV audio is enabled,
see page 39);
• BLUETOOTH AUDIO (only if
BLU ETOOTH AUDIO is enabled
(see page 38) and a compatible
device is paired and active) (see
page 44).
14
1. Waveband - FM shown
Page 15
Radio
MPH
62
1892
ODO
144.2
RADIO 1
FMP2AF TA RG
97.9
ST
21
MPH
0
1892
ODO
RADIO 1
FM AF TA RG
97.9
ST
PRESET
P4 97.9
1
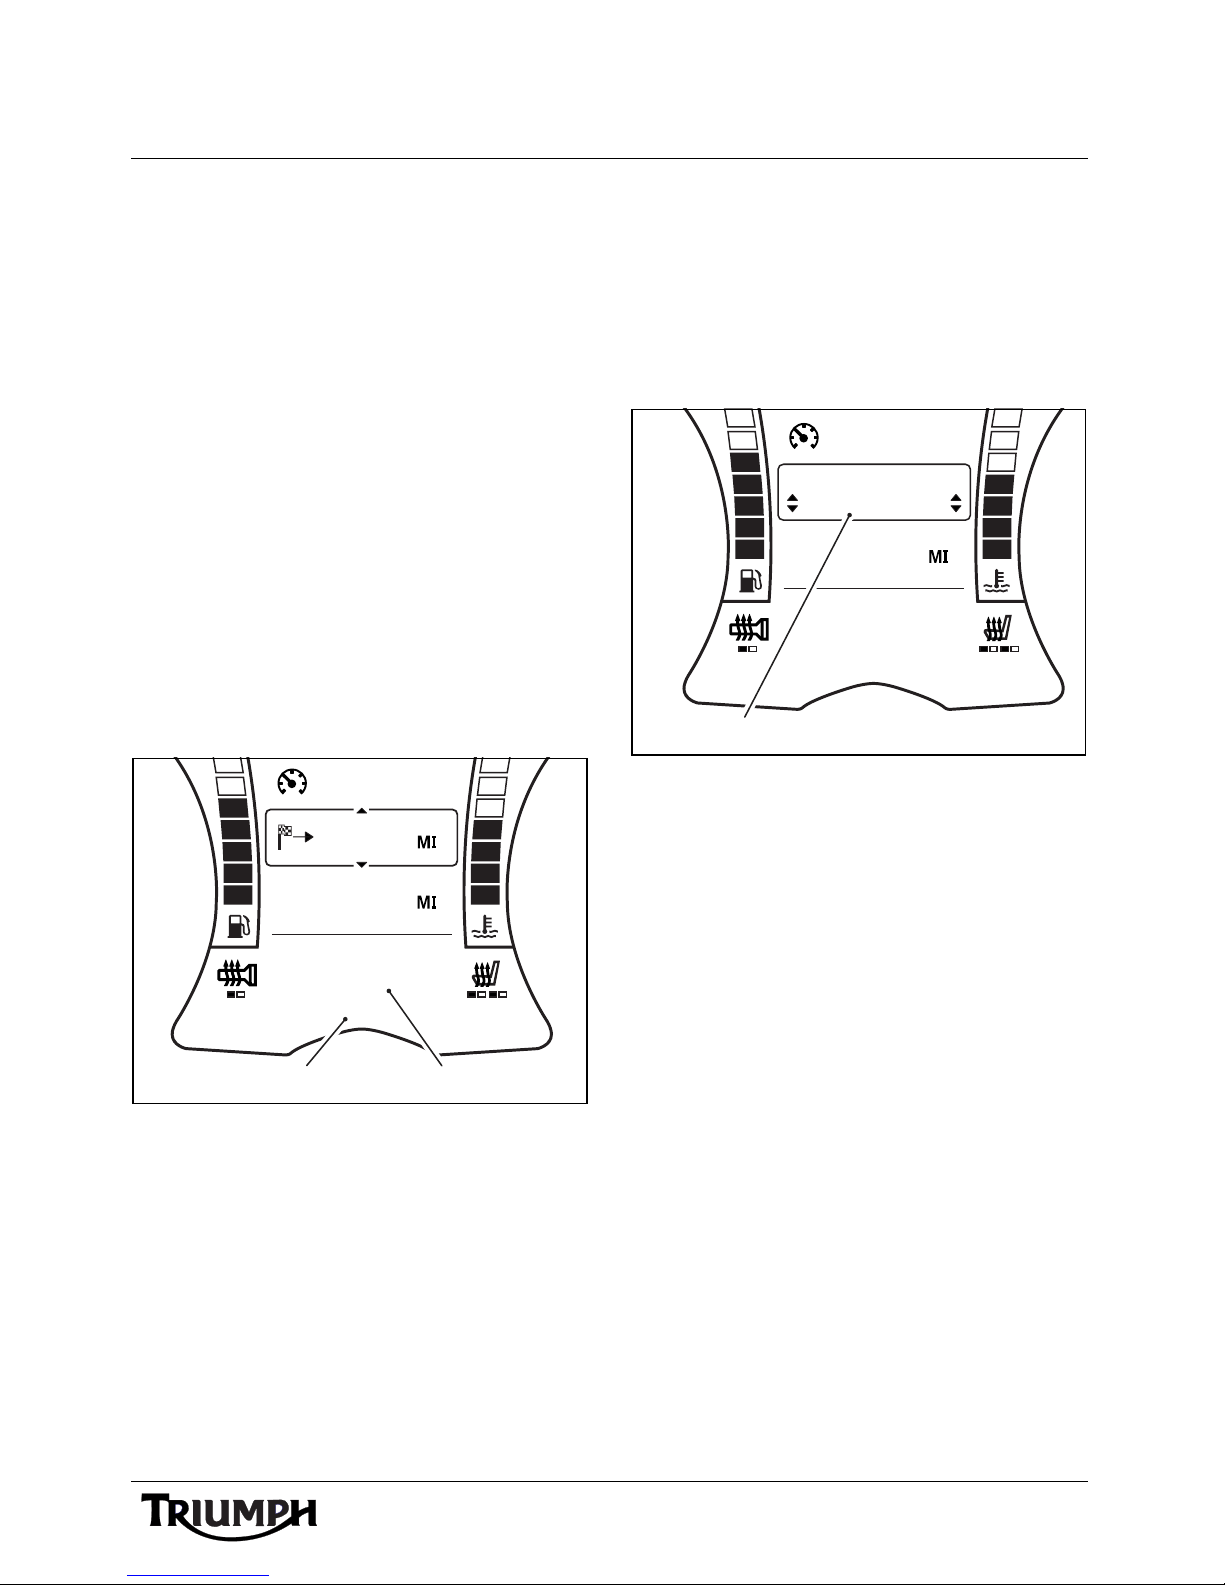
Finding and Saving Radio
Stations
Search for a Radio Station
Press and hold the Tuning up (T+) or Tuning
down (T-) buttons to seek through the
available stations. Briefly press and hold the
Tuning up (T+) or Tuning down (T-) buttons
to increment or decrement through the
frequency range in single steps for fine
tuning.
The instruments will display the radio station
name (if available - FM only) and/or
frequency (FM, MW, AM or LW - note that
the frequencies available vary by market),
and ST if the programme is broadcast in
stereo (FM only).
Save a Radio Station to a Preset
Tune the radio to the desired radio station
(see page 15 ).
Press and hold the PRESET button until the
central display area shows the next available
preset.
1. Storing a preset
1. Frequency indicator
2. Station name (if available)
To store the radio station at this preset press
and release the PRESET button.
To store the radio station at a different preset
position, press the SCROLL button up or
down to select the desired preset and press
the SELECT button.
If a radio station is already stored at the
selected location it will be replaced with the
new selection.
Up to 15 presets can be stored for each
waveband.
15
Page 16
Radio
MPH
62
1892
ODO
144.2
RADIO 1
FMP2AF TA RG
97.9
ST
1
N
PROG TYPE
EXIT
iPod CATEGORY
RDS OPTIONS
SOURCE SETUP
ALT SOURCE
PRESETS
ALT SOURCE
PRESETS
CLEAR FM
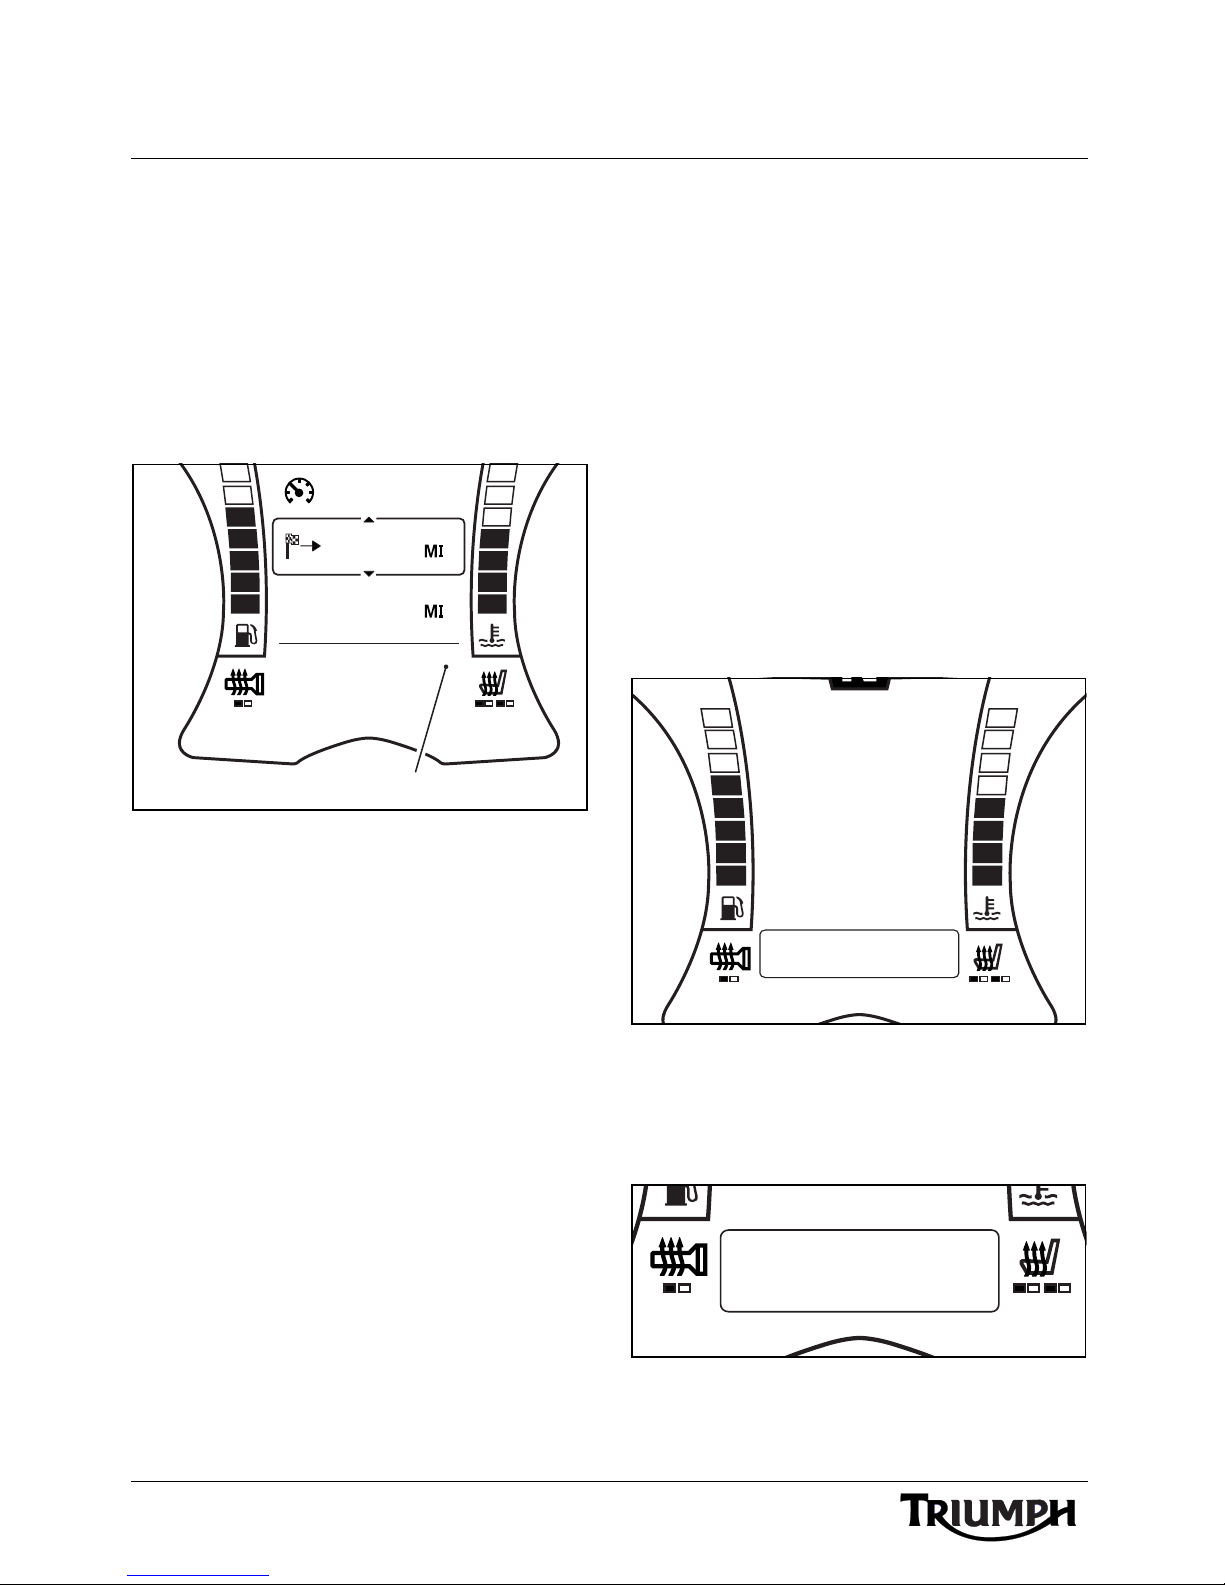
Select a Stored Preset
Press and release the PRESET button to cycle
through the stored presets one at a time. The
instruments will display P1 up to P15 (or the
highest preset stored) in the lower display
area, along with the radio station name (if
available - FM only) or frequency (MW/AM
or LW).
Erase All Stored Presets
To ac c es s t h e P R E S ET S m e nu :
1. With the motorcycle stationary, press and
hold the MODE/MENU button on the
audio switch unit until RADIO
SETTINGS is highlighted in the display
screen.
2. Press and release the SCROLL button
until SOURCE SETUP is highlighted.
Press the SELECT button to enter the
menu item.
3. Press and release the SCROLL button
until PRESETS is highlighted. Press the
SELECT button to enter the item.
1. Preset indicator
Source Setup Menu - Presets
Press the SCROLL button up or down to
select the waveband presets to erase and
press the SELECT button to erase all presets.
Clear Presets - FM Shown
16
Page 17
Radio
ALT SOURCE
PRESETS
FM EMPTY
MPH
62
1892
ODO
144.2
RADIO 1
FMP2AF TA RG
97.9
ST
1
2
3
The audio system will scroll through in the
following order:
• CLEAR FM;
• CLEAR MW (Europe) or AM (All
Markets Except Europe, USA and
Canada);
• CLEAR LW (Europe only).
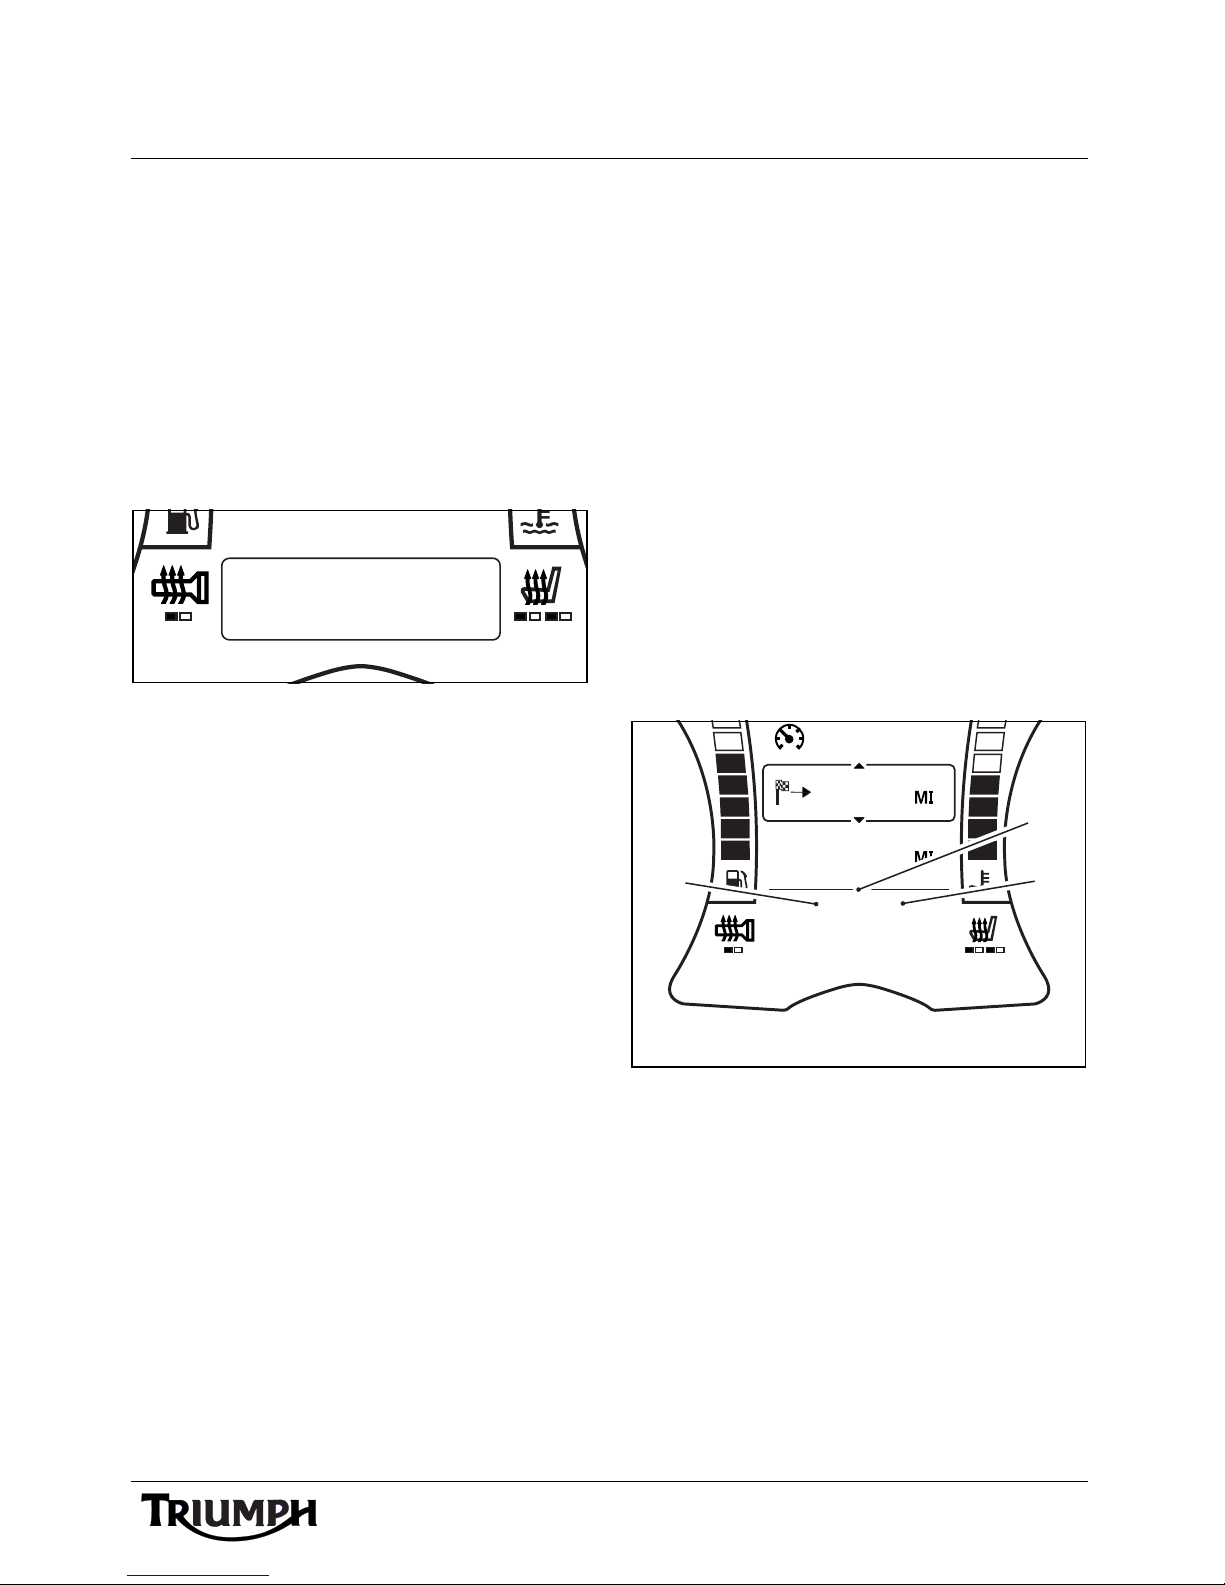
If no presets are stored for that waveband,
the display will show XX (waveband) EMPTY.
Clear Presets - Preset Empty
Once the desired waveband presets have
been erased, press the SCROLL button up or
down until EXIT is selected and press the
SELECT button to exit.
Radio Data System (RDS)
Note:
• RDS is not available in Japan.
RDS is a service provided by radio stations
broadcasting on FM frequencies, which
allows the transmission of additional
background information such as the radio
station name and local traffic
announcements.
When the RDS functions are turned on, RDS
stations are recognised by the display of the
station name in addition to the station
frequency.
If no station name is transmitted, waveband
and frequency are shown in the display.
1. Alternative frequency (AF) indicator
2. Regional frequency (RG) indicator
3. Traffic announcement (TA) indicator
The following RDS features are available, and
can be turned on or off via the RDS Options
menu (see page 18 ):
17
Page 18
Radio
N
PROG TYPE
EXIT
iPod CATEGORY
RDS OPTIONS
SOURCE SETUP
ALT SOURCE
PRESETS
Alternative Frequency (AF)
Alternative frequency (AF) allows the audio
system to re-tune to a different frequency
that provides the same station, when the first
signal becomes too weak (e.g. when moving
out of range).
Regional Frequency (RG)
Some radio stations will broadcast different
regional programmes over different
frequencies at certain times of the day. This
could mean that the programme will change
automatically if the region is changed, even if
the rider has not changed the station. If the
rider does not want the station to be
changed, turn the RG function on.
Traffic Alert (TA)
Some radio stations will broadcast traffic
announcements and travel information. If TA
is turned on, the audio system will switch to
the traffic announcement:
RDS Options Adjustment
Note:
• The following settings can only be
adjusted when the motorcycle is
stationary and the ignition is
turned on.
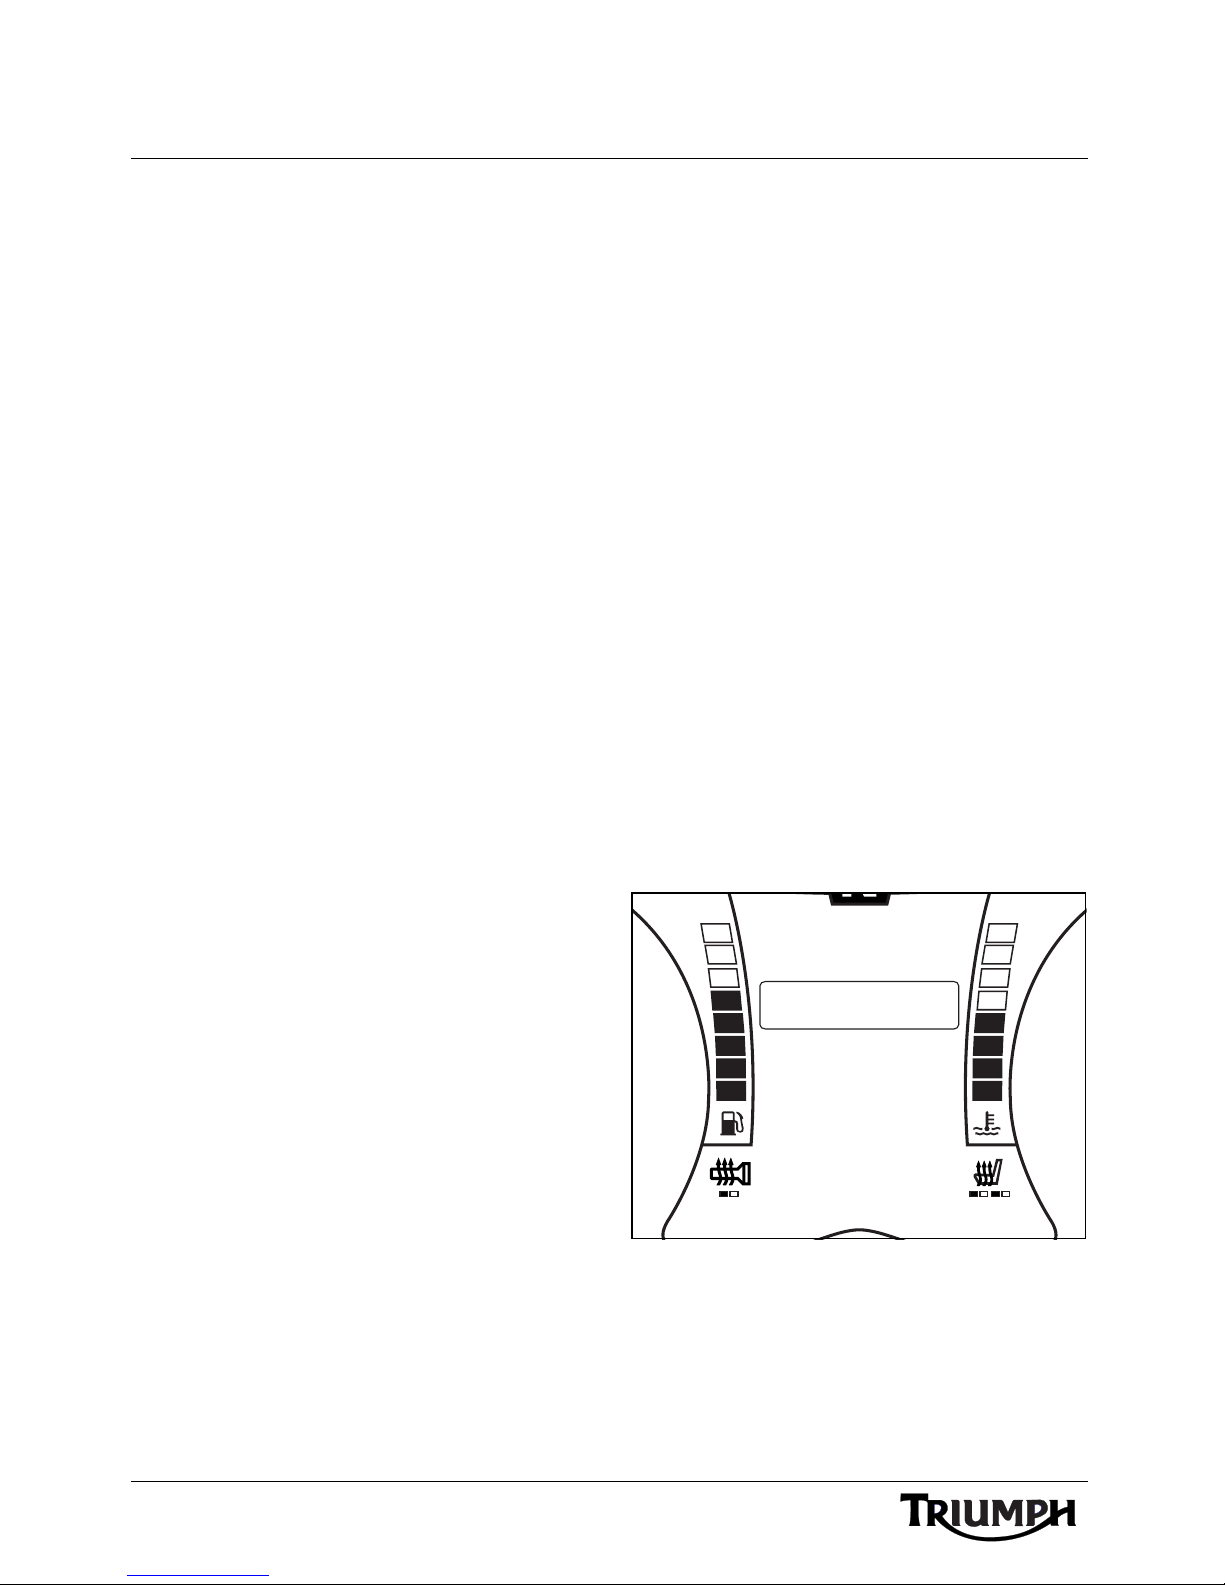
To access the RDS OPTIONS menu;
1. With the motorcycle stationary, press and
hold the MODE/MENU button on the
audio switch unit until RADIO
SETTINGS is highlighted in the display
screen.
2. Press and release the SCROLL button
until SOURCE SETUP is highlighted.
Press the SELECT button to enter the
menu item.
3. Press and release the SCROLL button
until the RDS OPTIONS is highlighted.
Press the SELECT button to enter the
item.
• automatically from any audio mode;
• automatically when the audio system
is on and the volume muted.
During traffic announcements the current
radio programme will be interrupted and
external sources such as iPod devices or USB
devices will be paused; playback will resume
when the traffic announcement ends.
The instruments will display TRAFFIC in the
lower display area during a traffic
announcement.
Pressing the Mode/Menu or Tuning up (T+)
or Tuning down (T-) buttons at any time will
exit the traffic announcement (except if the
traffic announcement is coming from the
station the audio system is tuned to, when
TRAFFIC will be removed from the display
only) and return to the previous source.
Source Setup Menu - RDS
Options
18
Page 19
Radio
PROG TYPE
EXIT
ALT FREQ
ON
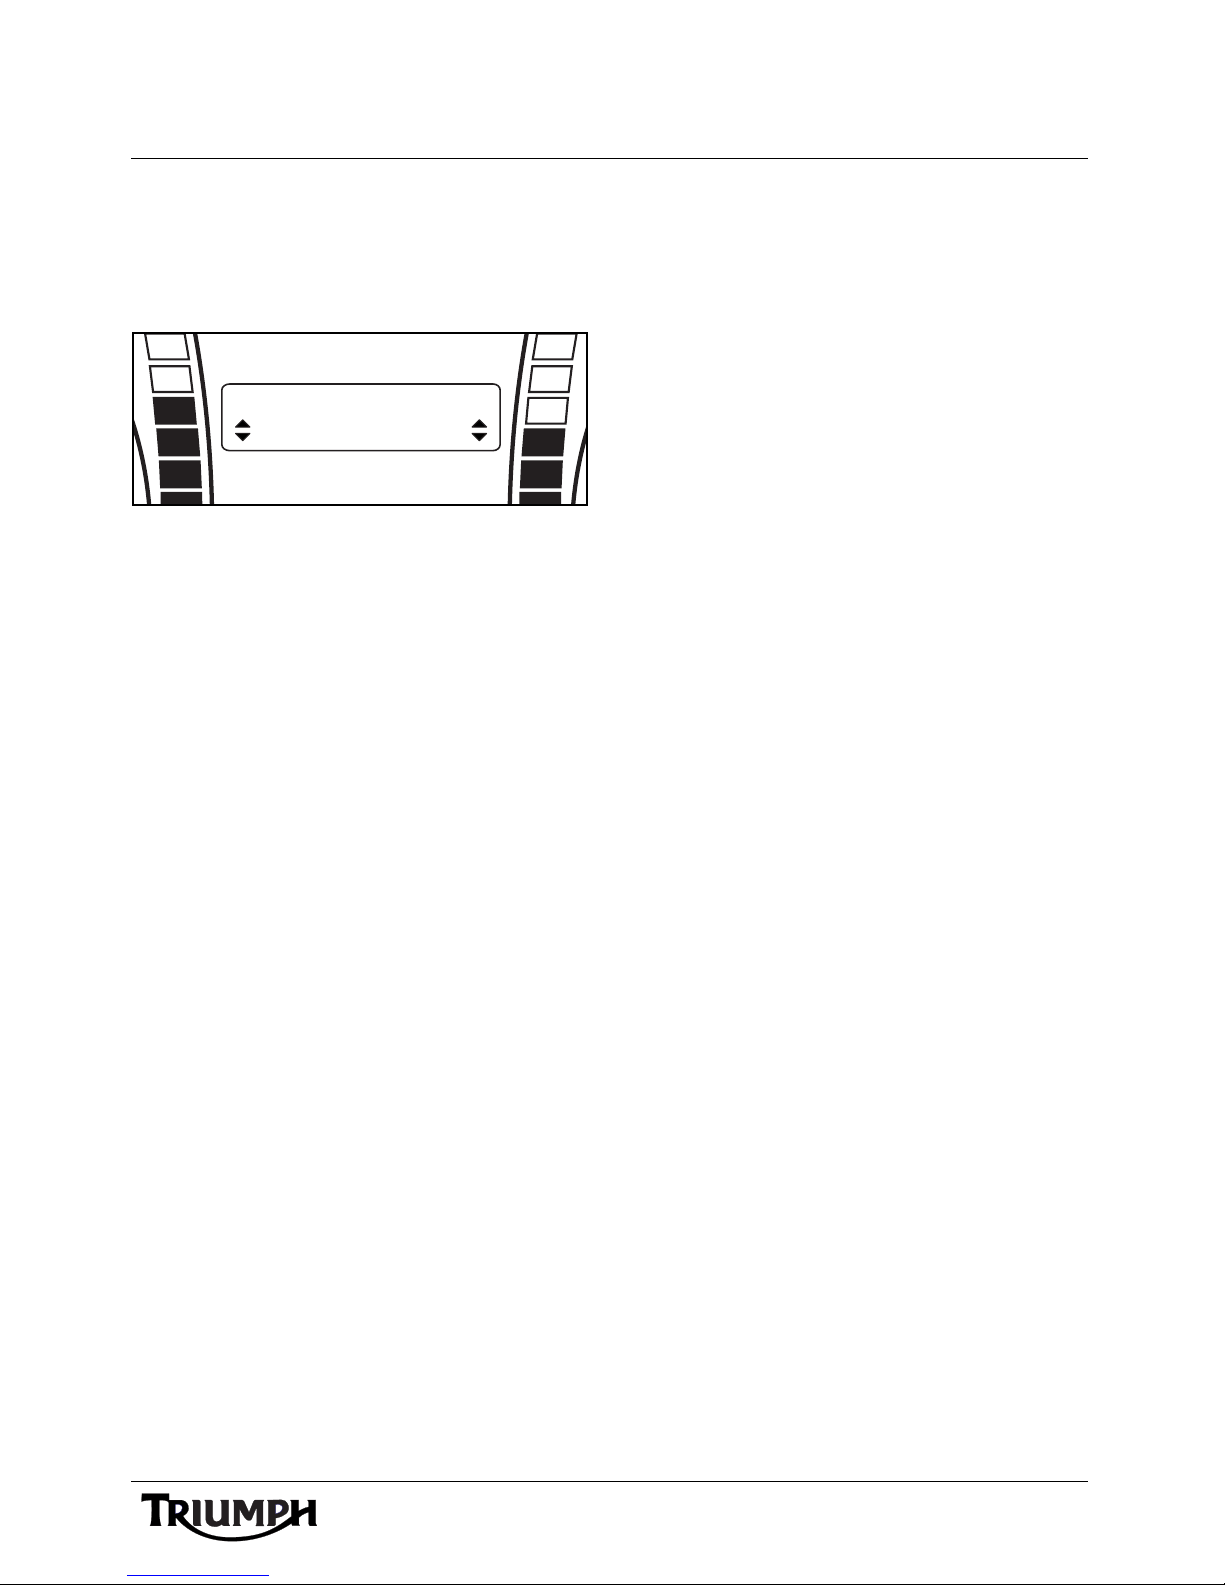
Press the SCROLL button up or down to
toggle each item on or off and press the
SELECT button to save the setting and move
to the next item.
RDS Options - Alternative
Frequency Shown
The display will scroll through in the following
order:
• Traffic Alert (TA);
• Alternative Frequency (AF);
• Regional Frequency (RG).
The display will return to SOURCE SETUP
once adjustments have been made.
Programme Type (PTY)
Radio stations can assign different
programme types to their shows, depending
on what is being broadcast at a particular
time of day. The rider can use the audio
system to search for a particular type of
programme.
The radio will then scan to look for the
programme type selected. If one is found, the
radio will tune in to that station.
If no station is found the radio will tune to the
next available station and the programme
type will return to ALL.
There are up to 29 Programme Types,
including NEWS, CURRENT AFFAIRS,
INFO (information), SPORT, EDUCATION,
DRAMA, CULTURE, SCIENCE, POP
MUSIC, ROCK MUSIC etc.
Programme Type Adjustment
To access the PROG TYPE menu:
1. With the motorcycle stationary, press and
hold the MODE/MENU button on the
audio switch unit until RADIO
SETTINGS is highlighted in the display
screen.
2. Press and release the SCROLL button
until SOURCE SETUP is highlighted.
Press the SELECT button to enter the
menu item.
19
Page 20
Radio
N
PROG TYPE
EXIT
iPod CATEGORY
RDS OPTIONS
SOURCE SETUP
ALT SOURCE
PRESETS
PROG TYPE
EXIT
iPod CATEGORY
RDS OPTIONS
ROCK M
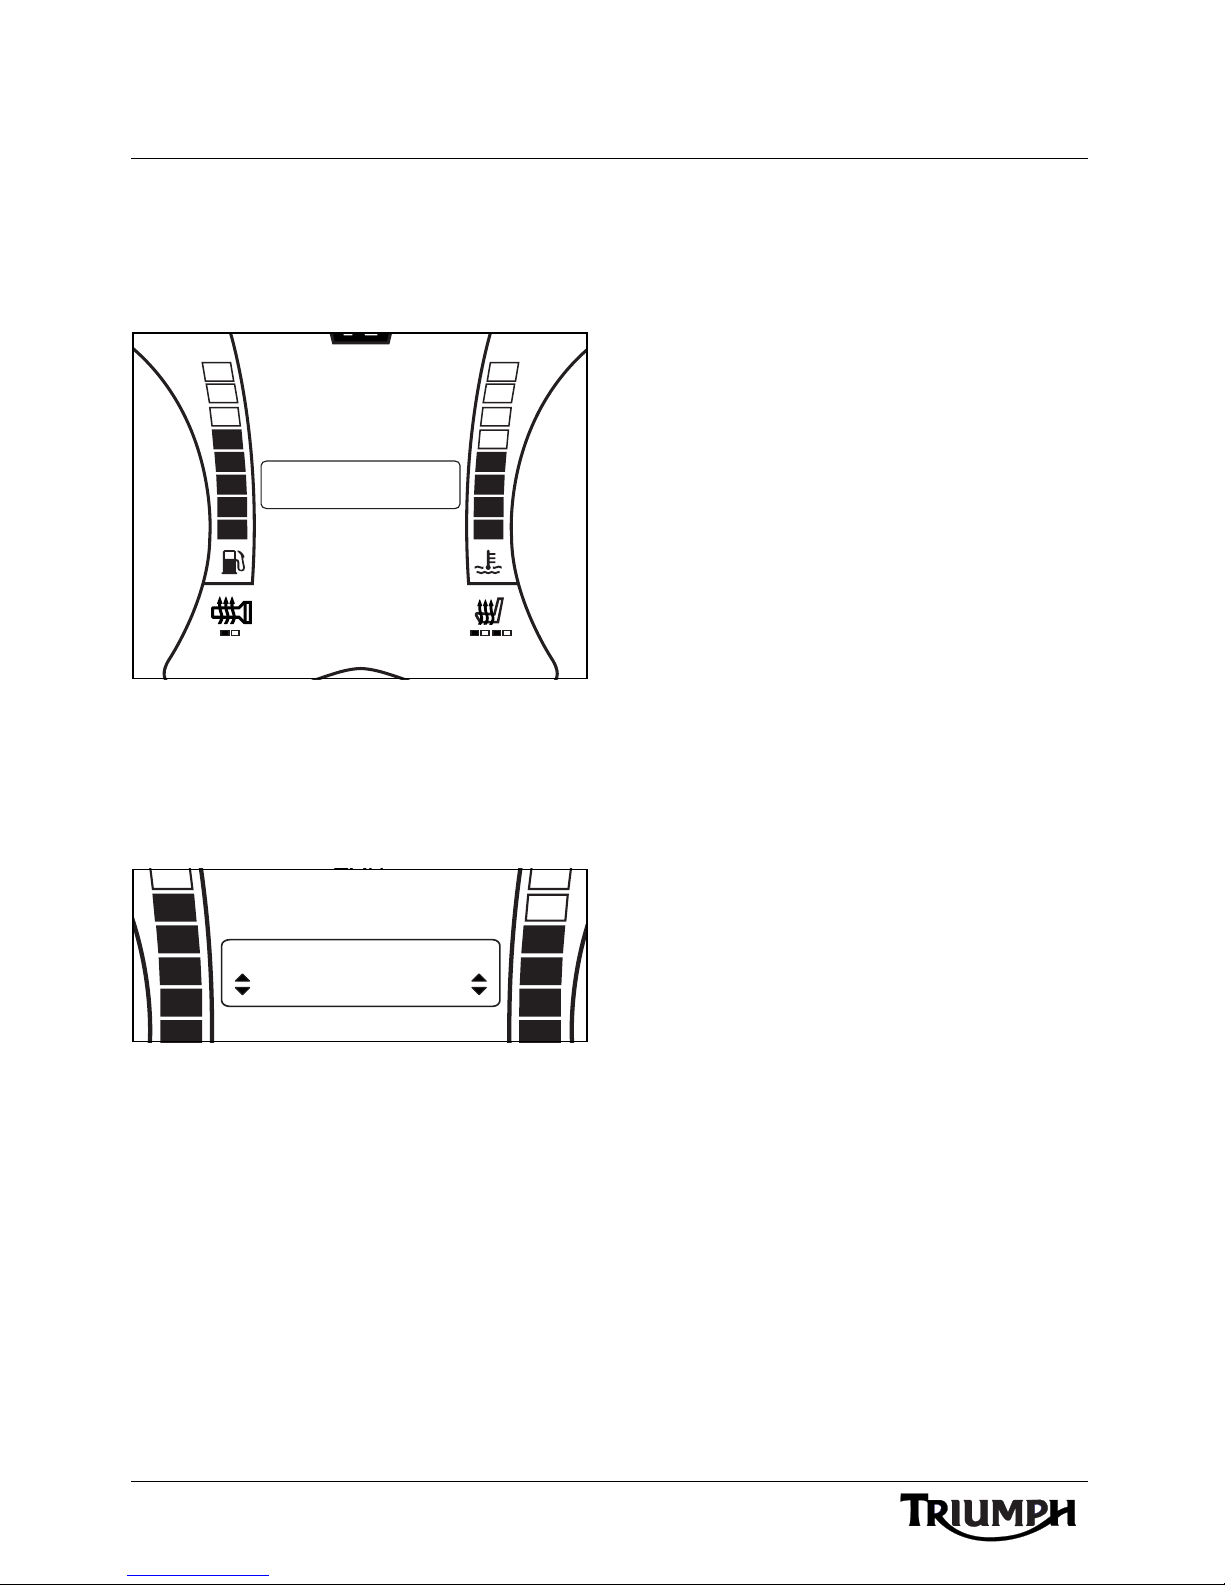
3. Press and release the SCROLL button
until the PROG TYPE is highlighted.
Press the SELECT button to enter the
item.
Source Setup Menu -
Programme Type
Press the SCROLL button up or down to
select the programme type and press the
SELECT button to save the setting and exit.
The display will scroll through in the following
order:
•NEWS;
• AFFAIRS (Current Affairs);
• INFO (Information);
•SPORT;
• EDUCATE (Educational);
•DRAMA;
•CULTURE;
• SCIENCE;
• VARIED (Variety);
• POP M (Popular Music);
• ROCK M (Rock Music;
• EASY M (Easy Listening);
• LIGHT M (Light Classical);
• CLASSICS (Serious Classical);
• OTHER M (Other Music);
•WEATHER;
•FINANCE;
Programme Type - Rock Music
Shown
20
• CHILDREN (Children’s Programmes);
• SOCIAL (Social Affairs);
• RELIGION;
•PHONE IN;
•TRAVEL;
•LEISURE;
• JAZZ (Jazz Music);
• COUNTRY (Country Music);
• NATION M (National Music);
•OLDIES;
•FOLK M (Folk Music);
• DOCUMENT (Documentaries).
Page 21

Radio
RADIO
USA and Canada Only
Table of Contents
Selecting the Source or Waveband . . . . . . . . . . . . . . . . . . . . . . . . . . . . . . . . . . . . . . . . . . . . . . 22
Finding and Saving Radio Stations . . . . . . . . . . . . . . . . . . . . . . . . . . . . . . . . . . . . . . . . . . . . . . 22
Search for a Radio Station. . . . . . . . . . . . . . . . . . . . . . . . . . . . . . . . . . . . . . . . . . . . . . . . . . 22
Save a Radio Station to a Preset . . . . . . . . . . . . . . . . . . . . . . . . . . . . . . . . . . . . . . . . . . . . . 23
Select a Stored Preset . . . . . . . . . . . . . . . . . . . . . . . . . . . . . . . . . . . . . . . . . . . . . . . . . . . . . 23
Erase All Stored Presets. . . . . . . . . . . . . . . . . . . . . . . . . . . . . . . . . . . . . . . . . . . . . . . . . . . . 24
Weather Radio (WX). . . . . . . . . . . . . . . . . . . . . . . . . . . . . . . . . . . . . . . . . . . . . . . . . . . . . . . . . . 25
®
SiriusXM Satellite Radio
. . . . . . . . . . . . . . . . . . . . . . . . . . . . . . . . . . . . . . . . . . . . . . . . . . . . . 25
About SiriusXM Satellite Radio . . . . . . . . . . . . . . . . . . . . . . . . . . . . . . . . . . . . . . . . . . . . . . 25
SiriusXM Legal . . . . . . . . . . . . . . . . . . . . . . . . . . . . . . . . . . . . . . . . . . . . . . . . . . . . . . . . . . 25
SiriusXM Subscription . . . . . . . . . . . . . . . . . . . . . . . . . . . . . . . . . . . . . . . . . . . . . . . . . . . . . 26
SiriusXM Activation . . . . . . . . . . . . . . . . . . . . . . . . . . . . . . . . . . . . . . . . . . . . . . . . . . . . . . . 26
SiriusXM Channel Name/Number Display. . . . . . . . . . . . . . . . . . . . . . . . . . . . . . . . . . . . . . . . 27
SiriusXM Display Adjustment . . . . . . . . . . . . . . . . . . . . . . . . . . . . . . . . . . . . . . . . . . . . . . . 28
SiriusXM Categories. . . . . . . . . . . . . . . . . . . . . . . . . . . . . . . . . . . . . . . . . . . . . . . . . . . . . . . . . . 29
SiriusXM Category Selection . . . . . . . . . . . . . . . . . . . . . . . . . . . . . . . . . . . . . . . . . . . . . . . 30
21
Page 22
Radio
MPH
62
1892
ODO
144.2
WLGX - FM
FM
P2
100.5
ST
1
MPH
62
1892
ODO
144.2
WLGX - FM
FM
P2
100.5
ST
21
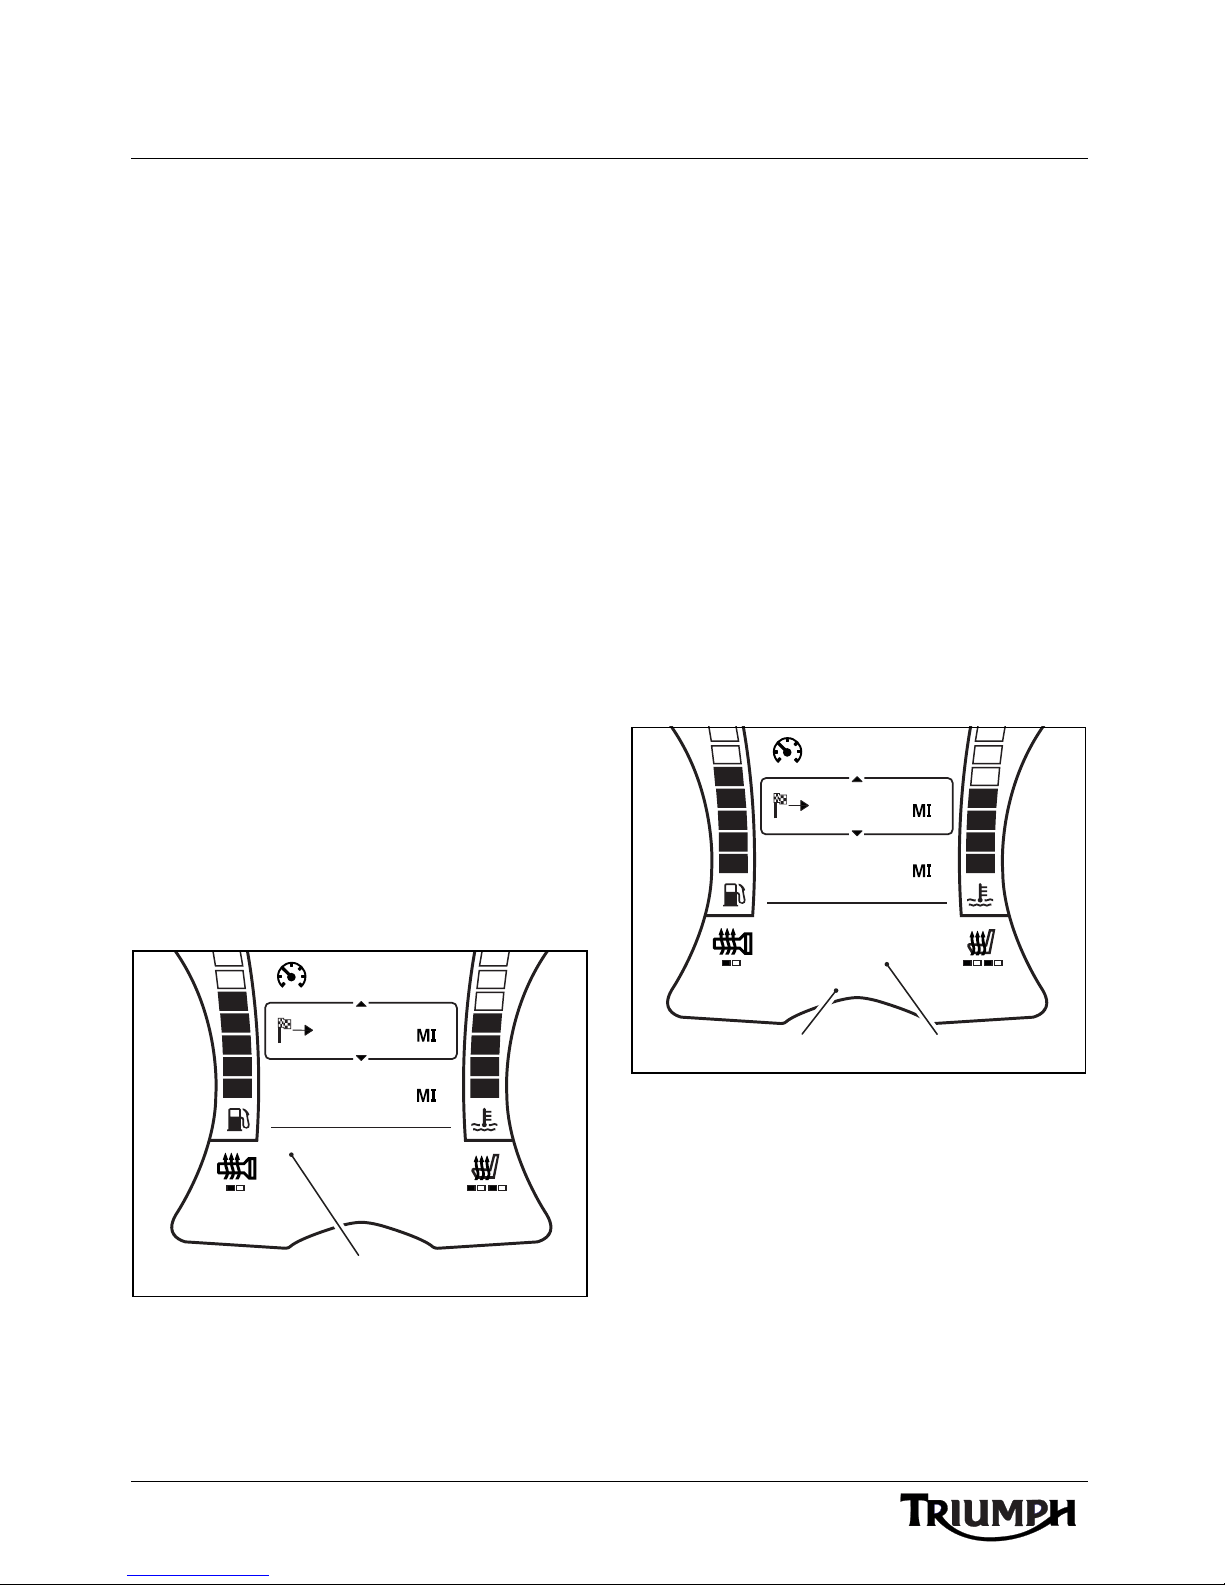
Selecting the Source or
Waveband
Press and release the MODE/MENU button
to cycle through the available input source or
radio waveband. The audio system will scroll
through in the following order:
•FM;
•AM;
• WX (Weather Radio);
• USB or iPod (iPod will display only if
an iPod or iPhone device is
connected, otherwise the display will
show USB) (see page 33);
• NAV (only if NAV AUDIO is
enabled, see page 39);
• BLUETOOTH AUDIO (only if
BLUETOOTH AUDIO is enabled
(see page 38) and a compatible
device is paired and active) (see
page 44).
• SiriusXM Satellite Radio
page 25).
®
(see
Finding and Saving Radio
Stations
Search for a Radio Station
Press and hold the Tuning up (T+) or Tuning
down (T-) buttons to seek through the
available stations. Briefly press and hold the
Tuning up (T+) or Tuning down (T-) buttons
to increment or decrement through the
frequency range in single steps for fine
tuning.
The instruments will display the radio station
name (if available - FM only), channel
number (WX) or frequency (FM and AM),
and ST if the programme is broadcast in
stereo (FM only).
1. W a v e b a n d
22
1. Frequency indicator
2. Station name (if available)
Page 23
Radio
MPH
0
1892
ODO
WLGX - FM
FM AF TA RG
100.5
ST
PRESET
P4 100.5
1
MPH
62
1892
ODO
144.2
WLGX - FM
FM
P2
100.5
ST
1
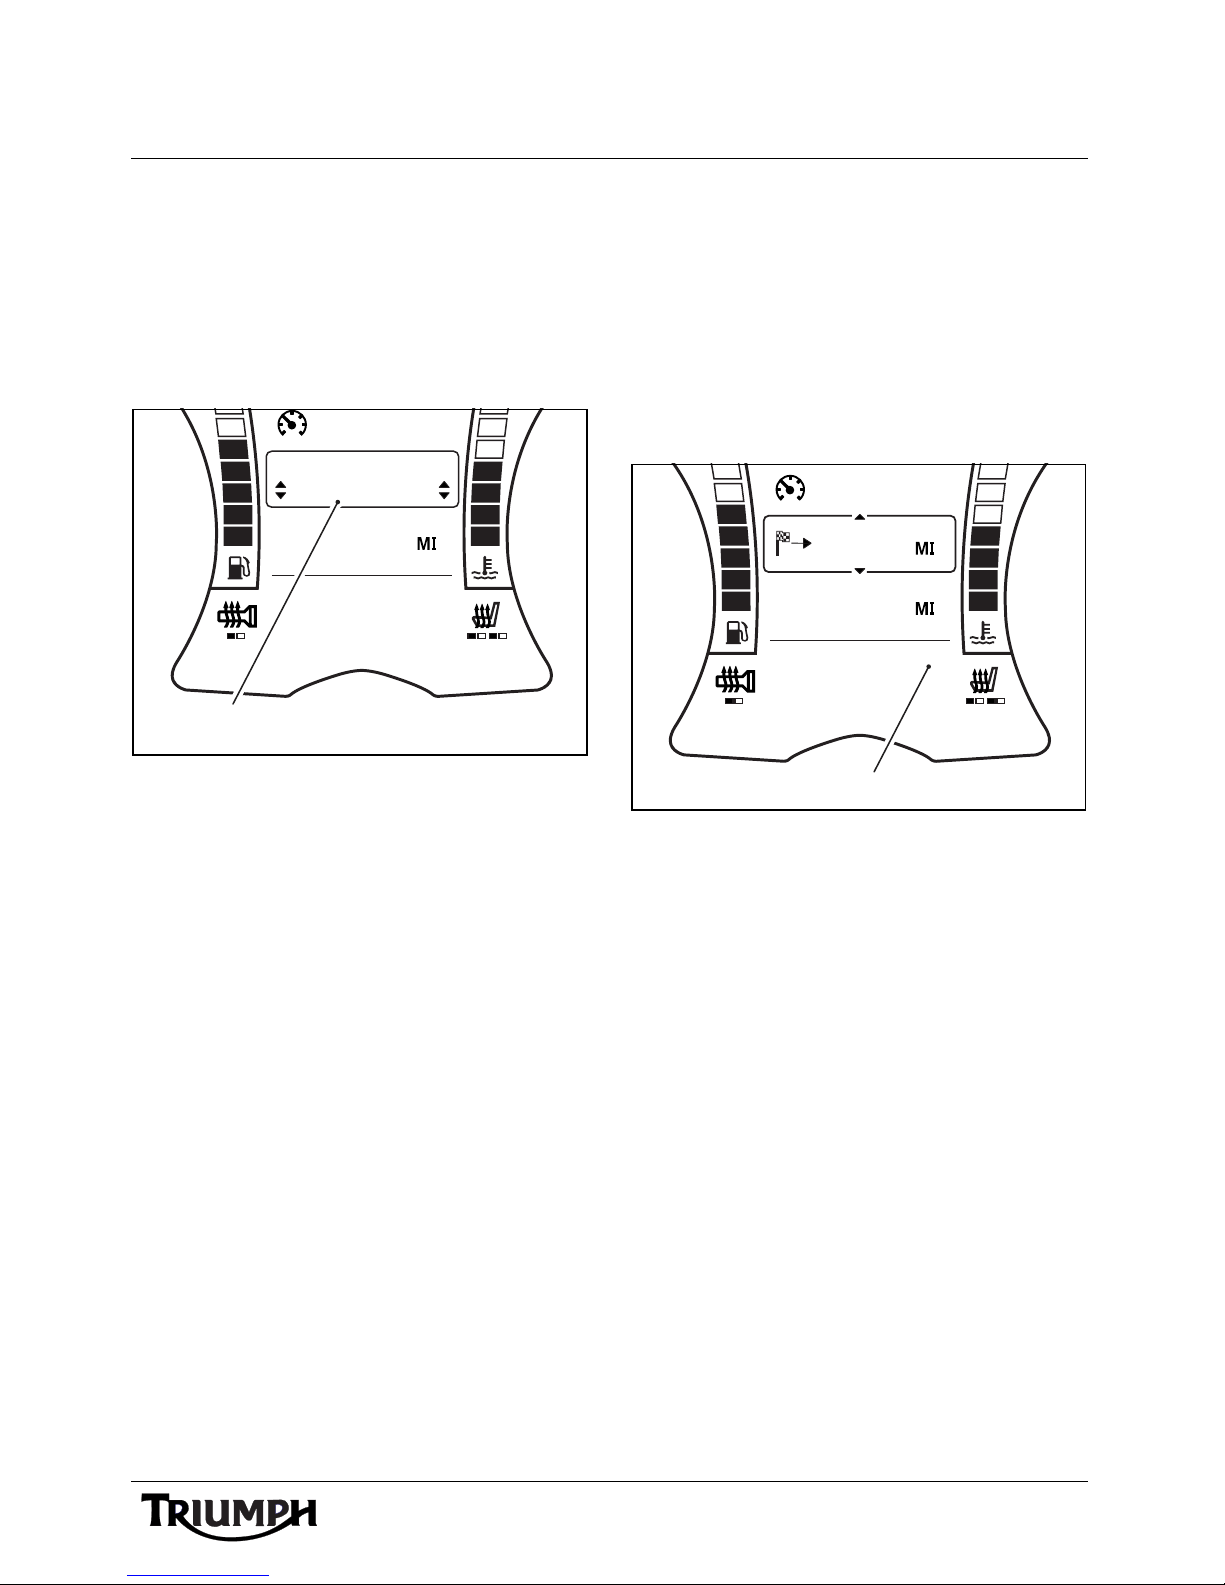
Save a Radio Station to a Preset
Tune the radio to the desired radio station
(see page 22).
Press and hold the PRESET button until the
central display area shows the next available
preset.
1. Storing a preset
Select a Stored Preset
Press and release the PRESET button to cycle
through the stored presets one at a time. The
instruments will display P1 up to P15 (or the
highest preset stored) in the lower display
area, along with the radio station name (FM
and XM Satellite Radio only), or frequency
(AM).
To store the radio station at this preset press
and release the PRESET button.
To store the radio station at a different preset
position, press the SCROLL button up or
down to select the desired preset and press
the SELECT button.
If a radio station is already stored at the
selected location it will be replaced with the
new selection.
Up to 15 presets can be stored for each
waveband.
1. Preset indicator
23
Page 24
Radio
XM CATEGORY
iPod CATEGORY
XM DISPLAY
ALT SOURCE
PRESETS
ALT SOURCE
PRESETS
CLEAR FM
ALT SOURCE
PRESETS
FM EMPTY
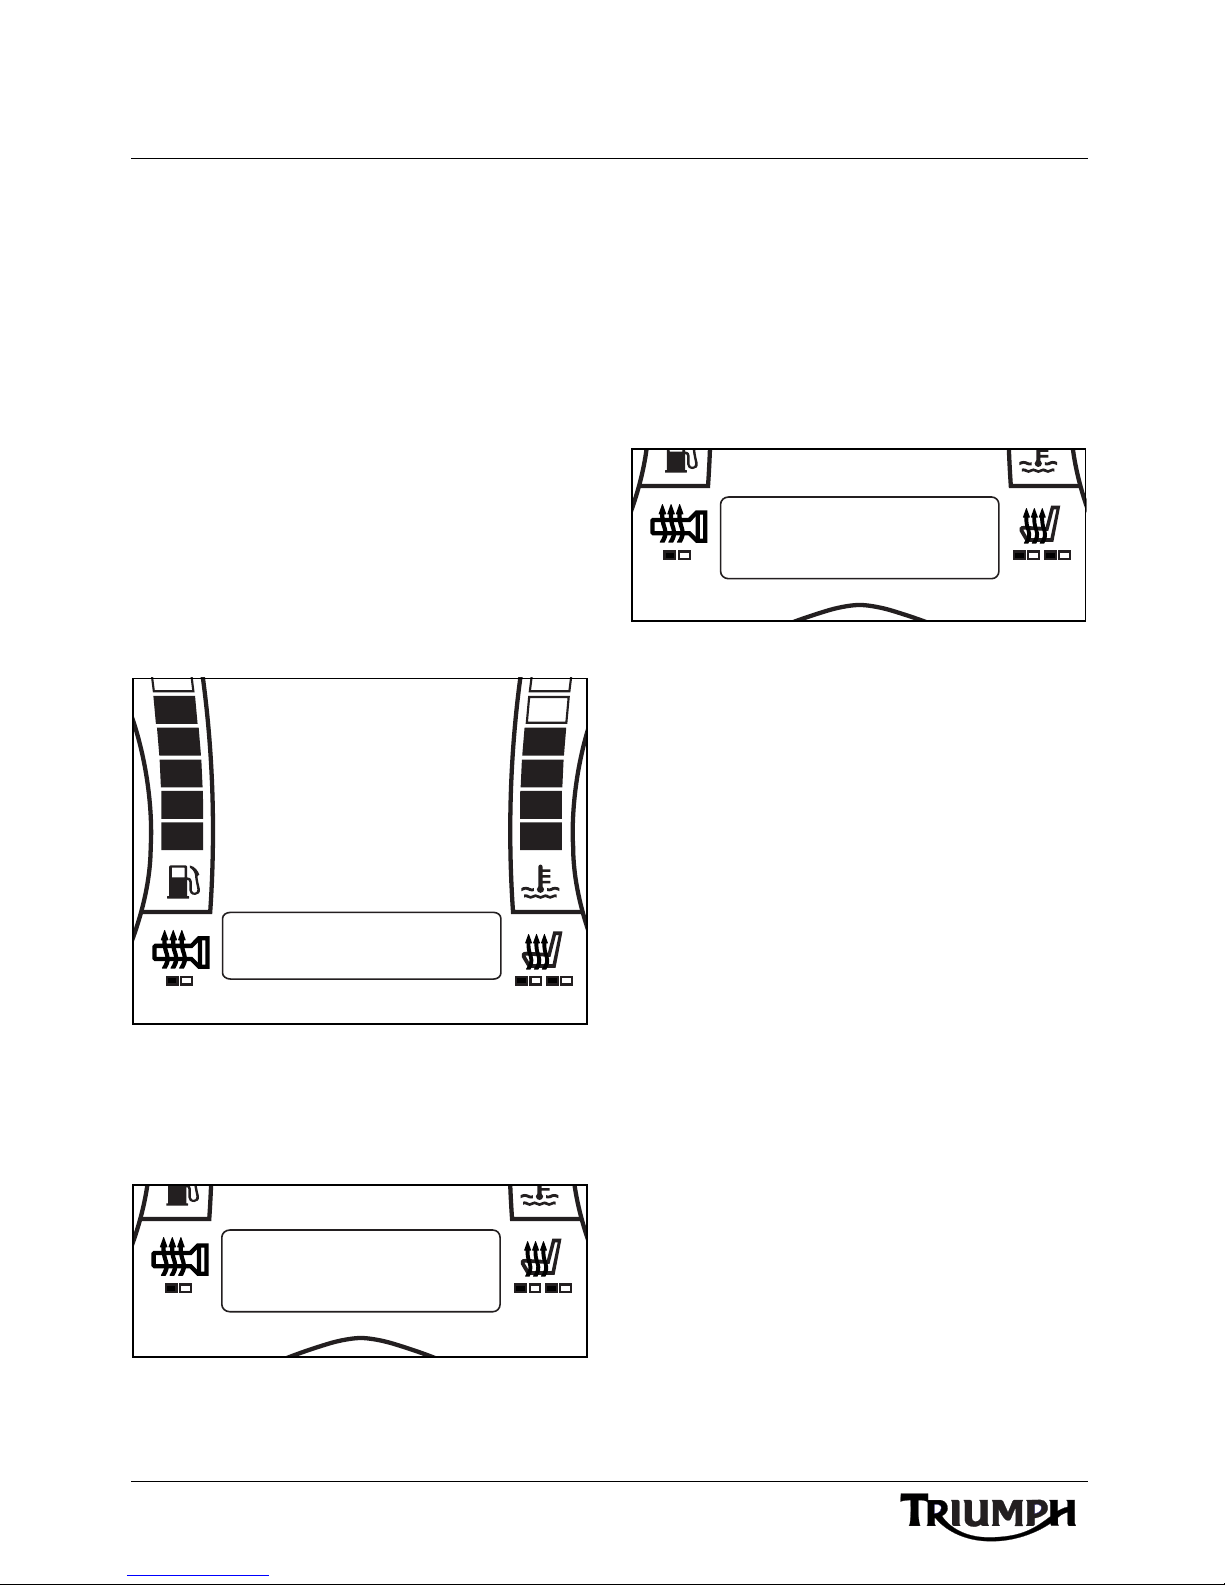
Erase All Stored Presets
To access the PRESETS menu:
1. With the motorcycle stationary, press and
hold the MODE/MENU button on the
audio switch unit until RADIO
SETTINGS is highlighted in the display
screen.
2. Press and release the SCROLL button
until SOURCE SETUP is highlighted.
Press the SELECT button to enter the
menu item.
3. Press and release the SCROLL button
until the PRESETS is highlighted. Press
the SELECT button to enter the item.
The audio system will scroll through in the
following order:
•CLEAR FM;
• CLEAR AM;
•CLEAR XM.
If no presets are stored for that waveband,
the display will show XX (waveband) EMPTY.
Clear Presets - Preset Empty
Once the desired waveband presets have
been erased, press the SCROLL button up or
down until EXIT is selected and press the
SELECT button to exit.
Source Setup Menu - Presets
Press the SCROLL button up or down to
select the waveband presets to erase and
press the SELECT button to erase all presets.
Clear Presets - FM Shown
24
Page 25
Radio
WX
3
1
2
Weather Radio (WX)
Weather Radio is a network of radio stations
broadcasting continuous weather
information, warnings, watches, forecasts and
other hazard information 24 hours a day, 7
days a week in the United States and
Canada.
Weather Radio also broadcasts warning and
post-event information for all types of hazards
- including natural (such as earthquakes or
avalanches), environmental (such as chemical
releases or oil spills), and public safety (such
as AMBER alerts or 911 Telephone outages).
• Weather Radio in the USA covers all
50 states, adjacent coastal waters,
Puerto Rico, the U.S. Virgin Islands,
and the U.S. Pacific Territories.
• Weather Radio in Canada provides
cover to approximately 90% of the
population.
Weather radio operates on channels 1 to 7.
1. Waveband (Weather Radio shown)
2. Channel number
When the radio is on and tuned to the
weather band, it airs both normal and
emergency weather information. If the radio
is muted or tuned to another waveband or
input source, it automatically switches to the
weather band for emergency weather
information.
SiriusXM Satellite Radio®
About SiriusXM Satellite Radio
SiriusXM is North America’s number one
satellite radio company, offering an
extraordinary variety of commercial-free
music, plus the best in premier sports, news,
talk radio, comedy, children’s and
entertainment programming; broadcast in
superior digital audio quality coast to coast.
For more information, or to subscribe, U.S.
customers visit www.siriusxm.com or call XM
Listener Care at 1-866-635-2349; Canadian
customers visit www.xmradio.ca or call XM
Listener Care at 1-877-GETXMSR (1-877438-9677).
SiriusXM Legal
SiriusXM monthly service subscription sold
separately. It is prohibited to copy, decompile,
disassemble, reverse engineer, hack,
manipulate or otherwise make available any
technology or software incorporated in
receivers compatible with the SiriusXM
Satellite Radio System. Other fees and taxes,
including a one-time activation fee may apply.
All fees and programming subject to change.
Channels with frequent explicit language are
indicated with an XL. Channel blocking is
available for SiriusXM radio receivers by
calling 1-800-XMRADIO (U.S. residents) and
1-877-GETXMSR (Canadian residents). Only
available in the 48 contiguous United States
and Canada.
©2007 SiriusXM Satellite Radio Inc. All rights
reserved.
25
Page 26
Radio
SiriusXM Subscription
There are two places to find your eight
character SiriusXM Radio ID:
• On SiriusXM Channel zero;
• On the outside of the audio unit
(contact your authorized Triumph
dealer for details of where to find
this).
Tuning to channel zero will display the ID
number on the instrument lower display
screen.
Record the SiriusXM Radio ID below for
reference.
Note:
• The SiriusXM Radio ID does not
use the letters “I”, “O”, “S” or “F”.
Activate your SiriusXM Satellite Radio service
in the U.S. online at https://care.siriusxm.com
or call 1-866-635-2349. Activate your XM
Satellite Radio service in Canada online at
https://activate.xmradio.ca or call 1-877-GETXMSR (1-877-438-9677).
You will need a major credit card.
SiriusXM will send a signal from the satellites
to activate the full channel line-up. Activation
normally takes 15 minutes, but during peak
periods you may need to keep your SiriusXM
audio system on for up to an hour.
SiriusXM Activation
1. Park the motorcycle outside so that you
have a clear view of the southern sky.
2. Switch on the ignition and the radio.
3. Select the XM mode (see page 22).
Ensure that the headlights and any other
electrical accessory is switched off to
prevent the battery from becoming
discharged.
4. Tune the XM radio to channel zero and
confirm the alphanumeric radio
identification number (this number is
also shown on the outside of the audio
unit).
5. Contact SiriusXM Satellite Radio as
follows: U.S. customers visit https://
care.siriusxm.com or call XM Listener
Care on 1-866-635-2349; Canadian
customers visit www.xmradio.ca or call
XM Listener Care at 1-877-GETXMSR
(1-877-438-9677) to activate the radio
reception.
6. Tune to channel one and follow the
activation instructions. This process takes
15 minutes to one hour and requires a
clear view of the southern sky.
7. After confirming the XM radio is
activated, check for proper radio
operation by referring to the user’s
manual.
When you can access the full line-up on your
SiriusXM audio system you are done.
26
Page 27
Radio
MPH
62
1892
ODO
144.2
ARTIST
XM
THE HEAT
TRACK
1
2
3
4
MPH
62
1892
ODO
144.2
ARTIST
XM
CH47
TRACK
1
2
3
4
SiriusXM Channel Name/
Number Display
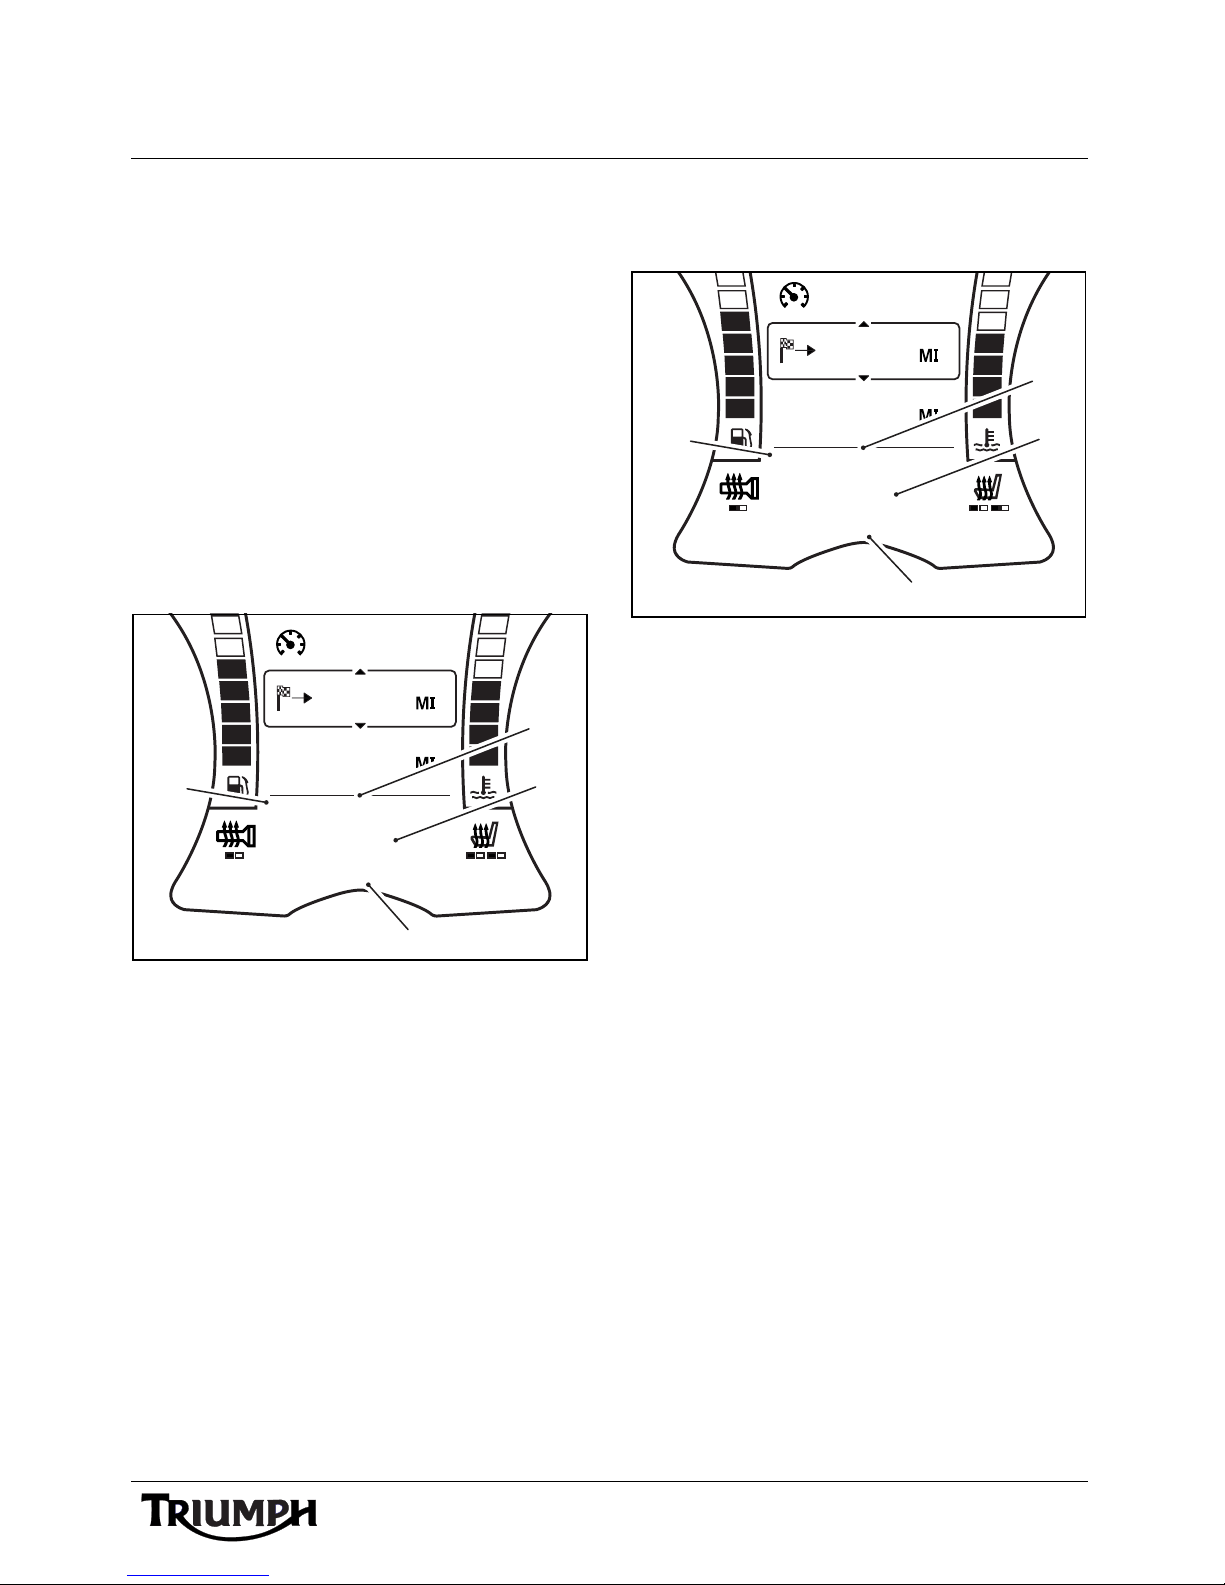
When the audio system is set to XM Satellite
Radio, the instruments display the channel
name by default.
After a brief delay the display will show the
artist and song title.
The XM Display menu allows the user to
toggle between displaying the channel name
or the channel number while tuning XM.
CHANNEL NAME will scroll through each
channel name in turn.
CHANNEL NUMBER will scroll through
each channel number in turn.
1. Source - XM Satellite Radio
2. Channel number
3. Artist
4. Track
Pressing the Tuning up (T+) and Tuning
down (T-) buttons in either display mode will
change the channel.
To select the XM Display type see page 28.
1. Source - XM Satellite Radio
2. Channel name
3. Artist
4. Track
27
Page 28
Radio
N
XM CATEGORY
EXIT
iPod CATEGORY
XM DISPLAY
SOURCE SETUP
ALT SOURCE
PRESETS
XM CATEGORY
EXIT
XM DISPLAY
CHANNEL NAME
SiriusXM Display Adjustment
Note:
• The following settings can only be
adjusted when the motorcycle is
stationary and the ignition is
turned on.
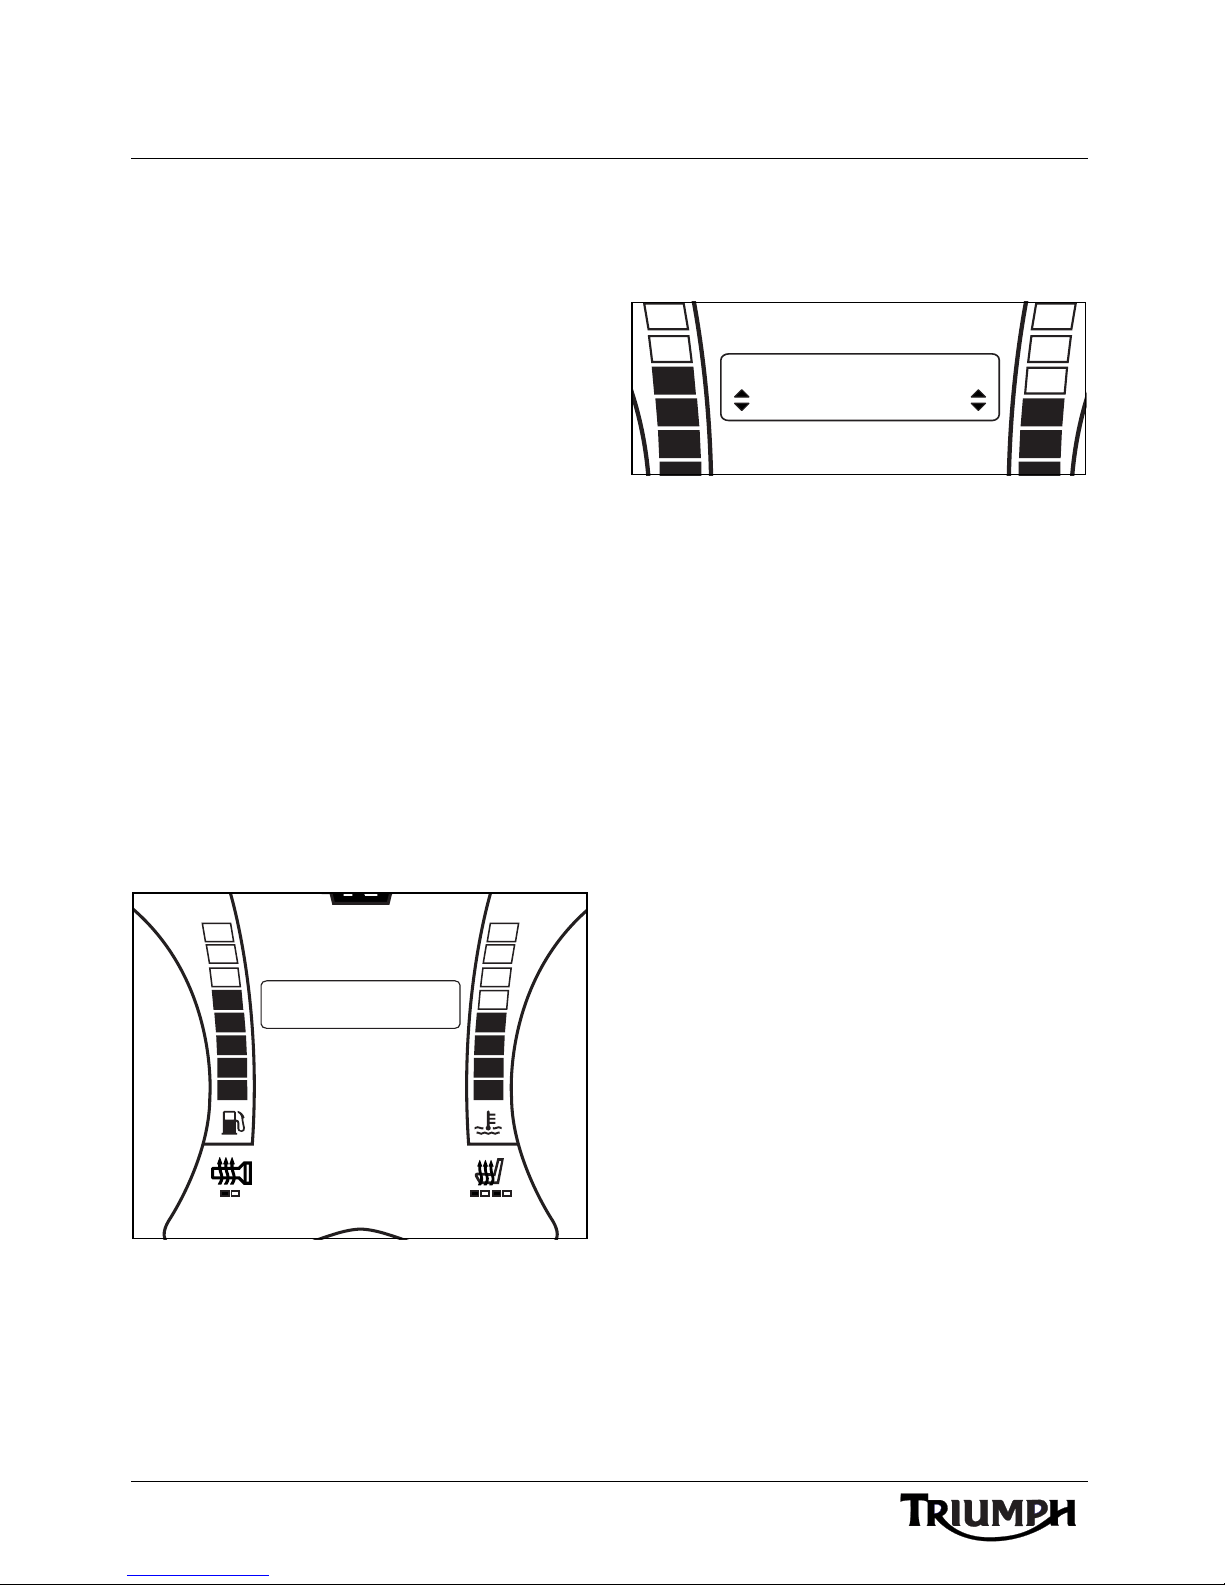
To access the XM DISPLAY menu;
1. With the motorcycle stationary, press and
hold the MODE/MENU button on the
audio switch unit until RADIO
SETTINGS is highlighted in the display
screen.
2. Press and release the SCROLL button
until SOURCE SETUP is highlighted.
Press the SELECT button to enter the
menu item.
3. Press and release the SCROLL button
until the XM DISPLAY is highlighted.
Press the SELECT button to enter the
item.
Press the SCROLL button up or down to
select the XM display mode and press the
SELECT button to save the setting and exit.
XM Display - Channel Name
Shown
The display will toggle between CHANNEL
NAME and CHANNEL NUMBER.
28
XM Display Menu
Page 29
Radio
MPH
62
1892
ODO
144.2
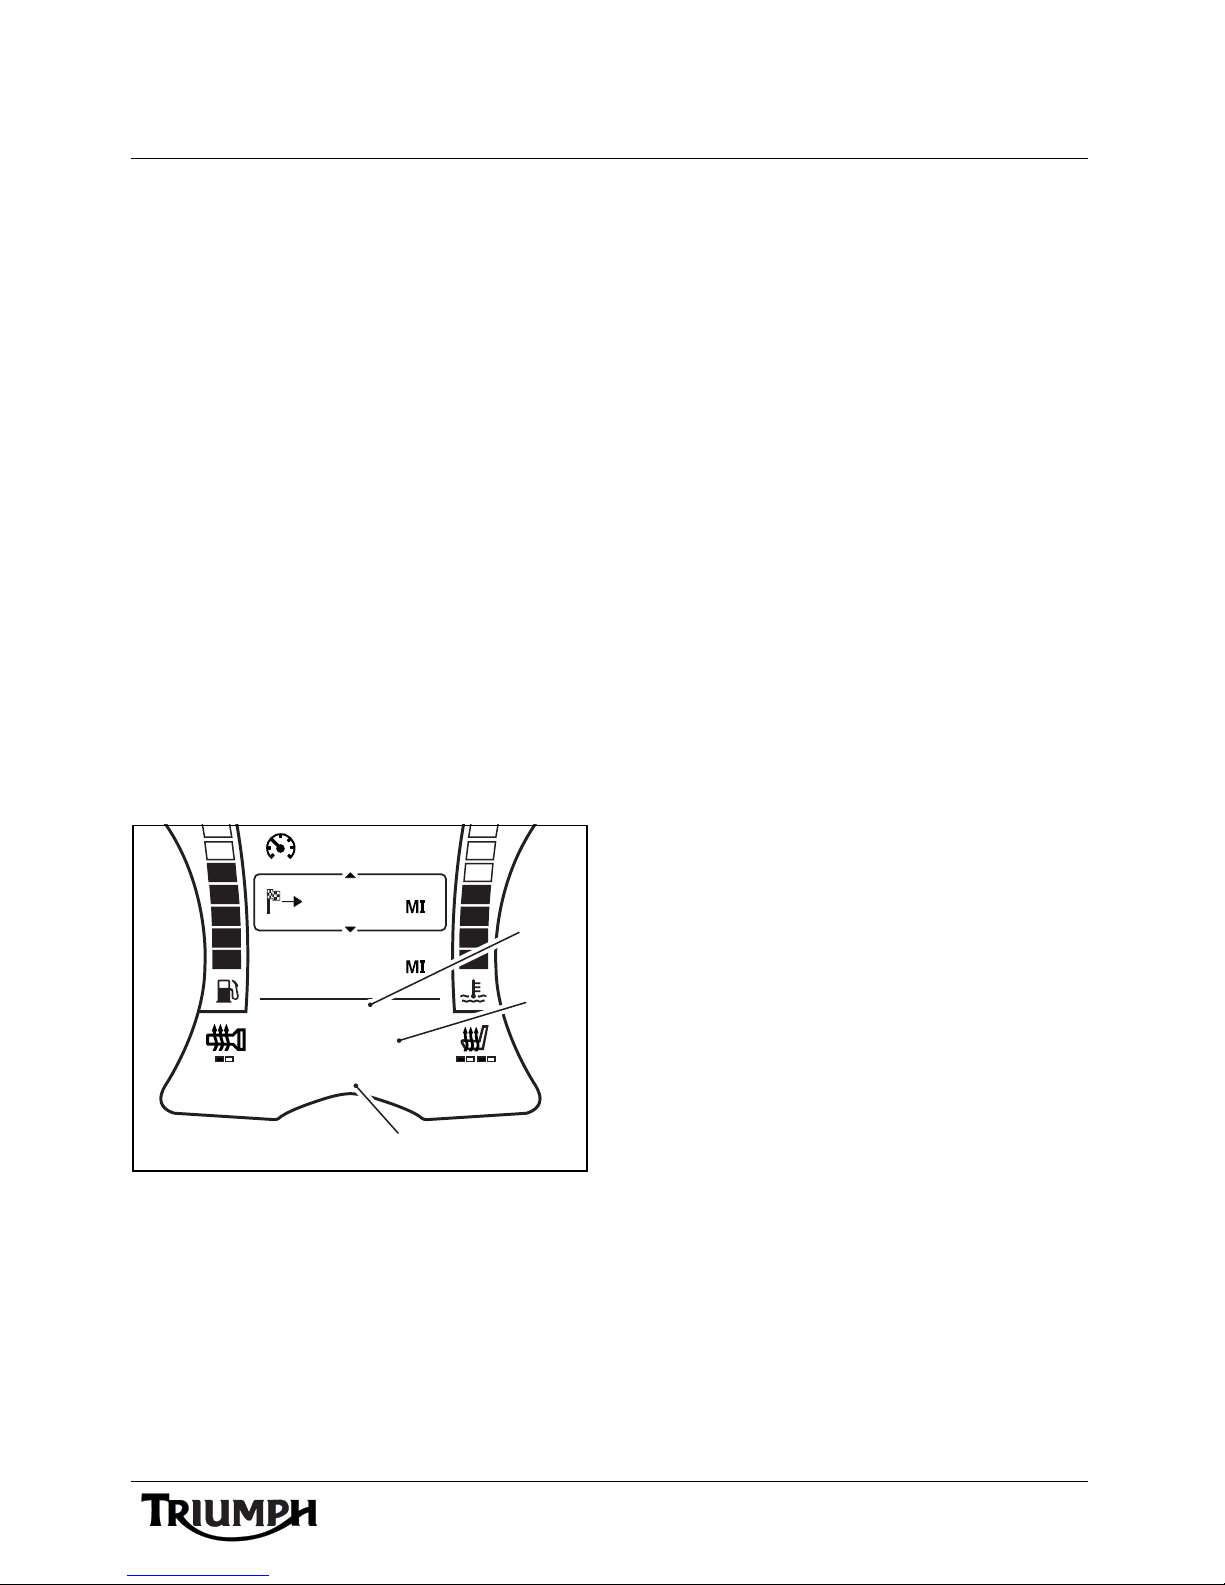
<< CH47 >>
XM
P2
CAT
THE HEAT
1
2
3
SiriusXM Categories
SiriusXM Satellite Radio divides its
programmes in to categories such as ALL,
POP, ROCK, COUNTRY, DANCE/
ELECTRONIC, ENTERTAINMENT, NEWS,
SPORTS etc.
For an up to date list of XM Categories and
channels visit the XM website at
(US) www.siriusxm.com,
or
(Canada) www.xmradio.ca.
The audio system can be set to only tune to
channels in the desired XM Category.
Once a category is selected, CAT will be
displayed in the lower instrument display
while tuning XM.
Pressing the Tuning up (T+) and Tuning
down (T-) buttons will only select those
channels in that category.
Note:
• XM Channels can be stored to
presets (see page 23) and will be
available regardless of the XM
Category selected.
• To access all channels it is
necessary to select ALL
CHANNELS from the XM
CATEGORY menu (see page 30).
• The category selection is reset to
ALL CHANNELS at power off.
1. Tuning mode (Category Shown)
2. Channel number
3. Channel name
After a brief delay the display will show the
channel name or channel number
(depending on the display type set on
page 27), artist and song title.
29
Page 30
Radio
N
XM CATEGORY
EXIT
iPod CATEGORY
XM DISPLAY
SOURCE SETUP
ALT SOURCE
PRESETS
XM CATEGORY
iPod CATEGORY
XM DISPLAY
ROCK
SiriusXM Category Selection
Note:
• The following settings can only be
adjusted when the motorcycle is
stationary and the ignition is
turned on.
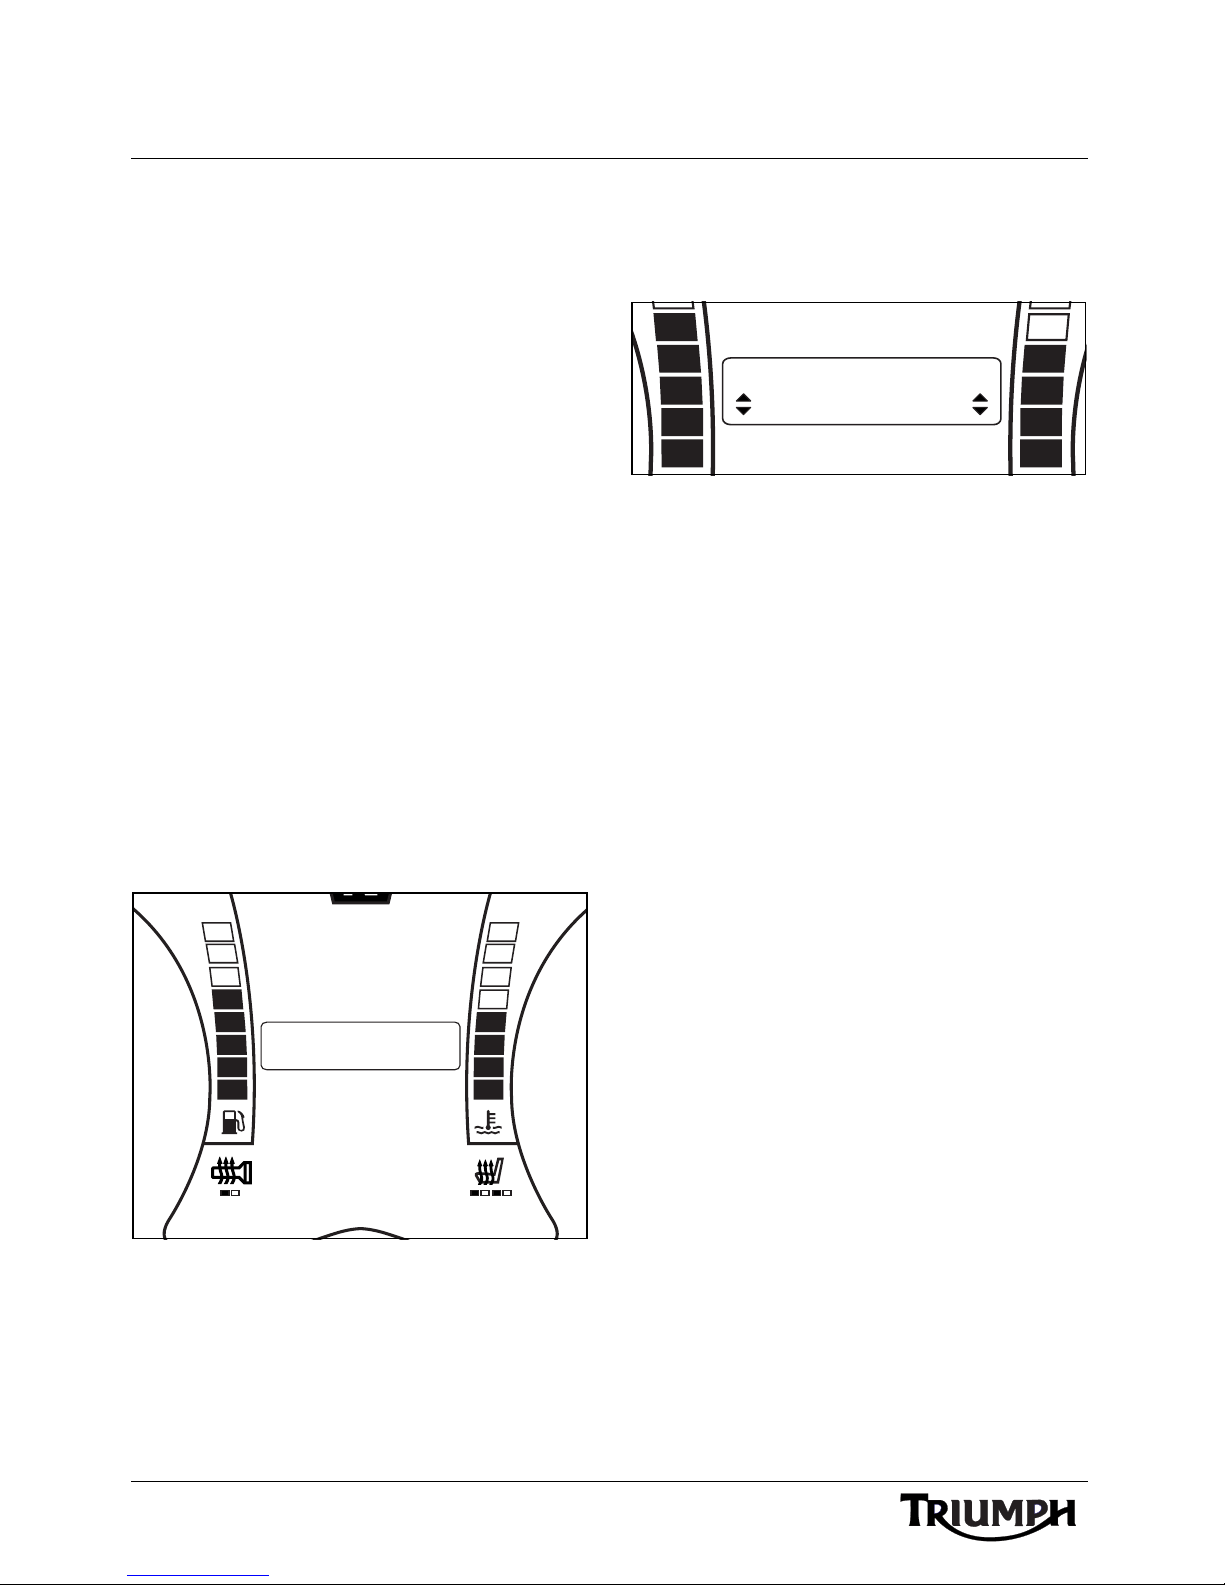
To access the XM CATEGORY menu;
1. With the motorcycle stationary, press and
hold the MODE/MENU button on the
audio switch unit until RADIO
SETTINGS is highlighted in the display
screen.
2. Press and release the SCROLL button
until SOURCE SETUP is highlighted.
Press the SELECT button to enter the
menu item.
3. Press and release the SCROLL button
until the XM CATEGORY is highlighted.
Press the SELECT button to enter the
item.
Press the SCROLL button up or down to
select the desired XM Category and press the
SELECT button to save the setting and exit.
XM Category Selection
For an up to date list of XM Categories and
channels visit the XM website at
(US) www.siriusxm.com,
or
(Canada) www.xmradio.ca.
30
XM Category Menu
Page 31

External Media Players and Telephone
EXTERNAL MEDIA PLAYERS AND TELEPHONE
Table of Contents
Selecting the Audio Source . . . . . . . . . . . . . . . . . . . . . . . . . . . . . . . . . . . . . . . . . . . . . . . . . . . . 32
Connection To The Motorcycle . . . . . . . . . . . . . . . . . . . . . . . . . . . . . . . . . . . . . . . . . . . . . . . . . 33
Universal Serial Bus (USB) . . . . . . . . . . . . . . . . . . . . . . . . . . . . . . . . . . . . . . . . . . . . . . . . . . . . . 33
Requirements . . . . . . . . . . . . . . . . . . . . . . . . . . . . . . . . . . . . . . . . . . . . . . . . . . . . . . . . . . . 33
Connecting the Audio Device via USB. . . . . . . . . . . . . . . . . . . . . . . . . . . . . . . . . . . . . . . . 34
iPod and iPhone Device Playback . . . . . . . . . . . . . . . . . . . . . . . . . . . . . . . . . . . . . . . . . . . . . . . 35
iPod Category . . . . . . . . . . . . . . . . . . . . . . . . . . . . . . . . . . . . . . . . . . . . . . . . . . . . . . . . . . . 35
iPod Album/Artist/Playlist Selection . . . . . . . . . . . . . . . . . . . . . . . . . . . . . . . . . . . . . . . . . . 37
iPod Device Track Selection . . . . . . . . . . . . . . . . . . . . . . . . . . . . . . . . . . . . . . . . . . . . . . . . 38
Alternative Sources. . . . . . . . . . . . . . . . . . . . . . . . . . . . . . . . . . . . . . . . . . . . . . . . . . . . . . . . . . . 38
Bluetooth® Audio . . . . . . . . . . . . . . . . . . . . . . . . . . . . . . . . . . . . . . . . . . . . . . . . . . . . . . . . 38
Satellite Navigation Systems . . . . . . . . . . . . . . . . . . . . . . . . . . . . . . . . . . . . . . . . . . . . . . . . 39
ALT SOURCE (Alternative Source) Menu . . . . . . . . . . . . . . . . . . . . . . . . . . . . . . . . . . . . . 40
Telephone . . . . . . . . . . . . . . . . . . . . . . . . . . . . . . . . . . . . . . . . . . . . . . . . . . . . . . . . . . . . . . . . . . 41
Incoming Phone Calls . . . . . . . . . . . . . . . . . . . . . . . . . . . . . . . . . . . . . . . . . . . . . . . . . . . . . 41
31
Page 32
External Media Players and Telephone
MPH
62
1892
ODO
144.2
TRACK
ARTIST
USB
1
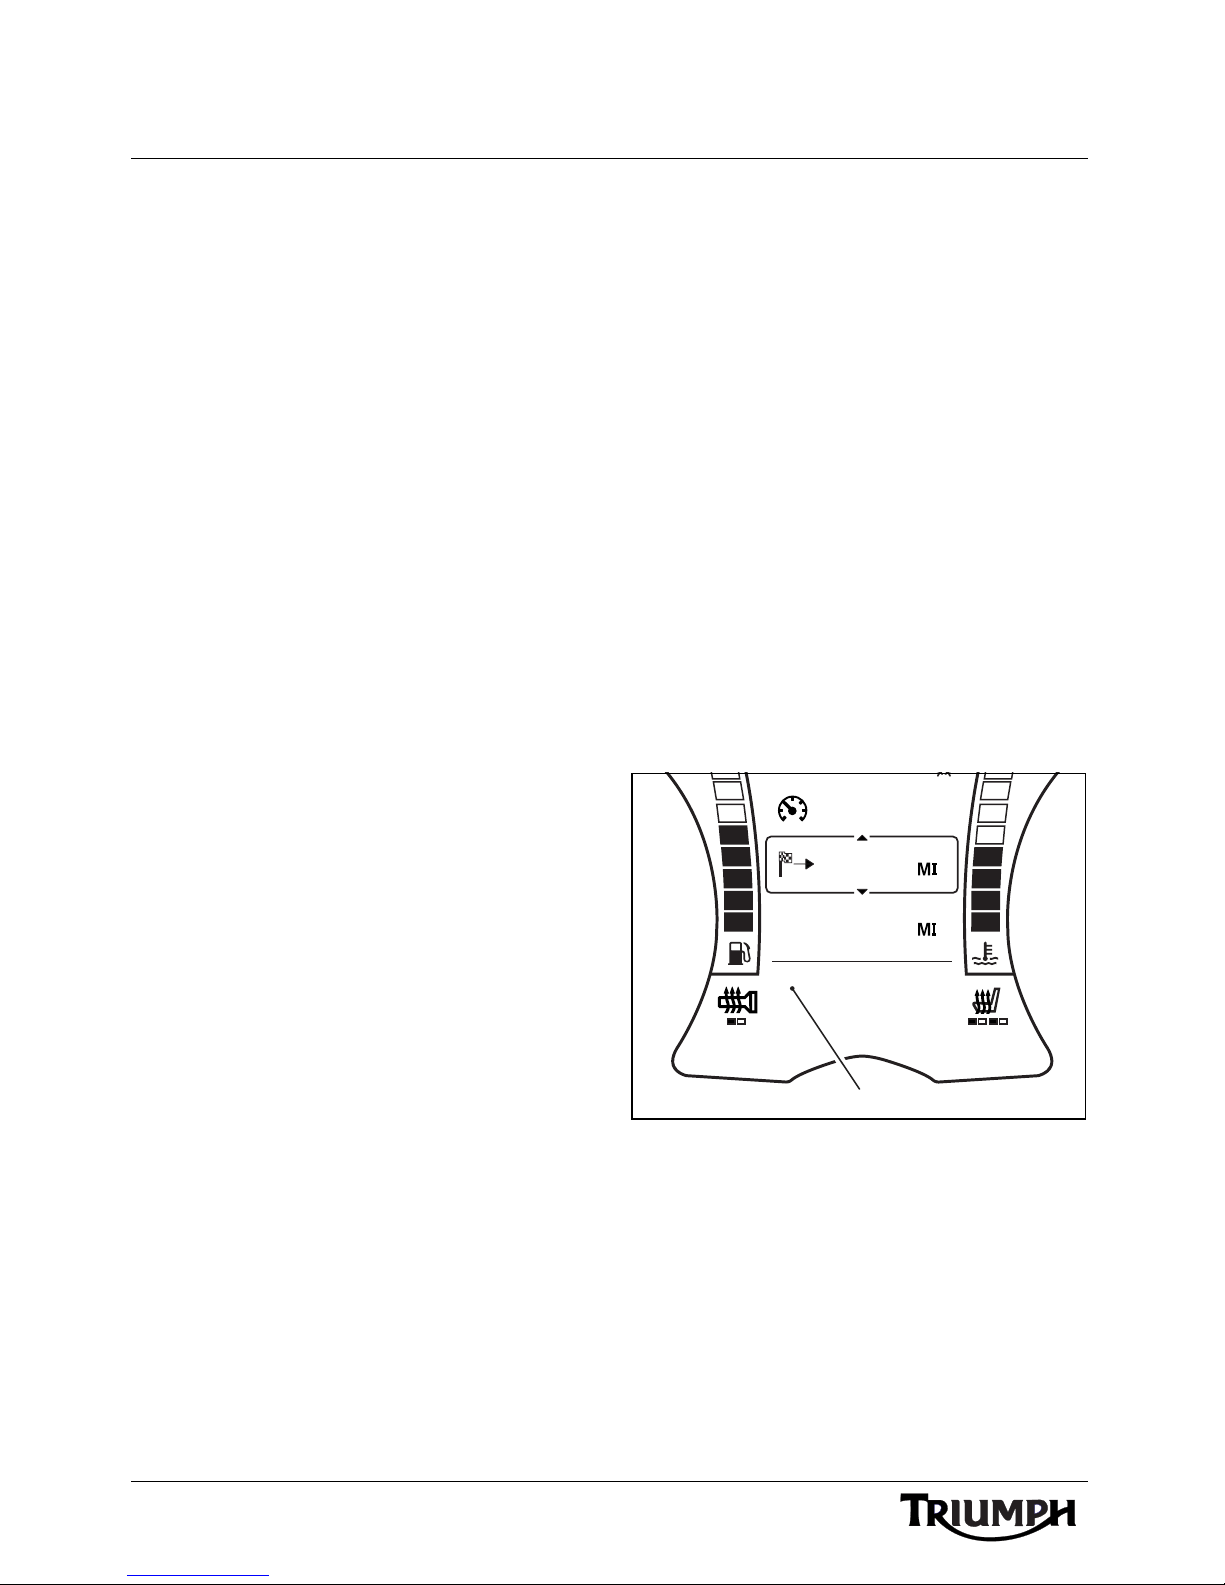
Selecting the Audio Source
Press and release the MODE/MENU button
to cycle through the available input sources
or radio wavebands.
The audio system will scroll through in the
following order:
Europe Only
•FM;
• MW (medium wave);
• LW (long wave);
• USB or iPod (iPod will display only if
an iPod or iPhone device is
connected, otherwise the display will
show USB;
• NAV (only if NAV audio is enabled,
see page 39);
• BLUETOOTH AUDIO (only if
BLUETOOTH AUDIO is enabled
(see page 38) and a compatible
device is paired and active) (see
page 44).
USA and Canada Only
•FM;
•AM;
•WX;
• USB or iPod (iPod will display only if
an iPod or iPhone device is
connected, otherwise the display will
show USB);
• NAV (only if NAV audio is enabled,
see page 39);
• BLUETOOTH AUDIO (only if
BLU ETOOTH AUDIO is enabled
(see page 38) and a compatible
device is paired and active) (see
page 44).
• SiriusXM Satellite Radio
page 25).
®
(see
All Markets Except Europe, USA and
Canada
•FM;
•AM;
• USB or iPod (iPod will display only if
an iPod or iPhone device is
connected, otherwise the display will
show USB;
• NAV (only if NAV audio is enabled,
see page 39);
• BLUETOOTH AUDIO (only if
32
BLUETOOTH AUDIO is enabled
(see page 38) and a compatible
device is paired and active) (see
page 44).
1. Source - USB shown
Page 33
External Media Players and Telephone
chto
1
Connection To The
Motorcycle
Input sources can be connected to the
motorcycle in three ways:
• Universal Serial Bus (USB) (see
page 33);
•via Bluetooth
• via the Navigation system
connection (see page 39).
(see page 43);
Universal Serial Bus (USB)
Requirements
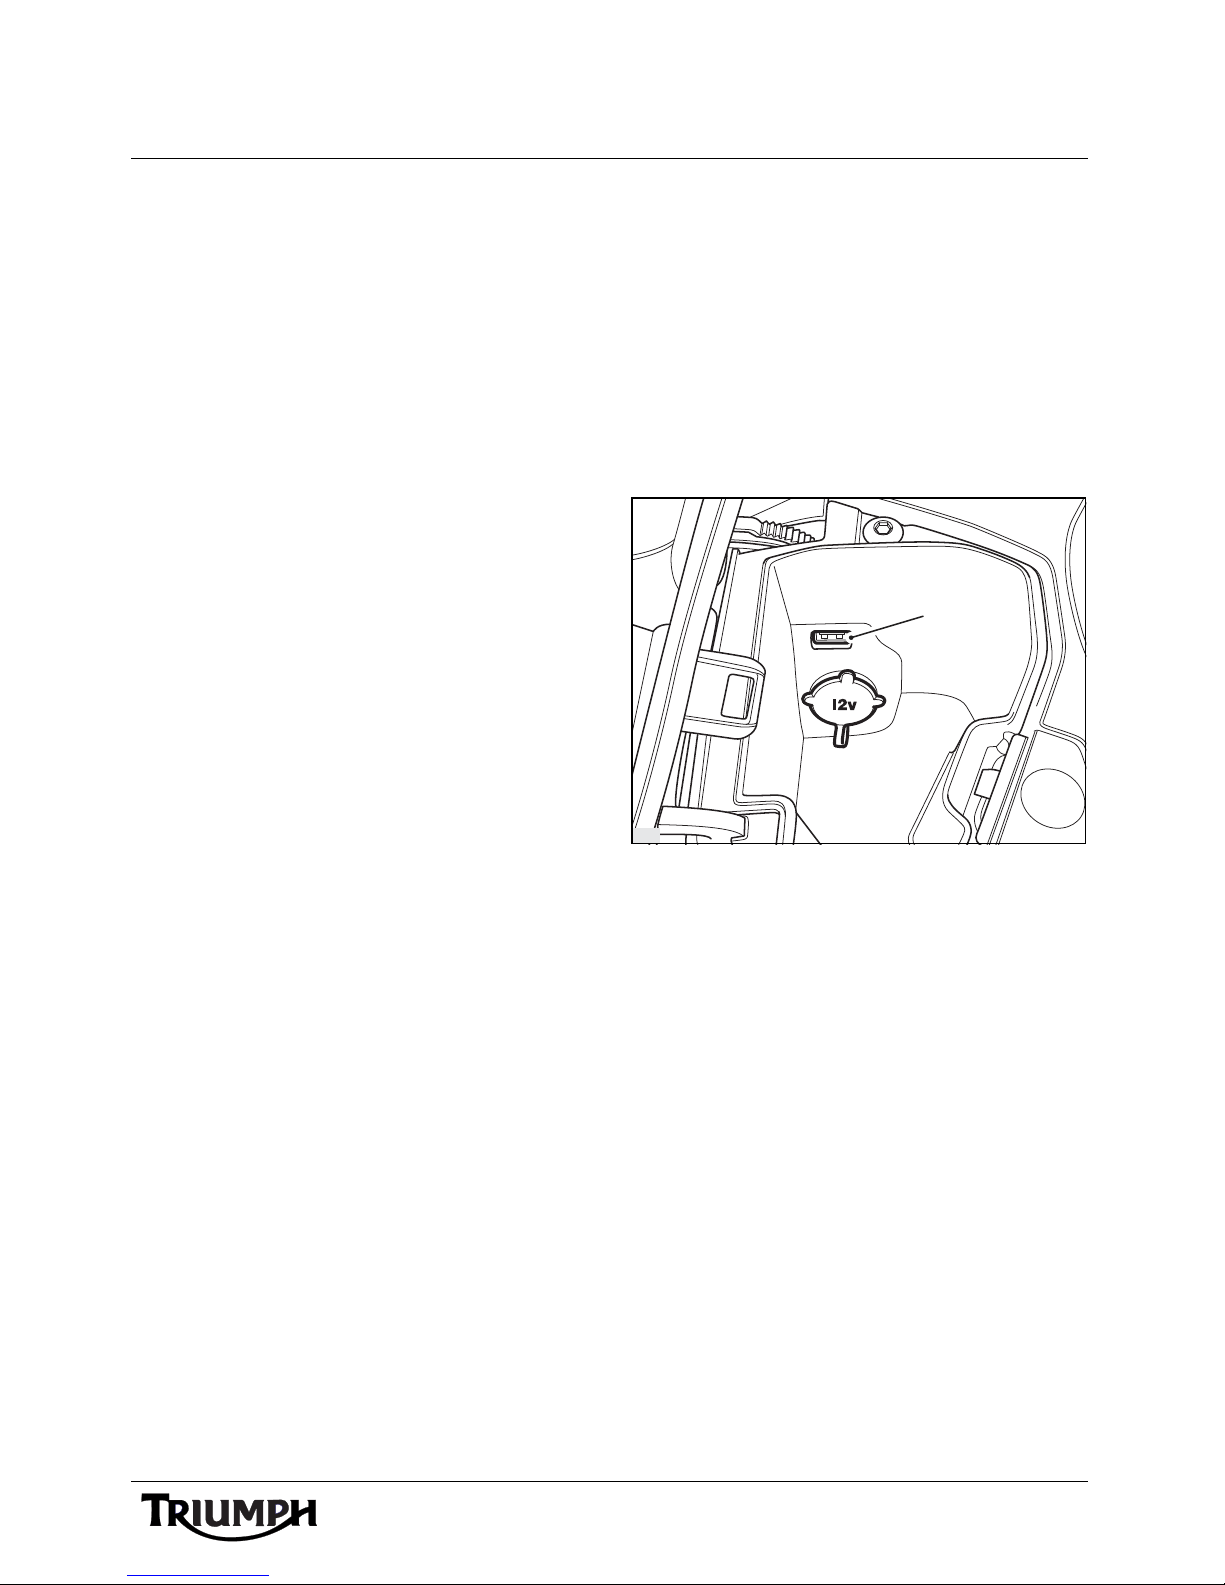
Suitable audio devices (such as MP3 players)
or media storage devices (such as USB
drives) can be connected to the audio system
via the 'type A' USB (USB 1.1 and 2.0
compatible) connection in the cockpit
stowage compartment.
1. USB connection
The audio device must:
• have a compatible USB connector;
• be stowable inside the cockpit
stowage compartment;
• be able to withstand the vibrations
arising from normal motorcycle
usage;
• be able to withstand the high
temperatures occurring inside the
cockpit stowage compartment in
summer.
33
Page 34
External Media Players and Telephone
Caution
Caution
Close the stowage compartment lid, ensuring
that neither the audio device or cable is
trapped.
Triumph Motorcycles Limited will not be
liable for any damage to, or loss of data
from, any audio devices used in this way.
Refer to the audio device manufacturer’s
instructions for any usage restrictions.
Audio devices containing hard disks should
not be used, as vibration will cause the
playback to skip, and may damage the hard
disk in the device.
The audio system provides a 5 Volt 1 Amp
power supply via the USB connector,
through which it is possible to charge most
mobile phones and other such devices.
Connecting the Audio Device via
USB
Switch off the audio system (see page 7) or
motorcycle ignition.
Connect the audio device to the USB
connector in the cockpit stowage
compartment using a suitable USB cable, or
for USB drives, directly in to the USB
connector.
Switch on the audio system (see page 6).
Select the audio source (see page 32).
The audio system will scan the root folder
and any sub-folders of the device for
compatible tracks and then begin play-back
of all tracks by folder and then track title in
alphabetical order.
Press and release the PRESET button to cycle
through the folders one at a time.
Press and release the Tuning up (T+) or
Tuning down (T-) buttons to change track in
alphabetical order.
Press and hold the Tuning up (T+) or Tuning
down (T-) buttons to increment or decrement
through the sub-folders in alphabetical order.
To pause the playback select another audio
source or turn the audio system off (see
page 7). Playback will resume once the
device is selected or the audio system is
turned on again.
Do not allow the USB cable to become
trapped in the stowage compartment lid,
or route the USB cable outside of the
stowage compartment. Either of these
conditions may damage the stowage
compartment lid seal and allow water or
dust to enter the stowage compartment,
damaging the audio device and other
contents.
34
Page 35
External Media Players and Telephone
N
PROG TYPE
EXIT
iPod CATEGORY
RDS OPTIONS
SOURCE SETUP
ALT SOURCE
PRESETS
PROG TYPE
iPod CATEGORY
ALT SOURCE
ARTIST
iPod and iPhone Device
Playback
Connect a compatible iPod or iPhone device
to the USB connection as described on
page 34.
A full list of compatible devices is listed in the
Specifications section on page 50.
The audio system will detect any Artists,
Albums or Playlists saved on the device.
While the scan is taking place, SEARCHING
is shown on the instrument display.
The Artists, Albums or Playlists found are
sorted in to alphabetical order by track title
(this may not be the same name as the file
name on the device) and played in this order.
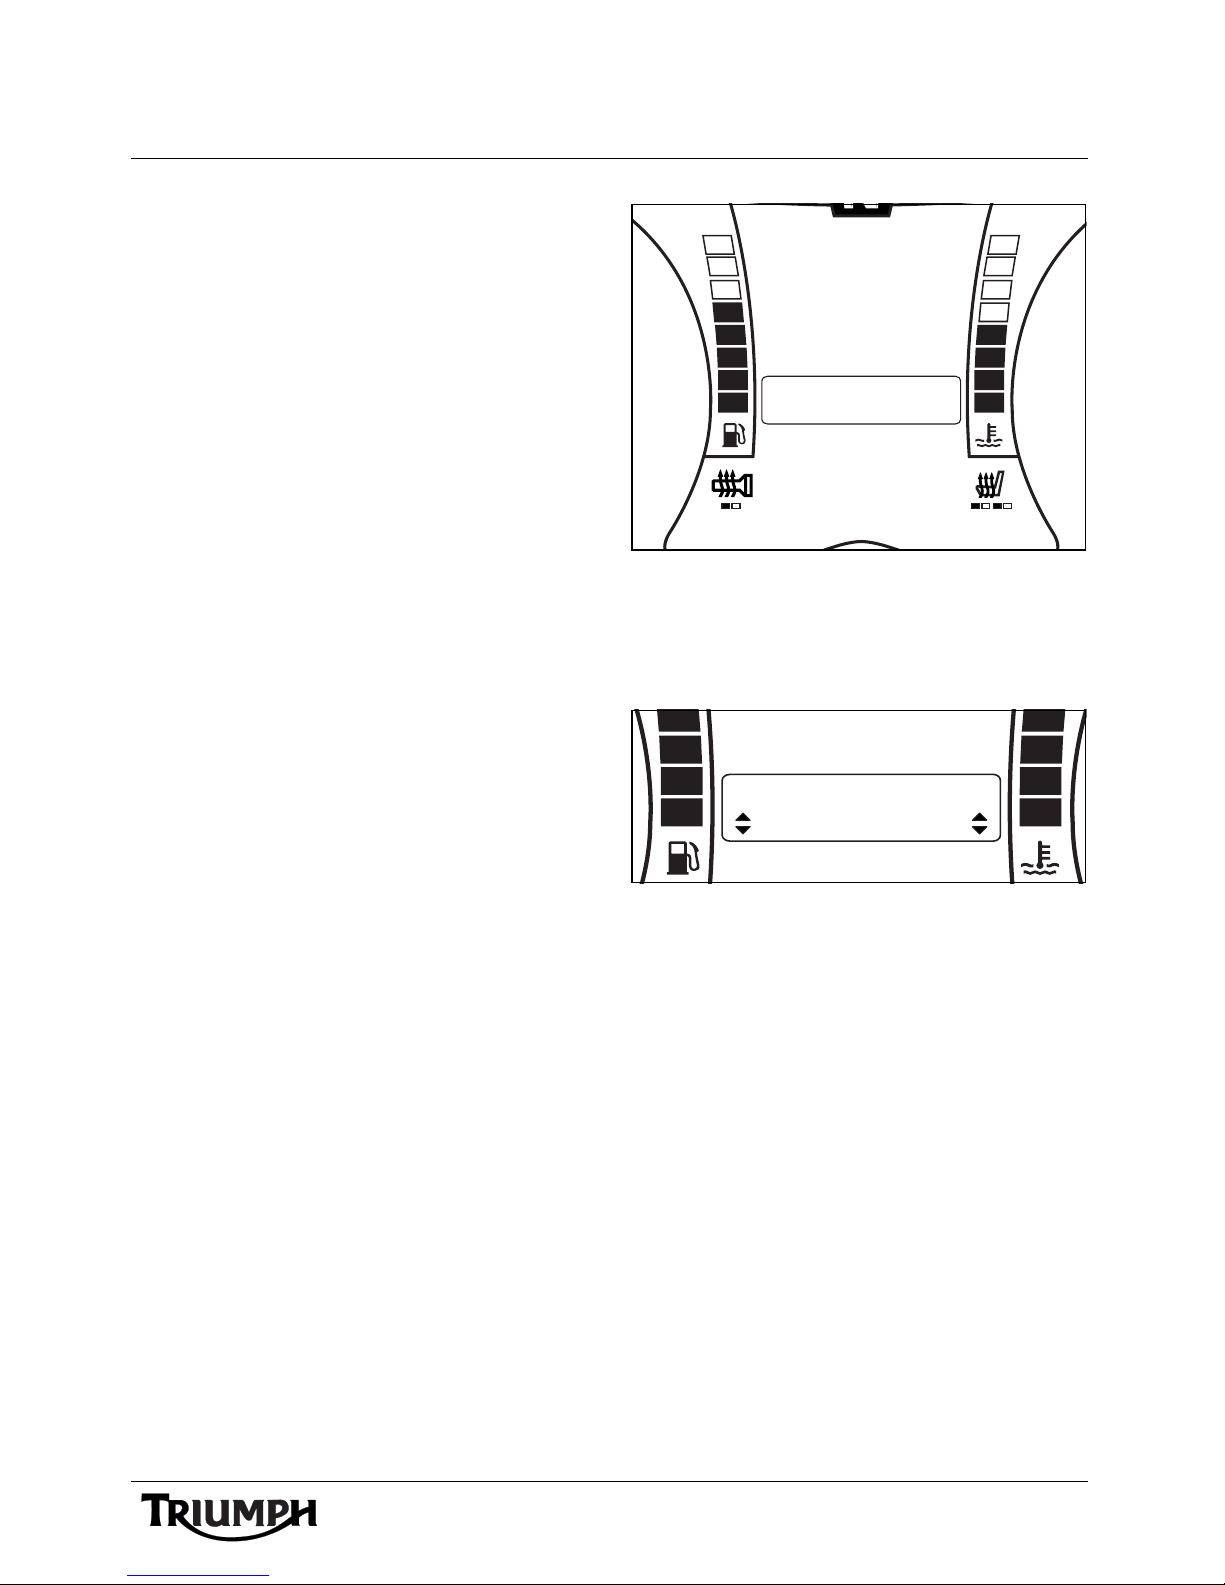
Source Setup Menu - Presets
Press the SCROLL button up or down to
select the CATEGORY mode and press the
SELECT button to save the setting and exit.
iPod Category
You can choose to sort the detected tracks by
ARTIST, ALBUM or PLAYLIST within the
iPod CATEGORY menu item.
To access the iPod CATEGORY menu:
Motorcycle Stationary
1. With the motorcycle stationary, press and
hold the MODE/MENU button on the
audio switch unit until RADIO
SETTINGS is highlighted in the display
screen.
2. Press and release the SCROLL button
until SOURCE SETUP is highlighted.
Press the SELECT button to enter the
menu item.
3. Press and release the SCROLL button
until the iPod CATEGORY is highlighted.
Press the SELECT button to enter the
item.
iPod Category- Artist Shown
The display will scroll through in the following
order:
•PLAYLIST;
•ALBUM;
•ARTIST.
35
Page 36
External Media Players and Telephone
Warning
TRIP 1
MPH
62
6
1892
ODO
iPod CATEGORY
TRIP 1
MPH
62
6
1892
ODO
iPod CATEGORY
PLAYLIST
Motorcycle Moving
Any adjustments made to audio system
settings when the motorcycle is moving
must be carried out only when it is safe to
do so.
Making adjustments to audio system
settings while travelling at high speed,
during cornering or braking, or in heavy
traffic or poor visibility, may result is loss of
motorcycle control and an accident.
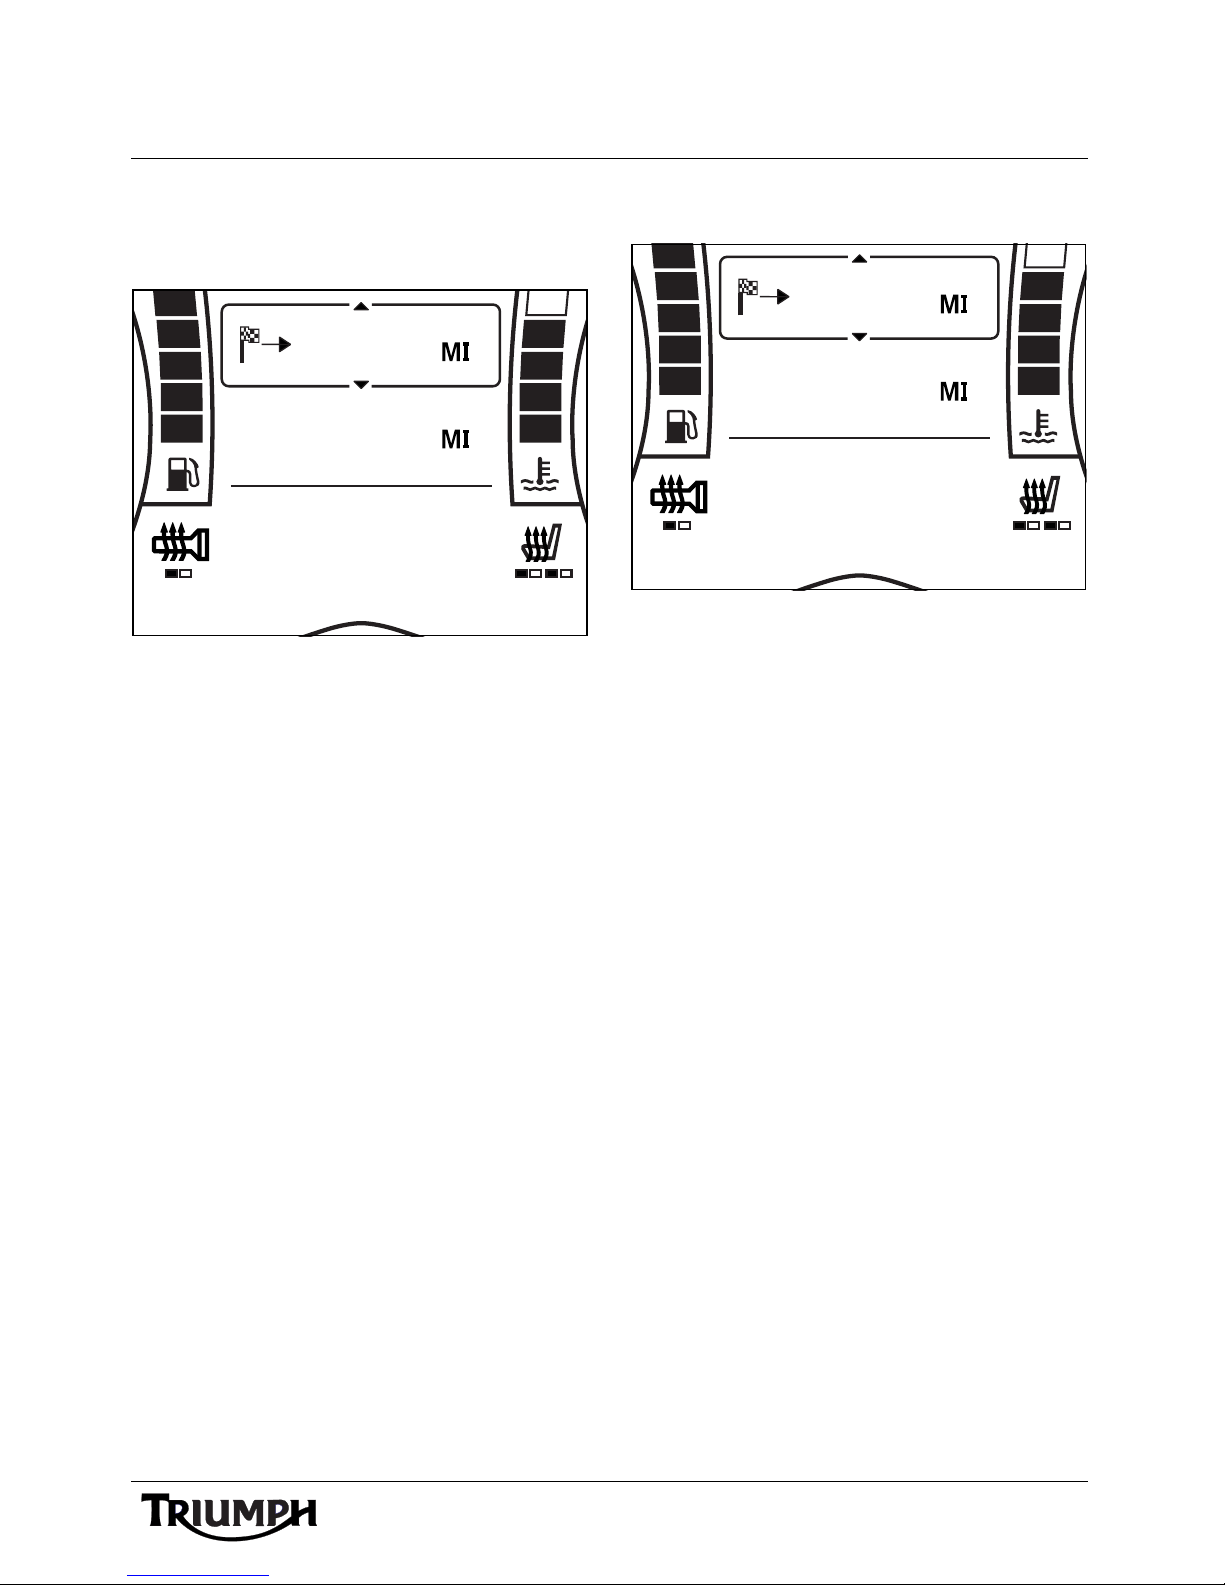
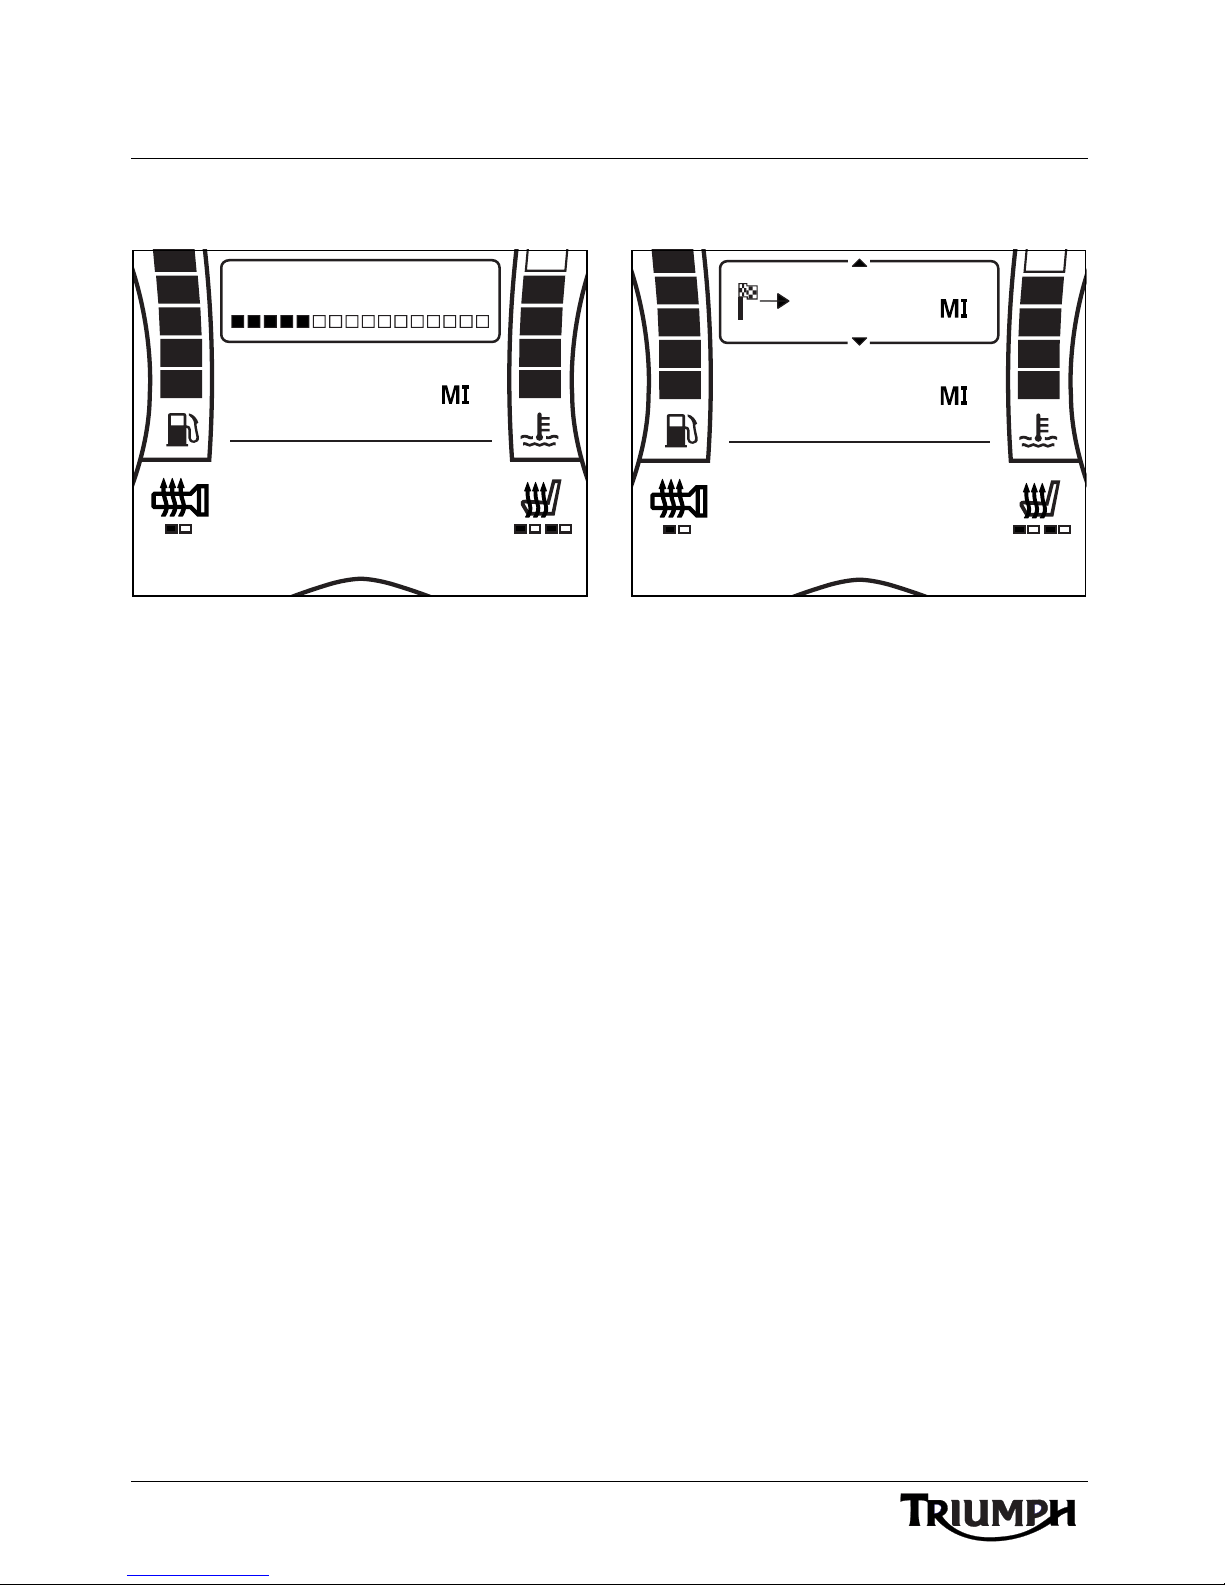
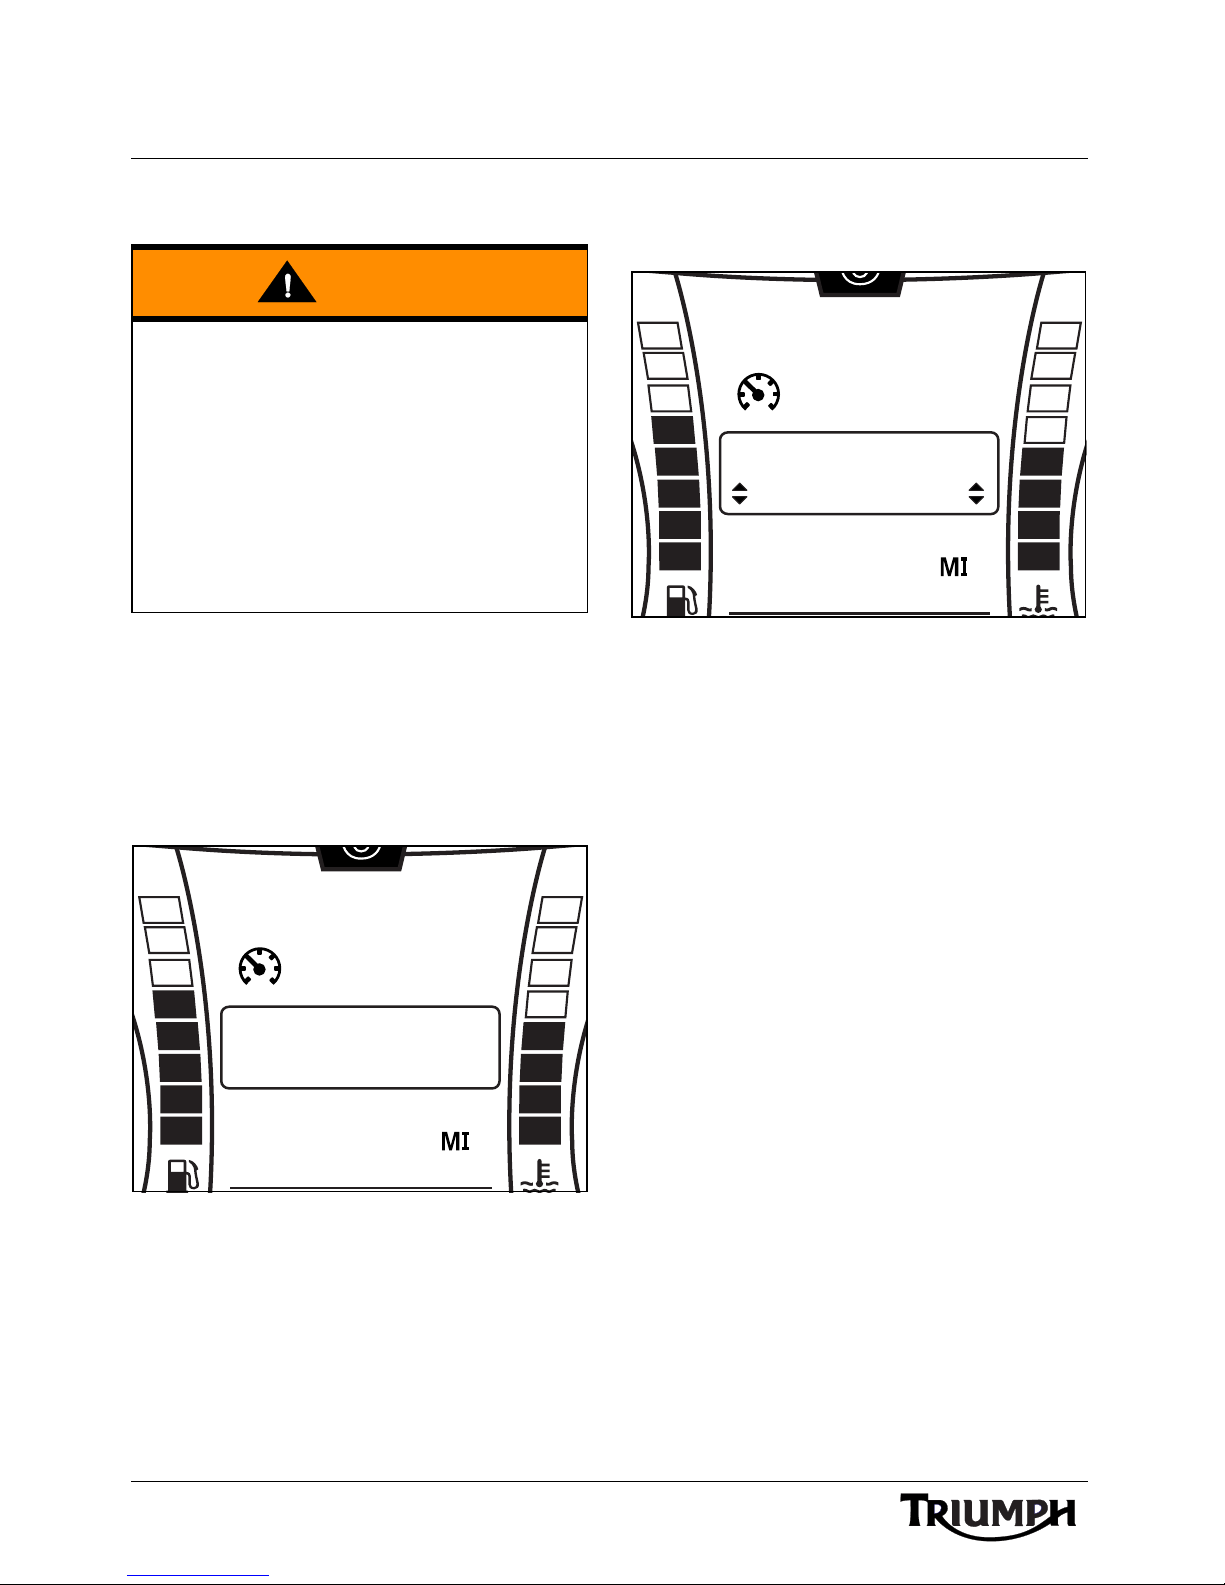
1. Press and hold the MODE/MENU
button on the audio switch unit until iPod
CATEGORY is displayed in the centre of
the instrument display screen.
2. Press the SELECT button to enter the
menu item.
4. Press the MODE/MENU button to save
the adjustment and exit.
iPod Category Select
(Motorcycle Moving)
The display will scroll through in the following
order:
•PLAYLIST;
•ALBUM;
iPod Category Select
(Motorcycle Moving)
3. Press and release the SCROLL button
until the desired iPod category is
displayed.
•ARTIST.
The display will return to the previously
selected Trip Computer once adjustment has
been made.
36
Page 37
External Media Players and Telephone
TRIP 1
MPH
62
6
1892
ODO
ARTIST
ARTIST NAME
iPod Album/Artist/Playlist Selection
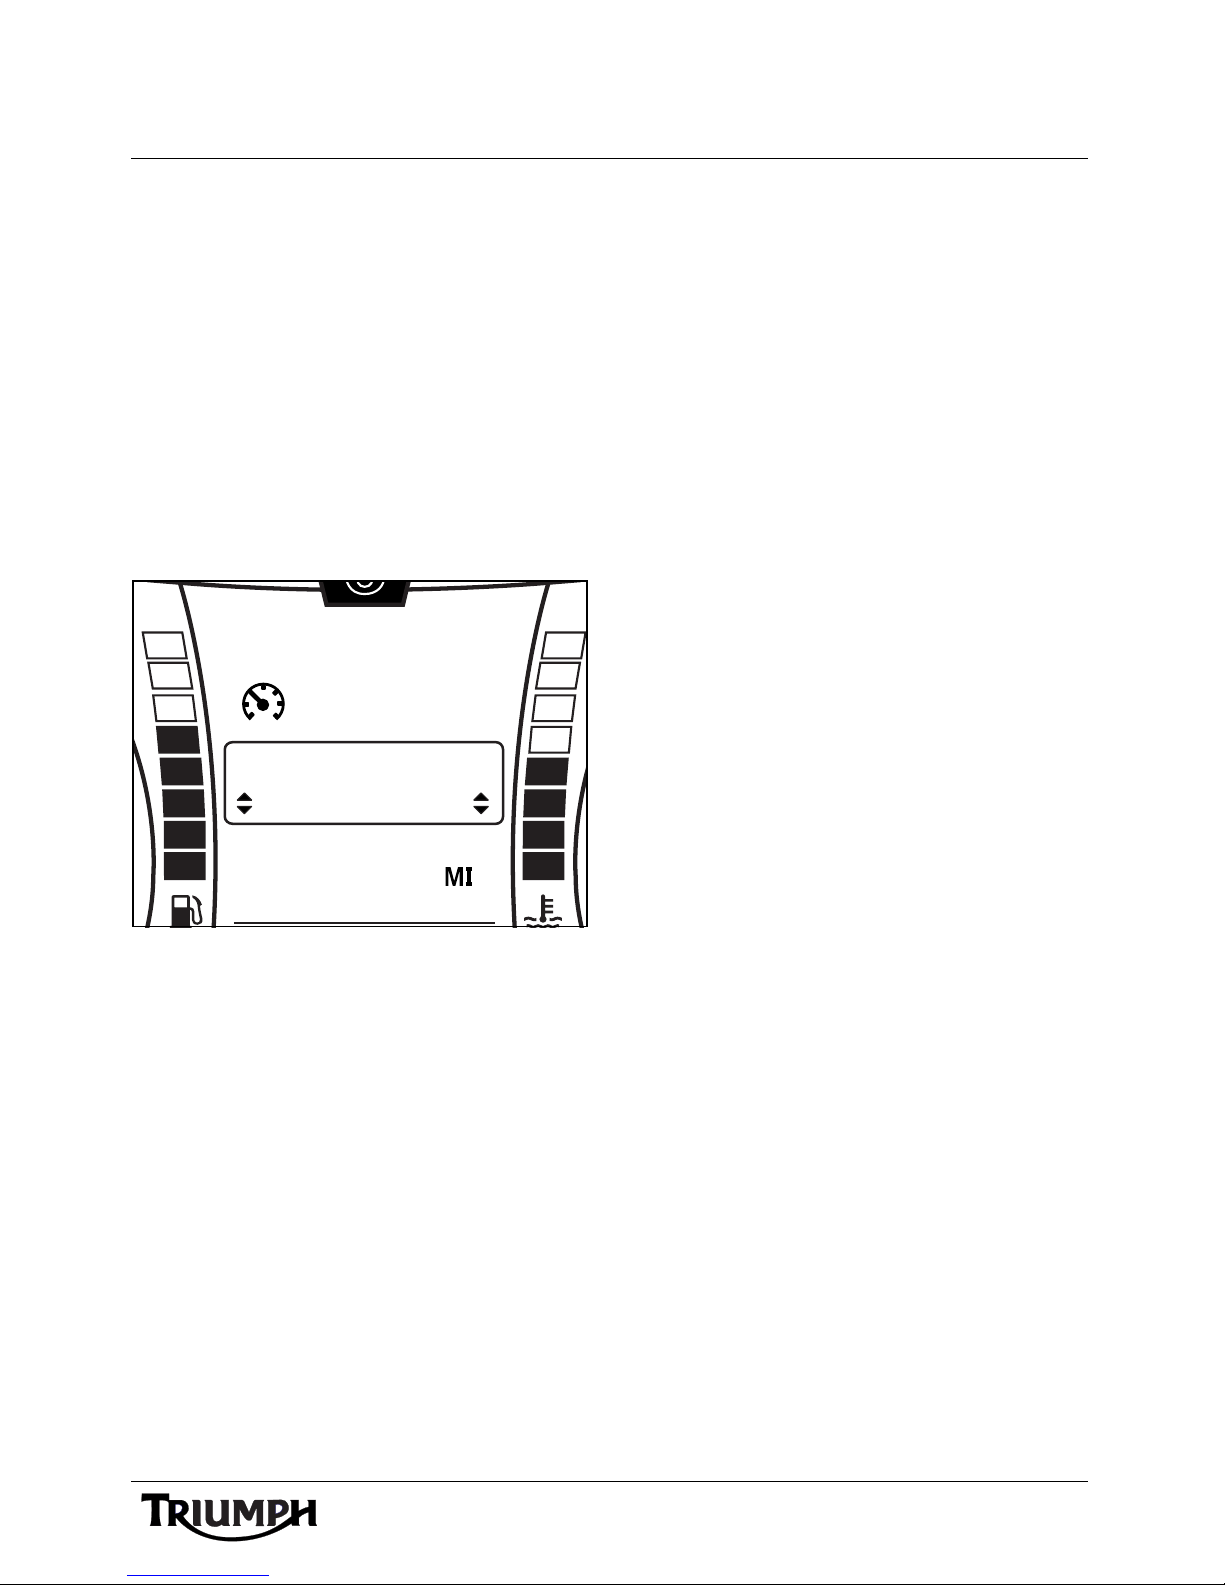
1. While the iPod or iPhone device is the
source, press and hold the PRESET
button on the audio switch unit until the
iPod Adjust menu is displayed in the
centre of the instrument display screen.
2. Press and release the SCROLL button
until the desired Album/Artist/Playlist is
displayed.
3. Press the SELECT button to select the
Album/Artist/Playlist and exit.
to the next or previous artist in
alphabetical order.
Album
If sorted by album, the selection of albums
will be sorted alphabetically:
• The tracks from that album will then
be played in the order dictated by
the album, starting with the first
track.
• If PRESET is pressed, the tracks on
that album will be available in the
order dictated by the album.
• Press and hold the Tuning up (T+) or
Tuning down (T-) buttons to change
to the next or previous album in
alphabetical order.
Playlist
iPod Album/Artist/Playlist
Selection
The three categories are described below:
Artist
If sorted by artist, the selection of artists will
be sorted alphabetically:
• The tracks will then be played in
alphabetical order, starting with the
first track.
• If PRESET is pressed, a list of tracks
by that artist will be available in
alphabetical order.
If sorted by playlist, the selection of playlists
will be sorted alphabetically.
• The tracks will then be played in the
order defined by the playlist, starting
with the first track.
• If PRESET is pressed, the tracks in
that playlist will be available in the
order defined by the playlist.
• Press and hold the Tuning up (T+) or
Tuning down (T-) buttons to change
to the next or previous playlist in
alphabetical order.
• Press and hold the Tuning up (T+) or
Tuning down (T-) buttons to change
37
Page 38
External Media Players and Telephone
MPH
62
1892
ODO
TRACK
TRACK NAME
ARTIST
TRACK
iPod
MPH
62
1892
ODO
144.2
TRACK
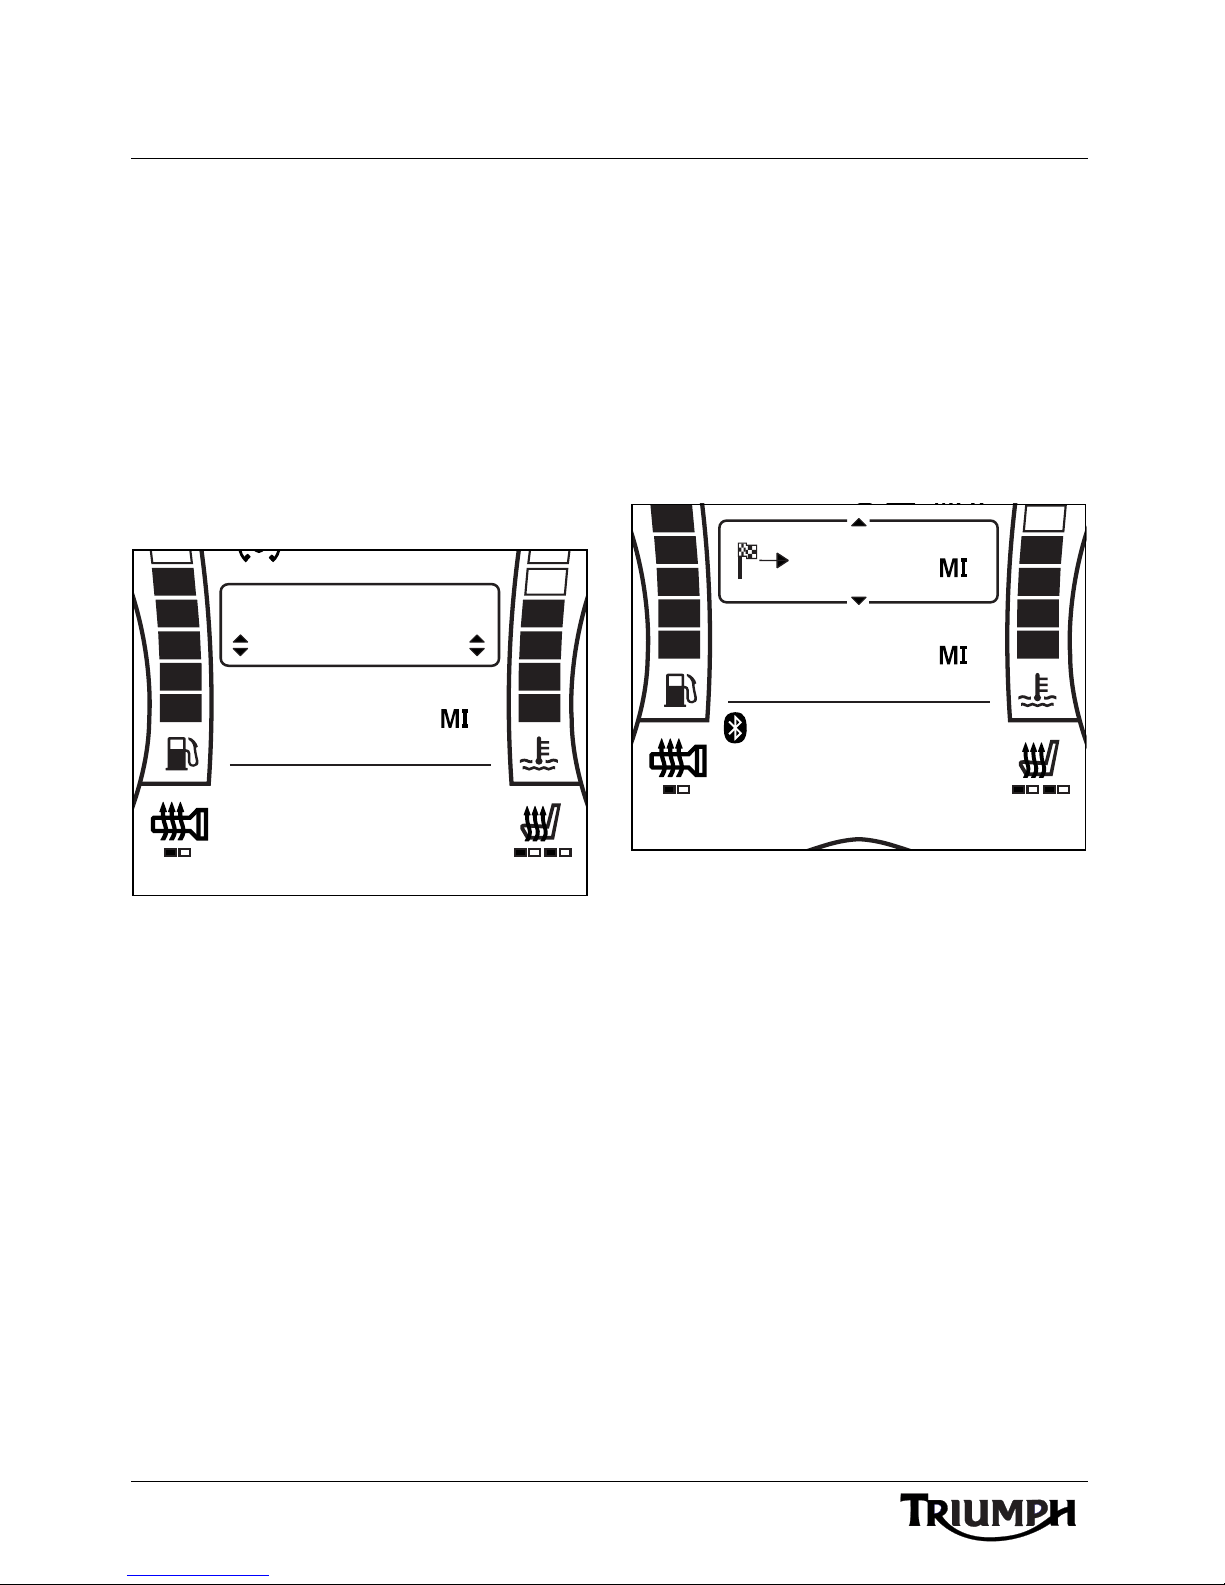
iPod Device Track Selection
1. While the iPod or iPhone device is the
source, press and release the PRESET
button on the audio switch unit to display
the iPod track list in the centre of the
instrument display screen.
2. Press and release the SCROLL button
until the desired track is displayed.
3. Press the SELECT button to start playing
the selected track and exit.
Alternative Sources
Bluetooth Audio
A streaming music device can be connected
to the audio system via Bluetooth wireless
technology (see page 44).
Once connected the audio system supports
the playback of music and other compatible
audio files from the device.
iPod Track Selection
Press and release the Tuning up (T+) or
Tuning down (T-) buttons to change to the
next or previous track.
Tracks will be selected as follows:
• In alphabetical order if iPod
Category is Artist;
• In the order defined by the album if
iPod Category is Album;
• In the order defined by the playlist if
iPod Category is Playlist.
Bluetooth Audio
38
Page 39

External Media Players and Telephone
Bluetooth® Audio Playback
Note:
•The Bluetooth Audio source will
be displayed if it is enabled, even if
the device is not active.
Select the Bluetooth audio source.
Select the audio track or album etc. to be
played using the device controls; refer to the
device manufacturer’s instructions.
Tracks will be played in the order defined by
the device.
If available, artist and track name will be
displayed in the lower instrument display
screen.
Bluetooth Audio Settings
It is possible to turn off the device as an input
source. This will allow a phone to remain
connected and receive incoming calls (see
page 43), but not play back audio to the
motorcycle.
The setting BLUETOOTH AUDIO can be
turned on or off in the ALT SOURCE menu
(see page 40). The setting is off by default.
Satellite Navigation Systems
The audio system provides support for
Garmin Zumo
models 660 and 665.
Other satellite navigation systems may be
compatible.
Audio input from the navigation system is via
a 3.5 mm audio jack located inside the
cockpit, adjacent to the headlight.
The navigation system must be connected to
the audio system power supply to prevent
interference. The power supply is located
next to the 3.5 mm jack inside the cockpit. A
suitable lead is available from your authorised
Triumph dealer.
For full details refer to the instructions
supplied in the navigation mount kit and
power lead kit available from your authorised
Triumph dealer.
Navigation (NAV) System
Announcements
During navigation system announcements
the current radio programme will be
interrupted and external sources such as iPod
or USB will be paused; playback will resume
when the navigation announcement ends.
®
Satellite Navigation Systems
The instruments will display NAV in the lower
display area during a navigation
announcement.
39
Page 40
External Media Players and Telephone
PROG TYPE
iPod CATEGORY
RDS OPTIONS
ALT SOURCE
PRESETS
NAV Audio
The audio system supports the playback of
music and other compatible audio files from
your compatible navigation system, allowing
the playback of audio files stored on the
device.
The instruments will display NAV in the lower
display area during NAV Audio play back.
Playback of NAV Audio is controlled by the
navigation system’s controls; refer to the
manufacturer’s instructions.
Note:
• Audio output from the navigation
system is treated in the same way
as a regular navigation system
announcement - it will always
override any other selected
source.
• Selecting a different source or
radio waveband will not pause
NAV Audio playback.
To stop NAV Audio playback, stop
or pause the playback on the
navigation system.
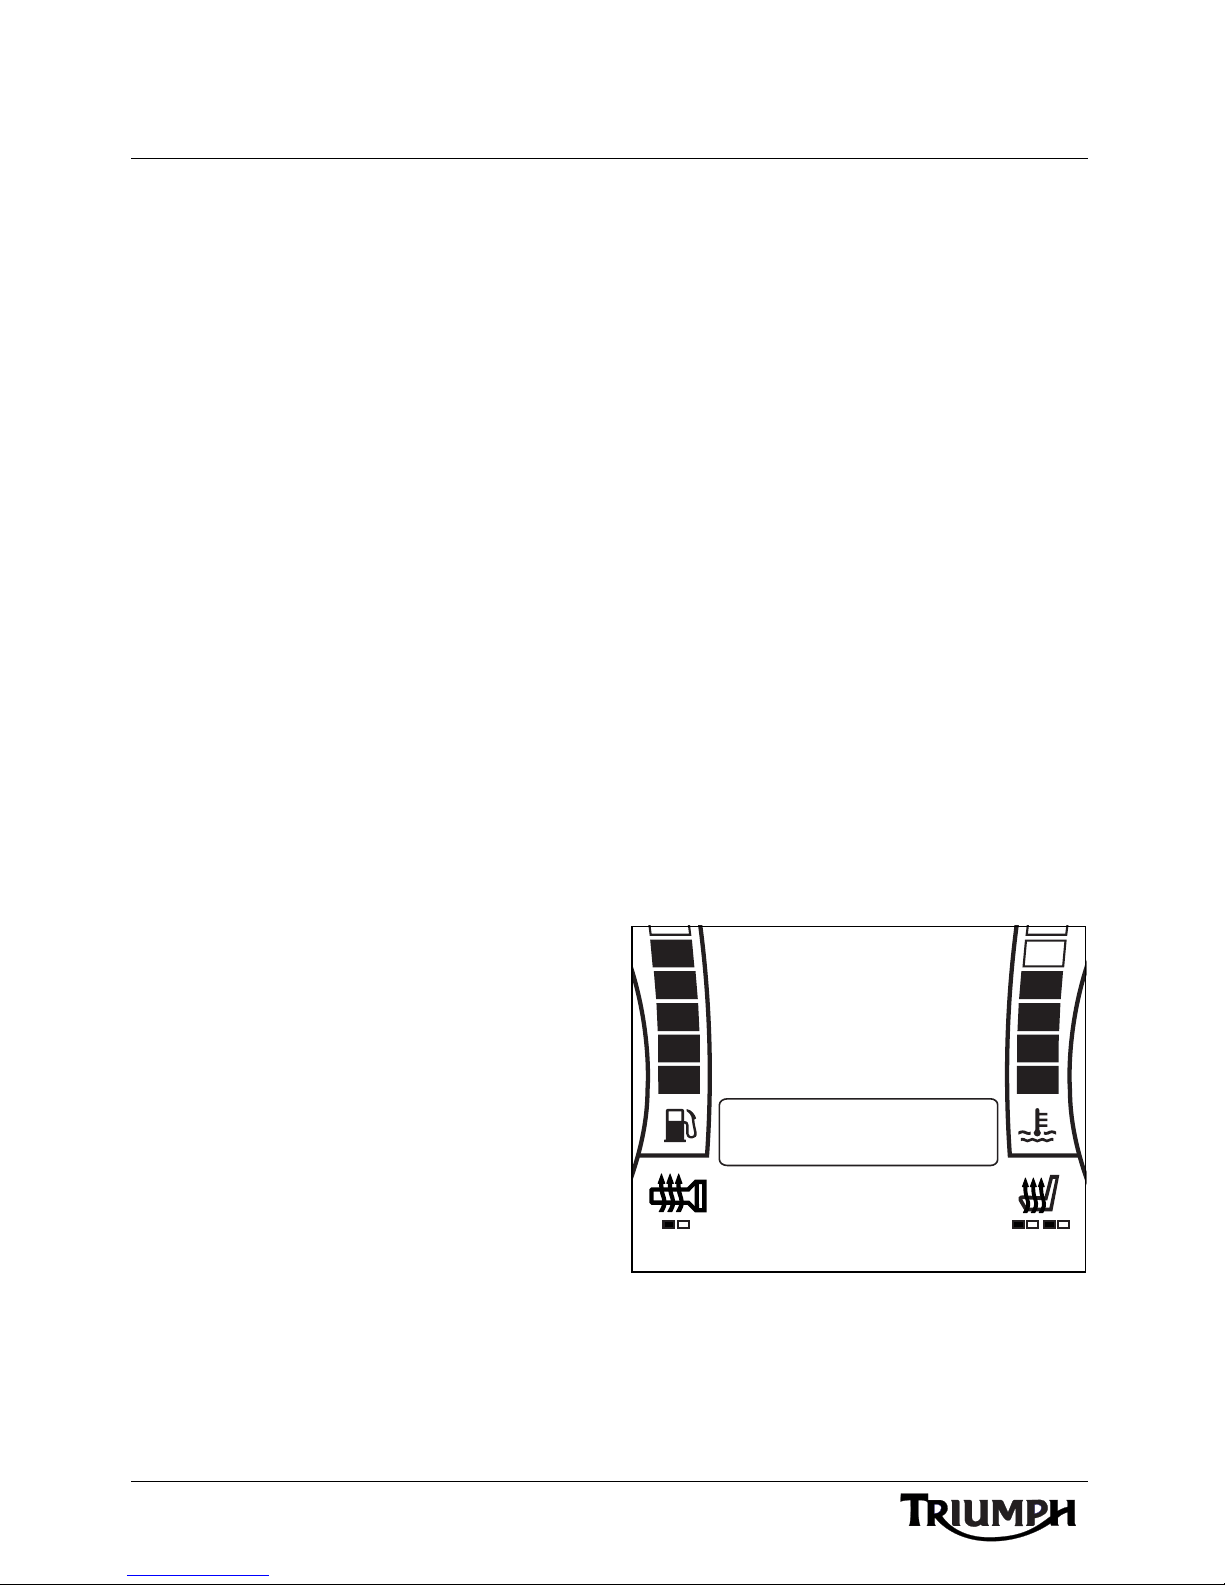
ALT SOURCE (Alternative Source)
Menu
Note:
• The following settings can only be
adjusted when the motorcycle is
stationary and the ignition is
turned on.
To access the ALT SOURCE menu;
1. With the motorcycle stationary, press and
hold the MODE/MENU button on the
audio switch unit until RADIO
SETTINGS is highlighted in the display
screen.
2. Press and release the SCROLL button
until SOURCE SETUP is highlighted.
Press the SELECT button to enter the
menu item.
3. Press and release the SCROLL button
until the ALT SOURCE is highlighted.
Press the SELECT button to enter the
item.
NAV Settings
It is possible to display NAV as an item in the
source list; this allows you see when NAV
Audio is playing as the source.
To display NAV as an item in the source list,
the setting NAV AUDIO must be turned on
in the ALT SOURCE menu.
The setting NAV AUDIO is off by default;
NAV AUDIO is turned on or off in the ALT
SOURCE menu (see page 40).
40
Alt Source Menu
Page 41
External Media Players and Telephone
iPod CATEGORY
NAV AUDIO
PRESETS
ON
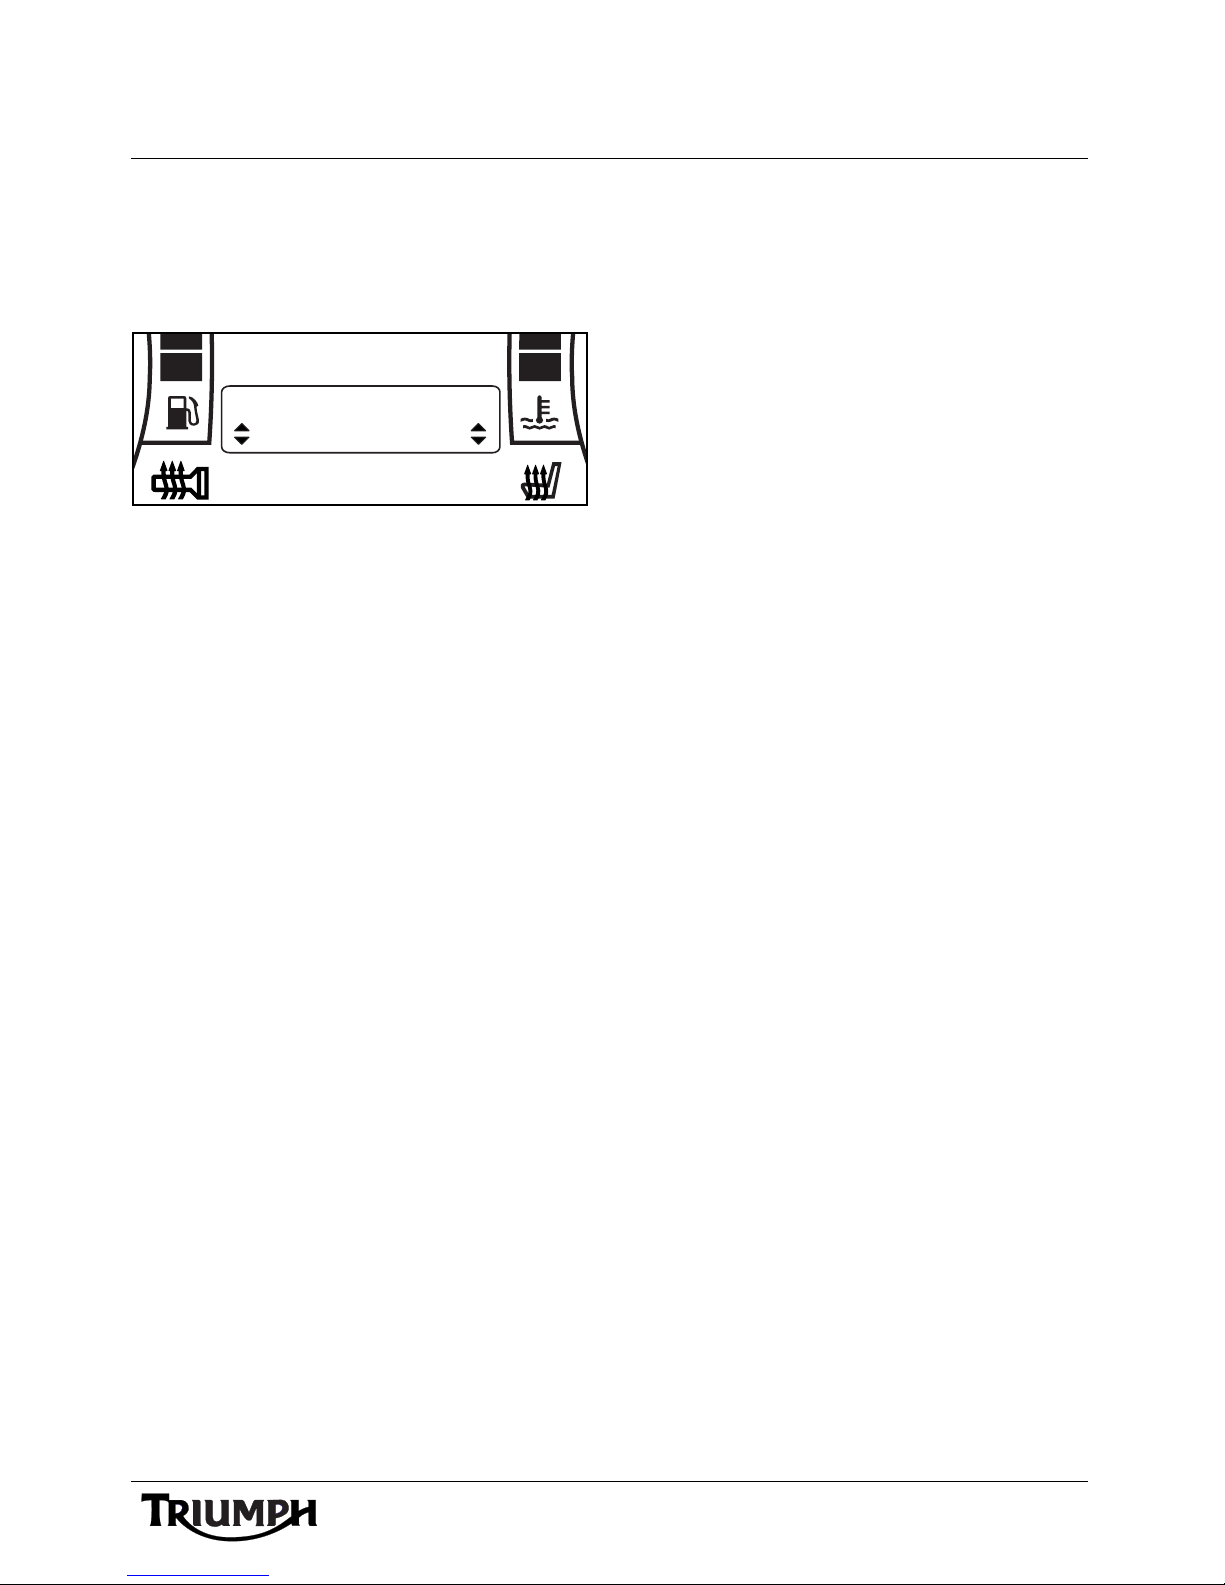
Press the SCROLL button up or down to
toggle each item on or off and press the
SELECT button to save the setting and move
to the next item.
Alternative Source - Nav Audio
On Shown
The display will scroll through in the following
order:
•NAV AUDIO ON/OFF (see
page 39);
• BLUETOOTH AUDIO ON/OFF
(only if device 2 is a compatible,
paired device);
Telephone
Incoming Phone Calls
Note:
• The reception of incoming phone
calls requires a compatible
Bluetooth headset to be
connected.
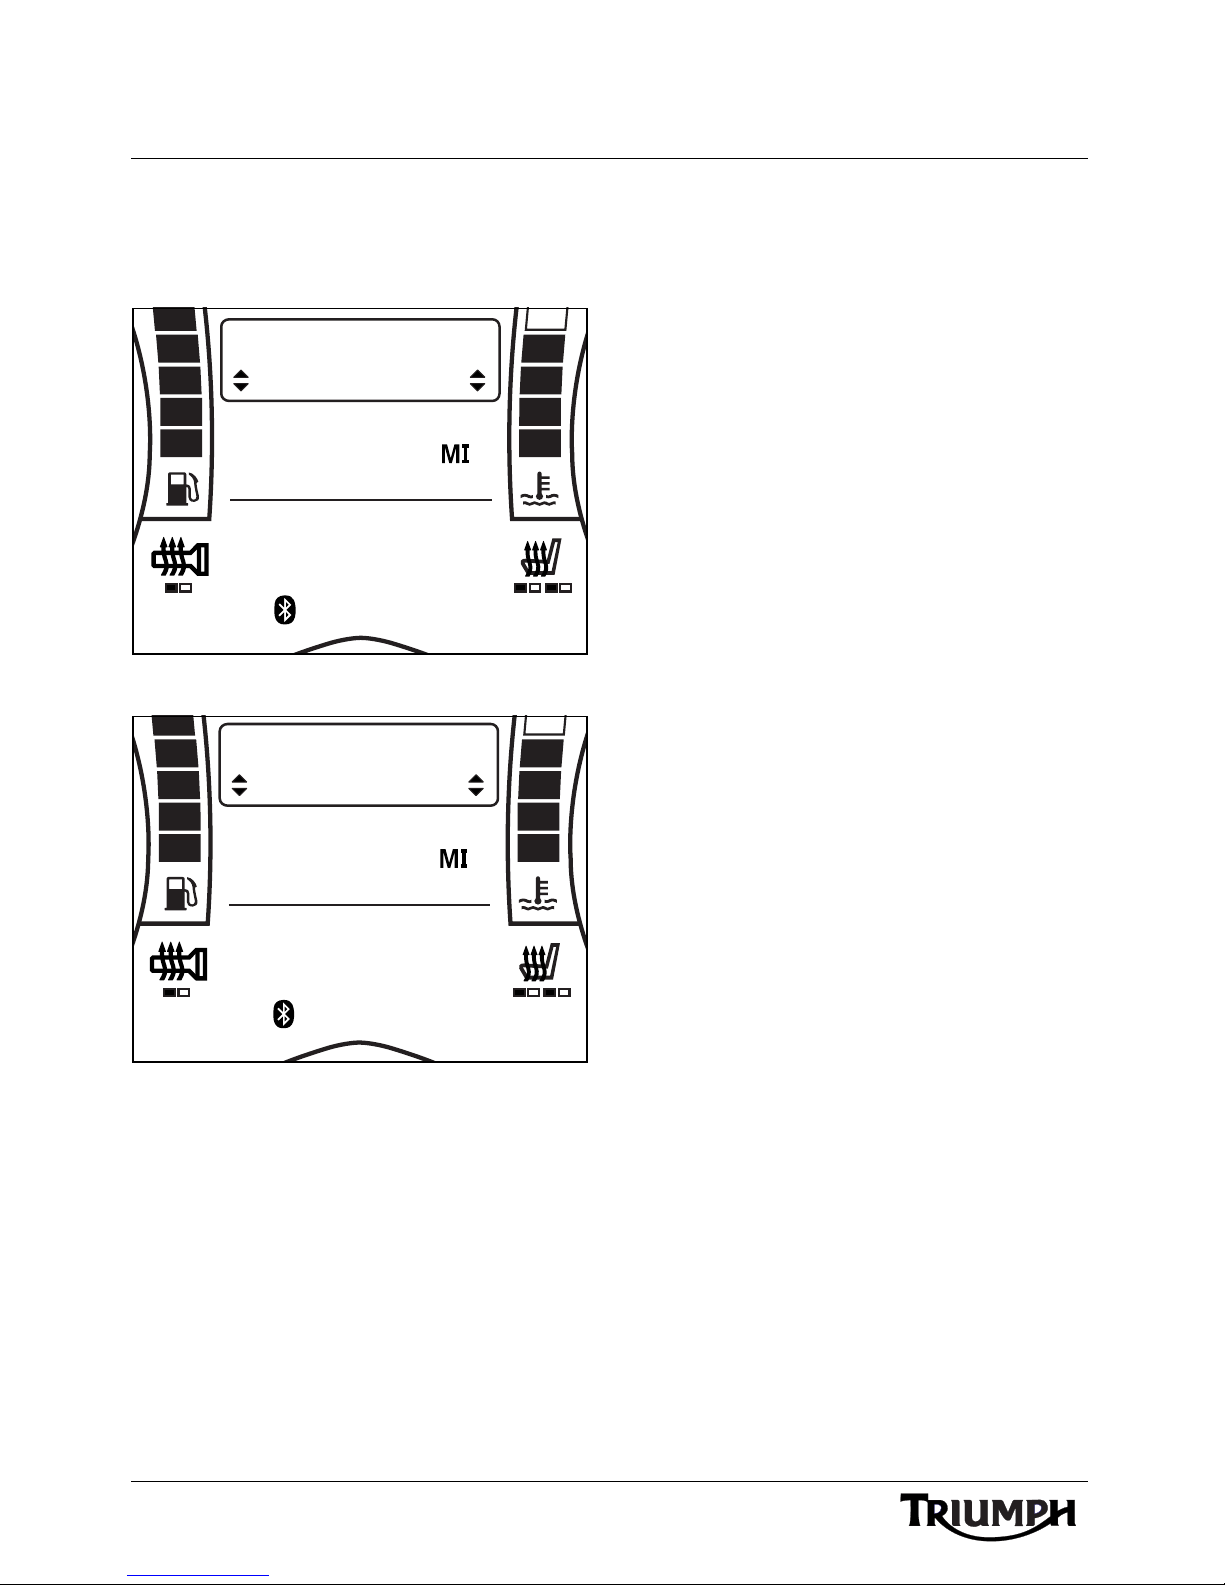
The audio system can handle incoming calls
via a paired and connected phone (see
page 44).
An incoming call will be identified in the
centre display screen. You can choose to
answer or ignore the call. The lower display
area will show the phone number or caller
name.
The display will return to SOURCE SETUP
once adjustments have been made.
41
Page 42
External Media Players and Telephone
1892
ODO
CALL
ANSWER
PHONE
01455 251700
1892
ODO
CALL
IGNORE
PHONE
01455 251700
To Answer or Ignore a Call
Press the SCROLL button up or down and
select ANSWER or IGNORE.
Answer a Call
To End a Call
Press the PRESET button to end the call.
Ignore a Call
Press the SELECT button to make the
selection.
The call volume can be adjusted in the
headset using the VOL+ and VOL- buttons
on the audio switch unit.
42
Page 43

Bluetooth
BLUETOOTH
Table of Contents
Bluetooth Requirements. . . . . . . . . . . . . . . . . . . . . . . . . . . . . . . . . . . . . . . . . . . . . . . . . . . . . . . 44
Bluetooth Setup . . . . . . . . . . . . . . . . . . . . . . . . . . . . . . . . . . . . . . . . . . . . . . . . . . . . . . . . . . . . . 44
Pairing . . . . . . . . . . . . . . . . . . . . . . . . . . . . . . . . . . . . . . . . . . . . . . . . . . . . . . . . . . . . . . . . . 44
Un-pairing . . . . . . . . . . . . . . . . . . . . . . . . . . . . . . . . . . . . . . . . . . . . . . . . . . . . . . . . . . . . . . 46
43
Page 44

Bluetooth
Bluetooth Requirements
The audio system is equipped with Bluetooth
wireless technology version 2.1 + EDR. This
allows wireless connectivity to Bluetooth
headsets, streaming music devices and
compatible mobile phones.
You can connect up to two devices:
• A headset and a streaming music
device (or phone);
•Two headsets.
In order to operate correctly the wireless
device must first be connected (paired) with
the audio system.
Once connected, the audio system will allow
the playback of audio tracks from a
compatible device (and reception of incoming
phone calls from a mobile phone) to the
audio system, and transfer of all audio output
to the helmet mounted headsets instead of
the vehicle speakers.
Note:
• The reception of incoming phone
calls requires a compatible
Bluetooth headset to be
connected.
A headset is not required to play
audio tracks, provided SPEAKERS
are selected in the Radio Settings
Menu (see page 9).
Bluetooth Setup
Pairing
Note:
• The following settings can only be
adjusted when the motorcycle is
stationary and the ignition is
turned on.
• HEADSET 1 will only allow pairing
of a compatible headset. DEVICE 2
will allow pairing of a compatible
headset, mobile phone or
streaming music device.
• Pairing is similar for streaming
music devices, mobile phones and
headsets. The following procedure
describes pairing a typical mobile
phone as DEVICE 2.
Make sure the wireless device is turned on,
and that Bluetooth is turned on and visible to
the audio system (sometimes called
discoverable or visible). Refer to the device
manufacturers instructions for details of
Bluetooth operation specific to that device.
To ac c es s t h e BLUETOOTH menu;
1. With the motorcycle stationary, press and
hold the MODE/MENU button on the
audio switch unit until RADIO
SETTINGS is highlighted in the display
screen.
44
2. Press and release the SCROLL button
until BLUETOOTH is highlighted. Press
the SELECT button to enter the menu
item.
Page 45
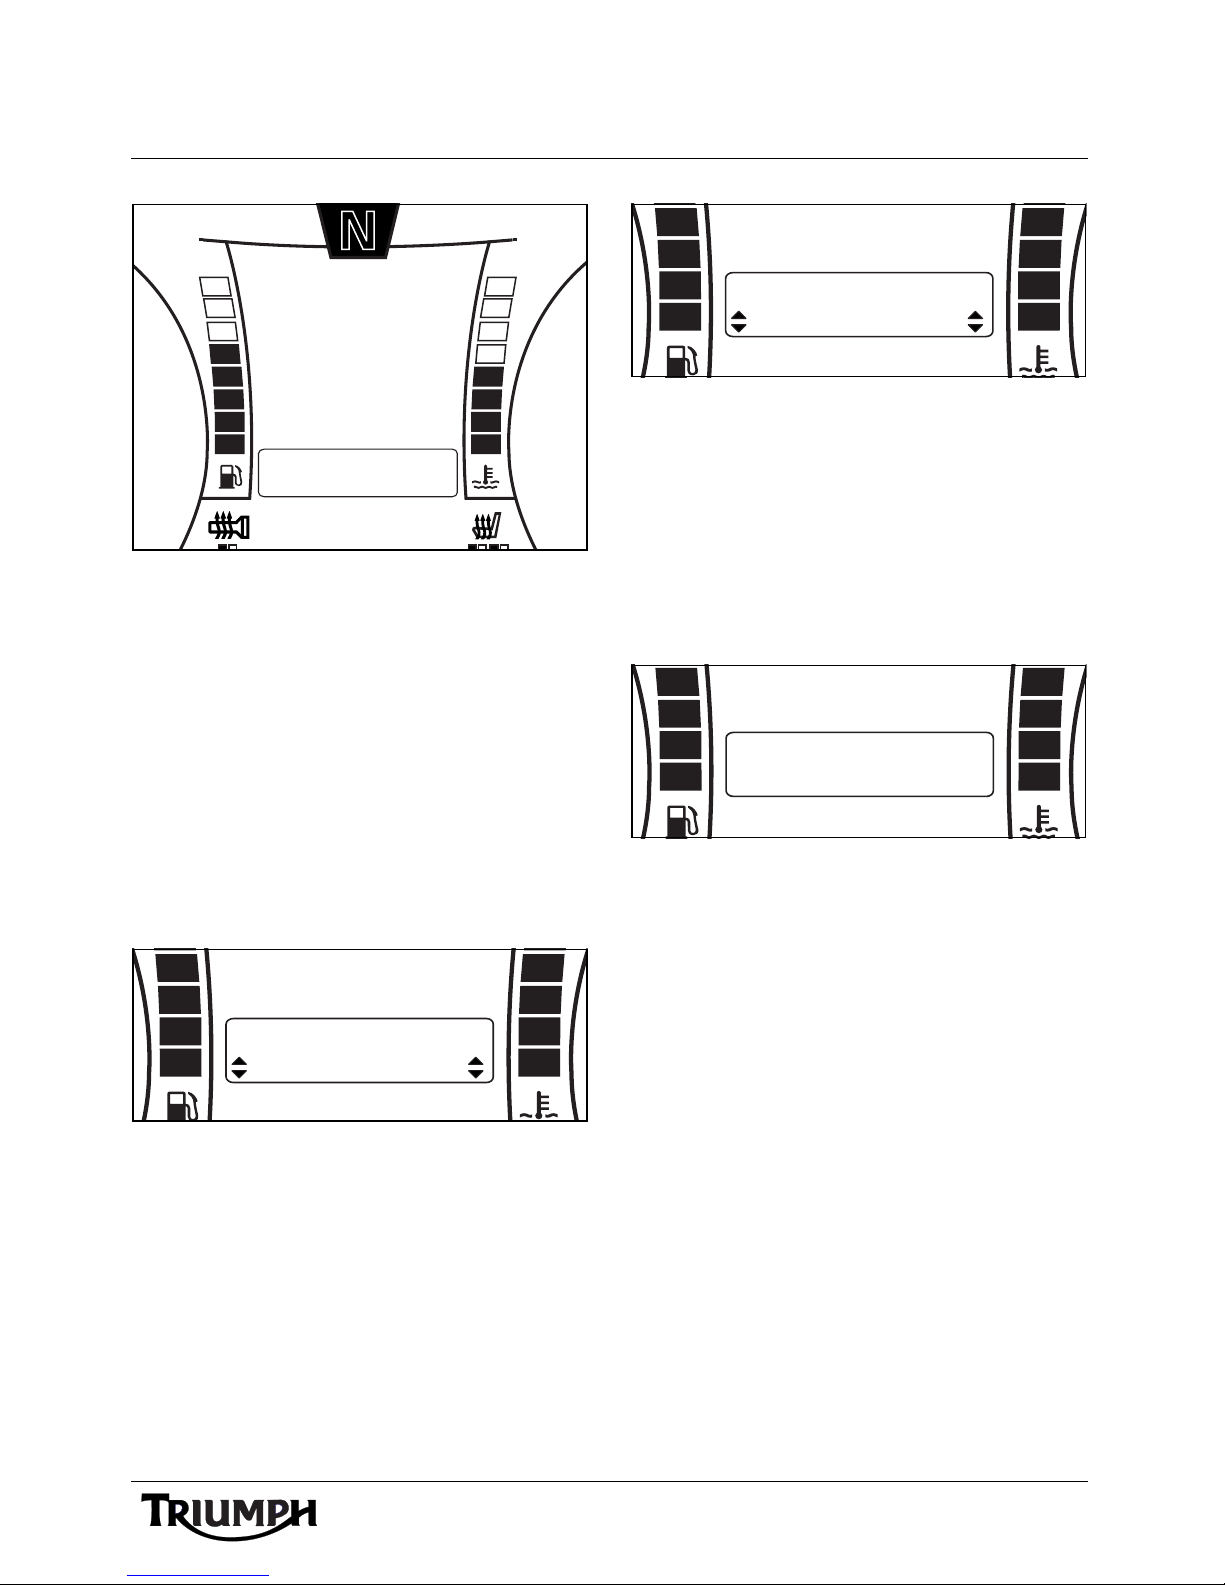
Bluetooth Setup Screen
10:08
N
22°C
SOURCE SETUP
EXIT
BLUETOOTH
AUDIO SETUP
AUDIO SETTINGS
DEVICE 2
HEADSET 1
PAIR
DEVICE 2
HEADSET 1
SEARCHING
DEVICE 2
HEADSET 1
MY PHONE
Bluetooth
Searching In Progress
If no device is found the display will show
DEVICE 2 - NO DEVICE. Check that the
device is turned on, in range (within
10 metres), Bluetooth is turned on, and the
device is discoverable/visible.
Press the SCROLL button up or down and
select DEVICE 2 and press the SELECT
button.
If a phone is already paired as DEVICE 2 the
display will show DEVICE 2 - UNPAIR.
To un-pair a device, see page 46.
If no phone is paired the display will show
DEVICE 2 - PAIR.
Press the SCROLL button up or down to
select PAIR or EXIT and press SELECT.
Device Pairing
EXIT will return to the previous BLUETOOTH
SETUP screen.
Selecting PAIR will start the pairing process;
the audio unit will begin searching for devices
in range.
Once the device is found its name will be
shown in the display.
Device Found
If more than one device is found press the
SCROLL button up or down to select the
required device and press SELECT.
The audio system will begin pairing with the
device. Depending on the device, you may
be required to accept the connection to the
motorcycle (the motorcycle device name will
be TROPHY SE), or the device may accept
the connection automatically. Refer to the
device manufacturer’s instructions for details.
If the display screen shows ENTER PIN, enter
the correct PIN number for that device. Press
the SCROLL button up or down to select
each digit in turn and press the SELECT
button to enter that number.
45
Page 46
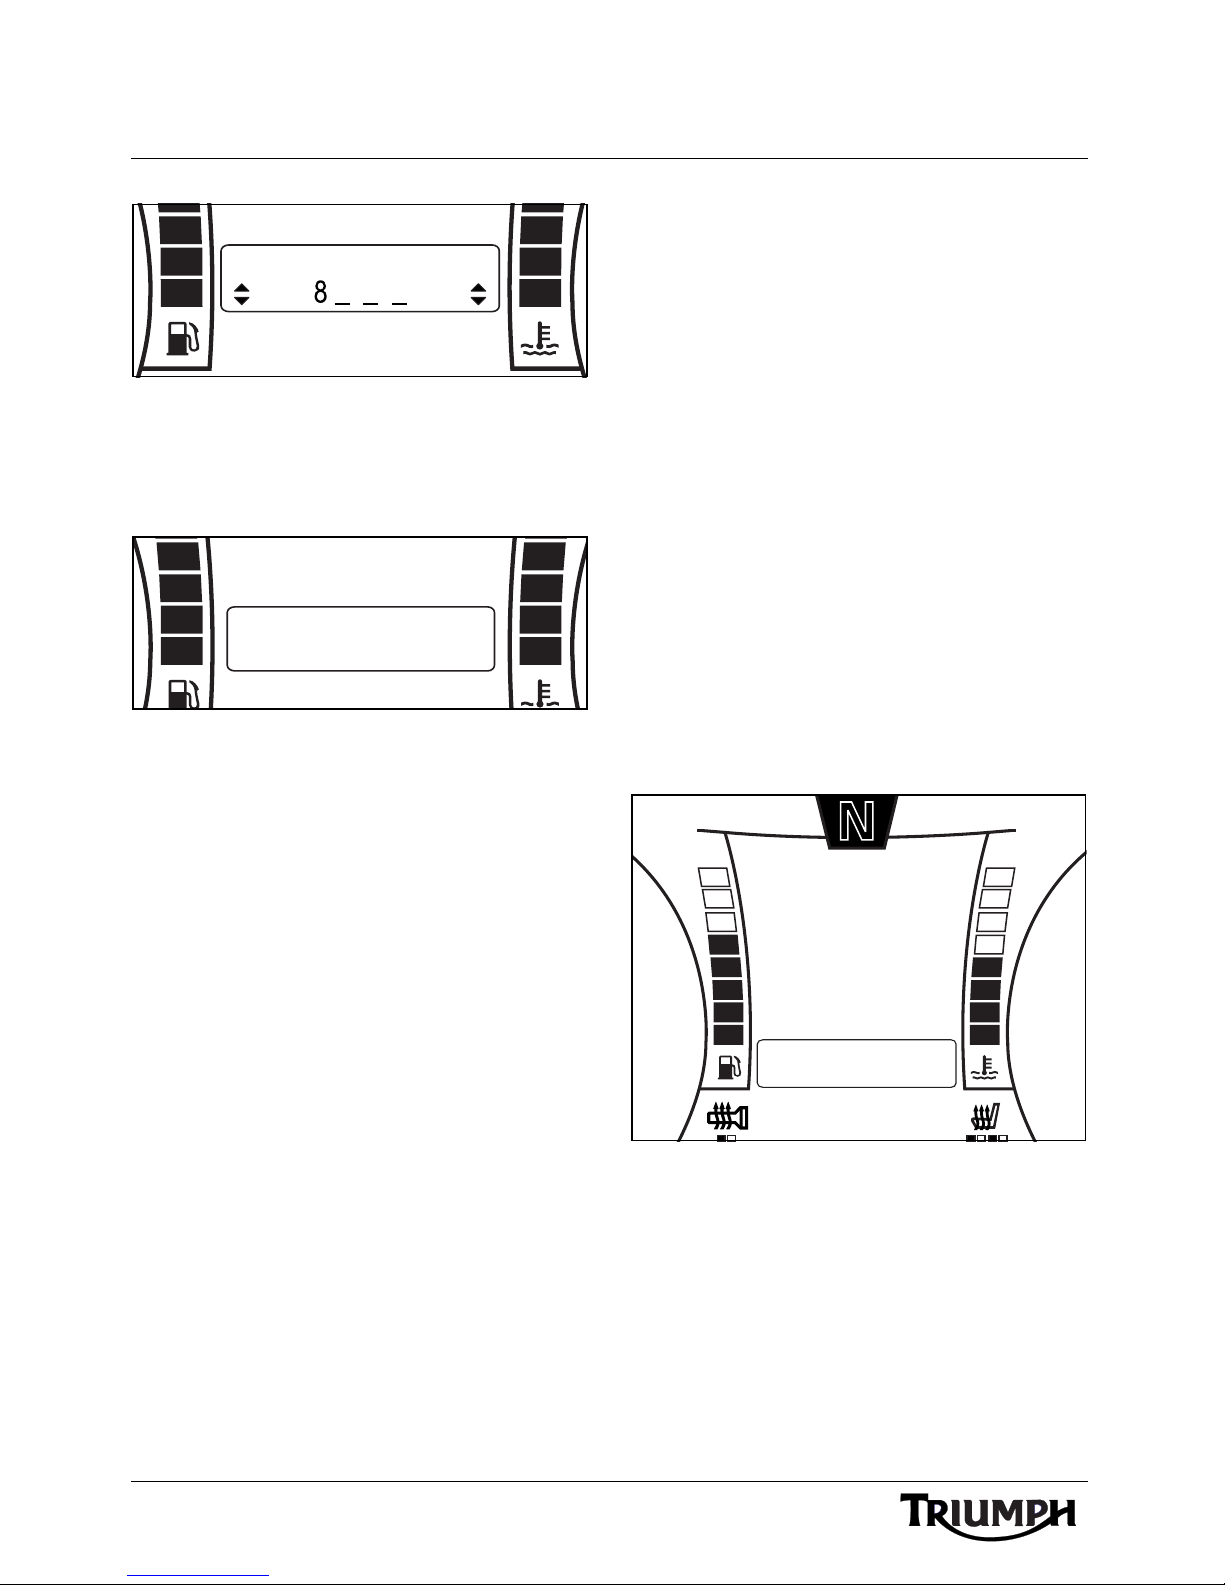
Bluetooth
UNPAIR ALL
ENTER PIN
DEVICE 2
HEADSET 1
PAIRED
10:08
N
22°C
SOURCE SETUP
EXIT
BLUETOOTH
AUDIO SETUP
AUDIO SETTINGS
Enter Pin Screen
The display will either show DEVICE 2
PAIRED if pairing was successful, or PAIRING
FAILED if pairing was unsuccessful.
Device Paired
If pairing fails, check that any PIN number
used is correct, the device is still in range, and
that the device is not requesting any
confirmation from you before it allows
connection to the motorcycle.
Un-pairing
Note:
• Un-pairing is similar for mobile
phones and headsets. The
following procedure describes
un-pairing a typical mobile phone
stored as DEVICE 2.
To ac c es s t h e BLUETOOTH menu;
1. With the motorcycle stationary, press and
hold the MODE/MENU button on the
audio switch unit until RADIO
SETTINGS is highlighted in the display
screen.
2. Press and release the SCROLL button
until BLUETOOTH is highlighted. Press
the SELECT button to enter the menu
item.
46
Bluetooth Setup Screen
Press the SCROLL button up or down and
select DEVICE 2 and press the SELECT
button.
If no device is paired the display will show
DEVICE 2 - PAIR.
To pair a device see page 44.
Page 47
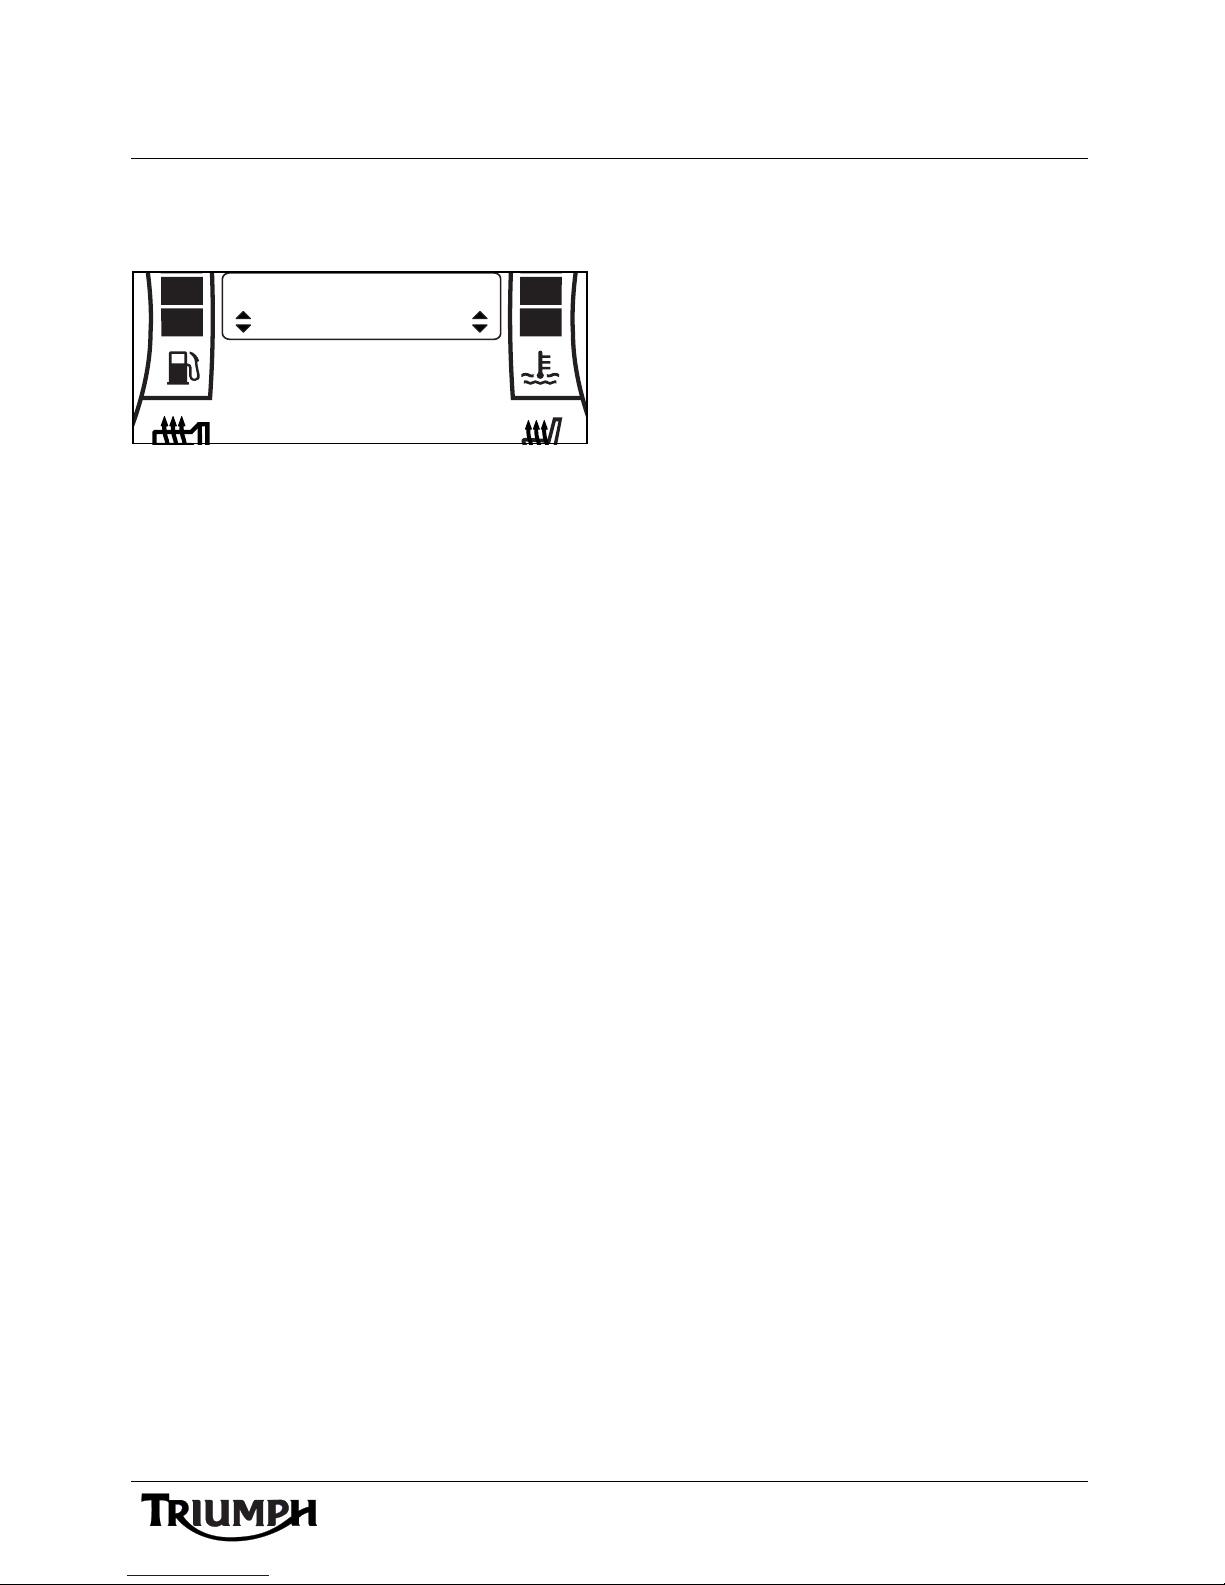
Bluetooth
UNPAIR ALL
DEVICE 2
UNPAIR
If a device is paired as DEVICE 2 the display
will show DEVICE 2 - UNPAIR.
Device Un-pairing
Press the SCROLL button up or down to
select UNPAIR or EXIT and press SELECT.
EXIT will return to the previous BLUETOOTH
SETUP screen.
Selecting UNPAIR will un-pair the device and
return to the previous BLUETOOTH SETUP
screen.
To un-pair all paired devices, select the
Bluetooth menu as described above and
press the SCROLL button up or down to
select UNPAIR ALL and press SELECT.
Selecting UNPAIR ALL will un-pair the all
devices and return to the previous
BLU ETOOTH SETUP screen.
47
Page 48

Bluetooth
This page intentionally left blank
48
Page 49

Specifications
SPECIFICATIONS
• Digital Signal Processor (DSP) for optimised audio output
• Automatic Volume Control (AVC) - automatically adjusts volume based on vehicle
speed
• FM/MW/LW radio tuner (European markets only)
• FM/AM radio tuner (all markets except Europe, USA and Canada)
• FM/AM/WX radio tuner (US and Canadian markets only)
• Integrated SiriusXM Satellite Radio receiver (US and Canadian markets only)
• RDS - including Alternate Frequency (AF), Traffic Alerts (TA), Regional Tuning (RG) and
Enhanced Other Network (EON) (all markets except Japan, USA and Canada)
• Program Type Tuning (PTY) (I.E. News, Rock, Pop - all markets except Japan, USA and
Canada)
• NOAA weather alerts (US and Canadian markets only)
• Presets per band: 15
• Compatible with iPod and iPhone (see page 50 for a list of compatible devices)
• USB port with flash drive and MP3 player support (file types supported: AAC, FLAC,
MP3, OGG, WAV and WMA)
• NAV Audio (supported models - Garmin Zumo 660 or 665)
• Bluetooth - stream audio to 2 headsets via A2DP (2.1 + EDR)
• Output selection: Bluetooth headsets or speakers
• Power output - 20 watts RMS x 2
• 3 band equalization (EQ): Treble, Mid, Bass - range +/-8 steps for each band
• Speaker impedance - 4 ohms
• Operating temperature range: -20°C to +60°C
• Operating voltage range: 10.5 - 16V
• Low voltage detection (automatic shutdown to preserve battery)
49
Page 50
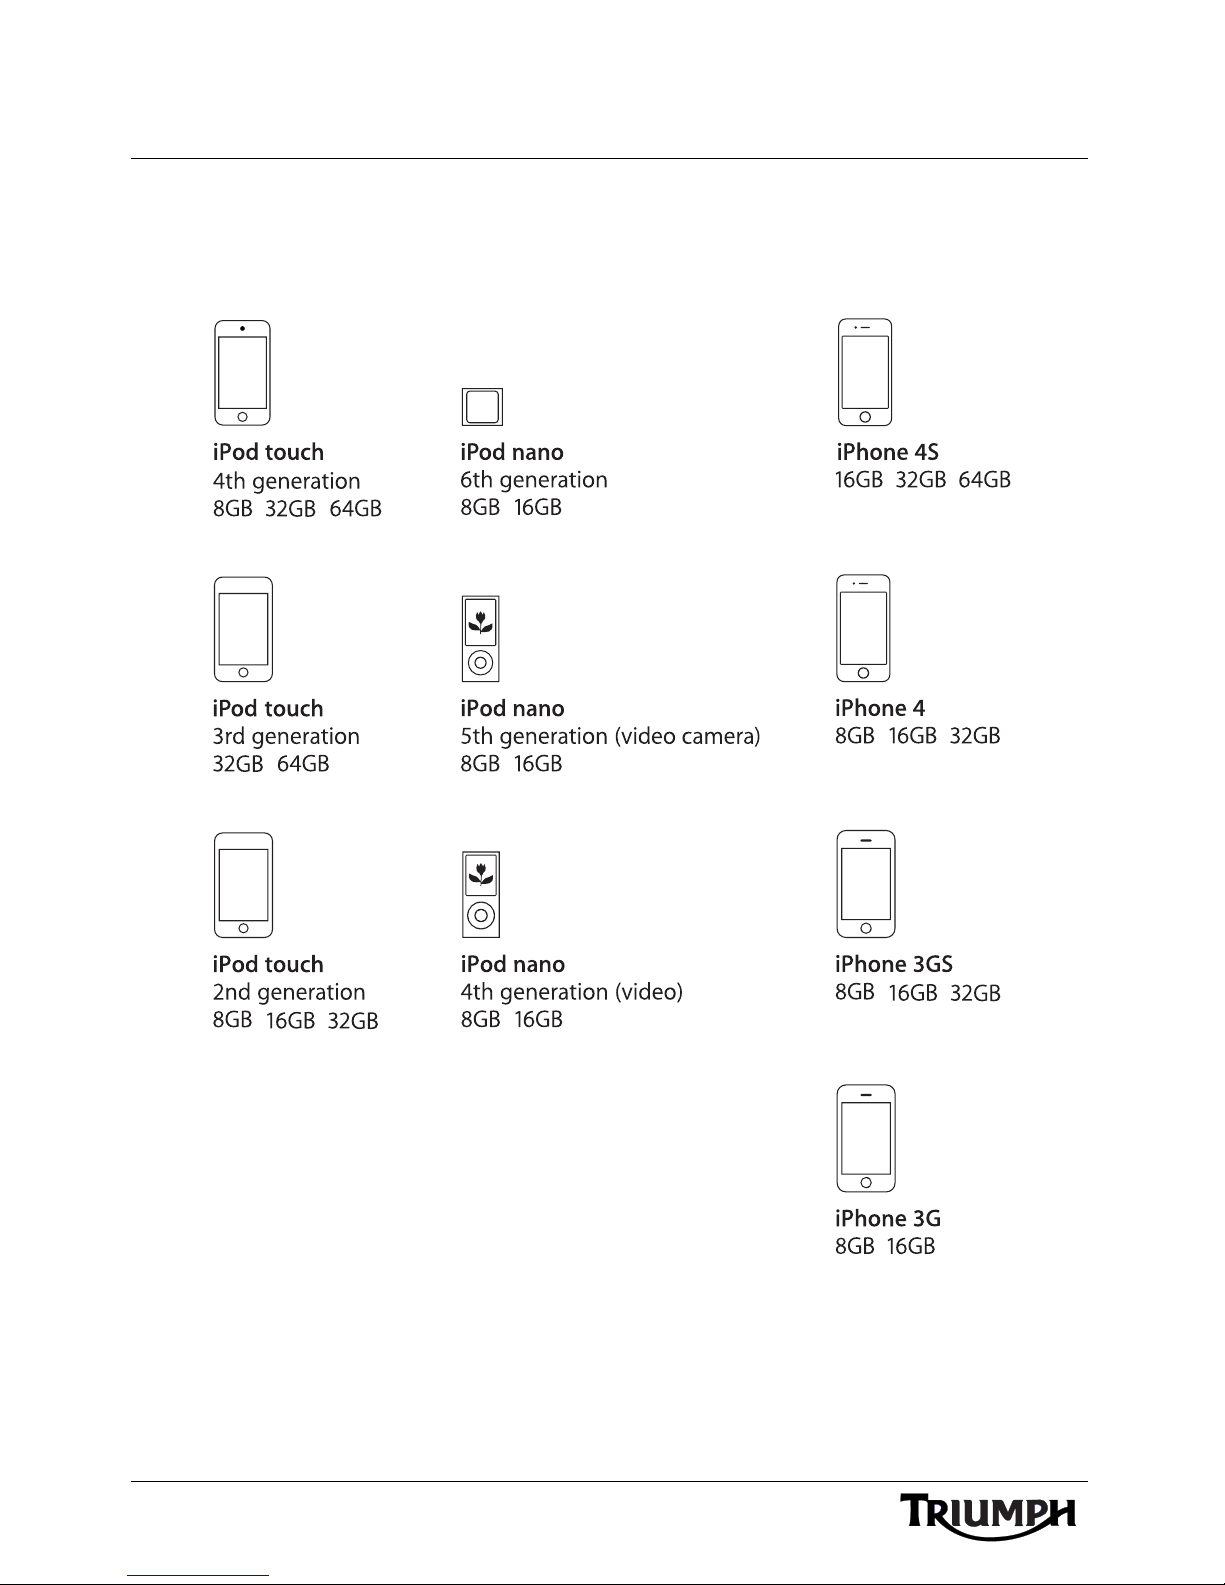
Specifications
Made for
50
Page 51

INDEX
Index
A
ALT SOURCE Menu . . . . . . . . . . . . . . . . 40
Alternative Sources. . . . . . . . . . . . . . . . . . 38
Bluetooth Audio. . . . . . . . . . . . . . . . . 38
Phone Music
Phone Music Settings. . . . . . . . . 39
Playback . . . . . . . . . . . . . . . . . . . 39
Satellite Navigation Systems . . . . . . . 39
NAV Music. . . . . . . . . . . . . . . . . 40
NAV Settings . . . . . . . . . . . . . . . 40
Navigation (NAV) System
Announcements . . . . . . . . . . . . . 39
Audio Settings . . . . . . . . . . . . . . . . . . . . . . . 9
Adjustment Range. . . . . . . . . . . . . . . . . 9
Audio Adjustment . . . . . . . . . . . . . . . . . 9
Motorcycle Moving . . . . . . . . . . . 11
Motorcycle Stationary. . . . . . . . . . . 9
B
Bluetooth
Requirements. . . . . . . . . . . . . . . . . . . 44
Bluetooth Setup . . . . . . . . . . . . . . . . . . . . 44
Pairing . . . . . . . . . . . . . . . . . . . . . . . . 44
Un-pairing . . . . . . . . . . . . . . . . . . . . . 46
F
Finding and Saving Radio Stations . . 15 , 22
I
iPod and iPhone Playback . . . . . . . . . . . . 35
iPod Category . . . . . . . . . . . . . . . . . . 35
iPod Track Selection . . . . . . . . . . 37, 38
Album . . . . . . . . . . . . . . . . . . . . . 37
Artist . . . . . . . . . . . . . . . . . . . . . . 37
Playlist . . . . . . . . . . . . . . . . . . . . . 37
R
Radio Data System (RDS) . . . . . . . . . . . . . 17
Alternative Frequency (AF) . . . . . . . . 18
Regional Frequency (RG). . . . . . . . . . 18
Traffic Announcement (TA) . . . . . . . . 18
S
Selecting the Audio Source . . . . . . . . . . . 32
All Markets Except USA
and Canada . . . . . . . . . . . . . . . . . 14 , 32
USA and Canada Only . . . . . . . . . . . 32
Selecting the Source or Waveband . . 14 , 22
Switching Off the Audio System . . . . . . . . 7
Low Voltage Power Off . . . . . . . . . . . . 7
Switching On the Audio System . . . . . . . . 6
System Settings
Radio Data System (RDS)
RDS Options Adjustment . . . . . . 18
XM Category . . . . . . . . . . . . . . . . . . . 29
T
Telephone . . . . . . . . . . . . . . . . . . . . . . . . . 41
Incoming Phone Calls . . . . . . . . . . . . 41
To Direct a Call to a Headset. . . . . . . 42
To End a Call . . . . . . . . . . . . . . . . . . . 42
U
Universal Serial Bus (USB) . . . . . . . . . . . . 33
Connecting the Audio Device . . . . . . 34
Requirements . . . . . . . . . . . . . . . . . . . 33
V
Volume
Adjusting . . . . . . . . . . . . . . . . . . . . . . . 8
Muting . . . . . . . . . . . . . . . . . . . . . . . . . 8
P
Programme Type . . . . . . . . . . . . . . . . . . . . 19
Adjustment . . . . . . . . . . . . . . . . . . . . . 19
W
Warnings
Warnings, Cautions and Notes . . . . . . 1
51
Page 52

Index
Weather Radio (WX). . . . . . . . . . . . . . . . . 25
X
XM Activation . . . . . . . . . . . . . . . . . . . . . . 26
XM Categories . . . . . . . . . . . . . . . . . . . . . 29
XM Category Selection . . . . . . . . . . . 30
XM Channel Name/Number Display . . . 27
Adjustment . . . . . . . . . . . . . . . . . . . . 28
XM Legal . . . . . . . . . . . . . . . . . . . . . . . . . 25
XM Satellite Radio . . . . . . . . . . . . . . . . . . 25
XM Subscription. . . . . . . . . . . . . . . . . . . . 26
52
Page 53
Acknowledgements
iPhone, iPod, iPod nano, and iPod touch
are trademarks of Apple Inc., registered
in the U.S. and other countries.
'Made for iPod' and 'Made for iPhone'
mean that an electronic accessory has
been designed to connect specifically to
iPod or iPhone, respectively, and has
been certified by the developer to meet
Apple performance standards. Apple is
not responsible for the operation of this
device or its compliance with safety and
regulatory standards. Please note that
the use of this accessory with iPod or
iPhone may affect wireless performance.
Bluetooth
®
word mark and logos are
registered trademarks owned by
Bluetooth SIG, Inc. and any use of such
marks by Triumph Motorcycles Limited
is under license. Other trademarks and
trade names are those of their
respective owners.
Sirius Satellite Radio
®
, SiriusXM, XM
®
and the XM logo are trademarks,
service marks or registered marks of
Sirius XM Radio Inc.
 Loading...