

Triumph 45-6793SKUSA Assembly Manual

Item# 45-6793SKUSA
Please keep this instruction manual for future reference
48" 13-in-1
Combo Table
If you have any problems with your new product, please visit our website
www.triumphsportsusa.com for the fastest expedited service possible for your
replacement part ordering needs. Please have a copy of your receipt of purchase.
For any technical support or warranty issues, please contact Triumph Sports USA
at 1-866-815-4173 or email us at csr@triumphsportsusa.com
A PURCHASE RECEIPT (or other proof of purc hase date) will be required before
any warranty service is initiated. All requests for warranty service can be submitted
by email, in writing or by contacting our Customer Service Department at:
1-866-815-4173 or email us at csr@triumphsportsusa.com.
IMPORTANT NOTICE! Please contact us before returning the product to the store.
All Tr iumph S ports U SA, Inc. (TSU) games have a limited 90-day from date of purchase
warranty. This warrants the retail purchase r for any TSU game purchased to be free from
any defect in materials and construc tion for 90 days from the date of purchase. The only
exceptions to the warranty include main frames, tabletops, play ing surfaces, batteri es or
tools. Damaged main frames, tabletops, playi ng surfaces need to be returned to the
store as we are unable to replace these parts. Normal play wear and usage is not
covered under the war ranty, nor is wear or damage due to improper use of the TSU
game. This will void any and al l TSU warranties.
Limited 90-Day Triumph Sports USA, Inc. Warranty
Triumph Sports USA
11327 W Lincoln Ave.
West Allis, WI 53227
www.triumphsportsusa.com
©2015 Triumph Sports USA. All Rights Reserved.
Warnings
WARNING:Choking Hazard—Product contains small ball s and/or s mall part s.
Not for children under 3 years of age.
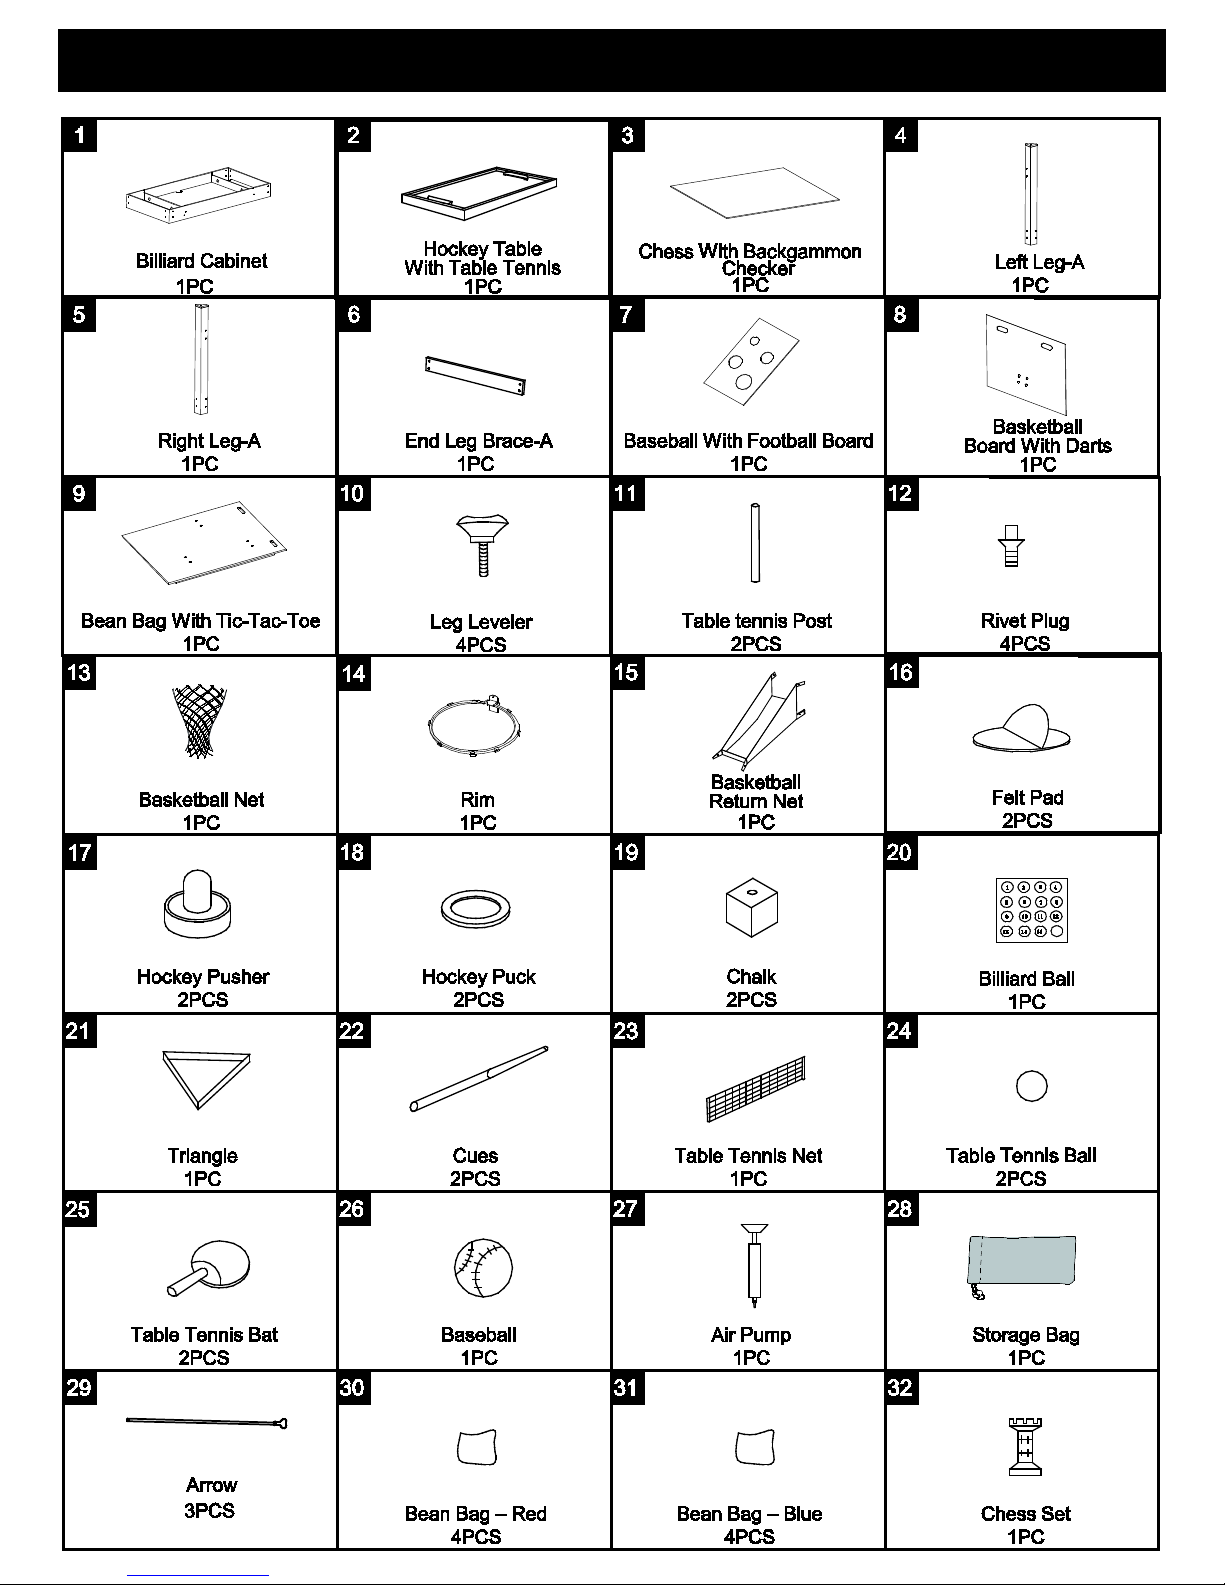
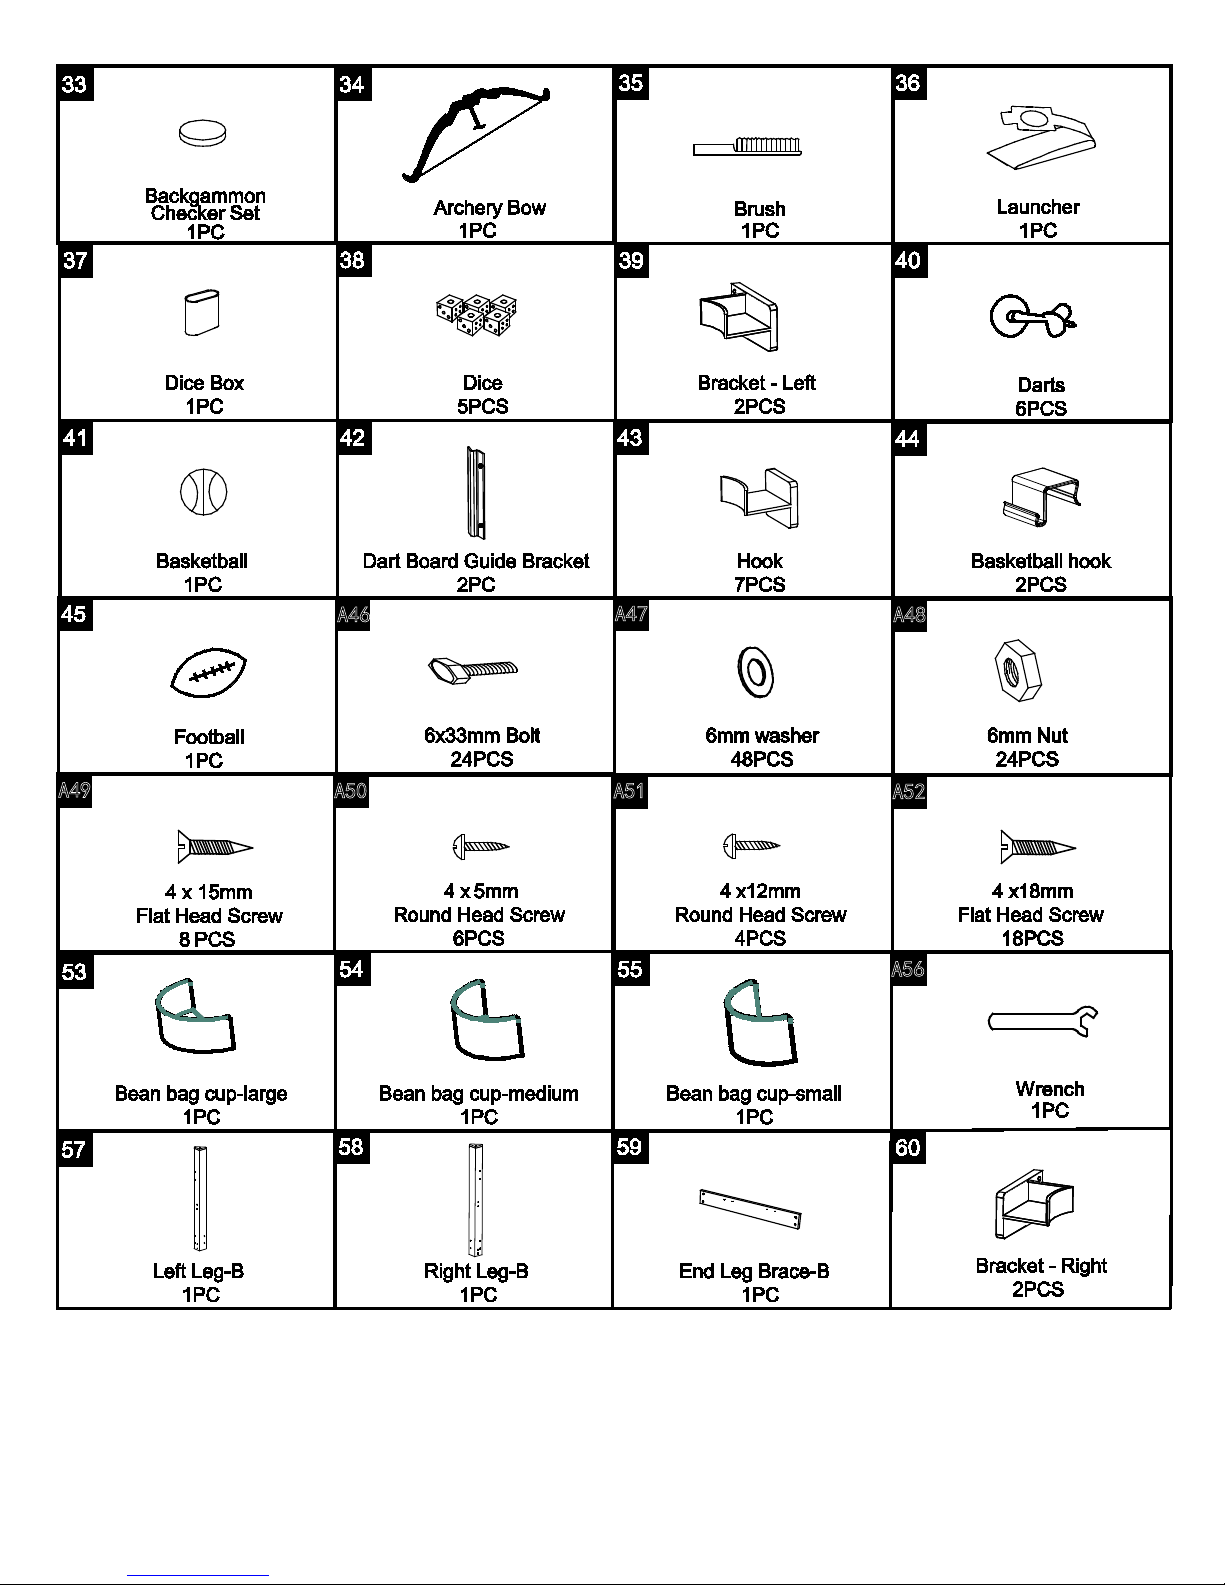
Parts List
A46
A47
A48
A49
A50
A51
A52
A56
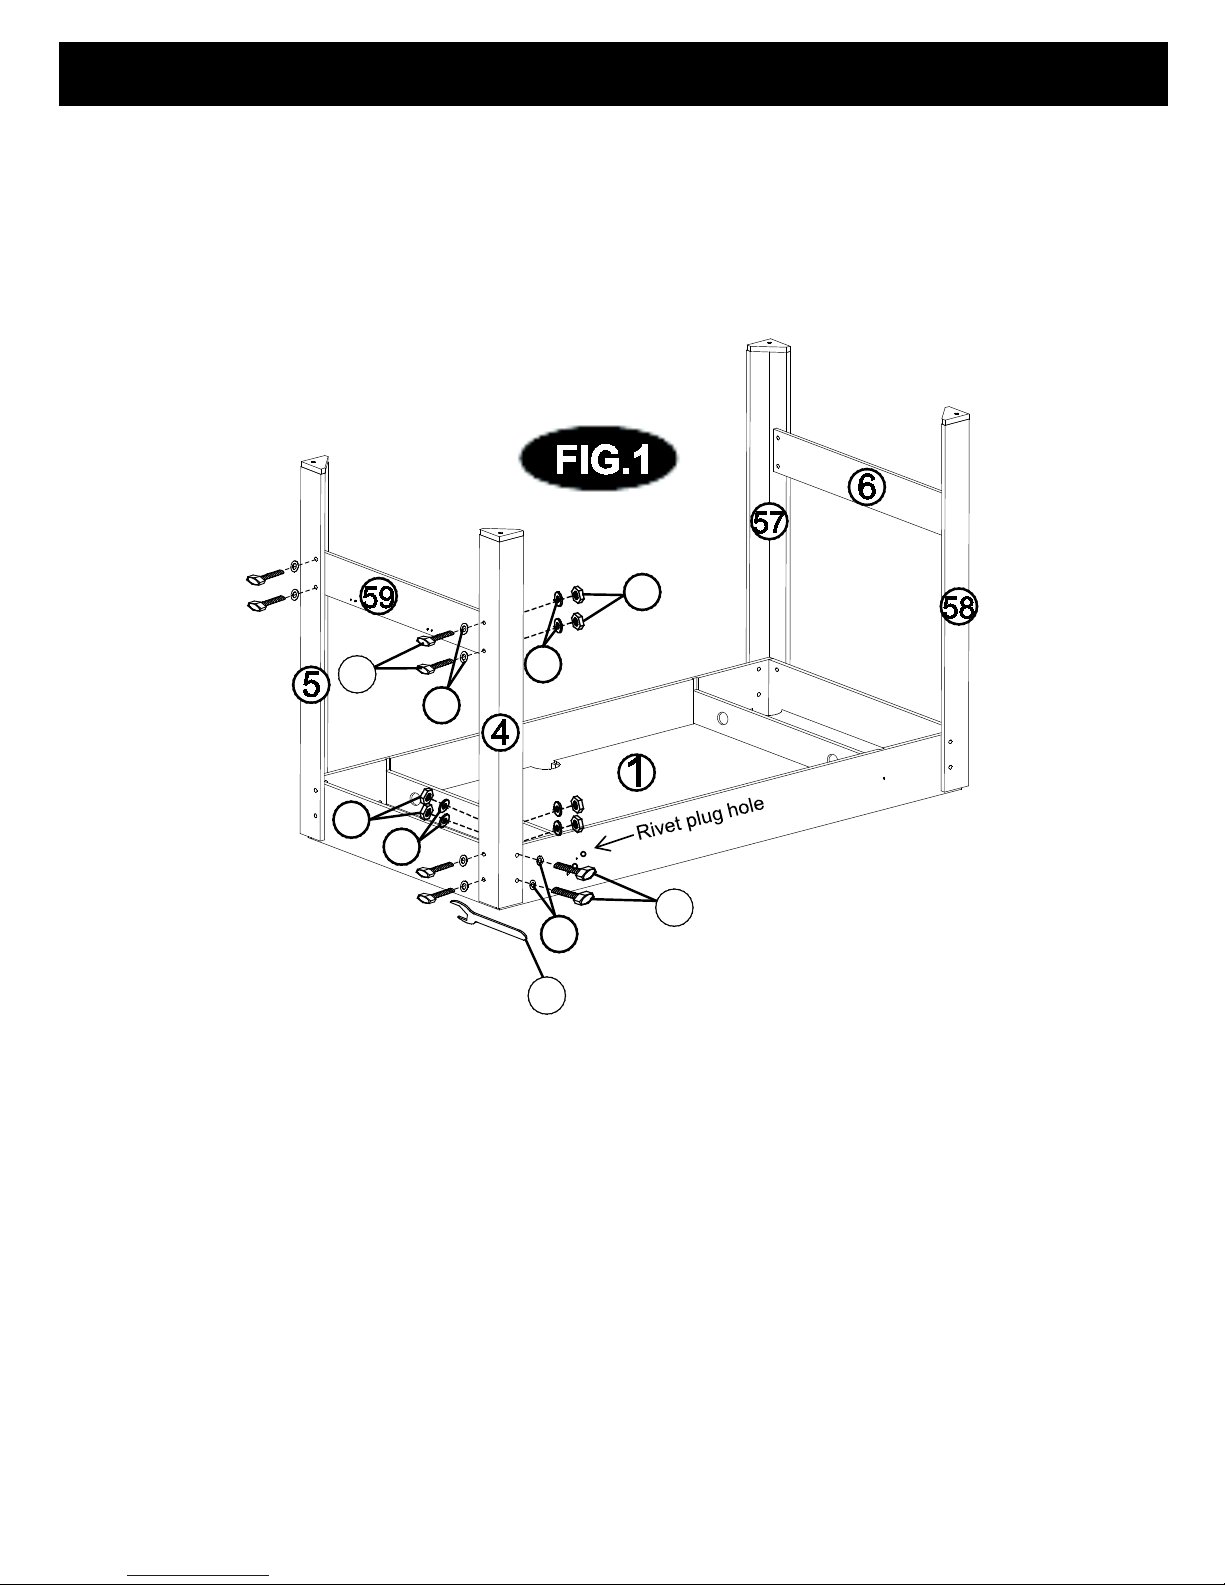
FIG.1
Attach the Legs (#4#5#57#58) to the Billiard Cabinet (#1) using four Bolts (#A46), four Nuts
(#A48) and eight Washers (#A47) per leg.
Attach the End Leg Braces(#6#59)to the Legs Using four Bolts(#A46),four Nuts (#A48)and eight
Washers(#A47) per End Leg Brace.
HELPFUL HINT: Be sure legs
#4.#5 and leg brace #59 are all
assembled together on the same
side of the table as shown.
Future assembly steps require
holes on these legs to be in a
certain position for correct
assembly. Legs #57, #58, and
leg brace #6 should also all be
assembled together on the
opposite side of table.
HELPFUL HINT:
The main cabinet #1
must be in position
as shown in the
diagram with the
r
ivet plug hole close
to the left hand side
(near leg #4 as
shown in FIG 1).
Assembly Instructions
A56
A47
A46
A47
A48
A47
A46
A47
A48
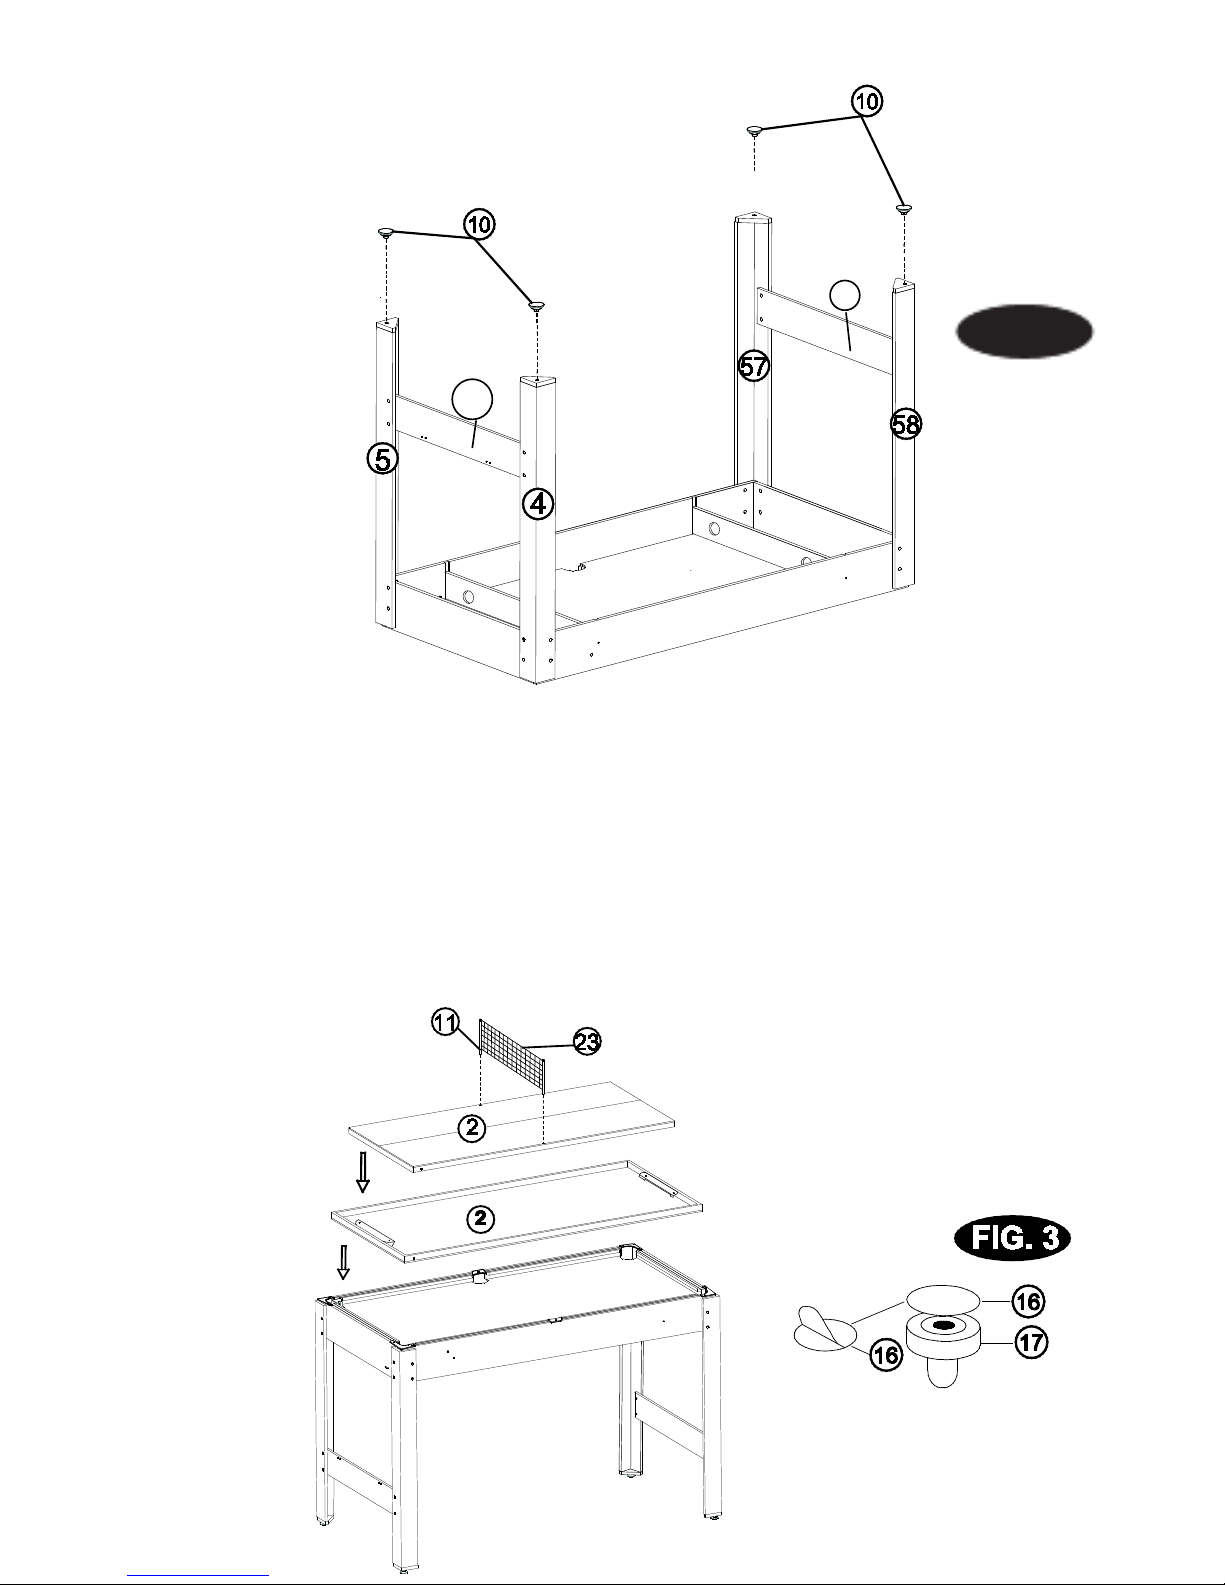
FIG.3
Remove the paper from the Felt Pads(#16)and stick them to the bottom of the
Pushers(#17).
Place the Hockey Table with Table Tennis(#2)on the Billiard Cabinet to Play Glide Hockey
using the Pushers(#17)and Puck(#18).
Turn the Hockey Table Top over to the Table Tennis Top (#2) on the Billiard Cabinet. Then
insert the Net Posts (#11) and Net (#23) to play Table Tennis.
FIG.2
Screw in the 4 leg levelers #10 to the bottom of
the legs as shown in fig 2.
FIG.2
59
6
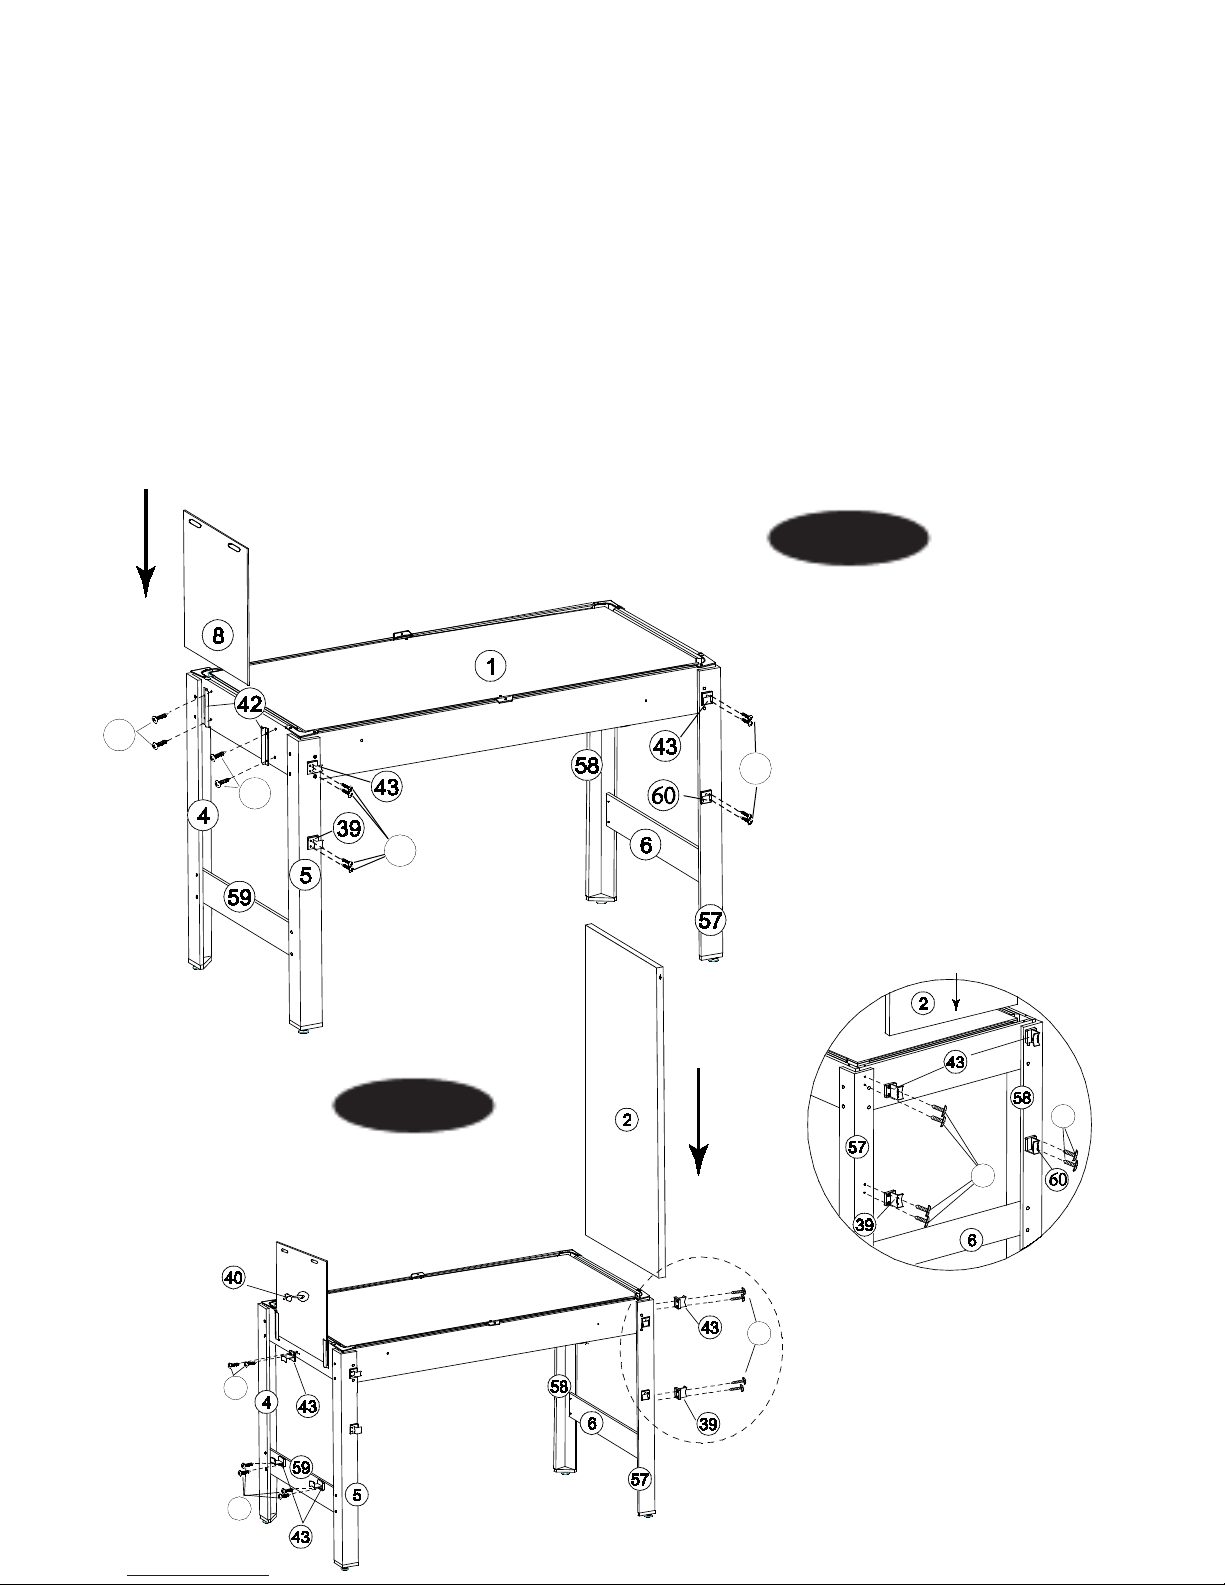
FIG.4A
Attach one hook #43 (top) and one left bracket #39 (bottom) to leg#5 using screws #A52
Repeat the step to attach hook and right bracket #60 to leg # 57 These brackets will hold
the archery board in place. Attach the Dart Board Guide Brackets (#42) to the end panel
using two round head screws (#A51). These brackets will hold dartboard #8
FIG.4B
To support the Table Tennis table #2 into the upright position, attach the left brackets (#39)
and right brackets (#60) to the Legs using two Screws(#A52). And attac
h the Hooks (#43)
to the Legs using two Screws (#A52) as shown in FIG 4B . At the opposite end of the table
attach 1 Hook (#43) to the end panel of table#1 using screws (#A52). Attach 2 hooks #43 to
the bottom leg brace#59 with screws #A49 These hooks will stow the smaller game boards
when not in use.
FIG.4A
FIG.4B
A52
A51
A51
A52
A49
A52
A52
A52
A52
 Loading...