

Page 1

Q
UICK INSTALL GUIDE
Congratulations on your purchase of the SEE2. The USB 2.0 interface allows the SEE2
to work with most Windows-based PC systems. It provides a high-speed VGA port that is
ideal for PC users with small LCD displays as it can support a second display with up to
1600 x 1200 resolution. This easy-to-use solution will provide increased productivity,
expandability and connectivity to both home and office users.
***For the entire manual, please insert the included CD***
F
EATURES
High-Resolution Monitors supported; up to 1600 x 1200
Plug-and-Play USB connectivity
Multi graphics display modes – primary, extended, mirror, rotated
Full USB 2.0 Compliance
Standard VGA (DB15) connector to support secondary CRT/LCD monitor
S
YSTEM REQUIREMENTS
1.0GHz or higher processor;
Intel Pentium 4 / Celeron Family, AMD K6 / Athlon / Duron Family.
256MB memory or higher (512MB memory or higher recommended for optimal
performance)
Available USB 2.0 port
Windows 2000 SP4 / Windows XP SP2 / Windows Vista
P
ACKAGE CONTENTS
SEE2 USB TO VGA ADAPTOR
CD (User Manual, Driver)
Quick Start Guide
R
EGULATORY COMPLIANCE
FCC / CE / C-tick / VCCI
1
Page 2
I
NSTALLATION
¾ Installing the SEE2 DRIVER
Do not plug the SEE2 into the computer system before the driver is completely
installed.
1. Turn on your computer, wait for bootup to complete.
2. Insert the driver CD and follow the instructions.
3. Make sure to restart the computer.
¾ Installing the SEE2 Hardware
After installing the SEE2 software, you are ready to connect the SEE2 to your
computer.
1. Plug the cable from the monitor, into the VGA port on the SEE2
2. Plug the SEE2 into an available USB 2.0 port.
3. Follow the instruction for installing.
¾ At this point if you have additional SEE2 Adaptors to install, you do not
have to restart your computer between installing the devices. Plug them in
and follow the instructions.
4. Restart your computer.
¾
F
UNCTION DESCRIPTION
This section describes the main functions provided by the SEE2 .
USB
TO GRAPHICS
Supports either LCD or CRT monitors;
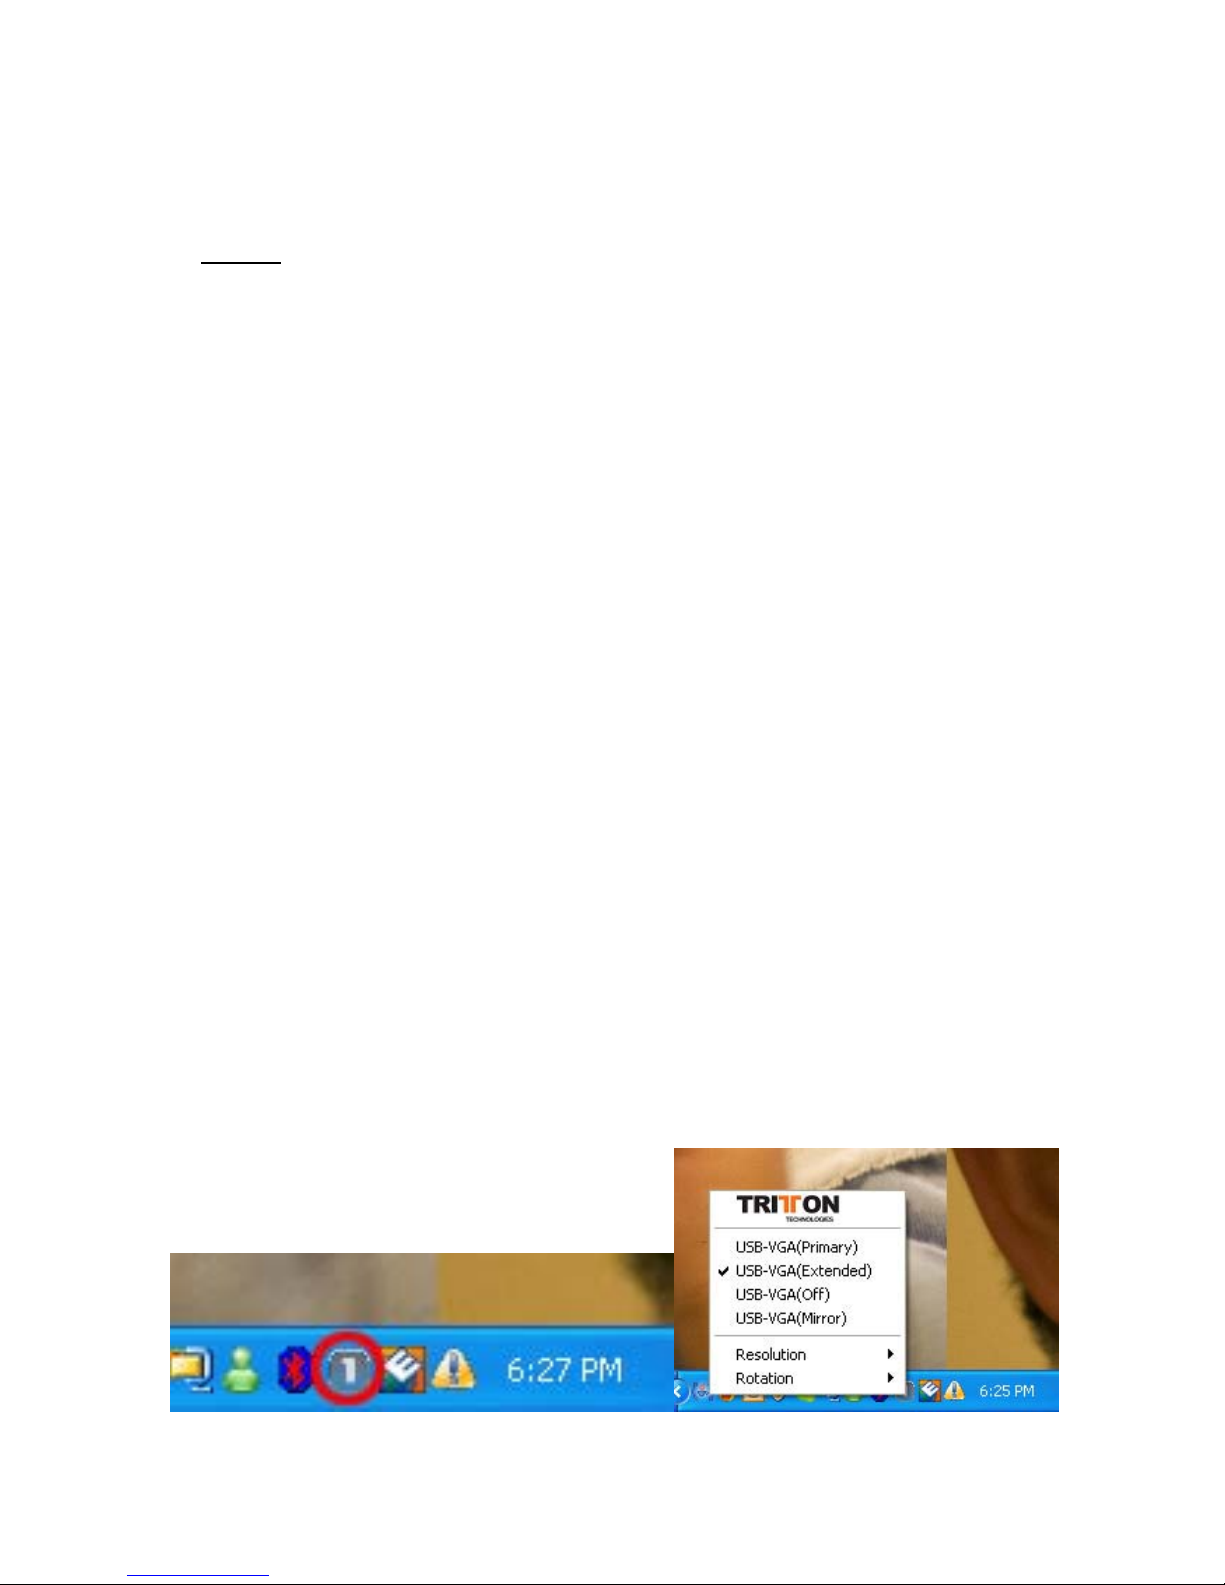
On an LCD or CRT monitor 3 modes are supported; Primary, Extended and Mirror;
access them by right-clicking on the “T” icon in the system tray, by your clock, or from
display properties in control panel.
/VGA:
2
Page 3
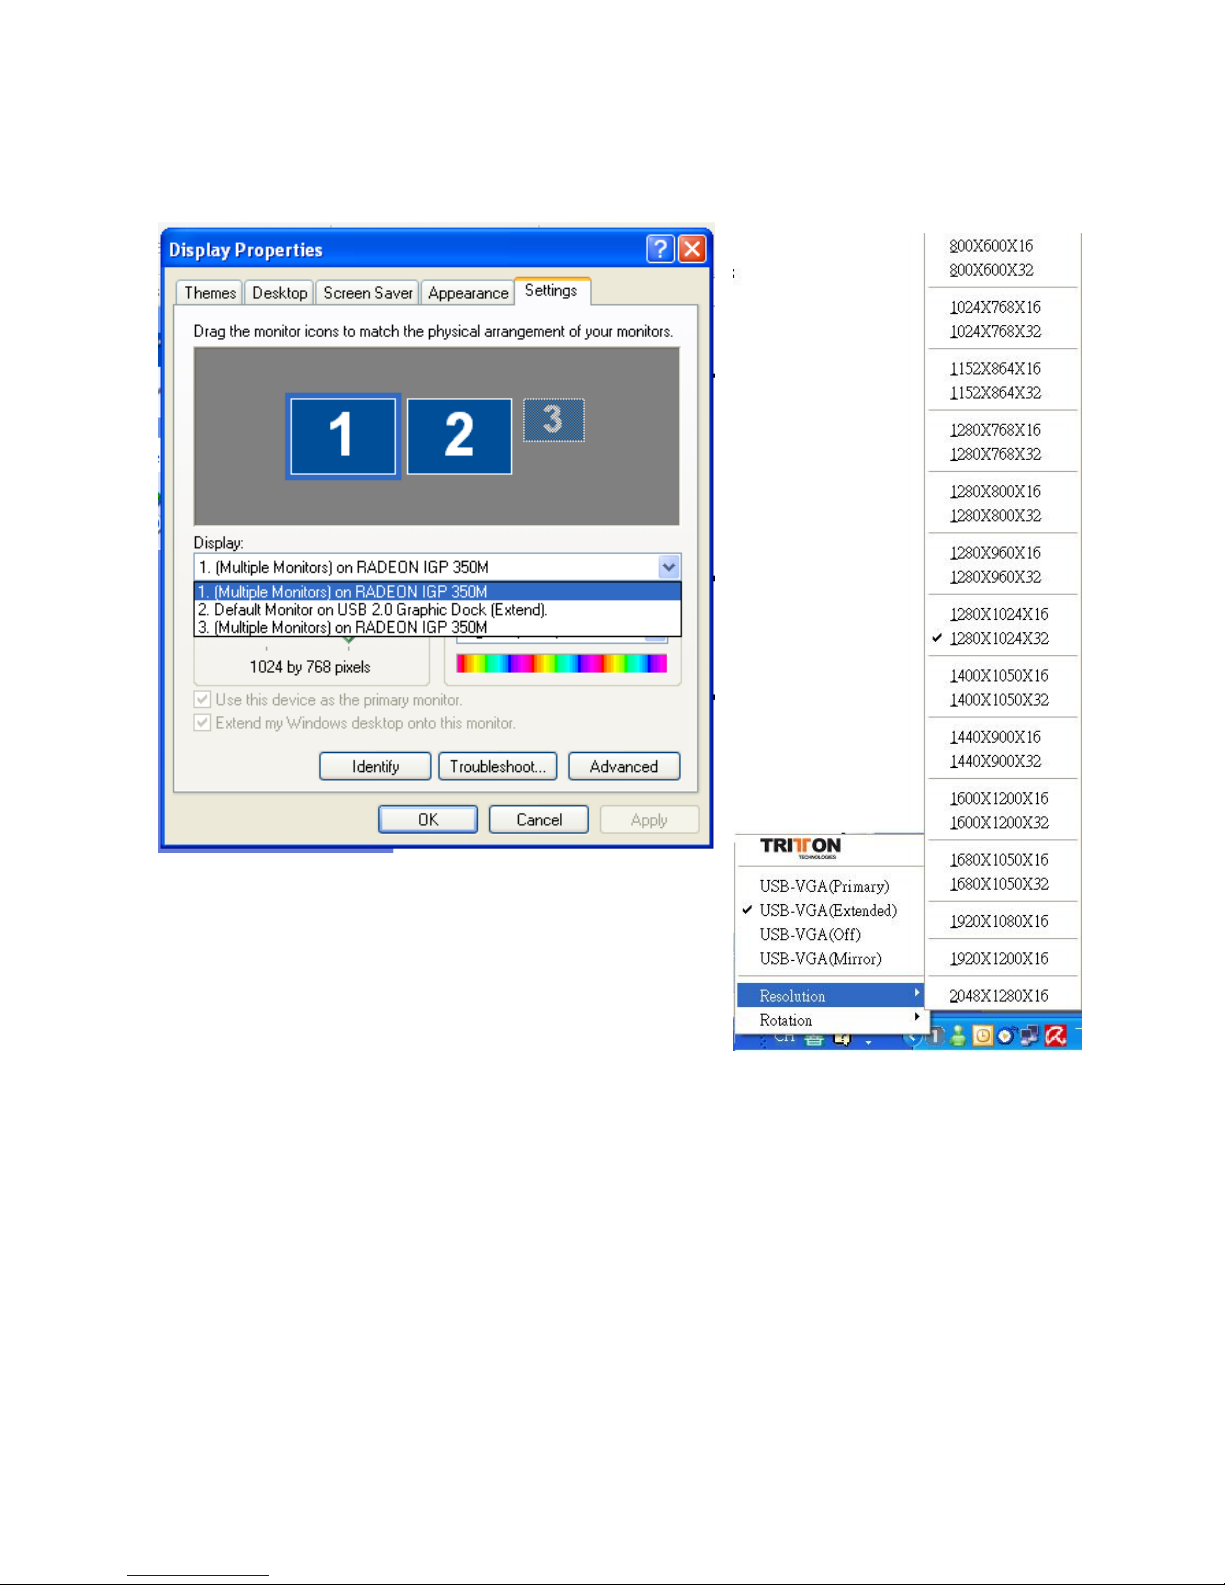
- The resolution supports from 800x600 x 16 / 32 bit and up-to 1600 x 1200 16 bit.
- The resolution can be modified via the system tray or Display Properties.
3
Page 4

Color Bits
Resolutions Supported
16 Bits 32 Bits
1600 x 1200
1680 x 1050
1440 x 900
1280 x 1024
1280 x 960
1280 x 800
1280 x 768
V n/a
V n/a
V V
V V
V V
V V
V V
1152 x 864
1024 x 768
800 x 600
V V
V V
V V
4
Page 5

“Primary” M o d e
When selected, the screen connected to your
internal video card will work as the extended
desktop. The monitor connected to the SEE2 will
act as the primary Windows desktop. Be
advised that display utilities and drivers that ship
with some AGP and built-in display adapters may
prevent this option from working. You can disable
the offending utility program (usually found in the
same toolbar located on the bottom right hand
corner) to make this function work properly. If you
need to do this, please contact your internal video
card manufacturer for instructions, or Tritton’s
technical support team.
“Extended” Mode (Default)
By default, the monitor connected to SEE2 will
work as, “Extended Desktop” which extends the
primary Windows desktop of your system. You can
change the relative position of this extended
desktop under the Display Properties.
“Mirror” Mode
By setting this mode, the Windows desktop
displayed on your existing monitor will be
mirrored/replicated to the secondary CRT/LCD
monitor on the SEE2. The screen resolution setting
on the secondary monitor must have the exact
same resolution as the primary screen. For
example, if the primary resolution is
1024x768x32bit, the secondary monitor’s
resolution will be the same. But if the selected
resolution setting is not supported by the primary
screen, a warning dialogue box will be displayed
and the suggested screen resolution will be shown.
5
Page 6

Rotation
Many LCD monitors allow you to turn the display
90 degrees (portrait mode). This feature enables
setting the orientation of the secondary CRT/LCD
monitor. Several options such as “90 degrees”,
“180 degrees”, 270 degrees” or “0 degress” are
available under the Extended or Primary mode
“OFF” Mode
This option disables the SEE2 video port on the
system.
6
Page 7

Q&A
This section describes the common Q&A regarding to the installation or operation of the
SEE2.
Q: Why can’t I make the SEE2 the primary display?
A: Some video cards ship their product with a utility that prevent other video cards from
being set as the primary card. Check the bottom right hand corner taskbar for the utility.
Disable the utility before switching our SEE2 to be the primary display.
Q: Why won’t my DVD player work when I move it over to the extended display?
A: Some DVD playback software packages do not support playing on a second display
of any kind. You may have to open the program in the secondary display first before
playing the DVD.
Q: How come my video will not play on Media Player if I move it over to the extended
desktop?
A: Check that you have moved the Media Player window completely over to the
second screen.
Q: Why does my mouse not move pass the right side of the screen as it should on
extended desktop?
A: Go to control panel\displays, click on “Identify Monitors”, verify that the position as
recorded in Display Properties matches the physical positioning of the monitors. You
can rearrange how Windows treats each display in relation to each other in the Display
Properties Settings.
Q: There are lines running horizontally up and down my screen.
A: This is due to a low refresh rate setting. You can change this in the Display
Properties Settings Advanced Monitor. Make sure you select the
set the refresh rate higher than what your monitor can support. This may damage your
monitor. You can also try to reset/refresh/resynchronize your monitor.
Q: Direct3D does not work?
A: This is a current limitation of the
SEE2
. Check for driver updates in the future to
add support for this. If your application requires this, please use the main display.
SEE2
first and not
7
Page 8

T
ROUBLESHOOTING TIPS
The following troubleshooting tips may help if you are experiencing any difficulties using
your Tritton SEE2. Contact your dealer for additional assistance if needed.
- Check to make sure that all connectors are plugged in properly.
- Reset/refresh/resynchronize your monitor.
- Make sure that the USB port that you are using is USB 2.0.
- Try connecting the
- Try a different USB 2.0 port and/or computer
- Check to see that the monitor is connected correctly and the power is ON.
- Try Unplugging all other USB devices from the system.
- Make sure to restart your computer after the driver installation.
- Unplug the SEE2, wait a few seconds, and re-connect.
- Check the website to make sure you have the latest drivers.
- Selecting Primary Mode may disable the main system display on certain Intel graphics
solution based computer systems that will not allow primary to shift to another device.
- If you have problems during the boot up process, start your computer in Safe Mode
and uninstall the driver. Hold the CTRL key until the Windows startup menu appears
and select Safe Mode.
SEE2
directly to the computer instead of through a hub.
Copyright© 2008 Tritton Technologies Inc. All rights reserved. All trade names are registered trademarks
of their respective owners. Features and specifications are subject to change without notice. Product may
not be exactly as shown in the diagrams
8
 Loading...