

Page 1
USB
2.0
EXTERNAL VIDEO ADAPTER
USER MANUAL
Page 2

SEE2 USB 2.0 EXTERNAL VIDEO ADAPTER
CONTENTS
I
NTRODUCTION
........................................................................................................................1
F
EATURES
..........................................................................................................................1
S
YSTEM REQUIREMENTS
.....................................................................................................1
P
ACKAGE CONTENTS
..........................................................................................................1
R
EGULATORY COMPLIANCE
.................................................................................................1
S
UPPORTED DISPLAY RESOLUTIONS
:
.........................................................................................2
D
EVICE INSTALLATION WINDOWS
2000/XP...........................................................................3
S
OFTWARE INSTALLATION
............................................................................................3
W
INDOWS
2000/XP H
ARDWARE INSTALLATION
.............................................................5
FOR MULTIPLE SEE2 UNITS .....................................................................................7
For SINGLE SEE2 ...................................................................................................7
V
ERIFYING DEVICE DRIVER INSTALLATION IN WINDOWS
2000/XP..........................................8
D
EVICE DRIVER UN-INSTALLATION IN WINDOWS
2000/XP S
YSTEM
......................................10
D
EVICE INSTALLATION ON WINDOWS VISTA SYSTEM
..................................................................11
S
OFTWARE INSTALLATION
............................................................................................11
H
ARDWARE INSTALLATION ON WINDOWS VISTA SYSTEM
.................................................13
Installation of Multiple SEE2 Units in Windows Vista..................................13
Installation of ONE SEE2 Units...................................................................13
V
ERIFYING DEVICE DRIVER INSTALLATION IN WINDOWS VISTA
..............................................15
D
EVICE DRIVER UN-INSTALLATION IN WINDOWS VISTA
.........................................................17
F
UNCTION DESCRIPTION
........................................................................................................18
“Primary” Mode....................................................................................................19
“Extended” Mode (Default) ..................................................................................19
“Mirror” Mode.......................................................................................................20
“OFF” Mode.........................................................................................................20
Rotation...............................................................................................................20
Q&A
.............................................................................................................................21
T
ROUBLESHOOTING TIPS
.................................................................................................22
Page 3

SEE2 USB 2.0 EXTERNAL VIDEO ADAPTER
1
I
NTRODUCTION
Thank you for purchasing the SEE2. The flexibility and universality of USB 2.0
technology makes it un-necessary to open your computer. The SEE2 enables you to
connect one or more display devices (CRT/LCD monitor, projector) to your desktop or
notebook PC. The connected display can act as mirrored or extended desktop of the
main display on your computer. Turn your monitor sideways, and enable portrait mode
for easier web and print viewing.
F
EATURES
w PC Resolution support up VGA 1600 x 1200
w Primary, Extended, Mirror and Rotated modes
w Supports multiple display devices on one PC
w USB 2.0 compliant
w Plug-and-Play compliant
w Windows OS 2000 SP4 / Windows XP SP2 / Windows Vista
※
Please note that you can install up to six SEE2 on one PC at the same time.
S
YSTEM REQUIREMENTS
w PC USB 2.0 Port
w Single SEE2: 256MB RAM or Higher; Pentium 4 /
Celeron family or AMD K6/Athlon/Duron family with 1.5GHz
w Multiple SEE2 Units: 512MB RAM or Highe
OPERATING SYSTEMS SUPPORTED
w Windows OS 2000 SP4 /Windows XP SP2 / Windows Vista
P
ACKAGE CONTENTS
w SEE2
w CD with User Guide and Installation Driver
w Quick Start Guide
R
EGULATORY COMPLIANCE
w FCC / CE / C-tick / VCCI
Page 4

SEE2 USB 2.0 EXTERNAL VIDEO ADAPTER
2
S
UPPORTED DISPLAY RESOLUTIONS
:
VGA
PC Resolutions Supported
16 Bits 32 Bits
1600 x 1200
V n/a
1680 x 1050
V n/a
1400 x 1050
V V
1440 x 900
V V
1280 x 1024
V V
1280 x 960
V V
1280 x 800
V V
1280 x 768
V V
1152 x 864
V V
1024 x 768
V V
800 x 600
V V
Page 5
SEE2 USB 2.0 EXTERNAL VIDEO ADAPTER
3
D
EVICE INSTALLATION WINDOWS
2000/XP
Ø S
OFTWARE INSTALLATION
Installing the device driver enables your computer’s operating system to recognize the
SEE2. Please check what operating system you are using, and ensure you are
referring to the appropriate installation procedure before you begin. Please make sure
the SEE2 is unplugged from your PC or Notebook before executing the setup
program.
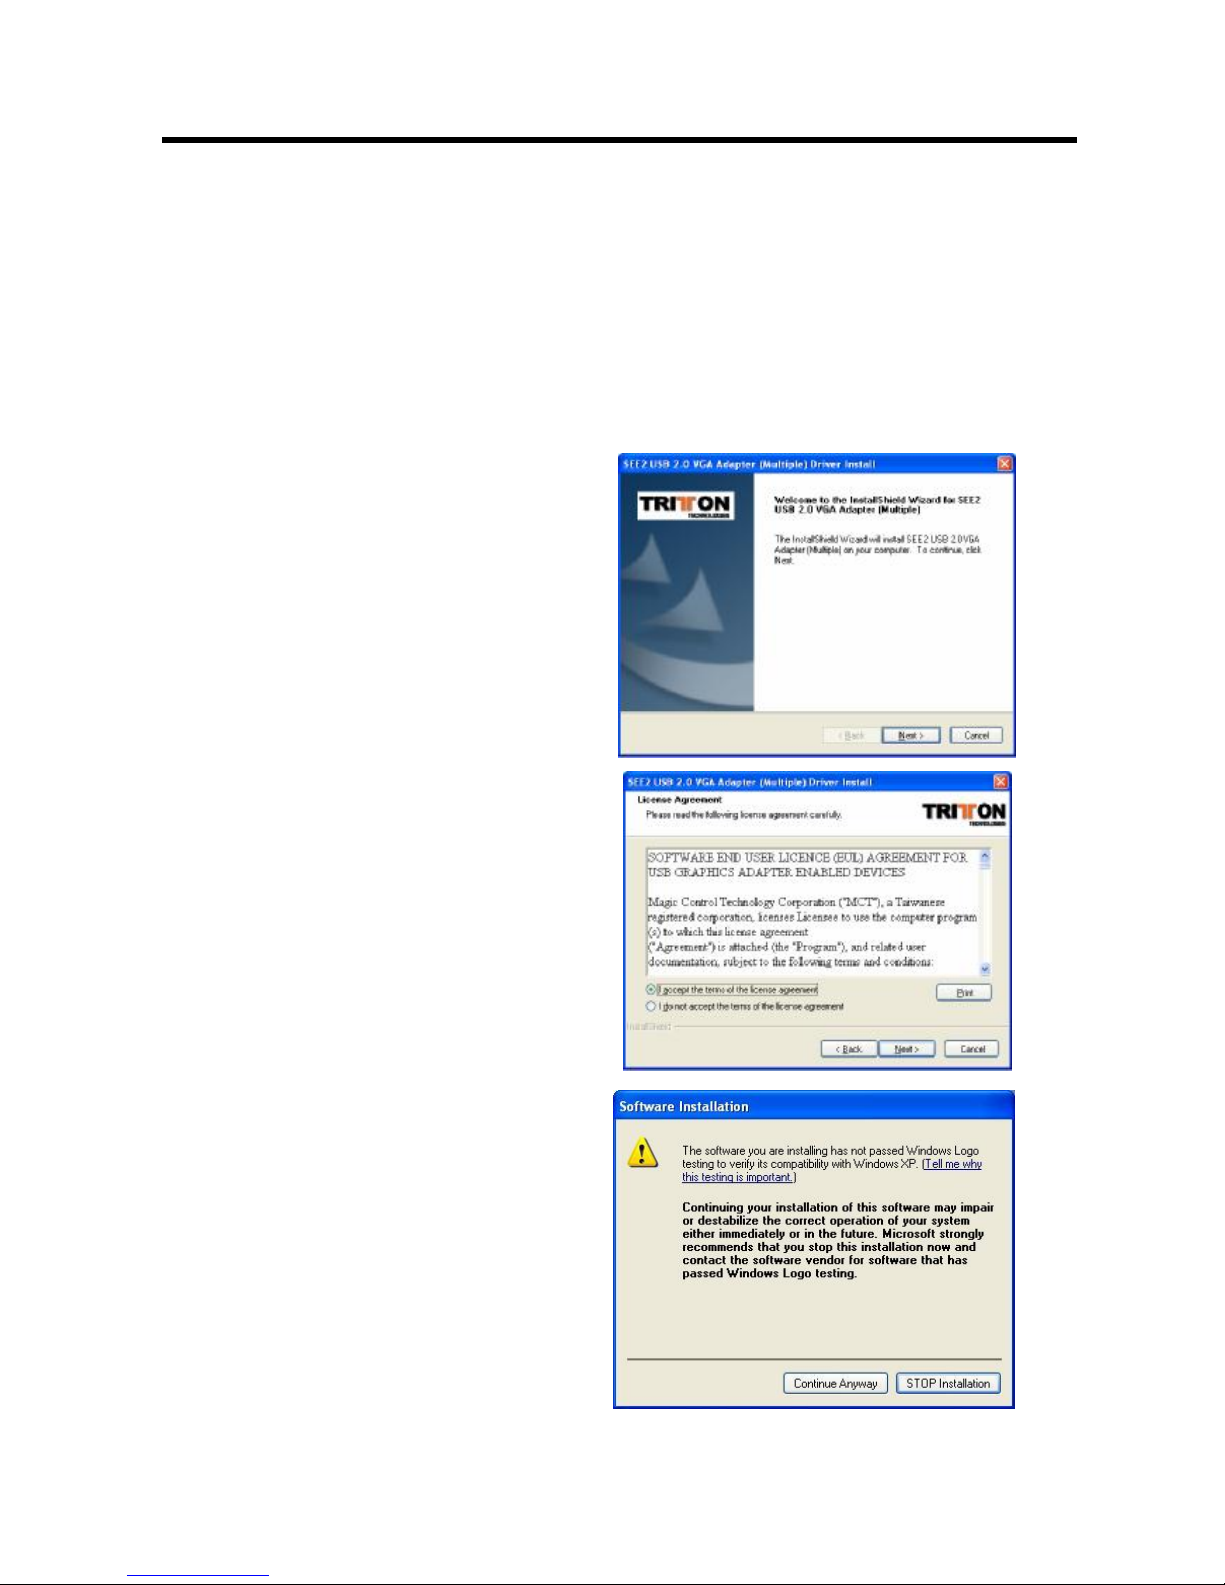
Step 1.
Insert the Driver CD into the CD-ROM
drive; the setup program should
launch automatically. If the setup
program does not begin
automatically, click Start, Run and
type “D:\Setup.exe” (where D: is the
path of your CD-ROM drive). You can
also access it from My Computer
Driver Installation Wizard, click “Next”
to continue.
Step 2.
License Agreement; please review
and select “I accept the terms of
the license agreement.” Click
“Next” to accept the License
Agreement.
Step 3.
The Microsoft Software Installation
Certificate warning dialogue box
will be displayed under Windows
XP OS up to 6 times. Please
select “Continue Anyway” to
continue with the device driver
installation. This will not affect the
device driver installation or usage.
The Microsoft Certificate warning
dialogue boxes will not appear once
the driver receives the WHQL
certification.
Page 6
SEE2 USB 2.0 EXTERNAL VIDEO ADAPTER
4
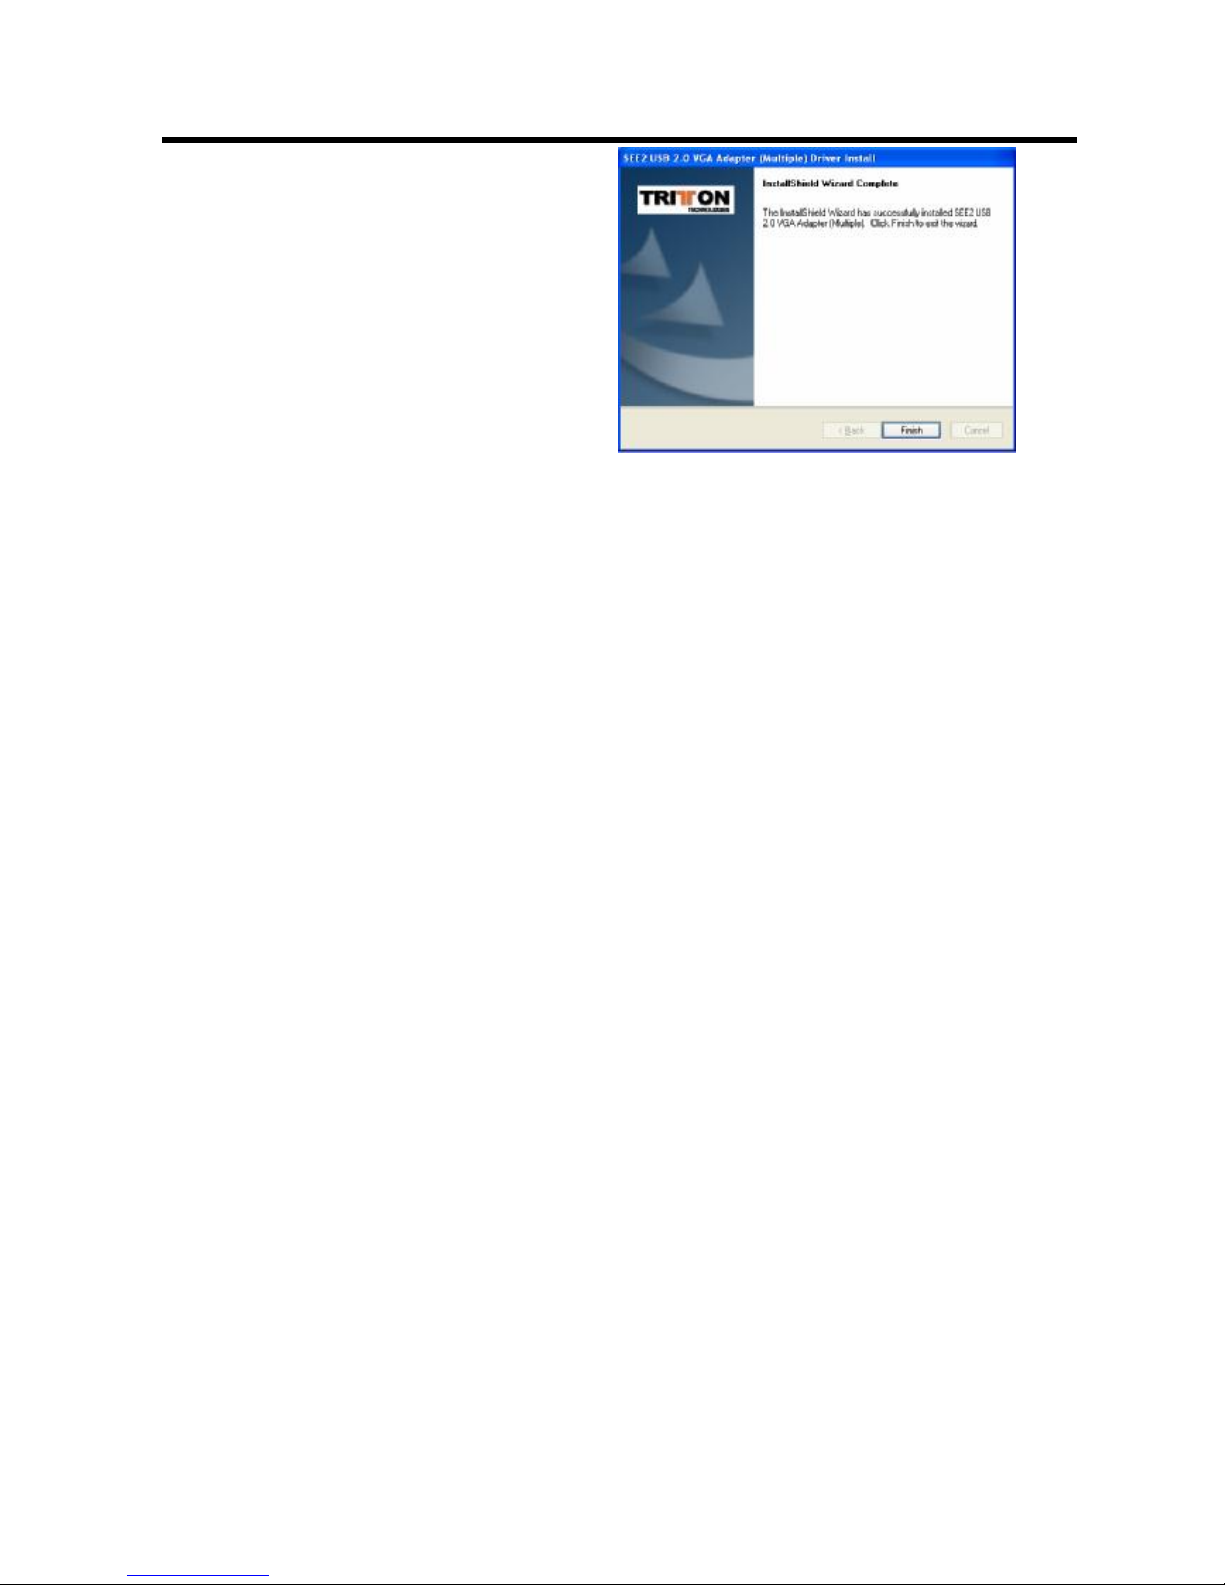
Step 4.
Click “Finish” to exit the Driver
Wizard.
Step 5
Reboot your computer
Page 7
SEE2 USB 2.0 EXTERNAL VIDEO ADAPTER
5
Ø W
INDOWS
2000/XP H
ARDWARE INSTALLATION
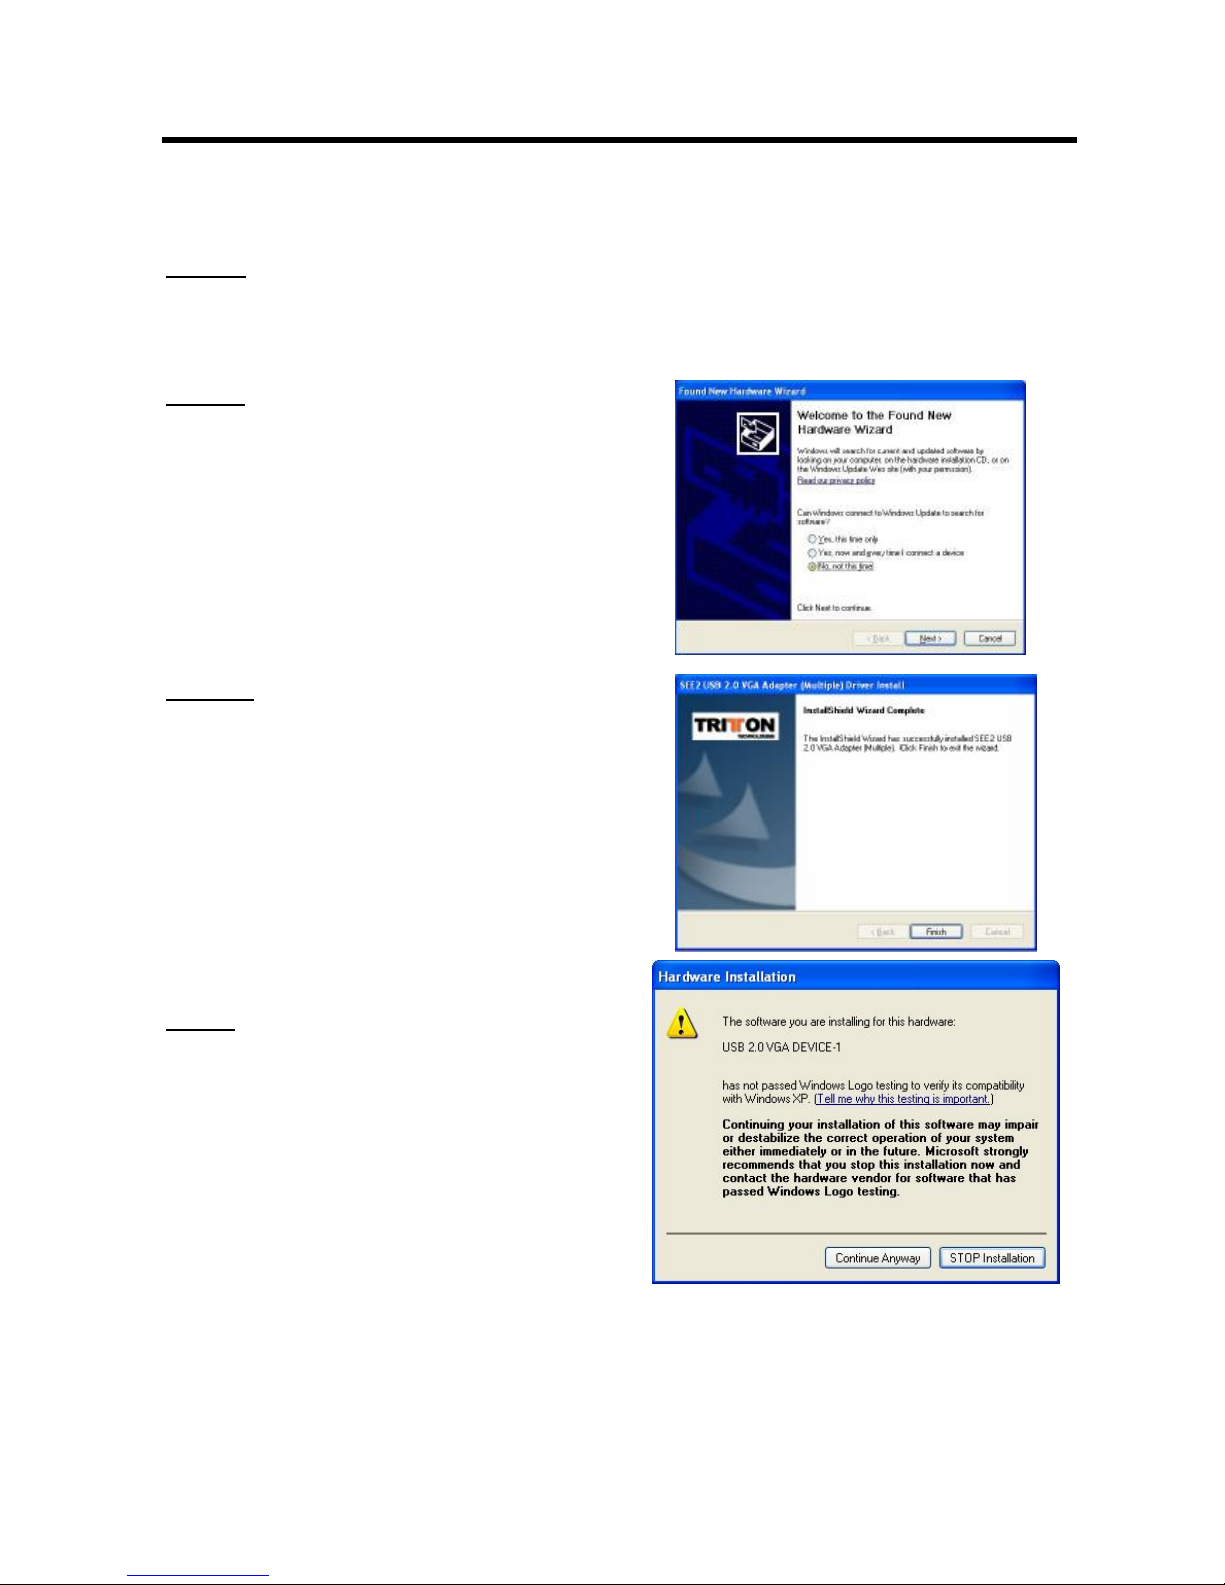
Step 1
Connect the external display device (monitor/projector) to the VGA connector of the
SEE2 and ensure the display device is on
Step 2
Plug the SEE2 into an available USB 2.0 port
of your PC or Notebook. Then your computer
will show the Hardware Installation Wizard,
please select “No, not this time” for
checking windows update, and click “Next”
Step. 3
Select “Install the software automatically
(Recommended)”. Click “Next” to continue
Step 4
Please select “Continue Anyway” to
continue with the installation. It will not
affect the device installation and the device
usage
*
The Microsoft Certificate warning dialogue
boxes will not appear when the driver
receives the WHQL certification.
Page 8
SEE2 USB 2.0 EXTERNAL VIDEO ADAPTER
6
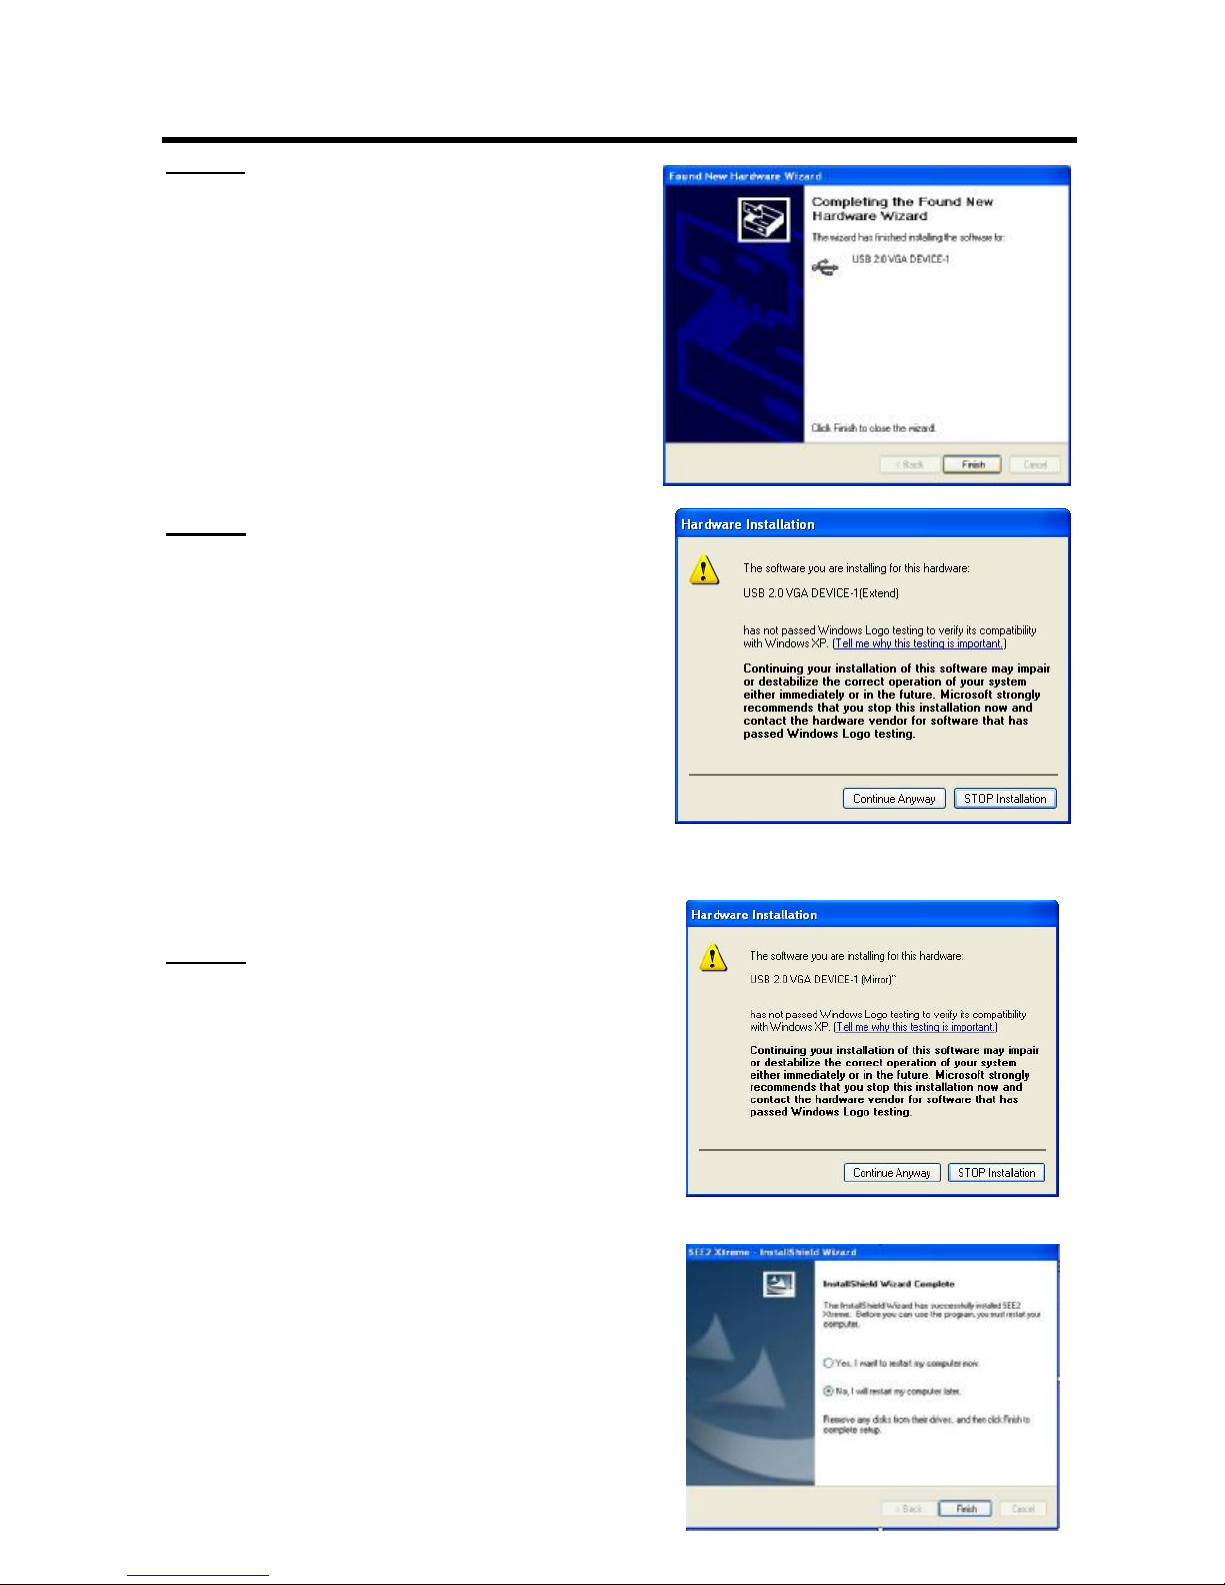
Step 5
Click “Finish” to close the wizard
Step 6
Please select “Continue Anyway” to
continue with the device driver installation.
It will not affect the device driver installation
and the device usage
*
The Microsoft Certificate warning dialogue
boxes will not appear when the driver
receives the WHQL certification.
Step 7
Please select “Continue Anyway” to
continue with the device driver installation.
It will not affect the device driver installation
and the device usage
*
The Microsoft Certificate warning dialogue boxes
will not appear when the driver receives the WHQL
certification.
Page 9

SEE2 USB 2.0 EXTERNAL VIDEO ADAPTER
7
Step 8A
FOR MULTIPLE SEE2 UNITS
Please select “No, I will restart my
computer later.” and click “Finish” to
continue the installation of next SEE2.
Repeat the Hardware Installation Procedure Step 1 ※- 7 and 8 A for all additional SEE2
units, then after all units are installed, move on to 8 B. Ensure that all units are connected
to monitors that are powered on.
Step 8B
For SINGLE SEE2
Please select “Yes, I want to restart my
computer now.” and click “Finish” to
complete the driver installation.
Page 10

SEE2 USB 2.0 EXTERNAL VIDEO ADAPTER
8
V
ERIFYING DEVICE DRIVER INSTALLATION IN WINDOWS
2000/XP
The following procedure allows you to verify the device driver installation. It is
optional, but a useful troubleshooting tool.
Right click “My Computer” → “Properties” → “Hardware” → “Device Manager”.
Double click “Display adapters”, and “Universal Serial Bus controllers”.
Page 11

SEE2 USB 2.0 EXTERNAL VIDEO ADAPTER
9
v Multiple SEE2 USB 2.0 VGA Adapter
u The device number is dependant upon how many SEE2 units are installed.
Page 12

SEE2 USB 2.0 EXTERNAL VIDEO ADAPTER
10
D
EVICE DRIVER UN-INSTALLATION IN WINDOWS
2000/XP
S
YSTEM
The following procedure allows you to un-install the SEE2 device driver.
Step 1 Please make sure the SEE2 is unplugged from your PC or Notebook before
executing the device driver un-installation program.
Step 2.
Default Windows XP Start menu:
Click “Start
” → “Control Panel” →
“Add or Remove Programs”.
Classic start menu:
Click “Start” → “Settings” →
“Control Panel” → “Add or Remove
Programs”.
Select “SEE2 driver” item. Click the
“Remove” button.
Step 3.
Make sure the SEE2 is unplugged from
notebook/PC USB port and click “OK”
to continue.
Step. 4
Select “Yes, I want to restart my
computer now” and click “Finish” to
reboot. After reboot, you will complete
the driver un-installation
Page 13

SEE2 USB 2.0 EXTERNAL VIDEO ADAPTER
11
D
EVICE INSTALLATION ON WINDOWS VISTA SYSTEM
Ø S
OFTWARE INSTALLATION
Installing the device driver enables your computer’s operating system to recognize the
SEE2. Please check what operating system you are using, and ensure you are
referring to the appropriate installation procedure before you begin.
Please make sure the SEE2 is unplugged from your desktop or notebook before
executing the setup program. This section illustrates the simple device driver
installation procedure for computer running Windows 2000 / XP operating system.
Step 1.
Insert the Driver CD into the CD-ROM drive; the setup program should launch
automatically. If the setup program does not begin automatically, click Start, Computer,
and double-click the CD drive with our disc in it.
Step 2.
Driver Installation Wizard, click “Next” to
continue
Step 3
License Agreement; review it and check
“I accept the terms of the license
agreement.” Click “Next” to accept the
License Agreement
Page 14

SEE2 USB 2.0 EXTERNAL VIDEO ADAPTER
12
Step 4
It will show the Windows Security
warning dialogue box under Windows
Vista, it will not affect the device driver
installation and usage the device. Please
select “Always trust software from
“Magic Control Technology Corp.”,
then click “Install” to continue
Step 5
Setup is searching for installed
features…
Normally, it will take around 2~3
minutes during the period of time
Step. 6
Driver Installation Wizard, click “Finish”
to continue.
Page 15

SEE2 USB 2.0 EXTERNAL VIDEO ADAPTER
13
Ø H
ARDWARE INSTALLATION ON WINDOWS VISTA SYSTEM
u Installation of Multiple SEE2 Units in Windows Vista
Step 1
Connect the external display device (monitor/projector) to the VGA connector of the
SEE2 and ensure the display device is on.
Step 2
Plug the SEE2 into an available USB 2.0 port of your PC. The driver installation will
proceed automatically.
Step 3
Please select “No, I will restart my
computer later. ” And click “Finish” to finish
installation for device 1 and continue for
next installation.
※ Repeat steps 1 – 3 for each additional SEE2 you are connecting to your computer
※ After connecting your last SEE2 device, wait for the installation to complete, you
can restart your computer through the installation program, or manually.
u Installation of ONE SEE2 Units
Step 1
Connect the external display device (monitor/projector) to the VGA connector of
SEE2 and ensure the display device is on.
Step 2
Plug the SEE2 into an available USB 2.0 port of your PC. The driver installation will
proceed automatically.
Page 16

SEE2 USB 2.0 EXTERNAL VIDEO ADAPTER
14
a. Please select “Yes, I want to
restart my computer now ” to
complete the installation
Page 17

SEE2 USB 2.0 EXTERNAL VIDEO ADAPTER
15
V
ERIFYING DEVICE DRIVER INSTALLATION IN WINDOWS
V
ISTA
The following procedure allows you to verify the device driver installation. It is optional,
but a useful troubleshooting tool.
Please right click “Computer” → “Properties” → “Device Manager”.
Please double click “Display adapters”, and “Universal Serial Bus controllers”.
Page 18

SEE2 USB 2.0 EXTERNAL VIDEO ADAPTER
16
v Multiple SEE2 USB 2.0 VGA Adapter
u The device number is dependeing on how many SEE2 units are installed.
Page 19

SEE2 USB 2.0 EXTERNAL VIDEO ADAPTER
17
D
EVICE DRIVER UN-INSTALLATION IN WINDOWS VISTA
The following procedure allows you to un-install the SEE2’s device driver. Please make
sure the SEE2 is unplugged from your PC or Notebook before executing the device
driver un-installation program.
Step 1.
w Standard menu:
Please click “Start” → “Control
Panel” → “Program and Features”.
w
Classic Start memu:
Please click “Start” → “Settings”
→ “Control Panel” → “Program and
Features”.
Select “See2” item. Click “Uninstall”
button.
Step 2.
Click “OK” to continue
Step 3.
select “Yes, I want to restart my
computer now” and click “Finish” to
reboot. After reboot, you will complete the
driver un-installation.
Page 20

SEE2 USB 2.0 EXTERNAL VIDEO ADAPTER
18
F
UNCTION DESCRIPTION
This section describes the main functions provided by the SEE2.
- The SEE2 can support LCD or
CRT displays; The VGA interface
can be used on LCD or CRT
monitors. Four different modes are
available for use: Primary,
Extended, Mirror and Portrait
Mode (Rotation) by right-clicking
the utility icon (the number is
dependent upon the quantity of
SEE2 be installed)
- The resolution can be modified via the Utility Icon or Display Properties.
Page 21

SEE2 USB 2.0 EXTERNAL VIDEO ADAPTER
19
“Primary” Mode
The system’s main graphics adapter will
automatically switch to act as the
secondary graphics adapter and the
main screen as the extended desktop.
The monitor connected to the SEE2 will
now act as the primary Windows desktop.
Please be advised that display utilities
that shipped with some AGP and built-in
display adapters may prevent this option
from working on some systems. You can
disable the other utility program (usually
found in the same toolbar located on the
bottom right hand corner) to make this
function work properly.
“Extended” Mode (Default)
By default, the monitor connected to SEE2 will work as, “Extended Desktop” which
extends the primary Windows desktop of your system. You can change the relative
position of this extended desktop under the Display Properties.
Page 22

SEE2 USB 2.0 EXTERNAL VIDEO ADAPTER
20
“Mirror” Mode
By setting this mode, the Windows desktop
will be mirrored/replicated to the secondary
CRT/LCD monitor. The screen resolution
setting on the secondary monitor MUST
match the primary screen’s resolution. For
example, if the primary resolution is 1600 x
1200 x 32bit, the secondary monitor’s
resolution will be the same. If the selected
resolution setting is not supported by the
primary screen, a warning dialogue box will
be displayed and the suggested screen
resolution will be shown.
“OFF” Mode
This option disables the SEE2 on the
system.
Rotation
This feature enables setting the orientation of the secondary CRT/LCD monitor. Several
options such as “0 degrees”, “90 degrees”, “180 degrees” or “270 degrees” are
available under the Extended or Primary mode. This is helpful because some monitors
rotate to the left, and some to the right.
Page 23

SEE2 USB 2.0 EXTERNAL VIDEO ADPATER
21
Ø Q&A
This section describes the common Q&A regarding the installation and operation of the
SEE2.
Q: Why can’t I make the SEE2 the primary display?
A: Some video cards ship their product with a utility that prevent other video cards
from being set as the primary card. Check the bottom right hand corner taskbar for
the utility. Disable the utility before switching our adapter to be the primary display.
Q: Why won’t my DVD player work when I move it over to the extended display?
A: Some DVD playback software packages do not support playing on a second
display adapter of any kind. Sometimes opening the program in the secondary
display before before playing the DVD can help this.
Q: How come my video will not play on Media Player if I move it over to the extended
desktop?
A: Ensure that you have moved the Media Player window completely over to the
second screen, if it is overlapping both screens, this will affect playback
Q: Why does my mouse not move pass the right side of the screen as it should on
extended desktop?
A: Check the display settings and make sure that your displays are oriented correctly.
You have to tell your computer how the monitors are physically positioned on your
desk. From Control Panel \Display Properites (see page 17 for example), click the
“Identify Monitors” button, you will see how the computer has numbered the monitors.
If this does not match how your computer has them oriented on “display properties”,
you must drag-and-drop the monitors in display properties so that the numbers are
oriented the same as displayed when you click the “Identfy Monitors” button.
Q: There are lines running horizontally up and down my screen.
A: This is due to a low refresh rate setting. You can change this in the Display
Properties Settings Advanced Monitor. Make sure you select the USB 2.0 VGA
Device first and not set the refresh rate higher than what your monitor can support.
This may damage your monitor. You can also try to reset/refresh/resynchronize your
monitor.
Q: Direct3D does not work?
A: This is a current limitation of the adapter. Please check for driver updates in the
future to add support for this. If your application requires this, please use the main
display adapter.
Q: Why won’t the Adapter work on Windows Vista 64 bit version?
A: Currently, the driver is compatible with Windows Vista 32 bit version only. Please
check for the driver updates in the future.
Page 24

SEE2 USB 2.0 EXTERNAL VIDEO ADPATER
22
Ø
T
ROUBLESHOOTING TIPS
The following troubleshooting tips may help if you are experiencing any difficulties
using our device. Contact your dealer for additional assistance if needed.
- Check to make sure that all connectors are plugged in correctly.
- Make sure that the USB port that you are using is USB 2.0.
- Try a different USB 2.0 port and/or computer
- Check to see that the monitor is connected correctly and the power is ON.
- Try connecting the adapter directly to the computer instead of through a hub, port
replicator, or docking station.
- Unplug all other USB devices from the system.
- Make sure to restart your computer after the driver installation.
- Unplug the adapter, wait a minute, then re-insert it.
- Check the website to make sure you have the latest drivers.
- Reset/refresh/resynchronize your monitor.
- For optimal video playback, alternate third-party video player may work better. We
do not endorse one in particular; however several quality players are available for
free.
- Selecting Primary Mode may disable the main system display on certain Intel
graphics solution equipped computer systems.
- If you have problems during the boot up process, start your computer in Safe
Mode and uninstall the driver. Hold the CTRL key until the Windows startup menu
appears and select Safe Mode.
Copyright© 2008 Tritton Technologies Inc. All rights reserved. All trade names are registered
trademarks of their respective owners. Features and specifications are subject to change without notice.
Product may not be exactly as shown in the diagrams.
 Loading...