

Page 1

BACKLIT INFORMATION PANEL
USER GUIDE
Page 2
CLOSER TO REALITY
WITH SAITEK’S PRO FLIGHT RANGE
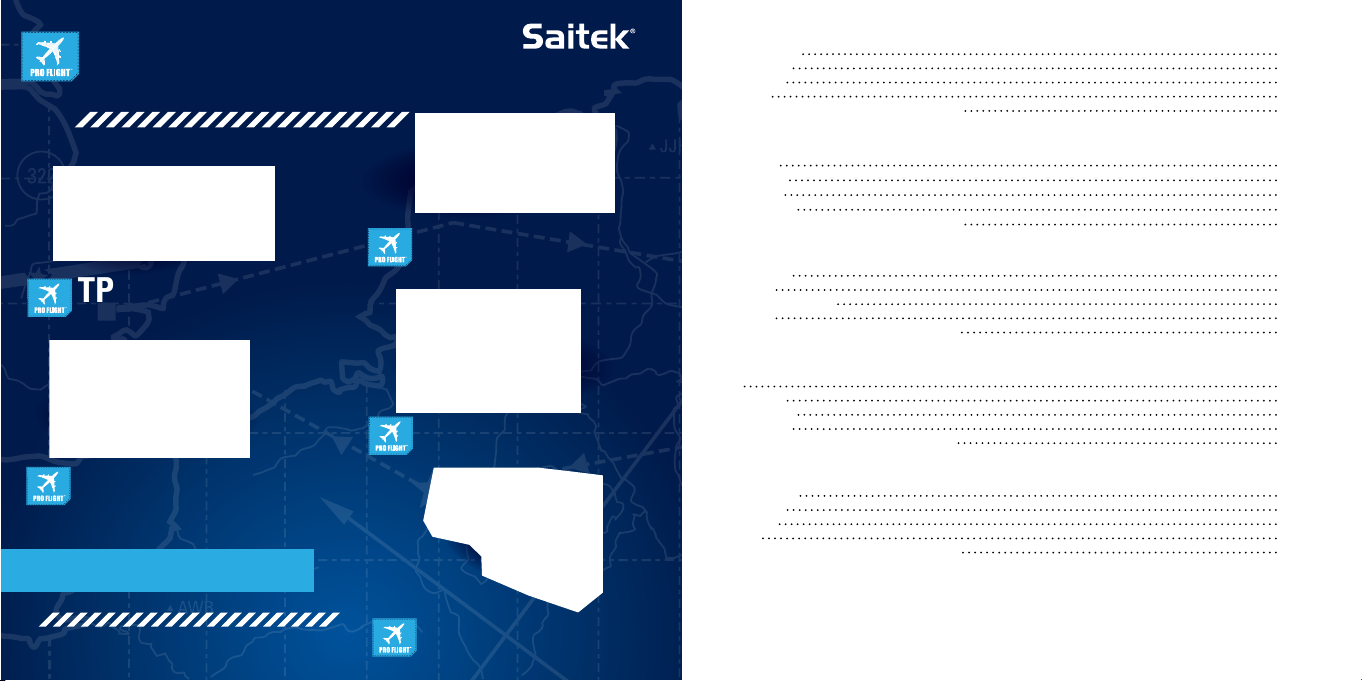
YOUR COMPLETE COCKPIT SOLUTION //
TPM
THROTTLE/PROP./MIXTURE CONTROLS
MULTI PANEL
IN-COCKPIT CONTROLS
PERFECT PARTNERS
SWITCH PANEL
IN-COCKPIT CONTROLS
RADIO PANEL
IN-COCKPIT CONTROLS
ENGLISH
GEttING StartEd 4
INtroductIoN 5
INStaLLatIoN 5
SEttING uP 7
Smart tEcHNoLoGy ProGrammING SoftwarE 8
fraNÇaIS
démarraGE 12
INtroductIoN 13
INStaLLatIoN 13
coNfIGuratIoN 15
Smart tEcHNoLoGy ProGrammING SoftwarE 16
dEutScH
ErStE ScHrIttE 20
EINfüHruNG 21
SoftwarEINStaLLatIoN 21
EINrEIcHtEN 23
Smart tEcHNoLoGy ProGrammING SoftwarE 24
ItaLIaNo
avvIo 28
INtroduzIoNE 29
INStaLLazIoNE 29
ImPoStazIoNE 31
Smart tEcHNoLoGy ProGrammING SoftwarE 32
ESPañoL
PrImEroS PaSoS 36
INtroduccIóN 37
INStaLacIóN 37
INStaLar 39
Smart tEcHNoLoGy ProGrammING SoftwarE 40
YOKE SYSTEM
AND QUADRANT
Page 3
GEttING StartEd INtroductIoN
Compatible with Microsoft® Flight Sim™ X, the Pro Flight Backlit Information Panel
provides users with clear and authentic information during ight.
Supplied with 51 individual ‘Optical Tiles’ which display a wide variety of in ight
events and information, users can customize their Information Panel to display ight
24 LIGHT LENSES
For real time in-game feedback
Pour une rétroaction en temps réel dans le jeu
Echtzeitfeedback während des Spiels
Per feedback in tempo reale durante il gioco
Para retroalimentación durante el juego en tiempo real
TRI-STATE LEDS
Choose between red, green & amber
Choisissez entre rouge, vert et ambre
Wählen Sie zwischen rot, grün und gelb
Per scegliere tra rosso, verde e ambra
Escoge entre rojo, verde y ámbar
information relevant to their aircraft or personal preference.
Optical Tiles not illuminated remain invisible to the naked eye, allowing aspiring pilots to
accurately access the information they need, when they need it.
fEaturES:
• Backlit Information Panel
• 24 Individually controlled segments
• Each segment has 3 user dened colours: Red, Orange and Green
• 51 optical lenses with individual legends included
• Works with Microsoft Flight Simulator X (FSX)
• Powerful ST Graphical User interface
drIvErS aNd SoftwarE INStaLLatIoN for uSErS of wINdowS® XP, 32- aNd 64-bIt
1. With your computer powered on, close down any programs that are currently
running, and then insert the Installation CD into your CD-ROM drive.
2. When the Welcome screen appears, click Next to continue. If the CD does not
run automatically, select Start from the Windows Taskbar, then Run, then type D:\
Setup.exe into the Run window’s text entry eld, and then click OK (assuming D:\
is the letter of your CD-ROM drive).
3. After reading the Disclaimer, select the I accept the terms of the Disclaimer
option and click Next to continue.
4. At the Driver Setup screen, if you haven’t already done so, plug the USB cable into
one of your computer’s USB ports, and then click Next.
4 5
ENGLISH
Page 4

5. The drivers will now install
6. In the following Software Setup screen, click Next and follow the on-screen
instructions. At this point you will be asked to install such features as the
Programmable Support for Mouse, Programmable Support for Keyboard and
Programmable Hotkeys (these are important components of the programming
software and are required).
7. If you are asked if Windows can connect to Windows Update to search for
software, choose No, not at this time. Continue to click Next and Finish to accept
the installation.
8. Upon completion of the installation, you have the option to Run Prole Editor,
which will give you a view of the programming environment. If you do not wish to
see the Prole Editor at this point, uncheck the box and click Finish to complete
the installation.
drIvErS aNd SoftwarE INStaLLatIoN for uSErS of wINdowS® vISta aNd 7,
32- aNd 64-bIt
1. With your computer powered on, close down any programs that are currently
running, and then insert the Installation CD into your CD-ROM drive.
2. When the Welcome screen appears, click Next to continue. If the CD does not
run automatically, select Start from the Windows Taskbar, then Run, then type D:\
Setup.exe into the Run window’s text entry eld, and then click OK (assuming D:\
is the letter of your CD-ROM drive).
3. After reading the Disclaimer, select the I accept the terms of the Disclaimer
option and click Next to continue.
4. At the Driver Setup screen, if you haven’t already done so, plug the USB cable
into one of your computer’s USB ports and then click Next.
5. The drivers will now install
6. In the following Software Setup screen, click Next and a pop-up box will appear
asking if you “want to trust software from Saitek.” Click yes, and then click Next
6 7
7. Upon completion of the installation, you have the option to Run Prole Editor,
which will give you a view of the programming environment. If you do not wish to
see the Prole Editor at this point, uncheck the box and click on Finish to complete
the installation.
SEttING uP your backLIt INformatIoN PaNEL (bIP)
In the packaging of your BIP you will nd:
• Setting up your Backlit Information Panel (BIP)
• In the packaging of your BIP you will nd:
• 1 x Backlit Information Panel with 24 tted optical lenses
• Box containing an extra 27 optical lenses
• Manual
• Unirack
• Velcro strips
1. Remove the front fascia: Unscrew the 4 corner nuts and to remove: just pull the
clear fascia away from the cabinet of your BIP (take note the fascia is magnetically
coupled to the BIP).
ENGLISH
Page 5

2. Set up your legends: You will see 24 individual optical lenses displaying various
legends already tted to the BIP; these lenses can be interchanged amongst
themselves or with the extra lenses supplied in the packaging. A good tip here is
to keep similar announcements together, so Eng Fire 1, Eng Fire 2, Eng Fire 3 and
Eng Fire 4 should all be in the same area, as should Gear Up and Gear Down. Its
is recommended you have all the slots covered by Optical Lenses even if they are
not in use.
3. Program the Backlit Information Panel: Now we need to tell the programming
software what optical lenses you have used where, and which colour you want
them to light up.
[Tip: It is a good idea to have the fascia off when programming so that you can see the
Optical Lenses]
ENGLISH
ProGrammING your Pro fLIGHt backLIt INformatIoN PaNEL wItH Smart tEcHNoLoGy
ProGrammING SoftwarE
Introducing Smart Technology Programming Software
Smart Technology (ST) Programming Software is the software supplied to congure
your controller for enhanced functionality. ST delivers a powerful set of features,
allowing you to program your device with the ultimate conguration for total interaction.
Despite a level of sophistication previously unseen in the market, the software remains
simple and intuitive to use.
How to start the Smart Technology software
A. Click on Start, then All Programs, then Smart Technology then Prole Editor.
B. Look on your desktop for the Smart Technology icon, once found, double click and
the Smart Technology software will load.
C. Right click the BIP icon in the applet tray by the clock, in the bottom left hand corner
of your desktop. Then select the Prole Editor.
8 9
Product
The product page is the main screen that appears when the Smart Technology software
is rst opened (as shown above). This screen detects which Pro Flight hardware
you have plugged in and shows it on this screen, if you have no Pro Flight hardware
plugged in the Pro Flight BIP will appear in the screen, this is because they are rst in
the list.
Page 6

ProGrammING
From the programming tab, you can setup your BIP to correspond to the Optical Lenses
you set up manually. Once programmed, these will correspond to the Flight Simulator X
(FSX).
When you click on the programming tab you will be presented with a high resolution
image of the backlit information Panel, which will have no events programmed. You
will also see blocks of different events that correspond to the different Optical Lenses
that can be assigned under the BIP image. Each event can be dragged to any slot. If
an event already occupies that slot, that event will be replaced by the new one and will
return to the event list under the BIP image. Each event has a pre dened colour of
either Red, Amber or Green, these colours can be changed by right clicking the event
and choosing between Red, Amber or Green. Typically a red colour indicates a warning
(such as an engine re!). Green typically indicates an on-state or helpful condition.
Above the BIP you will see a Prole Page icon. The icon will have a blue glow to show
this is the current prole that is being edited.
Multiple BIP Programming
You can plug a second BIP and this will be detected as a second icon Prole Page
above the BIP image. You can interchange between the BIP’s and program them as
you see t. There are no restrictions on event sharing on BIP’s.
Exporting and Importing Programming
The Prole Editor will automatically save any progress even if you close down the
Editor. So, as you update the BIP with events that particular prole is automatically
saved. If you want to have a backup copy of that prole, then click Export
Programming. Give the prole a name and it will be saved in your proles folder.
If you want to import a prole then click Import Programming and browse to the folder
that contains the prole you want to use.
SuPPort
From the support tab, you can access the following features by clicking on them:
dowNLoad drIvErS aNd SoftwarE
Clicking on this link will open your default browser and direct it to the download drivers
and software page.
coNtact uS
Clicking on Contact Us will open your default browser and direct it to the contact
information page; from here you can choose from a list of contacts.
ENGLISH
10 11
Page 7
démarraGE INtroductIoN
Compatible avec Microsoft® Flight Sim™ X, le panneau d’informations rétroéclairé Pro
Flight donne aux utilisateurs des informations claires et ables pendant le vol.
Disposant de 51 « pavés optiques » individuels qui afchent un grand nombre
d’événements et d’informations de vol, les utilisateurs peuvent personnaliser leur
panneau d’informations pour que celui-ci afche les informations de vol appropriées à
24 LIGHT LENSES
For real time in-game feedback
Pour une rétroaction en temps réel dans le jeu
Echtzeitfeedback während des Spiels
Per feedback in tempo reale durante il gioco
Para retroalimentación durante el juego en tiempo real
TRI-STATE LEDS
Choose between red, green & amber
Choisissez entre rouge, vert et ambre
Wählen Sie zwischen rot, grün und gelb
Per scegliere tra rosso, verde e ambra
Escoge entre rojo, verde y ámbar
leur avion ou à leurs préférences personnelles.
Les pavés optiques qui ne sont pas éclairés restent invisibles à l’œil nu, ce qui permet
aux aspirants pilotes d’accéder au bon moment aux informations dont ils ont besoin.
caractérIStIquES :
• Panneau d’informations rétroéclairé
• 24 segments contrôlés de manière individuelle
• Chaque segment possède 3 couleurs dénies par l’utilisateur : Rouge, orange et vert
• 51 verres optiques avec légendes individuelles inclus
• Fonctionne avec Microsoft Flight Simulator X (FSX)
• Puissante interface utilisateur graphique ST
INStaLLatIoN dES PILotES Et du LoGIcIEL Pour LES utILISatEurS dE wINdowS® XP, 32
Et 64 bItS
1. Lorsque votre ordinateur est allumé, fermez tous les programmes en cours de
fonctionnement, puis insérez le CD d’installation dans le lecteur de CD-ROM.
2. Lorsque l’écran de bienvenue apparaît, cliquez sur Next pour poursuivre. Si le CD
ne s’exécute pas automatiquement, sélectionnez Start dans la barre des tâches
Windows, puis Run, puis saisissez D:\Setup.exe dans le champ de saisie de la
fenêtre Run, puis cliquez sur OK (en supposant que D:\ correspond à la lettre de
votre lecteur de CD-ROM).
12 13
fraNÇaIS
Page 8

3. Après avoir lu l’avis d’exclusion de responsabilité, sélectionnez l’option I accept the
terms of the Disclaimer et cliquez sur Next pour poursuivre.
4. Dans l’écran de conguration du pilote, si vous ne l’avez pas encore fait, branchez
le câble USB dans l’un des ports USB de l’ordinateur, puis cliquez sur Next.
5. Pilotes et logiciel installera maintenant
6. Dans l’écran Software Setup suivant, cliquez sur Next et suivez les instructions
à l’écran. À ce stade, il vous sera demandé d’installer des fonctions telles
que Programmable Support for Mouse, Programmable Support for Keyboard
et Programmable Hotkeys (il s’agit de composants importants du logiciel de
programmation et ils sont nécessaires).
7. S’il vous est demandé si Windows peut se connecter à Windows Update pour
rechercher le logiciel, choisissez No, not at this time. Poursuivez pour cliquer
sur Next et Finish pour accepter l’installation jusqu’à ce que l’écran Registration
apparaisse.
8. À la n de l’installation, il vous est proposé l’option Run Prole Editor, qui vous
donnera un aperçu de l’environnement de programmation. Si vous ne souhaitez
pas voir l’éditeur de prol à ce stade, décochez la case et cliquez sur Finish pour
achever l’installation.
INStaLLatIoN dES PILotES Et du LoGIcIEL Pour LES utILISatEurS dE wINdowS® vISta
Et 7, 32 Et 64 bItS
1. Lorsque votre ordinateur est allumé, fermez tous les programmes en cours de
fonctionnement, puis insérez le CD d’installation dans le lecteur de
CD-ROM.
2. Lorsque l’écran de bienvenue apparaît, cliquez sur Next pour poursuivre. Si le CD
ne s’exécute pas automatiquement, sélectionnez Start dans la barre des tâches
Windows, puis Run, puis saisissez D:\Setup.exe dans le champ de saisie de la
fenêtre Run, puis cliquez sur OK (en supposant que D:\
correspond à la lettre de votre lecteur de CD-ROM).
3. Après avoir lu l’avis d’exclusion de responsabilité, sélectionnez l’option I accept the
14 15
terms of the Disclaimer et cliquez sur Next pour poursuivre.
4. Dans l’écran de conguration du pilote, si vous ne l’avez pas encore fait, branchez
le câble USB dans l’un des ports USB de l’ordinateur, puis cliquez
sur Next.
5. Pilotes et logiciel installera maintenant
6. Dans l’écran de démarrage du pilote, cliquez sur Next pour tester le contrôleur.
7. À la n de l’installation, il vous est proposé l’option Run Prole Editor, qui vous
donnera un aperçu de l’environnement de programmation. Si vous ne souhaitez
pas voir l’éditeur de prol à ce stade, décochez la case et cliquez sur Finish pour
achever l’installation.
coNfIGuratIoN dE votrE PaNNEau d’INformatIoNS rétroécLaIré (PIr)
Dans l’emballage de votre PIR, vous allez trouver :
• 1 x panneau d’informations rétroéclairé équipé de 24 verres optiques
• Boîte contenant 27 verres optiques supplémentaires
• CD, contenant le logiciel ST
• Manuel
• Support universel
• Bandes Velcro
1. Retirez le carénage avant Dévissez les 4 écrous des coins et pour l’enlever : tirez
simplement le carénage seul pour le retirer du boîtier du PIR (notez que le carénage est couplé magnétiquement au PIR).
fraNÇaIS
Page 9

2. Congurez vos légendes : Vous allez voir 24 verres optiques individuels afchant
diverses légendes déjà installés sur le PIR ; il est possible d’interchanger ces
verres entre eux ou avec les verres supplémentaires fournis dans l’emballage. Il
est judicieux ici de garder ensemble les annonces similaires, an que « Eng Fire
1 », Eng Fire 2 », Eng Fire 3 » et « Eng Fire 4 » se trouvent tous dans la même
zone, de même que « Gear Up » et « Gear Down ». Il est également recommandé
de recouvrir tous les logements d’un verre optique, même s’ils ne sont pas utilisés.
3. Programmer le panneau d’informations rétroéclairé : Nous devons maintenant in-
diquer au logiciel de programmation quels sont les verres optiques que vous avez
utilisés et de quelle couleur vous souhaitez qu’ils s’allument.
[Conseil : Il est préférable que le capotage soit retiré pendant la programmation an
que vous puissiez voir les verres optiques]
ProGrammatIoN dE votrE PaNNEau d’INformatIoNS rétroécLaIré Pro fLIGHt avEc
LE LoGIcIEL dE ProGrammatIoN Smart tEcHNoLoGy
Comment démarrer le logiciel Smart Technology
Smart Technology (ST) Programming Software is the software supplied to cong-
ure your controller for enhanced functionality. ST delivers a powerful set of features,
allowing you to program your device with the ultimate conguration for total interaction.
Despite a level of sophistication previously unseen in the market, the software remains
simple and intuitive to use.
How to start the Smart Technology software
A. Cliquez sur Démarrer, puis sur Tous les programmes, puis sur Smart Technology,
puis sur Prole Editor (Éditeur de prol).
B. Recherchez sur votre bureau l’icône Smart Technology icon et double-cliquez
dessus une fois que vous l’avez trouvée pour charger le logiciel Smart
Technology.
16 17
C. Cliquez avec le bouton droit sur l’icône du PIR dans la barre des applets à côté de
l’horloge, dans le coin inférieur gauche du bureau. Sélectionnez
ensuite l’éditeur de prol
fraNÇaIS
Page 10

ProduIt
La page produit est l’écran principal qui apparaît lors de la première ouverture du
logiciel Smart Technology (comme illustré ci-dessous). Cet écran détecte quel matériel
Pro Flight vous avez branché et il l’afche sur cet écran ; si aucun matériel Pro Flight
n’est branché, les pédales de gouvernes de direction Pro Flight Rudder Pedals apparaîtront sur l’écran car ce sont les premières dans la liste.
couleur prédénie (rouge, orange ou vert) ; il est possible de modier ces couleurs en
cliquant sur l’événement et en choisissant entre rouge, orange ou vert. En général, une
couleur rouge indique un avertissement (un feu moteur par exemple !). Le vert indique
généralement un état actif ou une condition utile.
Au-dessus du PIR, vous allez voir une icône Page de prol. L’icône brille en bleu pour
indiquer que c’est le prol actuel qui est en cours de modication.
fraNÇaIS
Multiple BIP Programming
You can plug a second BIP and this will be detected as a second icon Prole Page
above the BIP image. You can interchange between the BIP’s and program them as
you see t. There are no restrictions on event sharing on BIP’s.
Exporting and Importing Programming
The Prole Editor will automatically save any progress even if you close down the Editor. So, as you update the BIP with events that particular prole is automatically saved.
If you want to have a backup copy of that prole, then click Export Programming. Give
the prole a name and it will be saved in your proles folder.
If you want to import a prole then click Import Programming and browse to the folder
that contains the prole you want to use.
ProGrammatIoN
Dans l’onglet de programmation, vous pouvez congurer votre PIR pour qu’il corresponde aux verres optiques que vous avez congurés manuellement. Une fois qu’ils seront
programmé, ils correspondront à Flight Simulator X (FSX).
Lorsque vous cliquez sur l’onglet de programmation, une image haute résolution du
panneau d’informations rétroéclairé vous sera présentée, dans laquelle aucun événe-
ment n’est programmé. Vous allez également voir des blocs d’événements différents
qui correspondent aux verres optiques qui peuvent être affectés sous l’image du PIR.
Chaque événement peut être glissé vers un logement quelconque. Si un événement
occupe déjà ce logement, celui-ci sera remplacé par le nouvel événement et retournera
dans la liste des événements sous l’image du PIR. Chaque événement possède une
18 19
aSSIStaNcE
Dans l’onglet Aide, vous pouvez accéder aux fonctions suivantes en cliquant dessus.
téLécHarGEr LES PILotES Et LE LoGIcIEL
Un clic sur ce lien ouvre votre navigateur par défaut et le dirige vers la page de
téléchargement des pilotes et du logiciel.
coNtactEz-NouS
Un clic sur Contact Us ouvre votre navigateur par défaut t le dirige vers la page
d’informations sur les contacts ; là, vous pouvez faire un choix dans une liste de
contacts.
Page 11

ErStE ScHrIttE EINfüHruNG
Die hintergrundbeleuchtete Pro Flight-Informationstafel ist mit Microsoft® Flight Sim™
X kompatibel und sorgt dafür, dass Benutzer klare und authentische Informationen
während des Flugs erhalten.
Die Informationstafel ist mit 51 optischen Feldern ausgestattet, die zahlreiche Ereignisse und Informationen während des Flugs anzeigen. Benutzer können ihre Infor-
24 LIGHT LENSES
For real time in-game feedback
Pour une rétroaction en temps réel dans le jeu
Echtzeitfeedback während des Spiels
Per feedback in tempo reale durante il gioco
Para retroalimentación durante el juego en tiempo real
TRI-STATE LEDS
Choose between red, green & amber
Choisissez entre rouge, vert et ambre
Wählen Sie zwischen rot, grün und gelb
Per scegliere tra rosso, verde e ambra
Escoge entre rojo, verde y ámbar
mationstafel individuell anpassen, um ugzeugspezische bzw. bevorzugte Informationen anzuzeigen.
Optische Felder, die nicht beleuchtet sind, bleiben dem bloßen Auge verborgen, sodass
aufstrebende Piloten genau zum richtigen Zeitpunkt auf die Informationen zugreifen
können, die sie brauchen.
fEaturES:
• Hintergrundbeleuchtete Informationstafel
• 24 einzeln gesteuerte Segmente
• Jedes Segment hat drei benutzerdenierte Farben: Rot, Orange und Grün
• inklusive 51 optische Linsen mit individueller Beschriftung
• Einsetzbar mit Microsoft Flight Simulator X (FSX)
• Leistungsstarke grasche ST-Benutzeroberäche
trEIbEr- uNd SoftwarEINStaLLatIoN für bENutzEr voN wINdowS® XP 32-bIt uNd
64-bIt
1. Schließen Sie alle Programme, die auf Ihrem eingeschalteten Computer
ausgeführt werden, und legen Sie die Installations-CD in Ihr CD-ROM-Laufwerk
ein.
2. 2.Klicken Sie, wenn der Willkommensbildschirm angezeigt wird, auf Next, um
fortzufahren. Wenn die CD nicht automatisch ausgeführt wird, wählen Sie Start
auf der Windows-Taskleiste und dann Run und geben Sie D:\Setup.exe in
20 21
dEutScH
Page 12

das Texteingabefeld des Fensters Run ein. Klicken Sie anschließend auf OK
(vorausgesetzt, D:\ ist der Buchstabe Ihres CD-ROM-Laufwerks).
3. Wählen Sie, nachdem Sie den Garantieausschluss gelesen haben, die Option I
accept the terms of the Disclaimer und klicken Sie auf Next, um fortzufahren.
4. Wenn der Bildschirm für das Treiber-Setup angezeigt wird, schließen Sie das USBKable an einen USB-Anschluss Ihres Computers an, sollten Sie das noch nicht
getan haben, und klicken Sie dann auf Next.
5. Treiber – und softwareinstallation fährt jetzt fort
6. Klicken Sie auf dem folgenden Software-Setupbildschirm auf Next und befolgen
Sie die Bildschirmanweisungen. An diesem Punkt werden Sie aufgefordert,
Features wie Programmable Support for Mouse, Programmable Support for
Keyboard und Programmable Hotkeys zu installieren (dies sind wichtige
Komponenten der Programmiersoftware, die notwendig sind).
7. Wenn die Option Windows can connect to Windows Update to search for software
angezeigt wird, wählen Sie No, not at this time. Klicken Sie weiter auf Next und
Finish, um die Installation zu akzeptieren, bis der Bildschirm Registration angezeigt
wird.
8. Nach Abschluss der Installation erhalten Sie die Option Run Prole Editor, die
Ihnen die Programmierumgebung anzeigt. Wenn Sie den Proleditor zu diesem
Zeitpunkt nicht anzeigen möchten, deaktivieren Sie das Kontrollkästchen und
klicken Sie auf Finish, um die Installation abzuschließen.
trEIbEr- uNd SoftwarEINStaLLatIoN für bENutzEr voN wINdowS® vISta uNd 7 32bIt uNd 64-bIt
1. Schließen Sie alle Programme, die auf Ihrem eingeschalteten Computer ausge-
führt werden, und legen Sie die Installations-CD in Ihr CD-ROM-Laufwerk ein.
2. Klicken Sie, wenn der Willkommensbildschirm angezeigt wird auf Next , um fortzufahren. Wenn die CD nicht automatisch ausgeführt wird, wählen Sie Start auf der
Windows-Taskleiste und dann Run und geben Sie D:\Setup.exe in das Texteingabefeld des Fensters Run ein. Klicken Sie anschließend auf OK (vorausgesetzt,
22 23
D:\ ist der Buchstabe Ihre CD-ROM-Laufwerks).
3. Wählen Sie, nachdem Sie den Garantieausschluss gelesen haben, die Option I
accept the terms of the Disclaimer und klicken Sie auf Next , um fortzufahren.
4. Wenn der Bildschirm für das Treiber-Setup angezeigt wird, schließen Sie das USBKable an einen USB-Anschluss Ihres Computers an, sollten Sie das noch nicht
getan haben, und klicken Sie dann auf Next.
5. Treiber – und softwareinstallation fährt jetzt fort
6. Wenn der Bildschirm für das Treiber-Setup angezeigt wird, klicken Sie auf Next,
um Ihren Controller zu testen.
7. Nach Abschluss der Installation erhalten Sie die Option Run Prole Editor, die
Ihnen die Programmierumgebung anzeigt. Wenn Sie den Proleditor zu diesem
Zeitpunkt nicht anzeigen möchten, deaktivieren Sie das Kontrollkästchen und
klicken Sie auf
EINrEIcHtEN IHrEr HINtErGruNdbELEucHtEtEN INformatIoNStafEL
Verpackungsinhalt der hintergrundbeleuchteten Informationstafel:
• 1 x hintergrundbeleuchtete Informationstafel mit 24 angepassten optischen Linsen
• Behälter mit weiteren 27 optischen Linsen
• CD mit ST-Software
• Benutzerhandbuch
• Unirack
• Klettverschluss
1. Entfernen Sie die Vorderabdeckung: Schrauben Sie die vier Eckmuttern und
ziehen Sie die transparente Abdeckung vom Schrank Ihrer hintergrundbeleuchteten Informationstafel ab (beachten Sie, dass die Abdeckung magnetisch mit
der Informationstafel verbunden ist).
dEutScH
Page 13

2. Richten Sie Ihre Beschriftungen ein: Sie können 24 individuelle optische Linsen
sehen, für die bereits verschiedene Beschriftungen an der hintergrundbeleuchteten
Informationstafelangebracht sind. Diese Linsen können untereinander vertauscht
oder mit den zusätzlichen Linsen, die im Lieferumfang enthalten waren, ausge-
tauscht werden. Wir empfehlen ähnliche Beschriftungen nebeneinander zu verwenden. Eng Fire 1, Eng Fire 2, Eng Fire 3 und Eng Fire 4 sollten sich deshalb alle
in dem gleichen Bereich benden ebenso wie Gear Up (Hochschalten) und Gear
Down (Herunterschalten). Außerdem ist zu empfehlen, alle Plätze mit optischen
Linsen zu versehen, selbst wenn sie nicht verwendet werden.
3. Programmieren Sie die hintergrundbeleuchtete Informationstafel: Jetzt müssen
Sie der Programmiersoftware mitteilen, welche optischen Linsen Sie wo verwendet
haben und in welcher Farbe sie aueuchten sollen.
[Tipp: Nehmen Sie die Abdeckung ab, wenn Sie die Programmierung vornehmen,
damit Sie die optischen Linsen sehen können.]
• Starten der Smart Technology-Software
A. Klicken Sie auf Start, Alle Programme, Smart Technology, Prole Editor.
B. Suchen Sie auf Ihrem Desktop nach dem Symbol Smart Technology und
doppelklicken Sie darauf. Die Smart Technology-Software wird geladen.
C. Klicken Sie mit der rechten Maustaste auf das BIP-Symbol in der Applet-Taskleiste
neben der Uhr unten links auf Ihrem Desktop. Wählen Sie dann den Prole Editor aus.
dEutScH
ProGrammIErEN dEr HINtErGruNdbELEucHtEtEN Pro fLIGHt-INformatIoNStafEL mIt
Smart tEcHNoLoGy ProGrammING SoftwarE
Einführung in Smart Technology Programming Software
Smart Technology (ST) Programming Software ist die Software, die bereitgestellt
wird, damit Sie Ihren Controller für erweiterte Funktionen kongurieren können. ST
bietet leistungsstarke Features zur Programmierung des Geräts mit der ultimativen
Konguration für absolute Interaktion. Trotz der auf dem Markt einmaligen Technologie
bleibt die Software einfach und intuitiv.
24 25
Produkt
Die Produktseite ist der Hauptbildschirm, der angezeigt wird, wenn die Smart Technol-
ogy Software das erste Mal geöffnet wird (wie oben dargestellt). Diese Seite erkennt,
welche Pro Flight-Hardware angeschlossen ist und zeigt dies auf dem Bildschirm an.
Wenn keine Pro Flight-Hardware angeschlossen ist, werden die Pro Flight-Ruderpedale
auf dem Bildschirm angezeigt, da sie als Erstes auf der Liste stehen.
Page 14

ProGrammIErEN
Auf der Registerkarte „Programming“ können Sie Ihre hintergrundbeleuchtete Informationstafel so einrichten, dass sie mit den optischen Linsen korrespondiert, die Sie
manuell eingerichtet haben. Sobald sie programmiert sind, korrespondieren sie mit dem
Flight Simulator X (FSX).
Wenn Sie auf die Registerkarte „Programming“ klicken, wird ein hochaufgelöstes Bild
der hintergrundbeleuchteten Informationstafel angezeigt, auf der keine Ereignisse
programmiert sind. Außerdem werden Gruppen von verschiedenen Ereignissen
angezeigt, die mit den verschiedenen optischen Linsen übereinstimmen, die auf dem
Bild der hintergrundbeleuchteten Informationstafel zugewiesen werden können. Jedes
Ereignis kann an einen beliebigen Platz verschoben werden. Wenn ein Ereignis bereits
an einem Platz vorhanden ist, wird es von dem neuen Ereignis ersetzt und wieder in
die Ereignisliste auf dem Bild der hintergrundbeleuchteten Informationstafel verscho-
ben. Jedes Ereignis besitzt eine der vordenierten Farbe Rot, Gelb oder Grün. Diese
Farben können geändert werden, indem Sie mit der rechten Maustaste auf das Ereignis
klicken und zwischen den drei farben auswählen. Warnungen werden in der Regel rot
angezeigt (z. B. wenn das Triebwerk brennt). Grün verweist normalerweise auf einen
aktiven Zustand bzw. eine hilfreiche Bedingung.
Über der hintergrundbeleuchteten Informationstafel wird das Symbol „Prole Page“
(Prolseite) angezeigt. Das Symbol schimmert blau, um das derzeit bearbeitete Prol
anzuzeigen.
Programmierung mehrerer hintergrundbeleuchteter Informationstafeln
Sie können eine zweite hintergrundbeleuchtete Informationstafel anschließen. Dies wird
in Form eines zweiten Prolseitensymbols über dem Bild der hintergrundbeleuchteten
Informationstafel angezeigt. Sie können zwischen den hintergrundbeleuchteten
Informationstafeln wechseln und sie je nach Bedarf programmieren. Es gibt keine
Einschränkungen für das Teilen von Ereignissen auf hintergrundbeleuchteten Informa-
tionstafeln.
Exportieren und Importierung von Programmierungen
Der Prole Editor speichert jeden Fortschritt automatisch, selbst wenn Sie den Prole
Editor schließen. Wenn Sie die hintergrundbeleuchtete Informationstafel mit den
Ereignissen aktualisieren, wird das spezische Prol somit automatisch gespeichert.
Wenn Sie eine Sicherungskopie dieses Prols haben möchten, klicken Sie auf Export
Programming (Programmierung exportieren). Geben Sie dem Prol einen Namen. Es
wird dann in ihrem Prolordner gespeichert.Wenn Sie ein Prol importieren möchten,
klicken Sie auf Import Programming (Programmierung importieren) und navigieren Sie
zu dem Ordner, in dem sich das gewünschte Prol bendet.
SuPPort
Über die Registerkarte „Support“ können Sie per Mausklick auf die folgenden Features
zugreifen:
dowNLoad drIvErS aNd SoftwarE
Wenn Sie auf diesen Link klicken, wird die Seite zum Herunterladen von Treibern und
Software in Ihrem Standardbrowser geöffnet.
coNtact uS
Klicken Sie auf Contact Us, um die Seite mit den Kontaktangaben in Ihrem
Standardbrowser zu öffnen. Auf dieser Seite können Sie Ihren Kontakt aus einer
Kontaktliste auswählen.
dEutScH
26 27
Page 15

avvIo INtroduzIoNE
Compatibile con Microsoft® Flight Sim™ X, il pannello informazioni retroilluminato
fornisce informazioni chiare e reali agli utenti durante il volo.
Alimentato con 51 ‘Riquadri ottici’ che mostrano un’ampia gamma di eventi e informazi-
oni di volo, gli utenti possono personalizzare il pannello per visualizzare informazioni
signicative sul proprio velivolo o sulle preferenze personali.
24 LIGHT LENSES
For real time in-game feedback
Pour une rétroaction en temps réel dans le jeu
Echtzeitfeedback während des Spiels
Per feedback in tempo reale durante il gioco
Para retroalimentación durante el juego en tiempo real
TRI-STATE LEDS
Choose between red, green & amber
Choisissez entre rouge, vert et ambre
Wählen Sie zwischen rot, grün und gelb
Per scegliere tra rosso, verde e ambra
Escoge entre rojo, verde y ámbar
I riquadri ottici non illuminati rimangono invisibili ad occhio nudo, consentendo agli
aspiranti piloti di accedere alle informazioni di cui hanno bisogno, quando ne hanno
bisogno.
carattErIStIcHE:
• Pannello informazioni retroilluminato
• 24 segmenti controllati individualmente
• Ciascun segmento è dotato di 3 colori deniti dall’utente: Rosso, Arancio e Verde
• 51 lenti ottiche con didascalie singole incluse
• Funziona con Microsoft Flight Simulator X (FSX)
• Potente interfaccia graca utente ST
INStaLLazIoNE dEI drIvEr E dEL SoftwarE PEr utENtI dI wINdowS® XP a 32 E a 64 bIt
1. Con il computer acceso, chiudere tutti i programmi in esecuzione e inserire il CD di
installazione nell’unità CD-ROM.
2. Non appena viene visualizzata la schermata di benvenuto, fare clic su Next per
proseguire. Se il CD non si avvia automaticamente, selezionare Start dalla barra
degli strumenti di Windows, quindi Run, e digitare D:\Setup.exe, nella casella di
immissione testo Run; quindi, fare clic su OK (si presuppone che D:\ sia la lettera
corrispondente all’unità CD-ROM in uso).
28 29
3. Dopo aver letto la dichiarazione di non responsabilità, selezionare l’opzione
ItaLIaNo
Page 16

I accept the terms of the Disclaimer e fare clic su Next per proseguire.5. Alla
schermata di Installazione driver, se non è stato già fatto, collegare il cavo USB in
una delle porte USB del computer, quindi fare clic su Next.
4. Alla schermata Installazione driver, fare clic su Next per provare il controller.
5. Installazione dei driver del software ora continuerà
6. Nella schermata di Installazione software seguente, fare clic su Next e seguire
le istruzioni a schermo. A questo punto, sarà richiesta l’installazione di funzioni
come Programmable Support for Mouse, Programmable Support for Keyboard
e Programmable Hotkeys (si tratta di componenti importanti del software di
programmazione, e sono richiesti).
7. Alla domanda se Windows è in grado di connettersi a Windows Update per
cercare il software, scegliere No, not at this time. Proseguire facendo clic su Next
e Finish per accettare l’installazione no a che non viene visualizzata la schermata
Registration.
8. Al completamento dell’installazione, si dispone dell’opzione Run Prole Editor,
che fornisce una vista dell’ambiente di programmazione. Se non si desidera
visualizzare l’editor del prolo a questo punto, deselezionare la casella e fare clic
su Finish per completare l’installazione.
cept the terms of the Disclaimer e fare clic su Next per proseguire.
4. Alla schermata Installazione driver, se non è stato già fatto, collegare il cavo USB
in una delle porte USB del computer, quindi fare clic su Next.
5. Installazione dei driver del software ora continuerà
6. Alla schermata Installazione driver, fare clic su Next per provare il controller
7. Al completamento dell’installazione, si dispone dell’opzione Run Prole Editor, che
fornisce una vista dell’ambiente di programmazione. Se non si desidera visualizzare l’editor del prolo a questo punto, deselezionare la casella e fare clic su Finish
per completare l’installazione.
ImPoStazIoNE dEL bIP (backLIt INformatIoN PaNEL)
Contenuto della confezione del BIP:
• 1 x pannello informazioni retroilluminato con 24 lenti ottiche su misura
• Una scatola contenente 27 lenti ottiche supplementari
• CD, contenente il software ST
• Manuale
• Unirack
• Fascette di velcro
ItaLIaNo
INStaLLazIoNE dEI drIvEr E dEL SoftwarE PEr utENtI dI wINdowS® vISta E 7, a 32 E a
64 bIt
1. Con il computer acceso, chiudere tutti i programmi in esecuzione e inserire il CD di
installazione nell’unità CD-ROM.
2. Non appena viene visualizzata la schermata di benvenuto, fare clic su Next per
proseguire. Se il CD non si avvia automaticamente, selezionare Start dalla barra
degli strumenti di Windows, quindi Run, e digitare D:\Setup.exe, nella casella di
immissione testo Run; quindi, fare clic su OK (si presuppone che D:\ sia la lettera
corrispondente all’unità CD-ROM in uso).
3. Dopo aver letto la dichiarazione di non responsabilità, selezionare l’opzione I ac-
30 31
1. Rimuovere la fascia anteriore: Svitare i 4 dadi agli angoli e rimuovere. Basta
togliere la fascia dal contenitore del BIP (notare che la fascia è ssata al BIP
magneticamente).
Page 17

2. Congurazione delle didascalie: Si vedranno 24 lenti ottiche che visualizzano
diverse didascalie già pronte per il BIP; queste lenti possono essere scambiate tra
loro o con le lenti aggiuntive contenute nella confezione. Si consiglia di mettere
insieme gli avvisi simili, in modo che Eng Fire 1, Eng Fire 2, Eng Fire 3 ed Eng Fire
4 si trovino tutti nella stessa area, come anche Gear Up e Gear Down. Si raccomanda di avere tutti gli slot coperti dalle lenti ottiche, anche se non in uso.
3. Programmazione del BIP: Ora passeremo alla programmazione del software, al
ne di assegnare alle lenti ottiche la posizione e il colore di cui si desidera illuminarle.
[Suggerimento: è una buona idea programmare senza la fascia, in modo che si pos-
sano vedere le lenti ottiche]
ProGrammazIoNE dEL bIP coN IL SoftwarE Smart tEcHNoLoGy
Introduzione a Smart Technology Programming Software
Smart Technology (ST) Programming Software è il software fornito per congurare il
controller e avere una funzionalità ancora migliorata. ST fornisce un gruppo di funzioni
straordinarie, consentendo di programmare il proprio dispositivo con la congurazione
più avanzata, per un’interazione totale. Il software presenta un livello di rafnatezza
mai visto sul mercato, ma nonostante questo rimane semplice e intuitivo da usare.
Come iniziare con il software Smart Techonology
A. Fare clic su Start, quindi su Tutti i programmi, Smart Technology e su Prole Editor.
B. Identicare l’icona Smart Technology sul desktop, quindi fare doppio clic su di essa
per caricare il software Smart Technology.
C. Fare clic con il pulsante destro sull’icona BIP nella barra applet accanto all’orologio,
nell’angolo in basso a sinistra del desktop. Quindi selezionare Prole Editor.
Prodotto
La pagina di prodotto è la pagina principale visualizzata non appena viene aperto per
la prima volta il software Smart Technology (come illustrato sopra). Questa schermata
rileva quale hardware Pro Flight è collegato e lo fa vedere. Se non è presente alcun
hardware Pro Flight, verrà visualizzata la pedaliera Pro Flight Rudder Pedals, poiché è
la prima dell’elenco.
ItaLIaNo
32 33
Page 18

ProGrammING
Dalla scheda programmazione, è possibile impostare il BIP perché corrisponda alle lenti
ottiche congurate manualmente. Una volta programmate, corrisponderanno al Flight
Simulator X (FSX).
Facendo clic sulla scheda di programmazione, verrà presentata un’immagine ad alta
risoluzione del pannello informazioni retroilluminato, senza eventi programmati. Ver-
ranno visualizzati dei blocchi di diversi eventi che corrispondono a lenti ottiche diverse,
che è possibile assegnare in base all’immagine BIP. Ciascun evento può essere
trascinato su uno slot. Se un evento occupa già uno slot, è possibile sostituirlo con
uno nuovo e tornare all’elenco eventi in base all’immagine BIP. Ciascun evento ha un
colore predenito (rosso, ambra o verde). I colori possono essere modicati facendo clic
con il pulsante destro sull’evento e scegliendo il colore tra quelli disponibili. Tipica-
mente, il rosso indica pericolo (come un incendio al motore) Il verde invece indica una
condizione stazionaria o un’utilità.
Sopra il BIP è possibile vedere un’icona Prole Page. L’icona presenta un alone blu per
mostrare che questo è il prolo corrente modicato.
Programmazione multipla del BIP
È possibile collegare un secondo BIP, che verrà riconosciuto come seconda icona
Prole Page sull’immagine del BIP. In questo modo, è possibile scambiare i BIP e
programmarli a piacimento. Non esiste alcuna restrizione in merito alla condivisione
eventi sui BIP
Esporta e Importa programmazione
Il Prole Editor salva automaticamente qualsiasi progresso anche se è chiuso. In
questo modo, non appena il BIP viene aggiornato con degli eventi, quel particolare pro-
lo viene salvato automaticamente. Se si desidera conservare una copia di backup di
quel prolo, basta fare clic su Export programming. Nominare un prolo e sarà salvato
nella cartella dei proli.
Se si desidera importare un prolo, fare clic su Import Programming e spostarsi nella
cartella che contiene il prolo da utilizzare.
34 35
SuPPorto
Dalla scheda supporto, è possibile accedere alle seguenti funzionalità, facendo clic su
di esse:
Download dei driver e del software
Facendo clic su questo link si aprirà il browser predenito, che porterà alla pagina di
download dei driver e del software.
coNtattI
Facendo clic su Contact us si aprirà il browser predenito, che porterà alla pagina
informazioni sui contatti; da qui è possibile scegliere da un elenco di contatti.
ItaLIaNo
Page 19

PrImEroS PaSoS
24 LIGHT LENSES
For real time in-game feedback
Pour une rétroaction en temps réel dans le jeu
Echtzeitfeedback während des Spiels
Per feedback in tempo reale durante il gioco
Para retroalimentación durante el juego en tiempo real
INtroduccIóN
Compatible con Flight Sim™ X de Microsoft® , el panel informativo retroiluminado de
Pro Flight ofrece a los usuarios información clara y realista durante el vuelo.
Compuesto por 51 lentes ópticas individuales que muestran una gran variedad de
eventos e información durante el vuelo, los usuarios pueden personalizar su panel
informativo para visualizar datos de vuelo relevantes para su avión o preferencias
TRI-STATE LEDS
Choose between red, green & amber
Choisissez entre rouge, vert et ambre
Wählen Sie zwischen rot, grün und gelb
Per scegliere tra rosso, verde e ambra
Escoge entre rojo, verde y ámbar
personales.
Los lentes ópticas sin iluminar permanecen invisibles a simple vista, permitiendo así
que los aspirantes a pilotos puedan acceder a la información que necesiten cuando la
necesiten.
caractEríStIcaS:
• Panel informativo retroiluminado
• 24 segmentos controlados de manera individual
• Cada segmento tiene 3 colores denidos por el usuario: Rojo, naranja y verde
• 51 lentes ópticas con leyendas individuales incluidas
• Funciona con Flight Simulator X (FSX) de Microsoft
• Potente interfaz gráca de usuario ST
INStaLacIóN dE drIvErS y SoftwarE Para uSuarIoS dE wINdowS® XP, 32- y 64-bIt
1. Con el ordenador encendido, cierre todos los programas que se estén ejecutando,
y luego inserte el CD de instalación en la unidad de CD-ROM.
2. Cuando aparezca la pantalla Welcome, haga clic en Next para continuar. Si el
CD no se ejecuta automáticamente, seleccione Inicio en la barra de tareas de
Windows, después Ejecutar, luego escriba D:\Setup.exe en el campo de entrada
de texto de la ventana Ejecutar y a continuación haga clic en OK (suponiendo que
D:\ sea la letra de la unidad de CD-ROM).
36 37
ESPañoL
Page 20

3. Después de leer la cláusula de exención de responsabilidad (Disclaimer) seleccione la opción I accept the terms of the Disclaimer y haga clic en Next para
continuar.
4. En la pantalla Driver Setup, si todavía no lo ha hecho, conecte el cable USB en
uno de los puertos USB de su ordenador, y luego haga clic en Next.
5. Instalacion de drivers y software ahora continuará
6. En la pantalla Software Setup siguiente, haga clic en Next y siga las instrucciones
en pantalla. Llegados a este punto, se le pedirá que instale características como
Programmable Support for Mouse (soporte programable para ratón), Program-
mable Support for Keyboard (soporte programable para teclado) y Programmable
Hotkeys (teclas programables de acceso rápido).
7. Si se le pregunta si Windows puede conectarse a Windows Update para buscar
software, elija Esta vez no. Continúe haciendo clic en Next y Finish para aceptar la
instalación hasta que aparezca la pantalla Registration.
8. Tras completar la instalación, tiene la opción de ejecutar Prole Editor, el cual le
introducirá al entorno de programación. Si no desea ejecutar Prole Editor en ese
momento, desmarque la casilla y haga clic en Finish para completar la instalación.
INStaLacIóN dE drIvErS y SoftwarE Para uSuarIoS dE wINdowS® vISta y 7, 32- y
64-bIt
4. En la pantalla Driver Setup, si todavía no lo ha hecho, conecte el cable USB en
uno de los puertos USB de su ordenador, y luego haga clic en Next.
5. Instalacion de drivers y software ahora continuará
6. En la pantalla Driver Setup, haga clic en Next para probar su mando.
7. Tras completar la instalación, tiene la opción de ejecutar Prole Editor, el cual le
introducirá al entorno de programación. Si no desea ejecutar Prole Editor en ese
momento, desmarque la casilla y haga clic en Finish para completar la instalación.
INStaLar Su PaNEL INformatIvo rEtroaLImENtado (PIr)
El paquete de su PIR contiene:
• 1 panel informativo retroalimentado con 24 lentes ópticas integradas
• Caja con 27 lentes ópticas adicionales
• CD con el software ST
• Manual
• Unirack
• Cintas de velcro
ESPañoL
1. Con el ordenador encendido, cierre todos los programas que se estén ejecutando,
y luego inserte el CD de instalación en la unidad de CD-ROM.
2. Cuando aparezca la pantalla Welcome, haga clic en Next para continuar. Si el
CD no se ejecuta automáticamente, seleccione Inicio en la barra de tareas de
Windows, después Ejecutar, luego escriba D:\Setup.exe en el campo de entrada
de texto de la ventana Ejecutar y a continuación haga clic en OK (suponiendo que
D:\ sea la letra de la unidad de CD-ROM).
3. Después de leer la cláusula de exención de responsabilidad (Disclaimer), seleccione la opción I accept the terms of the Disclaimer y haga clic en Next para
continuar.
38 39
1. Retirar el tablero frontal: Desatornille las 4 tuercas de las esquinas y para retirar el
tablero: simplemente tire del tablero transparente separándolo de la unidad de su
PIR (tenga en cuenta que el tablero está unido magnéticamente al PIR).
Page 21

2. Congure sus leyendas: Verá que hay 24 lentes ópticas individuales integradas
en el PIR que muestran varias leyendas; estas lentes se pueden intercambiar
entre sí o por las lentes adicionales incluidas en el embalaje. Se aconseja colocar
juntas informaciones similares, de modo que, por ejemplo, Eng Fire 1, Eng Fire 2,
Eng Fire 3 y Eng Fire 4 estén en la misma zona, igual que Gear Up y Gear Down.
Se recomienda cubrir todas las ranuras con lentes ópticas, aunque no se utilicen.
3. Programar el panel informativo retroalimentado: Ahora debemos decirle al soft-
ware de programación qué lentes ópticas ha utilizado, dónde y de qué color quiere
que se iluminen.
[Consejo: Resulta buena idea apagar el tablero mientras se esté programando, de
modo que pueda ver las lentes ópticas]
ProGramar Su maNdo Pro fLIGHt coN EL SoftwarE dE ProGramacIóN Smart tEcHNoLoGy
Introducción al software de programación Smart Technology (ST)
El software de programación Smart Technology (ST) es el software que le ha sido
proporcionado para que congure su mando y obtenga una funcionalidad mejorada.
ST ofrece un gran número de características, permitiéndole programar su dispositivo
con la mejor de las conguraciones para que disfrute de una interacción total. Pese a
presentar un nivel de sosticación nunca antes visto en el mercado, el software es al
mismo tiempo sencillo y su uso resulta intuitivo.
Cómo iniciar el software Smart Technology
A. Haga clic en Inicio, luego en Todos los programas, después en Smart Technology y
a continuación en Prole Editor.
B. Busque en su escritorio el icono de Smart Technology. Cuando lo encuentre haga
doble clic y se cargará el software de Smart Technology.
C. Haga clic con el botón derecho del ratón sobre el icono del panel informativo
retroalimentado que hay en la bandeja de sistema junto al reloj, en el extremo inferior
izquierdo del escritorio. A continuación seleccione Prole Editor.
40 41
Producto
La página del producto es la ventana principal que aparece cuando el software Smart
Technology se abre por primera vez (como se muestra arriba). La pantalla detecta qué
hardware de Pro Flight ha conectado y lo muestra en esta pantalla, si no ha conectado
ningún hardware de Pro Flight, aparecerán en pantalla los pedales Pro Flight Rudder
Pedals, ya que será el primer dispositivo de la lista.
ESPañoL
Page 22

ProGramacIóN
Desde la pestaña Programming puede instalar su PIR para que se corresponda con las
lentes ópticas que ha congurado manualmente. Después de la programación, se corresponderán con el Flight Simulator X (FSX).
Cuando haga clic en la pestaña Programming, se mostrará una imagen en alta
resolución del panel de información retroalimentado, el cual no tendrá ningún evento
programado. Debajo de la imagen del PIR, también verá bloques de eventos diferentes
que corresponden a las diferentes lentes ópticas que se pueden asignar. Cada evento
se puede arrastrar a cualquiera de las ranuras. Si la ranura ya está ocupada por un
evento, dicho evento puede sustituirse por el nuevo y regresar a la lista de eventos
situada debajo de la imagen del PIR. Cada evento tiene un color predenido que
puede ser rojo, naranja o verde, los cuales pueden cambiar haciendo clic con el botón
derecho del ratón sobre el evento y escogiendo entre rojo, naranja o verde. Normalmente el color rojo indica advertencia (como “fuego en el motor”). El verde suele
indicar un estado activo o una información útil.
Encima del PIR verá un icono de Prole Page (página de perles). Este icono tendrá
un resplandor azul para mostrar que es el perl actual que está siendo editado.
Si desea importar un perl, haga clic en Import Programming y seleccione la carpeta
que contiene el perl que desea utilizar.
ayuda
Desde la pestaña Support, puede acceder a las siguientes características haciendo clic
sobre ellas:
dowNLoad drIvErS aNd SoftwarE (dEScarGar drIvErS y SoftwarE)
Al hacer clic en este enlace se abrirá su navegador por defecto y le dirigirá a la página
de descarga de drivers y software.
coNtact uS (coNtactE coN NoSotroS)
Al hacer clic en Contact Us se abrirá su navegador por defecto y le dirigirá a la página
de información de contacto; una vez allí, podrá elegir entre una lista de contactos.
Programación de varios PIR
Puede conectar un segundo PIR y este será detectado como un segundo icono de
Prole Page encima de la imagen del PIR. Puede cambiar de un PIR a otro y programarlos según le convenga. No existe ninguna restricción relativa a los eventos compartidos entre los PIR.
Exportar e importar programaciones
El Prole Editor guardará automáticamente cualquier progreso, aunque usted cierre el
Editor. Así, cuando actualice el PIR con eventos, ese perl en particular se guardará
automáticamente. Si desea tener una copia de seguridad de dicho perl, haga clic en
Export Programming. Asigne un nombre al perl y este se guardará en la carpeta de
perles.
42 43
ESPañoL
Page 23

 Loading...