

Page 1
Core CM™ Cart
Assembly Guide (v.3.1)
Thank you for choosing TrippNT for your storage and organization needs. Please check to make sure you received your cart in
good shape and all the necessary components are included. This
guide will show you step by step how to assemble your
Core CM™ Cart.
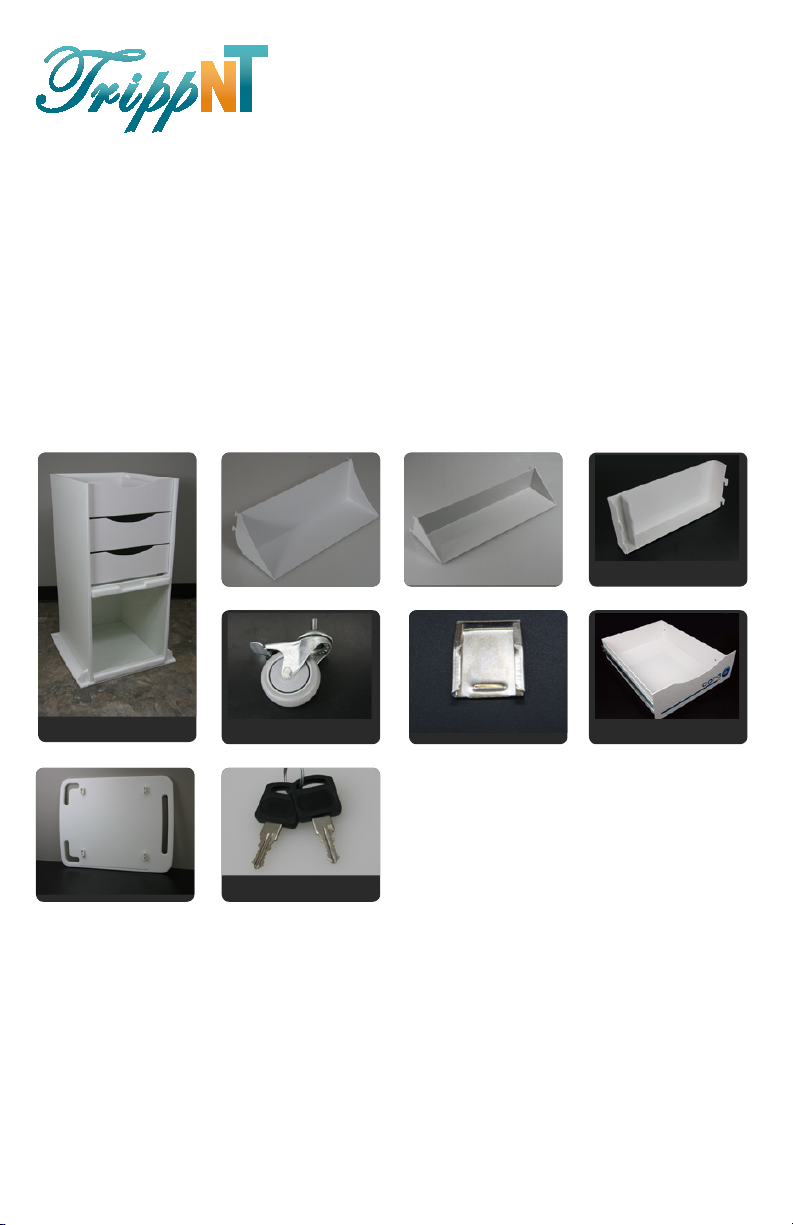
Included Components
x4
Large Side Shelf
B.
x4
Cart BodyA. Caster w/ Brake
x1
H.
Cart Top
E.
x1
I.
Set of 2 keys
x6
Small Side Shelf
C.
x4
Clips
F.
x1
Tool Holder
D.
x1
Top Drawer
G.
If you need any assistance please call TrippNT at 1.800.874.7768 or email us at
[email protected].
Page 2
Core CM™ Cart
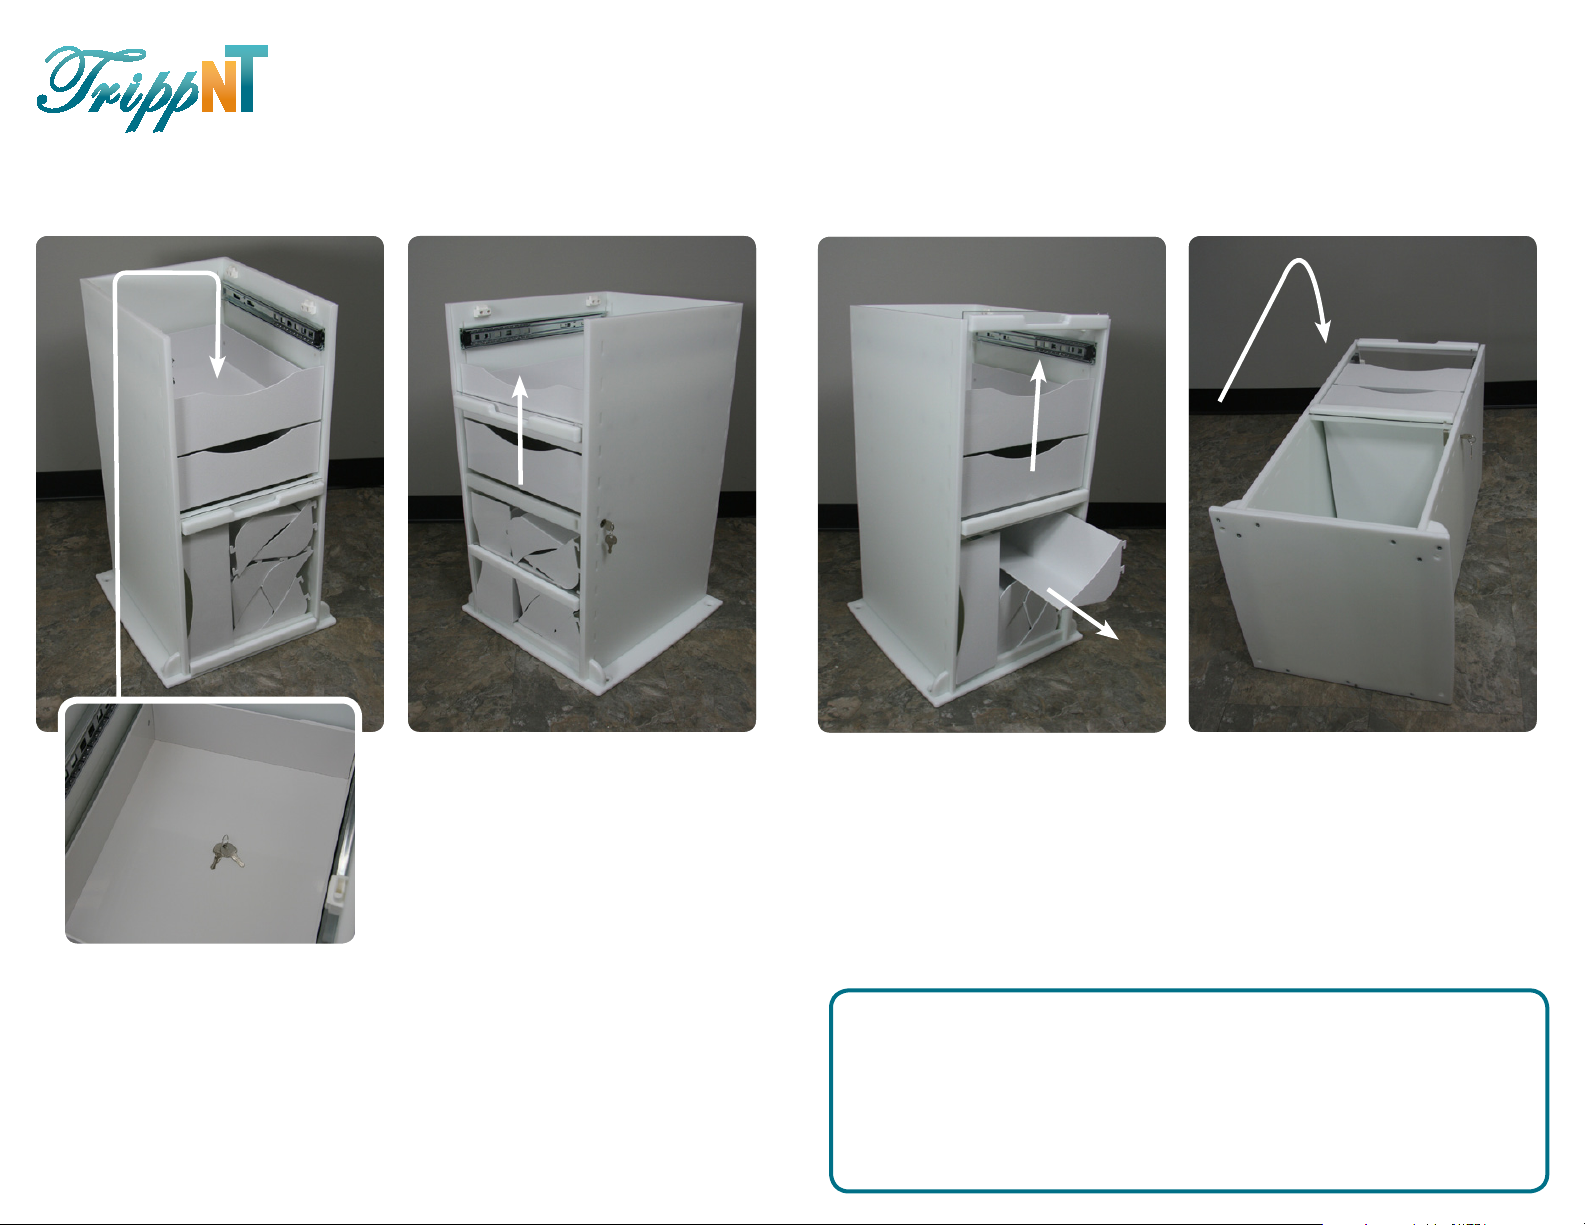
Unpacking the Cart
1
A
2
A
3
4
Front of
Cart (A)
I
Bottom of
Cart (A)
Unlock sliding door with keys (I).
I
Slide door up.
Unpack components and inspect
with the included component
list to ensure all items have been
included.
Gently lay cart body (A) on its
back with the drawers and door
facing up towards the ceiling.
Locate the keys (I) taped to the
second drawer.
Care Instructions for Your Cart
This product can be cleaned with a solution of water or with a mild organic
solvent. Use of strong solvents is not recommended.
Accessories and Replacement Parts
A variety of accessories and replacement parts are available at:
TrippNT.com/CartAccessories or from your normal TrippNT Distributor
Page 3
Core CM™ Cart
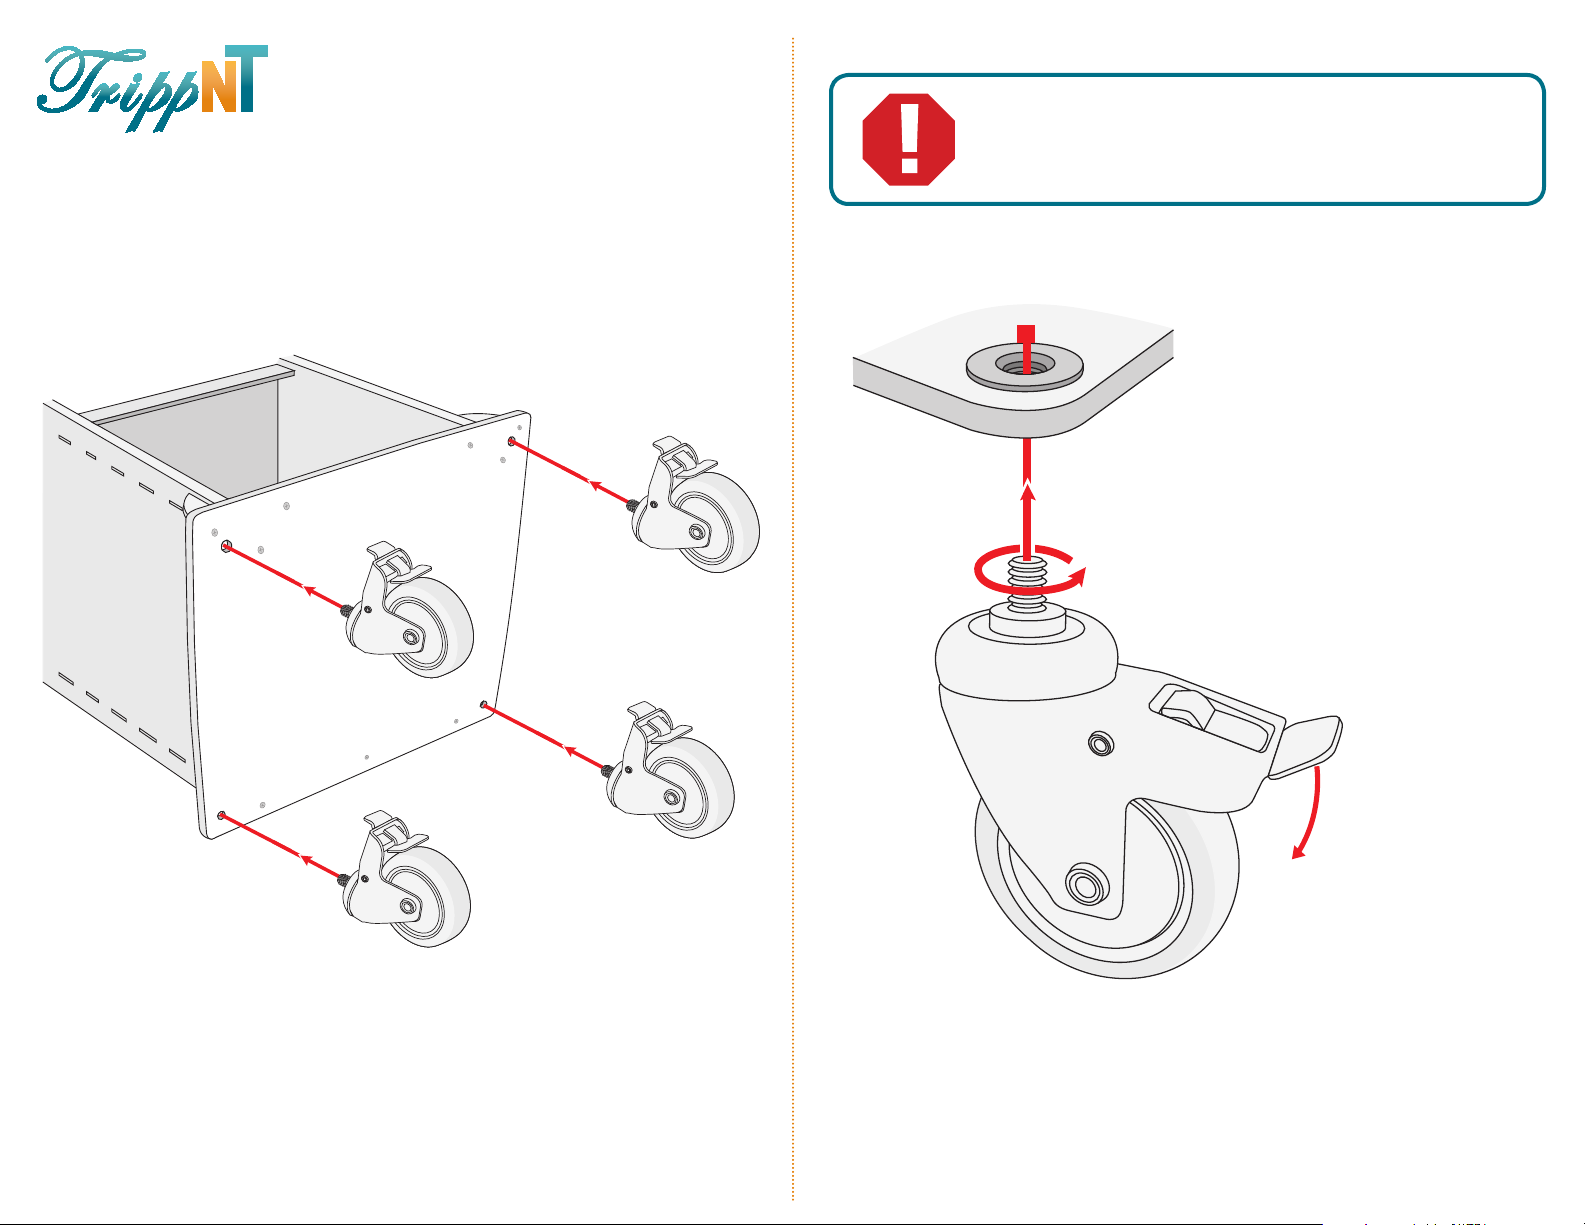
Installing the Casters
5
Front of Cart (A)
IMPORTANT CASTER INSTALLATION INSTRUCTIONS
Casters must be assembled correctly. The caster will stay on
tight if installed correctly.
A
Bottom of Cart with Embedded
Propel Nut
Bottom of Cart (A)
Caster (E)
E
Caster
Lock the brake of the caster.
Turn the caster in a clockwise
direction until it is snug.
Keep the brake on all of the
casters locked until assembly
is complete.
Page 4
Core CM™ Cart
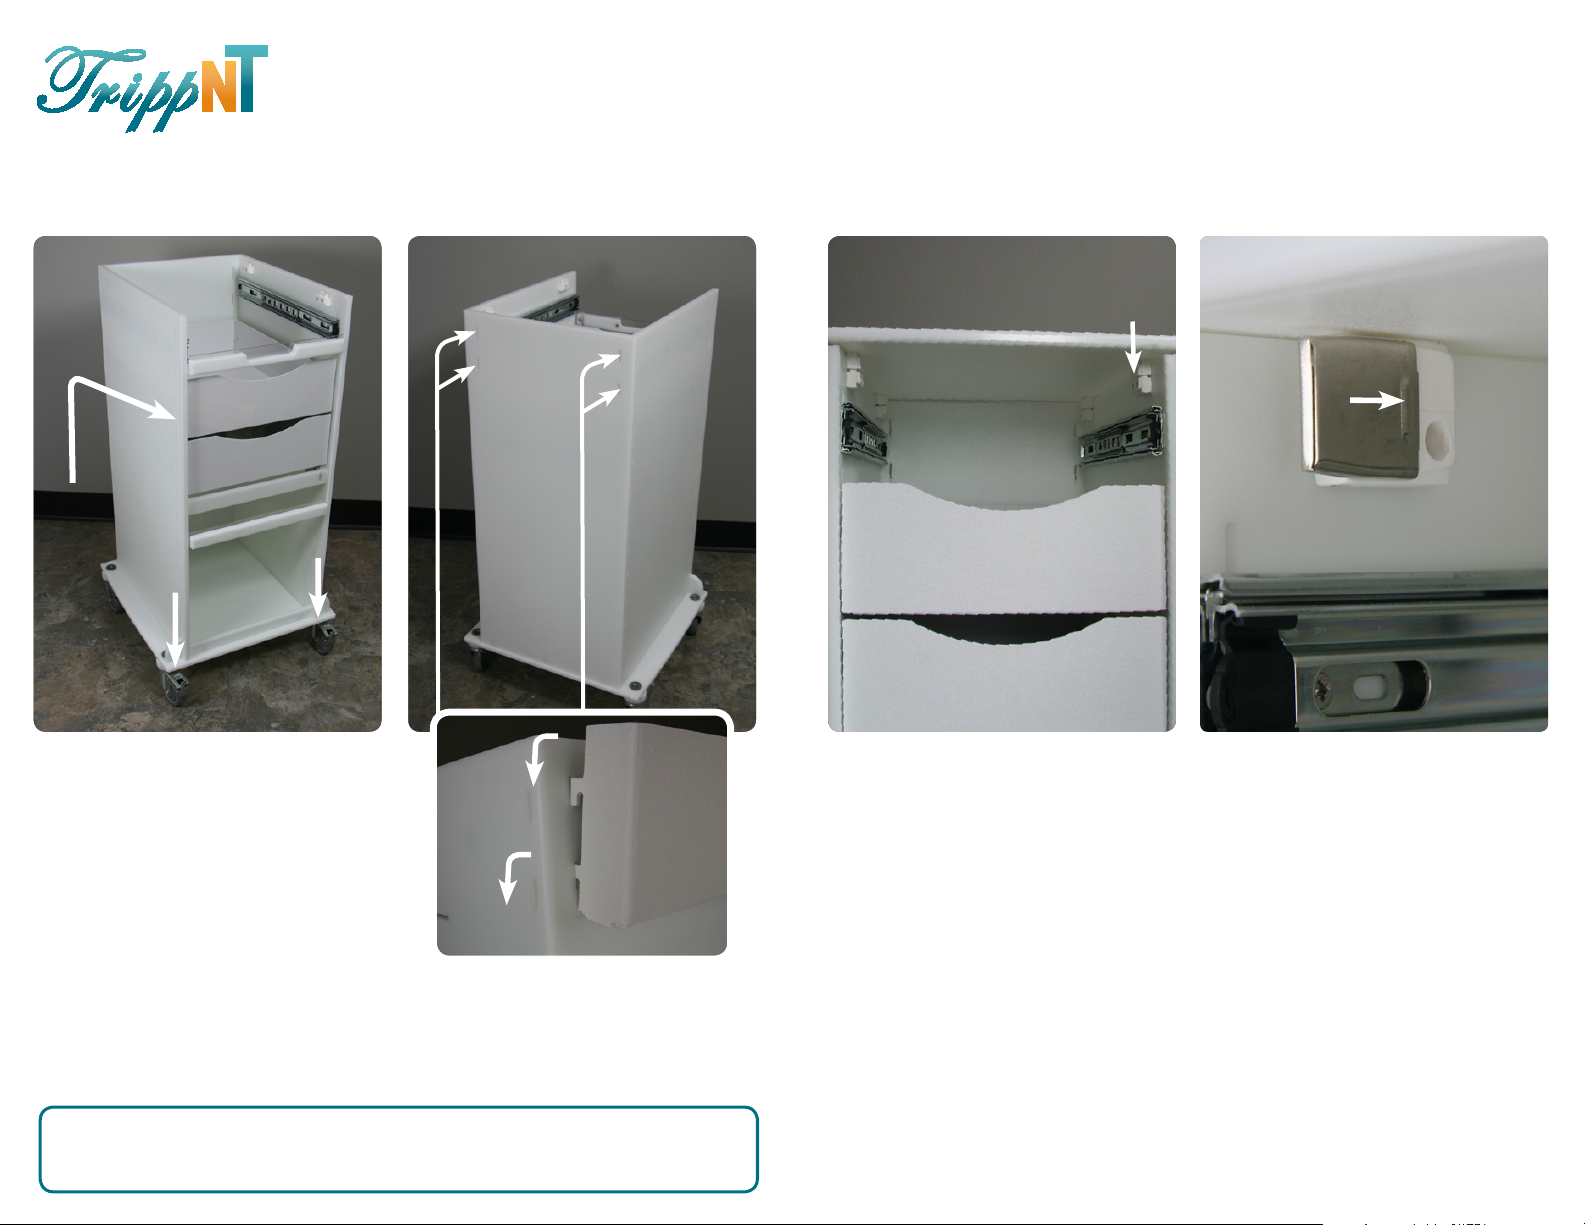
Assembling the Cart
6
Lock the brake on
these casters
Return cart to upright position. Ensure the lock brake on
the front casters is engaged to
prevent movement while
assembling.
7
Back of
Cart (A)
8
H
A
9
H
F
A
Install the cart top (H) using the
DA
plastic quick fittings. The fittings
will snap when the cart top is in
place. Please note the side of
the cart top with the groove
for the door should face
towards the front of the cart.
Slide metal clips (F) into
position to secure the cart top
(H) to the cart body (A).
On the back of the cart body
(A) Insert the tabs of tool holder
(D) into the four slots and press
down to secure.
Note:
Install the tool holder before installing the top of the cart.
Page 5
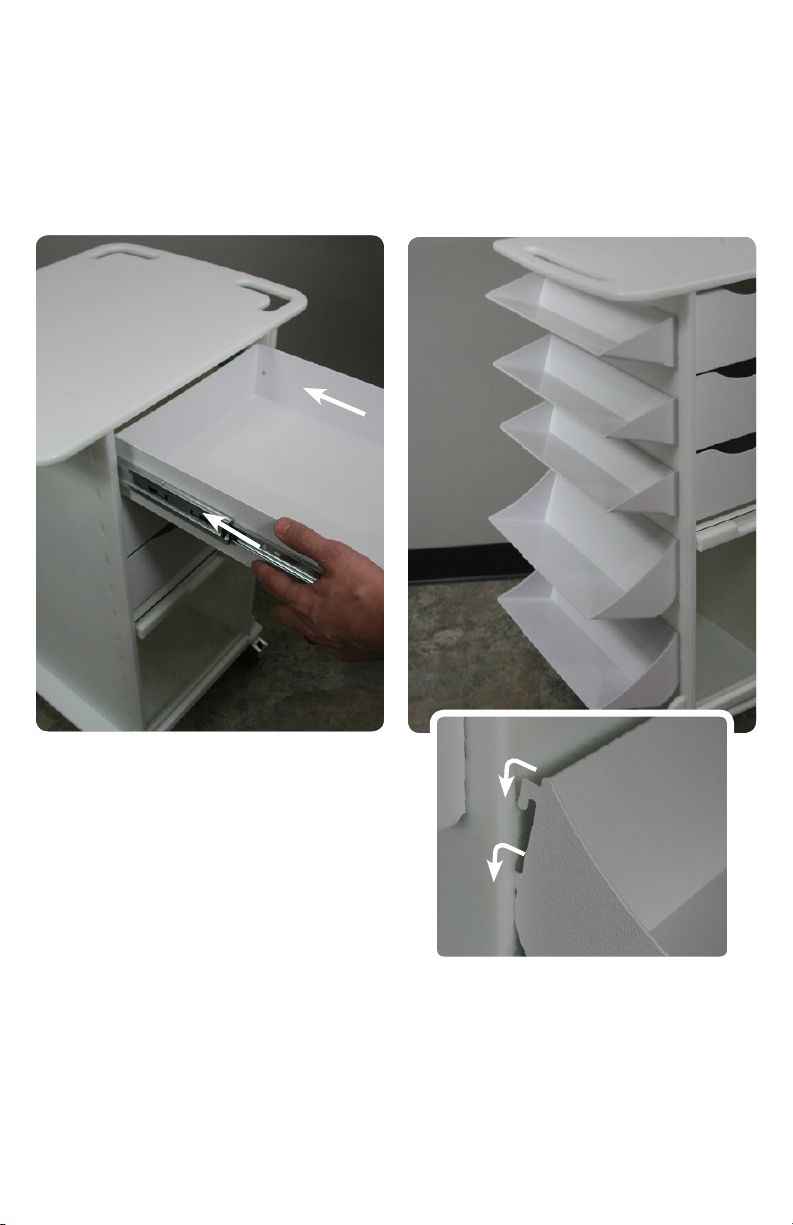
10
11
C
C
C
G
A
Align the tracks of the top
drawer (G) with the tracks on
the inside of the cart body.
Press the top drawer completely
in to the cart to snap it into
place.
B
B
Insert the tabs from the
side shelves (B) and (C) into the
slots as shown for your desired
configuration. Repeat on the
other side and your cart is
complete.
 Loading...