

Page 1
Warranty
Quick Start Guide
Registration:
register online today for a
chance to win a FREE Tripp Lite
product—www.tripplite.com/warranty
USB to VGA/DVI
Adapter
Model: U244-001-R
Note: This Quick Start Guide contains only basic
installation instructions. For more detailed instructions,
reference the Owner’s Manual on the CD.
Equipment Connection Warning: Use of this equipment in life support
applications where failure of this equipment can reasonably be expected to
cause the failure of the life support equipment or to signifi cantly affect its safety or
effectiveness is not recommended. Do not use this equipment in the presence of
a fl ammable anesthetic mixture with air, oxygen or nitrous oxide.
Copyright © 2008 Tripp Lite. All rights reserved. All trademarks are the property of
their respective owners.
Installing the Driver
Caution: DO NOT connect the adapter to your computer before
installing the driver
Insert the included driver CD into your computer’s CD-ROM drive.
The setup program should run automatically. If not, locate and
double-click the “Setup.exe” fi le in the “Driver” folder on the CD.
Follow the on-screen prompts to complete installation of the driver.
For Windows Vista® users:
• If you encounter the “User Account Control” dialog box upon
installing the driver, either enter the administrator password or click
“Allow” to continue with the installation.
• If you encounter the driver signature dialog box upon installing the
driver, click “Install this driver software anyway” to continue with
the installation.
• Restarting your computer is necessary to successfully install the
driver. When prompted to restart your computer, click “Yes.” If you
are not prompted to restart your computer you should manually
restart it.
For Windows
• If you encounter the driver signature dialog box upon installing the
driver, click “Continue Anyway” to continue with the installation.
For Windows 2000 users:
• If prompted for a system patch after starting the “Setup.exe” fi le,
you must download and install the required patch before installing
the driver.
®
XP users:
• If you encounter the driver compatibility dialog box upon
installing the driver, click “Yes” to continue with the installation.
• Restarting your computer is necessary to successfully install
the driver. When prompted to restart your computer, click “Yes.”
If you are not prompted to restart your computer you should
manually restart it.
Connecting the USB Cable to the VGA/DVI Adapter
1. Connect the included USB cable from your computer to the
adapter
2. For DVI monitors, connect the adapter to the monitor using a
Tripp Lite P560-Series or P561-Series cable (not included).
For VGA monitors, you must fi rst connect the included DVI to
VGA adapter to the U244-001-R, and then connect the adapter to
the monitor using a Tripp Lite P502-Series or P512-Series cable
(not included). Power on your monitor after connecting it to the
adapter.
3. Windows Vista and Windows 2000 will automatically complete
the installation for you, and the screen from your computer will
be displayed on the add-on monitor. If the screen of the add-on
monitor is blank, restart the computer. Windows XP will display
a “Found New Hardware Wizard.” Follow the steps below to
complete the installation on Windows XP.
Page 2
• Select “No, not this time to” ignore Windows Updates and then
click “Next.”
• Select “Install the software automatically (Recommended)” and
then click “Next.”
• Click “Finish” to complete the installation.
• The computer screen will now be displayed on the add-on
monitor.
Note: Before installation is complete, it is normal for the screen to
fl icker on and off a few times.
Changing the Display Mode
The add-on monitor can be confi gured to use “Mirror” mode,
“Extended” mode or to be the computer’s primary monitor. “Mirror”
mode will display the computer screen exactly as it is displayed on
the primary monitor. “Extended” mode will extend the computer
screen of the primary monitor onto the add-on monitor.
Note: If you’re under Windows Vista Display Driver Model (WDDM)
mode, you will only be able to use “Mirror” mode. Also, your Aero™
Experience (Flip 3D effect) will be disabled while the adapter is
connected to your computer. Please refer to the Owner’s Manual on
the CD for more details.
Using “Mirror” mode:
• Right-click on the desktop of your computer and select
“Personalize > Display Settings” (Windows Vista) or “Properties
> Settings” (Windows XP and Windows 2000).
• In the “Display” drop-down menu, select the option that ends with
“DisplayLink Graphics Adapter.”
• Uncheck the box labeled “Extend the desktop onto this monitor”
(Windows Vista) or “Extend my Windows desktop onto this
monitor” (Windows XP or Windows 2000).
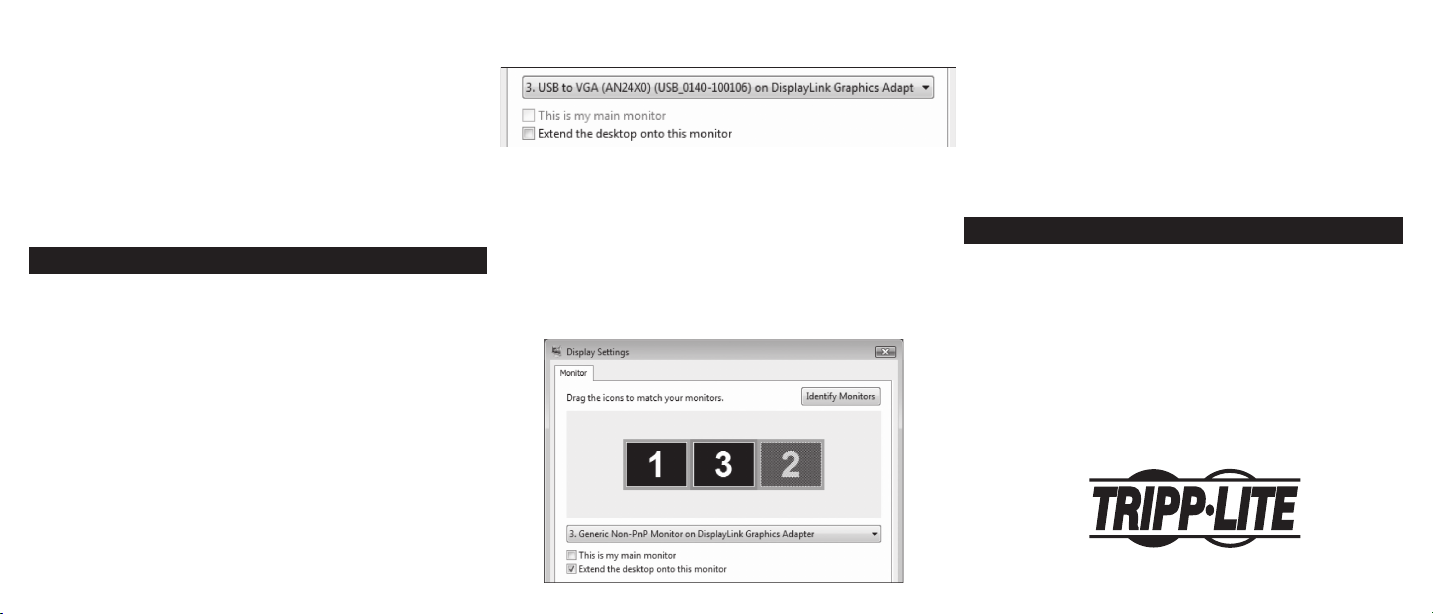
Using “Extended” mode:
• Right-click on the desktop of your computer and select
“Personalize > Display Settings” (Windows Vista) or “Properties >
Settings” (Windows XP and Windows 2000).
• In the “Display” drop-down menu, select the option that ends with
“Display Link Graphics Adapter.”
• Check the box labeled “Extend the desktop onto this monitor”
(Windows Vista) or “Extend my Windows desktop onto this
monitor” (Windows XP or Windows 2000).
• Drag the monitor icons in the middle of the screen so they
match the physical arrangement of your primary and add-on
monitors.
Note: Depending on your computer, the add-on monitor may be
identifi ed as either 2 or 3.
Warranty Registration
Visit www.tripplite.com/warranty today to register the warranty for
your new Tripp Lite product. You’ll be automatically entered into
a drawing for a chance to win a FREE Tripp Lite product!*
* No purchase necessary. Void where prohibited. Some restrictions apply. See
website for details.
Tripp Lite follows a policy of continuous improvement.
Product specifi cations are subject to change without notice.
Made in China
1111 W. 35th Street, Chicago, IL 60609 USA
(773) 869-1234 • www.tripplite.com
200803171
93-2774
 Loading...