

Page 1
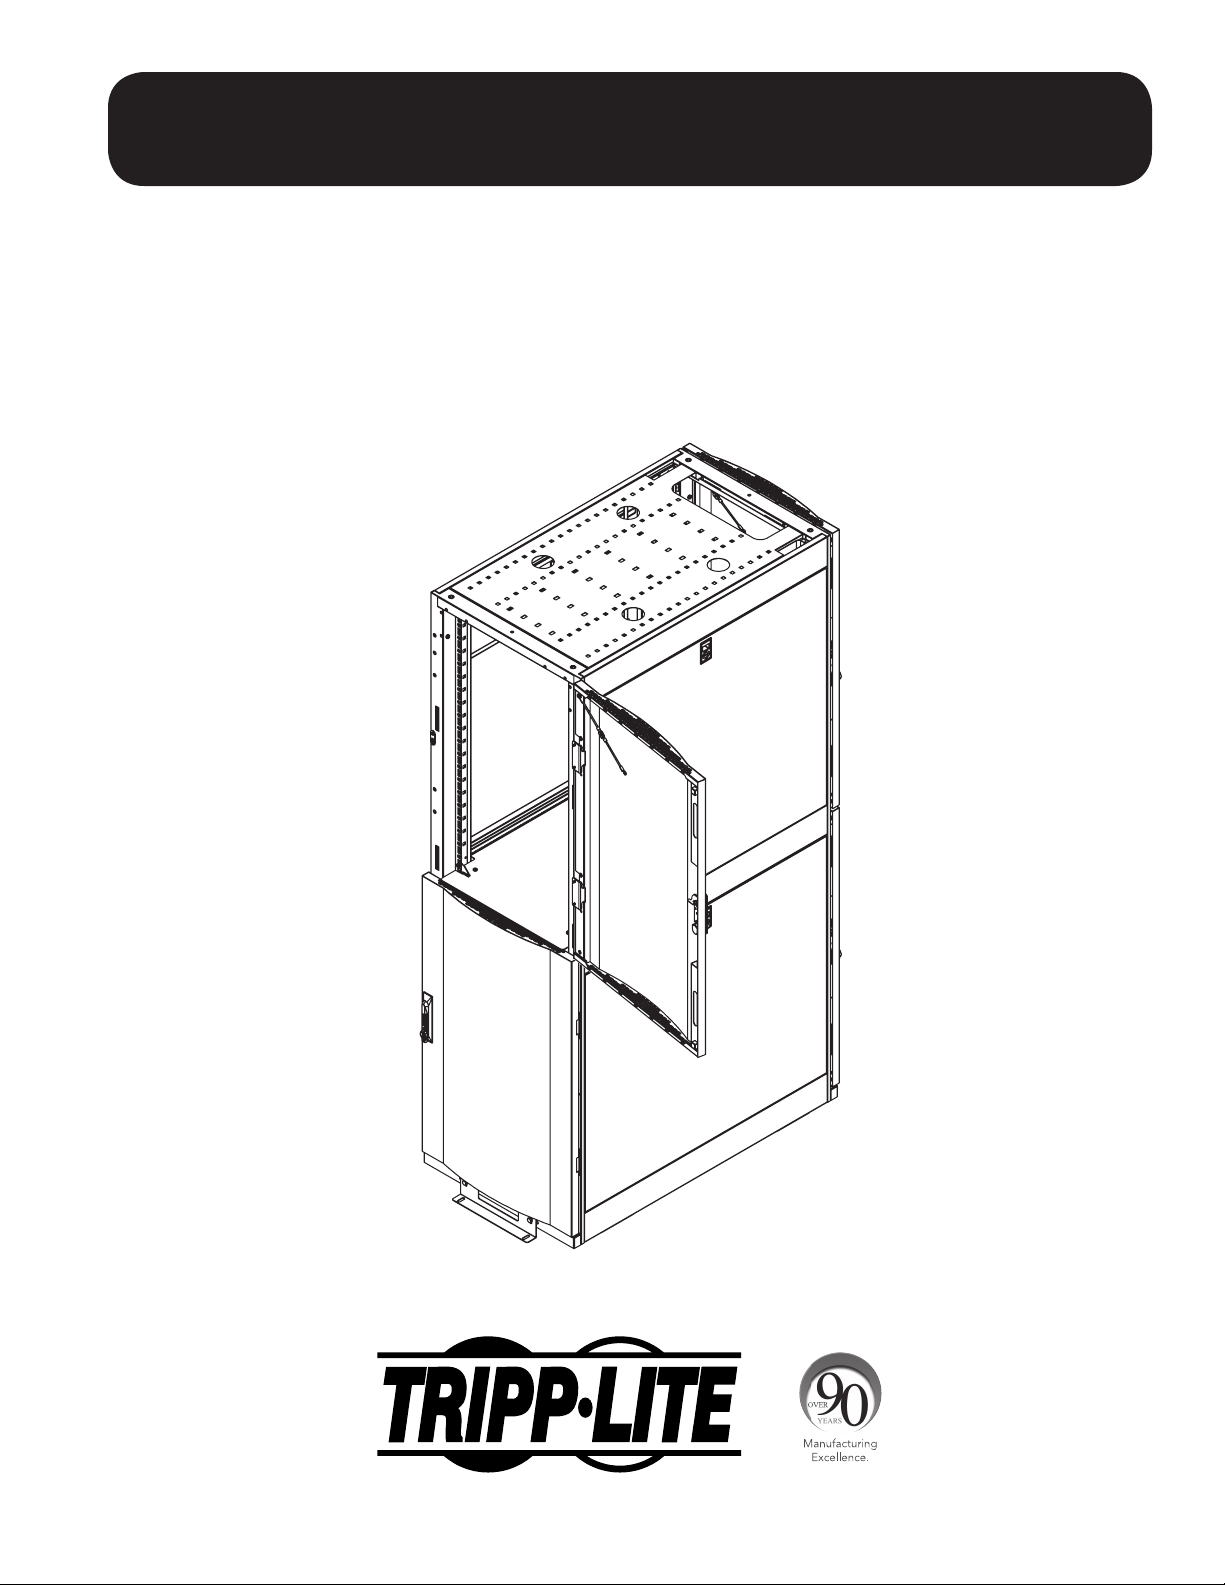
SmartRack® Assembly Instructions
Models:
SRCOLOKIT42U, SRCOLOKIT48U
1111 West 35th Street, Chicago, IL 60609 USA • www.tripplite.com/support
Copyright © 2014 Tripp Lite. All trademarks are the sole property of their respective owners.
1
Page 2
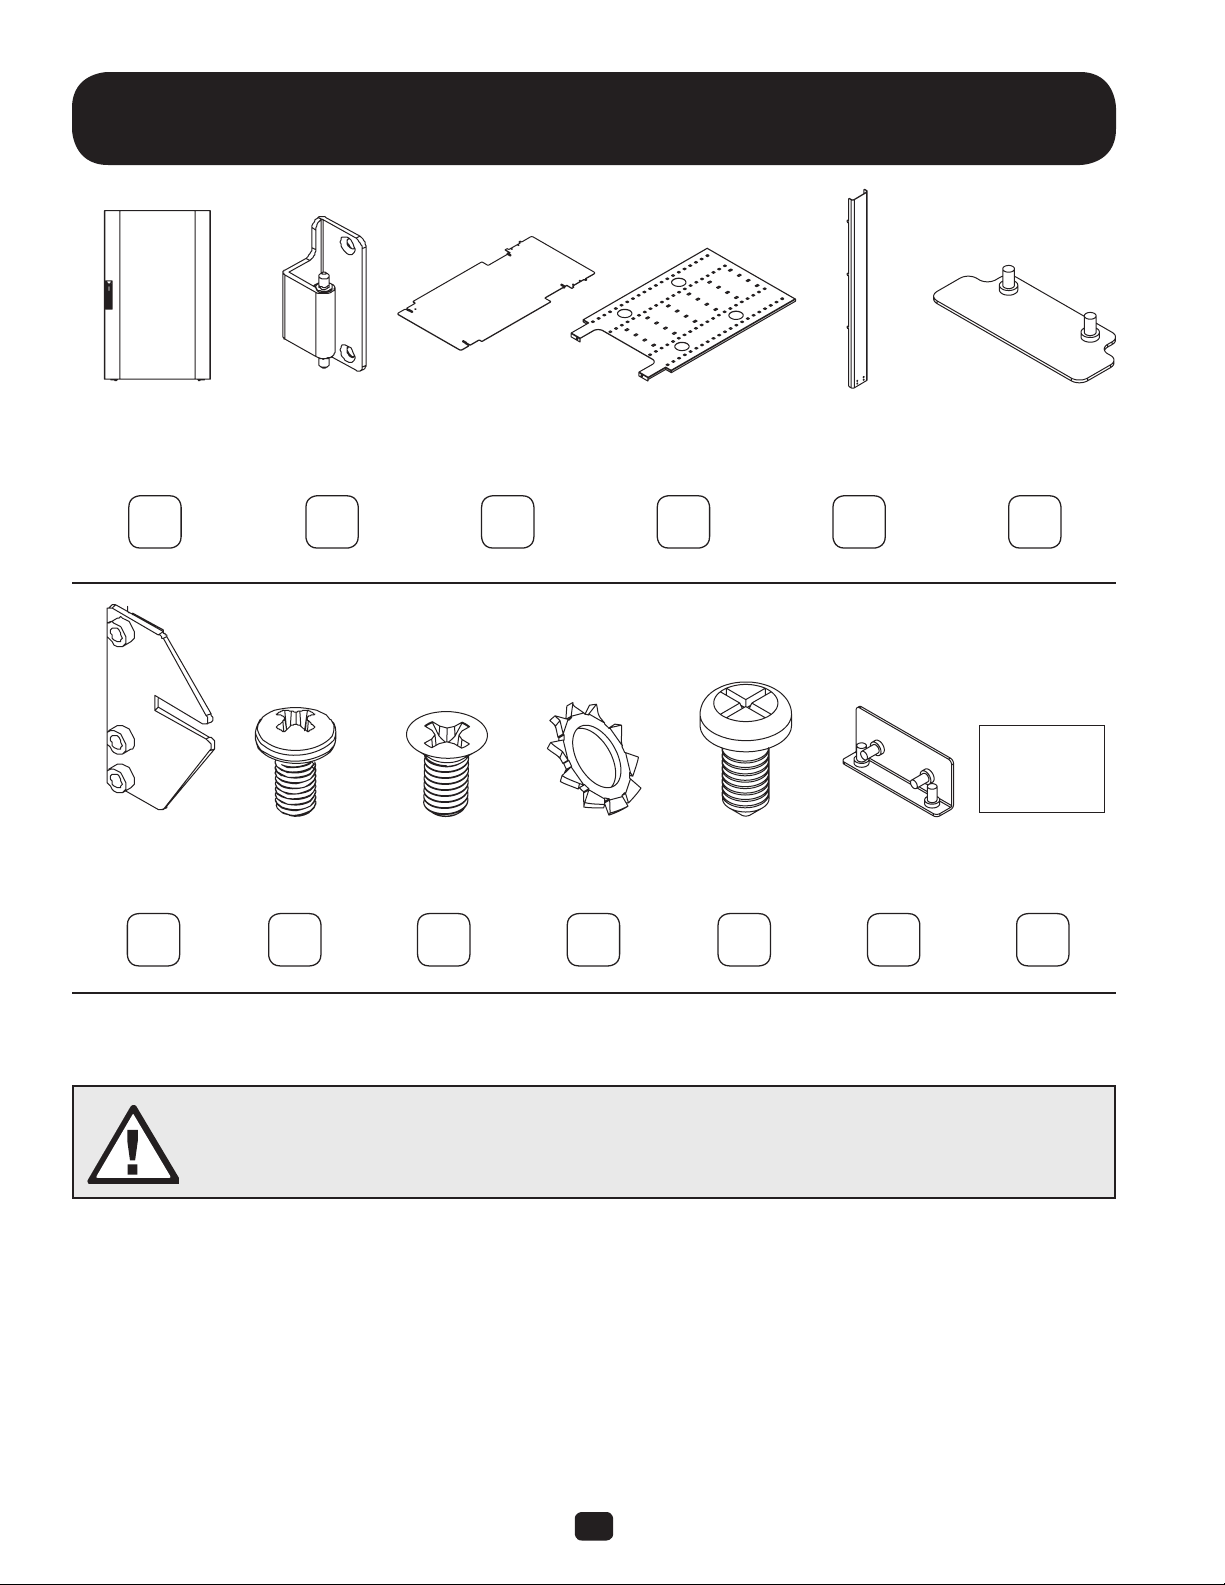
Parts List
A B C D E F
Colo Door Hinge
Brackets
Divider
Plate
Roof Cable
Channel
Blocking
Plate
G H I J K L M
Divider Plate
Bracket
M6 Screw M6 Flat Head
x4 x17 x17x4 x8 x1x2
Required tools (User Supplied):
Phillips Head Screwdriver
x2x4 x2
Lock Washer 8-32 Screw Cable Channel
Screw
x1x1 x1
Plate
MODEL:
SRCOLOKIT42U
WWW.TRIPPLITE.COM
SERIAL NUMBER
XXXXXXXXXXXXXXXX
Label
WARNING: The rack enclosure is extremely heavy. Do not attempt to unpack, move, assemble or install the
enclosure without assistance. Until it has been properly assembled and stabilized, the enclosure is prone to
tipping and could cause property damage and/or personal injury. Use extreme caution when assembling
the enclosure. Do not attempt to install equipment without first stabilizing the enclosure.
2
Page 3
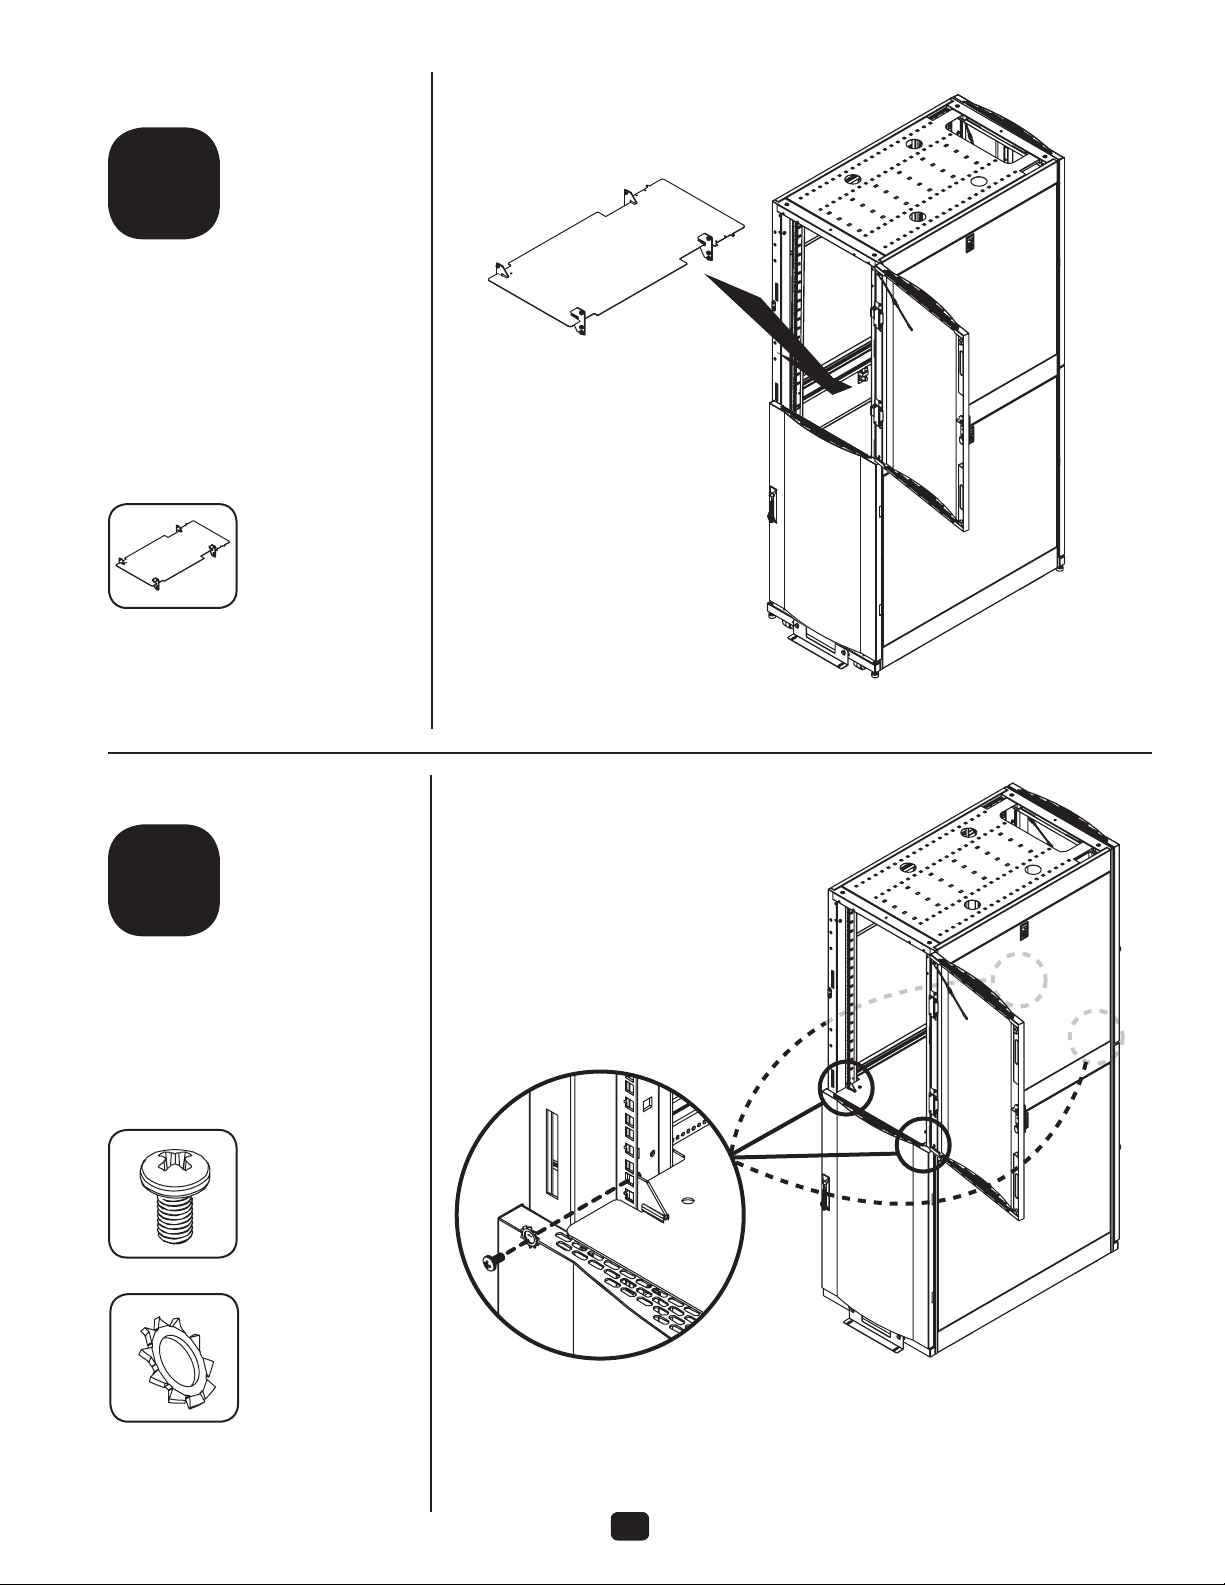
step
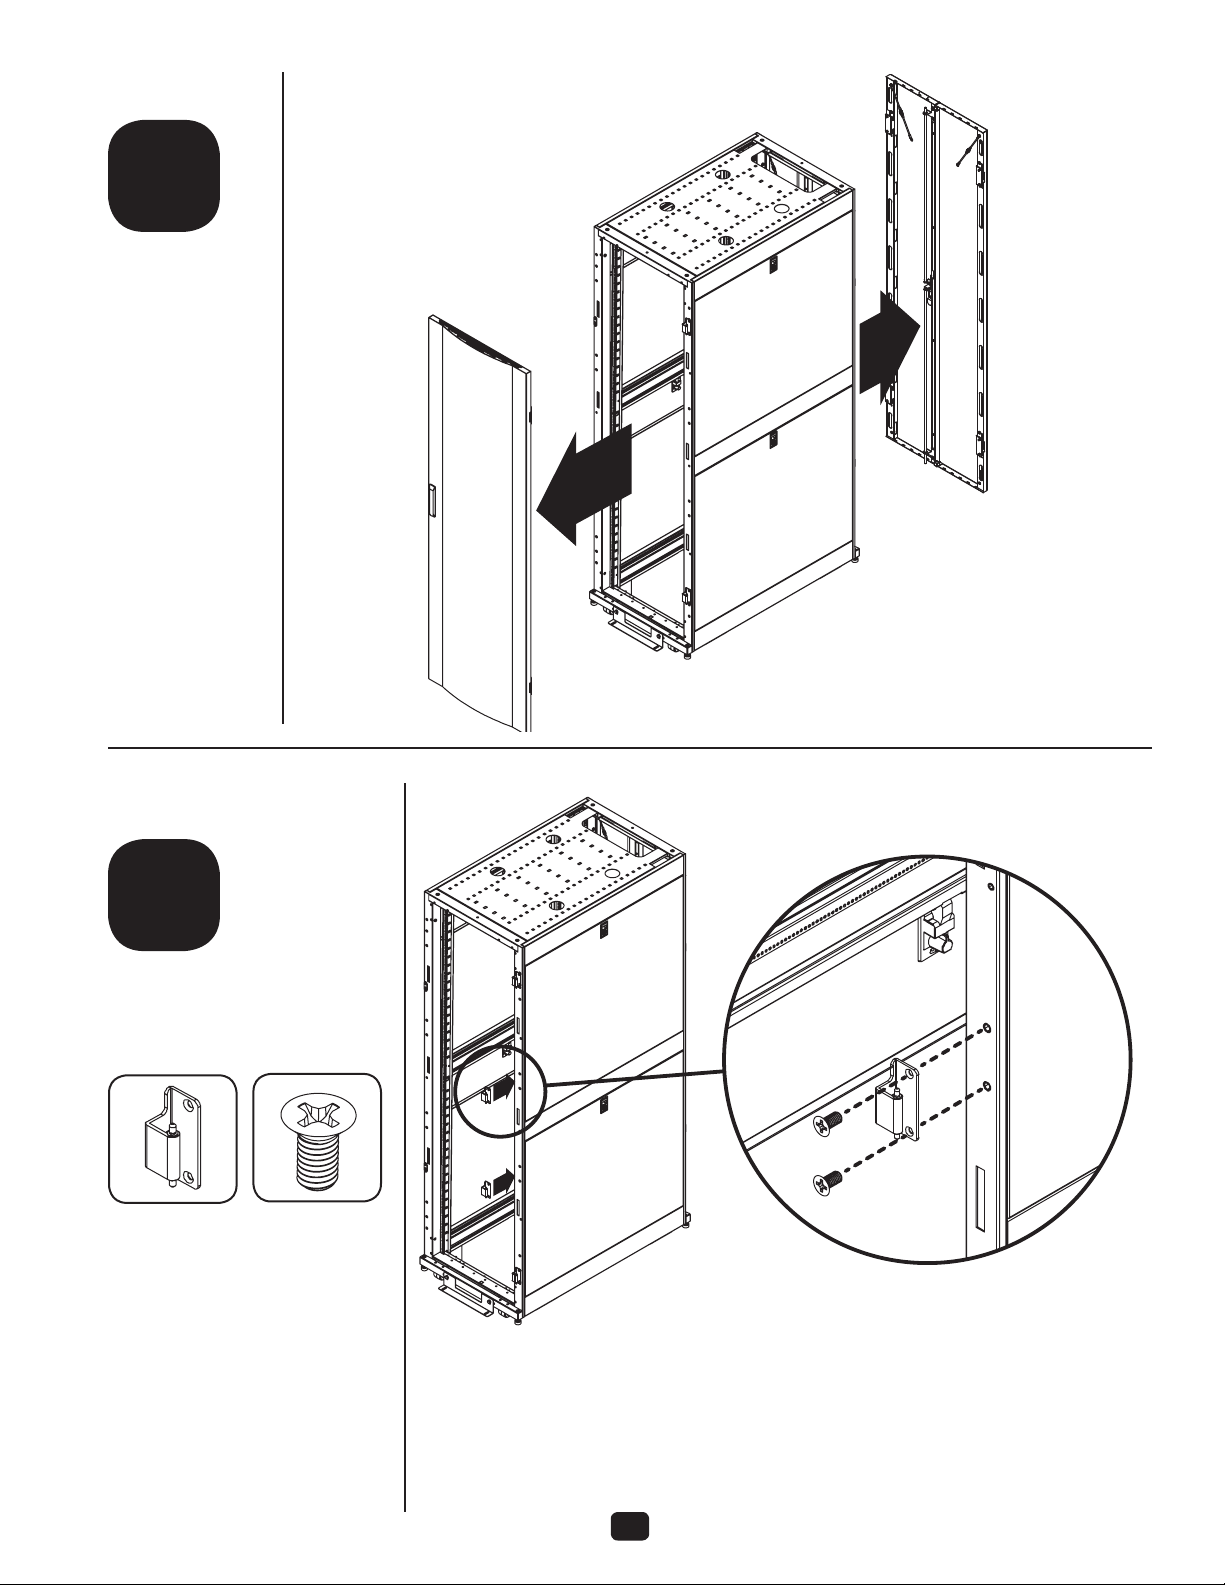
1
Remove front and
rear doors.
step
2
For front doors, attach additional
hinge brackets to door frame
on the same side as the existing
hinge brackets.
B
2 4
I
For rear doors, move two hinge
brackets so that all brackets
are on the same side of the
door frame.
3
Page 4
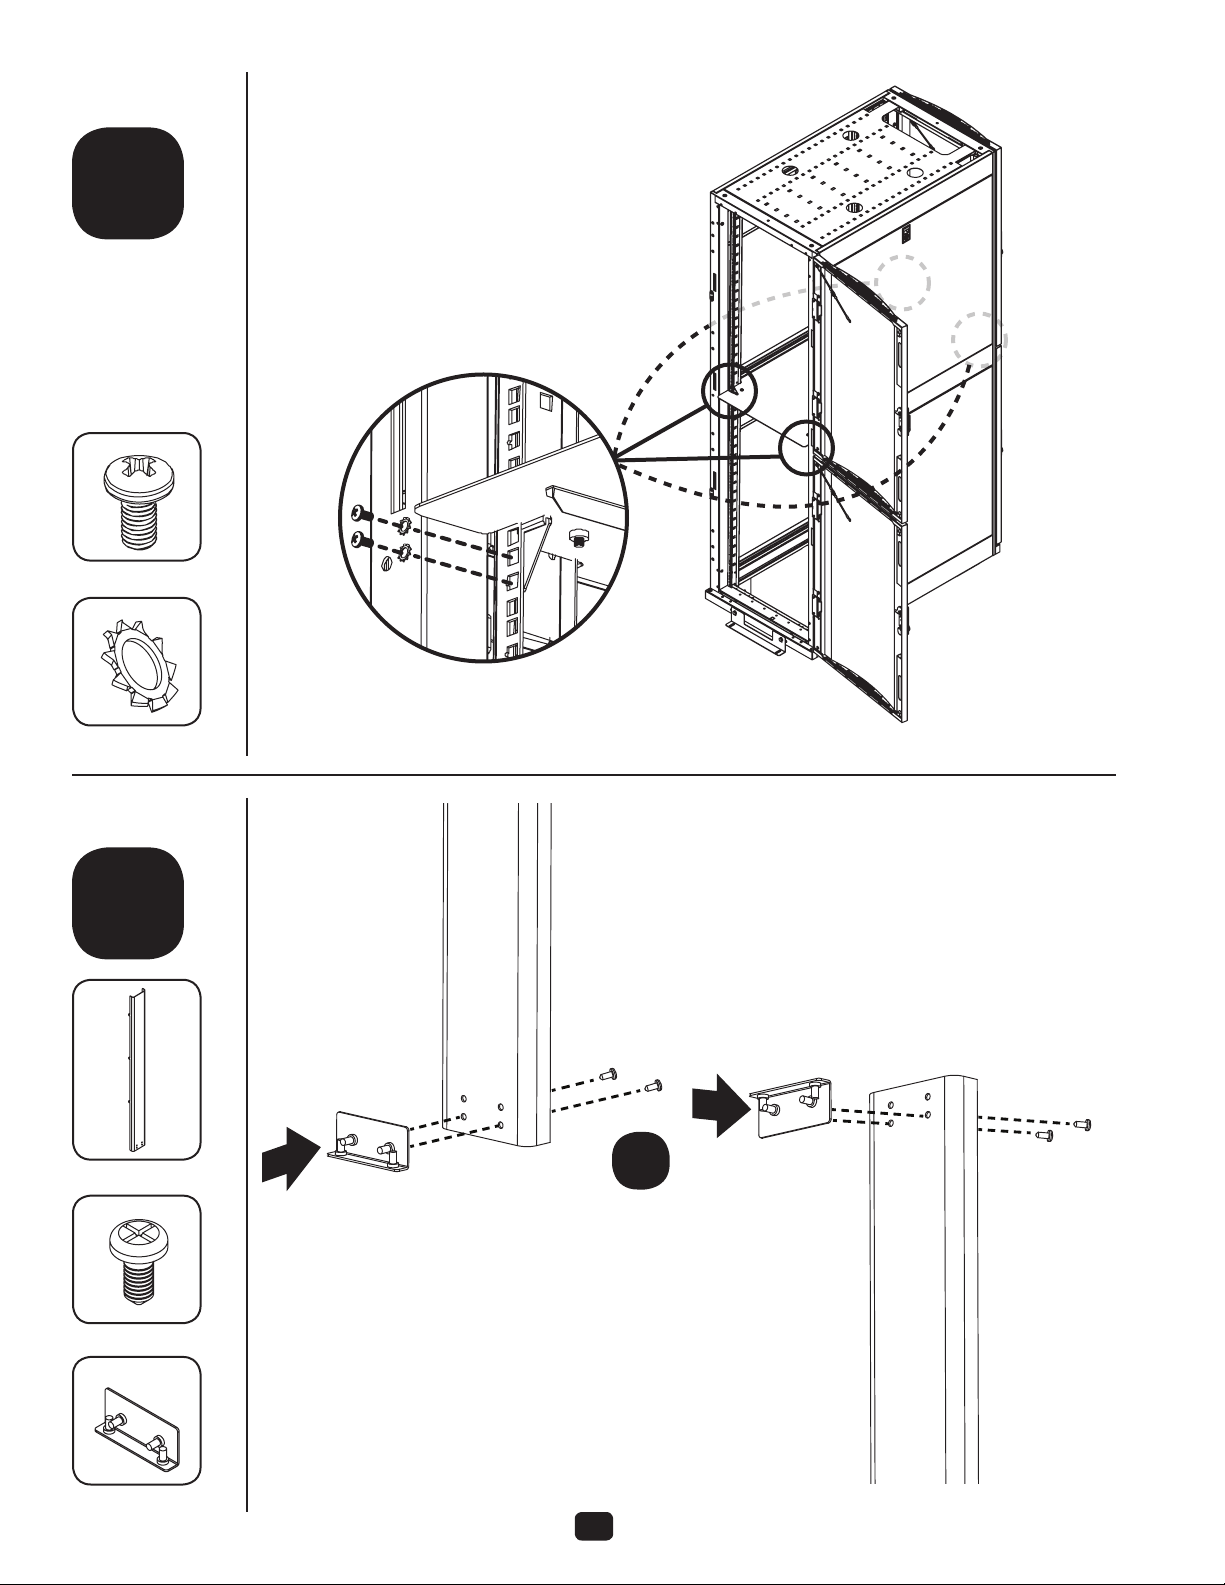
step
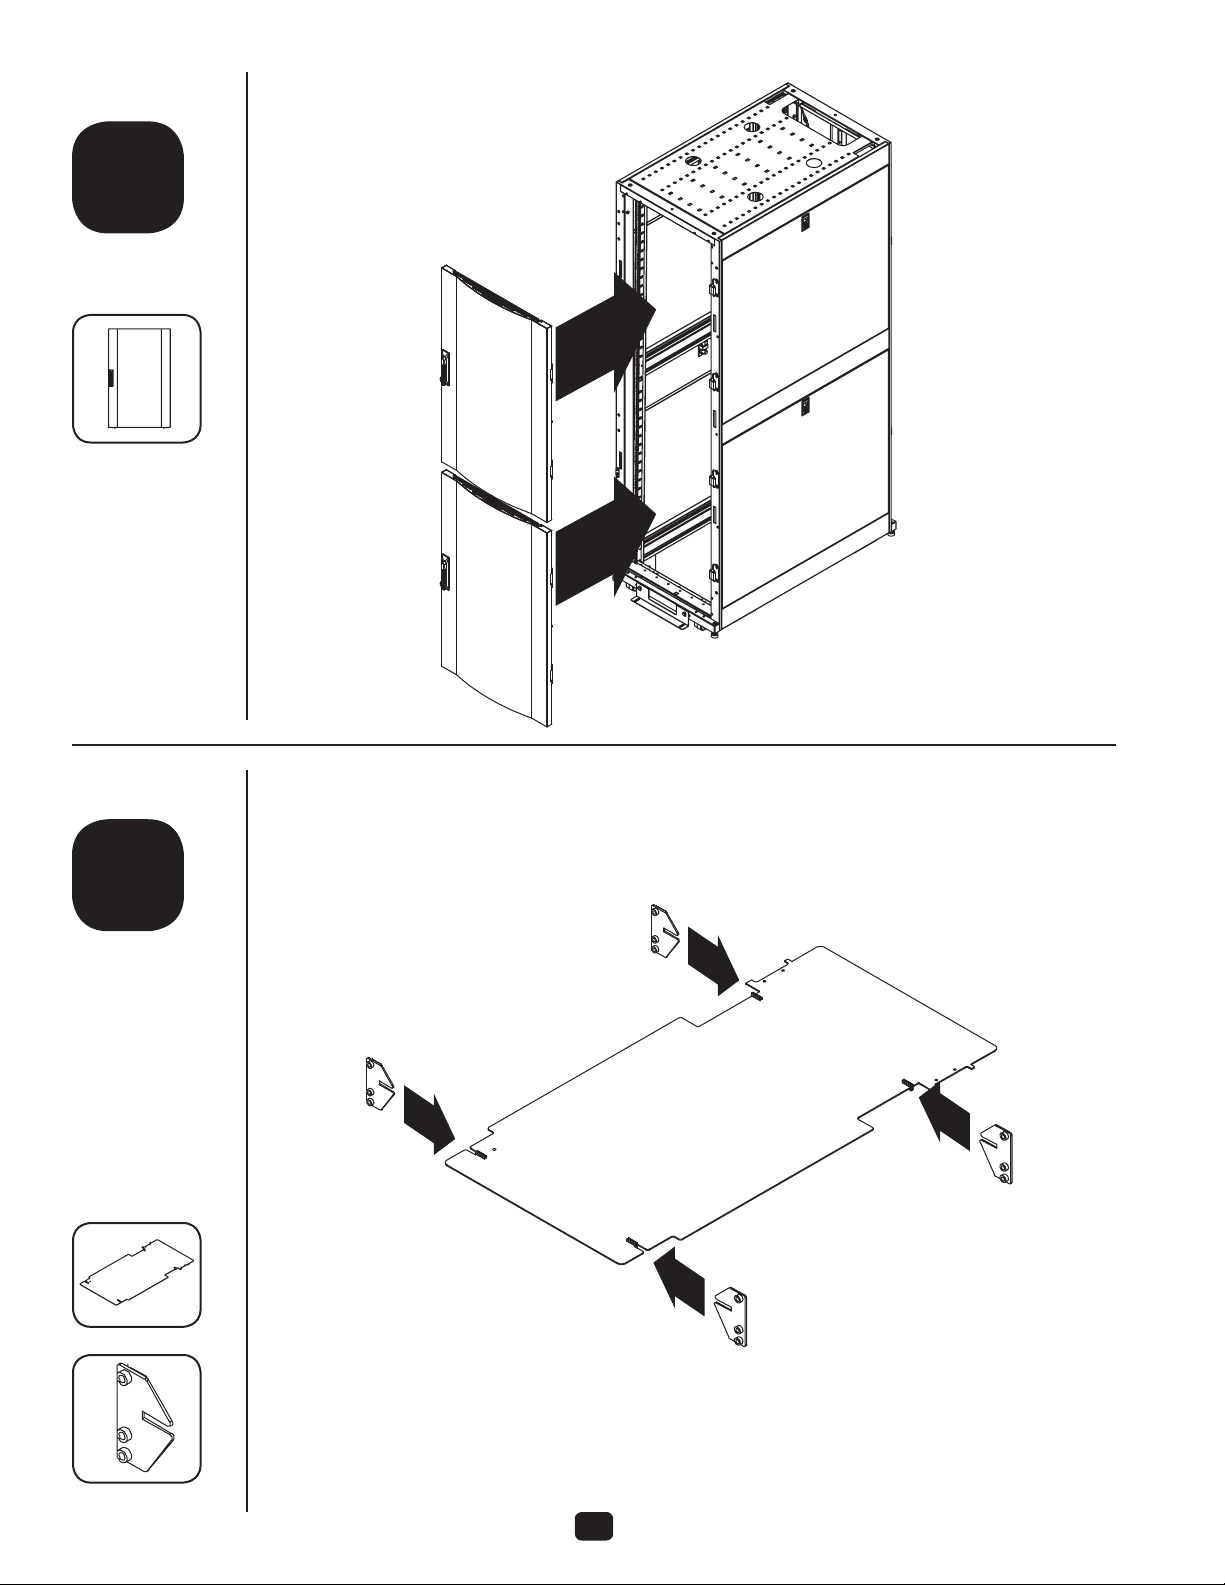
3
Attach colo doors
to hinges on frame.
A
4
Repeat step 3 for
rear doors.
step
4
Assemble divider
plate brackets
onto divider plate.
There are left and
right brackets.
Make sure the
flat surface of the
brackets face away
from each other
when assembled to
divider plate.
C
G
1
4
4
Page 5
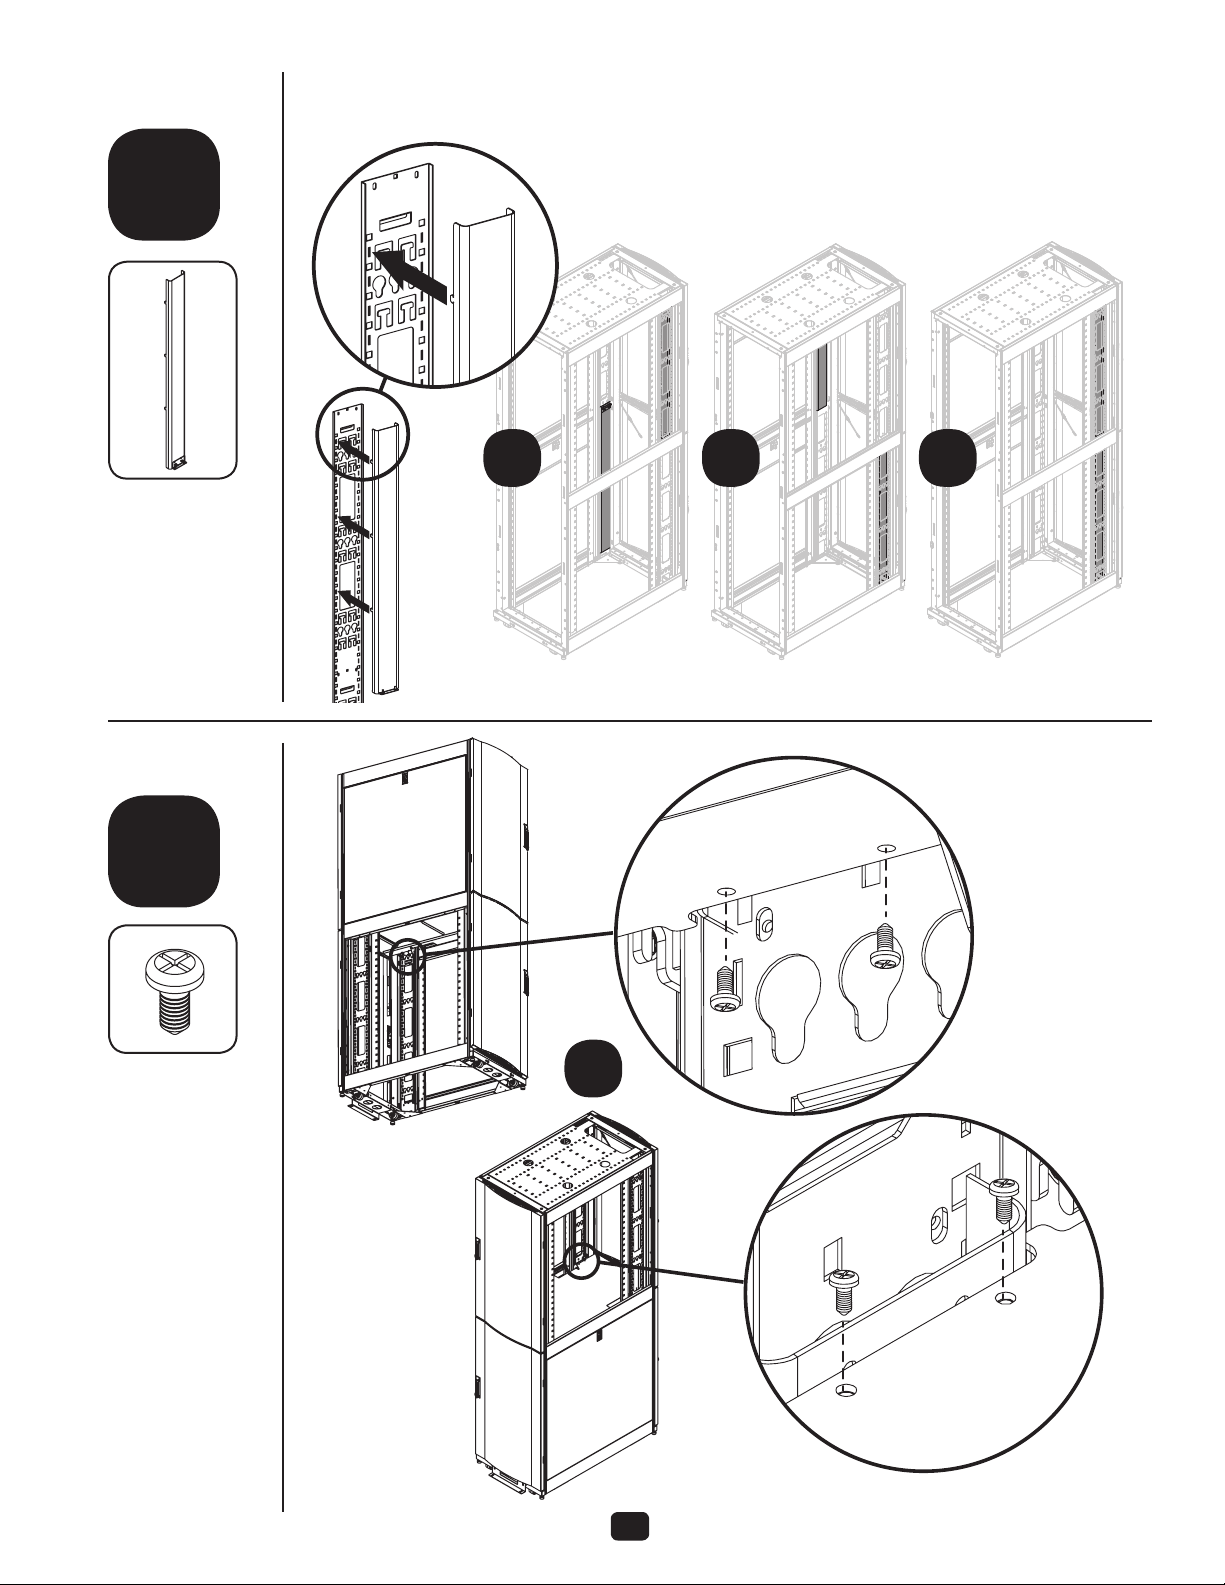
step
5
Using an assistant, install divider.
Divider should be installed
with lower doors installed and
completely closed so divider can rest
on the lower doors while installing
M6 washers and screws. Lock the
doors to prevent them from opening
and damaging the divider. Brackets
on divider should be on the inside of
the rack vertical rails.
C
1
step
6
Install upper M6 washers and screws
in the topmost hole of “U” number
22 for a 42U rack and “U” number 25
for a 48U rack. DO NOT open lower
doors until four of these washers and
screws are installed onto the four
vertical rails
H
4
J
4
5
Page 6
step
7
Once upper
M6 hardware
is installed, the
bottom doors can
safely be opened to
install the lower M6
hardware.
H
8
J
8
step
8
E
2
K
or
4
L
2
6
Page 7
step
9
Install cable channels onto the
cable managers using the tabs.
2
step
10
K
4 4
X
4
or
7
Page 8
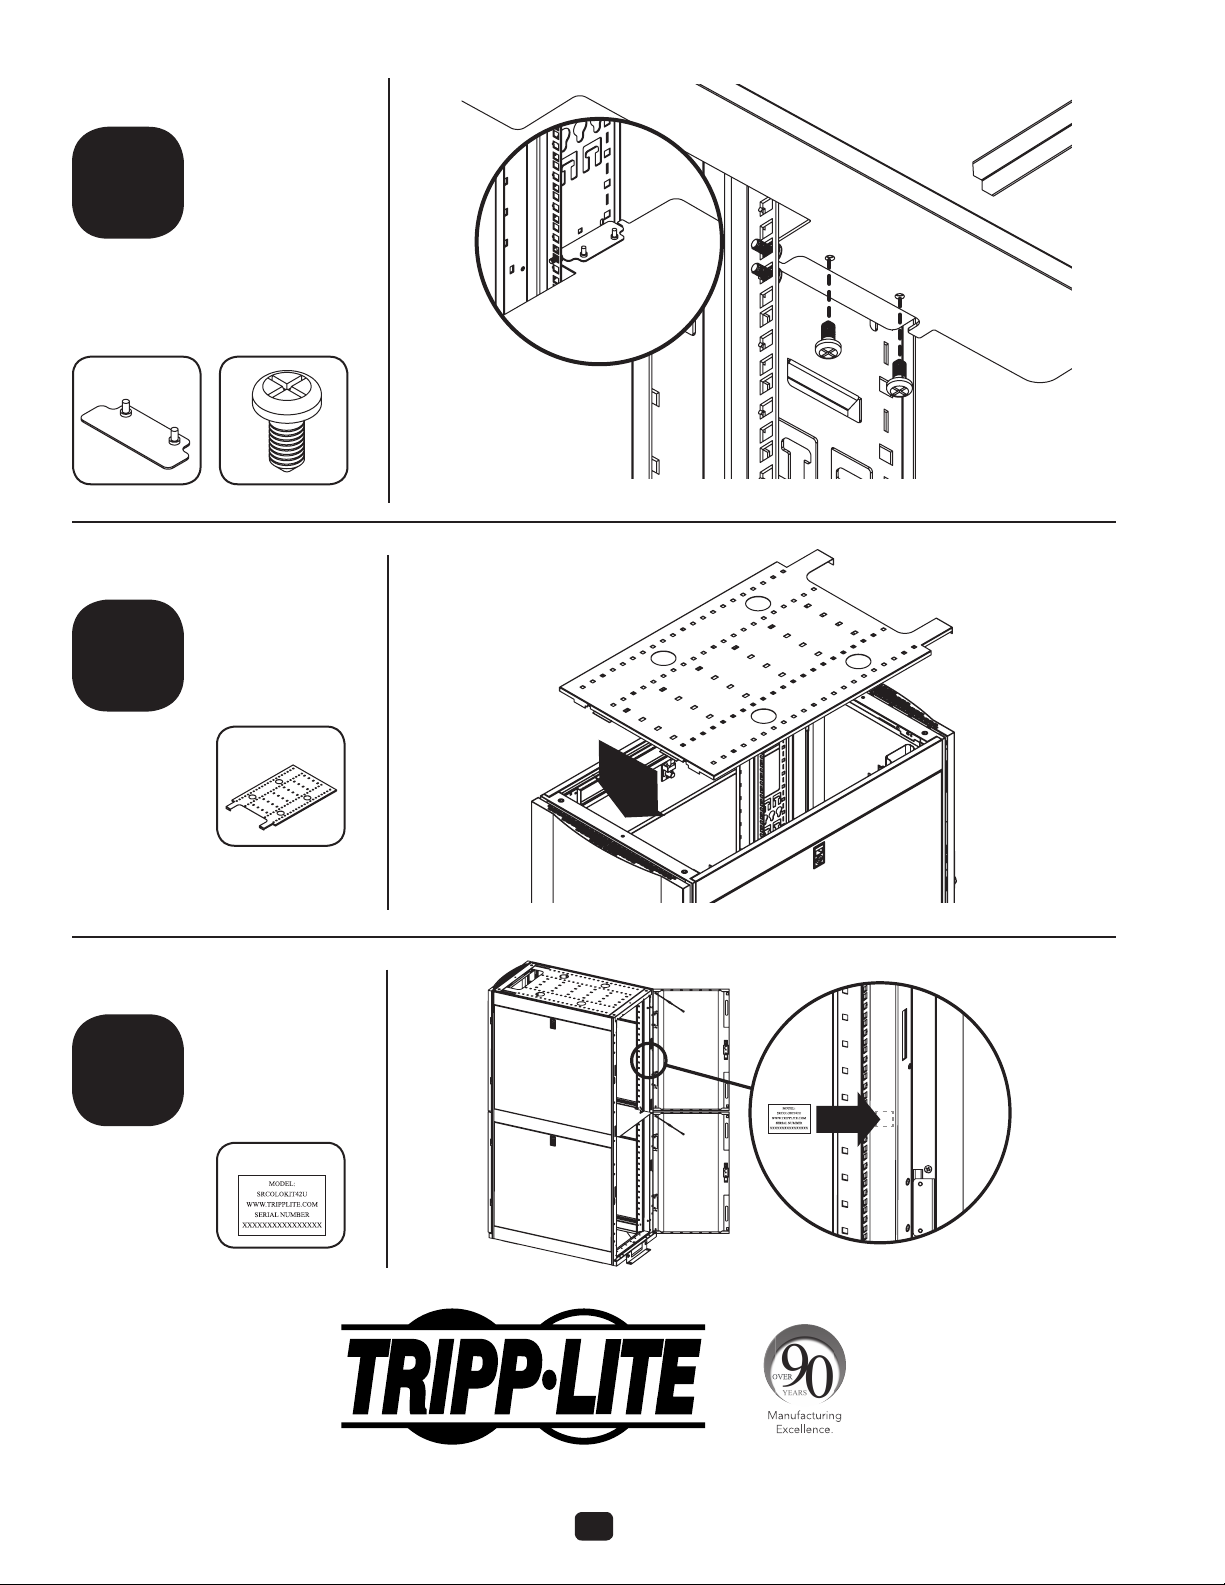
step
11
If you only put in one cable channel,
install the blocking plate on the side
opposite the cable channel. Secure
the plate to the divider.
KF
1
step
12
Install roof. No
fasteners are
needed.
step
2
D
1
13
Place provided
label over
existing model
number label.
L
1
1111 West 35th Street, Chicago, IL 60609 USA • www.tripplite.com/support
Tripp Lite follows a policy of continuous improvement. Product specications are subject to change without notice.
8
13-09-210 • 9332D8-EN Rev C
 Loading...