

Page 1
Zero U Vertical PDU
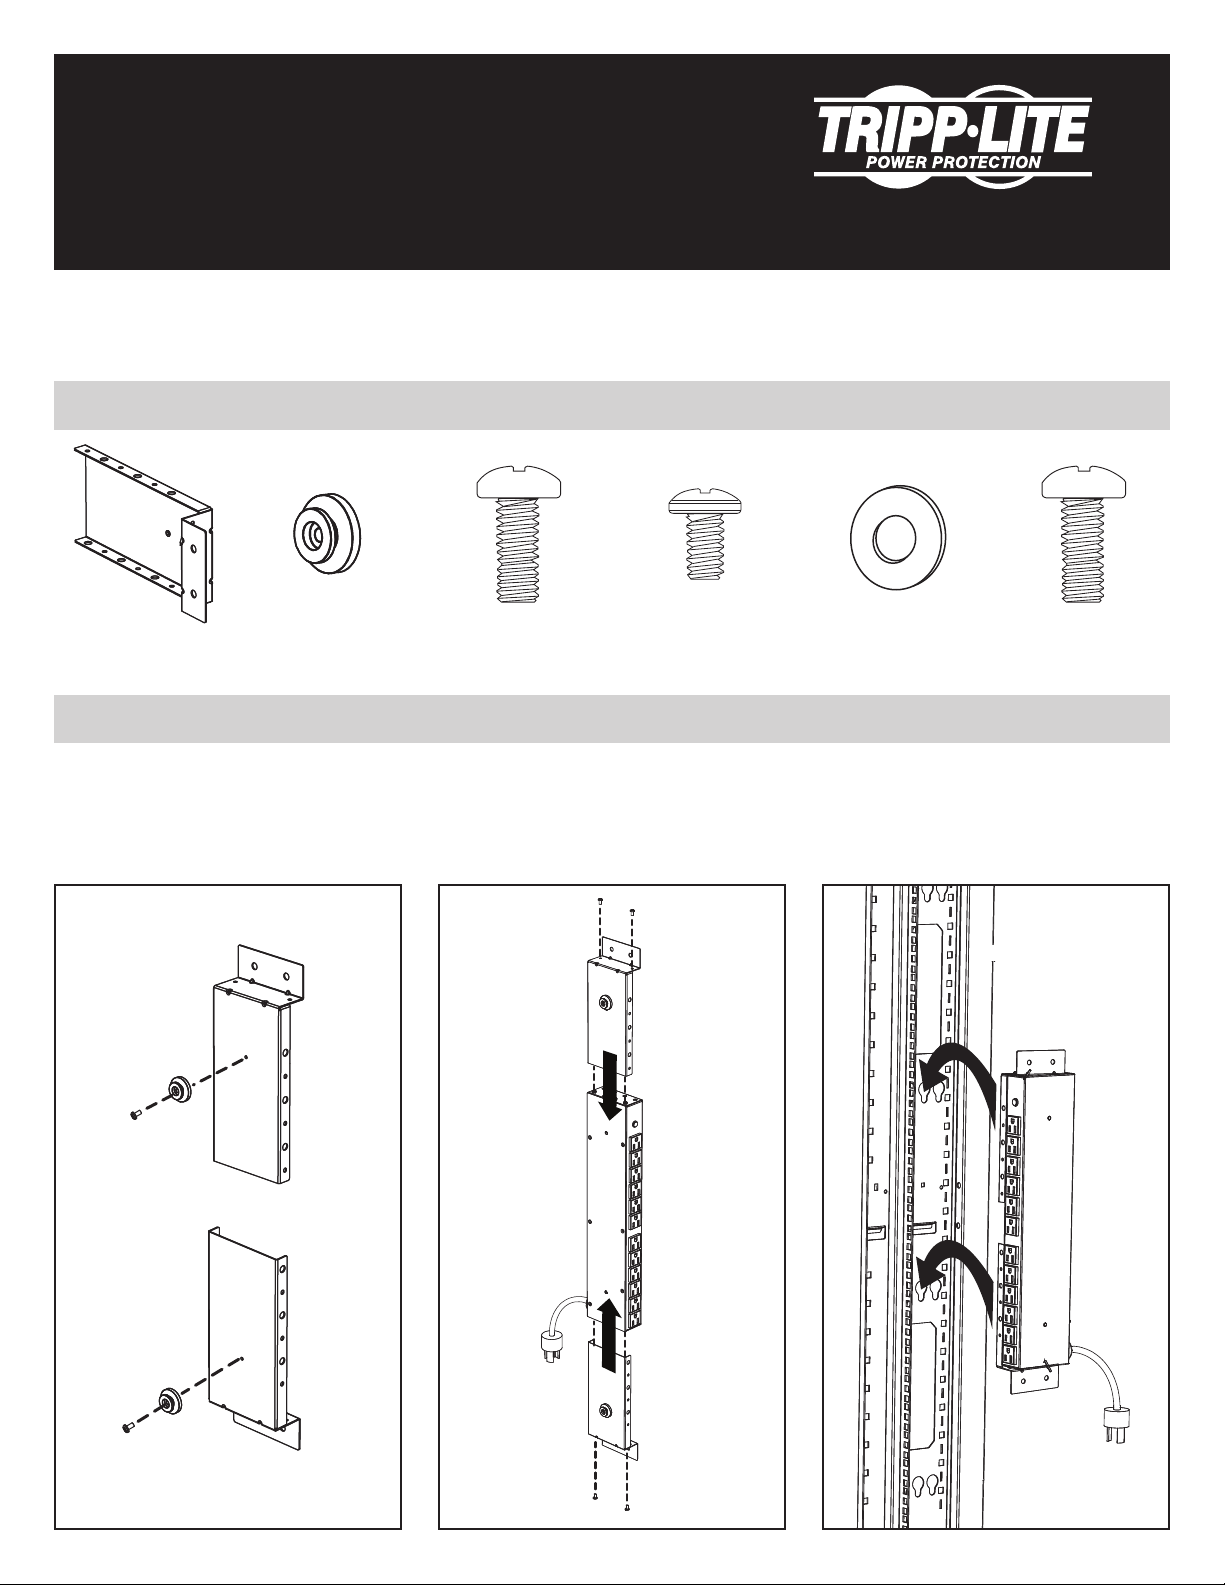
Mounting Bracket Kit in
SmartRack™ Configurations
1111 W. 35th Street, Chicago, IL 60609 USA
www.tripplite.com/support
(Model: PDUSIDEBRKT)
• Method 1: Mounting Buttons Snap into Button Holes in Toolless Mounting Rails (Toolless Mounting Option)
• Method 2: Direct Attachment to Mounting Rails with Screws (Hardware Option)
Parts List
Bracket
(x2)
Mounting Button
(x2)
4 mm Screws
(x2)
#6-32 Screws
(x4)
M6 Washers
(x4)
6 mm Screws
Method 1
Step 1. Attach the two mounting buttons
to the outside of the brackets
using the included 4 mm screws.
Step 2. Attach the two brackets to the
PDU using the four included #6-32
screws.
Step 3. To mount the PDU, simply insert
the mounting buttons into the
mounting rails inside the rack
enclosure. Snap down into place
until the PDU is secure in the rack.
(x4)
Step 1. Step 2. Step 3.
Page 2
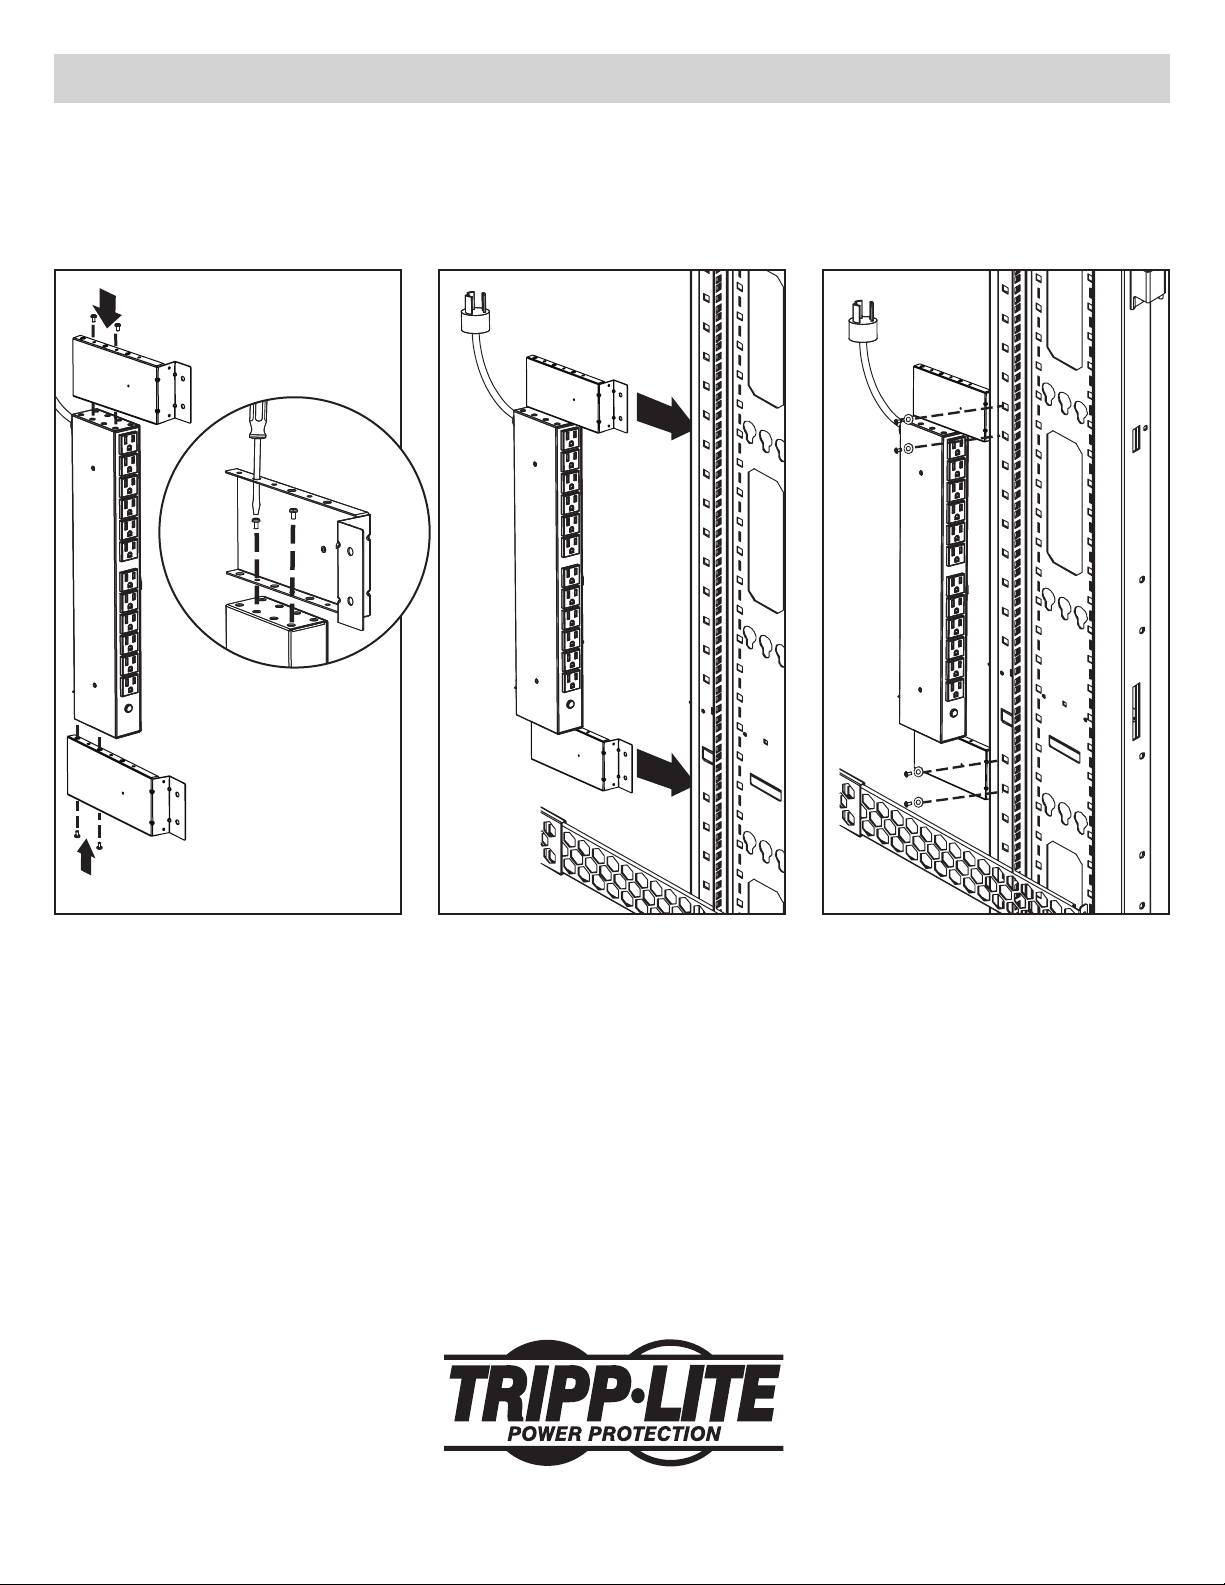
Method 2
Note: PDUSIDEBRKT must be installed
before equipment is installed in
the rack.
Step 2. Slide the brackets’ flanges behind
the outer portion of the mounting
rail as seen in the diagram.
Step 3. Attach the brackets to the rack’s
Step 1. Attach the two mounting brackets
to both ends of the PDU using the
four included #6-32 screws.
Note: Smaller and larger
screwdriver clearance
holes will alternate on each
edge of the bracket and are
transposed on the bracket’s
other edge. Insert the
screwdriver into the larger
clearance holes on one
edge to attach the screws
into the smaller holes on
Step 1. Step 2. Step 3.
the bracket’s other edge.
mounting rails using the four
included 6 mm screws and M6
washers.
1111 W. 35th Street, Chicago, IL 60609 USA
www.tripplite.com/support
201006016 93-2926
 Loading...