

Tripp Lite Media Converters N784-001-SC, N784-001-ST Owner's Manual
Owner’s Manual
Media Converters
Models: N784-001-SC & N784-001-ST
Warranty
Registration
Register online today for a
chance to win a FREE Tripp Lite
product! www.tripplite.com/warranty
Tripp Lite World Headquarters
1111 W. 35th Street, Chicago IL 60609 USA
(773) 869-1234, www.tripplite.com
Note: Follow these instructions and operating procedures to ensure correct performance and to prevent damage to this
unit or to its connected devices.
Overview
Package Checklist
Model Description
Wiring the Power Inputs
2
2
2
3
Communication Connection
4
Dip Switch Setting
Link Fault pass-Through
LED Description
4
5
6
Cable Connection Parameter
6
Specifications
7

2
Overview
The N784 Series Media Converter is a standalone physical layer device that converts
between 10/100BaseT(X) and 100BaseFX segments of the same network. The converter
supports Link Fault Pass-through (LFP) for easy tracing of network link failures, and the
LFP function enhances the integrity and conformity of twisted pair (TP)-Fiber linking to
make the network easier to maintain. The converter is powered by an external power
adapter or USB port on the hosting device (e.g., PC).
Package Checklist
• Media Converter
• AC-DC Power Adapter (100-240V)
• Owner’s Manual
Model Description
N784-001-SC 10/100BaseT(X) to 100BaseFX media converter; multi mode,
SC type fiber connection
N784-001-ST 10/100BaseT(X) to 100BaseFX media converter; multi mode,
ST type fiber connection
Panel Layout
• Front Panel View
• Side Panel View
3
Model Description
(continued)
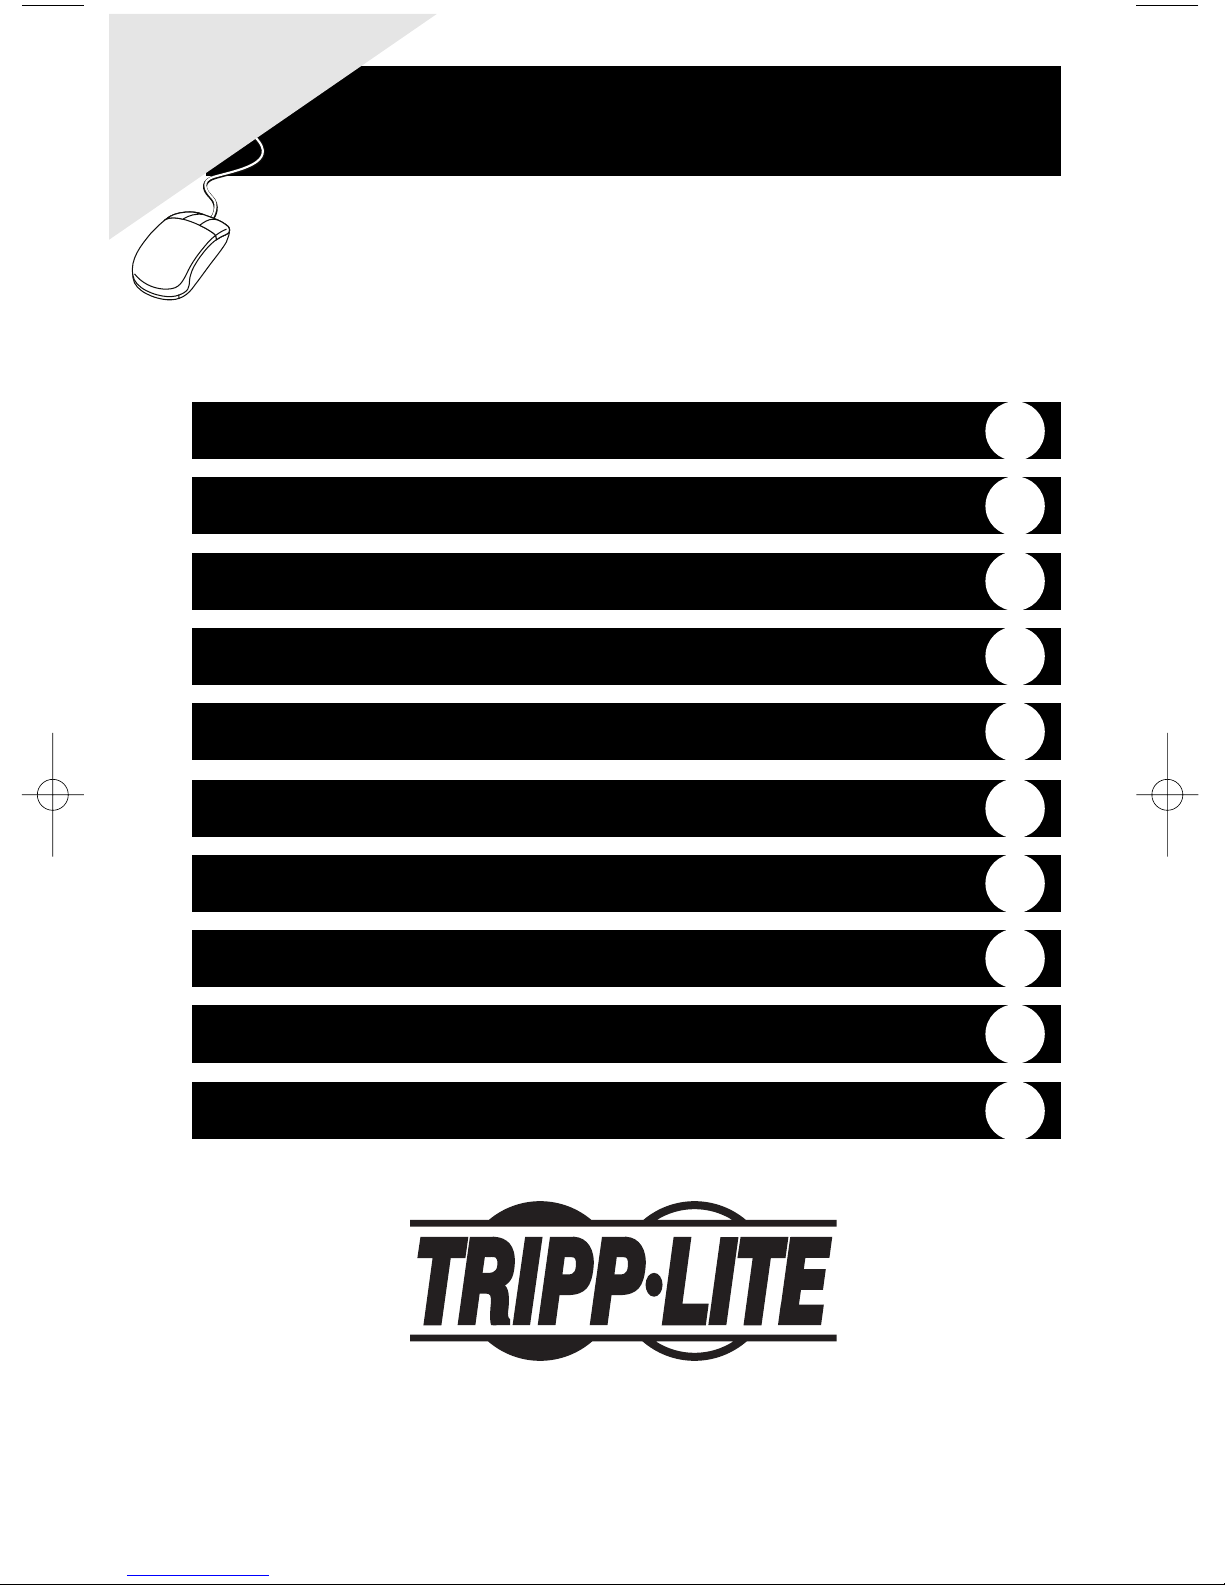
• Rear Panel View
Wiring the Power Inputs
Using the Converter with the AC-DC Power Adapter
1. Use DIP switch settings to enable power through the AC-DC Power Adapter
(refer to DIP switch settings section)
2. Verify that the AC-DC adapter conforms to your country’s AC power requirements and
then insert the power plug.
3. Connect the Converter to the network.
Note: Wear a grounding device to safeguard against damage due to electrostatic charge.
Using the Converter with power Over USB
1. Use DIP switch settings to enable power from the USB port
(refer to DIP switch settings section).
Note: Please ensure that the DIP switch is positioned on the USB side of the slider.
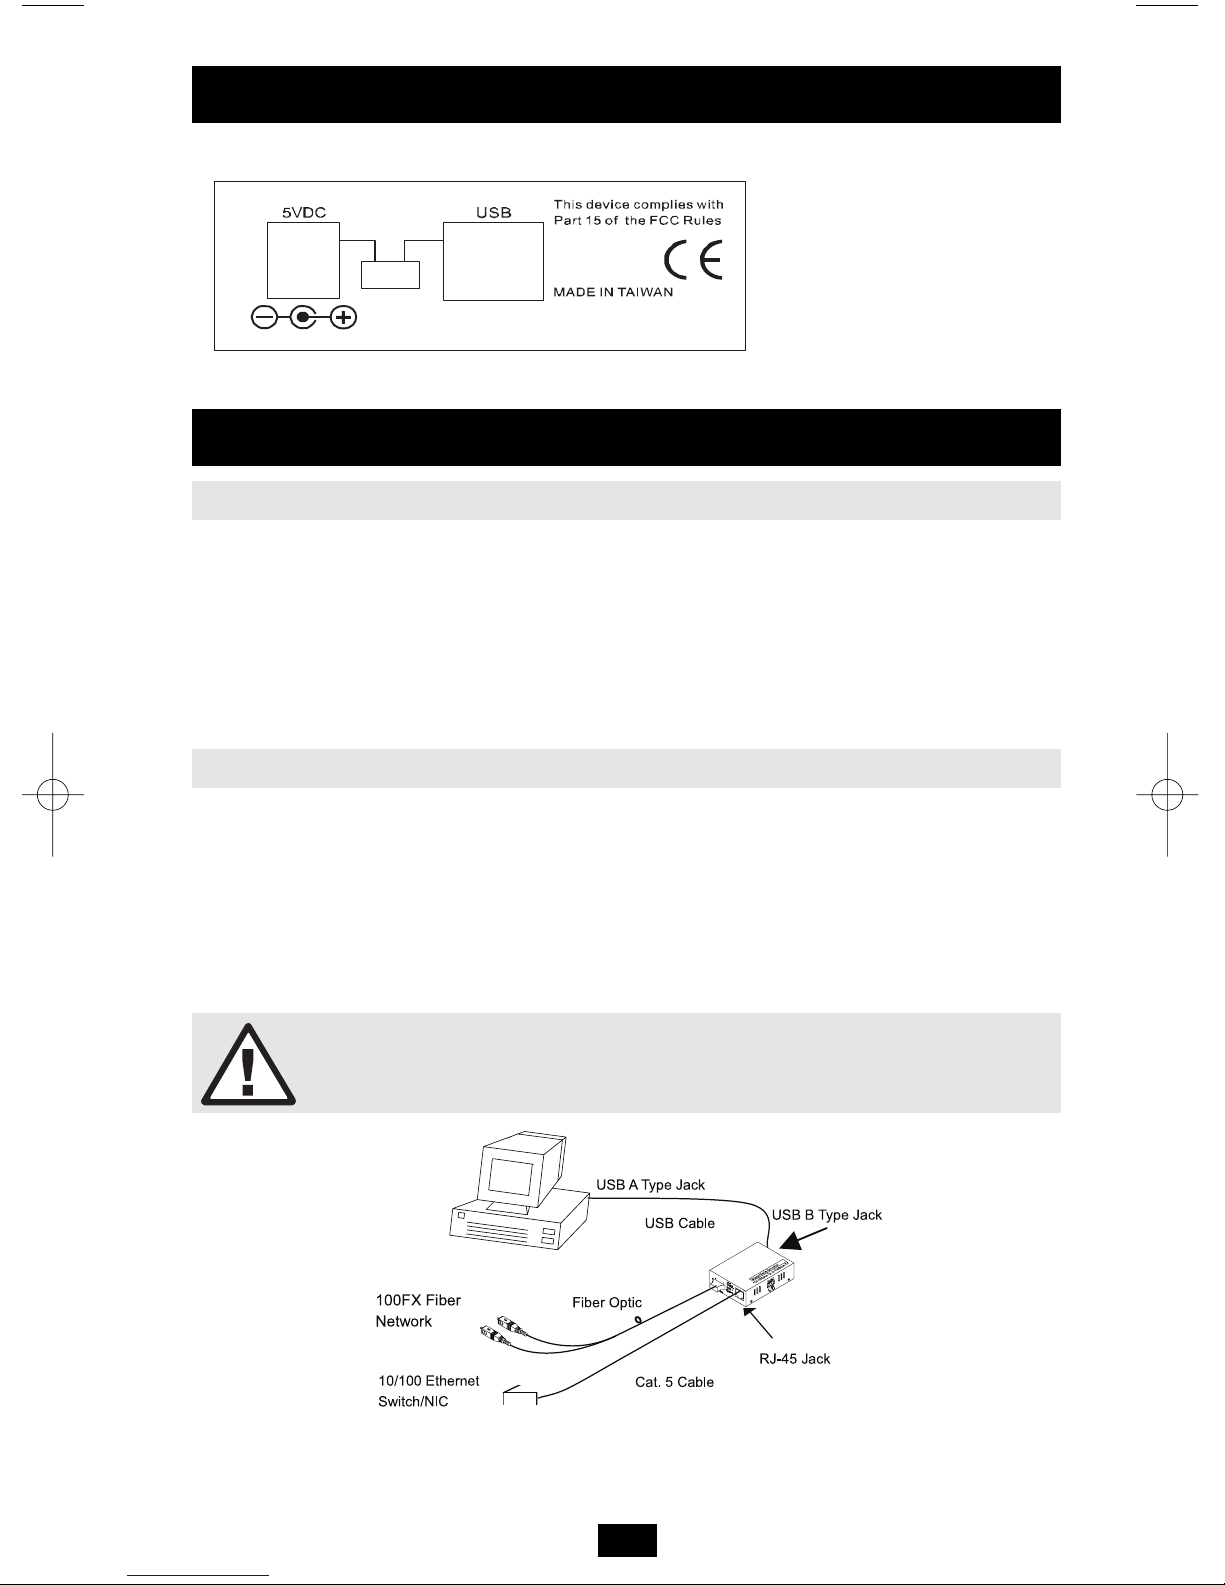
2. Install the USB cable. Plug type A connector in the PC’s USB port and the type B
connector in the Converter’s USB port (see Fig. 1).
3. Connect the Converter to the network.
WARNING
Make sure that the PC’s power is turned on. Otherwise the
Converter will not receive power.
Fig. 1: Media Converter with USB power source (Type B-to-Type A Plug) and FX/TP connection
 Loading...