

Page 1
Roll Up Door Opener Lock Kit Installation Instructions
SW1
JP1
LED
JP2
SW2
01
fi g
02
fi g
03
fi g
INSTALLATION INSTRUCTIONS | OWNERS COPY
Wireless Digital Keypad
TrioCode® KPX-6
TrioCode® Wireless Digital Keypad is designed for use
with automatic garage door and gate openers. The
TrioCode® format provides unparalleled security with
more than 99 million different codes. To operate, the
user enters their unique pin code on the KPX-6 keypad
(4 to 8 digits long) followed by the hash (#) key. The user
then presses one of the eight available channels.
Familiarise yourself with the following instructions prior
to commencing set up. Store this information including
your new pin code in a safe place for future reference.
Initial Set Up
The Keypad is supplied with a factory preset code (1111)
which must be changed to a new pin code before the
Keypad will operate. The pin code can be any 4-8 digits
number except 1111.
Storing your pin number
Note: There is a timeout of approximately 5 seconds
after the last button is pressed.
Enter 1111 followed by the hash (#) key.
Press and hold the hash (#) key again. The keypad
will beep for approximately 5 seconds. Once the
beeping stops, release the hash (#) key. Enter the
new pin code followed by the hash (#) key. Re-enter
the new pin code followed by the hash (#) key to
confi rm. A short string of beeps will be produced to
confi rm the acceptance of the new pin code.
Test operation using the new code. Enter the
new code followed by the hash (#) key. Press and
hold any button from 1-8 and you should hear a
continuous string of beeps.
NOTE: If you lose or forget a code, you will need
to return the Keypad to Automatic Technology for
reprogramming. A charge will apply for this service.
Coding The Keypad Into The Opener
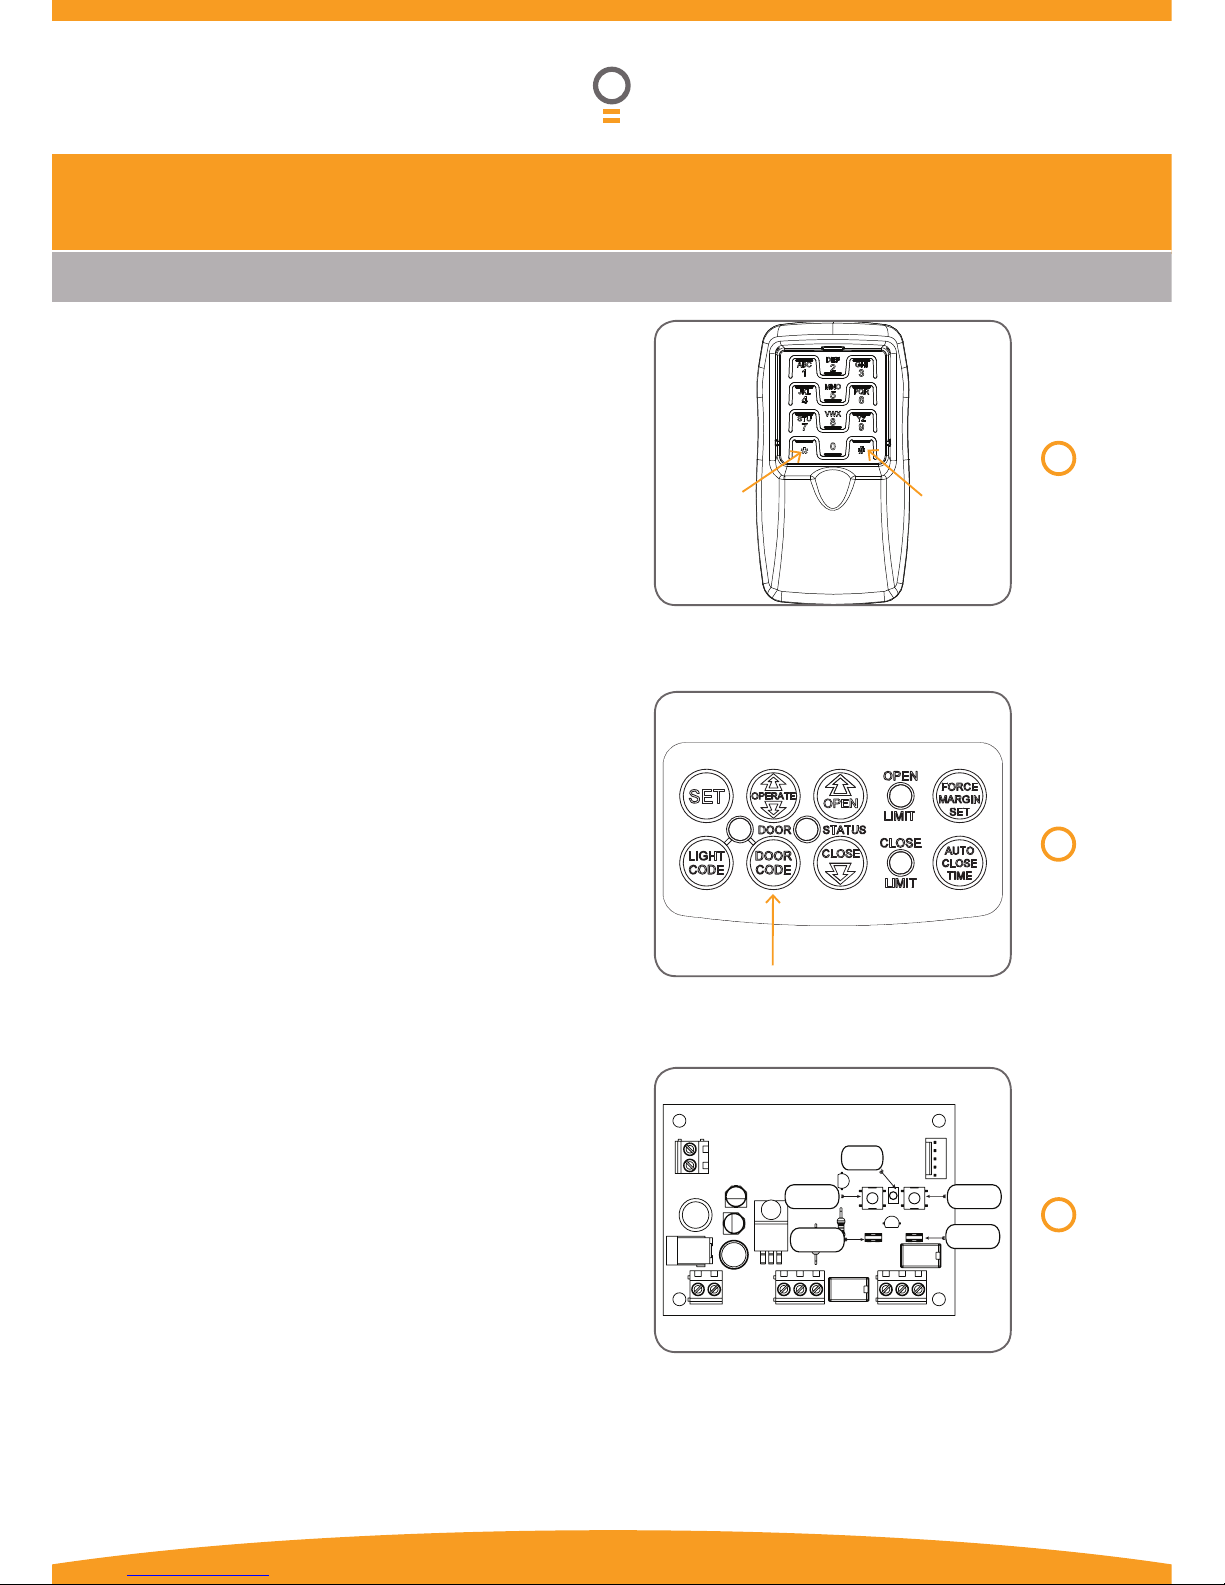
Press and hold the Door Code button on the control
panel of your Automatic Technology TrioCode®
garage door opener (Fig. 02) or SW1/SW2 on the
TrioCode® receiver board (Fig. 03).
Enter your pin code on the Keypad of the KPX-6
followed by the hash (#) key then press one of the
eight (channel) buttons you wish to use to operate
the door or gate etc.
Pause for a second and press the same button
again on the Keypad of the KPX-6.
Release the Door Code or SW button. The Keypad
code should now be stored into the opener’s
memory.
Test the operation of the Keypad by entering your
pin code followed by the hash (#) key and the stored
channel button (1-8). The door or gate should start
to move.
a.
b.
c.
a.
b.
c.
d.
e.
Star(*) key Hash(#) key
Part # 13259 Manual v1.02
Page 2
Attaching The KPX-6 To The Wall
Choose a convenient wall location where the
door is visible, but out of reach of children at a
height of at least 1.5 meters from the fl oor.
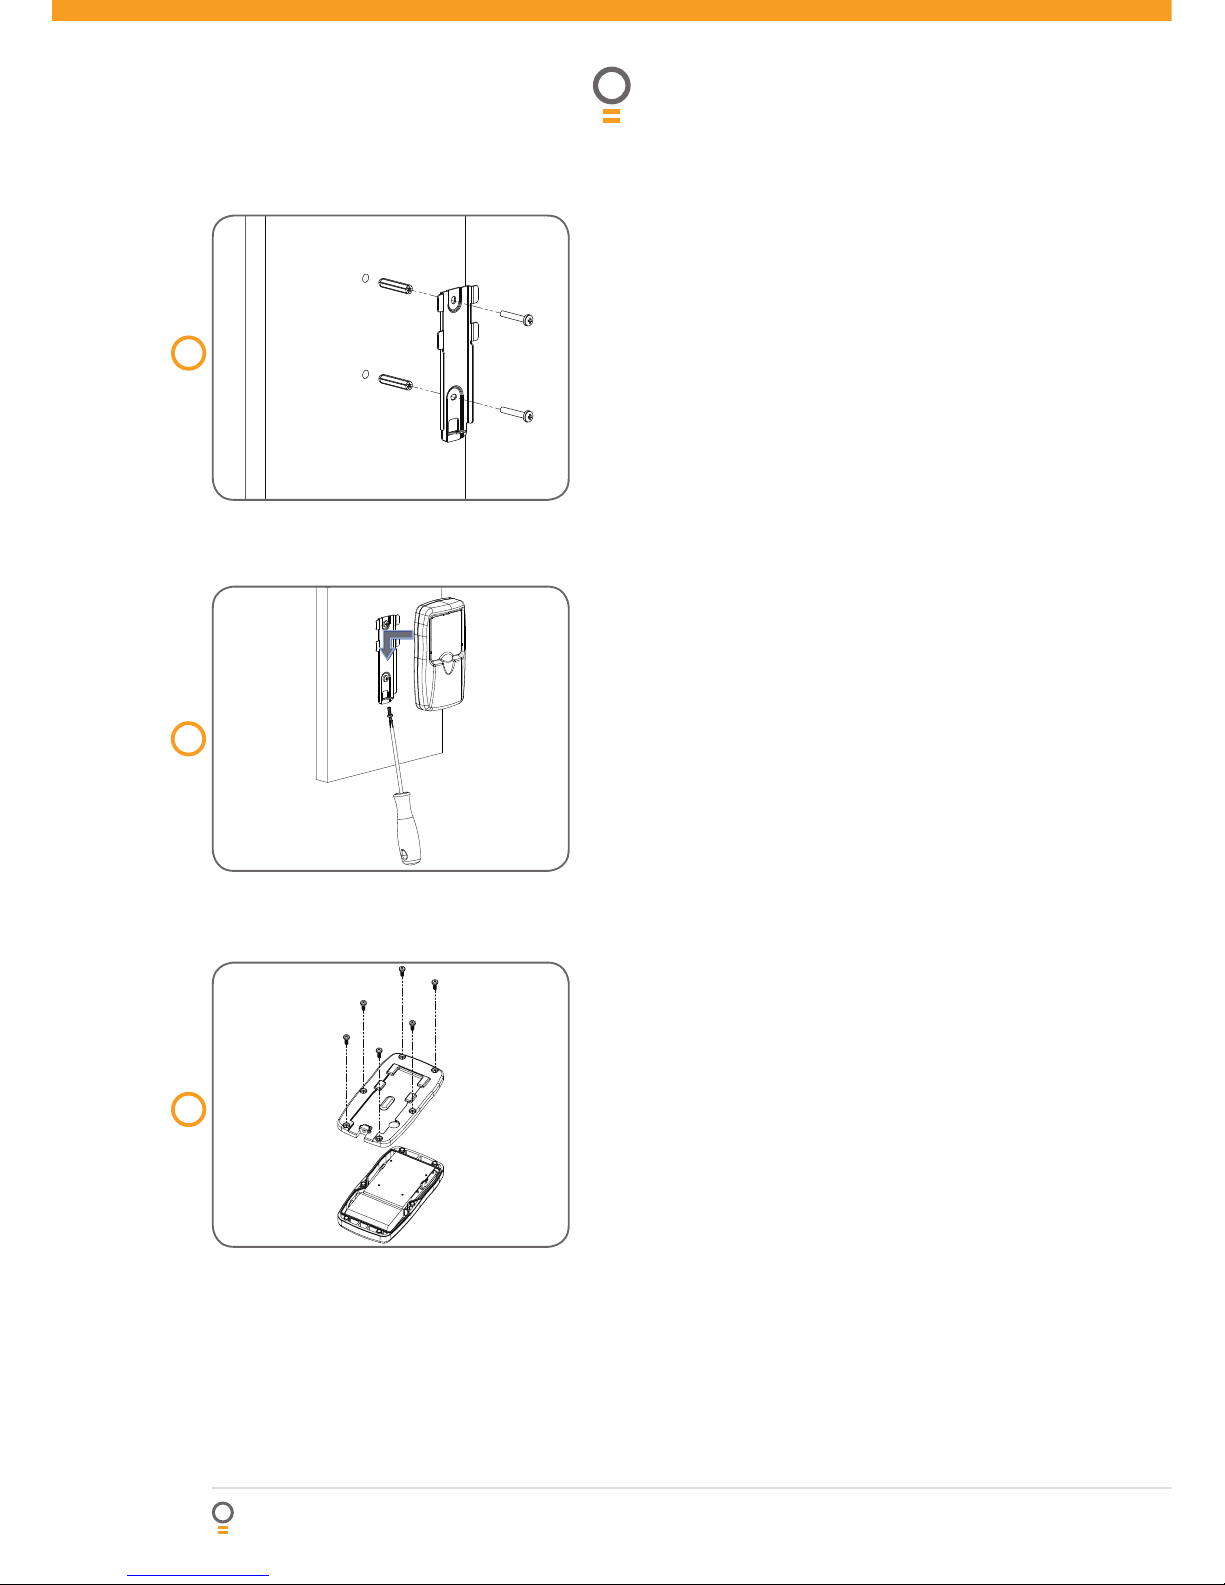
Use the mounting bracket as a template. Mark
and drill two 6mm holes and affi x the mounting
bracket with two wall plugs and screws (supplied)
as shown in Fig 04.
Slide the KPX-6 on to the mounting bracket and
secure it with a screw as shown in Fig 05.
Changing the Pin Code
Note: There is a timeout of approximately 5 seconds
after the last button is pressed.
Enter your current pin code followed by the hash
(#) key.
Press and hold the hash (#) key again. The keypad
will beep for approximately 5 seconds. Once the
beeping stops, release the hash (#) key. Enter the
new pin code followed by the hash (#) key. Re-enter
the new pin code followed by the hash (#) key to
confi rm. A short string of beeps will be produced to
confi rm the acceptance of the new pin code.
Test operation of the Keypad by entering your pin
code followed by the hash (#) key and the stored
channel button (1-8). The door or gate should start
to move.
Wrong Pin Code
If a wrong pin code is entered, a specifi c sound is heard
after pressing the hash (#) key. The star (*) key must be
pressed to start re-entering the pin code. On the fourth
consecutive wrong pin code entry, an alarm (light blinks
and sound beeps) is triggered for 10 seconds. Every
next wrong pin code entry will trigger the alarm. The
time out for the wrong pin code is one minute.
Back Light
The KPX-6 Keypad has built-in keypad lighting for use
at night or in the dark areas. The keys are backlit with a
pleasing green glow. The user can light the keypad by
pressing the star (*) or the hash (#) keys before entering
the pin code. The light will turn off after fi ve seconds if
none of the buttons are pressed. This saves the battery
power.
Battery Monitor
The KPX-6 Keypad has a built-in battery monitor. If the
battery power is low, the fi rst depress of any key will
produce a distinctive warning. If the battery voltage
drops further, the Keypad will stop transmitting and will
produce a continuous long beep.
Changing Batteries
Remove the back cover of the KPX-6 by removing
the six screws as shown in Fig 06.
Remove the three (3) batteries and dispose of them
properly.
Install fresh AAA size batteries.
Replace the back cover.
Install the six cover screws.
a.
b.
c.
a.
b.
c.
a.
b.
c.
d.
e.
04
fi g
05
fi g
06
fi g
 Loading...