

Trim-Tex Crown Molding User Manual [en, es]
Staple mud flange every 6"Staple mud flange every 6"
A piece of masking tape will
hold the corner as the
caulk sets.
A piece of masking tape will
hold the corner as the
caulk sets.
Pressure along top edgePressure along top edge
Wipe excess caulkWipe excess caulk
Foam
Left Inside
Corner
Left Inside
Corner
Right Outside
Corner
Right Outside
Corner
Bull AdapterBull Adapter
Trim-Tex 700/710 Caulk or
Big Stretch along the front edge
Trim-Tex 700/710 Caulk or
Big Stretch along the front edge
847847
VERY
IMPORTANT
VERY
IMPORTANT
Adhesive Caulk
along the front edge
Adhesive Caulk
along the front edge
Foam
Pieces
Pieces
Right Inside
Right Inside
Corner
Corner
Installation Instructions
INC.
for Crown Moldings
Please read entire instruction before proceeding.
Improper installation will void any applicable warranty.
Foam
Foam
Pieces
Pieces
Left Outside
Left Outside
Corner
Corner
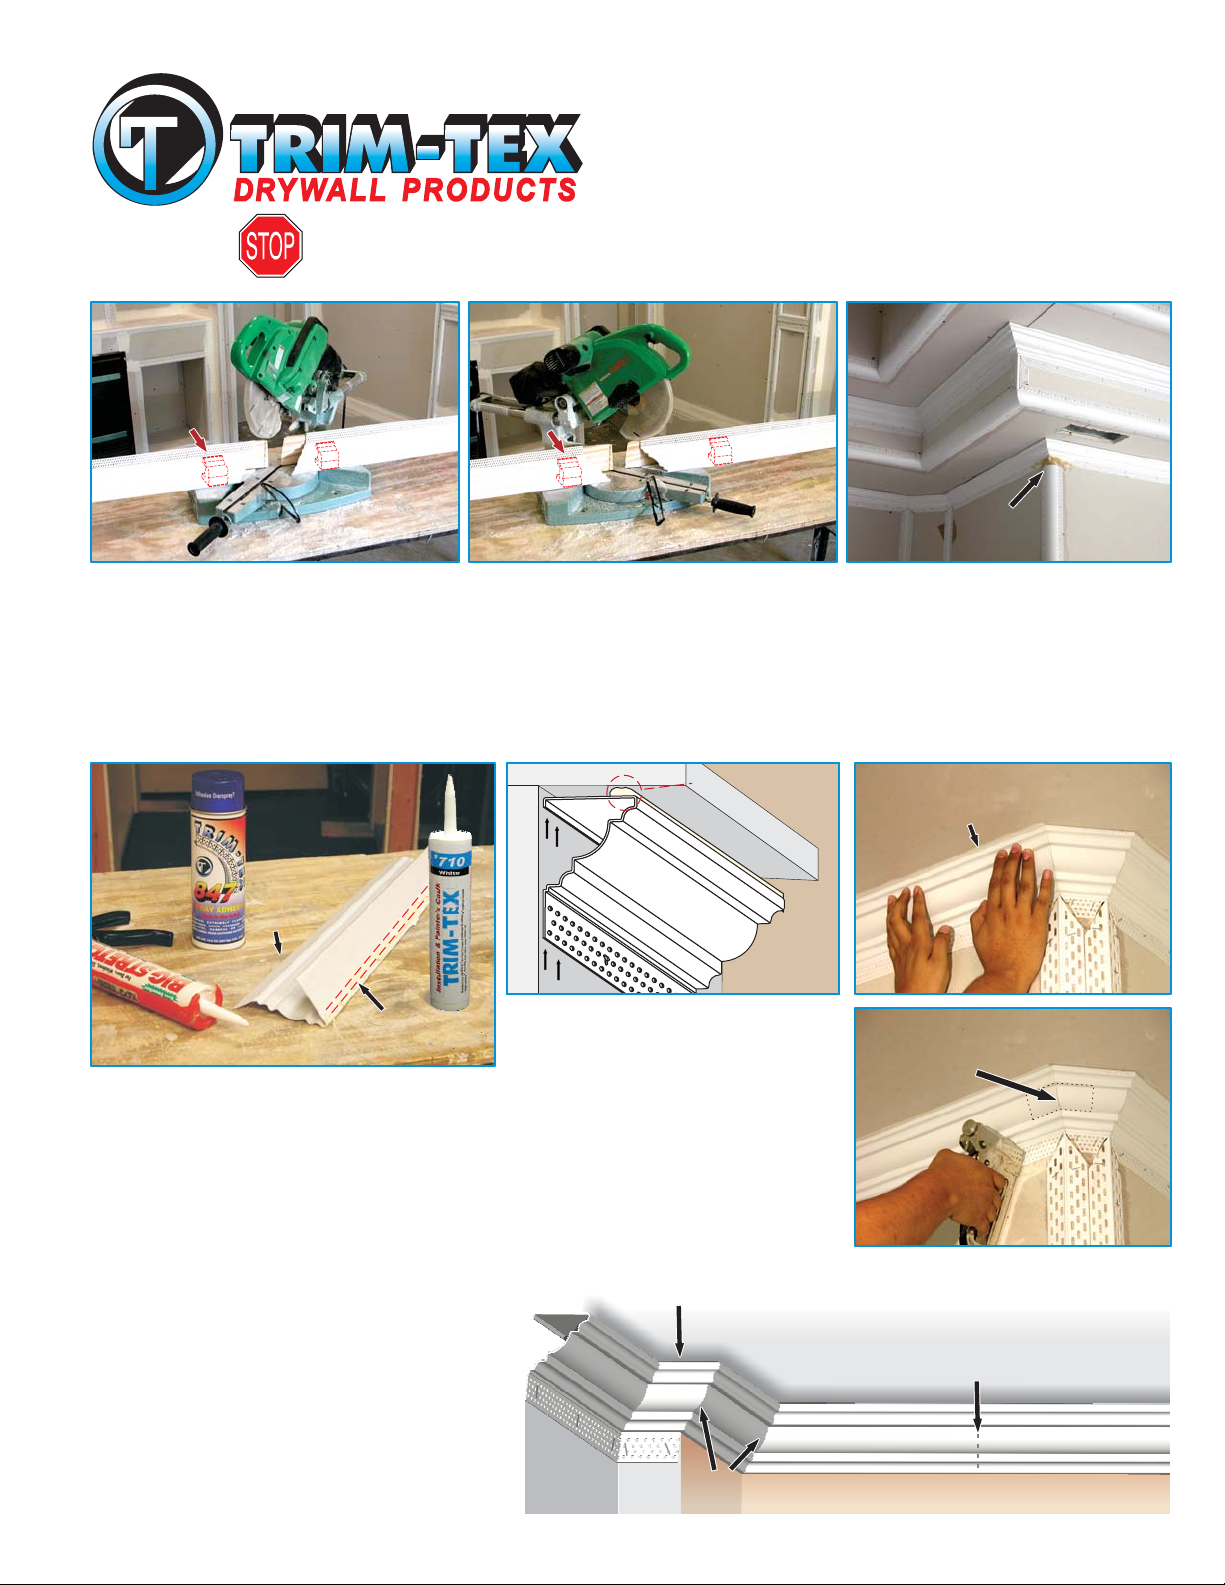
Step 1: If required by local codes, paper tape or fire tape the inside corner prior to installing the
crown molding. Always wear safety glasses when using miter saws, staple guns, or spray
adhesive. If necessary, attach some plywood to the miter saw so the part is supported as shown.
Break your saw to the left for a right inside or left outside corner. Break your saw to the right for a
left inside or right outside corner. For additional support, place the foam spacer pieces near the
blade. Use a fine tooth cross cut blade. Toensure accuracy,make the miter cuts slowly. Typically
a 90º inside or outside corner will require setting the miter saw to 45º. Most corners are rarely a
true 90º so you may need to adjust the angle and make some practice cuts first.
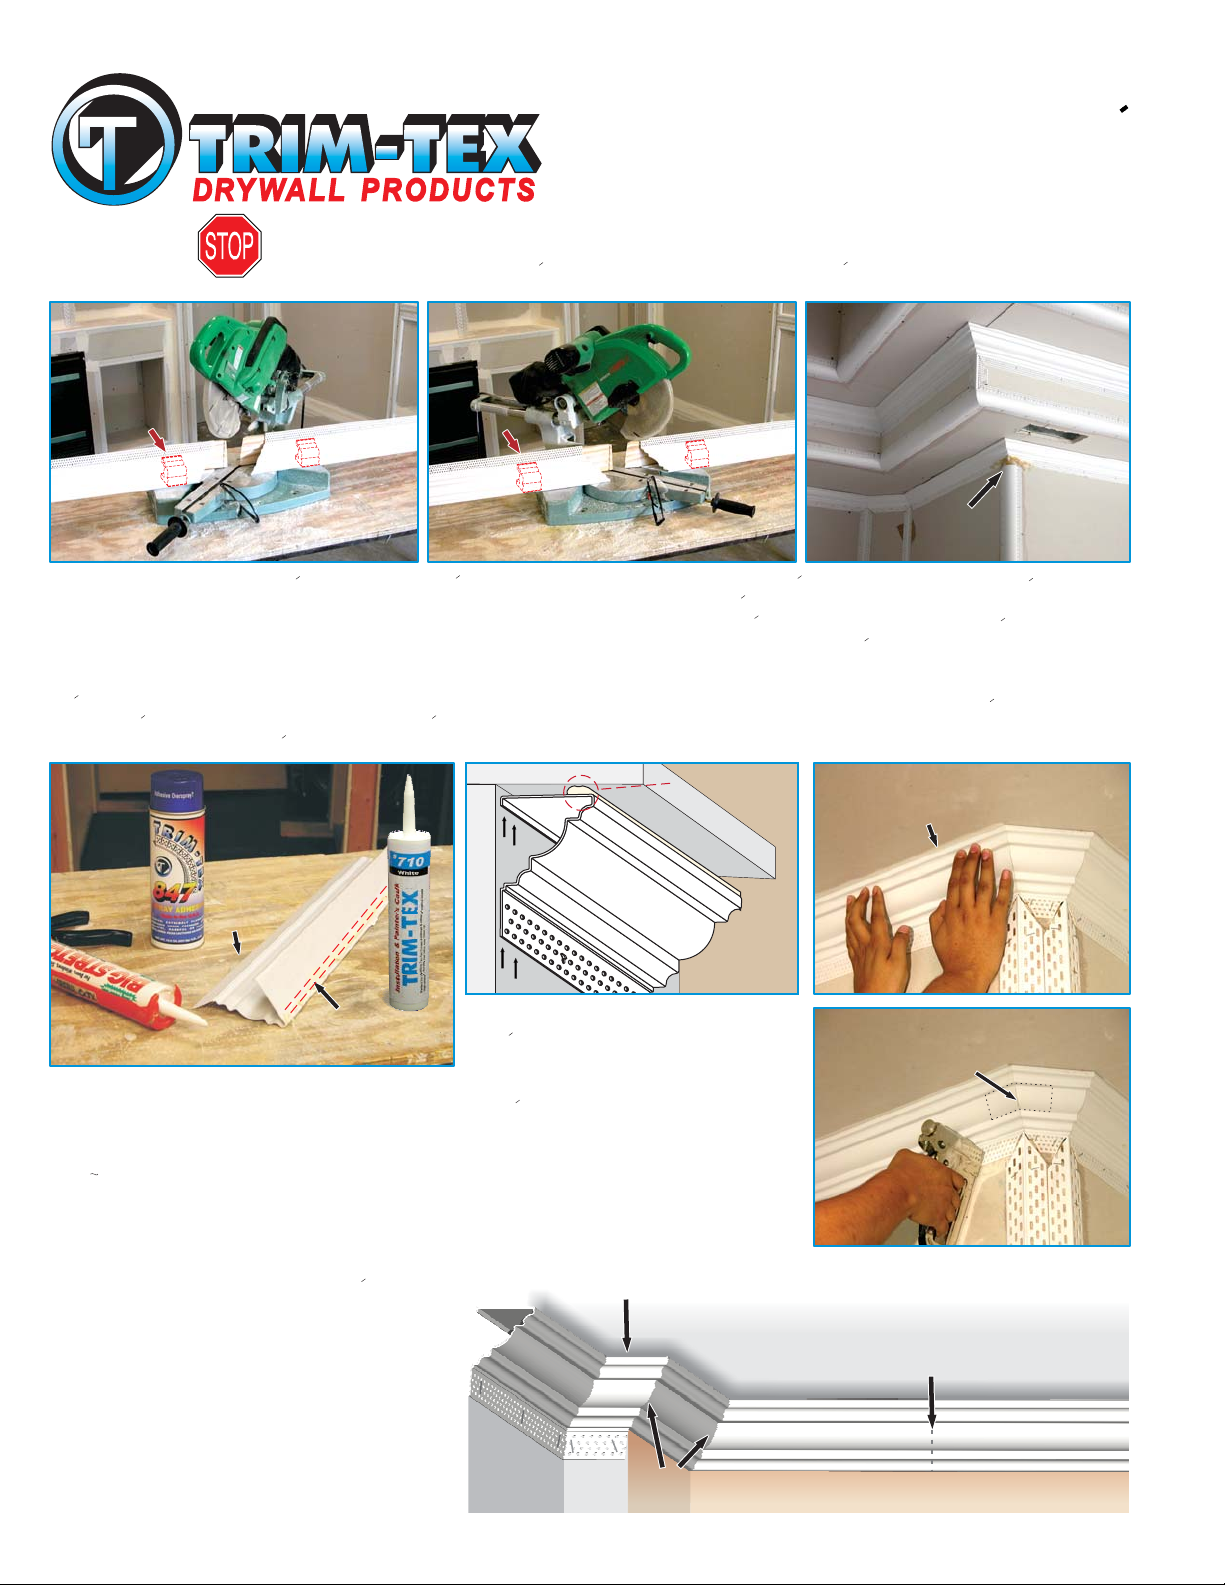
Step 4: Starting at any miter joints,
carefully install the crown molding
taking care to keep the product square
Step 3: You must apply a 1/2" bead of high
quality white paintable adhesive caulk, such
as Trim-Tex 700/710 caulk or Big Stretch from
Sashco, along the front edge of the top flange
of the Crown Molding. Apply 847 Spray
Adhesive to the mud leg.
to minimize gaps at miter joints. Apply
pressure to the bead along the top
edge to bond the crown molding to the
ceiling and then pressure along the
mud flange. Staple the mud flange
every 6" with 1/2" divergent staples.
Step 2: On a wall section where two
pieces of crown molding need to be
joined, it is easier to cut the miters first
and leave the straight butt joint as the
last cut. When using Crown Molding
with Bullnose, use Bull Adapters as
shown above.
Step 5: Wipe excess caulk that squeezed out
from the top flange. Then caulk along the top
edge of the crown molding, the inside and
outside corners and any butt joints.
compound along the mud flanges. For the
ultimate in compound performance, add MudMax Drywall Compound Additive to your mud.
Paint the crown molding with a high quality
latex paint.
settling or movement conditions, the caulk
may crack along the edge of the Crown
Molding. Re-caulk as needed.
3700 W. Pratt Ave. Lincolnwood, IL 60712-2508 (847) 679-3000 1-800 874-2333 Fax: (847) 679-3017 www.trim-tex.com
, Apply
See graphic to the right. In extreme
Caulk along top edgeCaulk along top edge
Caulk Mitered CornersCaulk Mitered Corners
Caulk Butt JointsCaulk Butt Joints
Mud - Sand - PaintMud - Sand - Paint
Pieza de
Esquina Interna
Izquierda
Esquina Interna
Izquierda
Esquina Externa
Derecha
Esquina Externa
Derecha
Bull AdapterBull Adapter
Engape cada 6"Engape cada 6"
Un trozo de cinta adesiva mantiene
la esquina en su lugar hasta que
el adesivo se cure
Un trozo de cinta adesiva mantiene
la esquina en su lugar hasta que
el adesivo se cure
Precione la parte posteriorPrecione la parte posterior
Limpie el exesoLimpie el exeso
847847
MUY
IMPORTANTE
MUY
IMPORTANTE
Trim-Tex 700/710 Caulk o Big Stretch
a lo largo de la parte superior.
Trim-Tex 700/710 Caulk o Big Stretch
a lo largo de la parte superior.
Adesivo en la
parte posterior
Adesivo en la
parte posterior
Pieza de
Espuma
Espuma
Esquina Interna
Esquina Interna
Derecha
Derecha
Instrucciones de Instalacion
INC.
para Molduras decorativas
Favor de leer las instrucciones antes de comenzar.
Una instalacion incorrecta, anulara cualquier garantia aplicable
Pieza de
Pieza de
Espuma
Espuma
Esquina Externa
Esquina Externa
Izquierda
Izquierda
1er Paso Si lo requieren los codigos de construccion local, antes de instalar la moldura, debera
encintar la esquina con cinta de papel. Siempre use lentes al usar sierras electricas,
engrapadoras y pegamento en aerosol. Si es nesesario instale madera sobre la sierra electrica
como soporte para la moldura. Mueva la sierra hacia la izquierda para un corte interno derecho o
externo izquierdo. Mueva la sierra a la derecha para un corte interno izquierdo o externo derecho.
Para soporte adicional, utilize la pieza de espuma cerca de la navaja. Use una navaja de dientes
multiples y finos. Para un corte preciso corte despacio. Usualmente un corte de 90º requiere que
la sierra electrica se encuentre en 45º. La mayoria de las esquinas raramente son 90º por lo cual
tendra que ajustar la sierra electrica y practicar unos cortes inicialmente.
3er Paso Aplique una capa de 1/2" de
pegamento siliconizado pintable de alta
calidad, como el silcon 700/710 de Trim-Tex o
Big Stretch marcha sashco a la parte superior
de la molduradecoritiva. Aplique pegamento
en aerosol 847 a la extremidad perforada.
:
4to Paso Comenzando con los cortes
en angulo, instale la moldura con
cuidado y a escuadra para minimizar
:
espacios en las uniones. Aplique
presion a la parte del techo y a la
extremidad perforada. Engrape la
extremidad perforada cada 6" con
grapas divergentes de
:
1/2".
2:ndo Paso En una seccion de pared
donde se requiere unir dos secciones,
es preferible cortar los angulos primero
y por ultimo la union recta. Cuando use
Molduras Decorativas con bullnose,
use el adaptador para bullnose como se
muestra en la ilustracion.
5to paso Limpie el exceso de silicon pintable
en la parte superior. Despues aplique silicon
pintable a la parte superior y a las uniones.
Aplique material para el terminado de tabla
roca a la parte perforada, agregue MUD-MAX
aditivo para material del terminado de tabla
roca para un mejor resultado. En
condeciones extremas de acentamiento
estructural, el silicon pintable puede
reventarse en la parte posterior de la
moldura, use silicon despues de limpiar el
area argietada.
:
Aplique silicon pintable en la parte superiorAplique silicon pintable en la parte superior
Aplique silicon pintable en las unionesAplique silicon pintable en las uniones
Aplique silicon pintable en los angulosAplique silicon pintable en los angulos
Aplique Material - Lijar - PintarAplique Material - Lijar - Pintar
 Loading...