

Page 1
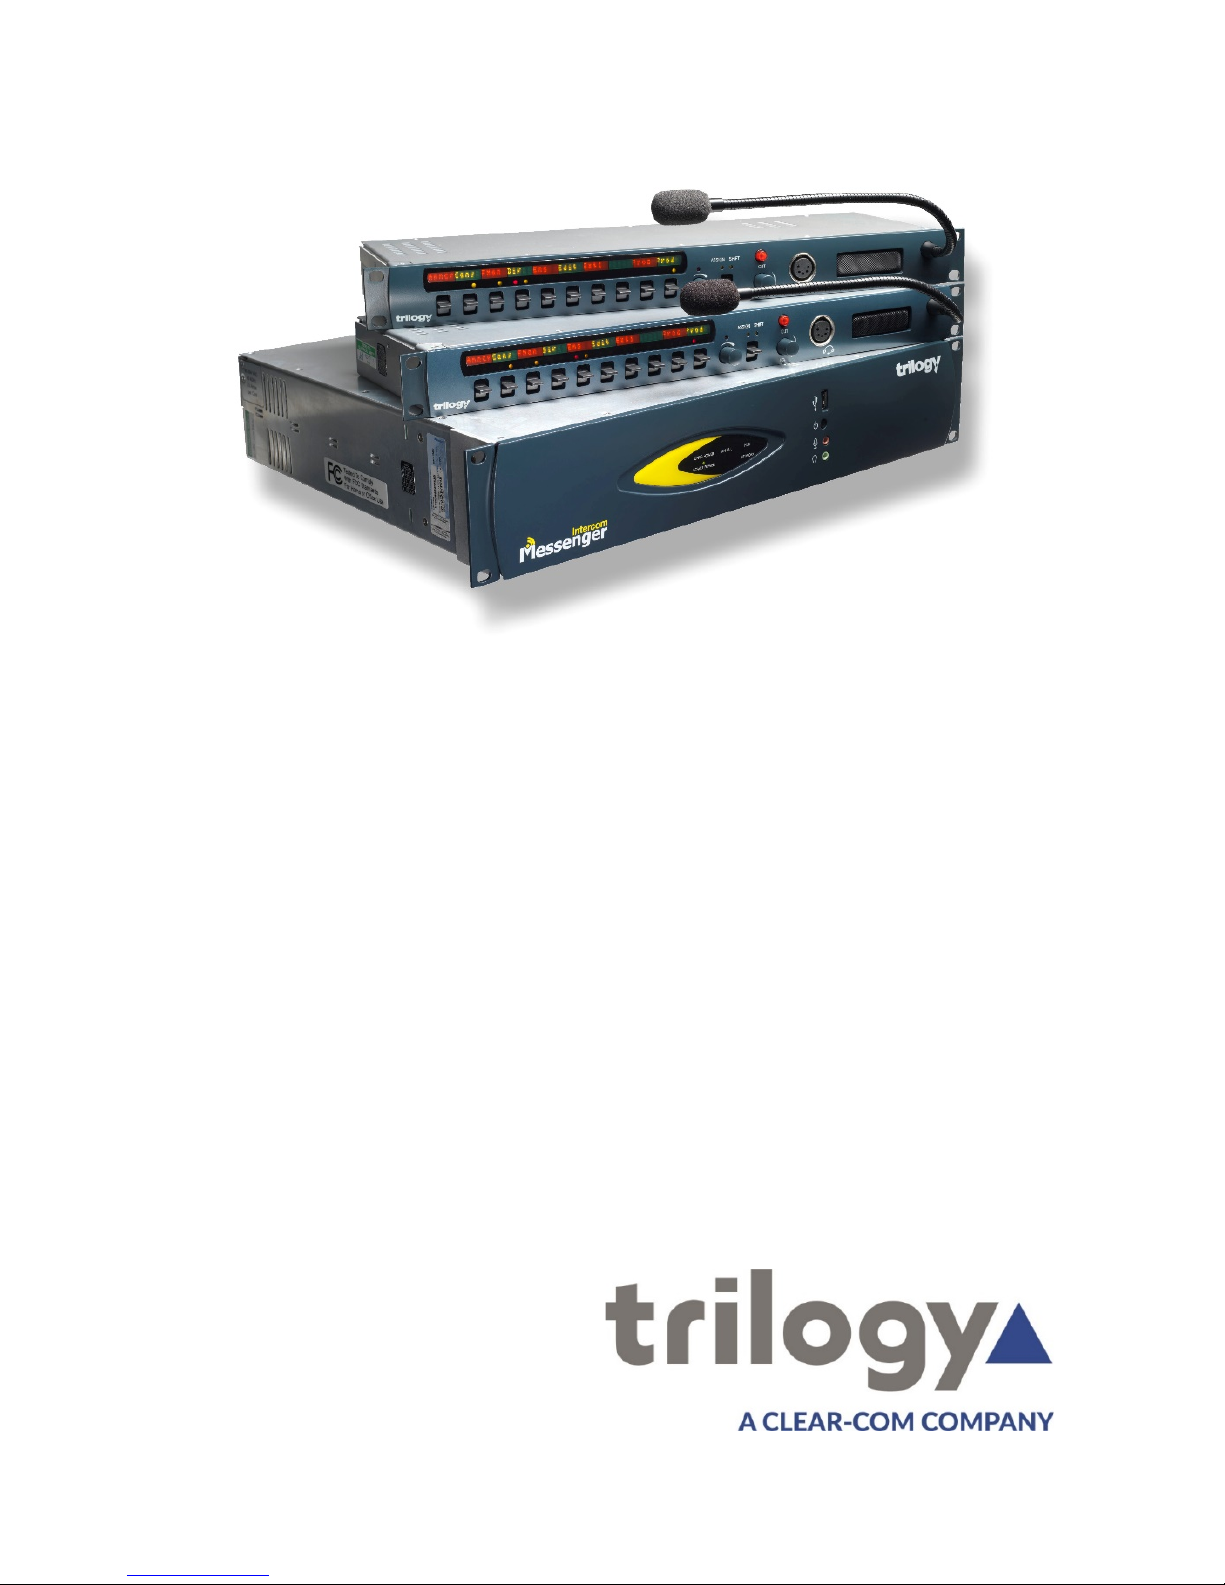
Messenger
Intercom
Quick Start
Guide
Page 2

2
Messenger Quick Start Guide
Contents
Overview ......................................................................................... 3
Network plan and IP addresses ...................................................... 4
Install Gateway Editor on your PC or laptop .................................. 5
Windows firewall ............................................................................ 5
Messenger Software Components ................................................. 6
Database Supervisor ........................................................ 6
Talkback Controller (TBC) ................................................ 6
Messenger - key connections ......................................................... 7
Messenger – initial setup ............................................................... 8
Gateway – the Configuration Editor ............................................. 11
Gateway – upload and restart ...................................................... 13
Hints and Tips ............................................................................... 15
This guide is intended as a Quick Start Reference only. Comprehensive
information covering these products is provided on the accompanying
CD.
Document: 70090623
Issued: March 2017 © Trilogy Communications.
Page 3

3
Messenger Quick Start Guide
Overview
Thank you for purchasing this Messenger intercom system
from Trilogy Communications. Please check all the equipment
supplied to ensure it matches both your purchase order and
the delivery paperwork. Inspect the equipment for damage
and immediately report any discrepancy or problem to your
supplier or direct to Trilogy.
This Quick Start Guide is designed to take you through the
initial stages of setting up your Messenger Intercom system.
More detailed information is provided in the Implementation
and Configuration Guides which are provided on the CD
included with your order.
Here is an outline of the contents of this guide:
• Plan your network and IP addresses
• Prepare your laptop or PC by installing Gateway
Configuration Editor software
• Messenger Software Components
• Messenger Key Connections
• Messenger initial setup
• Using Gateway Configuration Editor – the basics
Page 4

4
Messenger Quick Start Guide
Network plan and IP addresses
The Messenger matrix frame will normally be connected to an IP
network. This allows it to communicate with other Trilogy IPbased intercom products and to connect to the Gateway
configurations software. However, once correctly configured, a
single Messenger matrix frame can operate in isolation.
Each Messenger frame requires two static IP addresses:
1. The first is the Windows Host and the default ex-factory
values are provided in the table below.
2. The second is used by the IP audio card within Messenger
and is set by the configuration data.
Your laptop or PC must use an address in the same subnet
(“range”) as Messenger. If it is not convenient to adjust the
address of your PC then the default addresses used by Messenger
must be changed, as described later. Make a note of the values
which you plan to use.
IP Address
Subnet Mask
Default
gateway
Messenger
Windows Host
192.168.200.200
255.255.255.0
not set
Messenger
Audio
192.168.200.201
255.255.255.0
not set
Laptop / PC
Any mistakes or inconsistencies in these values may lead to
unpredictable audio behaviour. For example, if you declare a
gateway address on your PC, this must also be declared within
the configuration data for the Messenger Windows Host.
Page 5

5
Messenger Quick Start Guide
Install Gateway Editor on your PC or laptop
Gateway Configuration Editor is the Windows application used to
create or edit the configuration which governs how the panels
are arranged, what type of keys are present and the membership
of groups, conferences and IFBs. Gateway also manages the
deployment of your revised configuration to the Messenger
system. Gateway should not be installed on the Messenger
matrix itself.
Insert the supplied CD into your PC and from the menu, select the
option to “Install Software”. Only one components should be
installed - “Gateway Configuration Editor”. As we will explain in
the following section, the database resides on Messenger. You
should normally accept all other default options.
When prompted for the address of the database, enter the IP
address of the Messenger Windows Host as recorded above.
When complete, close the installation program. Before removing
the CD, use Windows Explorer to browse the CD and to copy the
documents and configurations to your PC.
Windows firewall
In order to allow your PC to connect to the database, a number of
ports must be opened on the PC firewall. We can supply scripts to
automate this process for Microsoft Windows Firewall: for other
firewalls please consult the documentation supplied with that
product.
To carry out the task manually, the following ports must be
opened to allow inbound access:
• TCP 12005 management database data
• TCP 12006 management database control
• TCP 13001 management database supervisor
Page 6

6
Messenger Quick Start Guide
Messenger Software Components
Messenger is supplied with software pre-installed and ready to
run. The main software components are:
Database Supervisor
This Windows service manages the database files and converts
them to the correct format for the TBC. The database is edited
using Gateway, which was installed on your PC in the preceding
section.
Talkback Controller (TBC)
This Windows service manages all of the audio traffic both within
and (where needed) outside Messenger. Data describing the
system layout is provided to the TBC by the database.
Each service is managed by a small graphical application which
normally runs minimised in the Windows system tray. Click on the
icon (see above) to show options including the management
tools.
Page 7
7
Messenger Quick Start Guide
Messenger - key connections
Full details of all connectors are provided in the Implementation
Guide which is supplied on the accompanying CD. At this stage
please identify the following key connectors from the Messenger
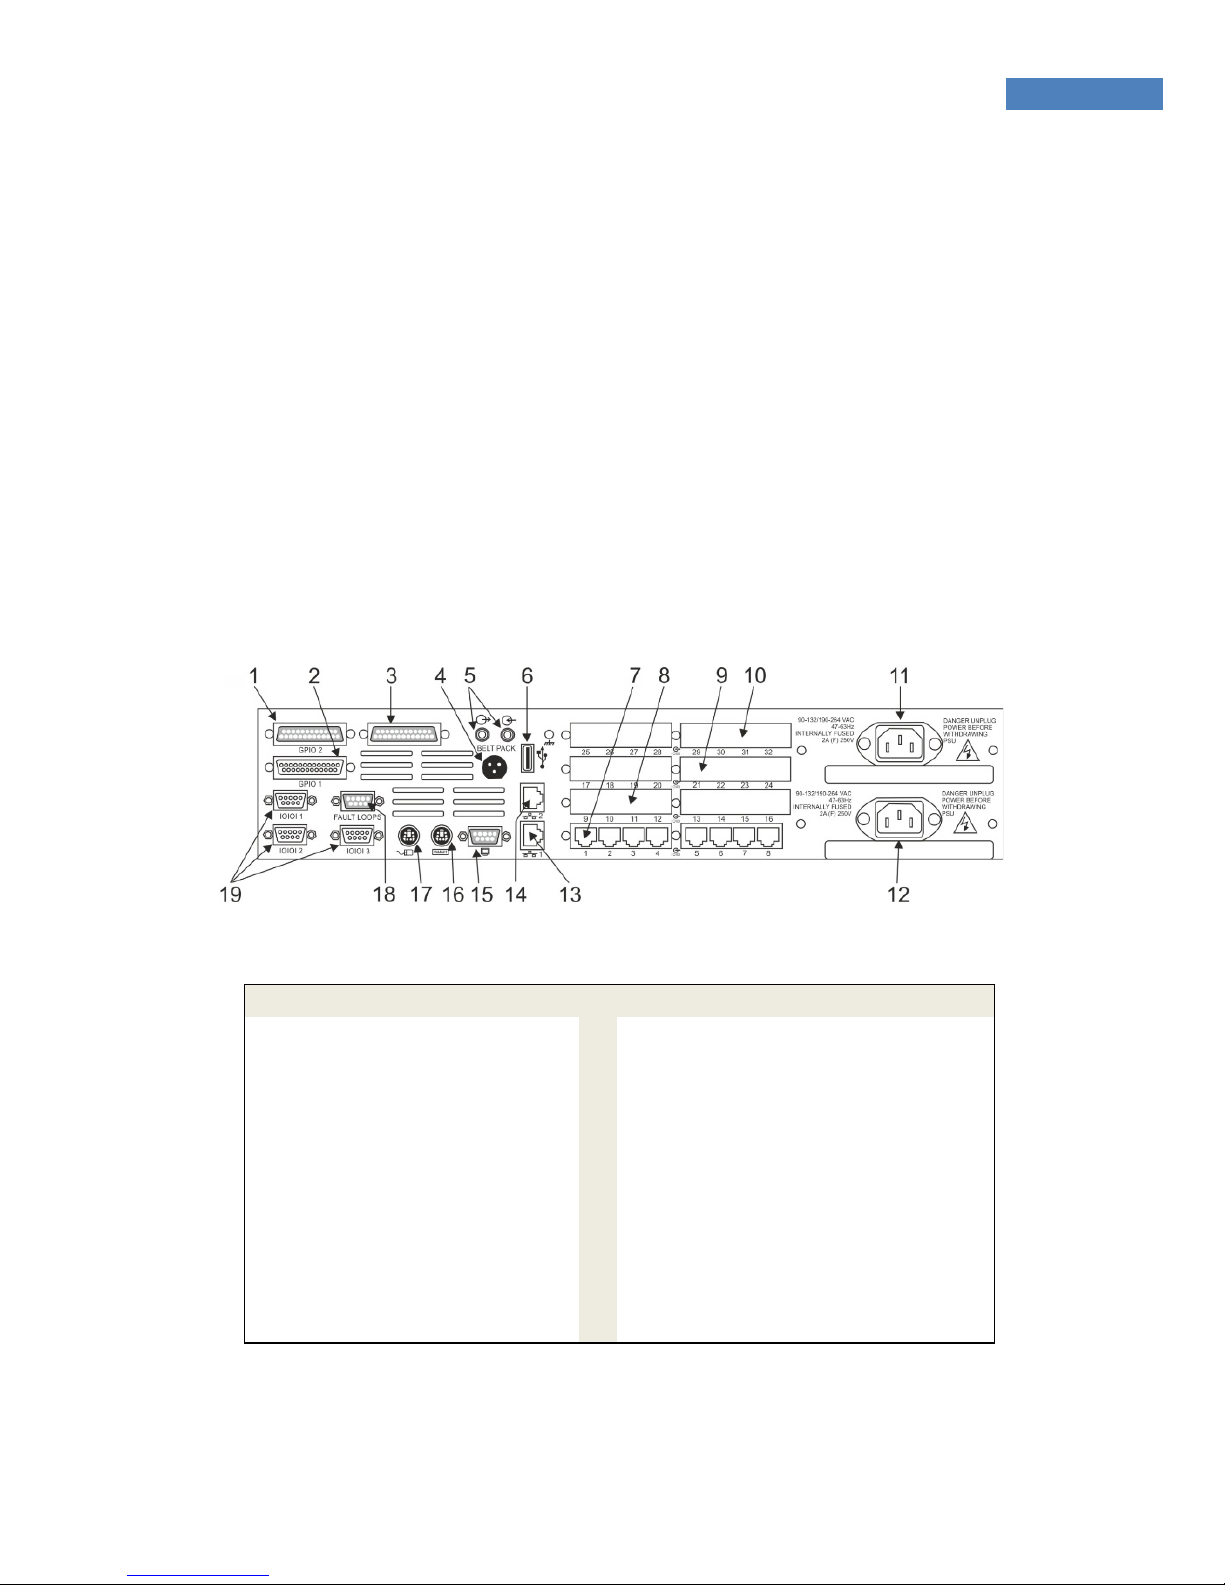
rear panel:
• 11, 12 - Mains IEC inlet (optional second inlet)
• 16, 17 - Keyboard and Mouse PS/2 connectors
(alternatively, rear and front mounted USB 6)
• 15 - Monitor VGA
• 13 - Ethernet (Primary LAN) RJ-45
Item
Description
Item
Description
1
GPI Input
11
Mains inlet 1
2
GPI Output
12
Mains inlet 2
3
Camera Mix
13
LAN (primary)
4
Aux Power
14
Aux LAN (not used)
5
PC audio (not used)
15
Monitor VGA
6
USB
16
Keyboard
7
Port 1 - 8
17
Mouse
8
Port 9 - 16
18
Fault Loop
9
Port 17 - 24
19
COM Port 1,2,3
10
Port 25 - 32
Page 8
8
Messenger Quick Start Guide
Messenger – initial setup
During the initial phase a keyboard, mouse and monitor are
required but may be removed later. The Messenger matrix frame
and your PC will normally be connected to an IP network. For
initial setup, this may be as simple as a single Ethernet cable
connected between Messenger and your laptop or PC. However,
do not connect Messenger to your LAN at this stage.
Please follow the instructions below step-by-step for initial setup.
1. Connect a keyboard, mouse and monitor to the
Messenger. If you cannot source PS/2 devices, you can
connect a USB mouse to the front of the frame.
2. Connect mains power to the frame: if your Messenger
has two power supplies, one mains input is sufficient at
this time. Messenger will boot automatically.
3. When prompted, log-in to Windows with the built-in
account, username trilogy password trilogy.
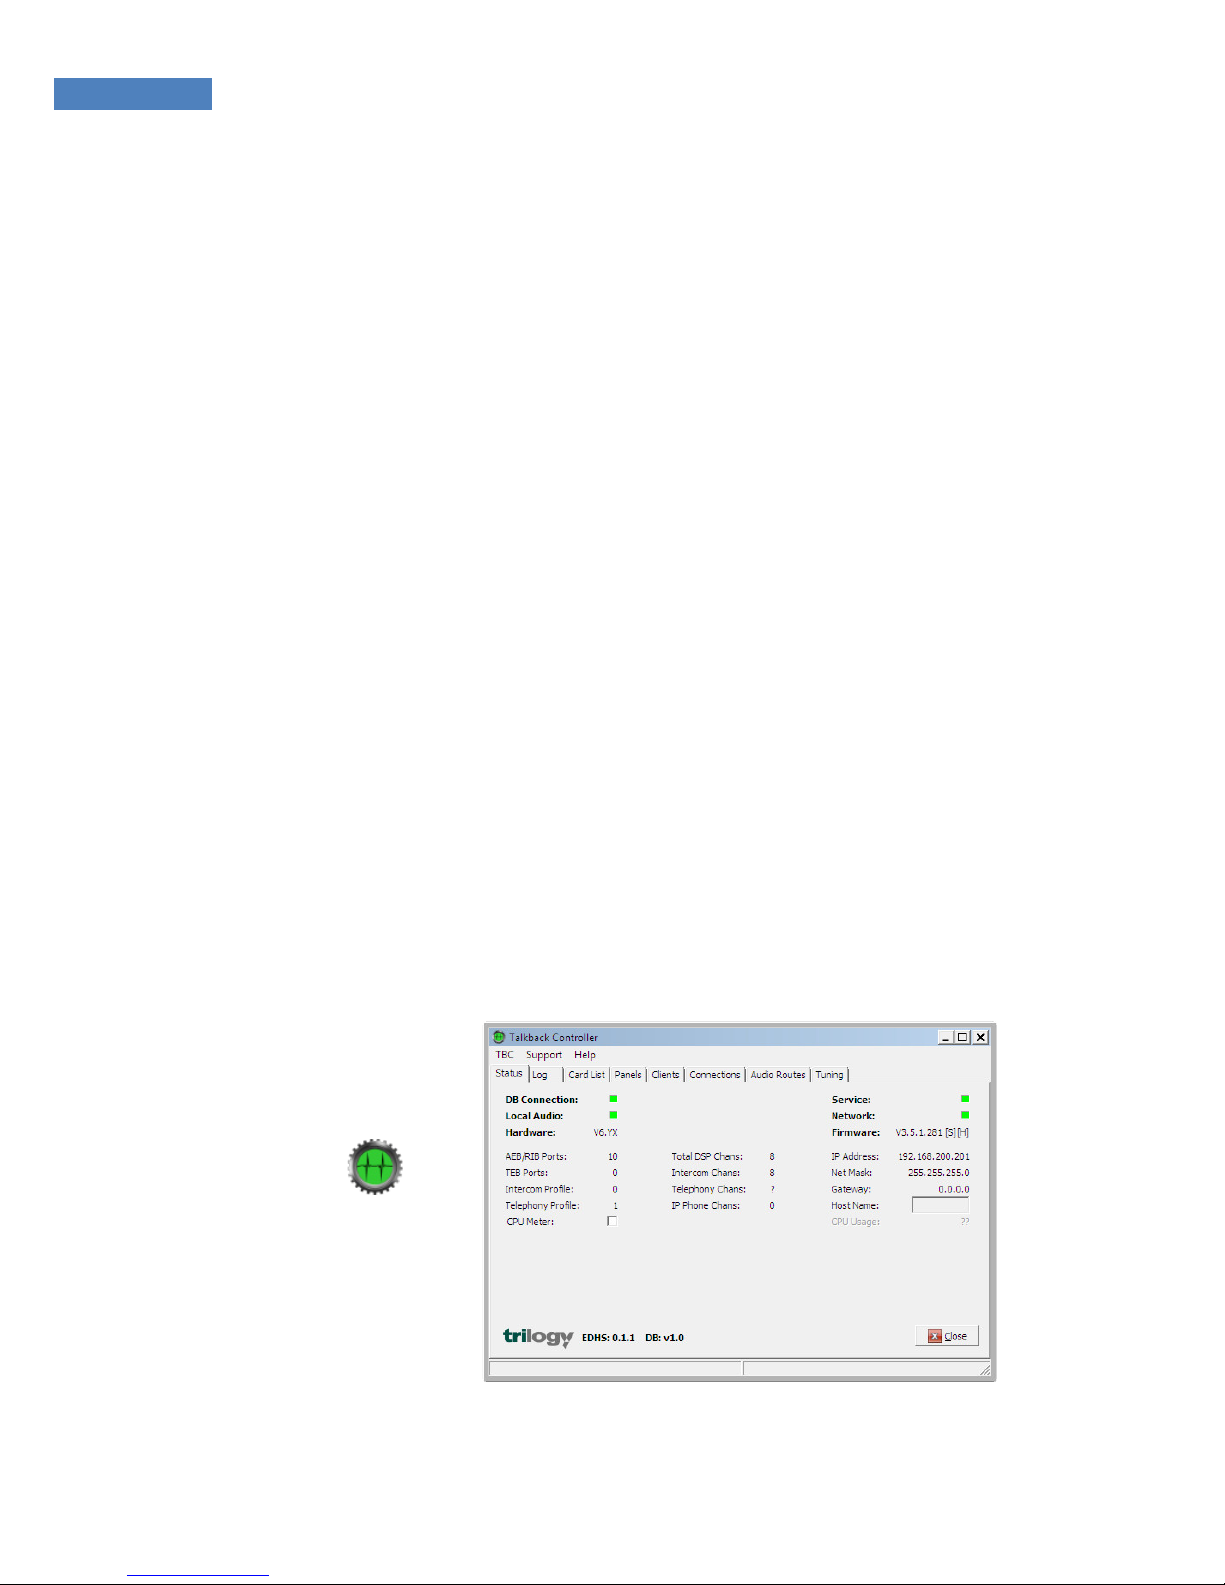
4. The TBC screen will be displayed, as shown below. You
can show it again by double clicking the icon in the
System Tray.
Page 9
9
Messenger Quick Start Guide
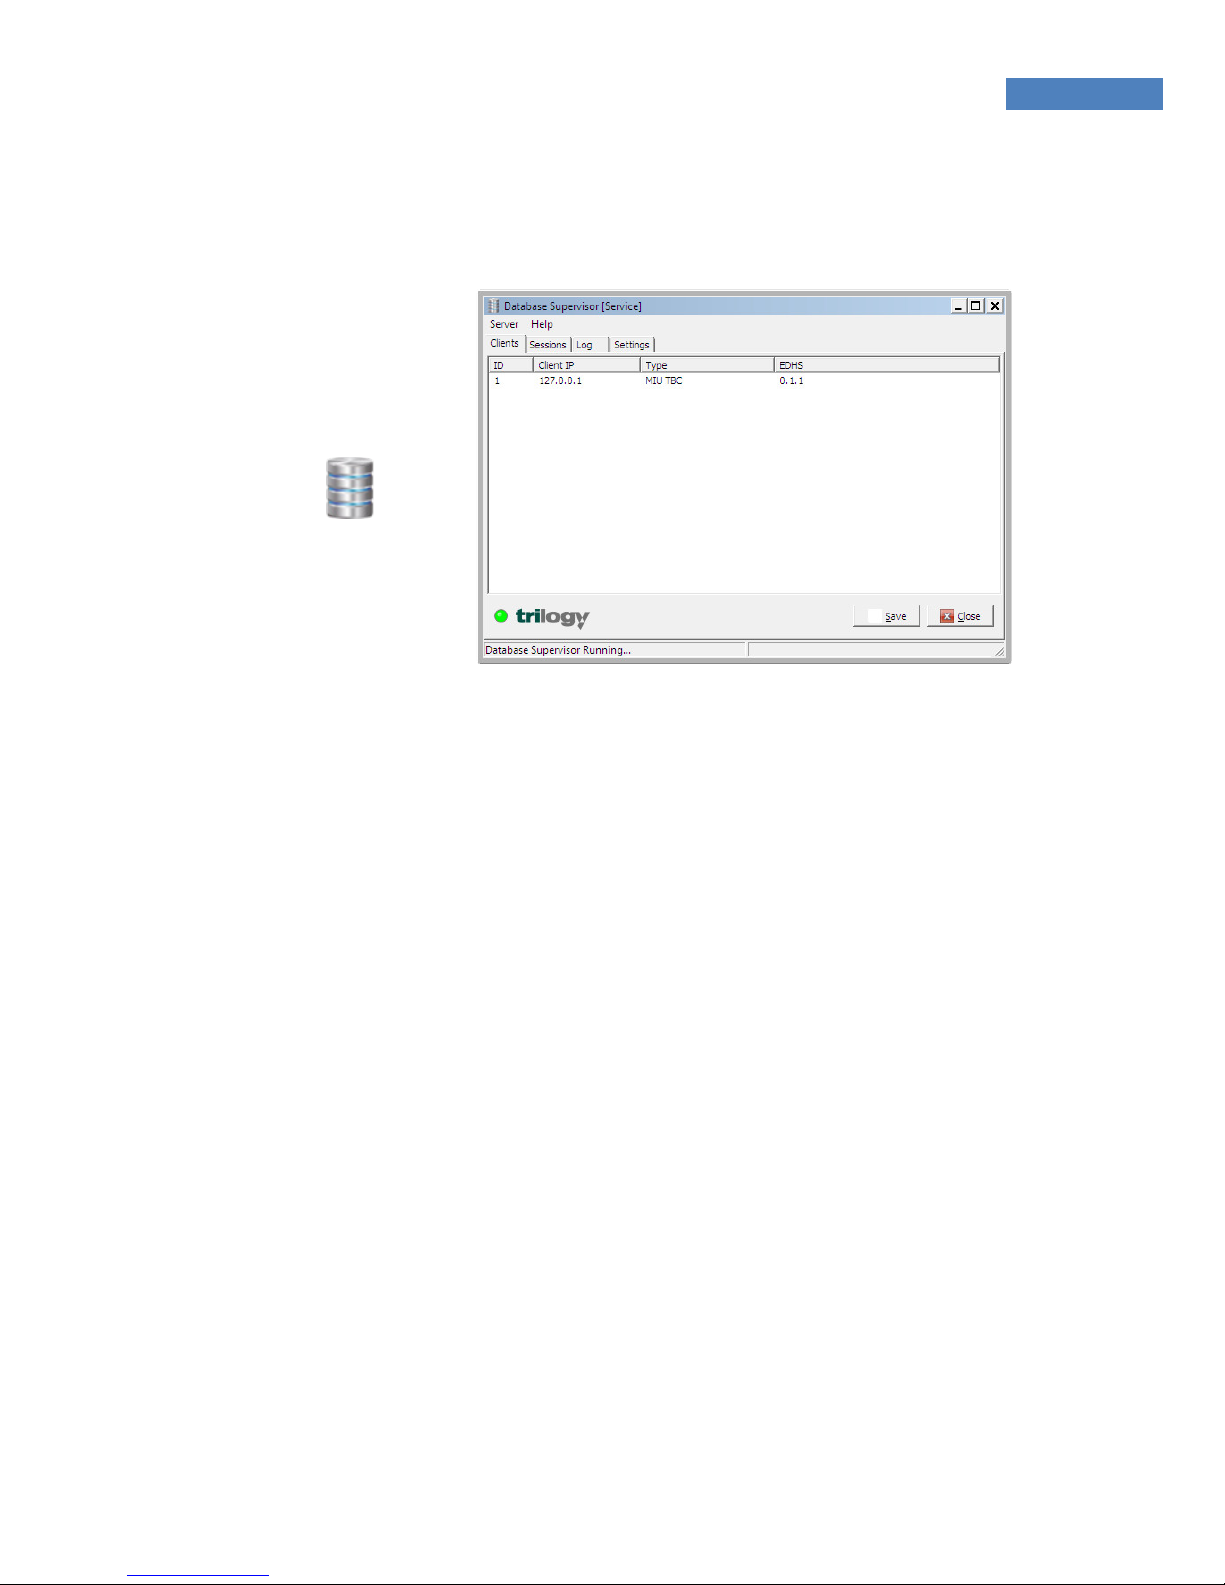
5. Check the status of the Database Supervisor by double
clicking the icon in the System Tray.
This shows that only one client is currently connected to
the database: the TBC application, which is also running
locally on Messenger.
6. Refer back to the IP address plan on page 4, which you
created earlier.
a. If you are confident that the default values will
not cause any conflicts on your network, it is now
safe to connect the Ethernet cable from the rear
of Messenger (lower RJ45 connector) to your
network or directly to your PC. You can skip the
next section and move ahead to Gateway – the
Configuration Editor on page 11.
b. Should you need to adjust these values, then
follow the instructions which start on page 10.
Page 10
10
Messenger Quick Start Guide
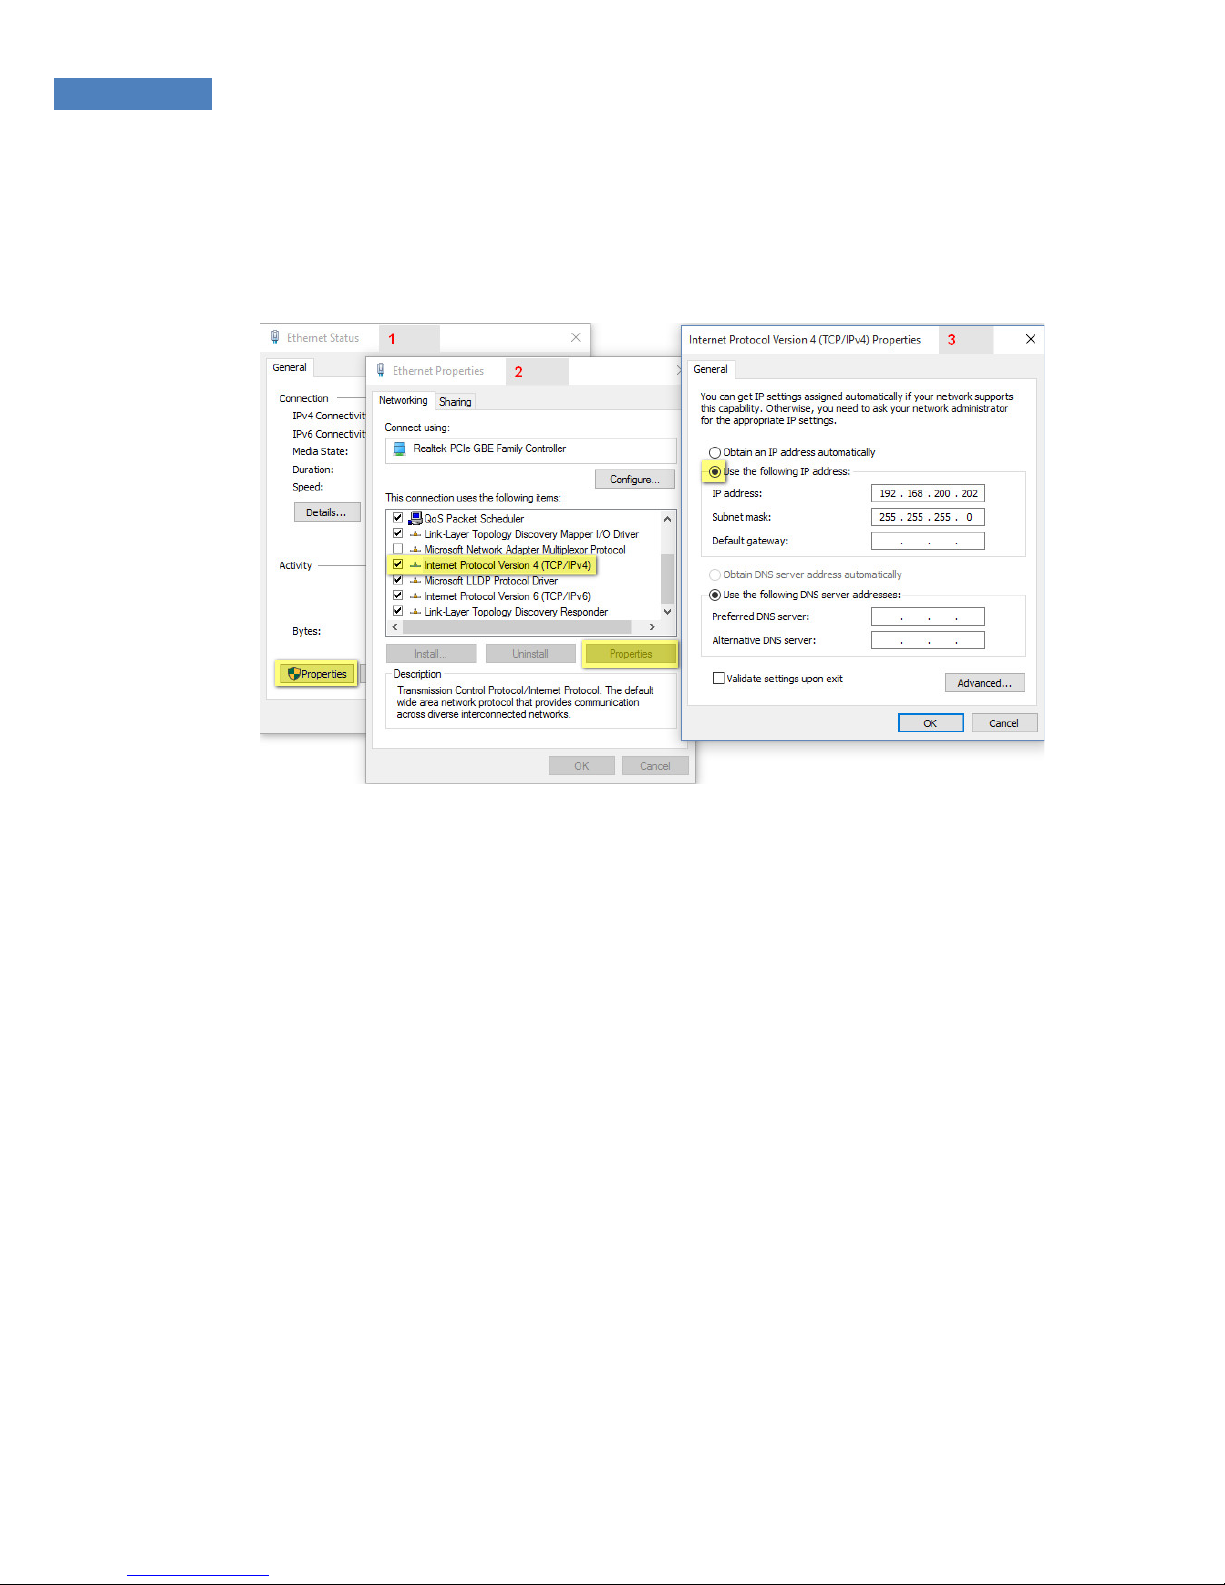
7. On Messenger, use normal Windows techniques to
change the IP settings of the Messenger Windows Host
connection.
8. The Messenger configuration must be edited to match.
Any mistakes or inconsistencies in these values may lead
to unpredictable audio behaviour. For example, if you
declare a default gateway IP address for the Windows
Host, this must also be declared within the configuration
data. See Gateway – the Configuration Editor, on page 11
for instructions.
Page 11
11
Messenger Quick Start Guide
Gateway – the Configuration Editor
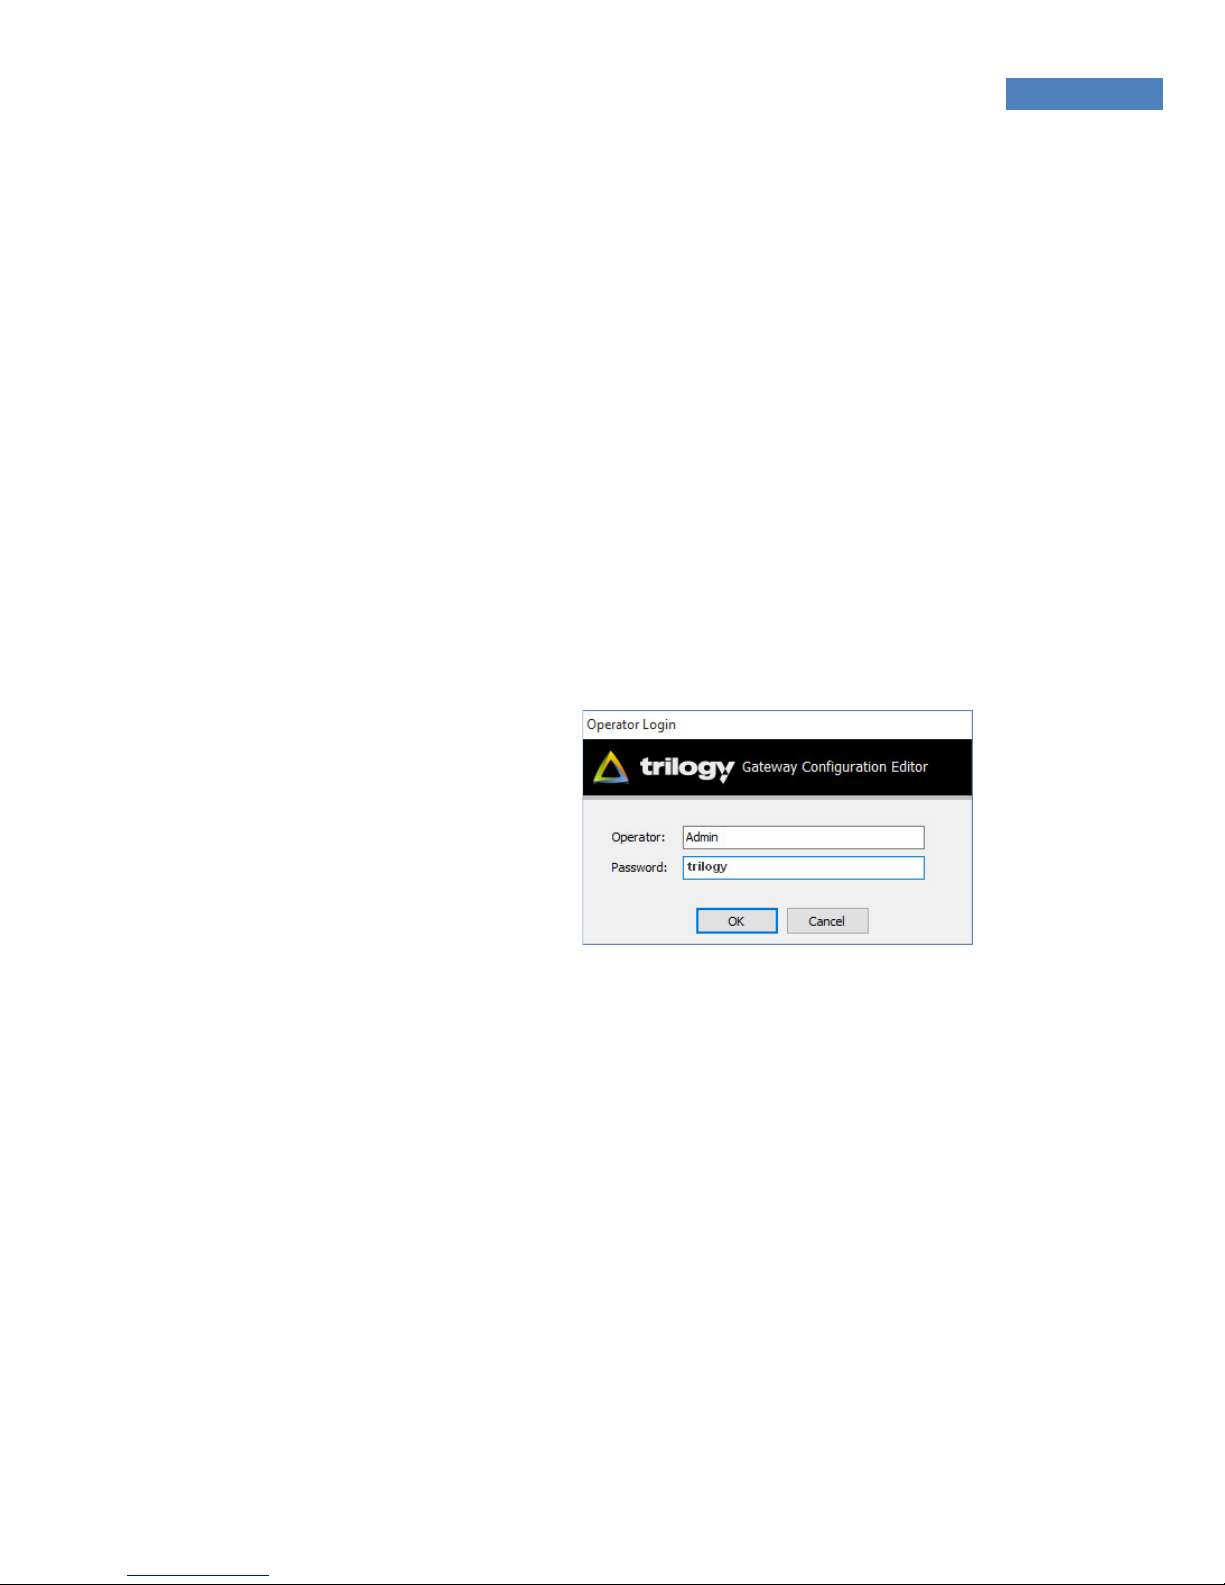
• Start Gateway from Programs > Trilogy > Trilogy V5 >
Configuration Editor.
• On first run you will be prompted for a licence code. This
is provided on a sticker attached to the original Trilogy CD
supplied with your order. Please keep it safe – you will
require it if the software is installed elsewhere in the
future.
• If Gateway cannot connect to the database, it will
appear to freeze and the log-in box will not appear.
Check carefully the IP settings of your PC and the
Messenger Windows Host. Remember – they must lie in
the same subnet (“range”) and the firewall ports must
be open.
• Select an initial configuration file from those which you
copied earlier from CD. A configuration named
“Messenger x Port Sample” is pre-loaded and provides
very basic functionality. Others provide a variety of
Messenger options and control panels and you can
choose one which most closely matches your application.
• Open the menus by clicking the gear icon at the top left
of the screen, then go to “File >> Load…”
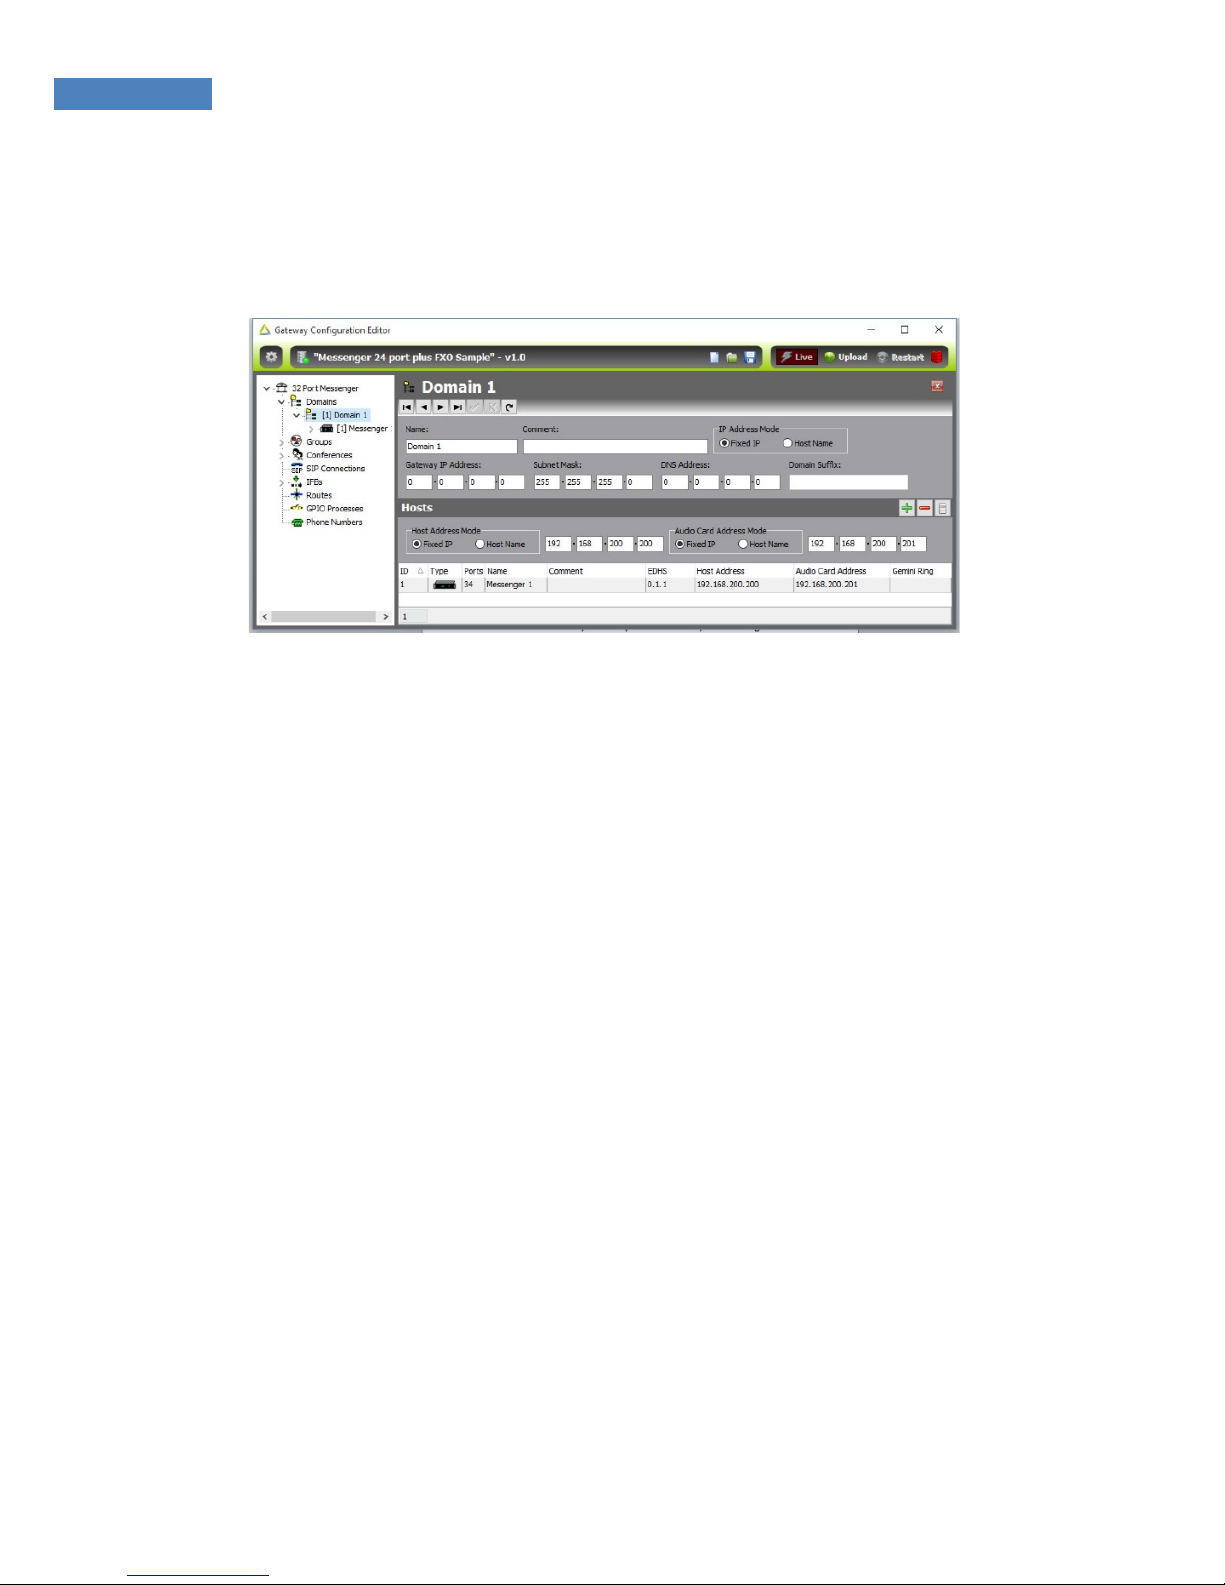
• Use the simple editors by single clicking items in the
“tree”. Open the editor for “Domain 1”: there is currently
just one entry “Messenger 1”.
Log-in using the
default credentials
Operator | Admin
Password |trilogy
Page 12
12
Messenger Quick Start Guide
• Refer to the IP Address plan on page 4 and if necessary,
edit the Host and Audio Card addresses to match your
planned values.
• To post your edited values to the database, press the
“tick” button, seen upper left in the image above, just
below the text “Domain 1”.
• Save a backup of your edited configuration by opening
the menus again and choosing “File >> Save As…” Choose
a suitable location on your PC.
• Now the data held in the database and the settings in
place on the Messenger hardware both match the IP
Address plan.
• The final step in this initial process is to transfer data
from the database to the TBC application and hence to
the intercom system itself. This process is also managed
by Gateway and is described next.
Page 13
13
Messenger Quick Start Guide
Gateway – upload and restart
This is a two stage process:
1. Upload, when data is transferred from the database to a
“buffer” memory location on Messenger. This happens in
the background and the running system is not disturbed.
Depending on the size and complexity of the system, it
can take up to 30 seconds.
2. Restart, when data is written from buffer to active
memory. The system will restart, which means all existing
audio routes are cancelled and panel layouts cleared
down. This is disruptive and in a live environment
requires careful scheduling. It takes around 20 seconds.
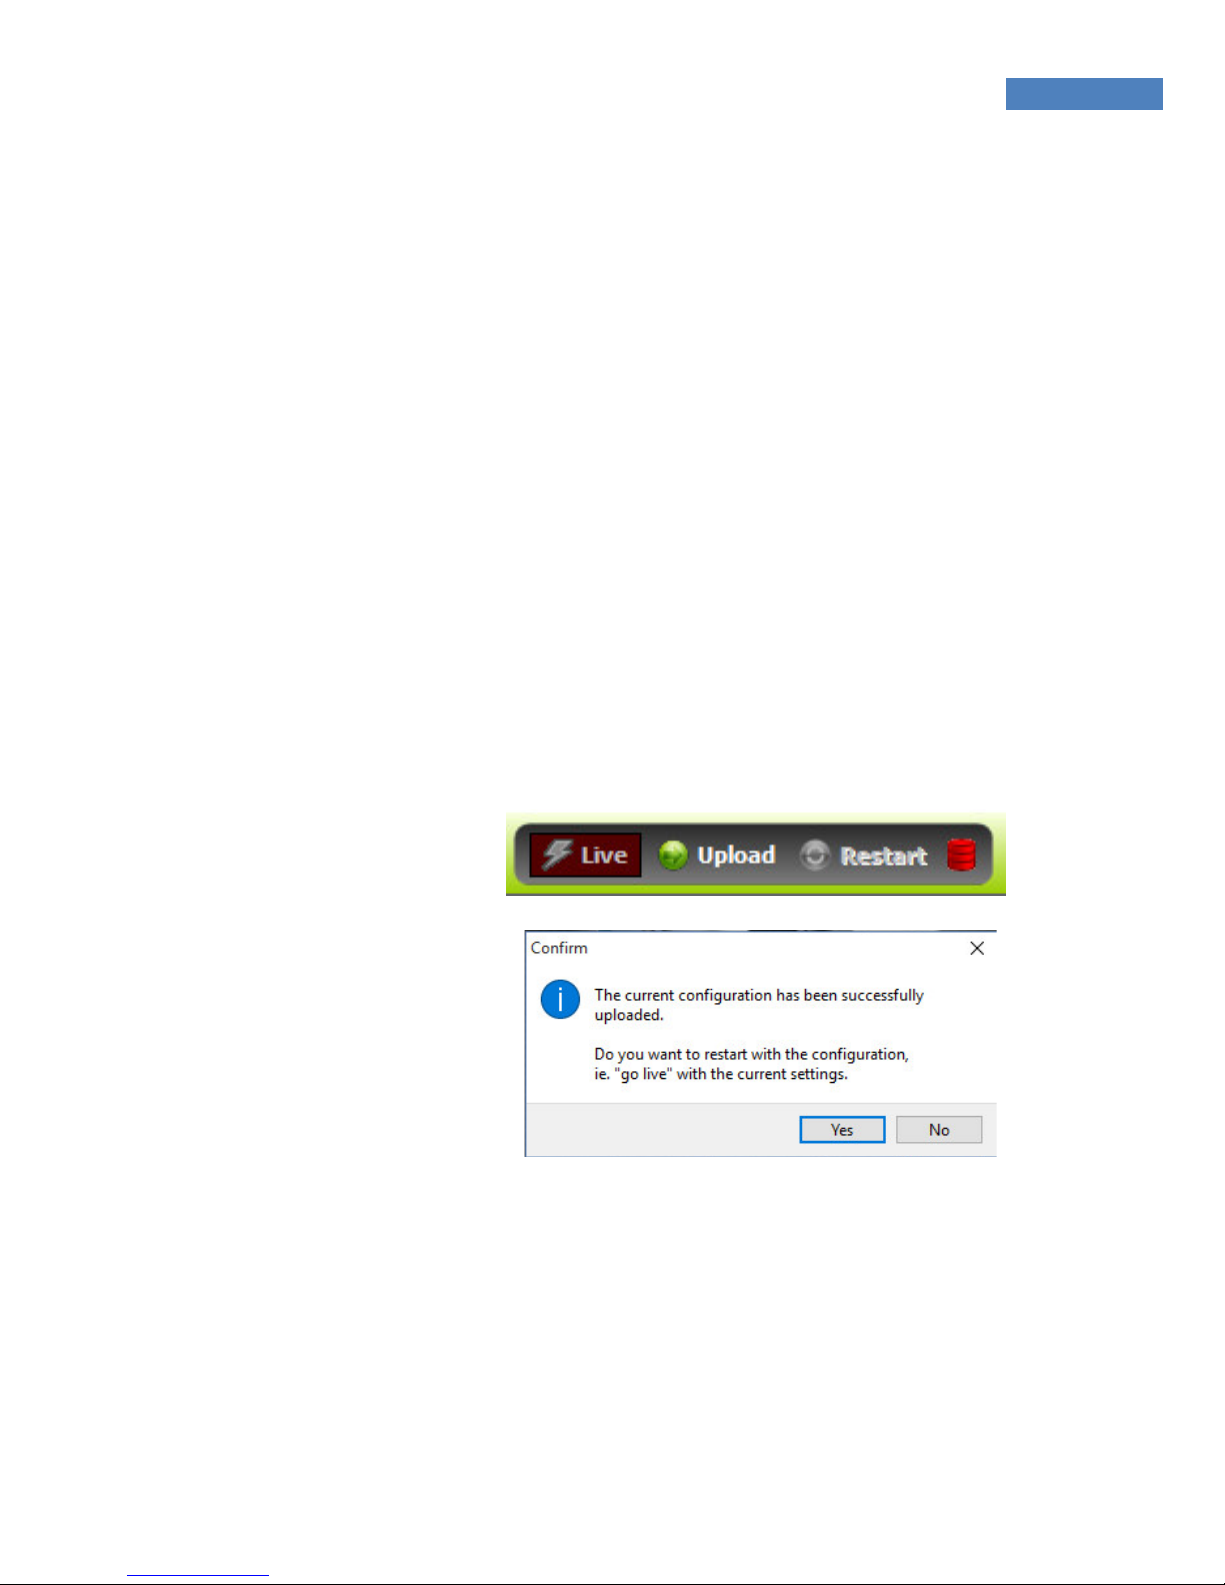
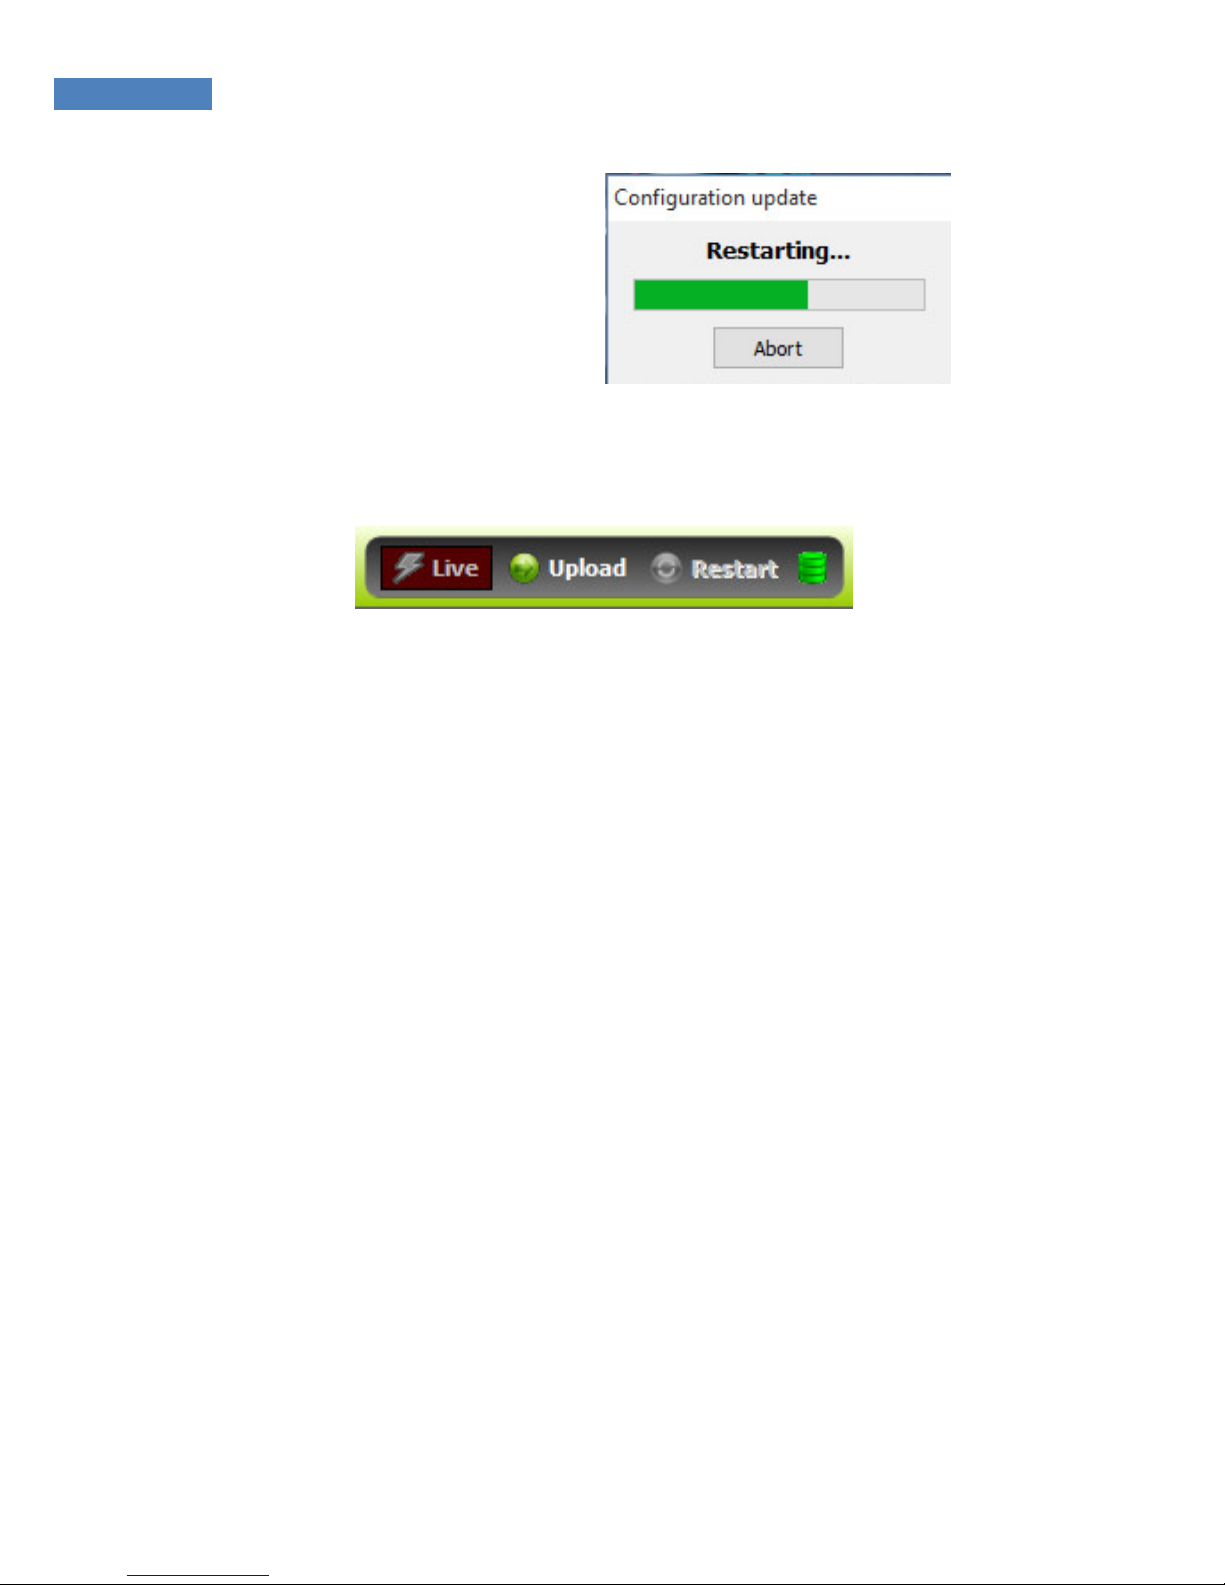
Check the toolbar at the top right of the screen and note that the
status drum at the right side of the toolbar is currently red.
If you choose “Yes”, the Messenger will restart immediately.
Selecting “No” allows you to defer the restart until a more
convenient time.
After a few
seconds, this
message will be
displayed:
Press the
“Upload” button.
Page 14
14
Messenger Quick Start Guide
Now the sequence is complete, the Messenger is back in service
and the status drum indicator is green.
If you have been supplied with a custom configuration for your
application, then follow the steps above to load this, ensuring at
all times that IP settings are correct.
You can now go ahead and connect panels and audio signals to
the ports on the rear of Messenger. Control panel displays will
now show labels such as “DIR” or “PROD” and by pressing a key
down, you will be able to speak from panel to panel.
More information is provided in the complete Messenger
Implementation Guide and Gateway Configuration Guide which
are included on the accompanying CD or by download from the
support section of the Trilogy website at:
www.trilogycomms.com.
The progress bar will
remain on screen until the
system has fully restarted
and is ready for operation.
Page 15

15
Messenger Quick Start Guide
Hints and Tips
• Take small steps. Just make one or two changes to the
configuration, then test. If it doesn’t work out as you
hoped, it’s easy to backtrack.
• Take frequent backups. Establish a file naming plan and
stick to it. For example, use the date format yyyymmdd
with a letter suffix – 20151225a.
• On Trilogy panels, red is for speaking, yellow for listening.
Remember that panels interact by speaking. Director
speaks to Sound – Sound replies to Director by speaking.
Listening happens automatically.
• Third party equipment such as cameras don’t have
intercom keys and must be programmed differently. So
Director still speaks to Camera but for the reply, Director
must listen to the Camera. This means that for cameras
and similar equipment, a different key type - Speak/Listen
- must be used on the Director’s panel.
• With many variables, troubleshooting third-party links
can appear difficult. First, make sure your panel has the
correct key type as explained above. Now completely
disconnect the other device from the port on the rear of
Messenger. In its place, temporarily connect a spare
Trilogy panel, on a short 1:1 Ethernet cable. The displays
on the spare panel will say “Not yet in service”, but
ignore that because the panel audio will be active. Now
try speaking, in both directions. This should help you to
narrow down the location of any problem.
Trilogy Communications Ltd.
26 Focus Way, Andover
Hampshire SP10 5NY
United Kingdom
Tel +44(0)1264 384000
Support: +44(0)1264 384044
[email protected]
 Loading...