

Page 1

8310 RSA
Return SpeedSweep Analyzer
Operation Manual
www.trilithic.com
innovative technology to keep you a step ahead
Specications are subject to change without notice. Please contact your sales representative for further information.
Copyright © 2016 Trilithic, Inc. All Rights Reserved - 020116-REV2
Page 2

Return Sweep Analyzer
THIS PAGE LEFT INTENTIONALLY BLANK
8310 RSA Operation Manual
Page 2
www.trilithic.com
www.trilithic.com
Page 3

Return Sweep Analyzer
Putting Innovation Within Reach
Product innovation at Trilithic has always been characterized by one thing: it’s practical. It
makes life easier for customers. It’s the natural result of listening to them. That philosophy
has been the driving force behind the company’s growth from its beginnings as a two-man
engineering team in 1986 to its current position as a global manufacturer with more than 130
employees.
A privately held company, Trilithic broadend its original RF and microwave component product
line by acquiring lters manufacturer Cir-Q-Tel and instruments manufacturer Texscan, adding
broadband solutions to the product line. The company also expanded operations to Thailand in
2001, to meet increasing demand for its products in the growing markets of Asia.
As new communications applications continue to emerge, part of Trilithic’s business has
evolved into managing change—helping customers respond quickly to market opportunities
with innovative technology and individualized solutions. But the core value of Trilithic’s
business approach—listening to customers—hasn’t changed. Keeping that focus intact will
help provide better products in the long run and ensure continued growth for decades to come.
Trilithic is comprised of three major divisions:
Broadband Instruments
The company is best known for innovations in signal level measurement, leakage detection
and reverse path maintenance—like the use of Digital Signal Processing (DSP) technology,
which lets eld technicians upgrade their signal analyzers by simply downloading rmware.
Emergency Alert Systems
Trilithic’s EAS division is a leading supplier of homeland security government-mandated
emergency alert systems for broadband and other communication system providers. As
the communications industry continues its rapid evolution, Trilithic has begun offering
comprehensive systems and services to address a wide variety of emergency alert system
needs, including the design and architectural layout of complex analog and digital EAS
networks.
XFTP
Trilithic’s XFTP division offers a specialty line of eld technical products for cable operators
and technicians, as well as a line of products for installing electronics in the home of
the future. The division brings together an experienced Trilithic team and a new group
of exclusive distributors to provide popular products and services at an affordable price,
without sacricing quality or support.
www.trilithic.com
8310 RSA Operation Manual
Page 3
Page 4

Return Sweep Analyzer
THIS PAGE LEFT INTENTIONALLY BLANK
8310 RSA Operation Manual
Page 4
www.trilithic.com
www.trilithic.com
Page 5

Return Sweep Analyzer
Table of Contents
Chapter 1
General Information ..................................................................................................................7
Helpful Website ......................................................................................................................7
Where to Get Technical Support ............................................................................................7
How this Manual is Organized ...............................................................................................8
Conventions Used in this Manual...........................................................................................9
Precautions ............................................................................................................................9
Chapter 2
Introduction & Installation ...................................................................................................... 11
What is the 8310 RSA? ........................................................................................................11
8380 RPC .......................................................................................................................11
System Diagram...................................................................................................................12
Return Path Sweep Comparisons ........................................................................................13
8310 RSA Features .............................................................................................................14
Available Models ..................................................................................................................14
Equipment Supplied with Your 8310 RSA ............................................................................14
A Guided Tour of Your 8310 RSA .........................................................................................15
Front View .......................................................................................................................15
Rear View .......................................................................................................................16
Installing the 8310 RSA ........................................................................................................17
Welcome Screen Navigation ................................................................................................18
Sweep Not Active............................................................................................................18
Sweep Active ..................................................................................................................18
Instrument Time, Date, & Internal Temperature ..............................................................19
Firmware & Software Version Numbers..........................................................................19
Chapter 3
Setup .........................................................................................................................................21
Setup Menu Navigation ........................................................................................................21
Selecting the Active Channel Plan .......................................................................................21
Setting Up the Active Channel Plan .....................................................................................23
Setting Start, Stop, & Step Frequency ............................................................................23
Adding Sweep Points to the Channel Plan .....................................................................24
Deleting Sweep Points from the Channel Plan ...............................................................24
Editing the Channel Plan Name......................................................................................25
Viewing / Deleting Individual Sweep Points in the Channel Plan ...................................26
www.trilithic.com
8310 RSA Operation Manual
Page 5
Page 6

Return Sweep Analyzer
Saving the Channel Plan ................................................................................................27
Setting the Link Frequency ..................................................................................................28
Setting the TX Attenuation Level ..........................................................................................29
Setting the RX Level & Tap Value .......................................................................................30
Editing the Device Name......................................................................................................31
Setting Up a Network Connection ........................................................................................32
Enabling & Disabling DHCP ...........................................................................................32
Viewing the Instrument MAC Address ............................................................................33
Manual Setup of Network Connection Settings ..............................................................33
Viewing Automatically Assigned DHCP Network Settings ..............................................35
Setting Username & Password .......................................................................................36
Adjusting Display Screen Contrast.......................................................................................37
Chapter 4
Web Access..............................................................................................................................39
Accessing the 8310 RSA with a Web Browser.....................................................................39
About the 8310 RSA ............................................................................................................40
Device Setup ........................................................................................................................41
Channel Plan Setup ........................................................................................................42
Network Settings.............................................................................................................44
Firmware Update..................................................................................................................45
Chapter 5
Appendix ..................................................................................................................................49
Specications .......................................................................................................................49
Trilithic Broadband Instruments 2-Year Limited Warranty ....................................................51
8310 RSA Operation Manual
Page 6
www.trilithic.com
Page 7

Chapter 1
Return Sweep Analyzer
General Information
Helpful Website
The following website contains general information which may be of interest to you:
http://www.trilithic.com
Trilithic’s website contains product specications and information, tips, release information,
marketing information, frequently asked questions (FAQs), bulletins and other technical
information. You can also check this website for product updates.
Where to Get Technical Support
Trilithic technical support is available Monday through Friday from 8:00AM to 5:00PM EST.
Callers in North America can dial 317-895-3600 or 800-344-2412 (toll free). International
callers should dial 317-895-3600 or fax questions to 317-895-3613. You can also e-mail
technical support at support@trilithic.com.
For quicker support response when calling or sending e-mail, please provide the following
information:
• Your name and your company name
• The technical point of contact (name, phone number, e-mail)
• The version numbers for the 8310 RSA rmware and hardware
• The serial number for the 8310 RSA
• A detailed description of the problem you are having, including any error or information
messages
www.trilithic.com
8310 RSA Operation Manual
Page 7
Page 8

Return Sweep Analyzer
How this Manual is Organized
This manual is divided into the following chapters:
• Chapter 1, “General Information” provides Trilithic contact information and describes
how this operation manual is structured.
• Chapter 2, “Introduction & Installation” introduces what the 8310 RSA is and what it
does. This chapter discusses the practical application, connections, and controls of the
8310 RSA.
• Chapter 3, “Setup” describes how to congure and operate the 8310 RSA.
• Chapter 4, “Web Access” shows how to access the 8310 RSA through a web browser
and apply rmware updates.
• Chapter 5, “Appendix” shows the technical specications of the 8310 RSA.
8310 RSA Operation Manual
Page 8
www.trilithic.com
Page 9
Return Sweep Analyzer
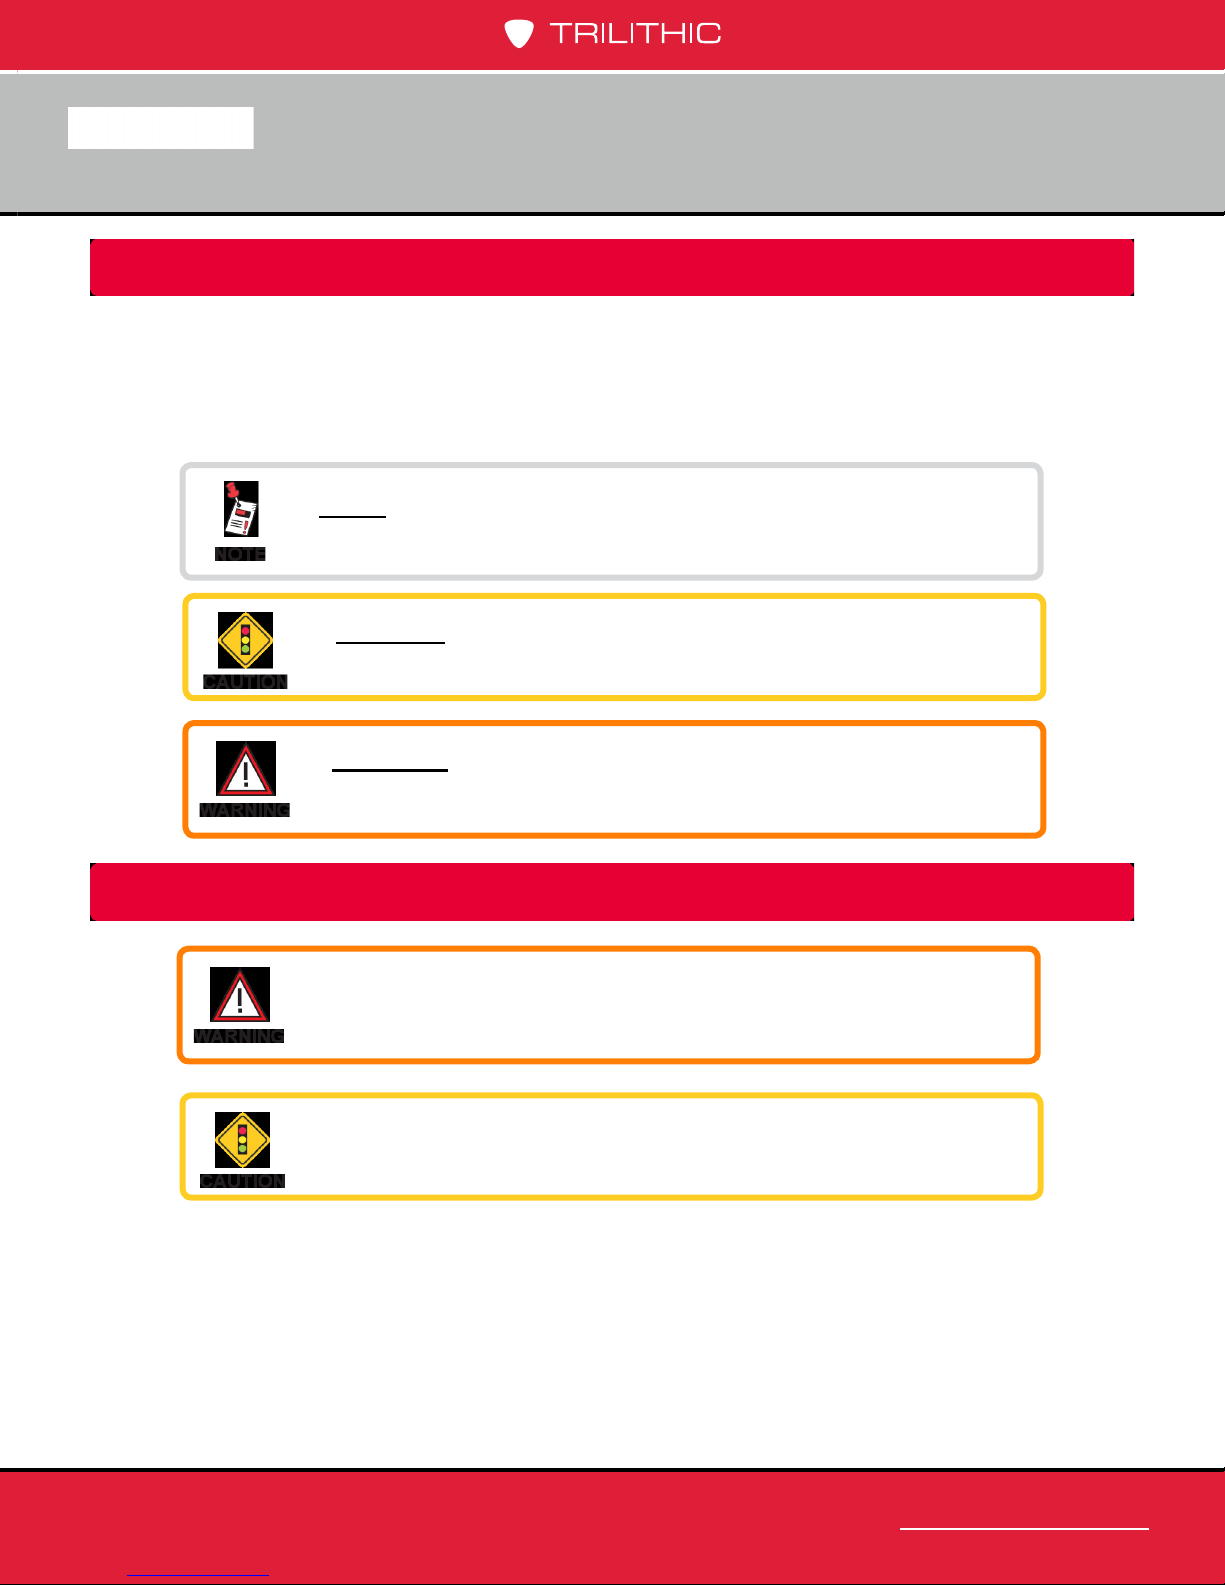
Conventions Used in this Manual
This manual has several standardized conventions for presenting information:
• Connections, menus, menu options, and user-entered text and commands appear in
bold.
• Section names, web, and e-mail addresses appear in italics.
A NOTE is information that will be of assistance to you related
to the current step or procedure.
A CAUTION alerts you to any condition that could cause a
mechanical failure or potential loss of data.
Precautions
A WARNING alerts you to any condition that could cause
personal injury.
Do not use the 8310 RSA in any manner not recommended by
the manufacturer.
The 8310 RSA may not operate correctly in the presence of a
strong electromagnetic eld.
www.trilithic.com
8310 RSA Operation Manual
Page 9
Page 10

Return Sweep Analyzer
THIS PAGE LEFT INTENTIONALLY BLANK
8310 RSA Operation Manual
Page 10
www.trilithic.com
www.trilithic.com
Page 11

Chapter 2
Return Sweep Analyzer
This chapter:
• Describes the purpose of the 8310 RSA
• Gives a feature overview of the 8310 RSA
• Lists the equipment supplied with the 8310 RSA
• Gives a guided tour of the 8310 RSA and explains the display screen and web
conguration pages.
Introduction & Installation
What is the 8310 RSA?
The 8310 RSA Return Sweep Analyzer receives a sweep initiated from a eld test point by
Trilithic’s 1G DSP maintenance meter and transmits the received sweep level information back
to the 1G DSP on a downstream telemetry signal.
The 1G DSP injects an agile sweep signal congured to “step around” active channels,
sweeping in unoccupied spectrum areas to a frequency resolution of 100 kHz. The reverse
sweep is received by the 8310 RSA, and the response information is relayed back to the 1G
DSP via a user-congurable frequency agile forward telemetry signal.
The 8310 RSA can also be used with the 860 DSPi in the same
manner as the 1G DSP.
8380 RPC
The 8380 RPC™ Return Path Combiner is a 16 x 1 nonblocking RF matrix switch designed
for use with Trilithic’s 8310 RSA™ in the return path of CATV systems. The 8380 RPC has
16 input ports that can be combined into a single output.
There are two versions of the 8380 RPC available, a master and a slave. The master 8380
RPC is used to control each slave using an RS-485 connection.
Much of the 8310 RSA can be set up via a web browser. To
set up an IP address, see Chapter 3: Setting Up a Network
Connection. To remotely set up the unit, see Chapter 4:
Web Access.
www.trilithic.com
8310 RSA Operation Manual
Page 11
Page 12

Return Sweep Analyzer
System Diagram
The following diagram shows the typical deployment of an 8310 RSA system.
Internet
Laptop/Desktop
Computer
Cell Phone, PDA,
or iPad
Ethernet
Forward
Telemetry
1G DSP
8310 RSA
Output
Input
Splitter
Combined
Output
VoIP
CMTS
Ethernet
Splitter
Light (fiber)
RS-485
Cable
Continue
Split
RF
RPC Switch
Test Point
Master
1G DSP
8310 RSA Operation Manual
Page 12
www.trilithic.com
Page 13

Return Sweep Analyzer
Return Path Sweep Comparisons
• The RSA Sweep feature on the 1G DSP maintenance
meter enables the meter to function as an
upstream return path sweep transmitter. It allows
for troubleshooting micro-reections and instances
of narrow suck-outs between the test point and the
headend, while also stepping around active channels in
order to avoid interference.
• When this function is selected, the 1G DSP transmits
the return sweep from a test point in the eld to the 8310
RSA Return SpeedSweep Analyzer in the headend for
analysis.
• The channel plan on the 8310 RSA and the sweep
response information are then sent back to the 1G DSP
via a telemetry signal which allows the 1G DSP to track
up to 643 individual sweep points and display a full
sweep on the screen every four seconds.
• The instrument compensates for differences in the amplitudes of the carriers by
comparing two sweeps, a reference scan saved to the 1G DSP (typically at the node or
rst active component of the network) and a test point in the eld.
• If the successive ampliers are operating according to the designed unity gain
principle, where each amplier output test point will ideally have the same output level
characteristics then the response will be very close to that of the stored reference.
When there is damage, loose connections, or an adjustment is required, the display
response will deviate from the ideal “at” response.
RSA SWEEP SCAN RSA SWEEP REFERENCE
www.trilithic.com
8310 RSA Operation Manual
Page 13
Page 14
Return Sweep Analyzer
8310 RSA Features
The 8310 RSA includes the following features:
• Speeds Troubleshooting and Maintenance with Fast, High Resolution Return Sweep
Analysis
• Finds Mirco-Reections and Narrow Suck-Outs
• Part of a Comprehensive Maintenance System, Works with the 1G DSP Maintenance
Meter
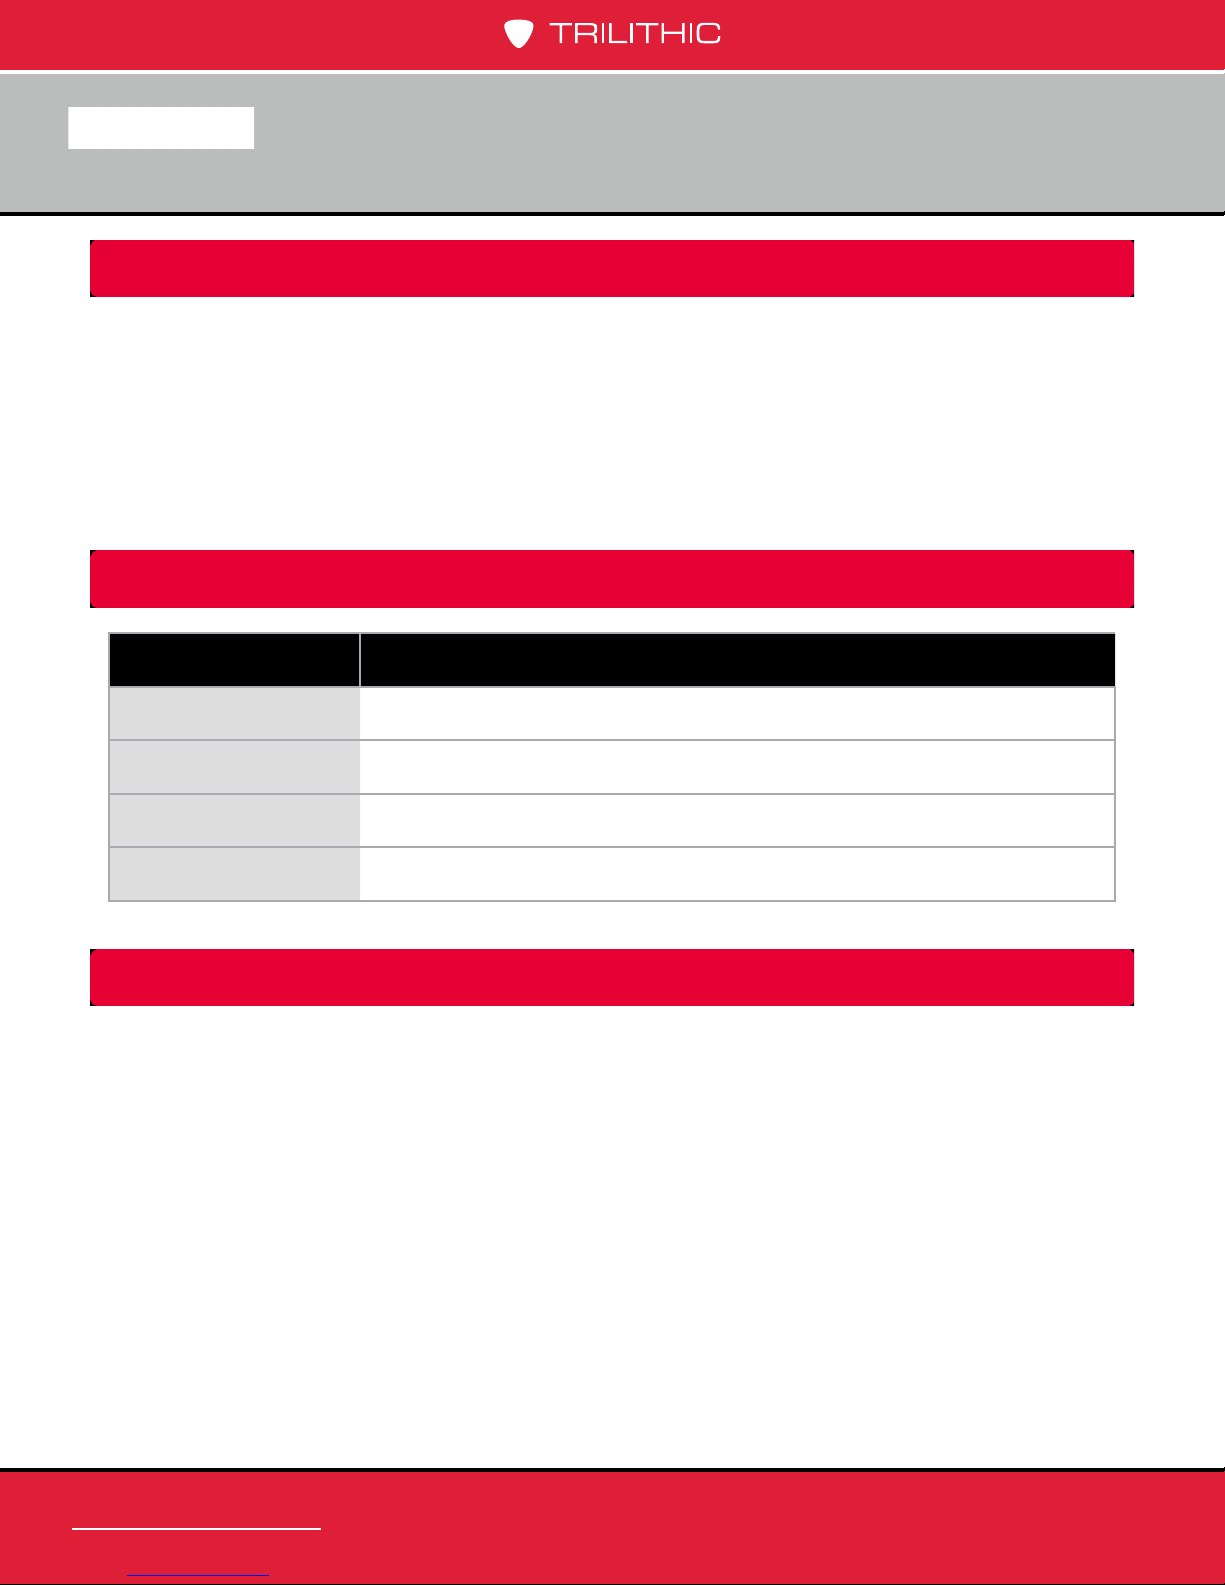
Available Models
Part Number Description
2011375000 65 MHz 8310 RSA with 120 to 240 VAC Power Supply
2011375100 65 MHz 8310 RSA with -48 VDC Power Input
2011699000 85 MHz 8310 RSA with 120 to 240 VAC Power Supply
2011699100 85 MHz 8310 RSA with -48 VDC Power Input
Equipment Supplied with Your 8310 RSA
The 8310 RSA comes with the following:
• 8310 RSA Return Sweep Analyzer
• AC U.S. Power Cable (for 120/240 VAC units only)
8310 RSA Operation Manual
Page 14
www.trilithic.com
Page 15

Return Sweep Analyzer
A Guided Tour of Your 8310 RSA
Front View
1 2
3 4
5 6 7
1. Display Screen – This LCD is used to display the setup and operational status of the
8310 RSA. The setup information on most screens can be adjusted from the front panel
of the device.
2. Speaker – An internal speaker that beeps when buttons are pressed.
3. Arrow Buttons – These buttons are used to control the 8310 RSA as follows:
• Scroll through the main menus
• Scroll through the setup/display options available within the selected sub-menu
• Adjust the settings within individual setup options after the Enter button has been
selected
4. Power Button – This button enables or disables operation of the instrument. To turn off
the instrument, remove the power cable.
5. Enter Button – This button is used to control the 8310 RSA as follows:
• Enter the menus and sub-menus
• Select individual setup options to adjust settings
6. Test Button – This button is used to view the internal temperature, date, and time of the
instrument.
7. Info Button – This button is used to view the hardware and software version numbers
of the instrument.
www.trilithic.com
8310 RSA Operation Manual
Page 15
Page 16
Return Sweep Analyzer
Rear View
1 2 3 4
1. Forward Output – This is the output connection that the 8310 RSA transmits the
received sweep level information back to the 1G DSP on a downstream telemetry
signal.
2. Reverse Input – This is the input connection that the 8310 RSA uses to receive a
sweep initiated from a eld test point by a 1G DSP.
5
3. Ethernet – This port is for factory use only.
4. AC Power Input – This is a female (IEC 320C13) port for connection of an AC power
cable. This port accepts AC input power from 100 to 240 VAC (50-60 Hz), 1 A.
5. Port-1 & Port-2 – Expansion (For Future Use)
8310 RSA Operation Manual
Page 16
www.trilithic.com
Page 17

Return Sweep Analyzer
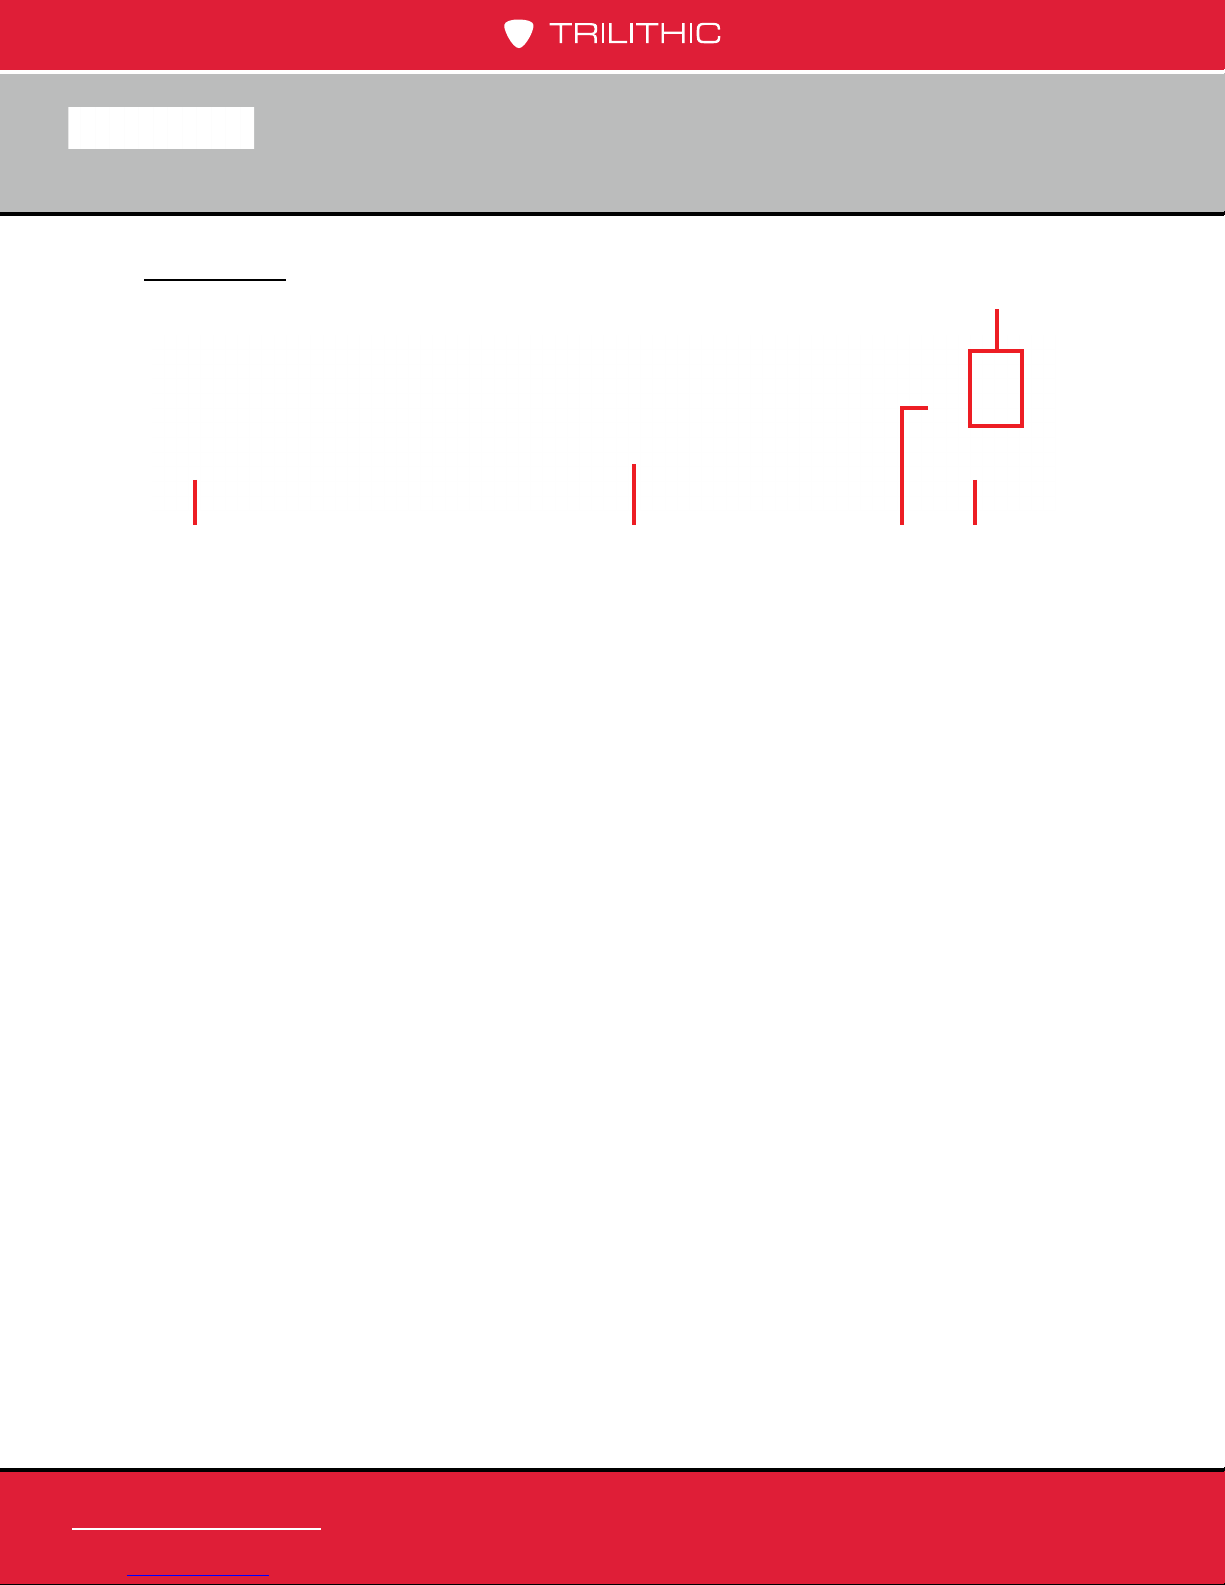
Installing the 8310 RSA
The following section explains the procedure used to physically install the 8310 RSA. In order
to properly setup the 8310 RSA the following steps must be completed in this order. Do not
skip any steps.
DO NOT plug in the 8310 RSA’s power cord until instructed
below.
1. Mount the 8310 RSA in a standard rack using four retaining screws.
Make sure the fan intake holes on the left of the 8310 RSA
and the fan exhaust holes on the right of the 8310 RSA remain
unblocked.
Fan Intake Holes Fan Exhaust Holes
2. Plug the 8310 RSA’s power cord into the 100-240 VAC Power Connection and then into
an AC power source. When power is supplied to 8310 RSA, the screen on the front of
the 8310 RSA is illuminated.
If the display screen is not illuminated upon connecting power
to the 8310 RSA, call Trilithic Application Support at
1-800-344-2412 for assistance.
www.trilithic.com
8310 RSA Operation Manual
Page 17
Page 18

Return Sweep Analyzer
Welcome Screen Navigation
After the splash screen disappears, either of the following types of screens will appear
depending on the status of your instrument.
Sweep Not Active
In the screen shown to the right, the selected
channel plan has not been set up yet and the
sweep signal is not active.
In this example, the selected channel plan
number is designated as “XX” and the message
“PLAN NOT SET UP” is displayed below instead
of the channel plan name.
A sweep signal will not be enabled until at least one channel
plan has been set up and enabled on the instrument.
Sweep Active
In the screen shown on the right, the selected
channel plan has been set up and the sweep is
currently active.
This screen will normally appear this way when
at least one channel plan has been setup and
enabled.
In this example, the selected channel plan
number is designated as “XX” and the channel
plan name is shown below.
8310 RSA Operation Manual
Page 18
www.trilithic.com
Page 19

Return Sweep Analyzer
Instrument Time, Date, & Internal Temperature
From the Welcome screen, select the Test
button to display the current time, date, and
internal temperature of the instrument.
The time and date of the unit are set at the
factory and are not adjustable at this time. The
time is set to Greenwich Mean Time (GMT).
In this example, the internal temperature is
designated as “XX”, the date is designated as
“MM/DD/YYYY”, and the time is displayed in a 24 hour format as “HHMM”. To exit this
screen and return to the Welcome screen, select the Enter button.
Firmware & Software Version Numbers
From the Welcome screen, select the Info
button to display the current rmware & software
version numbers and Trilithic contact information.
To exit this screen and return to the Welcome
screen, select the Enter button.
www.trilithic.com
8310 RSA Operation Manual
Page 19
Page 20

Return Sweep Analyzer
THIS PAGE LEFT INTENTIONALLY BLANK
8310 RSA Operation Manual
Page 20
www.trilithic.com
www.trilithic.com
Page 21

Chapter 3
Return Sweep Analyzer
Setup Menu Navigation
From the Welcome screen, select the Enter button
to display the SETUP MENU, as shown to the right.
Use the arrow buttons to highlight the desired setup
option, and then select the Enter button to adjust it.
To exit the SETUP MENU, highlight EXIT SETUP
and then select the Enter button.
Much of the 8310 RSA can be set up via a web browser. To set
up an IP address, see the Setting Up a Network Connection
section later in this chapter. To remotely set up the unit, see
Chapter 4: Web Access.
Setup
Selecting the Active Channel Plan
To select the active channel plan, perform the following steps:
1. From the SETUP MENU, highlight PLAN and
then select the Enter button to display the
PLAN SELECT MENU.
2. Use the arrow buttons to highlight the plan
number and then select the Enter button to
adjust it.
www.trilithic.com
8310 RSA Operation Manual
Page 21
Page 22

Return Sweep Analyzer
3. Use the up/down arrow buttons to adjust
the value of the selected digit, and then use
the left/right buttons to change between the
digits. Once you have nished, select the
Enter button to accept your changes.
Once you have selected a channel plan, either the channel
plan name or the message “PLAN NOT SET UP” will then be
displayed below the plan number.
The 8310 RSA allows a maximum of 16 user congurable
channel plans. If you select a channel plan number above 16,
the instrument will default back to channel plan 16.
4. To return to the SETUP MENU, use the arrow
buttons to highlight OK, and then select the
Enter button.
8310 RSA Operation Manual
Page 22
www.trilithic.com
Page 23

Return Sweep Analyzer
Setting Up the Active Channel Plan
From the SETUP MENU, highlight PLAN SETUP
and then select the Enter button to display the
PLAN SETUP MENU.
Use the arrow buttons to highlight the desired
channel plan setting, and then select the Enter
button to adjust it.
Setting Start, Stop, & Step Frequency
To adjust the start, stop, and step frequency of
the sweep, perform the following steps:
1. From the PLAN SETUP MENU, use the
arrow buttons to highlight START, STOP,
or STEP, and then select the Enter button
to edit the frequency.
2. Use the up/down arrow buttons to adjust
the value of the selected digit and then
use the left/right arrow buttons to change
between the digits. Once you have
nished editing the frequency, select the
Enter button to accept your changes.
The 8310 RSA has a minimum sweep frequency of 5.0625 MHz
and a maximum of 65.25 MHz, with a minimum step frequency
of 93.75 kHz.
www.trilithic.com
8310 RSA Operation Manual
Page 23
Page 24

Return Sweep Analyzer
Adding Sweep Points to the Channel Plan
To add the sweep points to the channel plan, perform the following steps:
1. From the PLAN SETUP MENU, use the
arrow buttons to highlight ADD and then
select the Enter button to add the sweep
points specied Start, Stop, and Step
frequencies.
2. The PLAN SIZE eld will be updated to
reect the newly added sweep points.
• The minimum number of sweep
points that may be dened is 2.
• The maximum number of sweep points is 643 for a sweep of the entire
spectrum (5.0625 to 65.25 MHz), with a step frequency of 93.75 kHz.
Deleting Sweep Points from the Channel Plan
To delete sweep points from the channel plan, perform the following steps:
1. Select the Start and Stop frequencies for
the block to be deleted. All points from
Start to Stop will be deleted, regardless of
the Step frequency setting.
2. From the PLAN SETUP MENU, use the
arrow buttons to highlight DEL, and then
select the Enter button.
3. The DELETE PLAN ITEMS menu will
appear, use the arrow buttons to highlight
YES, and then select the Enter button to
delete all of the specied sweep points.
4. To exit without deleting all of the sweep
points from the channel plan, use the up/
down arrow buttons to highlight NO, and
then select the Enter button to exit without
deleting the sweep points.
8310 RSA Operation Manual
Page 24
www.trilithic.com
Page 25

Return Sweep Analyzer
Editing the Channel Plan Name
To edit the name of the channel plan, perform the following steps:
1. From the PLAN SETUP MENU, use the
arrow buttons to highlight NAME, and then
select the Enter button.
2. The PLAN NAME MENU will appear, use
the arrow buttons to highlight the name,
and then select the Enter button.
3. Use the up/down arrow buttons to adjust
the value of the selected digit, and
then use the left/right arrow buttons to
change between the digits. Once you
have nished editing the name, select
the Enter button to accept your changes.
The channel plan name is limited to 20
characters.
4. Use the arrow buttons to highlight OK and
then select the Enter button to save the
channel plan name.
www.trilithic.com
8310 RSA Operation Manual
Page 25
Page 26

Return Sweep Analyzer
Viewing / Deleting Individual Sweep Points in the Channel Plan
To view and/or delete individual sweep points that are part of the channel plan, perform the
following steps:
1. From the PLAN SETUP MENU, use the
arrow buttons to highlight VIEW, and then
select the Enter button.
2. The VIEW PLAN ITEMS menu will
appear, use the up/down arrow buttons
to move between individual sweep point
frequencies.
3. To delete an individual sweep point, use
the left/right arrow buttons to highlight
DEL, and then select the Enter button.
4. Once you have nished viewing
and/or deleting sweep points from the
channel plan, use the left/right arrow
buttons to highlight EXIT, and then select
the Enter button.
8310 RSA Operation Manual
Page 26
www.trilithic.com
Page 27

Return Sweep Analyzer
Saving the Channel Plan
To save the channel plan, perform the following steps:
1. Use the arrow buttons to highlight SAVE,
and then select the Enter button.
2. If less than 2 sweep points were entered,
the message “PLAN MUST HAVE 2 OR
MORE ENTRIES!” will be displayed, press
the Enter button to return to the PLAN
SETUP MENU to add more sweep points
to your channel plan.
3. The save conrmation screen will appear,
use the arrow buttons to highlight YES,
and then select the Enter button to save
the channel plan.
4. To exit without saving the channel plan,
use the arrow buttons to highlight NO, and
then select the Enter button to exit without
saving the channel plan.
www.trilithic.com
8310 RSA Operation Manual
Page 27
Page 28

Return Sweep Analyzer
Setting the Link Frequency
To set the link frequency, perform the following steps:
1. From the SETUP MENU, highlight LINK
FREQ, and then select the Enter button to
display the LINK FREQUENCY menu.
2. Use the arrow buttons to highlight the link
frequency, and then select the Enter button
to edit the frequency.
3. Use the up/down arrow buttons to adjust
the value of the selected digit, and then use
the left/right buttons to change between
the digits. Once you have nished editing
the frequency, select the Enter button to
accept your changes. The 8310 RSA has a
minimum link frequency of 0050.00 MHz and
a maximum of 1000.00 MHz.
4. Use the arrow buttons buttons to highlight
OK, and then select the Enter button to save
the link frequency.
8310 RSA Operation Manual
Page 28
www.trilithic.com
Page 29

Return Sweep Analyzer
Setting the TX Attenuation Level
To set the TX attenuation level, perform the following
steps:
1. From the SETUP MENU, highlight TX ATTN
and then select the Enter button to display
the TX ATTENUATOR menu.
2. Use the arrow buttons to highlight the
attenuation value and then select the Enter
button to edit the level.
3. Use the up/down arrow buttons to adjust the
value of the selected digit, and then use the
left/right arrow buttons to change between
the digits. Once you have nished editing
the level, select the Enter button to accept
your changes. The 8310 RSA has a minimum
attenuation level of 00.0 dB and a maximum
of 31.5 dB.
4. Use the arrow buttons to highlight OK, and
then select the Enter button to save the TX
attenuation level.
The TX Attenutation Level should be set approximately 0 to
10 dB below the Video carrier level to avoid interference with
adjacent channels.
www.trilithic.com
8310 RSA Operation Manual
Page 29
Page 30

Return Sweep Analyzer
Setting the RX Level & Tap Value
To set the RX level and tap value, perform the following steps:
1. From the SETUP MENU, highlight RX LEVEL
and then select the Enter button to display
the RX LEVEL menu.
2. Use the arrow buttons to highlight the RX
Level or Tap Value, and then select the
Enter button to edit the level.
3. Use the up/down arrow buttons to adjust the
value of the selected digit, and then use the
left/right arrow buttons to change between
the digits. Once you have nished editing
the level, select the Enter button to accept
your changes. The 8310 RSA has a RX level
range of 0 to 60 dBmV and a tap value range
of 0 to 60 dB. The minimum tap level must be
within 15 dB of the current RX level, or the
instrument will automatically adjust the value
to bring the tap value within the proper range.
4. Use the arrow buttons to highlight OK and
then select the Enter button to save the RX
level and tap value.
8310 RSA Operation Manual
Page 30
www.trilithic.com
Page 31

Return Sweep Analyzer
Editing the Device Name
To edit the name of the device, perform the following steps:
1. From the SETUP MENU, use the arrow
buttons to highlight the DEV NAME, and then
select the Enter button.
2. The DEVICE NAME MENU will appear, use
the arrow buttons to highlight the name, and
then select the Enter button.
3. Use the up/down arrow buttons to adjust the
value of the selected digit, and then use the
left/right arrow buttons to change between
the digits. Once you have nished editing the
name, select the Enter button to accept your
changes. The device name is limited to 20
characters.
4. Use the arrow buttons buttons to highlight
OK, and then select the Enter button to save
the device name.
www.trilithic.com
8310 RSA Operation Manual
Page 31
Page 32

Return Sweep Analyzer
Setting Up a Network Connection
From the SETUP MENU, highlight NETWORK, and then select the Enter button to display the
NETWORK MENU.
Use the arrow buttons to highlight the desired
network setting, and then select the Enter button to
edit the selected parameter.
Enabling & Disabling DHCP
To enable and disable DHCP, perform the
following steps:
1. Use the arrow buttons to highlight DHCP,
and then select the Enter button.
2. Use the arrow buttons to highlight
ENABLE or DISABLE, and then select
the Enter button. You will automatically be
returned to the NETWORK MENU once
you select the Enter button.
The 8310 RSA must be rebooted before the DHCP selection
will be used.
8310 RSA Operation Manual
Page 32
www.trilithic.com
Page 33

Return Sweep Analyzer
Viewing the Instrument MAC Address
To view the MAC address of your instrument,
perform the following steps:
1. From the NETWORK MENU, use the
arrow buttons to highlight MAC ADDR,
and then select the Enter button.
2. The MAC ADDRESS menu will be
displayed, press the Enter button to return
to the NETWORK MENU.
The MAC Address of the 8310 RSA is for viewing only, this
value cannot be changed.
Manual Setup of Network Connection Settings
To set the IP address, subnet mask, gateway,
DNS-1 & DNS-2, perform the following steps:
1. From the NETWORK MENU, use the
arrow buttons to highlight IP SETUP, and
then press the Enter button.
www.trilithic.com
8310 RSA Operation Manual
Page 33
Page 34

Return Sweep Analyzer
2. The NETWORK SETUP menu will be
displayed, use the arrow buttons to
highlight the IP, SN, GW, DNS1, or DNS2
value elds, and then select the Enter
button to edit the value.
3. Use the up/down arrow buttons to adjust
the value of the selected digit, and then
use the left/right arrow buttons to change
between the digits. Once you have
nished editing the value, select the Enter
button to accept your changes.
If DHCP has been enabled and the 8310 RSA has been
rebooted, the 8310 RSA will display the IP SETUP - DHCP
menu for viewing purposes only. The values shown in that
menu are assigned by the DHCP server and cannot be
changed.
4. Once you have made all of the network
changes, use the arrow buttons to
highlight OK, and then select the Enter
button to save the network settings.
Network settings do not take effect until the 8310 RSA has
been rebooted. Take note of the IP address, it is necessary to
remotely connect to the 8310 RSA through a web browser.
8310 RSA Operation Manual
Page 34
www.trilithic.com
Page 35

Return Sweep Analyzer
Viewing Automatically Assigned DHCP Network Settings
To view the IP address, subnet mask, gateway,
DNS-1 & DNS-2 that has been assigned by the
DHCP servier, perform the following steps:
1. From the NETWORK MENU, use the
arrow buttons to highlight IP SETUP, and
then select the Enter button.
2. The IP SETUP - DHCP menu will be
displayed. The IP, SN, GW, DNS1,
and DNS2 elds will display the values
assigned by the DHCP server.
3. To return to the NETWORK MENU, select
the Enter button.
DHCP must be enabled and the 8310 RSA must be rebooted
before the IP SETUP - DHCP menu will be displayed. The
values shown are automatically assigned by the DHCP server
and cannot be changed.
Take note of the IP address, it is necessary to remotely
connect to the 8310 RSA through a web browser.
www.trilithic.com
8310 RSA Operation Manual
Page 35
Page 36

Return Sweep Analyzer
Setting Username & Password
To set the username and password perform the
following steps:
1. From the NETWORK MENU, use the
arrow buttons to highlight USER NAME,
and then select the Enter button.
2. The USERNAME SETUP menu will
be displayed, use the arrow buttons to
highlight the NAME or PSWD eld, and
then select the Enter button to edit the
value.
3. Use the up/down buttons to adjust the
value of the selected digit, and then use
the left/right buttons to change between
the digits. Once you have nished editing
the value, select the Enter button to
accept your changes.
4. Once you have made all of the username
and password changes, use the arrow
buttons to highlight OK, and then select
the Enter button to save the username
and password settings.
Take note of the username and password, it is necessary to
remotely connect to the 8310 RSA through a web browser.
8310 RSA Operation Manual
Page 36
www.trilithic.com
Page 37

Return Sweep Analyzer
Adjusting Display Screen Contrast
To adjust the contrast of the display screen, perform the following steps:
1. From the SETUP MENU, use the arrow
buttons to highlight CNTRST ADJ, and then
select the Enter button.
2. The CONTRAST ADJUST menu will appear,
use the up arrow button to make the screen
darker and the down arrow button to make
the screen lighter.
3. Once you have nished adjusting the screen
contrast, select the Enter button to return to
the SETUP MENU.
www.trilithic.com
8310 RSA Operation Manual
Page 37
Page 38

Return Sweep Analyzer
THIS PAGE LEFT INTENTIONALLY BLANK
8310 RSA Operation Manual
Page 38
www.trilithic.com
www.trilithic.com
Page 39

Chapter 4
Return Sweep Analyzer
Accessing the 8310 RSA with a Web Browser
To access the 8310 RSA from a web browser, perform the following steps:
1. Open an internet web browser and enter the IP
address of the 8310 RSA that you would like to
connect to.
2. A dialog box will appear, enter the username and
password that you setup for your 8310 RSA in
Chapter 3.
3. The 8310 RSA homepage will be displayed as
shown below. Select any of the hyperlinks from
the left column to navigate to the specic web
page.
Web Access
www.trilithic.com
8310 RSA Operation Manual
Page 39
Page 40

Return Sweep Analyzer
About the 8310 RSA
Select the About 8310 link to view the following information about the 8310 RSA:
• MAC Address
• Device Date & Time
• DSP Application/Bootloader Firmware Version
• Processor Application/Bootloader Firmware Version
8310 RSA Operation Manual
Page 40
www.trilithic.com
Page 41

Return Sweep Analyzer
Device Setup
Select the Device Setup link to adjust the following settings of the 8310 RSA:
• Current Channel Plan
– Select the down arrow
to the right of this eld
to select the current
channel plan.
• Channel Plan Setup
– Select this button to
congure the system
channel plan. See
Channel Plan Setup
later in this section for
more information.
• Link Frequency – Enter the link frequency into this eld. The 8310 RSA has a minimum
link frequency of 0050.00 MHz and a maximum of 1000.00 MHz.
• TX Attenuation Level – Enter the TX Attenuation Level into this eld. The 8310 RSA
has a minimum attenuation level of 00.0 dB and a maximum of 31.5 dB.
• RX Level & Tap Value – Enter the TX Level & Tap Value into their corresponding
elds. The 8310 RSA has a RX level range of 0 to 60 dBmV and a tap value range of
0 to 60 dB. The minimum tap level must be within 15 dB of the current RX level or the
instrument will automatically adjust the value to bring the tap value within the proper
range.
• Device Name – Enter the name of the device into this eld. The device name is limited
to 20 characters.
• Network Settings – Choose between Static or DHCP network settings and enter the
corresponding IP Address, Subnet, Gateway, and DNS settings in the corresponding
elds. See Network Settings later in this section for more information.
• Username & Password – Enter the Username and Password into their corresponding
elds.
When nished updating or viewing the settings, reboot the
8310 RSA before closing your browser.
www.trilithic.com
8310 RSA Operation Manual
Page 41
Page 42

Return Sweep Analyzer
Channel Plan Setup
Perform the following actions to set up the channel plans of the 8310 RSA:
• Select Plan – Select the dropdown box to the left of the Select Plan button to
choose the channel plan number and then select the Select Plan button to view the
channel plan.
• Plan Name – Enter the name of the channel plan into this eld.
• Show Ingress – Select this option to show the live ingress trace.
• Show Peak Ingress – Select this option to show the peak ingress trace over time.
• Zoom All – Select this option to return to full view of a zoomed area. To zoom,
highlight the area at the top you want to zoom to.
8310 RSA Operation Manual
Page 42
www.trilithic.com
Page 43

Return Sweep Analyzer
• Mouse Select – Select from either Add to Plan or Del from Plan. Then, the mouse
can be used to either add or delete frequencies from the sweep. Hover over the
sweep graph with the mouse over the area to add or delete. Then, left click and hold
the mouse button while moving the mouse to highlight the area to add or delete.
Finally, release the mouse button to add or delete the frequencies.
• Copy / Merge – Select the dropdown box below the Select button to choose the
channel plan to copy or merge and then select the Copy or Merge button to either
copy or merge the settings of the currently displayed plans to the selected plan.
• Manual Entry – To manually select the frequencies for the sweep, enter the
following information and then select the Add or Del button to add or delete the
selected frequencies:
• Start Frequency – Enter the Start Frequency into this eld.
• Start Frequency – Enter the Stop Frequency into this eld.
• Step Frequency – Enter the Frequency Step into this eld.
• Sweep Frequencies – To view the sweep frequencies that are included or excluded,
select either the Included or Excluded option. The list shown below will update
to show the included or excluded frequencies. To delete an included or excluded
frequency, use the mouse to select the frequency and then select the Del Selection
button.
• Send Sweep Plan to the RSA – After changing any of the channel plan settings,
select this button to send the settings to the device. The new sweep settings will not
take affect until they are sent to the device.
• Return to RSA Setup – To return to the RSA setup screen, select this button. You
must rst send the channel plan to the device if any changes have been made.
Otherwise any changes that have been made will be lost.
When nished updating or viewing the settings, reboot the
8310 RSA before closing your browser.
www.trilithic.com
8310 RSA Operation Manual
Page 43
Page 44

Return Sweep Analyzer
Network Settings
Perform the following actions to setup the network settings of the 8310 RSA.
• Network Setup DHCP – Select Disable to manually set the network settings of
the 8310 RSA or select Enable to automatically obtain the network settings from a
DHCP server.
• IP – Enter the IP address of the 8310 RSA into this eld.
• SN – Enter the Subnet of the 8310 RSA into this eld.
• GW – Enter the Gateway of the 8310 RSA into this eld.
The 8310 RSA must be rebooted before the DHCP selection
will be used.
• DNS1 – Enter the Primary DNS address of the 8310 RSA into this eld.
• DNS2 – Enter the Secondary DNS address of the 8310 RSA into this eld.
If DHCP is enabled, the values shown for the IP Address,
Subnet, Gateway, & DNS are automatically assigned by the
DHCP server and cannot be changed.
After rebooting the 8310 RSA, and if the IP address of the 8310
RSA is changed, you will need to enter the new IP Address
into the web browser to access the Web Interface.
8310 RSA Operation Manual
Page 44
www.trilithic.com
Page 45

Return Sweep Analyzer
Firmware Update
Select the Firmware Update link, then perform the following steps to apply a rmware update
to the 8310 RSA:
1. Select the Firmware
Type that you would like
to upload by selecting
from one of the following
options:
• UP Application
– This is rmware
designed for the microprocessor controller and has the following le name
structure “rsmaXXXX.mot”.
• DSP Application – This is rmware designed for the Digital Signal Processor
controller and has the following le name structure “rsdaXXXX.mot”.
2. Select the Browse button to
bring up a window to chose the
le to upload. Select the folder
location and name, and then
select the Open button.
www.trilithic.com
8310 RSA Operation Manual
Page 45
Page 46

Return Sweep Analyzer
3. The path and
le name of the
rmware le will
now be displayed
in the Firmware
Filename eld.
4. Select the Apply button, you will be
prompted with the following message;
“Do you wish to continue with the
upgrade process?”. To proceed with the
rmware update, select the OK button
or to exit without upgrading, select the
Cancel button.
5. The message shown below will appear, indicating that the 8310 RSA may be
unresponsive for a few minutes while the upgrade process is completed.
8310 RSA Operation Manual
Page 46
www.trilithic.com
Page 47

Return Sweep Analyzer
6. Once the rmware update starts, the display
screen on the 8310 RSA will indicate the
download progress as shown to the right.
7. Once the rmware update is
complete, the 8310 RSA web
interface will indicate “Firmware
Upgrade Succeeded!” as shown to
the right.
8. Select the Home link to return to
the homepage.
www.trilithic.com
8310 RSA Operation Manual
Page 47
Page 48

Return Sweep Analyzer
9. Select the Reboot 8310 RSA
button, you will be prompted with the
following message; “Are you sure
you want reboot the 8310 RSA?”.
To proceed with the reboot, select
the OK button or to exit without
rebooting, select the Cancel button.
10. The message shown below will
appear, indicating that the 8310 RSA may be unresponsivefor a few minutes while the
reboot process is completed.
If DHCP is enabled, you may need to verify the new IP address
that is assigned to the 8310 RSA after the reboot. This will be
necessary if you wish to communicate with the 8310 RSA via
the internet web interface again.
8310 RSA Operation Manual
Page 48
www.trilithic.com
Page 49

Chapter 5
Return Sweep Analyzer
Specications
Frequency
Range 5.0625 to 85.125 MHz – user configurable
Resolution 93.75 kHz
Level
Input Range 25 dBmV maximum
Accuracy * ±1.0 dBmV
Telemetry (downstream only)
Frequency 50 to 1,000 MHz – user configurable
Occupied Bandwidth ≤ 500 kHz @ -60 dBc
Appendix
Output Level ≥ 50 dBmV with ≤ 31.5 dB attenuation – user configurable in 0.5 dB steps
Spurious Carrier
Suppression
Mechanical
Rack Height 2 RU
Power Specifications
AC Power Input 100 to 370 VAC ~ 47 to 440 Hz, 0.75A Max
DC Power Input -36.8 to -74.9 VDC, 3.0A Max
*system accuracy, assuming stable plant
-60 dB
www.trilithic.com
8310 RSA Operation Manual
Page 49
Page 50

Return Sweep Analyzer
THIS PAGE LEFT INTENTIONALLY BLANK
8310 RSA Operation Manual
Page 50
www.trilithic.com
www.trilithic.com
Page 51

Return Sweep Analyzer
Trilithic Broadband Instruments 2-Year Limited Warranty
Trilithic, Inc. (“Trilithic”) warrants to the buyer that the product will be free from defects in materials and
workmanship, under normal use, operating conditions and service for a period of two (2) years from date of
delivery. Trilithic reserves the right, before having any obligation under this limited warranty, to inspect the
damaged product, and all costs of shipping the product to Trilithic for inspection shall be borne solely by the
buyer. Trilithic’s obligation under this limited warranty shall be limited, at Trilithic’s sole option, to replacing or
repairing the product, or to replacing or repairing any defective part, F.O.B. Indianapolis, Indiana. If neither of the
two options is reasonably available, then Trilithic, in its sole discretion, may provide a prorated refund to the buyer
of the purchase price of the product, as evidenced by the proof of purchase, less any applicable service fees in
accordance with the following schedule: months 0-3 = 100%; months 4-12 = 50%; and months 13–24 = 25%.
Batteries and fans are not included or covered by this limited warranty. Any product or part that is repaired or
replaced under this limited warranty shall be covered only for the remainder of the original warranty period which
applied to the original product or part, or for ninety (90) days, whichever is longer. All products or parts that are
exchanged for replacement shall become the property of Trilithic.
In order to recover under this limited warranty, buyer must make a written claim to Trilithic within sixty (60) days
of the occurrence and must present acceptable proof of original ownership of the product (such as an original
receipt, purchase order or similar documentation). In order for this limited warranty to be effective, the product
must have been handled and used as set forth in the documentation accompanying the product and/or its
packaging. This limited warranty shall not apply to any damage due to accident, misuse, abuse, neglect, re or
other casualty. Further, this limited warranty shall not apply to any product which has been altered or where the
damage was caused by a part not supplied by Trilithic. Trilithic retains the nal decision whether a product is
within warranty conditions.
THE REMEDY SET FORTH HEREIN SHALL BE THE ONLY REMEDY AVAILABLE TO THE BUYER AND
TO THE FULLEST EXTENT PERMITTED BY LAW, IN NO EVENT SHALL TRILITHIC BE LIABLE FOR ANY
SPECIAL, INCIDENTAL, PUNITIVE OR CONSEQUENTIAL DAMAGES, INCLUDING BUT NOT LIMITED
TO, LOST REVENUES, LOST PROFITS, LOSS OF USE OF SOFTWARE, LOSS OR RECOVERY OF DATA,
DOWNTIME, REPLACEMENT EQUIPMENT AND ANY THIRD PARTY CLAIMS ARISING OUT OF ANY THEORY
OF RECOVERY INCLUDING WARRANTY, CONTRACT, STATUTORY OR TORT IN CONNECTION WITH
THE PRODUCT, EVEN IF TRILITHIC HAS BEEN ADVISED OF THE POSSIBILITY OF SUCH DAMAGES.
NOTWITHSTANDING THE FOREGOING, IN THE EVENT THAT THIS LIMITED WARRANTY FAILS OF ITS
ESSENTIAL PURPOSE, IN NO EVENT SHALL TRILITHIC’S ENTIRE LIABILITY TO BUYER EXCEED THE
PURCHASE PRICE OF THE DEFECTIVE PRODUCT.
EXCEPT FOR THE LIMITED WARRANTY PROVIDED HEREIN, TO THE FULLEST EXTENT PERMITTED
BY LAW, TRILITHIC DISCLAIMS ALL WARRANTIES, EXPRESSED OR IMPLIED (INCLUDING WITHOUT
LIMITATION, ANY IMPLIED WARRANTIES OF MERCHANTABILITY OR FITNESS FOR A PARTICULAR
PURPOSE), WITH RESPECT TO THE PRODUCT OR ITS SUITABILITY FOR ANY USE INTENDED FOR IT BY
THE BUYER. TO THE EXTENT ANY IMPLIED WARRANTIES MAY NONETHELESS EXIST BY OPERATION OF
LAW, ANY SUCH WARRANTIES ARE LIMITED TO THE DURATION OF THIS LIMITED WARRANTY.
This limited warranty is non-transferable. This limited warranty does not affect any other legal rights buyer may
have by operation of law. No agent, reseller, distributor or business partner of Trilithic is authorized to modify the
terms of this limited warranty on behalf of Trilithic.
www.trilithic.com
8310 RSA Operation Manual
Page 51
Page 52

9710 Park Davis Drive
Indianapolis, IN 46235
(317) 895-3600
Made in U.S.A.
www.trilithic.com
 Loading...