

Page 1
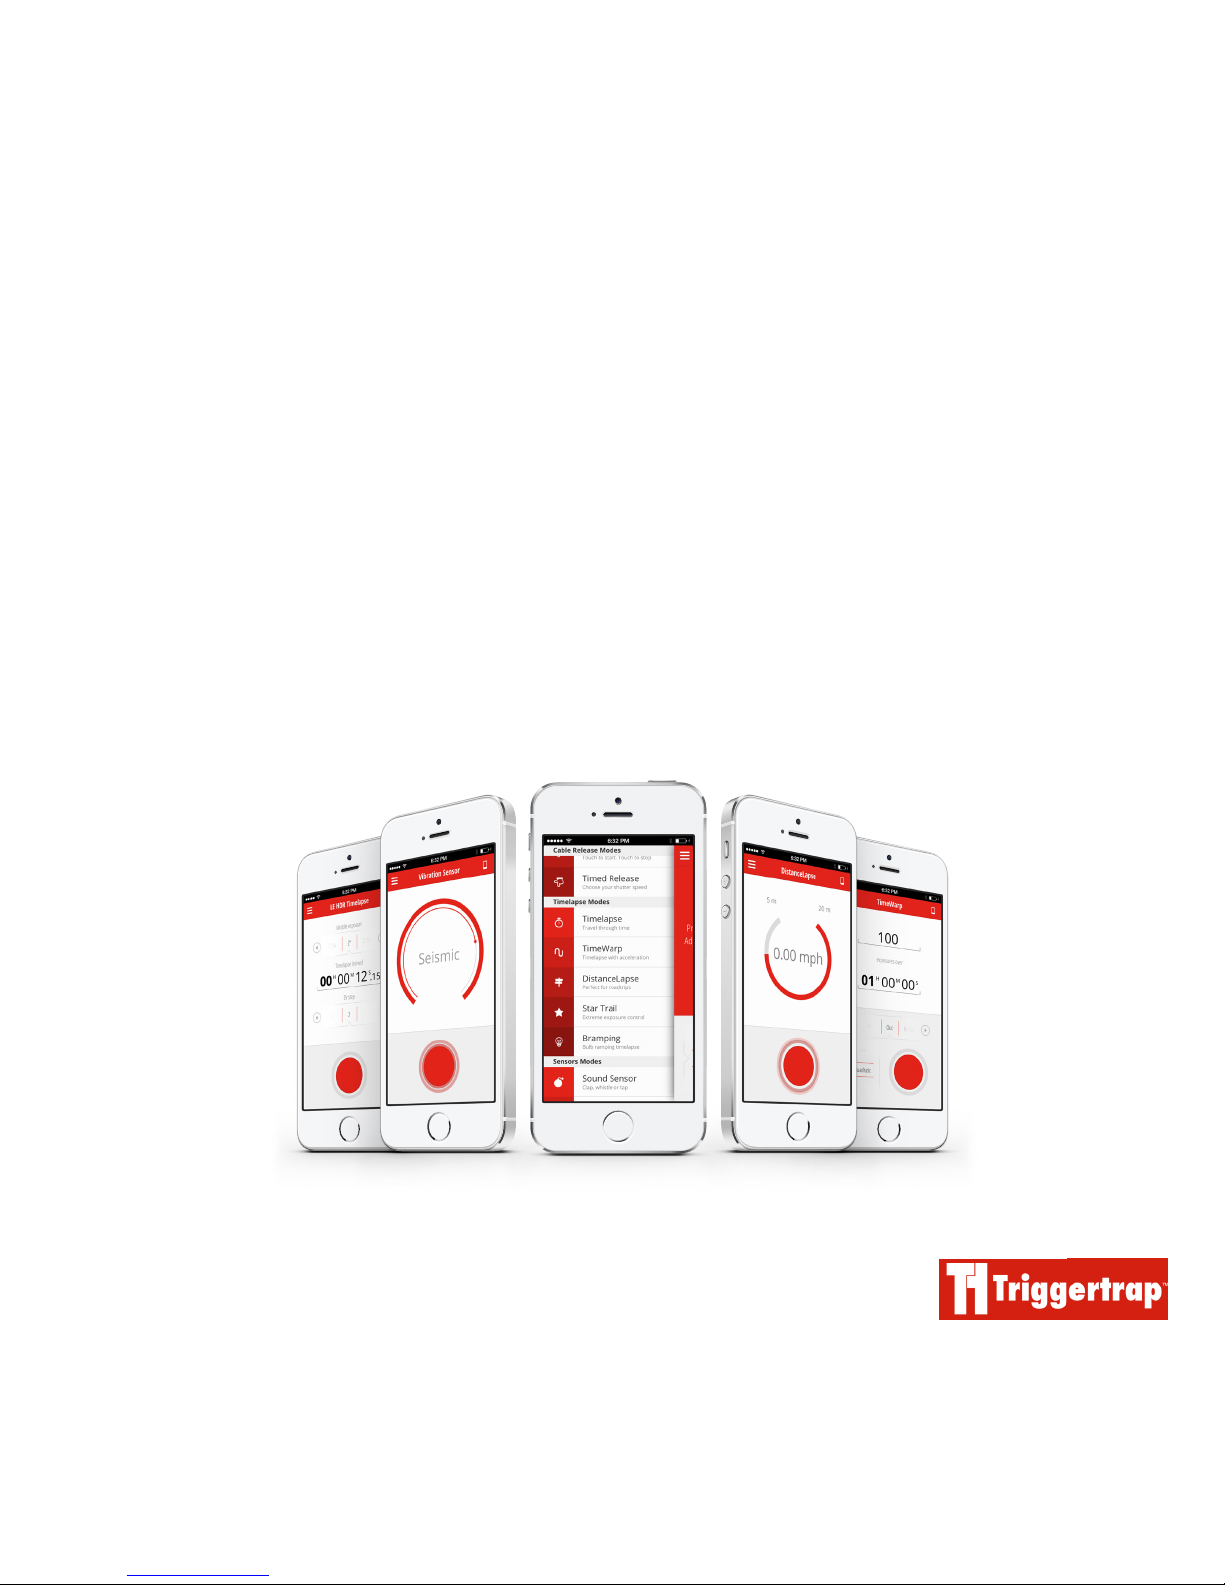
Triggertrap Mobile
User Manual for iOS
Version 2.2
Updated: 21 January 2014
Page 2

Triggertrap Mobile App Manual | Page 2
Table of Contents
Table of Contents .................................................................2
Introduction .......................................................................... 4
Compatible Devices........................................................................................4
Using Triggertrap Mobile on an iPad ...........................................4
What is the Triggertrap Mobile Dongle? ........................5
Why do I need a camera connection cable?! .......................... 5
How does the Triggertrap Mobile Dongle work? .............. 6
SLR and Advanced Compact Cameras Compatible with
Triggertrap Mobile ......................................................................................... 6
The Home Screen & Triggering Modes ...........................7
Setting the Language ...................................................................................7
Using the Internal Camera ................................................ 8
Triggering an SLR camera with Triggertrap Mobile ... 9
Manual Focus Only .........................................................................................9
The Settings Screen .......................................................................................9
Sensor Delay ......................................................................................................... 9
Sensor Reset Delay ......................................................................................10
Pulse Length ...................................................................................................... 10
Speed Unit and Distance Unit(s) ....................................................10
Screen Flashing ............................................................................................... 10
Screen Dimming ............................................................................................. 10
Cable Release Modes ......................................................... 11
Simple Cable Release ...................................................................................11
Press and Hold ...................................................................................................11
Press and Lock ...................................................................................................11
Timelapse Modes ................................................................12
TimeWarp
TM .........................................................................................................................................................................................12
DistanceLapse ...................................................................................................12
Star Trail ..................................................................................................................13
Bramping ................................................................................................................13
Sensor Modes ......................................................................14
Sound Sensor .................................................................................................... 14
Vibration Sensor ..............................................................................................15
Motion Sensor....................................................................................................15
Peekaboo ................................................................................................................16
LE HDR (High Dynamic Range) Modes ......................... 17
What does ‘Long Exposure’ mean? ...............................................18
LE HDR Timelapse .......................................................................................18
Remote Trigger: Wi-Fi Triggering ..................................19
How does it work? .........................................................................................19
Limitations ............................................................................................................19
Setting up your Master device ...........................................................19
Setting up your Slave device ...............................................................19
Page 3

Triggertrap Mobile App Manual | Page 3
Using Wi-Fi mode ......................................................................................... 20
Multiple slaves ................................................................................................. 20
What if there is no Wi-Fi network available? ...................... 20
I can’t get my Master / Slave system to work! ...................20
Network connectivity problems? ................................................... 20
Setting your camera to Bulb mode ................................21
Using ND (Neutral Density) Filters ................................21
Common problems and their solutions ........................ 22
Q: The camera is taking lots of photos in rapid succes-
sion .............................................................................................................................. 22
Q: The SLR camera isn’t taking any photos at all ...........22
Troubleshooting Triggertrap Mobile ............................ 23
Showing o your Triggertrap Mobile Photos ............24
Do you still have questions? ........................................... 25
The small print ................................................................... 25
Page 4
Triggertrap Mobile App Manual | Page 4
Introduction
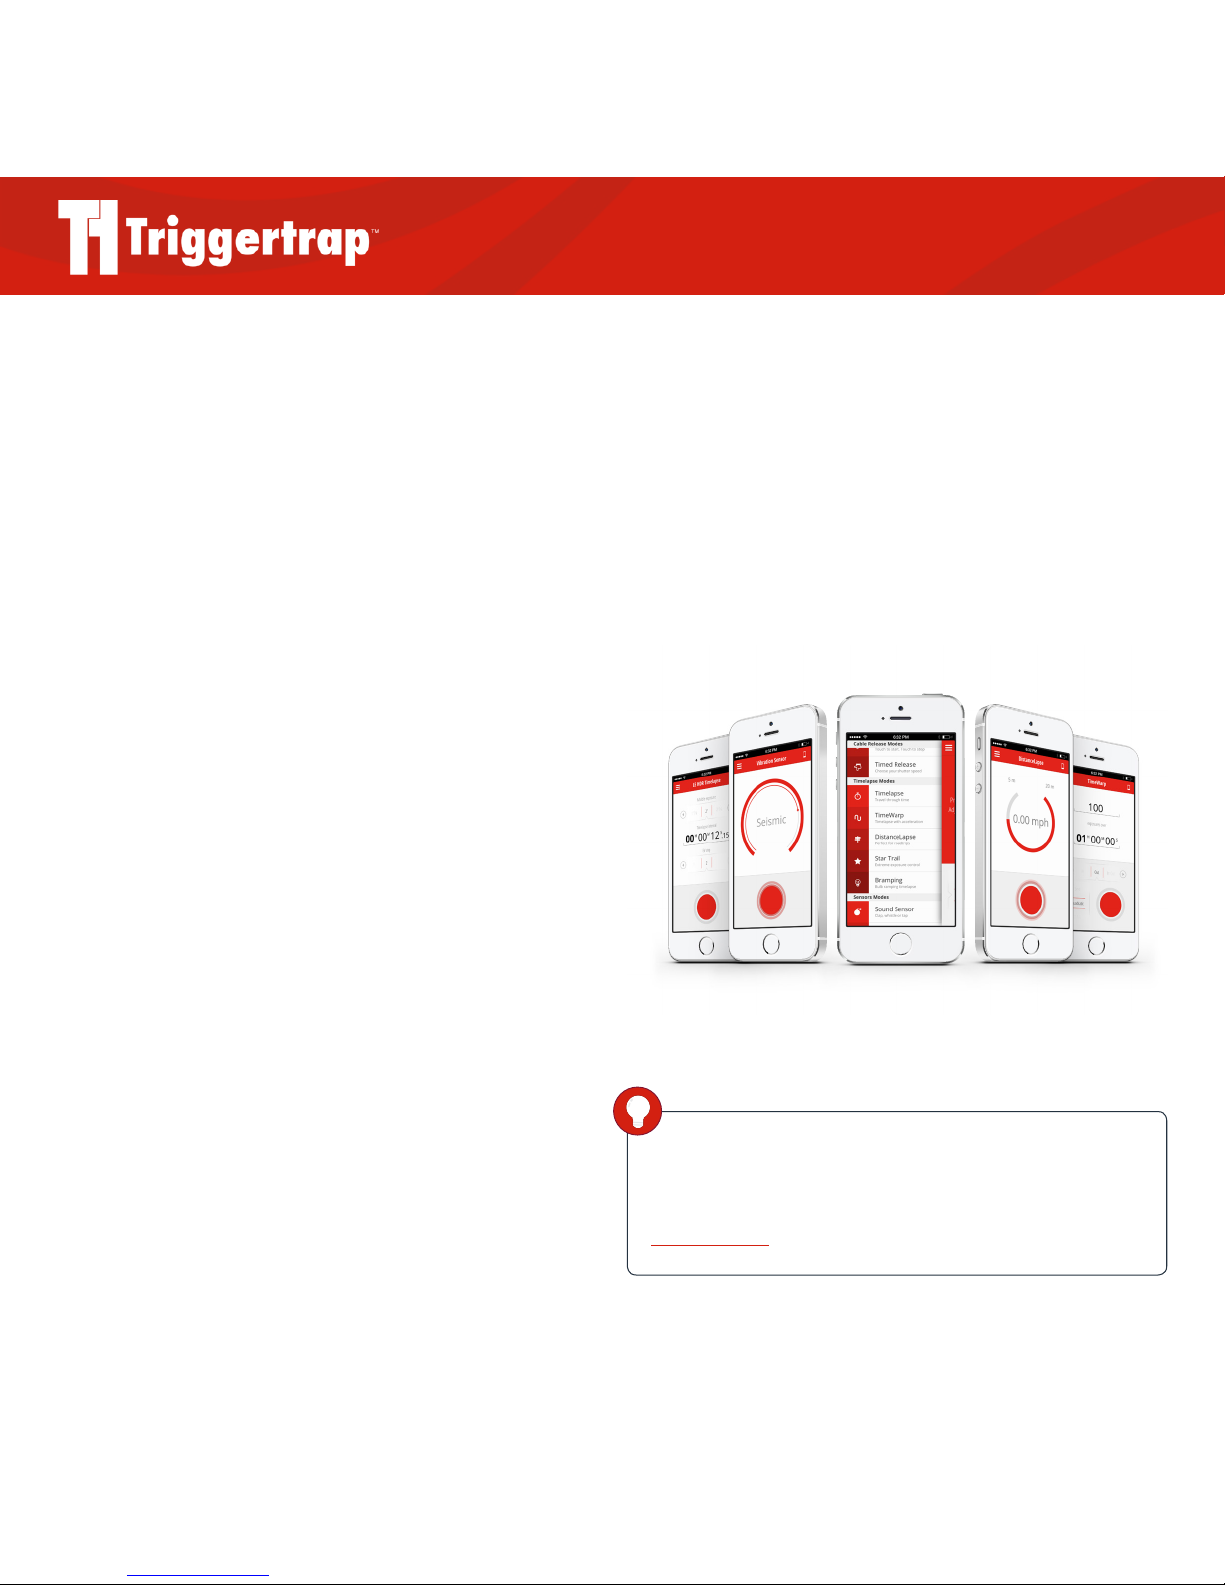
Triggertrap Mobile is an app that runs on your iOS device.
It enables you to use a number of dierent triggering
modes to trigger your camera.
You can use Triggertrap Mobile with either the internal
camera on your iOS device, or a compatible camera
connected via the Triggertrap Mobile Dongle.
Compatible Devices
Triggertrap Mobile for iOS is compatible with all devices
capable of running iOS 6.1 or newer, including iPhones,
iPod Touches, and iPads.
While the app will run on iPhone 3GS, we strongly
recommend using an iPhone 4S or newer with
Triggertrap Mobile, as this gives the best results and the
fastest triggering.
Using Triggertrap Mobile on an iPad
You can use Triggertrap Mobile on an iPad or iPod Touch,
but please be aware that these devices do not support all
features of Triggertrap Mobile, as not all of them have the
sensors required to operate all modes.
For example: some iPad and iPod touch models do not
have a built-in GPS chip, which means that the
DistanceLapse mode may not be available.
DID YOU KNOW?
You can always get the most recent version of Triggertrap
Mobile on the App Store – just point your browser at
http://tri.gg/ttm
Page 5
Triggertrap Mobile App Manual | Page 5
What is the Triggertrap Mobile Dongle?
Triggertrap Mobile can be used with the camera built into
your iOS device. However, for the full Triggertrap
experience, it’s best to connect Triggertrap Mobile to a
compatible camera.
To connect your SLR or advanced compact camera to
Triggertrap Mobile, you need a piece of hardware, known
as the Triggertrap Mobile Dongle, and a camera
connection cable.
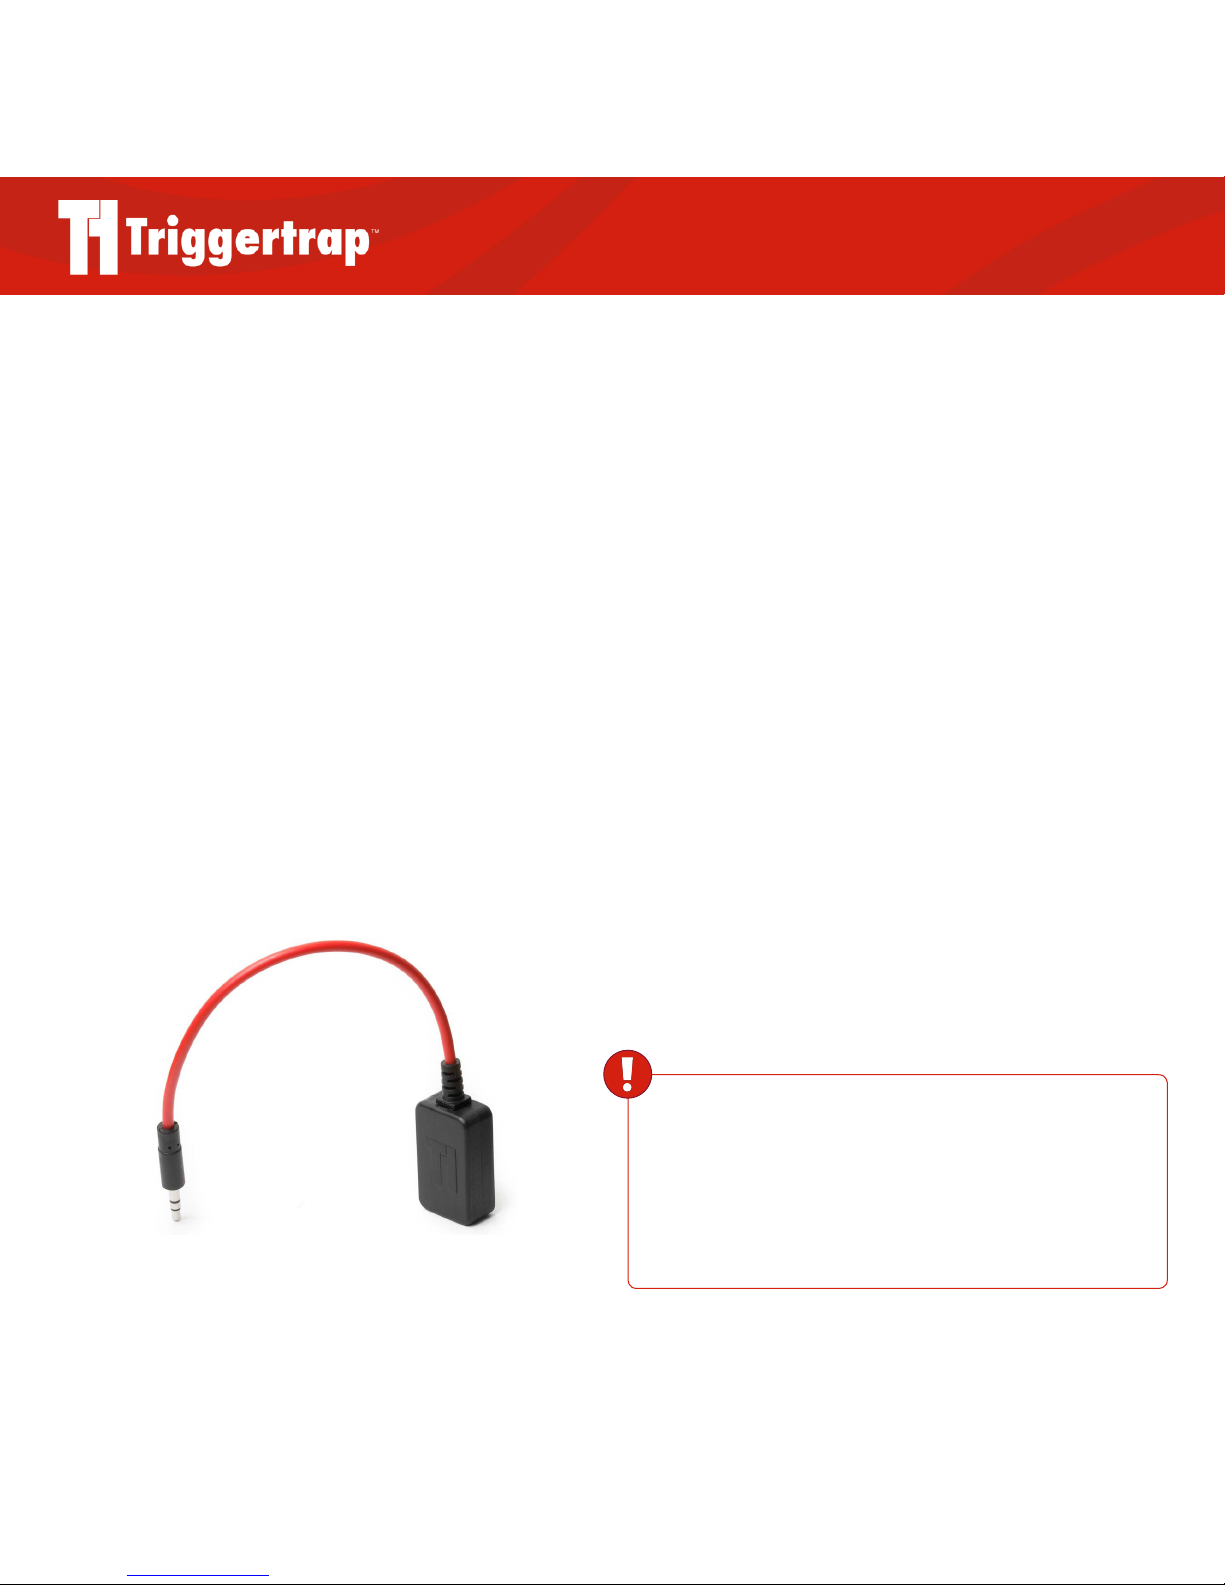
The Triggertrap Mobile Dongle is an inexpensive
converter that plugs into the headphone socket on your
iOS device.
Why do I need a camera connection cable?!
The Triggertrap Mobile Dongle is the same for all iOS
devices, but camera manufacturers have not settled on a
single standard for the remote control socket on cameras.
In fact, we sell nine dierent camera connection cables.
The camera connection cable plugs into the 2.5mm socket
on the Triggertrap Mobile Dongle, and into the camera’s
wired remote control socket.
The Triggertrap Mobile Dongle can be purchased on its
own, or as part of a kit, bundled with a camera connection
cable. Whichever option you choose, you will need both a
Triggertrap Mobile Dongle and a camera connection cable,
so please check carefully!
Triggertrap Mobile Dongle
WARNING
Always ensure you use the Triggertrap Mobile Dongle,
and never attempt to connect your camera directly to your iOS
device. Connecting the iOS device and the camera without a
dongle could harm your camera, your iOS device, or both.
Page 6
Triggertrap Mobile App Manual | Page 6
How does the Triggertrap Mobile Dongle
work?
Triggertrap Mobile works by sending a special, ultrasonic
audio signal through the headphone socket of your iOS
device.
The Triggertrap Mobile Dongle is an ingenious piece of
hardware that takes this audio signal and translates it to
something your camera can use.
SLR and Advanced Compact Cameras
Compatible with Triggertrap Mobile
We support more than 300 dierent camera models, far
too many to list in this manual. Please refer to our camera
selector page at http://tri.gg/dongle to select your camera.
This page will tell you which camera connection cable &
Dongle you need.
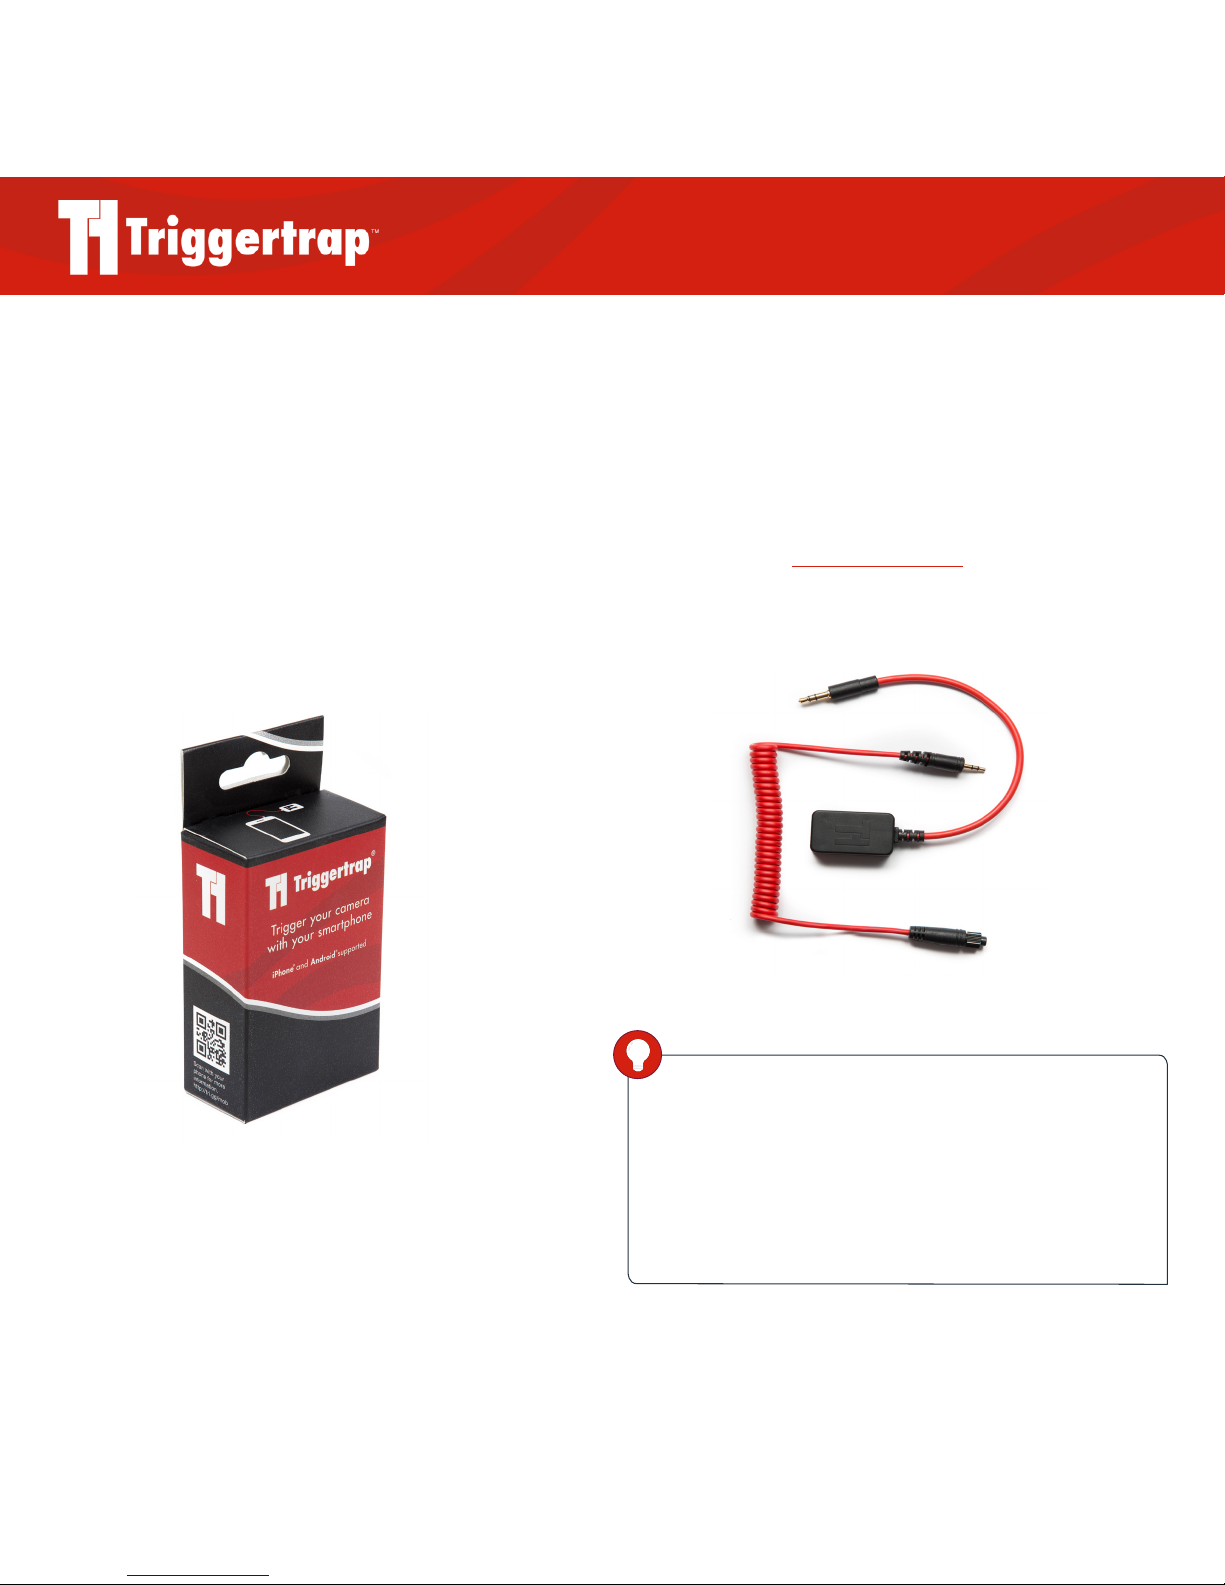
Triggertrap Mobile Dongle in retail packaging
Triggertrap Mobile Dongle and camera connection cable
DID YOU KNOW?
If you switch to a dierent model of camera later, you don’t have
to buy a second Triggertrap Mobile Dongle. Simply buy the
connection cable you need separately, and you’re good to go
again! You can also purchase the Mobile Dongle separately if
you ever need another.
Page 7
Triggertrap Mobile App Manual | Page 7
The Home Screen & Triggering Modes
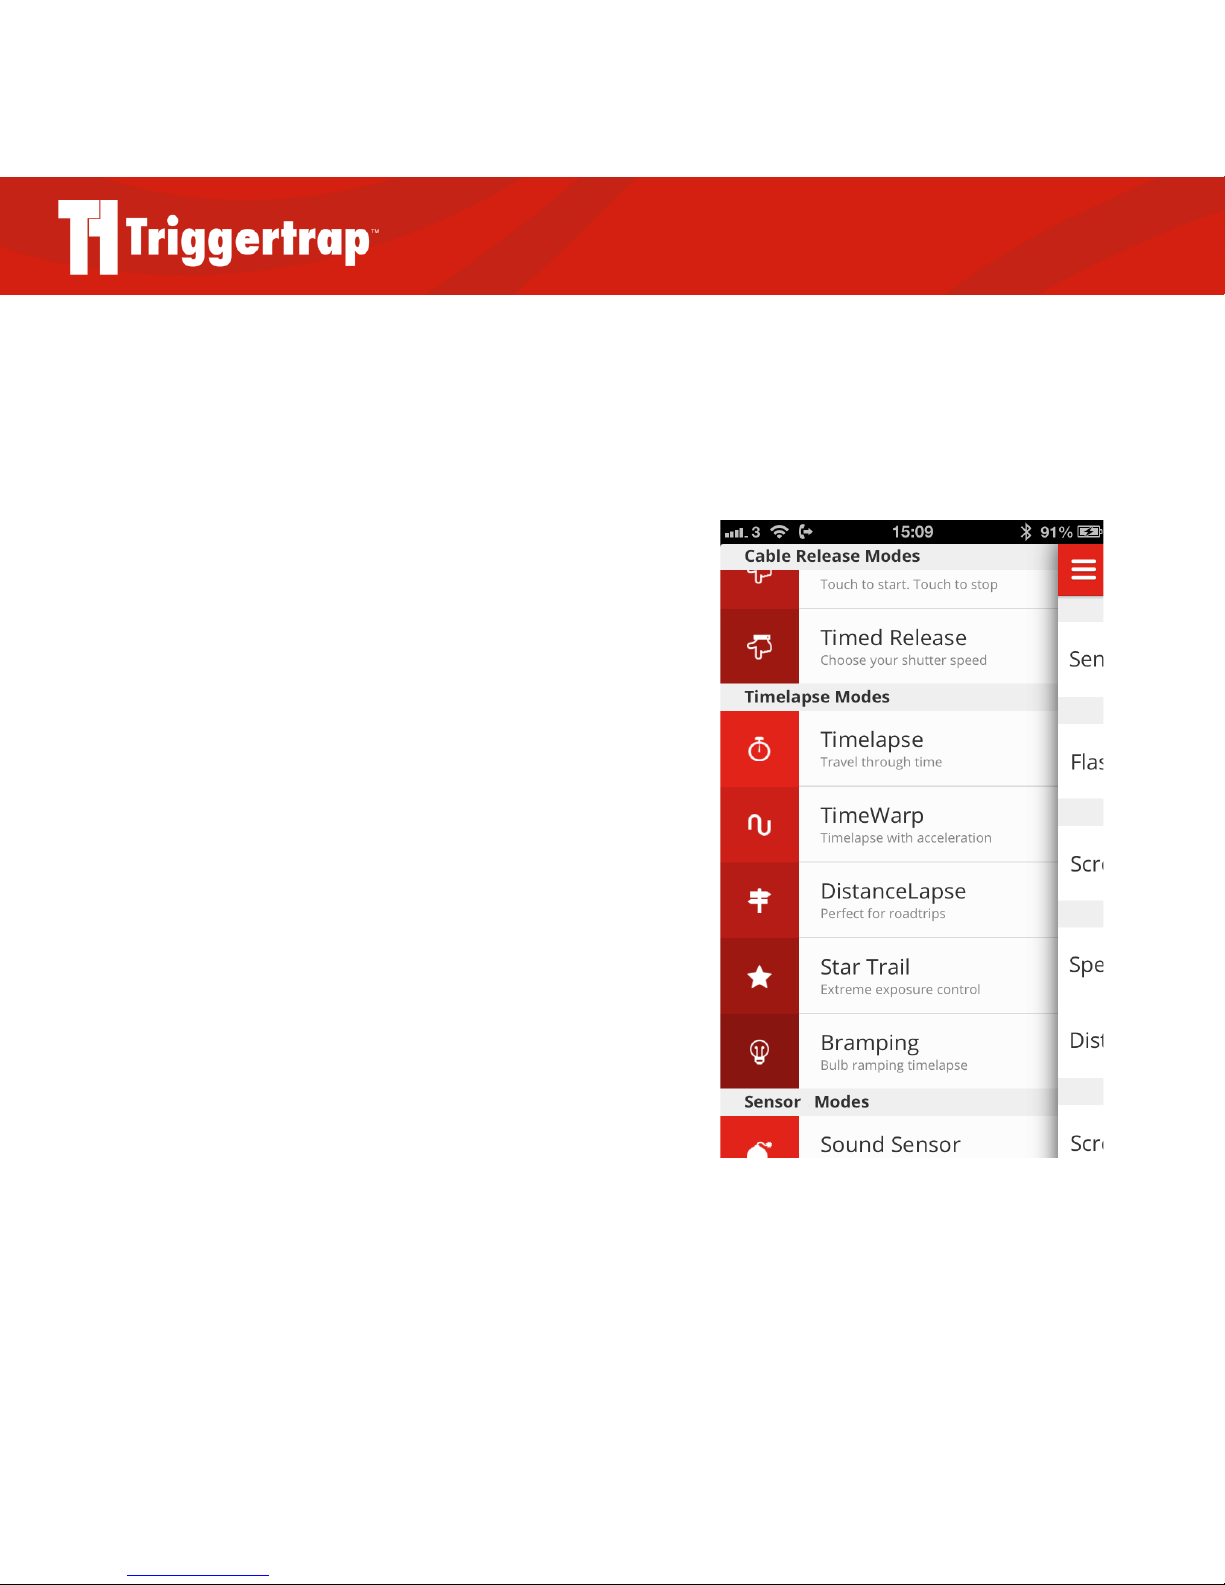
When you first launch the app, you will be greeted with a
welcome screen. You will then be taken to the Menu.
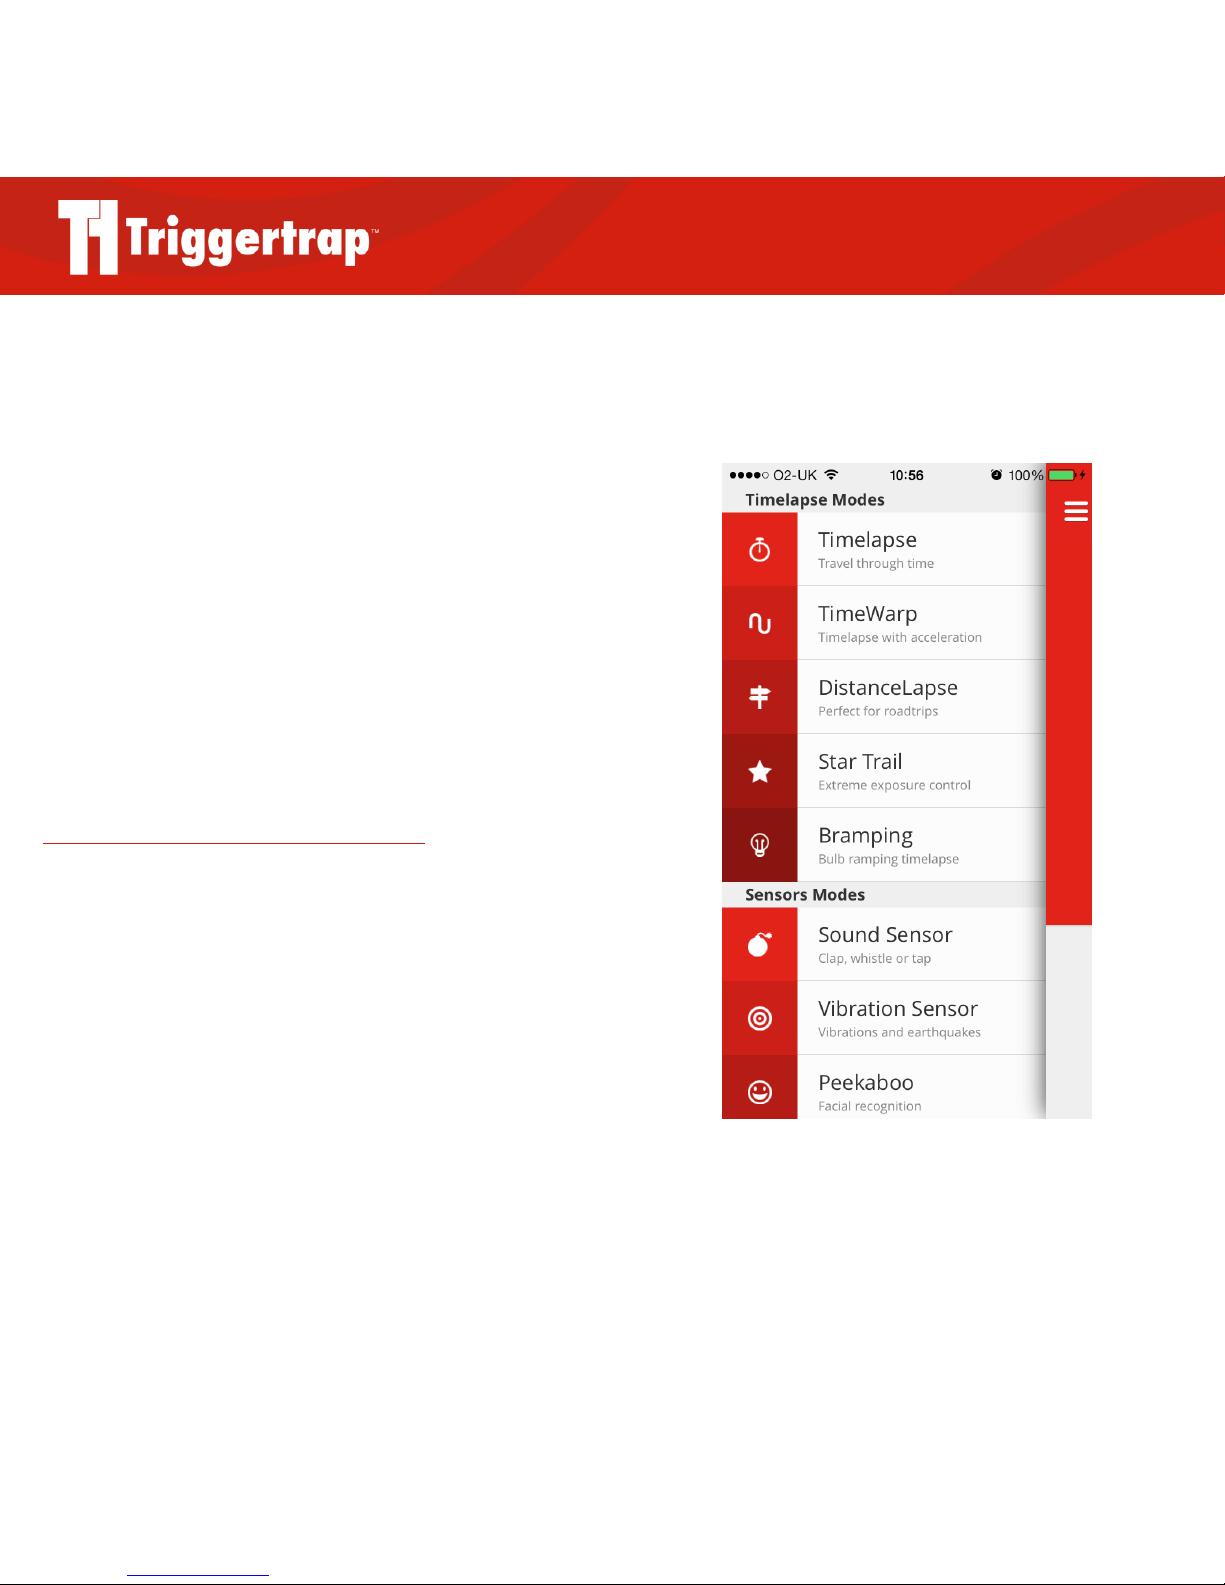
From the Menu, you can choose the triggering mode you
want to use, so pick your poison, and go exploring!
Setting the Language
Triggertrap Mobile is currently available in English and
German with more translations on their way, and will
automatically run in the same language as your iOS device.
If your phone is set to a non-English language, but the app
shows up in English anyway, it means that Triggertrap
Mobile is not yet available in your language. Feel free to
request it in our support forum or – even better – contact
us to find out how you can help translate it into your own
language!
Page 8
Triggertrap Mobile App Manual | Page 8
Using the Internal Camera
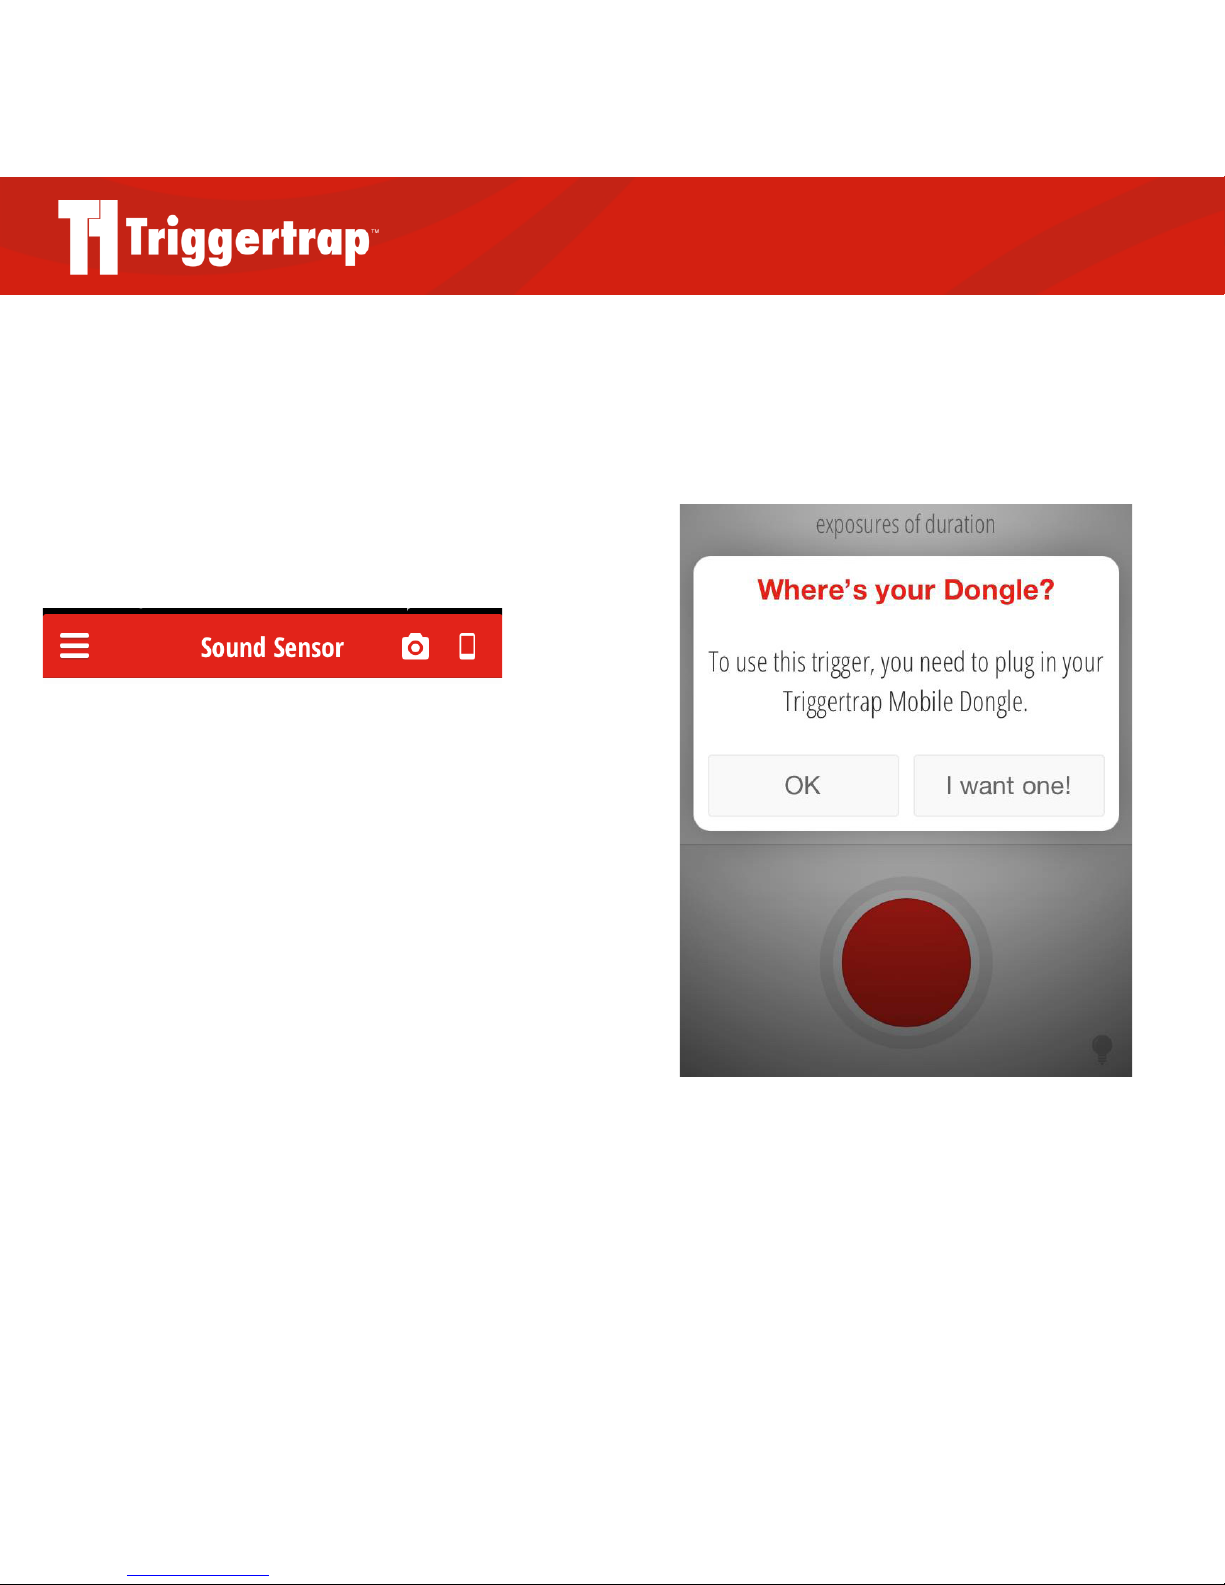
To use the internal camera, you need to ensure it is
activated. Any mode that supports the internal camera will
have the internal camera option in the top right corner of
the screen.
To activate the internal camera, go into any triggering mode,
and tap the internal camera icon. The app should then tell
you ‘Internal Camera Enabled’. Now, whenever the camera
triggers, it will take a photo using the internal camera, and
save it to your camera roll.
In modes where the internal camera is not available, you will
be asked to connect your Mobile Dongle when trying to take
a photo (see screenshot to the right).
The internal camera icon is shaped like a smartphone and
located on the far right
Page 9
Triggertrap Mobile App Manual | Page 9
Triggering an SLR camera with Triggertrap Mobile
So you want to hook up Triggertrap Mobile to a SLR
camera? Awesome – this is what the app was really made
for!
Manual Focus Only
Triggertrap Mobile 2.0 is a manual focus only app. This is
because it makes a lot more sense for the kinds of
photography Triggertrap enables, cutting out the delay
between the signal being sent and the shutter firing when
the camera is already ready to go. If you would like to read
more about why Mobile 2.0 is manual focus only check out
http://triggertrap.com/manual-focus-only/
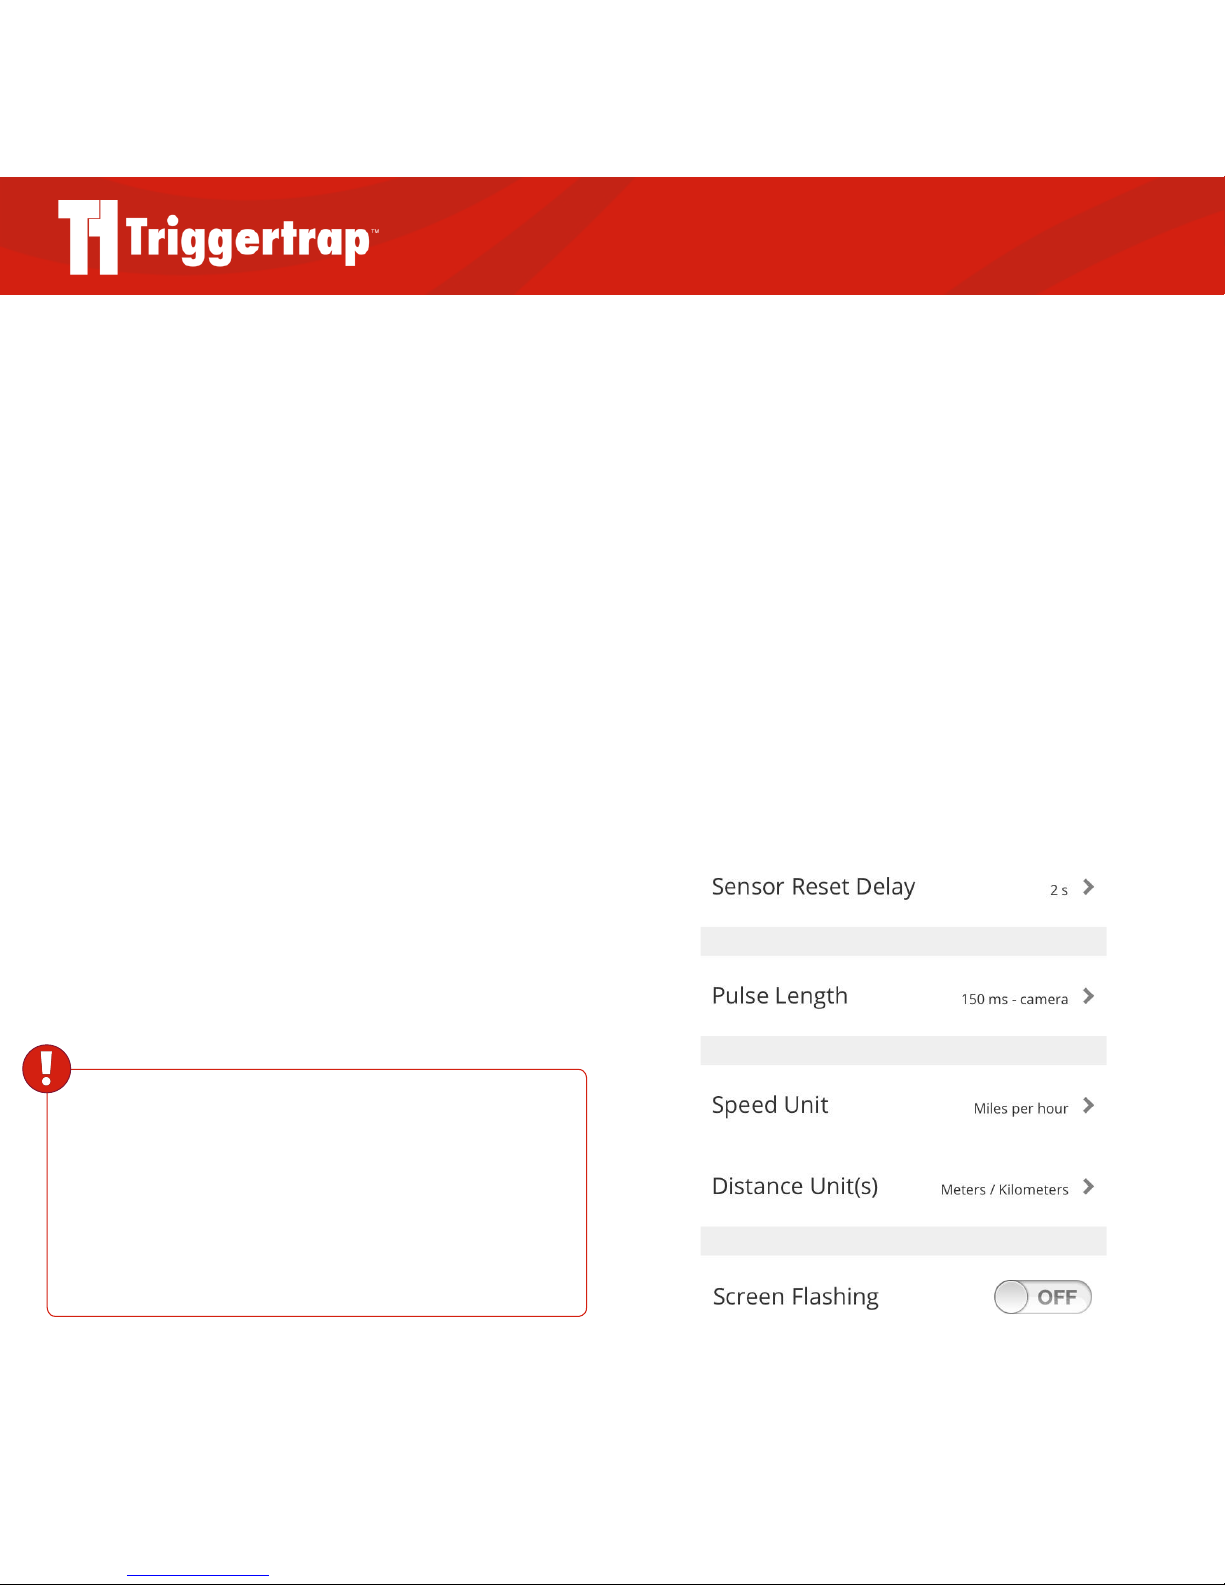
The Settings Screen
This screen allows you to take a little more control over your
camera triggering.
Sensor Delay
This setting allows you to select a delay before trigger in the
sensor modes, perfect for letting you jump into the photo, or
maybe even out of the way!
Page 10
Triggertrap Mobile App Manual | Page 10
Sensor Reset Delay
The sensor reset delay controls how quickly you want your
sensor to reset before taking another photograph. For
example, if you were using the Peekaboo (facial
recognition) sensor and did not want it to constantly take
photographs of people for as long as their faces were in the
frame, you could set a five second delay in order to give
them the time to move before the camera is triggered again.
Pulse Length
The Pulse Length is the duration Triggertrap Mobile sends
a signal to your camera. The default length is 150
milliseconds, which is long enough for your camera to
trigger, but short enough that your camera will usually not
trigger twice.
However, you may wish to decrease this if you are
triggering flashes (they generally only need 3-4ms pulses to
set o a flash), or you may wish to increase it if you’re using
one of the channels to focus your camera.
Speed Unit and Distance Unit(s)
Choose your preferred units of measurement.
Screen Flashing
Great for situations where it is more diicult to see when
the app is being triggered, this option will make your screen
flash on every trigger.
Screen Dimming
Although Screen Dimming may sound like an
inconvenience, a dimmer screen will burn through battery
power slower. Remember to follow the instructions in the
following notification before leaving the app.
WARNING
Triggertrap Mobile Dongle can be used to trigger external
flashes, but is only designed to trigger modern flashes, with
moderate power output. If you connect a studio strobe, a defective flash, or a flash that is more than a few years old to your
Triggertrap Mobile Dongle, it could damage your iOS device.
Page 11
Triggertrap Mobile App Manual | Page 11
Cable Release Modes
Cable Release is the simplest mode to trigger your camera
– press the button to take a photo! There are four dierent modes: One ‘regular’ trigger, and three long-exposure
modes.
Simple Cable Release
Simple Cable Release is your standard remote control. Press
the button to take a photo!
Press and Hold
Press and hold the shutter button to take a long exposure.
When you release the shutter button, the exposure ends.
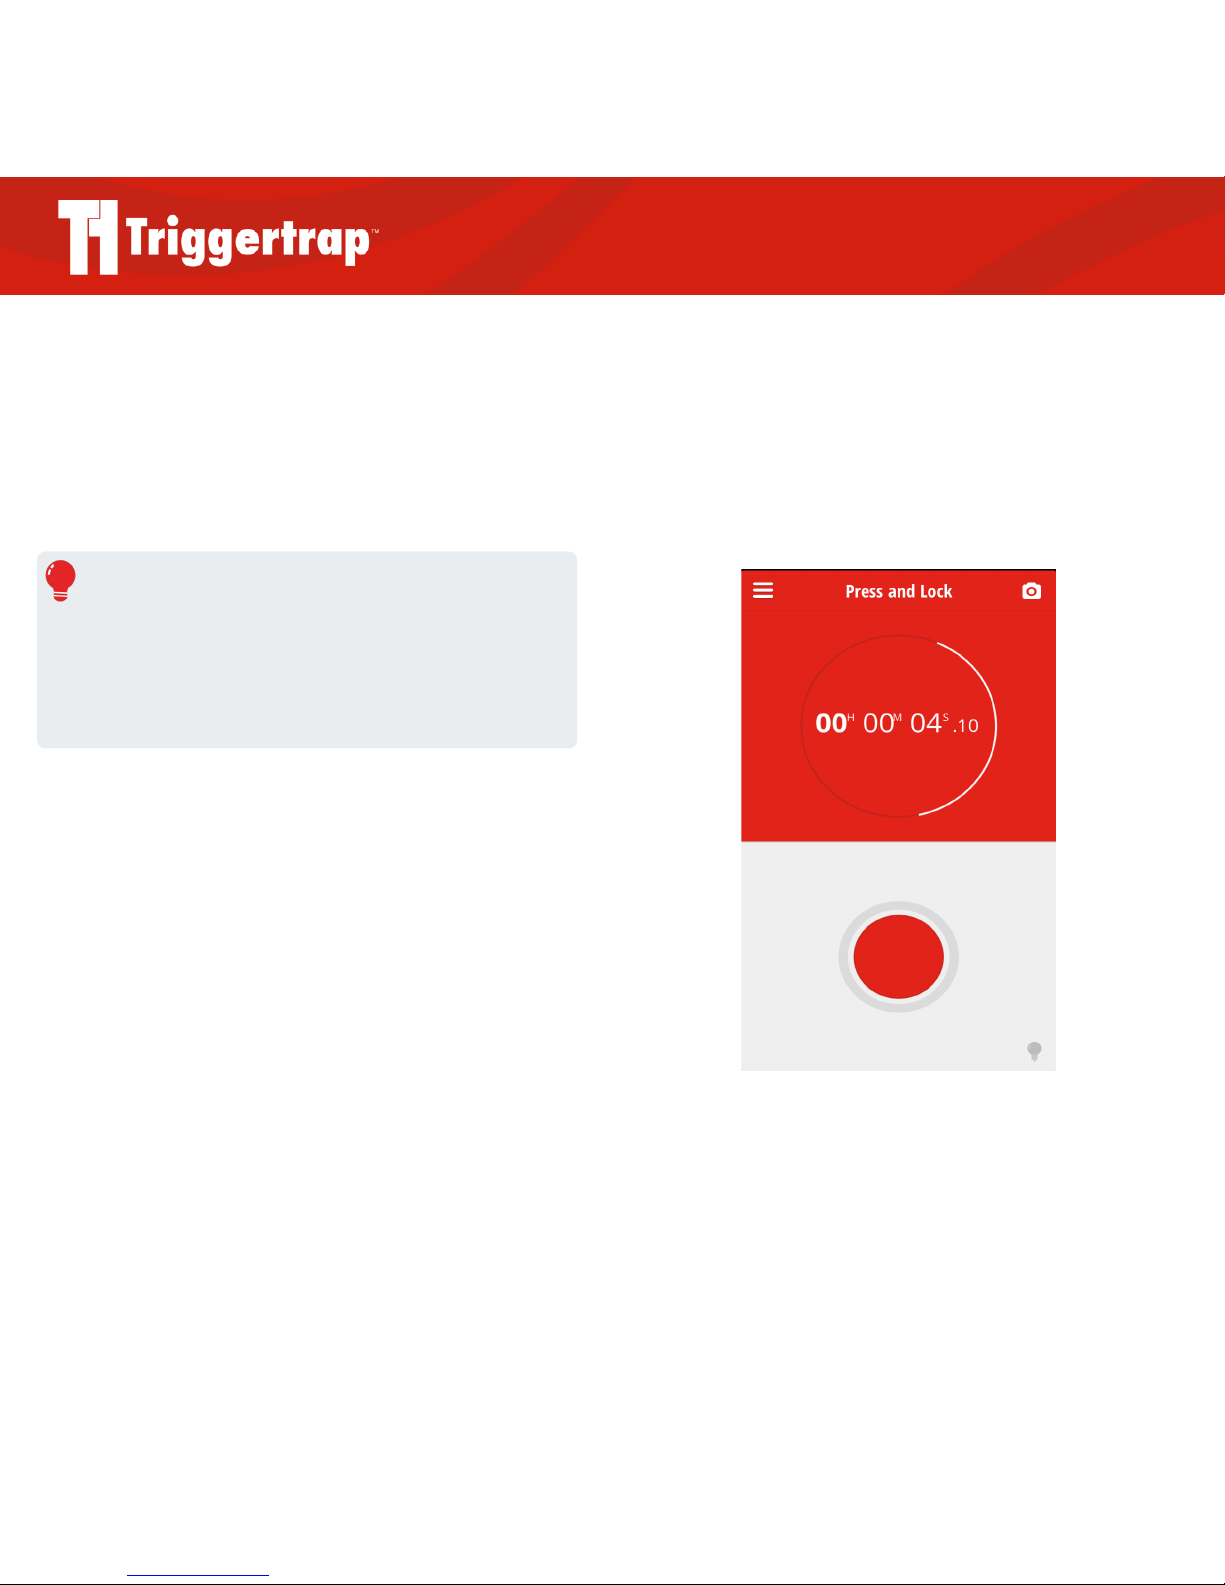
Press and Lock
Press the shutter button to take a long exposure. Press the
shutter button again to end the exposure.
Timed Release
Tap on the time input bar and use the keyboard to choose
the length of your exposure. Press the shutter button on the
Triggertrap Mobile app then sit back and relax!
REMEMBER
To use the long exposure modes, you need a Triggertrap Mobile
Dongle, and your camera needs to be set to Bulb mode. Please
see page 20 for more information about setting your camera to
Bulb.
Press and Lock mode
Page 12
Triggertrap Mobile App Manual | Page 12
Timelapse Modes
The Timelapse modes are used to take a series of photos
at fixed intervals. These photos can then be assembled into
a video, which creates the illusion that time is moving very
quickly.
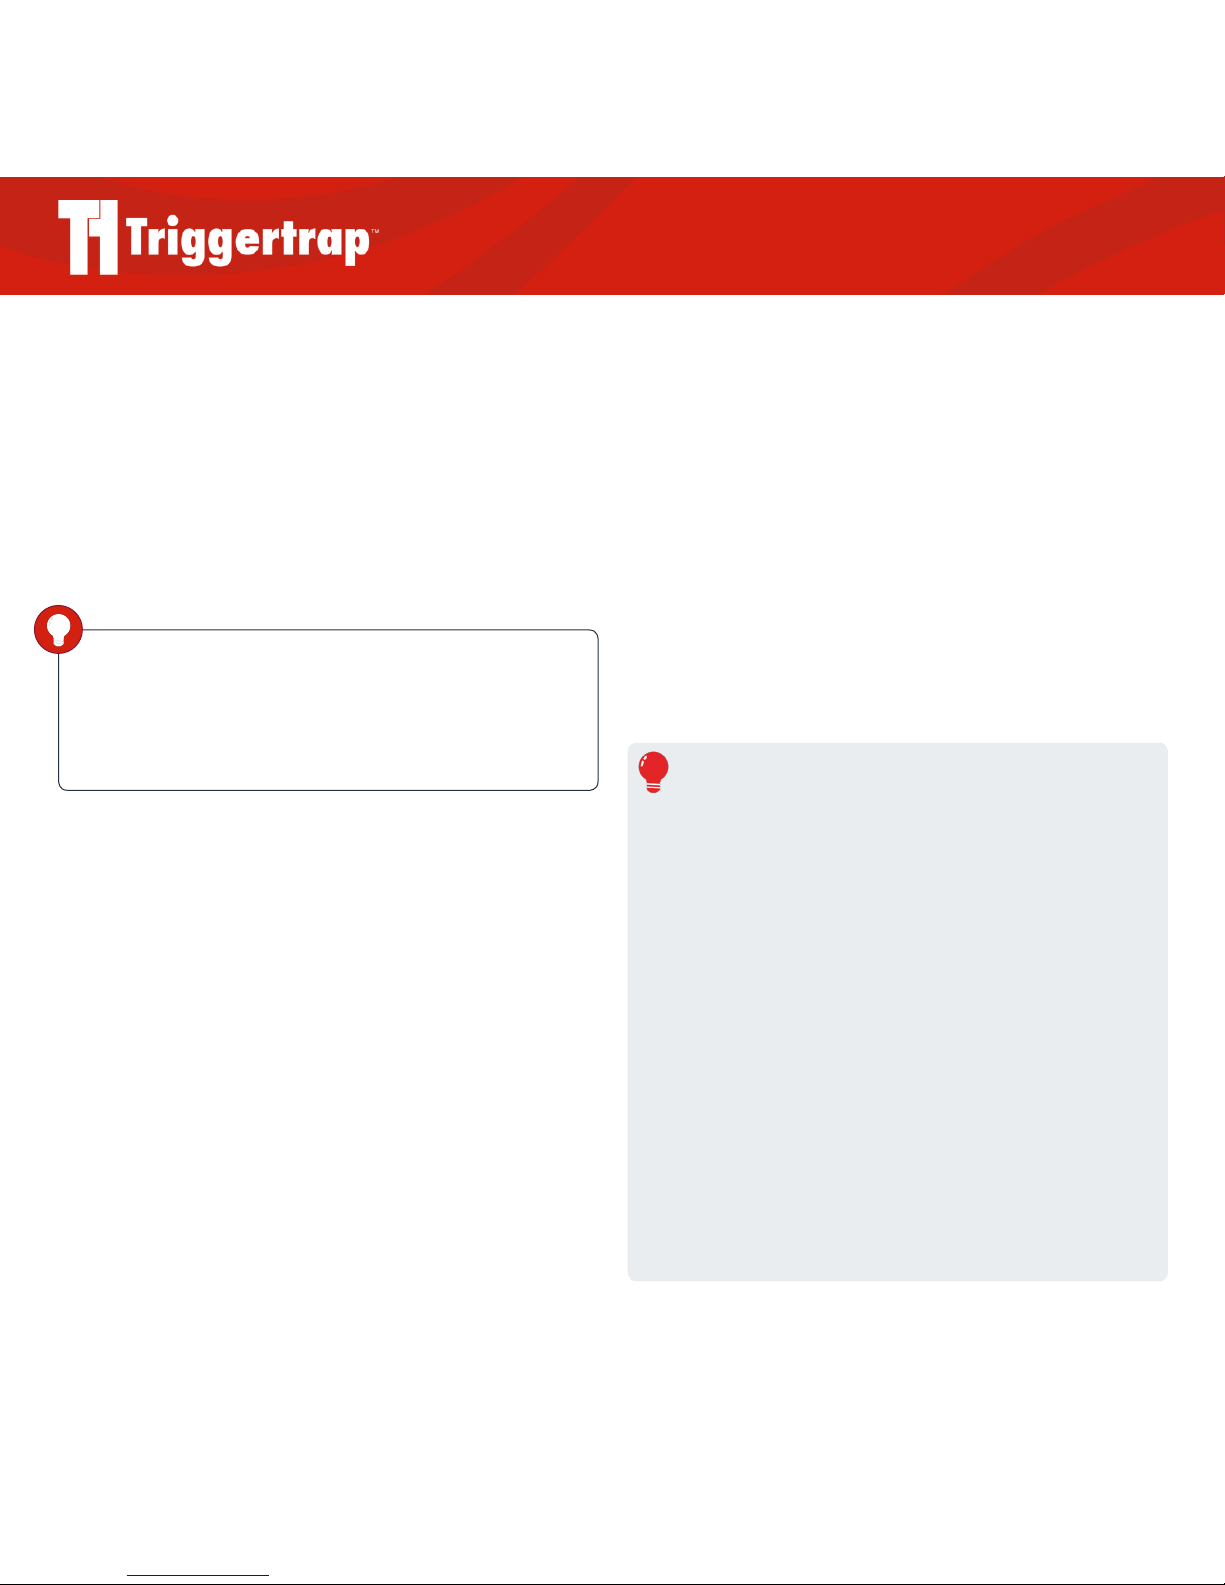
Timelapse
Select the interval you would like between the photographs,
press the big red button and Triggertrap Mobile will do the
rest! You can see the number of photographs taken
counting up next to the countdown ring.
TimeWarp
TM
A TimeWarp timelapse is a timelapse set that varies the
interval between shots. You can chose to accelerate (‘In’),
decelerate (‘Out’) or both (‘In Out’).
This causes a steadily moving object – such as the sun or
clouds – to appear to accelerate or gently ease to a stop.
It is a technique used by animators and can create some
amazing eects in your timelapses.
There are also five speeds available for selecting at the
bottom right; Sine, Quadratic, Cubic, Quartic and Quintic.
The animation they come with should give you an idea of
the motion!
DistanceLapse
DistanceLapse is like timelapse, except we use the GPS built
into your iOS device to trigger the camera every X feet/
meters, instead of every X seconds. Perfect for that roadtrip
where you might get stuck in traic!
REMEMBER
Be careful with your settings in DistanceLapse mode: Taking a
photo every 25 meters is great when you are cycling, but if you
are on board a car driving at high speed, it won’t work so well.
To protect your equipment, Triggertrap Mobile will trigger your
camera a maximum of once per second in DistanceLapse mode,
so please select your distance intervals accordingly.
DistanceLapse suggested triggering distances:
X Walking: Every 20m
X Cycling: Every 60m
X City driving: Every 150m
X Highway driving: Every 300m
X Propeller planes: Every 1500m
X Passenger jet: Every 3300m
X Fighter jet: Every 4200m
X ICBM missile: Every 8000m
X Speed of light: Every 24 km
DID YOU KNOW?
If your timelapse involves a diicult lighting situation, ND filters
could really help you out! Read more about them on page 20.
Page 13
Triggertrap Mobile App Manual | Page 13
Star Trail
Star Trail mode is designed to automatically take a series of
very long exposures in sequence: perfect for capturing stars
moving across the sky at night!
REMEMBER
To use the long exposure modes, like the ones on this page, you
have to have a Triggertrap Mobile Dongle, and your camera needs
to be set to Bulb mode. Please see page 20 for more information
about setting your camera to Bulb.
The Star Trail mode is simple to use: Choose how many
photos you want to take, how long you want each exposure
to be, and how long you want the pause between each
photo to be.
The idea is that instead of using a single, hour-long
exposure to take photos of star trails, you can use many
shorter (10 minute) exposures instead. This causes less
digital noise in your images - and gives better results overall!
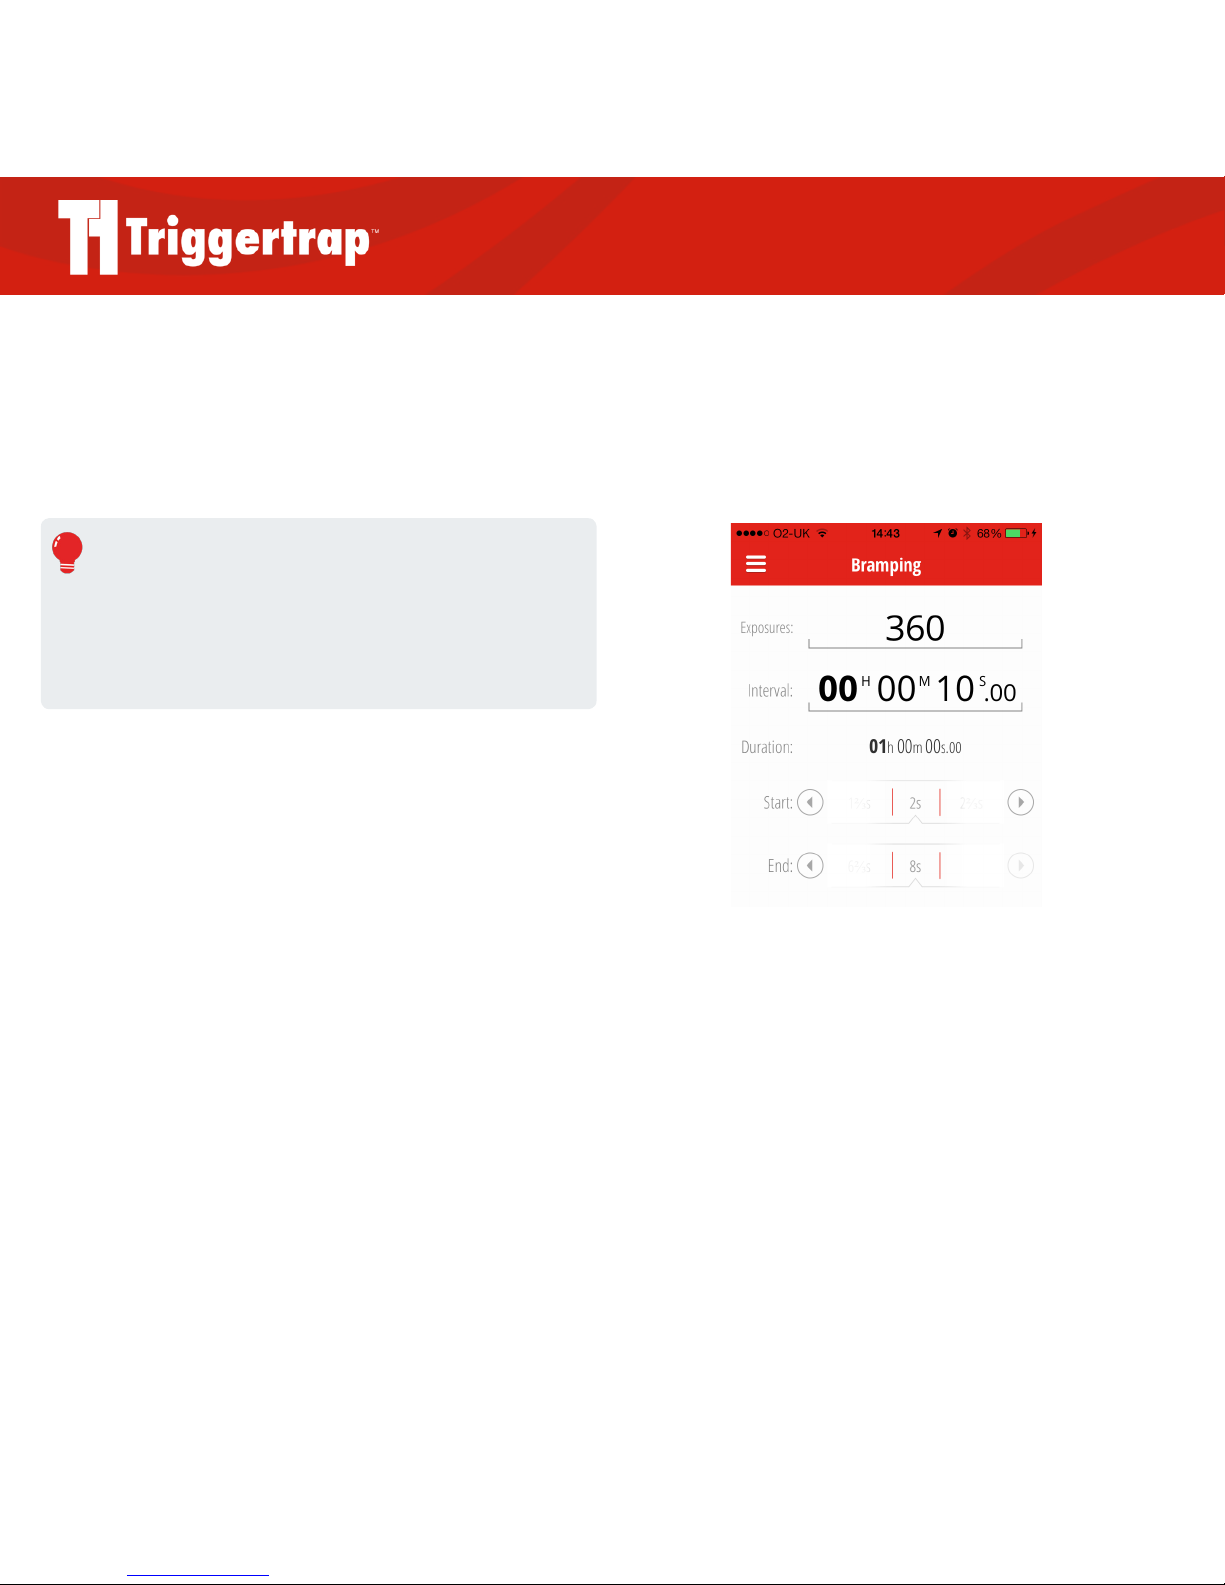
Bramping
A lot of people love doing timelapses - and we don’t
blame them, it’s a beautiful new frontier of photography.
Timelapses introduce a few new challenges. Since you
are taking photos over a long period of time, the lighting
situation is bound to change - but how do you deal with
this change? Bulb ramping aims to solve this problem: We
know for a fact what the lighting situation is now, and we
can make an educated guess about what it is going to be
two hours from now. So why don’t we just set a beginning
and an ending exposure, and gradually change the exposure
for each photo in the timelapse? That’s exactly what Bulb
ramping does.
Settings for Bulb Ramping:
X Exposures = the number of exposures you would like
to take during the total duration.
X Interval = the amount of time you would like between
exposures.
X Duration = the calculated total amount of time the
timelapse will run for.
X Start = the exposure length you want to begin with.
X End = the exposure length you want to end with.
Page 14
Triggertrap Mobile App Manual | Page 14
Sensor Modes
These modes use the sensors built into your iOS device
to trigger your camera based on sound, vibration, or facial
recognition.
Sound Sensor
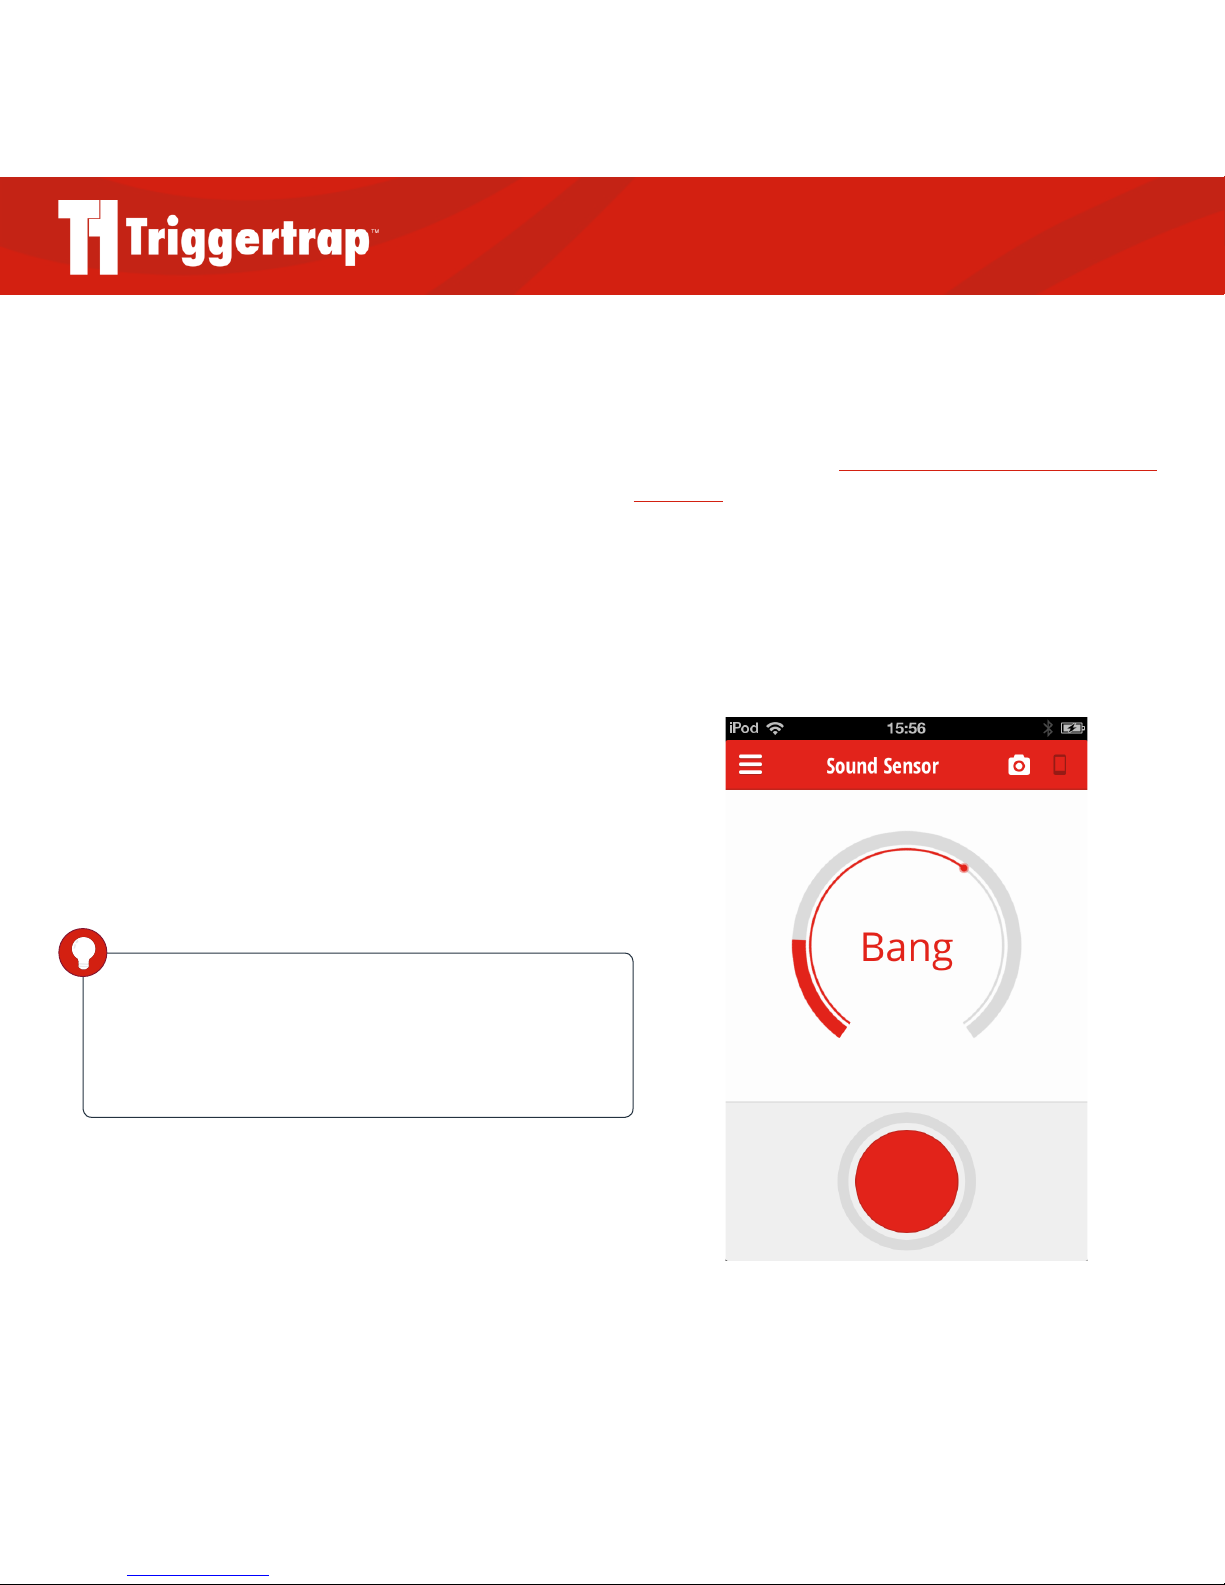
The Sound Sensor mode can be used to trigger your
camera based on sounds. This mode is compatible with all
iOS devices that have a built-in microphone.
Press the button to start listening for sounds. The inner ring controls the threshold and the outer ring shows
the volume level. You can slide the inner ring to change
the threshold level. When the volume level passes the
threshold position your camera will take a photo.
What about ambient sound?
Obviously, if you are in a loud environment, you might
find that the camera triggers when you don’t want it to.
The way to deal with that is to ensure that your trigger
threshold is set to a high enough level that any ambient
sounds are ignored.
It is also possible to solve the problem creatively:
Physics to the rescue! Look up the Inverse Square law on
Wikipedia for the theory, but in practice, keep in mind
that the closer your microphone is to the sound source,
the louder it appears. So, if you want to ensure that your
camera triggers at the right kind of events, ensure that the
iOS device’s microphone is as close to the sound source as
possible.
DID YOU KNOW?
If Triggertrap Mobile is taking too many photos too
quickly, you can increase the ‘delay after trigger’ in the Settings
screen. See page 10 for more information about Settings.
Page 15
Triggertrap Mobile App Manual | Page 15
Vibration Sensor
This is the bump and vibration sensor. The Vibration
sensor uses the accelerometer built into your iOS device
to trigger your camera – place your device on a table and
bump the table to see it in action! Use the slider to select
the sensitivity of the Vibration sensor.
Press the button to start listening for sounds. The inner ring
controls the threshold and the outer ring shows the
vibration level. You can slide the inner ring to change
the threshold level. When the vibration level passes the
threshold position your camera will take a photo.
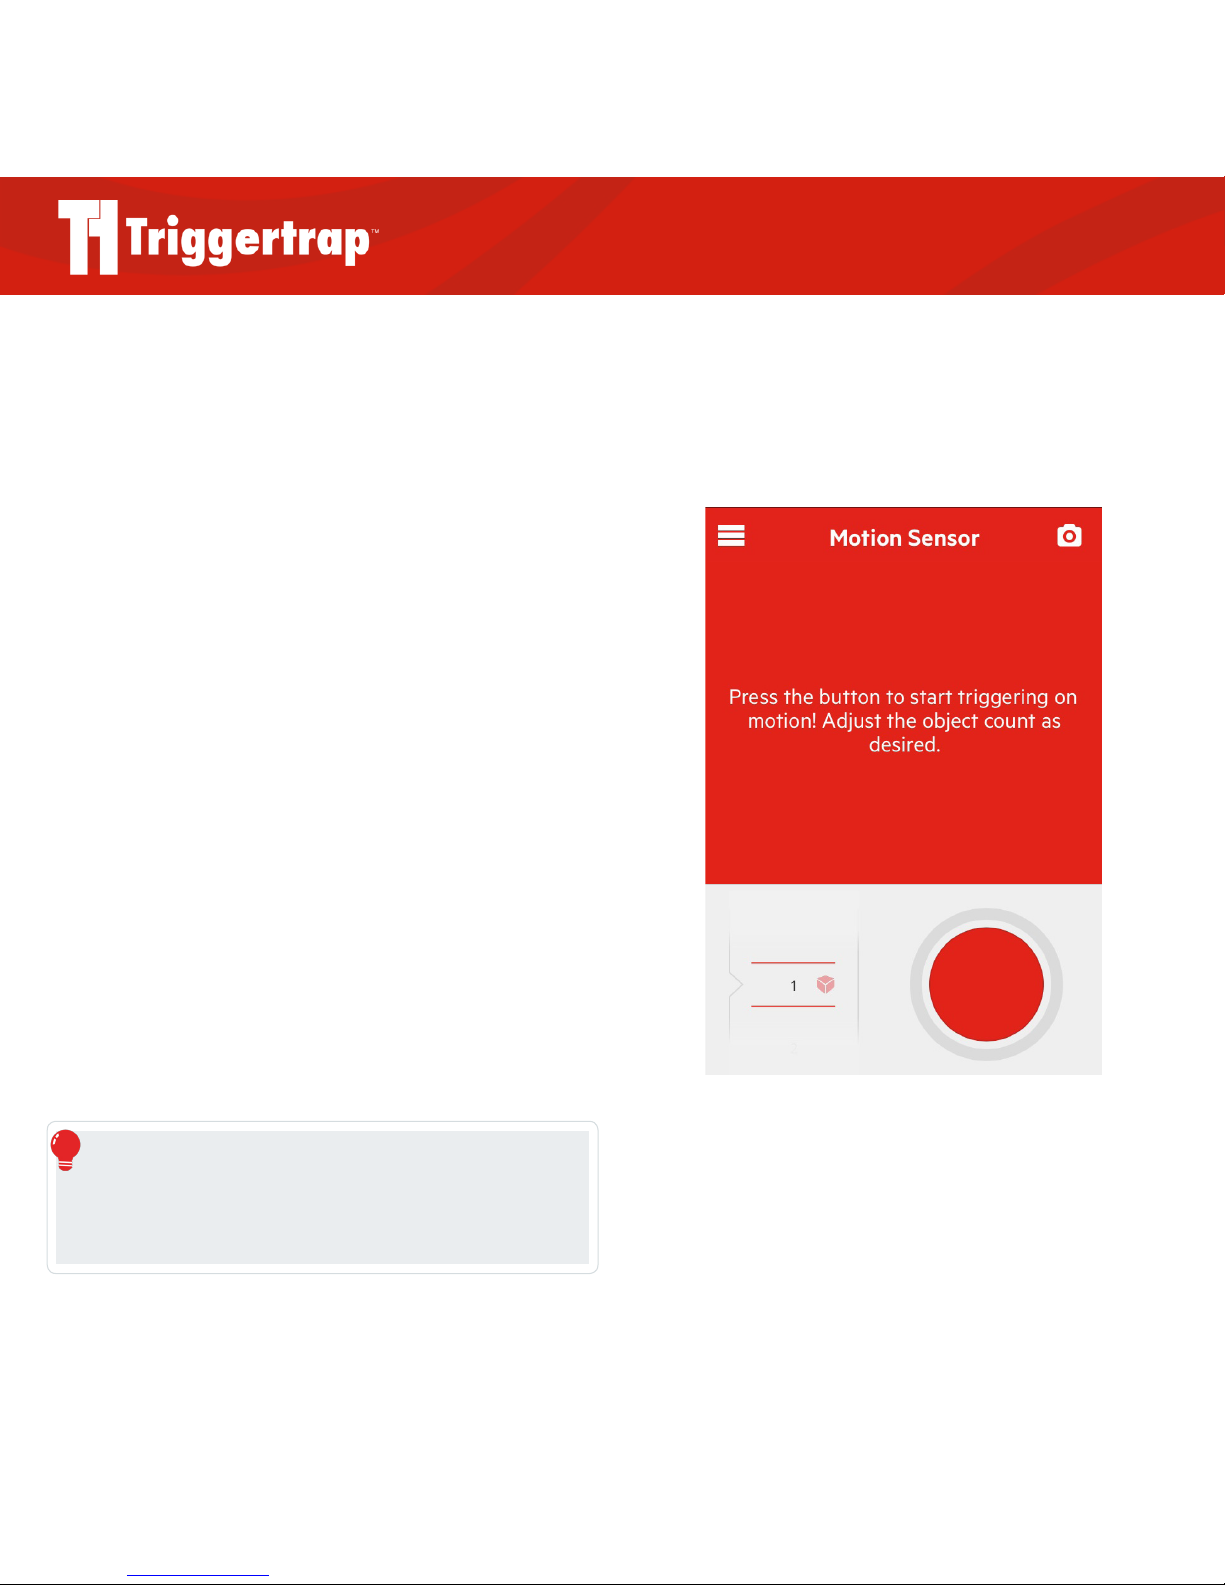
Motion Sensor
The Motion Sensor uses your iOS device’s internal
camera to trigger on movement. Use the slider to select the
number of moving objects you would like to trigger your
camera, and press the big red button to start! If your device
has both a front and back camera, you can switch between
them using the camera rotation icon at the bottom right of
the camera screen.
Unlike the other sensor modes, Motion Sensor cannot be
used with your internal camera.
REMEMBER
Please allow a few seconds for Motion Sensor to work out what is
background and what is an object. During this time it may trigger
even if there is no movement.
Page 16
Triggertrap Mobile App Manual | Page 16
Peekaboo
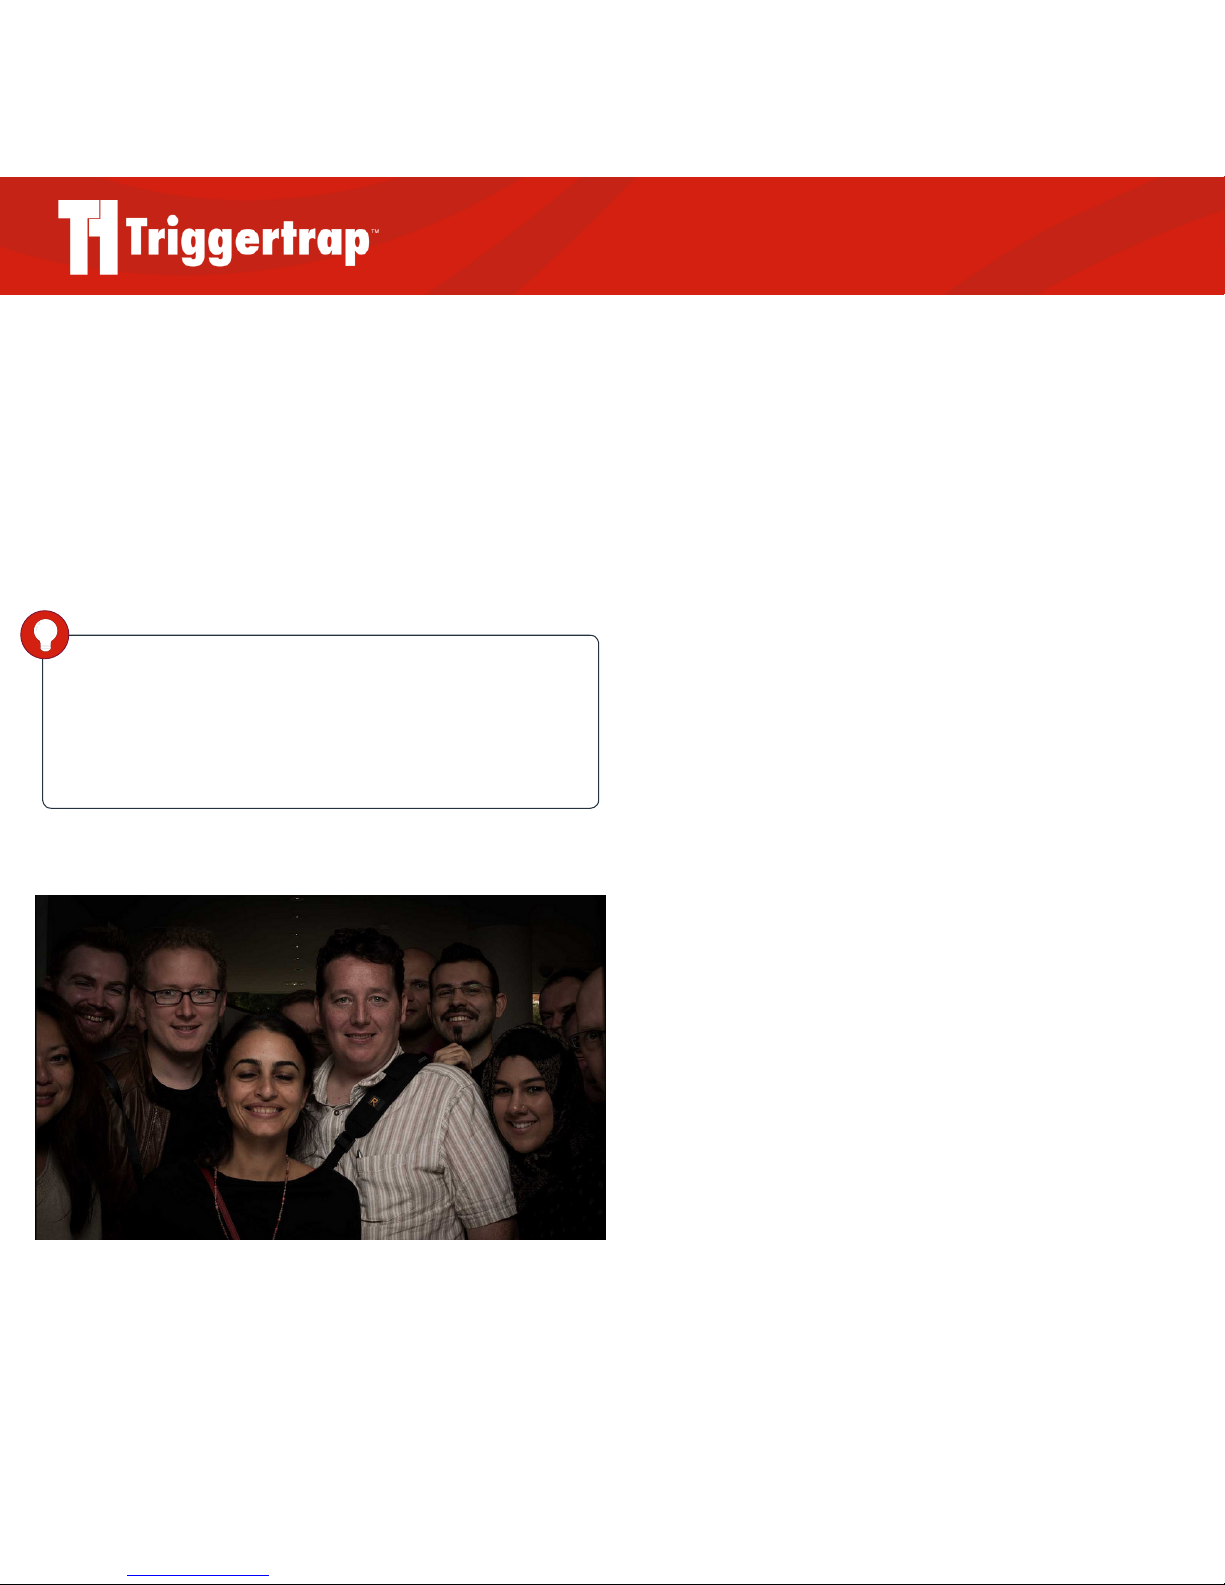
Peekaboo adds facial recognition to any camera. Point your
iPhone camera at the area where you want to look for faces,
and use the slider to select the number of faces you want to
capture in your images.
Peekaboo will trigger whenever it detects the number of
faces you have selected!
DID YOU KNOW?
If Triggertrap Mobile is taking too many photos too
quickly, you can increase the ‘delay after trigger’ in the Settings
screen. See page 10 for more information about Settings.
Page 17
Triggertrap Mobile App Manual | Page 17
LE HDR (High Dynamic Range) Modes
LE HDR stands for Long Exposure High Dynamic Range. If
you’ve never tried HDR photography before, well, you’re in
for a treat. The point of HDR is to combine several
photographs taken at dierent exposures into one picture.
The result is that you can get photos with a very wide
dynamic range.
Dynamic range, in this case, means that you can take photos
that have full details both in the highlights (the bright bits of
your photos) and in the shadows. You do this by using the
dark information from bright images, and the light
information from dark images. When you combine the two,
you end up with a photo that could not have been taken in
any other way.
HDR photos come in ‘sets’, usually of an odd number of
photos (so, 3, 5, 7, etc). These ‘sets’ consist of a middle
exposure, which is usually the exposure suggested by your
camera, followed by exposures taken on either side of the
middle exposure.
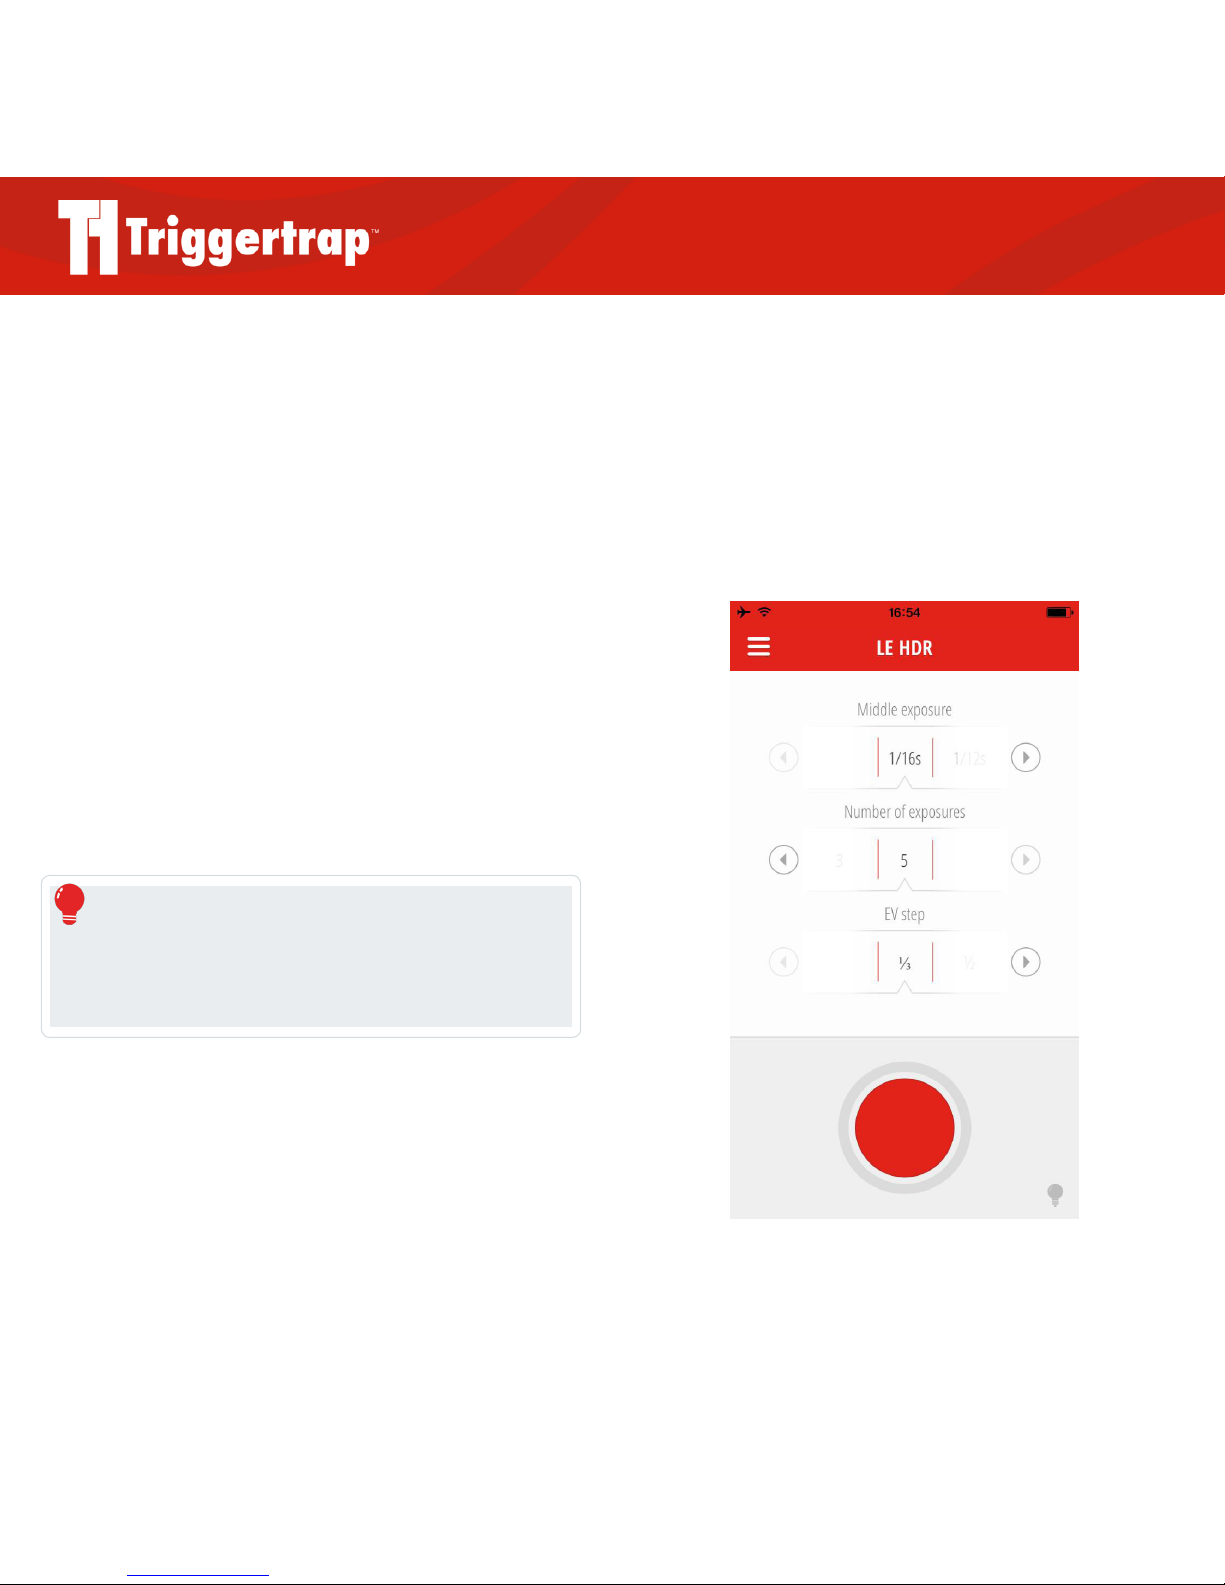
So, if you were to take a 3-photo HDR set, with one EV
(Exposure Value) step, and a one second middle
exposure, your exposures would be 1/2 second, one
second, and two seconds.
Once you have all the photographs in your HDR set, you can
combine them in Photoshop, or a specialised HDR software
package like Photomatix Pro.
REMEMBER
To use this mode, your camera needs to be set to Bulb mode.
Please see page 20 for more information about setting your
camera to Bulb.
Page 18
Triggertrap Mobile App Manual | Page 18
What does ‘Long Exposure’ mean?
You can use the HDR mode for shutter speeds down to 0.2
seconds (that’s 1/16th of a second), but due to the error
margins incurred in relation to shutter lag etc, you may find
that the HDR mode works best for longer-exposure HDR
sets, with exposure times ranging from one second and
beyond.
To use the HDR mode, you need to select the aperture on
your camera manually, along with the ‘Bulb’ shutter speed.
Then choose the ‘correct’ exposure on Triggertrap Mobile
as the Middle exposure. Next, choose the number of
photos you want in your HDR set, and the number of EV
steps between each shot.
For LE HDR mode, you will need to set the middle exposure
for your set of photos, which should be roughly the normal
exposure for a single photo, the number of exposures in the
photo set and the EV step between each photo in the set.
LE HDR Timelapse
In the LE HDR Timelapse mode, you can take High
Dynamic Range sets at certain intervals.
You love HDR photography, but you also want to play with
timelapses? You’re in luck, that’s exactly what our LE HDR
Timelapse mode does.
To use the HDR mode, you need to select the aperture on
your camera manually, along with the ‘Bulb’ shutter speed.
Then choose the ‘correct’ exposure on Triggertrap Mobile
as the Middle exposure. Next, choose the interval between
the photo sets, and the number of EV steps between each
shot.
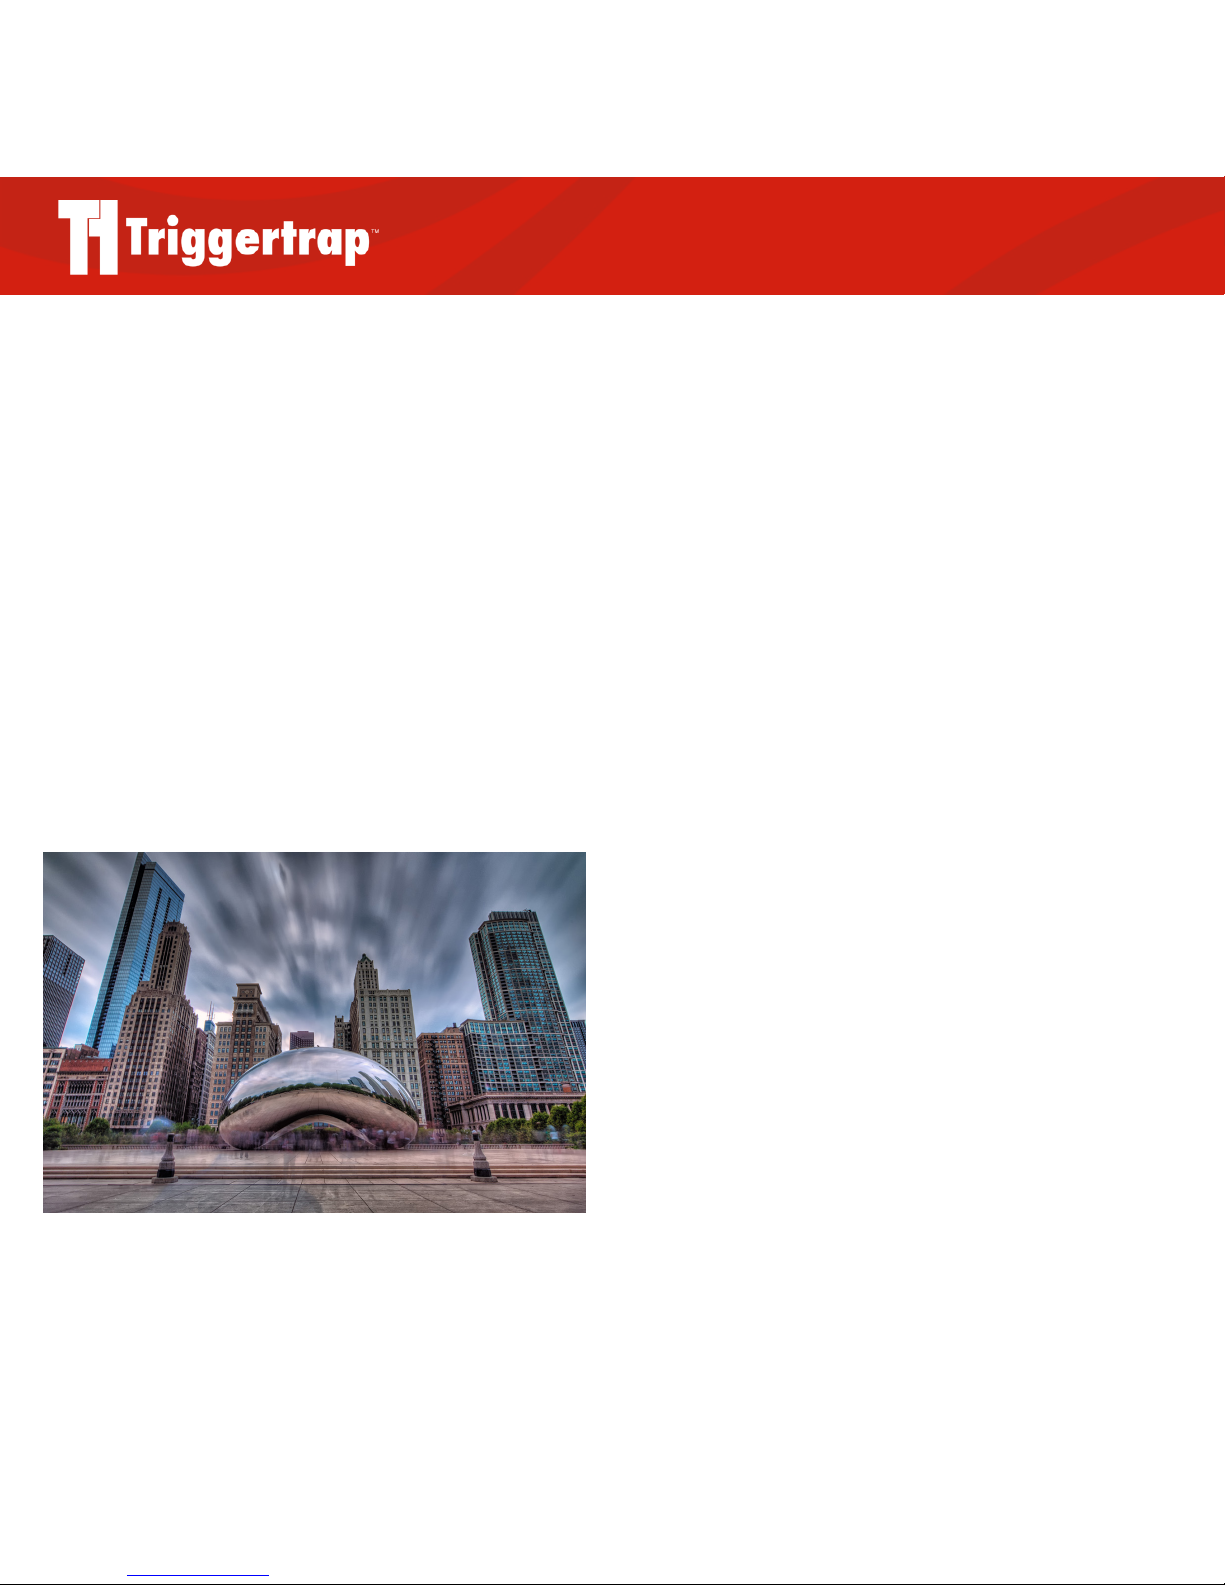
LE HDR photo by Milosh Kosanovich
Page 19
Triggertrap Mobile App Manual | Page 19
Remote Trigger: Wi-Fi Triggering
In addition to the SLR triggering and the internal triggering,
we have an awesome wireless mode built into Triggertrap
Mobile. You can use Wi-Fi triggering on a series of dierent
triggering modes in Triggertrap Mobile. To find instructions
on how to set up Wi-Fi triggering, go to the Reference and
Help section in the app menu and select ‘Setting up Wi-Fi’.
How does it work?
The Wi-Fi triggering mode in Triggertrap Mobile enables
photographers to trigger their cameras using one mobile
device as a ‘slave’, and the other as a ‘master’.
The ‘master’ device will be the one you use to trigger the
‘slave’ device. Both of them need to be connected to the
same Wi-Fi network.
Limitations
The Wi-Fi triggering is only a “one-shot” trigger. In other
words, it only sends a “please trigger now” signal without any
length information to the slave device.
This means it doesn’t work for bulb modes which require
variable length pulses, such as HDR and Star Trail.
Setting up your Master device
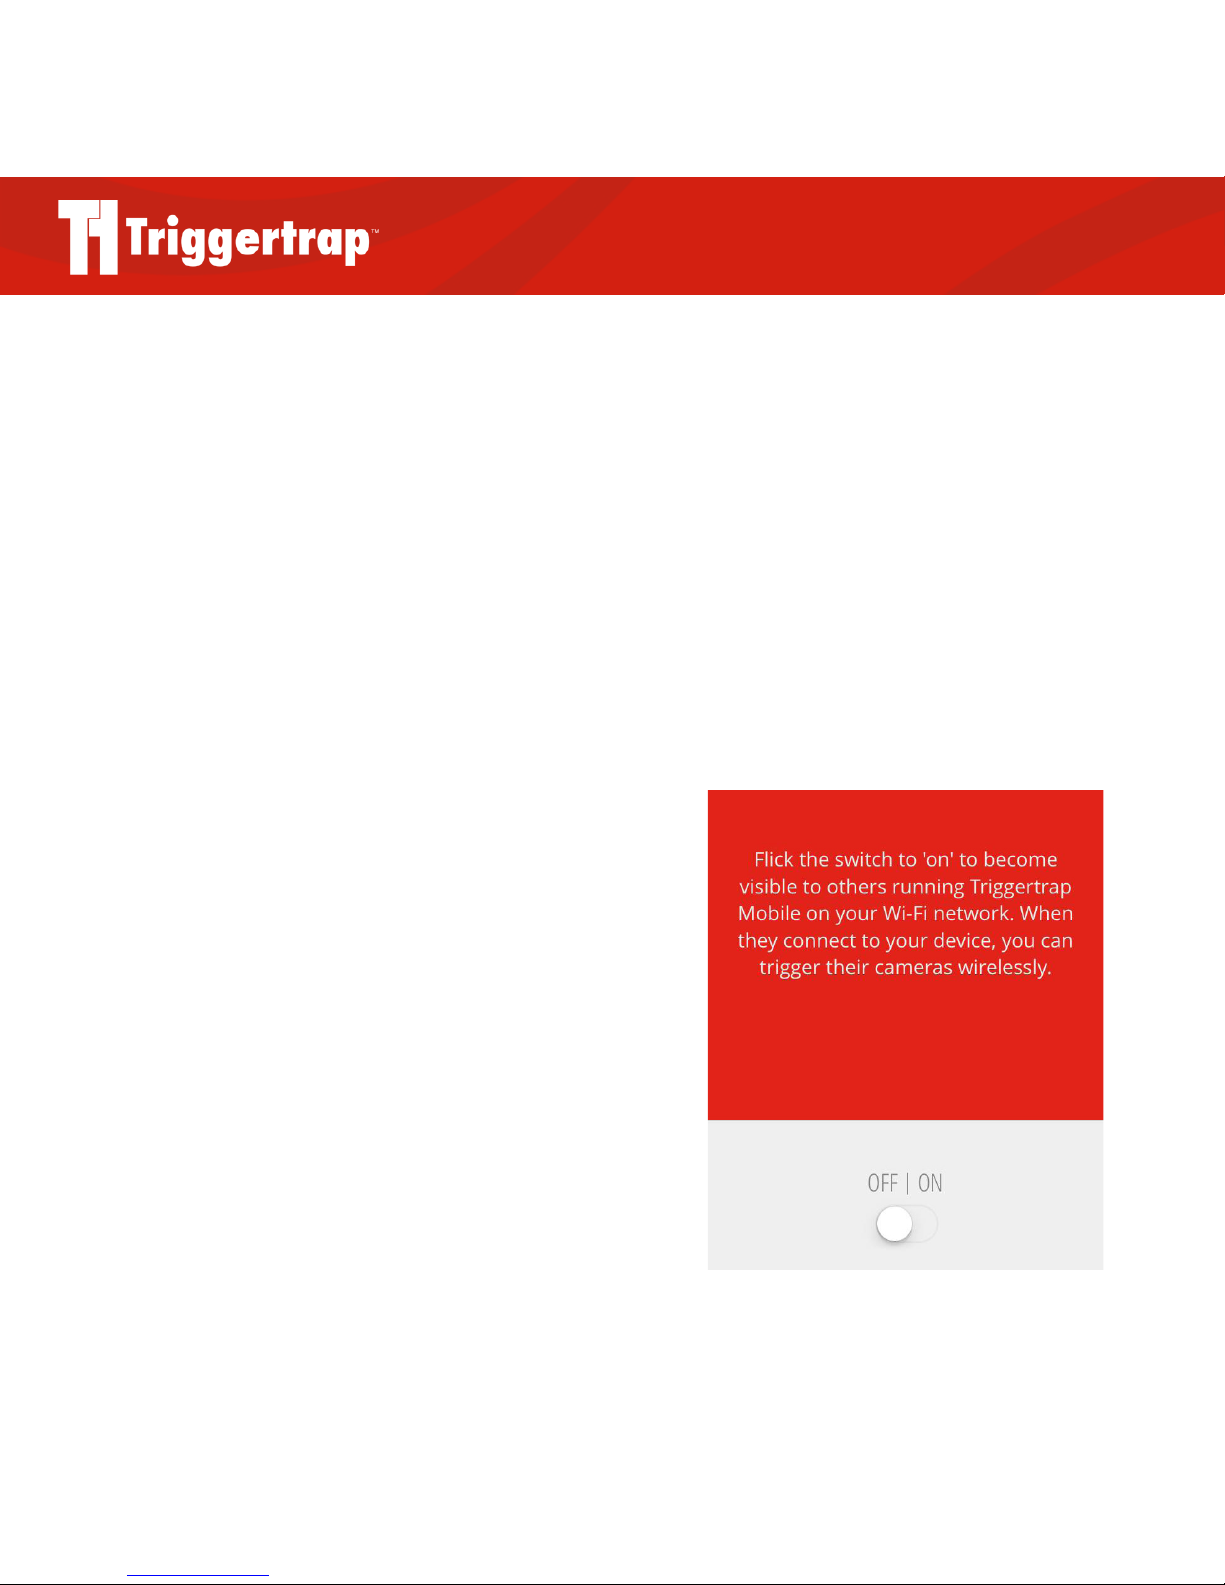
On your Master device, go to the ‘Wi-Fi Master’ in the
settings section of the menu (right at the bottom) you’ll find
a switch – switch it to ‘on’.
Setting up your Slave device
Plug your Triggertrap Mobile Dongle into the slave device,
and connect your dongle to your camera as usual. In the
menu, you’ll find a Wi-Fi Slave mode. This is just like any
other trigger, except that instead of sound or vibration, it’s a
signal over the Wi-Fi network that triggers your camera(s).
Press ‘start’, then connect to a Master device. Once you’re
connected, you can choose what you want to trigger (such
as the internal camera or a Mobile Dongle) as usual.
Page 20
Triggertrap Mobile App Manual | Page 20
Using Wi-Fi mode
Now that the two devices are connected together, you can
use the Master device to trigger the slaves.
Go to the triggering mode you want to use on the Master
device. Remember to ensure that Wi-Fi triggering is turned
on in the top menu. Now, whenever the Master sends a
trigger signal, the slaves will trigger.
Multiple slaves
You can connect as many slave devices to a master as you
want. Simply follow the instructions above to connect each
slave device to the Master trigger. All the slaves will trigger
at the same time.
What if there is no Wi-Fi network available?
If your Master device has support for ‘Personal Hotspot’, you
can use this instead of a traditional Wi-Fi connection.
Check the documentation for your device for instructions for
how to set up a personal hotspot.
I can’t get my Master / Slave system to work!
It is occasionally tricky to get the two systems to talk to each
other. If that happens to you, try going through these steps:
1. Turn on Airplane Mode on all devices. This resets all
the network connections
2. Turn o Airplane Mode on all devices after 10
seconds.
3. Connect to the Wi-Fi network on all devices
4. Launch Triggertrap Mobile, and turn o Master Mode
on both devices
5. Enter Slave Mode on all the devices you want to
operate as Slaves
6. Turn on Master Mode again on your Master device
7. The Master device will show up on all the Slave
devices, so you will now be able to connect properly.
Network connectivity problems?
If you are still struggling to get your Wi-Fi triggering mode
to work, it could be that there’s something amiss with your
network itself.
WARNING
Please note that some carriers have disabled the use of a
personal hotspot. If this applies to you, please contact your
mobile contract provider to find out how to enable the use of a
‘personal hotspot’ or ‘data connection sharing’.
Page 21

Triggertrap Mobile App Manual | Page 21
Setting your camera to Bulb mode
Most SLR and mirrorless cameras have a Bulb mode.
To enable this, set your camera to Manual exposure mode,
and choose the setting that’s slower than your slowest
shutter speed.
On most cameras, it goes from 30 seconds to show “B” or
“Bulb” in the display.
Please check your camera’s manual to find out how to set
your camera to Bulb mode.
Using ND (Neutral Density) Filters
Neutral Density filters are totally neutral filters that don’t
aect the colour of an image while they work like a pair of
darkened sunglasses to darken the exposure by blocking
some of the light entering the lens. This means you can use
them to do longer exposures than normally possible, which
is super useful for things like timelapses where you want to
get a specific shutter speed without using a small aperture.
There are two main types of ND filters. The most common
are standard ND filters which come in dierent grades
depending on how much light they prevent entering the
camera. They are often named by either an ND number or
by how many stops they cut. The description gives you an
idea of how much light will be cut out; for example a one
stop filter will remove one stop - this may also been known
as a 0.3ND or an ND2. A full list of how many stops each
filter cuts out is available here.
The range of filters goes from one stop to 10 stops.
However, 10 stop filters are very expensive and often hard
to come by.
The other option, which is extremely popular with
videographers is to use a variable ND filter. Variable ND
filters allow you adjust the density without taking the filters
o. These are often much more expensive, however you will
only need one filter rather than a full set of filters.
Page 22

Triggertrap Mobile App Manual | Page 22
Common problems and their solutions
There are a few ‘gotchas’ that people run into from time to
time; here are a few of the most common ones:
Q: The camera is taking lots of photos in rapid
succession
If you are trying to take a long exposure shot, remember
that your camera needs to be in Bulb mode.
If you are trying to take a single, short exposure shot,
remember to set your camera to single-shot mode (not
continuous shot mode).
Q: The SLR camera isn’t taking any photos at all
X Ensure your iOS device is turned to maximum
volume (press the ‘volume up’ button on the side of
the device a few times)
X Set the camera and/or lens to manual focus.
X Ensure the camera can take photos in the first place.
X Still not working? Turn to the troubleshooting guide
on page 21.
Page 23

Triggertrap Mobile App Manual | Page 23
Troubleshooting Triggertrap Mobile
If you’re struggling getting Triggertrap Mobile to behave,
we have some troubleshooting guides that we often find will
resolve most issues.
If this is your first time using Triggertrap Mobile, you may
want to begin by checking the Getting Started quick guide
at the top of the app menu.
Next please check the ‘Troubleshooting’ page under the
Reference and Help section in the app menu. This will guide
you through any settings you may have overlooked, such as
turning the volume on your device up to full or making sure
your camera is set to manual focus.
If this doesn’t fix the problem for you and you believe you
are experiencing a hardware issue with your Mobile Kit
rather than with the app or camera, please see http://tri.gg/
troubleshooting to find out how to test where the connec-
tion may be broken.
If none of the above troubleshooting guides are able to get
your camera triggering, please contact our team at hello@
triggertrap.com and we’ll help you work out what isn’t be-
having.
Page 24
Triggertrap Mobile App Manual | Page 24
Showing o your Triggertrap Mobile Photos
Our favourite thing in the whole world is seeing the awesome things you guys have created with Triggertrap Mobile.
Please post them anywhere you like and show the world, and ensure that you tweet about it (hashtag #Triggertrap or just
tweet @Triggertrap, and we’ll spot it).
Alternatively, please add your photos to the Triggertrap Flickr pool on http://tri.gg/flickr.
We also run a newsletter approximately once per month, where we feature awesome photos and videos made with
Triggertrap products – if you haven’t signed up yet, please do so at http://tri.gg/news!
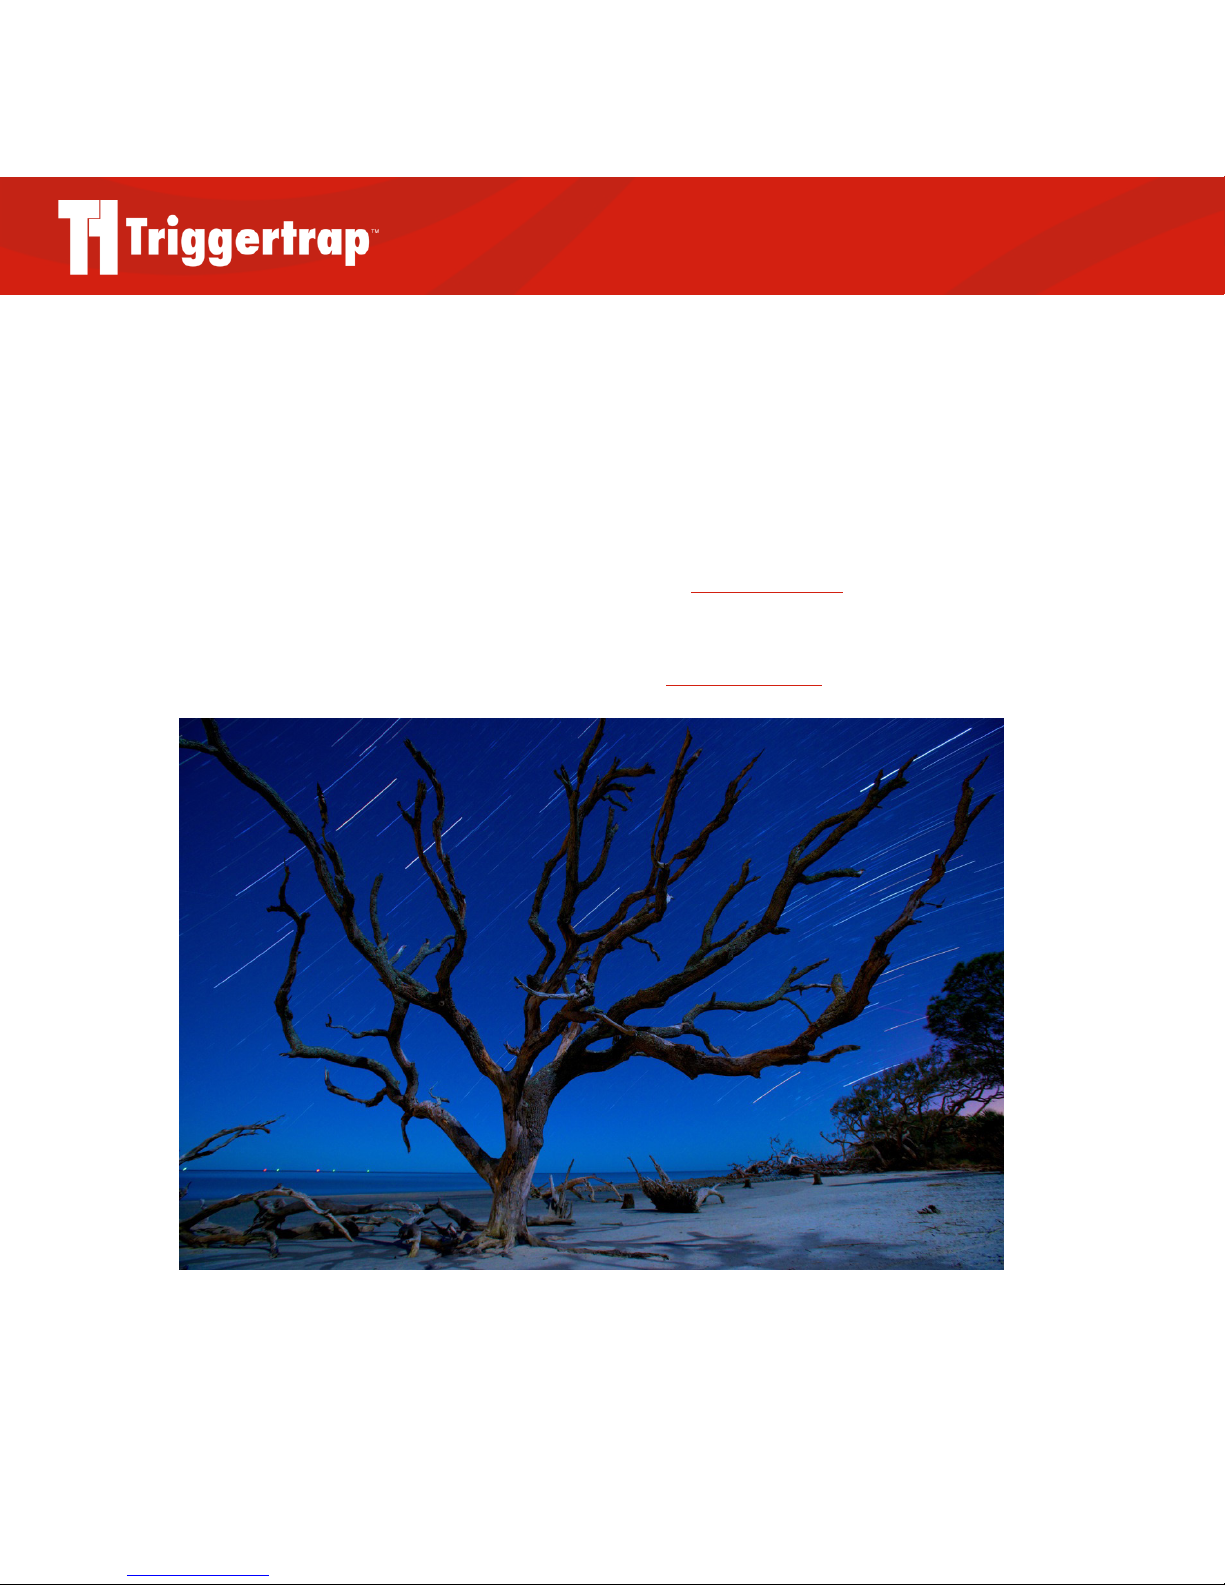
Photo: Moonlit Tree Jekyll Island by David Wright
Page 25

Triggertrap Mobile App Manual | Page 25
Do you still have questions?
We’ve done everything we can to make this manual as
thorough as possible, but if you’re still stuck, we’d love to
help you out!
We have an extremely lively and helpful support forum at
http://tri.gg/forum. If you’ve got a problem, search here first –
chances are that someone has already asked your question,
and you’ll be able to find an answer here.
We also have an FAQ Knowledge Base that lives at
http://tri.gg/faq that will provide you with some clearer and
more in depth explanations for some of our more commonly
asked product questions.
If you’re still stuck, you can email our super friendly support
team at [email protected]
The small print
We have taken all care to ensure that this manual is
as complete and as accurate as possible, but there may
be mistakes here and there. If you spot any errors, please
contact us on [email protected] so we can fix them in
the next edition!
Page 26

We have taken all care to ensure that this manual is as complete and as accurate as possible,
but there may be mistakes here and there. If you spot any errors, please contact us at
[email protected] so we can fix it in the next version of our manual.
We are Triggertrap.
We love photography.
For more information,
visit us on the web at:
triggertrap.com
 Loading...