

Page 1
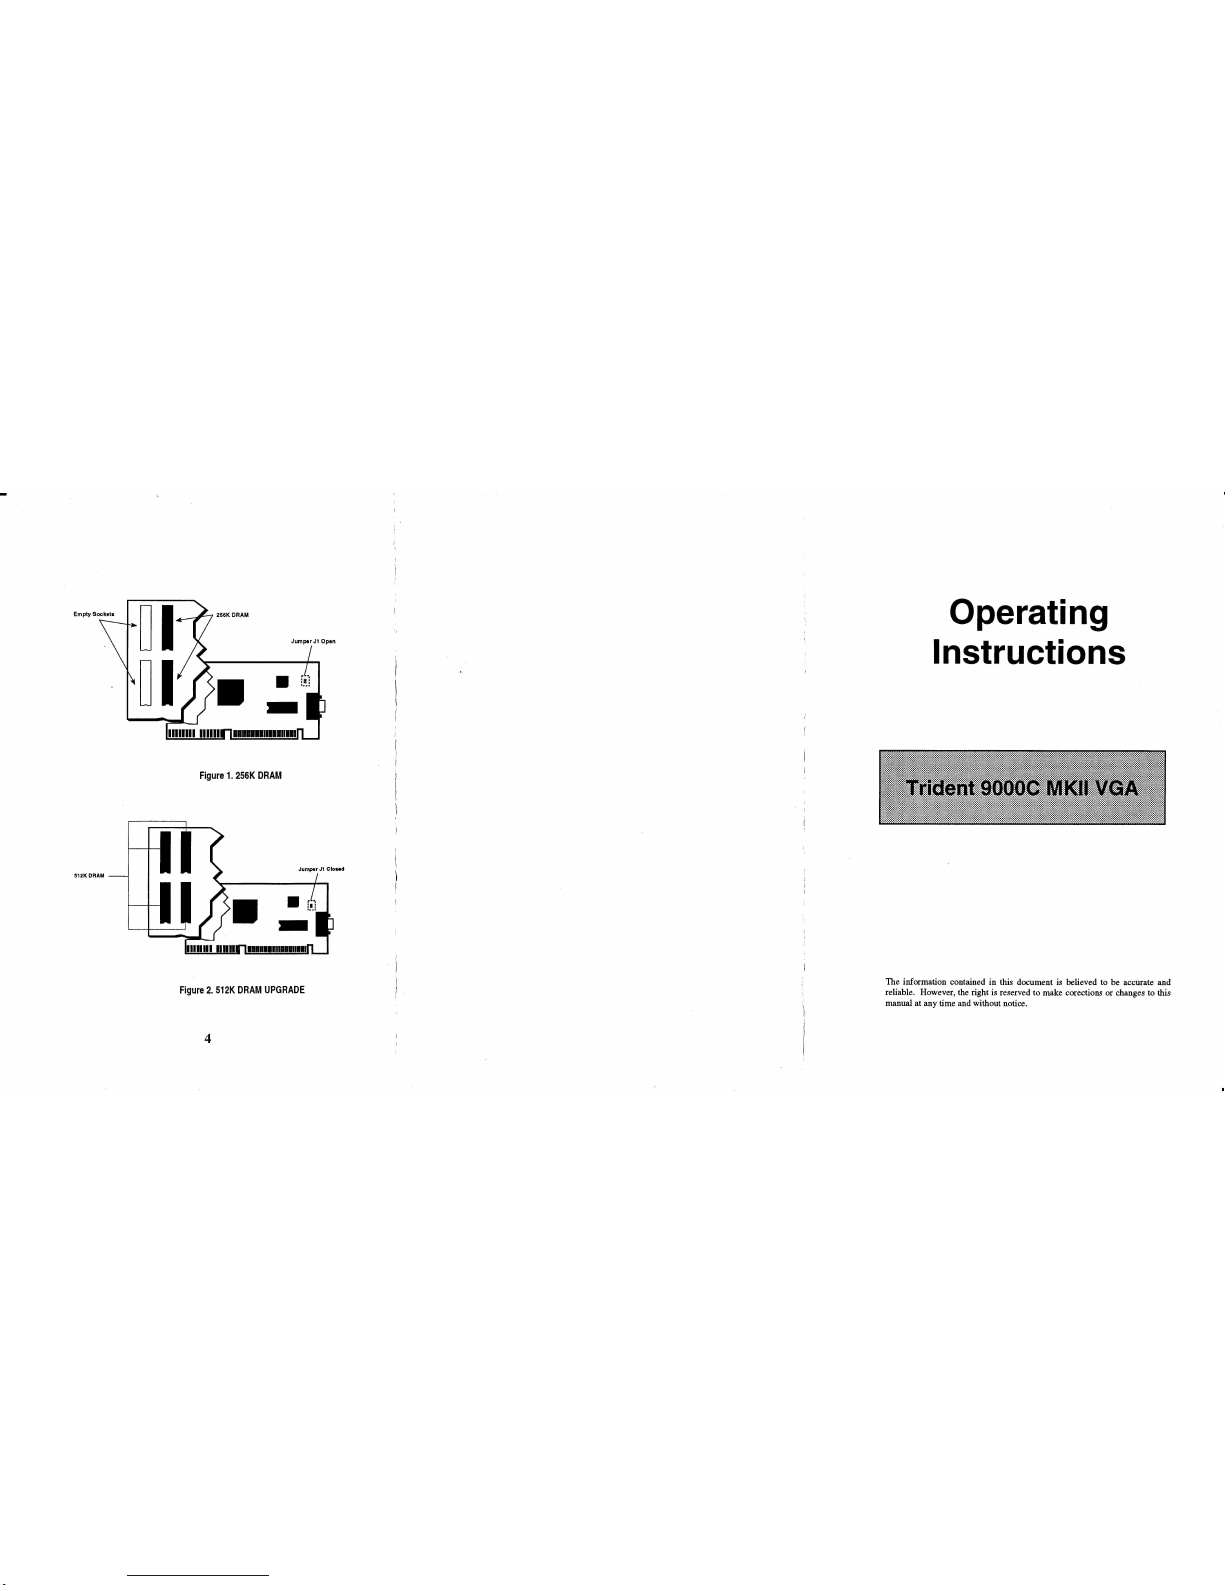
Figure
1.
256K
DRAM
512KOFIAM
Figure
2.
512K
DRAM
UPGRADE
4
Operating
Instructions
The information contained in this document is believed
to
be accurate and
reliable. However, the right
is
reserved to make corections or changes
to
this
manual at any time and without notice.
Page 2
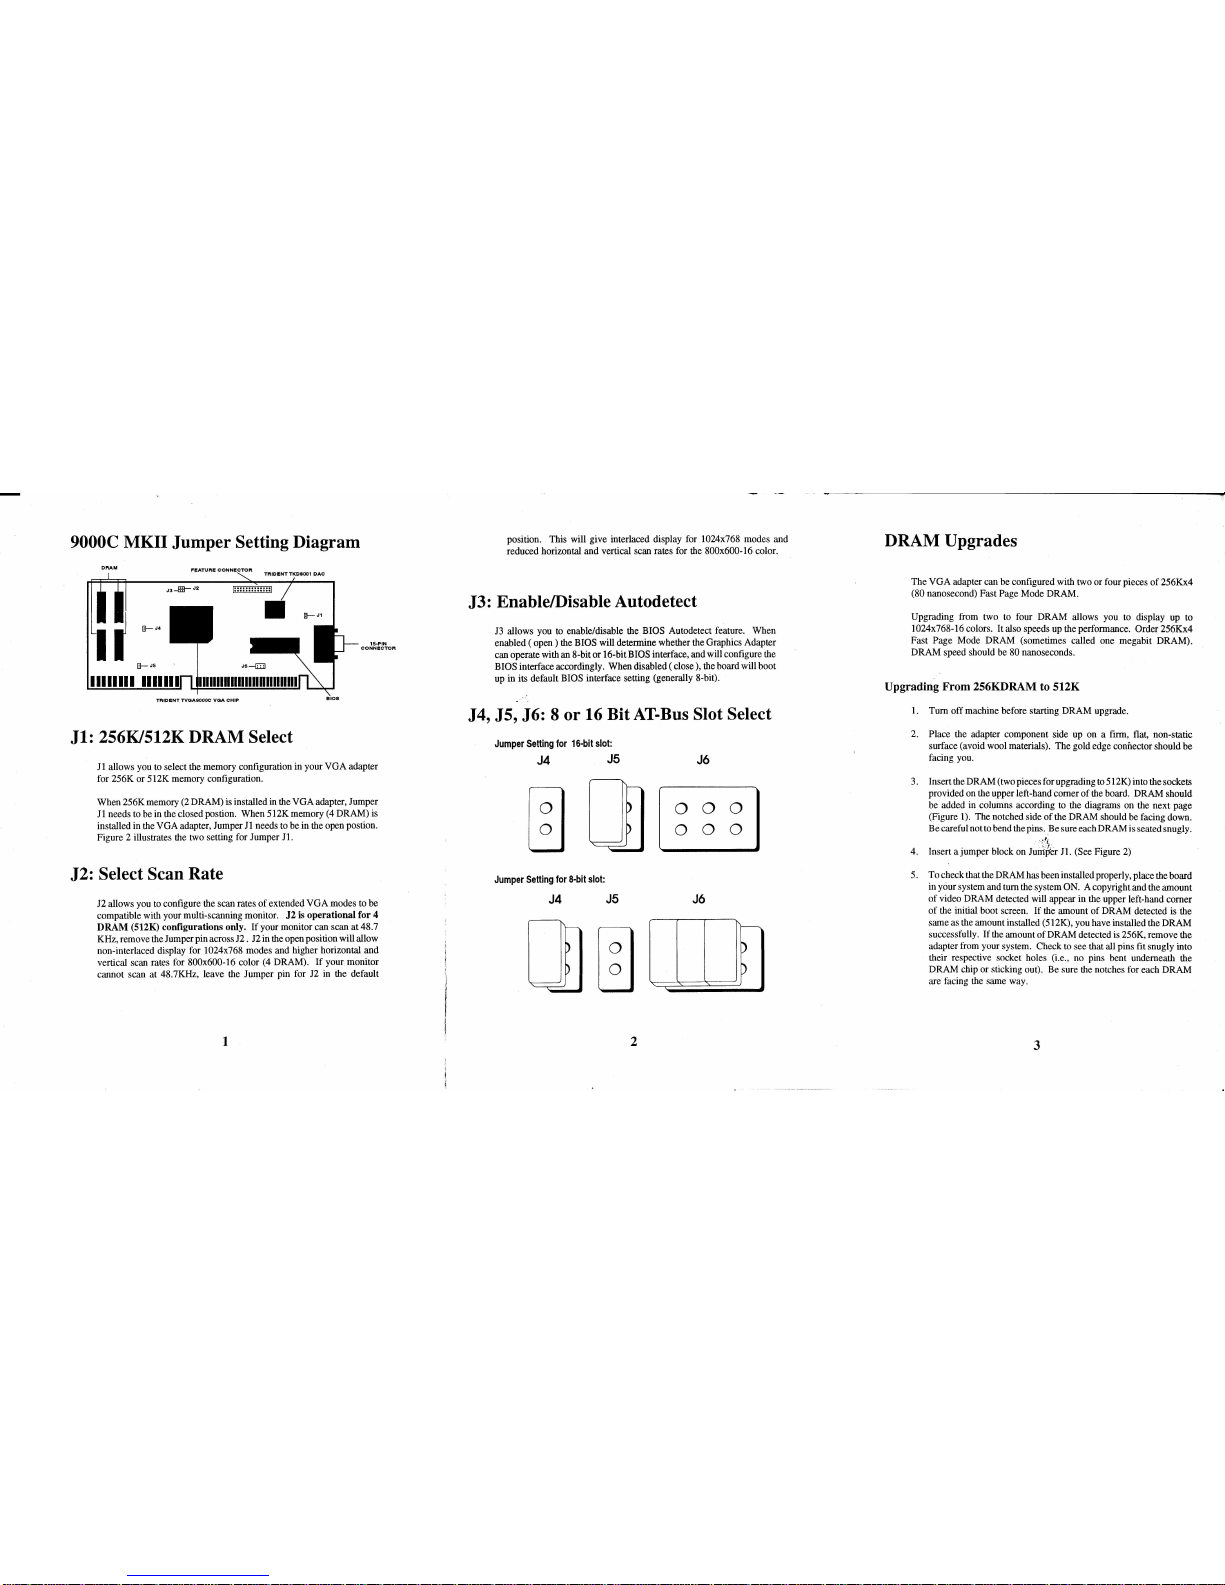
9000C MKII
Jumper
Setting Diagram
J1: 256K1512K DRAM Select
Jl
allows you to select the memory configuration in your VGA adapter
for 256K or 512K memory configuration.
When 256K memory (2 DRAM)
is
installed
in
the VGA adapter, Jumper
Jl
needs to be in the closed postion. When 512K memory
(4
DRAM) is
installed in the VGA adapter, Jumper
Jl
needs
10
be in the open postion.
Figure 2 illustrates the two setting for Jumper
JI.
J2: Select Scan Rate
J2 allows you
to
configure the scan rates
of
extended VGA modes to be
compatible with your multi-scanning monitor.
J2
is
operational
for
4
DRAM
(SI2K) configurations only.
If
your monitor can scan
at48.7
KHz, remove the Jumper pin across
J2.
J2
in the open position will allow
non-interlaced display for lO24x768 modes and higher horizontal and
vertical scan rates for 800x600-16 color (4 DRAM). If your monitor
cannot scan
at
48.7KHz, leave the Jumper pin for J2
in
the default
1
position. This will give interlaced display for lO24x768 modes and
reduced horiwntal and vertical scan rates for the
800x600-16 color.
J3: EnablelDisable Autodetect
J3
allows you
10
enable/disable the BIOS Autodetect feature. When
enabled (
open)
the B[OS will determine whether the Graphics Adapter
can operate with an 8-bit or 16-bit
B[OS interface, and will configure the
BIOS interface accordingly. When disabled ( close ), the hoard will boot
up in its default
BIOS interface setting (generally 8-bit).
J4, J5, J6: 8
or
16 Bit
AT-Bus
Slot Select
Jumper
Setting
for
16-bit
slot:
J4 J5
Jumper
Setting
for
8-bit
slot:
J4
J5
2
J6
~
~
J6
DRAM Upgrades
The VGA adapter can be configured with two
or
four pieces
of
256Kx4
(80 nanosecond) Fast Page Mode DRAM .
Upgrading from two to four DRAM allows you to display up to
I 024x768-16 colors. [t also speeds up the performance. Order 256Kx4
Fast
Page Mode DRAM (sometimes called one megabit DRAM) .
DRAM speed should be
80 nanoseconds.
Upgrading From 256KDRAM to 512K
I.
Tum
off
machine before starting DRAM upgrade.
2.
Place the adapter component side up on a firm, !lat, non-static
surface (avoid wool materials).
The
gold edge connector should
be
facing you.
3. Insert the DRAM (two pieces for upgrading
10
512K) into the sockets
provided on the upper left-hand comer
of
the board. DRAM should
be added
in
columns according
10
the diagrams on the next page
(Figure I). The notched side
of
the DRAM should be facing down.
Be careful nollo bend the pins.
Besure
each DRAM is seated snugty.
'~.-'~
4. Insert a jumper block on Juili",er
JI.
(See Figure 2)
5. To check
that the DRAM has been installed properly, place the board
in
your system and tum the system ON. A copyright and the amount
of
video DRAM detected will appear
in
the upper left-hand comer
of
the initial boot screen. If the amount
of
DRAM detected
is
the
same as the amount installed (512K), you have installed the DRAM
successfully. If the amount
of
DRAM detected
is
256K, remove the
adapter from your system. Check to see that all pins
lit snugly into
their respective socket holes (i.e., no pins bent underneath the
DRAM chip
or
sticking out). Be sure the notches for each DRAM
are facing
the same way.
3
 Loading...