


THE EZ – CUT JIG
USER MANUAL
TO REDUCE THE RISK OF INJURY, USER MUST READ AND UNDERSTAND USER MANUAL BEFORE ANY CUTTING IS DONE
0

THE EZ – CUT JIG
USER MANUAL
TO REDUCE THE RISK OF INJURY, USER MUST READ AND UNDERSTAND USER MANUAL BEFORE ANY CUTTING IS DONE
1
TOOLS NEEDED TO ATTACH YOUR MILWAUKEE BAND SAW TO THE EZ – CUT JIG
¾” OPEN END WRENCH
11/32” OPEN END WRENCH
3/32” HEX KEY
THE EZ – CUT JIG ATTACHES TO THE 6232-20 CORDED MILWAUKEE DEEP-CUT PORTABLE BANDSAW
AND TO THE 2729-20 CORDLESS MILWAUKEE DEEP CUT PORTABLE BAND SAW.

THE EZ – CUT JIG
USER MANUAL
TO REDUCE THE RISK OF INJURY, USER MUST READ AND UNDERSTAND USER MANUAL BEFORE ANY CUTTING IS DONE
2
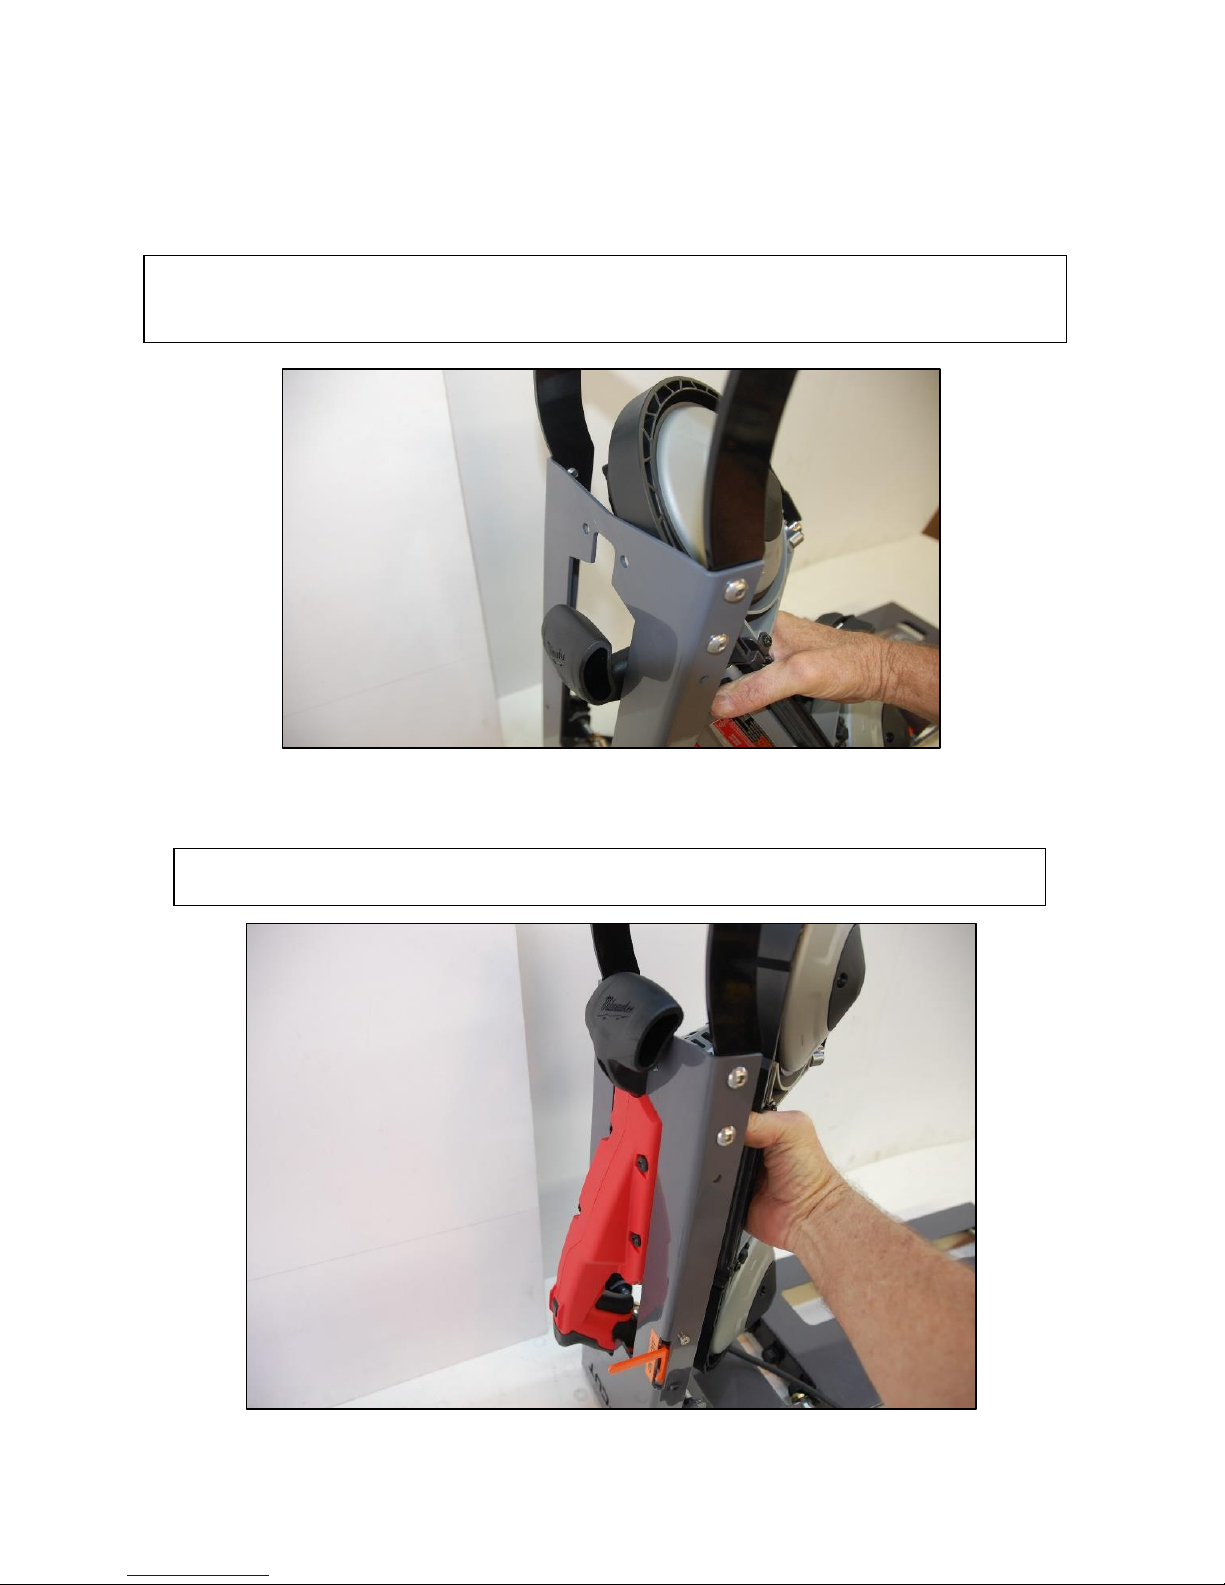
1. INSTALLING YOUR SAW INTO THE EZ – CUT JIG:
Open THE EZ – CUT JIG to the fully opened positon.
Remove the two ½” bolts and nuts from top lock and remove top lock assembly.

THE EZ – CUT JIG
USER MANUAL
TO REDUCE THE RISK OF INJURY, USER MUST READ AND UNDERSTAND USER MANUAL BEFORE ANY CUTTING IS DONE
3
Remove trigger arm assembly using 3/32 Allen Key and 11/32
Set trigger arm assembly aside.
THE EZ – CUT JIG
Handle the band saw by putting your hand under the motor and tilt the band saw so that
the top handle of the band saw will insert through the top side of THE EZ – CUT JIG.
Push the saw back so that the trigger handle seats into THE EZ - CUT JIG.
USER MANUAL
TO REDUCE THE RISK OF INJURY, USER MUST READ AND UNDERSTAND USER MANUAL BEFORE ANY CUTTING IS DONE
4

THE EZ – CUT JIG
USER MANUAL
TO REDUCE THE RISK OF INJURY, USER MUST READ AND UNDERSTAND USER MANUAL BEFORE ANY CUTTING IS DONE
5
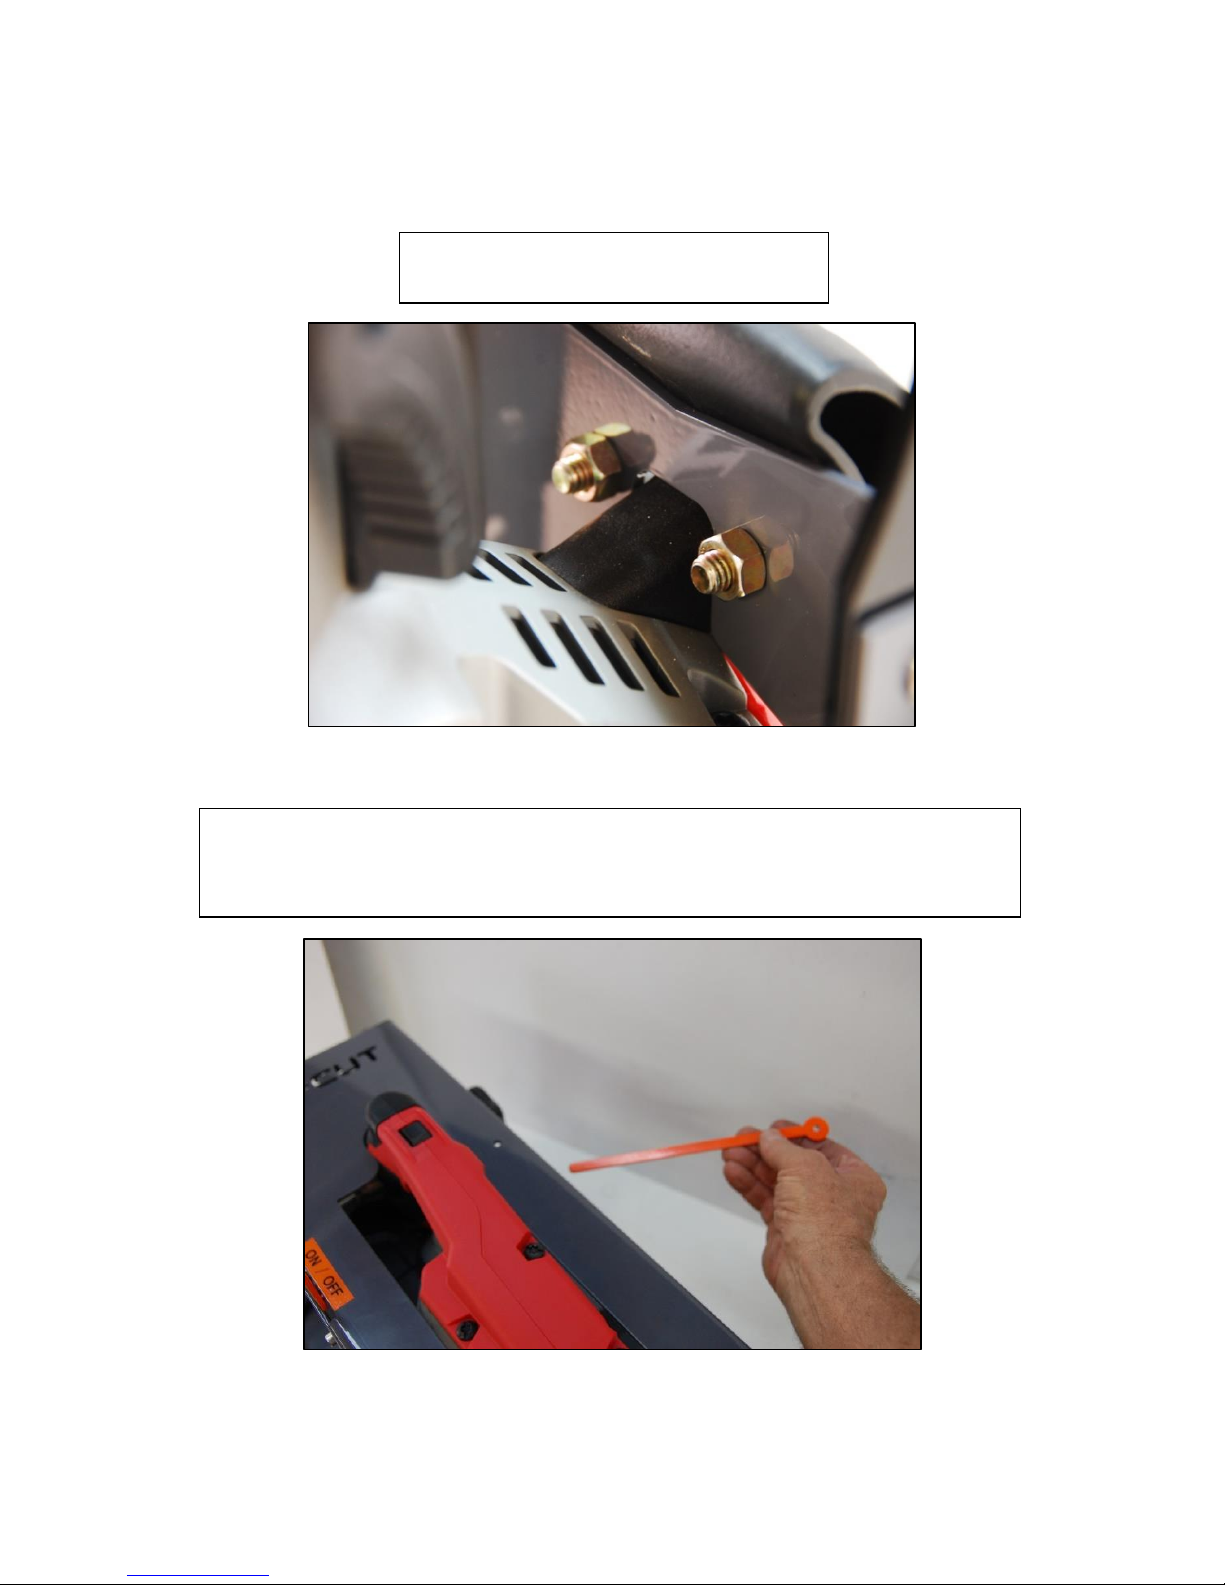
Install top lock assembly and firmly tighten the two ½” bolts and nuts.
(Top Lock Bolts pictured here)
Snuggly tighten the two handle clamps on both sides of THE EZ – CUT JIG.
Tighten the two ½” bolts and nuts
THE EZ – CUT JIG
USER MANUAL
TO REDUCE THE RISK OF INJURY, USER MUST READ AND UNDERSTAND USER MANUAL BEFORE ANY CUTTING IS DONE
6
Re-install trigger arm assembly (that was set aside on page 3) by sliding the
arm through the trigger slot.
(Top Lock Nuts pictured here)

THE EZ – CUT JIG
USER MANUAL
TO REDUCE THE RISK OF INJURY, USER MUST READ AND UNDERSTAND USER MANUAL BEFORE ANY CUTTING IS DONE
7
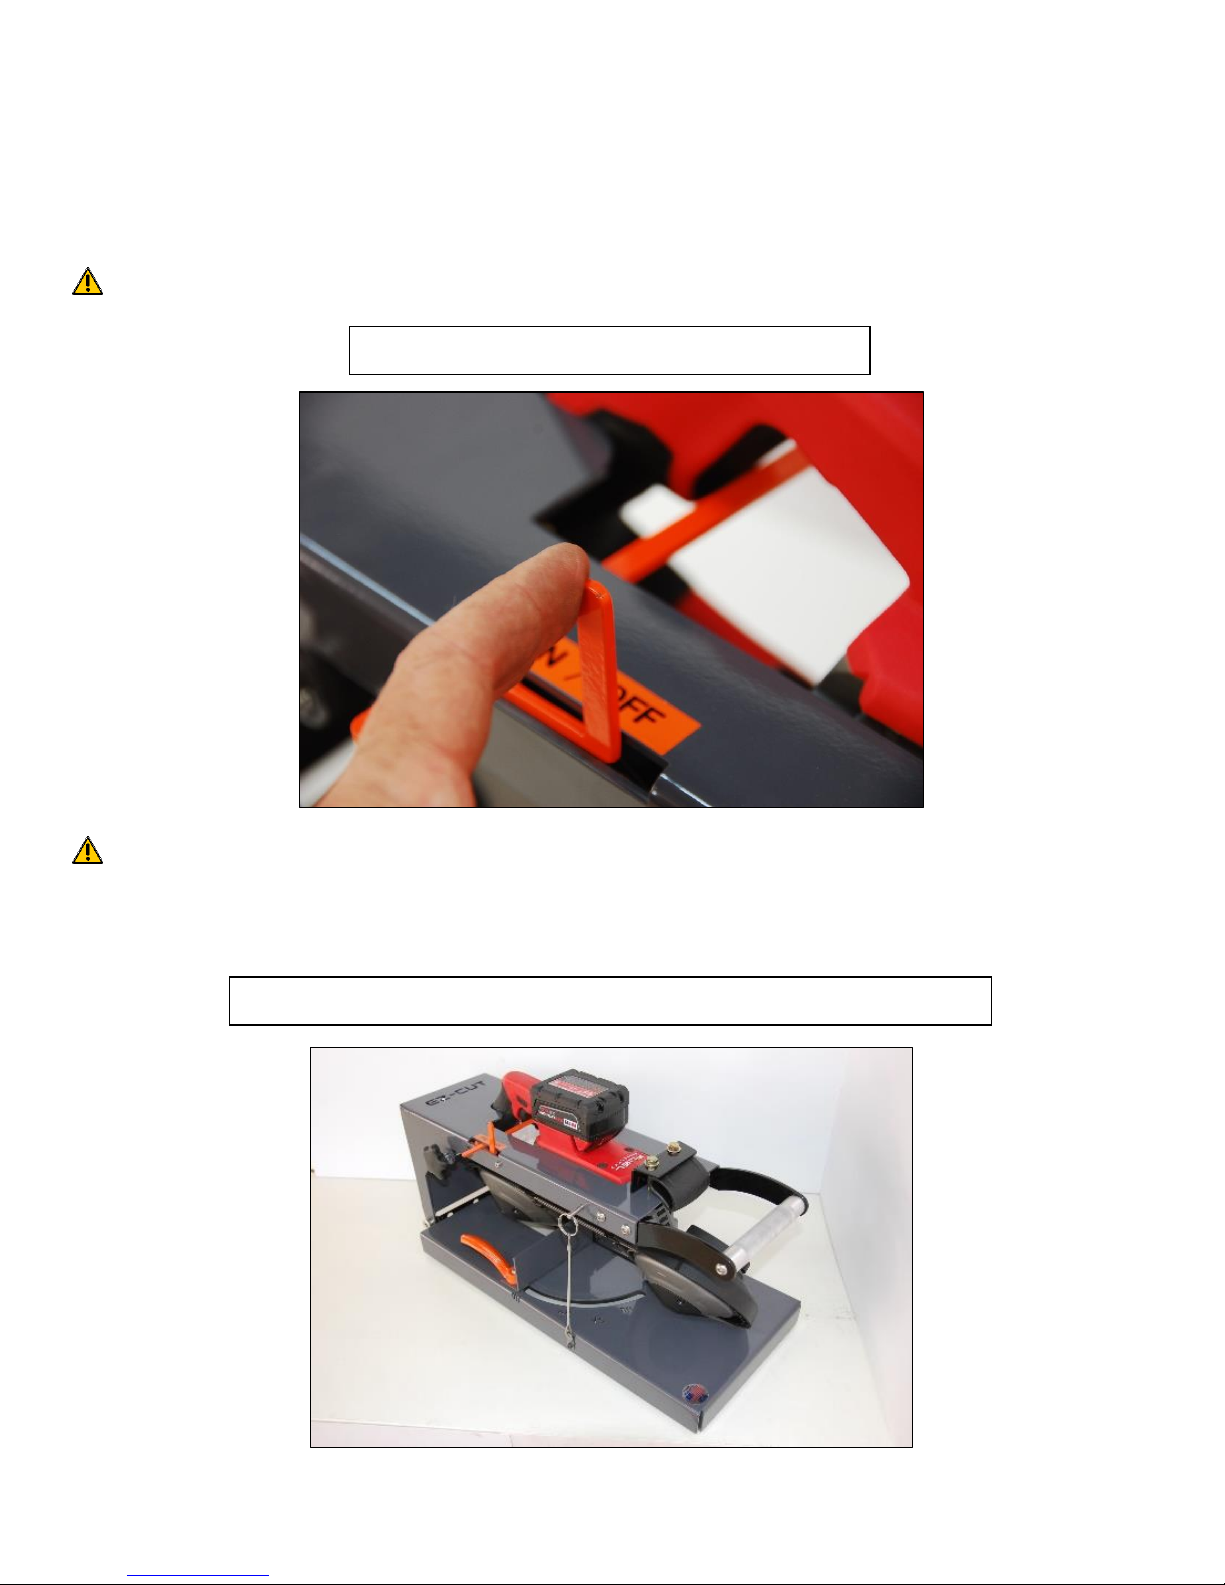
Fasten the round end of the arm underneath the top plate with 1/8” shoulder bolt and nut.
(Pictured here without 1/8“ shoulder bolt and nut)
(Pictured here with tightened 1/8” shoulder bolt and nut)

THE EZ – CUT JIG
USER MANUAL
TO REDUCE THE RISK OF INJURY, USER MUST READ AND UNDERSTAND USER MANUAL BEFORE ANY CUTTING IS DONE
8
When tightening be sure the trigger arm assembly moves freely.
(Pictured here in the OFF position)
(Pictured here in the ON position)

THE EZ – CUT JIG
USER MANUAL
TO REDUCE THE RISK OF INJURY, USER MUST READ AND UNDERSTAND USER MANUAL BEFORE ANY CUTTING IS DONE
9
1. INSTALLING THE BLADE INTO THE SAW:
CAUTION: SEE THE BAND SAW MANUFACTURER USER MANUAL ON
HOW TO SAFELY CHANGE BAND SAW BLADE
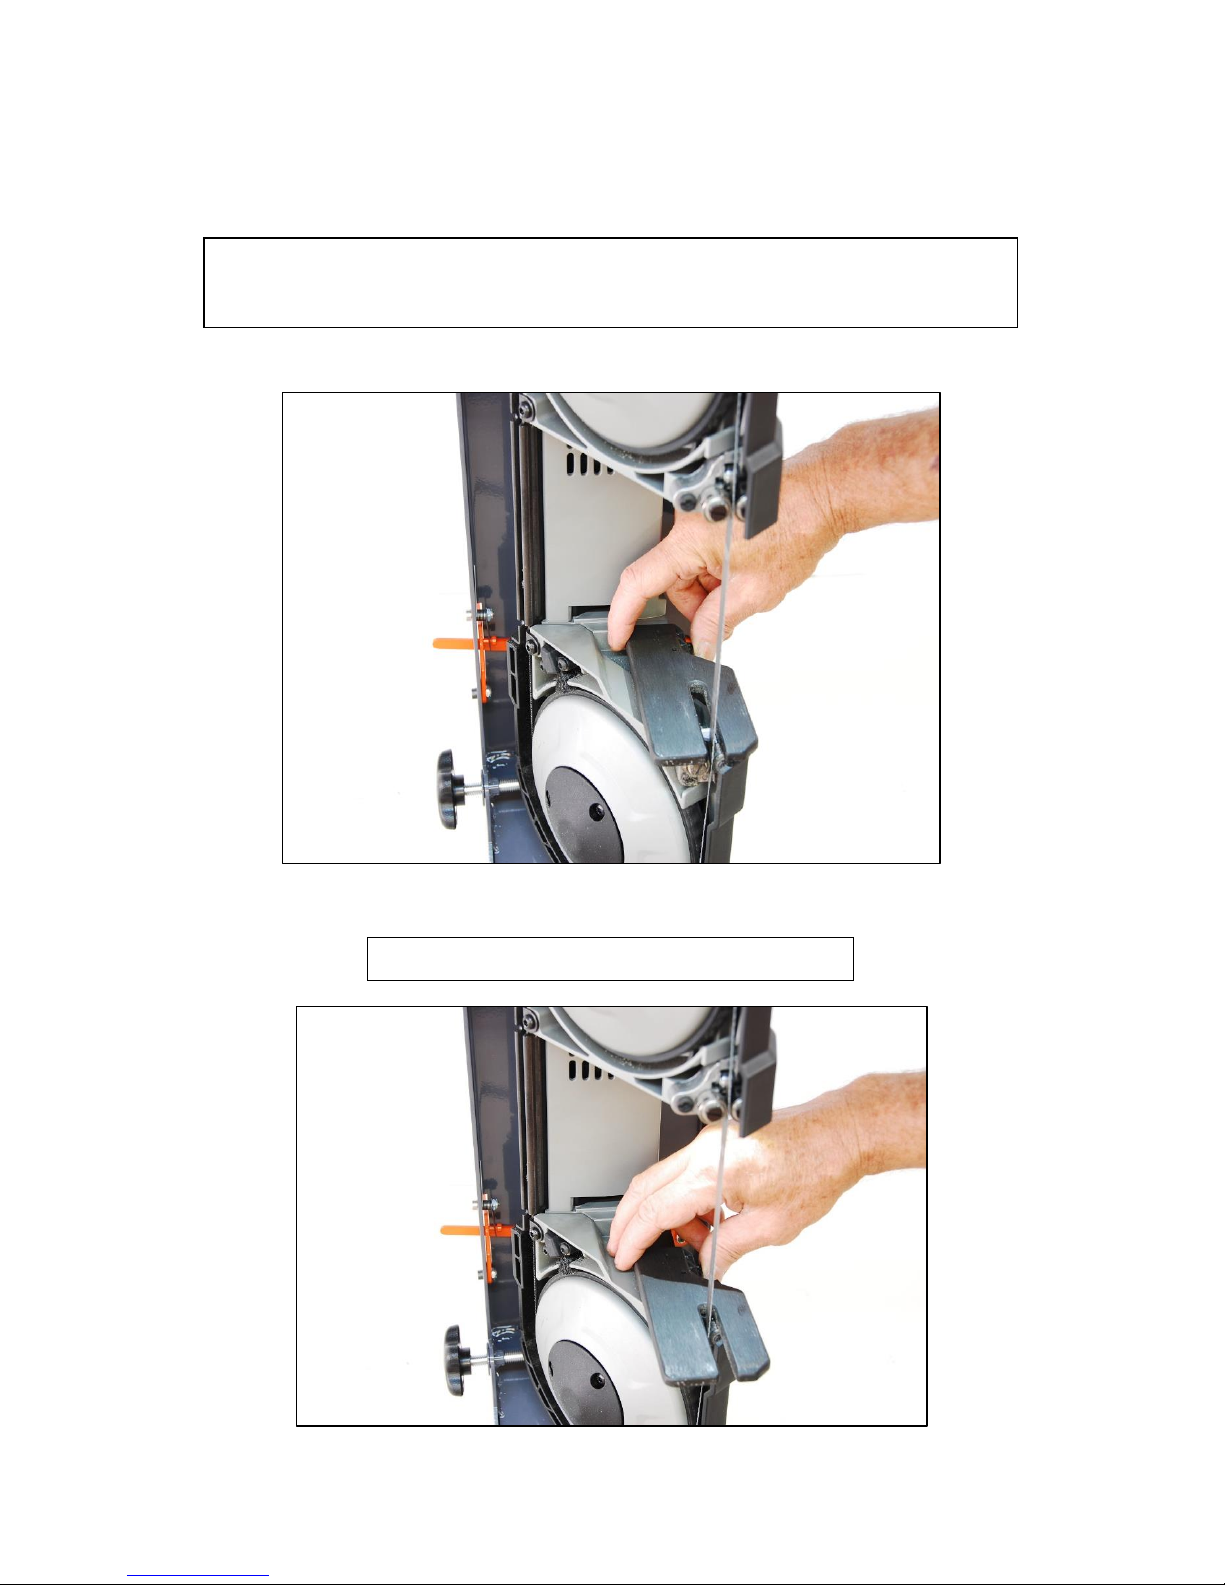
To install the blade while the band saw is connected to THE EZ – CUT JIG,
leave the band saw in the upright position and flip the blade lever back.

THE EZ – CUT JIG
USER MANUAL
TO REDUCE THE RISK OF INJURY, USER MUST READ AND UNDERSTAND USER MANUAL BEFORE ANY CUTTING IS DONE
10
2. TABLE ADJUSTMENT FOR ACCURATE CUTTING:
NOTE: Once the blade is installed, you can adjust the table to the blade for accurate cutting.
Put the band saw in the upright position and raise the table to
expose the three 3/4” flange bolts that are underneath the table.
Loosen the three ¾” flange bolts until the table moves freely
left, right, up, down, tilts left, and tilts right.

THE EZ – CUT JIG
USER MANUAL
TO REDUCE THE RISK OF INJURY, USER MUST READ AND UNDERSTAND USER MANUAL BEFORE ANY CUTTING IS DONE
11
Square the blade in the slot.
Tighten the three 3/4” flange bolts.

THE EZ – CUT JIG
USER MANUAL
TO REDUCE THE RISK OF INJURY, USER MUST READ AND UNDERSTAND USER MANUAL BEFORE ANY CUTTING IS DONE
12
CAUTION: It might take some practice getting used to adjusting the blade; and the user might have to
repeat the process when test cutting, to get it just right.
Handle clamps are located on both left
and right sides of THE EZ – CUT JIG.
Adjust the handle clamps left and/or right to fine tune the blade.
THE EZ – CUT JIG
USER MANUAL
TO REDUCE THE RISK OF INJURY, USER MUST READ AND UNDERSTAND USER MANUAL BEFORE ANY CUTTING IS DONE
13
3. HOW TO USE THE EZ – CUT JIG
CAUTION: TRIGGER ARM MUST BE IN OFF POSITON BEFORE STARTING.
CAUTION: BEFORE USING THE BAND SAW, TEST THE ON - OFF TRIGGER ACTION REPEATEDLY.
HOW TO SAFELY TURN ON THE SAW
Pull trigger lever back to put in OFF position.
Before turning on the band saw, close THE EZ – CUT JIG by folding it shut.

THE EZ – CUT JIG
USER MANUAL
TO REDUCE THE RISK OF INJURY, USER MUST READ AND UNDERSTAND USER MANUAL BEFORE ANY CUTTING IS DONE
14
CAUTION: IT IS RECOMMENDED THAT USER AQUIRES THE FEEL OF HOW THE BAND SAW AND THE EZ – CUT JIG
WORK TOGETHER, BEFORE ATTTEMPTING ANY CUTTING.
JSR Manufacturing Incorporated is not responsible for any injury caused by misuse of the EZ-CUT JIG.
4. CUTTING WITH THE EZ – CUT JIG
Turn the band saw to the ON position by pushing the trigger arm and locking in place.
When The EZ – CUT JIG is in ON position, gently lower the saw on to the object being cut.
Guide the band saw down through the cut and DO NOT USE THE
WEIGHT OF THE BAND SAW TO MAKE THE CUT.

THE EZ – CUT JIG
USER MANUAL
TO REDUCE THE RISK OF INJURY, USER MUST READ AND UNDERSTAND USER MANUAL BEFORE ANY CUTTING IS DONE
15
CAUTION: The EZ- CUT JIG does not have a built in clamping device to hold the piece being cut in place.so
firmly hold the object that is being cut, with hand that is not guiding the band saw
7. ADJUSTING THE FENCE
NOTE: THE EZ – CUT JIG HAS A NON-TOOL ADJUSTING MAIN FENCE.
If the cut is not square, go through the TABLE ADJUSTMENT FOR ACCURATE CUTTING
procedure again, starting on page 10, until a nice straight cut is had.
Lift the saw to an upright position.

THE EZ – CUT JIG
USER MANUAL
TO REDUCE THE RISK OF INJURY, USER MUST READ AND UNDERSTAND USER MANUAL BEFORE ANY CUTTING IS DONE
16
Lift the bottom table of THE EZ – CUT JIG to an upright position.
Simultaneously, hold the Wing Head Screw, located on the bottom side of
THE EZ – CUT JIG table, and grasp the Orange Handle on top of THE EZ – CUT
JIG table; and loosen the adjustable fence assembly to desired degree.

THE EZ – CUT JIG
USER MANUAL
TO REDUCE THE RISK OF INJURY, USER MUST READ AND UNDERSTAND USER MANUAL BEFORE ANY CUTTING IS DONE
17
. Then tighten the adjustable fence assembly.
When finished, lower THE EZ – CUT JIG table; and user
is now ready for an angle cut.

THE EZ – CUT JIG
USER MANUAL
TO REDUCE THE RISK OF INJURY, USER MUST READ AND UNDERSTAND USER MANUAL BEFORE ANY CUTTING IS DONE
18
8. USING THE EZ – CUT JIG AS AN UPRIGHT BANDSAW
Start with the EZ – CUT JIG in the upright position.
Angle cut pictured here.

THE EZ – CUT JIG
USER MANUAL
TO REDUCE THE RISK OF INJURY, USER MUST READ AND UNDERSTAND USER MANUAL BEFORE ANY CUTTING IS DONE
19
Slide THE EZ – CUT JIG to the edge of the work table and lower the bottom table of THE EZ -
CUT JIG by swinging it down until it becomes vertical and completely out of the way.
THE EZ – CUT JIG
USER MANUAL
TO REDUCE THE RISK OF INJURY, USER MUST READ AND UNDERSTAND USER MANUAL BEFORE ANY CUTTING IS DONE
20
Adjust the shoe (the table on the band saw that slides forward and back) while
pressing the shoe release button on the back side of the shoe.
The shoe adjusted forward pictured here.

THE EZ – CUT JIG
USER MANUAL
TO REDUCE THE RISK OF INJURY, USER MUST READ AND UNDERSTAND USER MANUAL BEFORE ANY CUTTING IS DONE
21
THE EZ – CUT JIG CAN BE USED WITH THE MILWAUKEE DEEP CUT BAND SAW TO ALSO CUT:
STEEL
CONDUIT
P.V.C.
A.B.S. PIPE
E.M.T.
WOOD
BONE
ANTLER
ALUMINUM
CAUTION: WHEN CUTTING ALUMNUM, CUT VERY SLOWLY AND KEEP THE BLADE FROM LOADING UP. ALUMINUM
TAKES PRACTICE, SO TAKE YOUR TIME.
User can also use the speed control dial on the right side of the saw
and the LED light switch on the top handle of the saw.

THE EZ – CUT JIG
USER MANUAL
TO REDUCE THE RISK OF INJURY, USER MUST READ AND UNDERSTAND USER MANUAL BEFORE ANY CUTTING IS DONE
22
FEATURES AND ADVANTAGES:
A CONVENIENT CORD STORAGE IN BACK SIDE OF THE TOP (FOR CORDED BANDSAW)
AN BLADE STORAGE AREA UNDER THE (BASE) TABLE, FOR AN EXTRA BLADE
A BUILT-IN FRONT HANDLE AND LANYARD MAKES CARRYING VERY CONVENIENT
WEIGHTS 23 LBS
o WEIGHTS 36 LBS WITH THE BANDSAW ATTACHED
NO SPARKS WHEN CUTTING
A MUCH QUIETER, SPARK-FREE AND SAFER WORK ENVIRONMENT
BUILT WITH QUALITY HARDWARE
A DURABLE POWDER-COAT FINISH
SAVES HOURS OF WORK TIME
MADE IN THE USA
JSR Manufacturing, Incorporated is not responsible for any injury while using the EZ – CUT JIG
The EZ – CUT JIG by JSR Manufacturing, Incorporated all rights reserved
Patent Pending filed with the United States Patent and Trademark Office: U.S. DEPARTMENT OF COMMERCE
www.jsrmfg.com

THE EZ – CUT JIG
THE “SLIDE-IN EZ – CUT JIG TABLE”
ALSO AVAILABLE IS THE “STAND-ALONE EZ - CUT JIG”
USER MANUAL
TO REDUCE THE RISK OF INJURY, USER MUST READ AND UNDERSTAND USER MANUAL BEFORE ANY CUTTING IS DONE
AND
JSR Manufacturing, Incorporated is not responsible for any injury while using the EZ – CUT JIG
The EZ – CUT JIG by JSR Manufacturing, incorporated all rights reserved
Patent Pending filed with the United States Patent and Trademark Office: U.S. DEPARTMENT OF COMMERCE
www.jsrmfg.com
23
 Loading...