

Page 1

Quick Start
Installation Guide
Tier 2 Advanced PowerStrip
Page 2
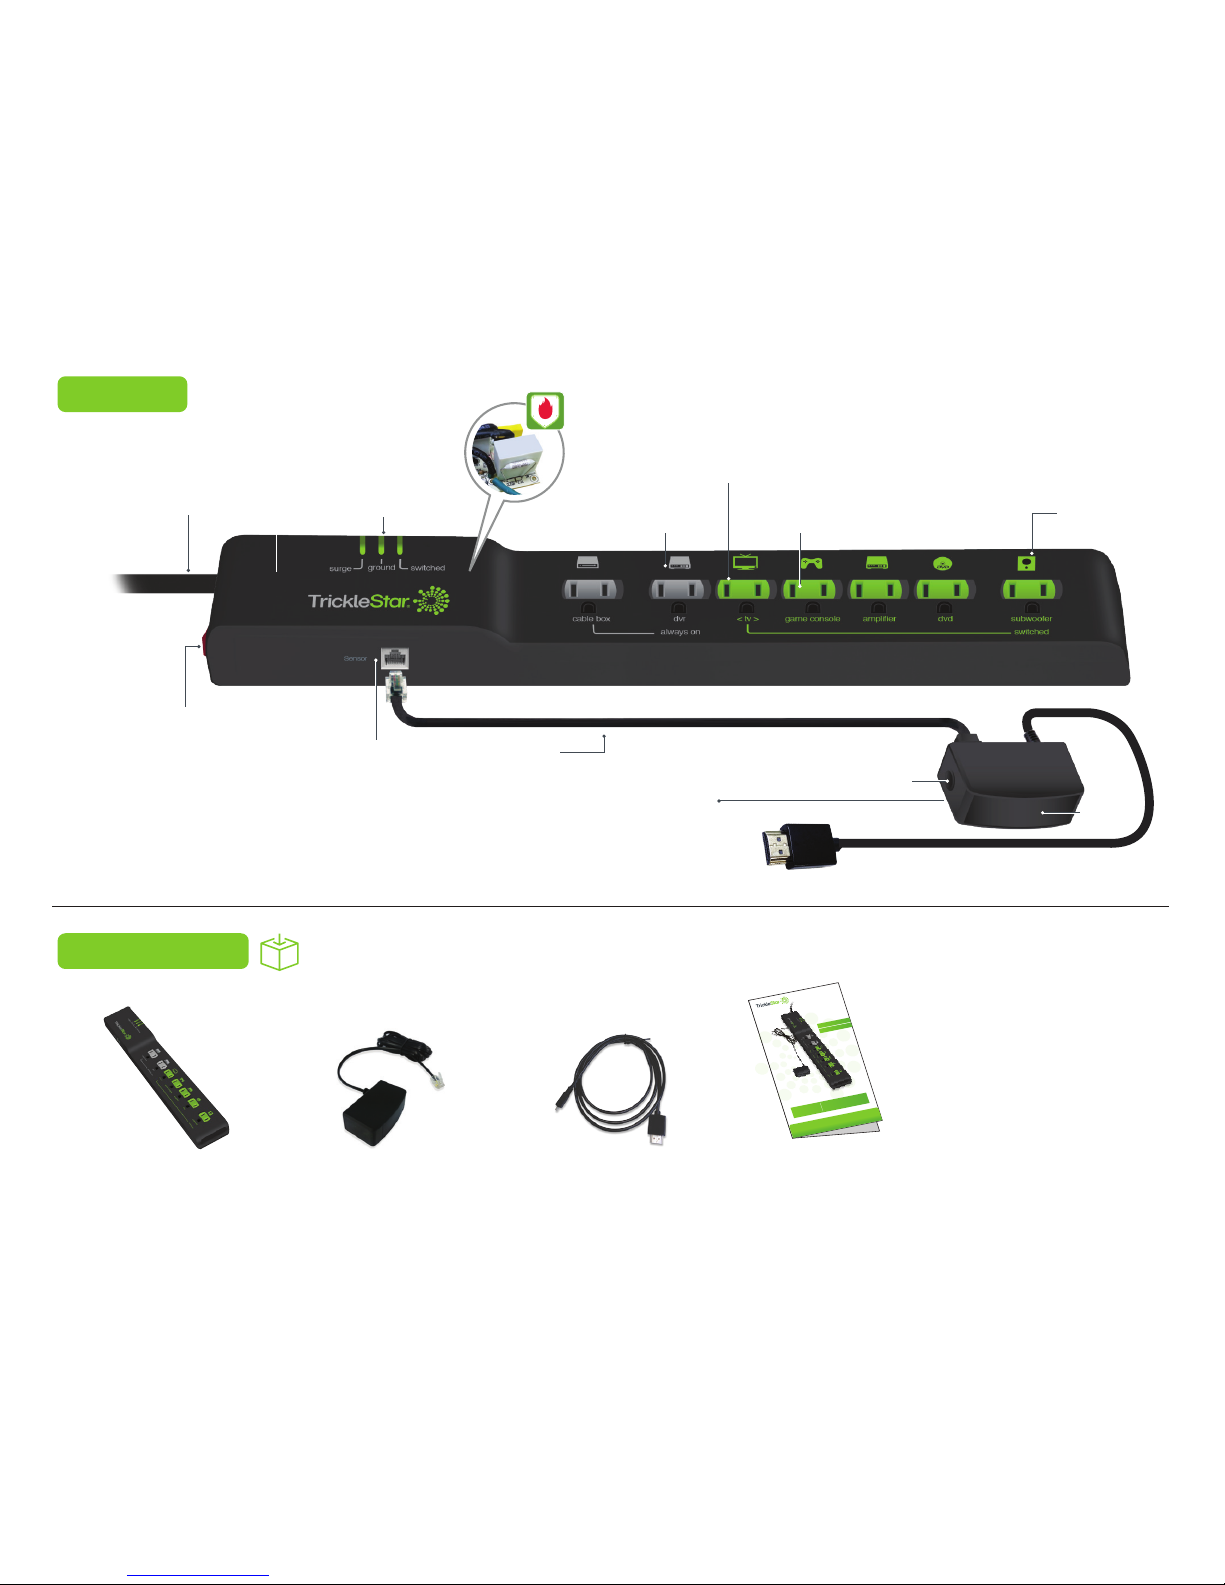
Premium Quality
FIREPROOF Surge Protection
Resettable
Circuit Breaker
True RMS Power Measurement
Outlet for TV
Sensor Port
Transformer
Spaced Outlet
Child Protection
Outlet Covers
Always on
Outlets
LED
Indicators
Heavy-Duty 4 ft. Power Cord
With Angled, Space-Saving plug
X
Manual
On/Off Button
RF/IR and
Motion Receiver
TV with CEC
compatible HDMI port
8 ft. Cable
4 ft. Cable
Buzzer
Features
What’s in the box
www.tricklestar.com
®
PRODUCT INFORMATION
7 Outlet Advanced PowerStrip+,
1080 Joules, 4 ft. Cord, Auto Threshold,
Zigbee Multi-Sensor, TAV-Link
TS1811
Quick Start Guide &
Instruction Manual
7 Outlet APS ZigBee Multi-Sensor TAV-Link™ Cable Instruction Booklet
surge ground switched
Page 3
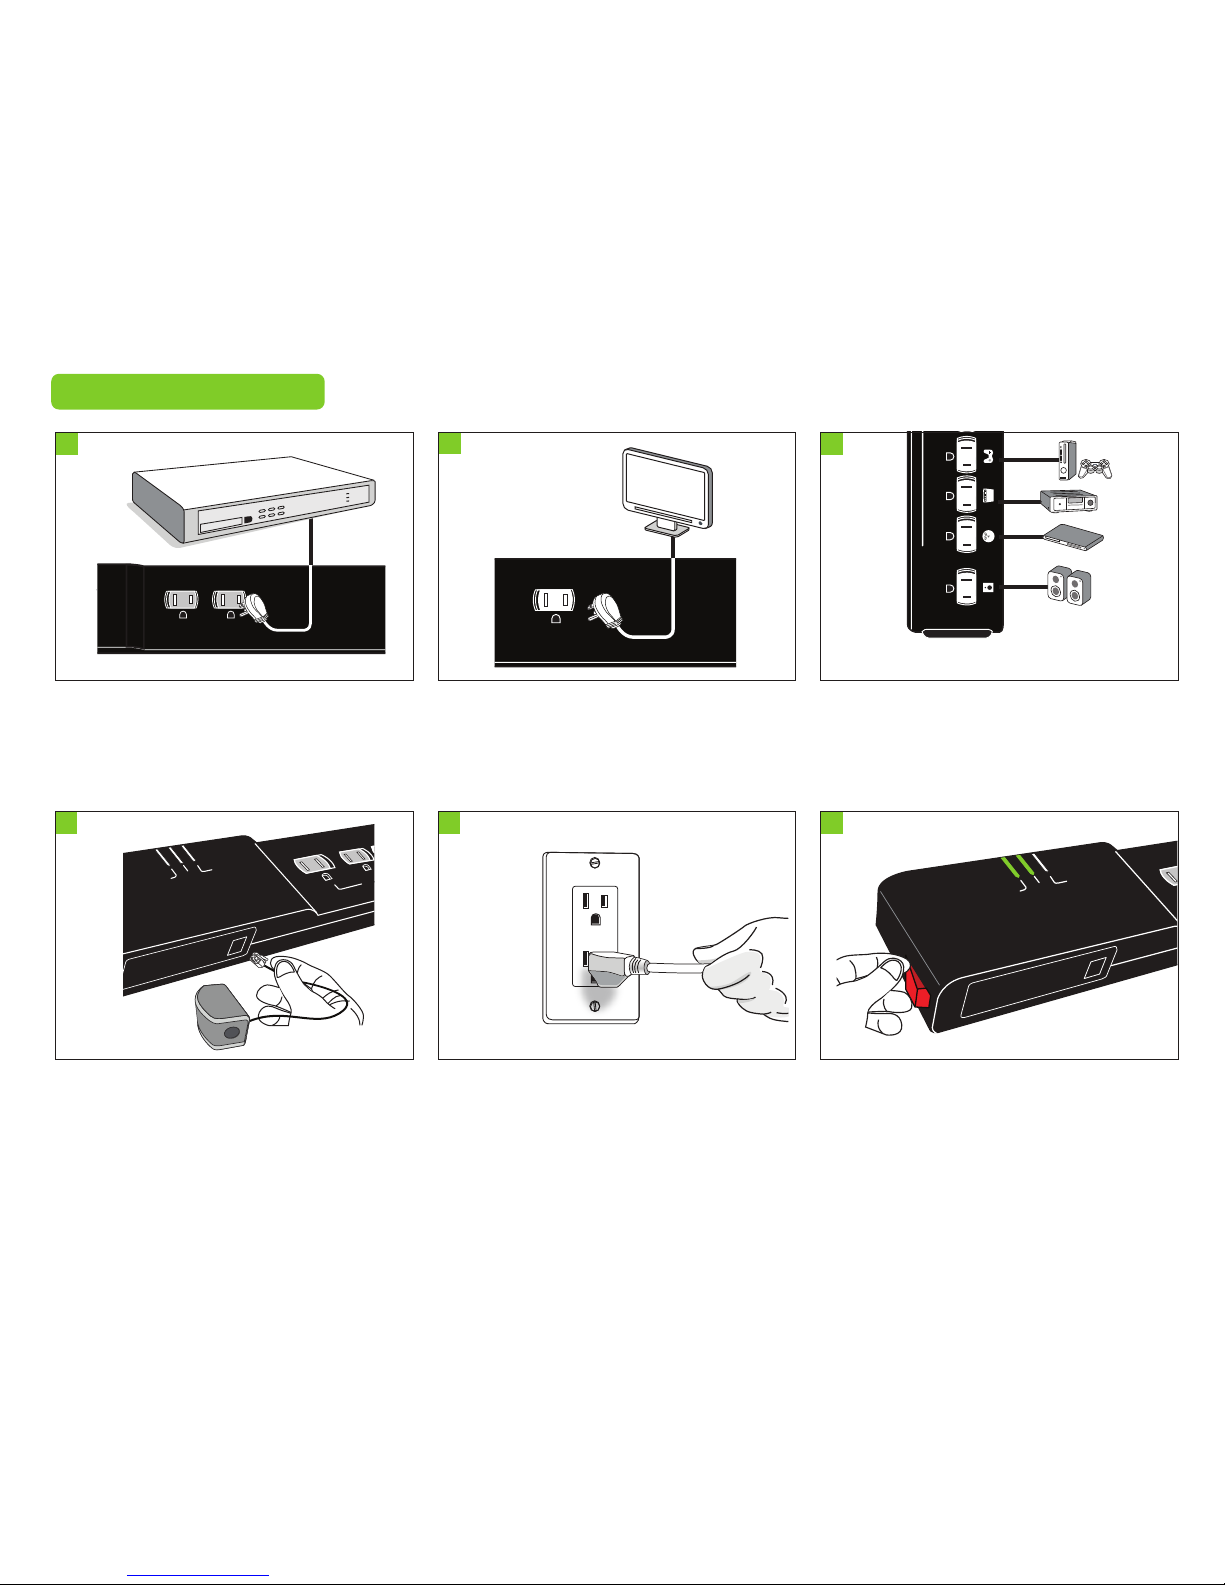
Plug devices that need constant power
into the Always-on outlets, such as
set-top boxes, digital video recorders,
and video game consoles with hard
drives.
Plug devices that can be switched off into
the Switched Outlets. Video game
consoles without hard drives can be
plugged into the switched outlets.
always on
ground
surge
sensor
swiched
1
< tv >
Plug the TV into the control outlet labeled
<tv>.
2
4
5
Installation - Start Here !
always on
switched
switched
dvd
cable box
game console
amplifier
< tv >
subwoofer
3
Plug the APS into a grounded receptacle.
Plug the sensor into the RJ11 port on the
side of the APS unit. This port looks just
like a telephone jack. You will hear a
“click” sound when the connection is
good.
6
Switch the resettable circuit breaker at
the end of the APS unit to RESET to
activate power. The LEDs on the face of
the APS unit marked “Surge” and
“Ground” will illuminate green.
ground
surge
sensor
swiched
Page 4
10
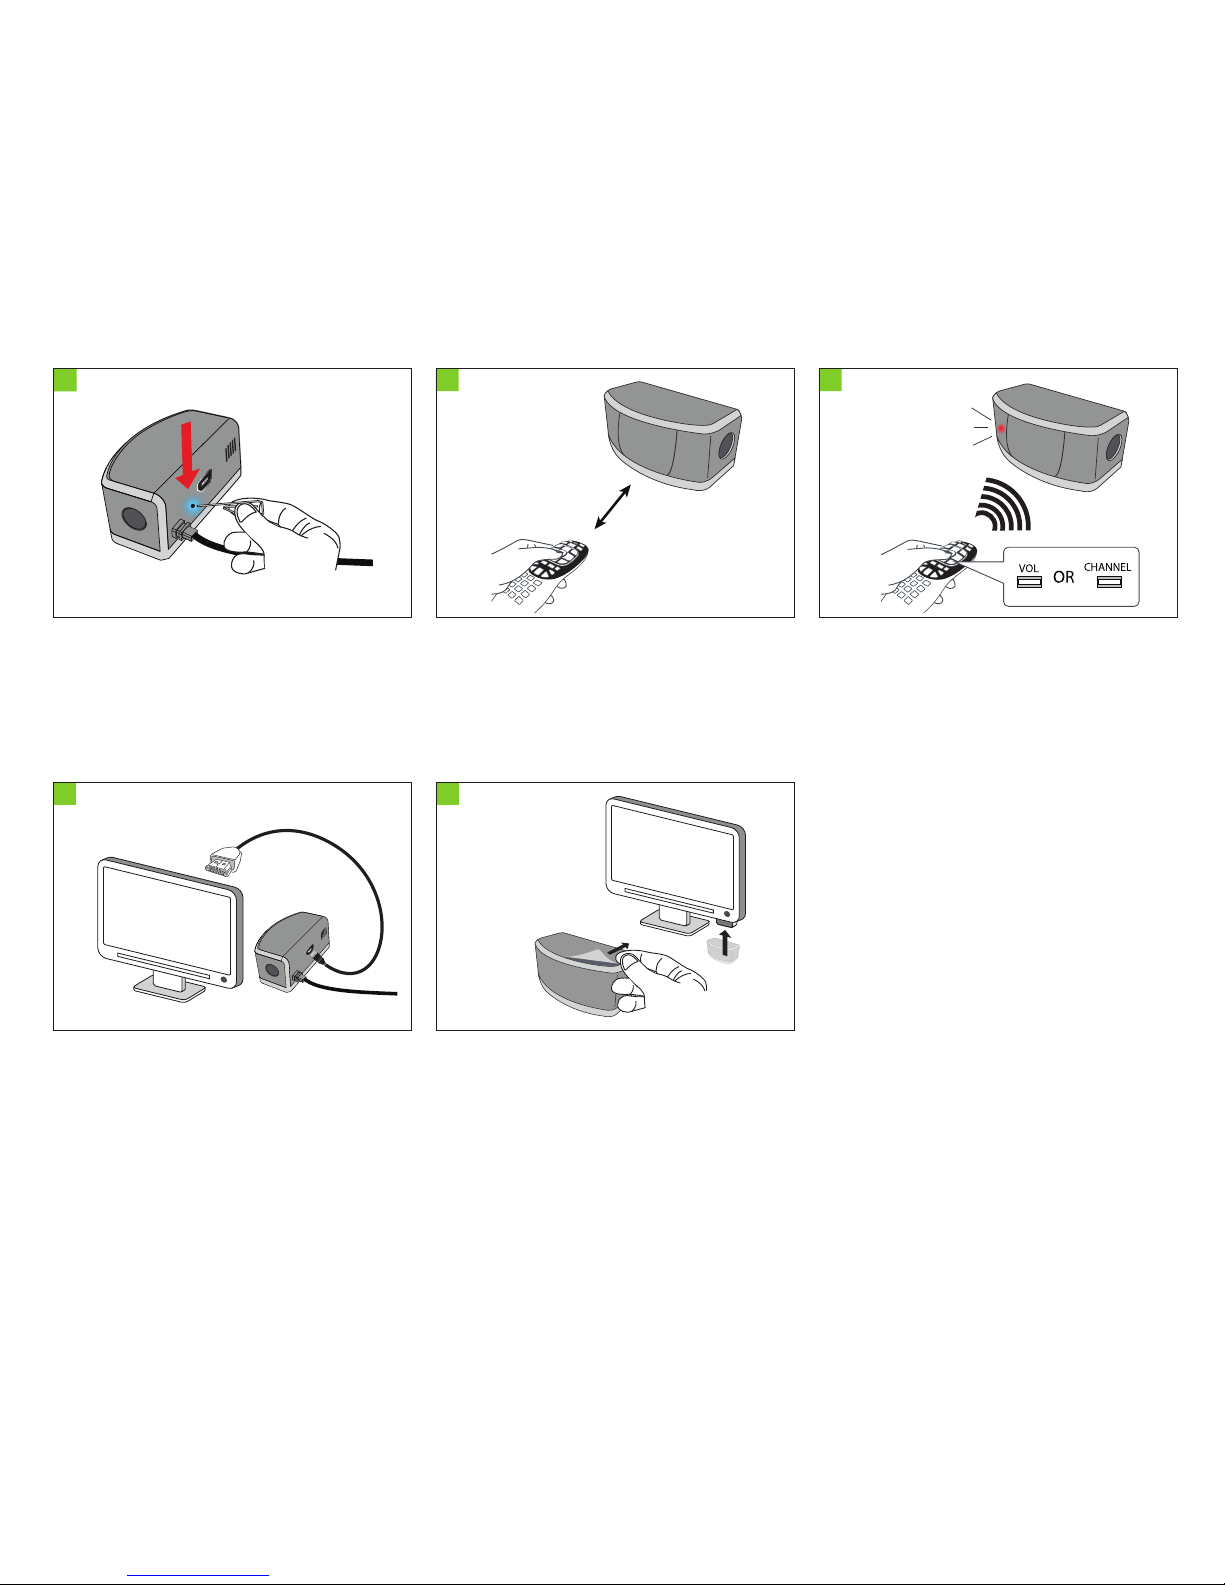
Connect the TAV-Link™ cable from the
back of the multi-sensor to an available
HDMI port on your TV.
Note: Requires a TV with a CEC
compatible HDMI port to operate
correctly and enable ‘soft switching’ of
the TV.
Remove the backing from the double-sided tape on the bottom of the
sensor. Mount the multi-sensor to a clean and dry surface, preferably on
the bottom of the TV.
Note: Ideal mounting location is near the TV infrared sensor. If the
TAV-Link™ cable is connected, ensure the sensor is close to the
HDMI port as the TAV-Link™ cable is 4 ft.
Using a paperclip or pin, short press the
button (< 1 second) in the pinhole on the
rear of the sensor to pair your RF (eg
DirecTV or Comcast) remote control. A
blue LED will start to flash.
Place the RF remote control two inches
from the sensor.
Press and hold Vol or Channel button on
the RF remote control until the blue LED
switches off and a red LED switches on
for one second when the remote has
been paired successfully. The pairing
process is now complete.
Note: You can pair up to 4 RF remote
controls. Repeat the process to pair
additional remotes. To delete all paired
remotes press and hold the pairing
button on the rear of the sensor for 5
second.
7
8
2 inches
9
11
OPTIONAL
Page 5
Operation - Music Mode
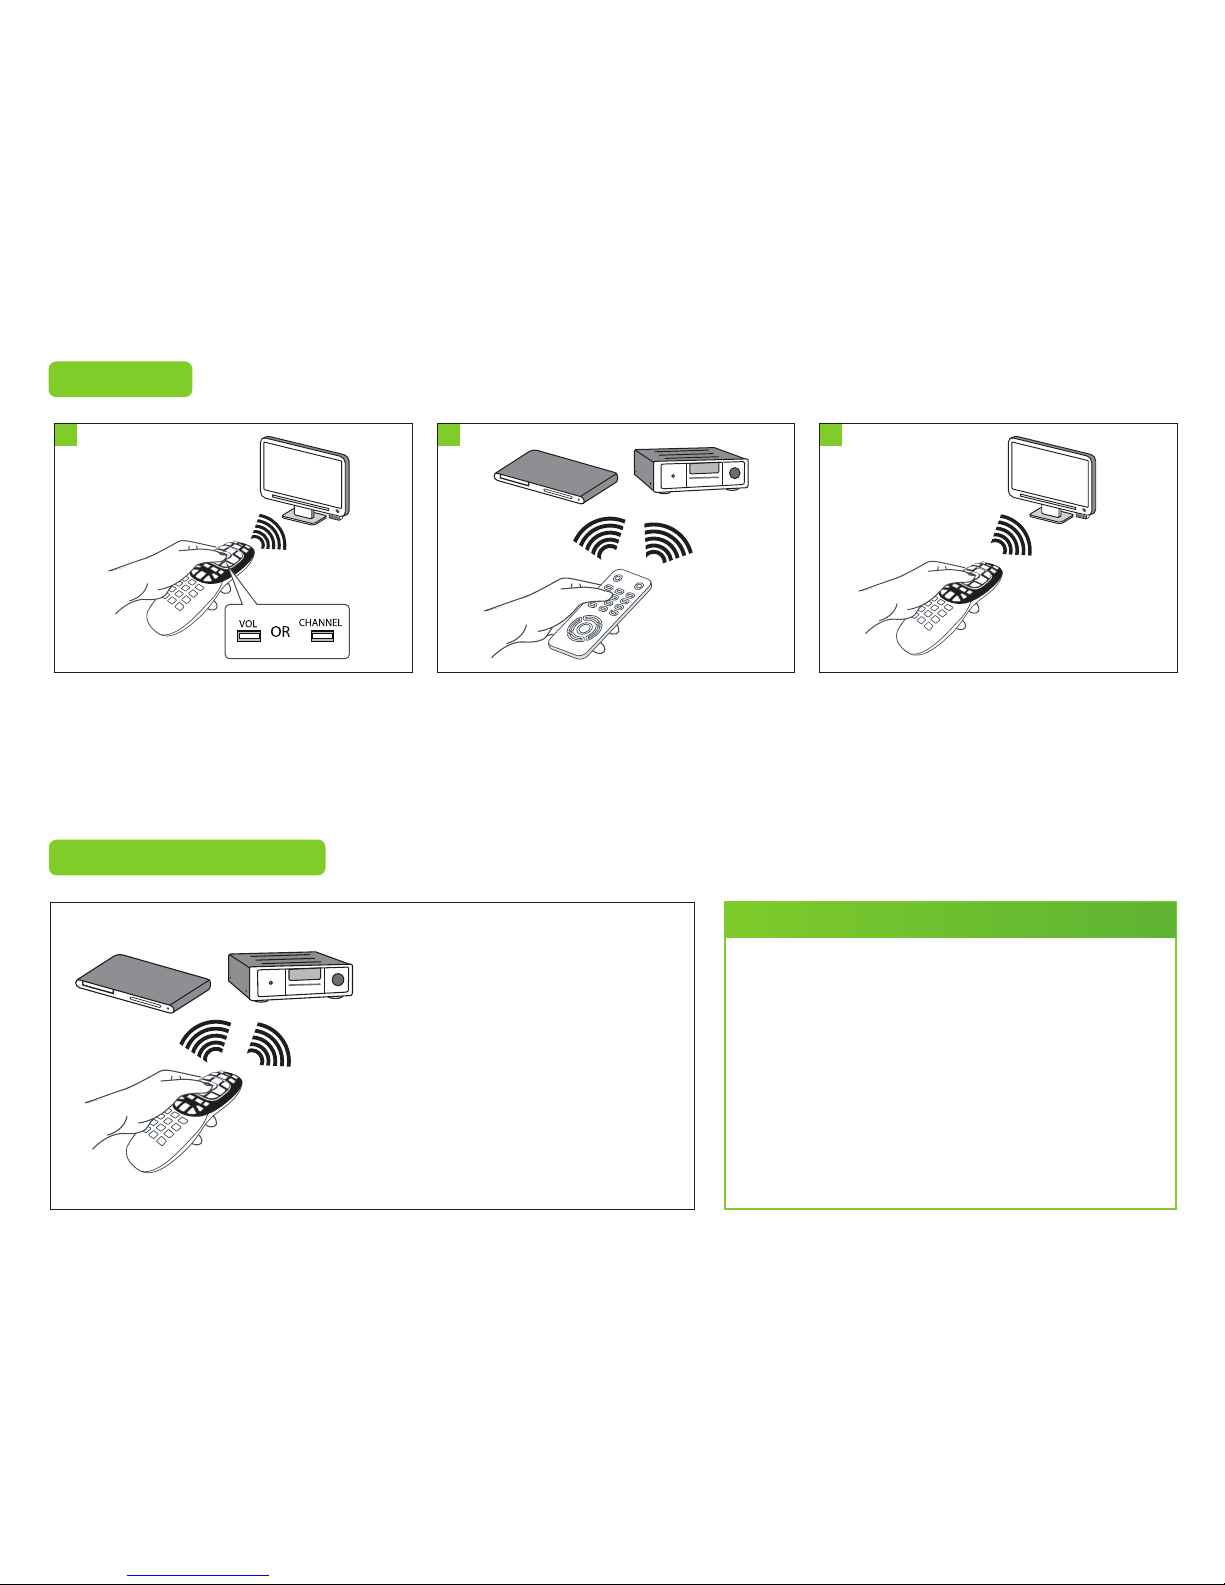
Press any button on AV receiver
or set-up box/DVD/CD player
remote control to turn on the
switched outlets.
Press power on all music related
devices to switch them on.
• If the TV is not switched on at any time in
between, all switched outlets will turn off after
eight hours.
• If any RF/IR signal is detected, the
countdown timer period will automatically
reset for another eight hours.
• If the TV is switched on during music mode,
the Advanced PowerStrip+ will switch to TV
mode.
Note
Operation
13 14
OFF
Turn on other peripheral devices as you
normally would, as they are needed.
When done watching TV, press the
power button on the TV remote control
to switch off the TV. All switched outlets
will then automatically turn off within one
minute.
12
ON
Turn on your TV by pressing the volume
or channel button on your cable TV radio
frequency or TV infrared remote control
to turn on power to TV and peripherals.
Page 6
Copyright© TrickleStar LLC 2016. All rights reserved.
TrickleStar® is a registered trademark of TrickleStar Ltd. All other trademarks are the property of their respective owners. The information in this document is subject
to change without notice.TrickleStar assumes no responsibility for any errors that may appear in this document.
For customer support go to:
www.tricklestar.com/support or call 1-888-700-1098
This device complies with Part 15 of the FCC Rules. Operation is subject to the following two conditions:
(1) this device may not cause harmful interference, and
(2) this device must accept any interference received, including interference that may cause undesired operation.
REV 8 / 2 June 2016
Changing The Countdown Timer
The default setting for the countdown timer is 60-minutes. Based on your
preference, you can adjust the countdown timer.
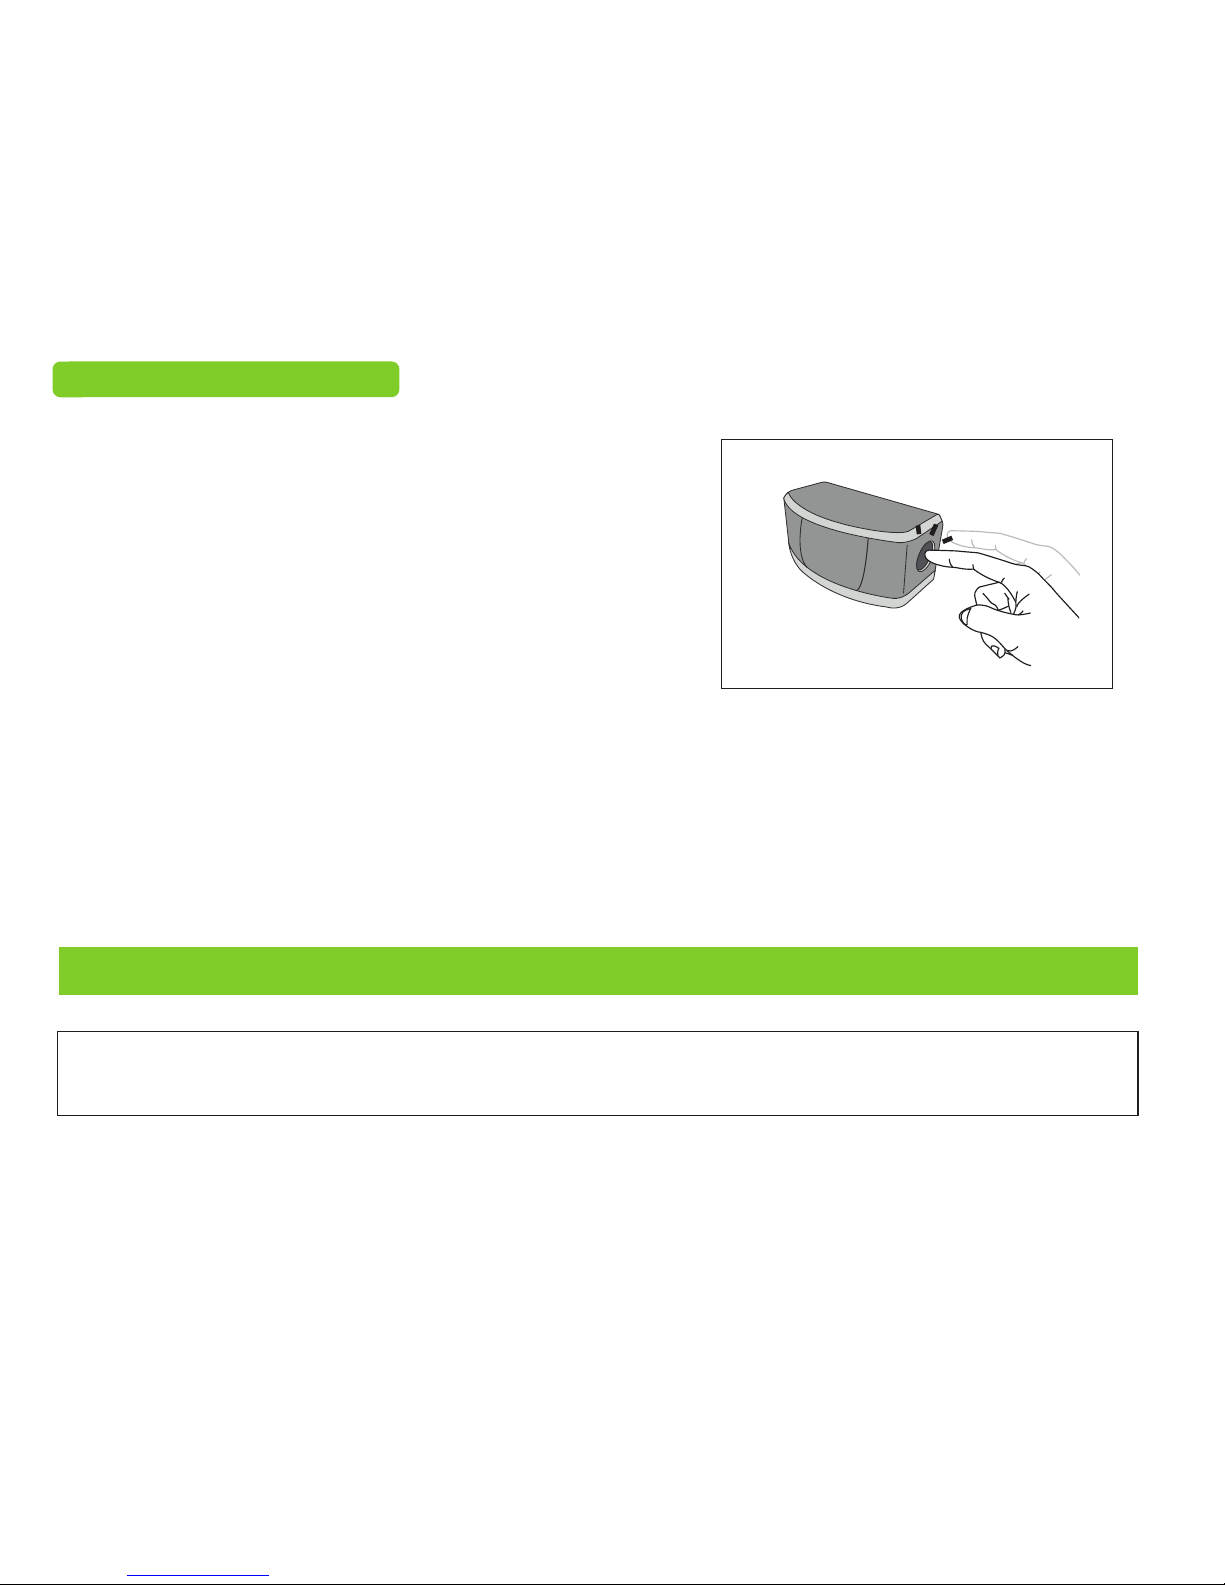
To change the countdown timer, press and hold the button on the
multi-sensor for 10 seconds and release the button once the red LED
illuminates.
• Press the button:
- Once for 30 minutes
- Twice for 60 minutes
- Three times for 120 minutes
• The red LED will flash once to confirm 30 minutes, flash twice to
confirm 60 minutes, flash three times to confirm 120 minutes.
 Loading...