

Page 1

OVER 5 COAX CABLES
HXMINI5
Extends HDMI™ 100 meters
www.tributariescable.com
Page 2
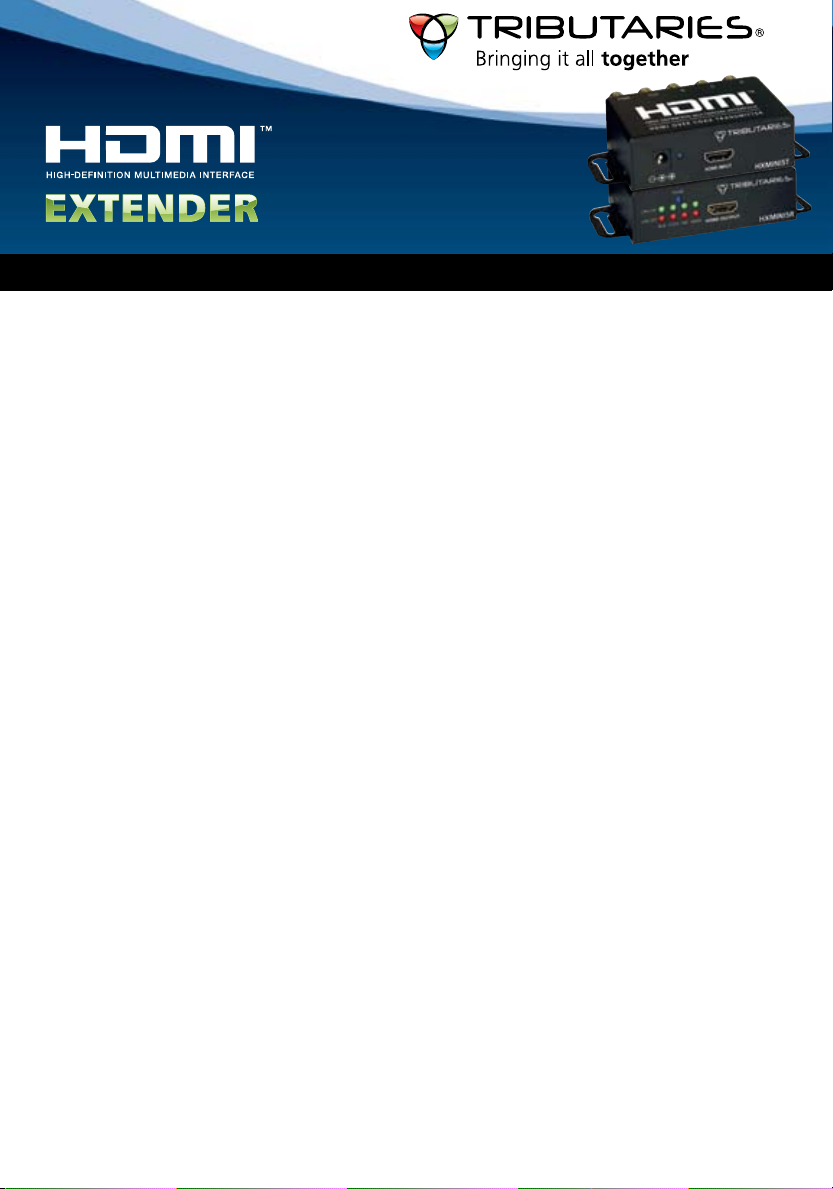
OVER (5) 75 Ohm COAX CABLES
HXMINI5
1. Introduction
The Tributaries HXMINI5 is the most advanced solution for extending HDMI. It easily
extends an HDMI v1.3 1080p signal over (5) 75 Ohm coax cables for a distance up
to 100 meters. Tributaries HXMINI5 provides the benefits of going long distances,
along with the ability to support full HDMI 1.3, including the latest HD features
such as higher resolutions, refresh rates and greater color depths. The installation
of Tributaries HXMINI5 is quick and easy. Simply place the transmitter next to
your HDTV source, and then place the receiver close to your display. Complete the
installation using Tributaries HDMI cables with one run of Tributaries TRIBMINI5 or
(5) 75 Ohm cables. The HXMINI5 automatically adapts to the cable length and signal
rate, providing a true install-and-forget solution. This solution is also ideal for a
retro fit /digital upgrade where analog RGBHV cabling has already been installed.
2. Features
1. HDMI 1.3, HDCP 1.1 and DVI 1.0 compliant
2. Deep Color: 10,12 and 16 bit color depth
3. X.V. Color Space
4. Supports refresh rates up to 120Hz
5. HD resolutions up to 1440p
6. PC Resolutions up to WQXGA, 2560 x 1600
7. Supports 1080p/ 8 bit Color / 60Hz (4.95 Gb/s) up to 100 meters (328 feet)
8. Supports 1080p/ 12 bit Color / 60Hz (6.75 Gb/s) up to 85 meters (279 feet)
9. Supports 1080p/ 8 bit Color / 120Hz (10.2 Gb/s) up to 55 meters (180 feet)
10. Supports Dolby® TrueHD, DTS® HD Master Audio
11. Supports EDID
12. Fully HDCP compliant
13. Supports CEC - Consumer Electronics Control
3. Package Contents
1. Tributaries HXMINI5 Powered Transmitter
2. Tributaries HXMINI5 Receiver
3. One universal 9 volt DC power supply (US/EU standards, CE/FCC/UL certified)
4. Operation Manual
1
Page 3
4. Transmitter Operations: Controls & Functions
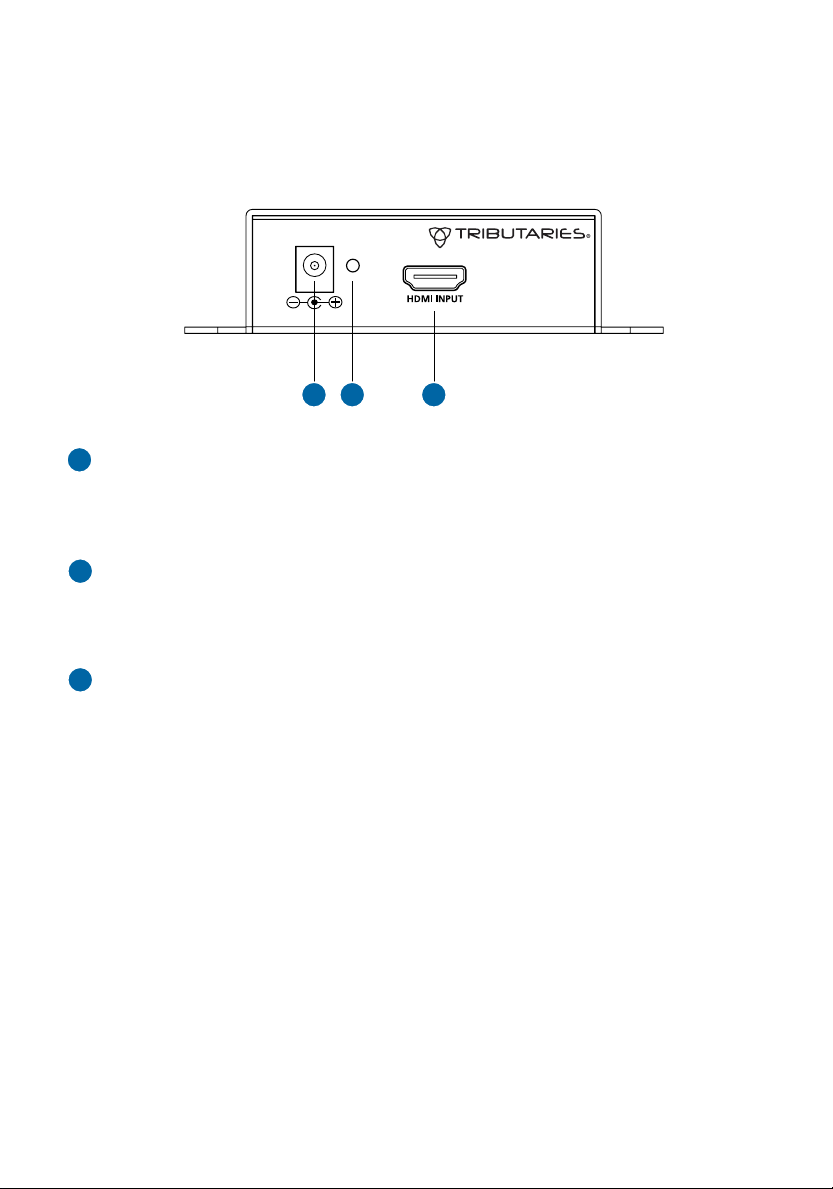
4.1 Front Panel
HXMINI5T
3
121
1. HDMI INPUT:
1
Connect to the HDMI output of your source equipment such as a DVD
player or set-top-box
2. POWER:
2
Plug 6VDC power supply into the unit and connect the adaptor to an
AC wall outlet
3
3. POWER INDICATOR LIGHT:
Blue LED illuminates indicating the unit is being powered
1
1
2
Page 4
4. Transmitter Operations: Controls & Functions
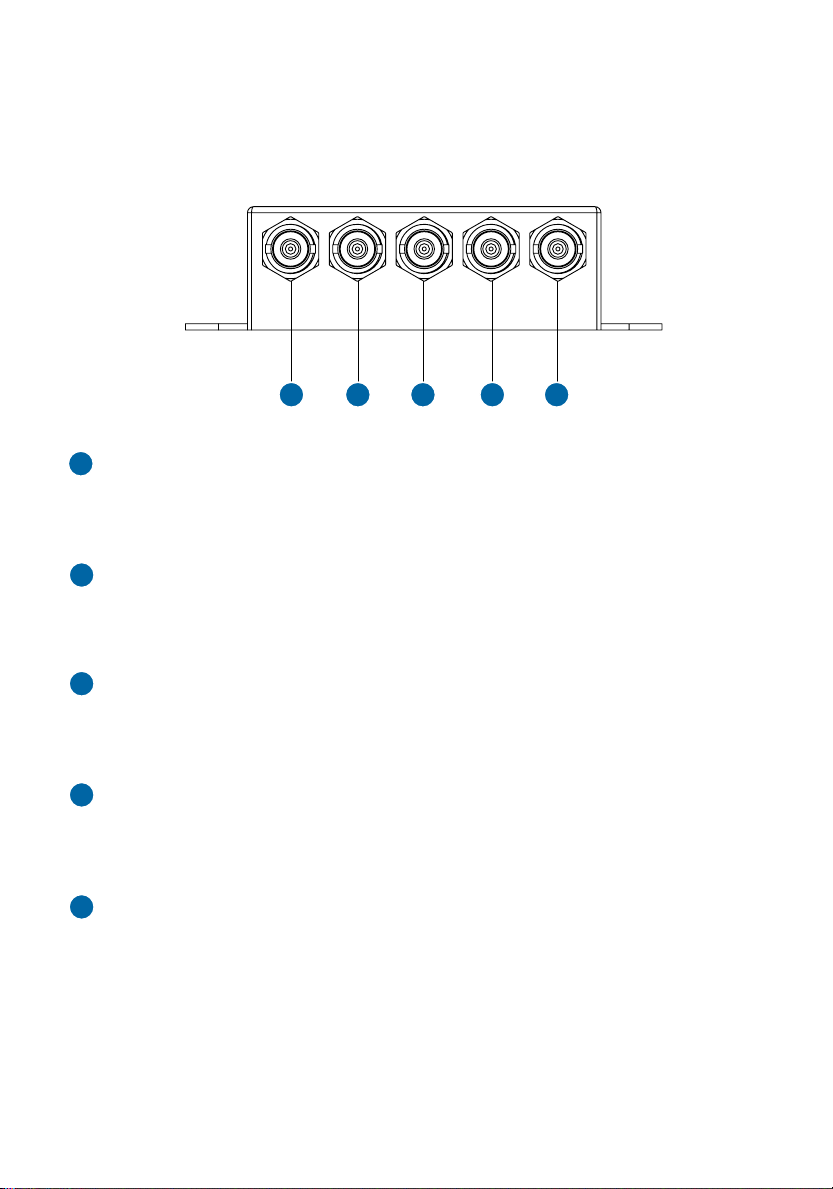
4.2 Rear Panel
1
1
1. RED BNC VIDEO OUTPUT:
1
Connect the Red output to the Red input of the HXMINI5 Receiver
using a 75 Ohm coax cable
2. GREEN BNC VIDEO OUTPUT:
2
Connect the Green output to the Green input of the HXMINI5 Receiver
using a 75 Ohm coax cable
2
1
3
1
4
1
5
1
3
3. BLUE BNC VIDEO OUTPUT:
Connect the Blue output to the Blue input of the HXMINI5 Receiver
using a 75 Ohm coax cable
4
CLOCK OUTPUT:
Connect the Clock output to the Clock input of the HXMINI5 Receiver
using a 75 Ohm coax cable
5
POWER OUTPUT:
Connect the Power output to the Power input of the HXMINI5 Receiver
using a 75 Ohm coax cable
3
Page 5
5. Receiver Operations: Controls & Functions
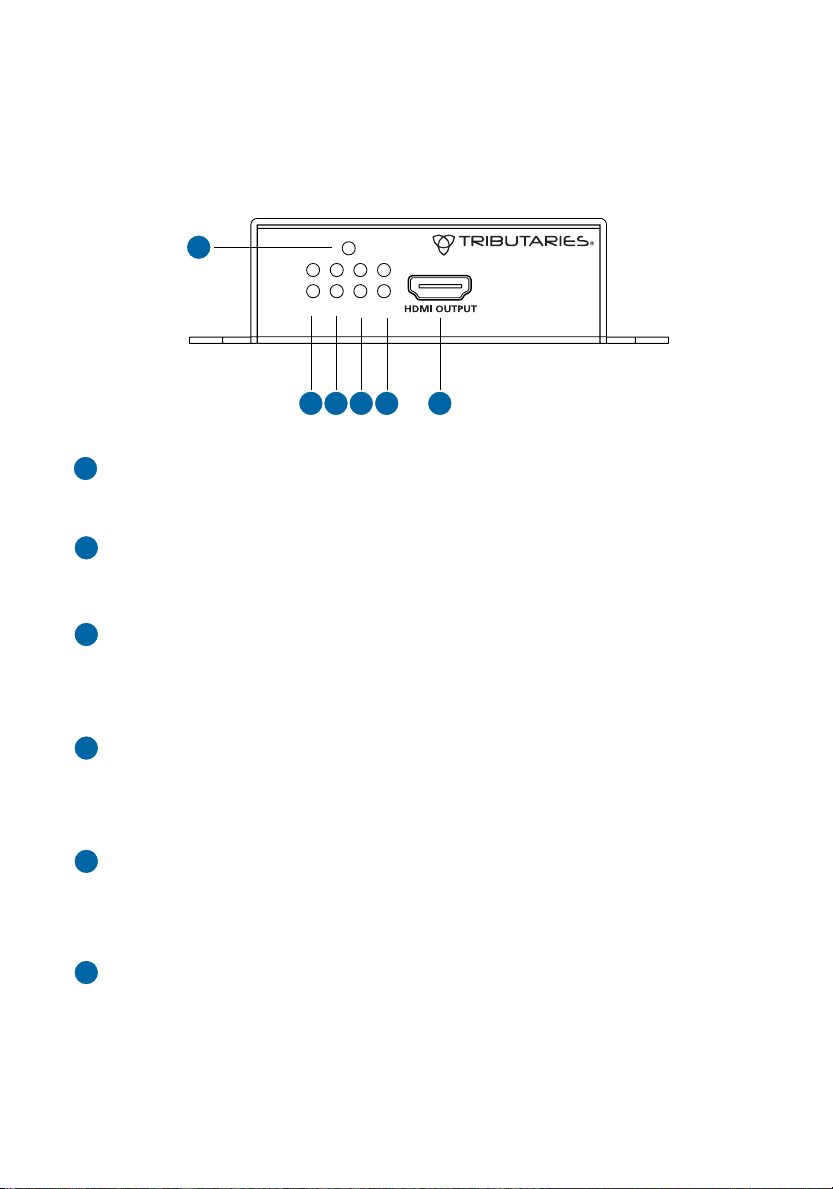
5.1 Front Panel
BLUE
3
1
CLOCK
4
1
POWER
GREEN
RED
5
1
1
161
HXMINI5R
2
1
1. HDMI OUTPUT:
1
LINK ON
LINK OFF
Connect to the HDMI input of your display
2
POWER LED:
Blue LED Illuminates indicating the receiver is powered
3
BLUE INDICATOR LIGHTS:
Green LED indicates the receiver’s Blue signal is linked to the Transmitter
Red LED indicates the receiver’s Blue signal is not Linked to the Transmitter
CLOCK INDICATOR LIGHTS:
4
Green LED indicates the receiver’s Clock signal is linked to the Transmitter
Red LED indicates the receiver’s Clock signal is not linked to the Transmitter
RED INDICATOR LIGHTS:
5
Green LED indicates the receiver’s Red signal is linked to the Transmitter
Red LED indicates the receiver’s Red signal is not linked to the Transmitter
GREEN INDICATOR LIGHTS:
6
Green LED indicates the receiver’s Green signal is linked to the Transmitter
Red LED indicates the receiver’s Green signal is not linked to the Transmitter
4
Page 6
5. Receiver Operations: Controls & Functions
5.2 Rear Panel
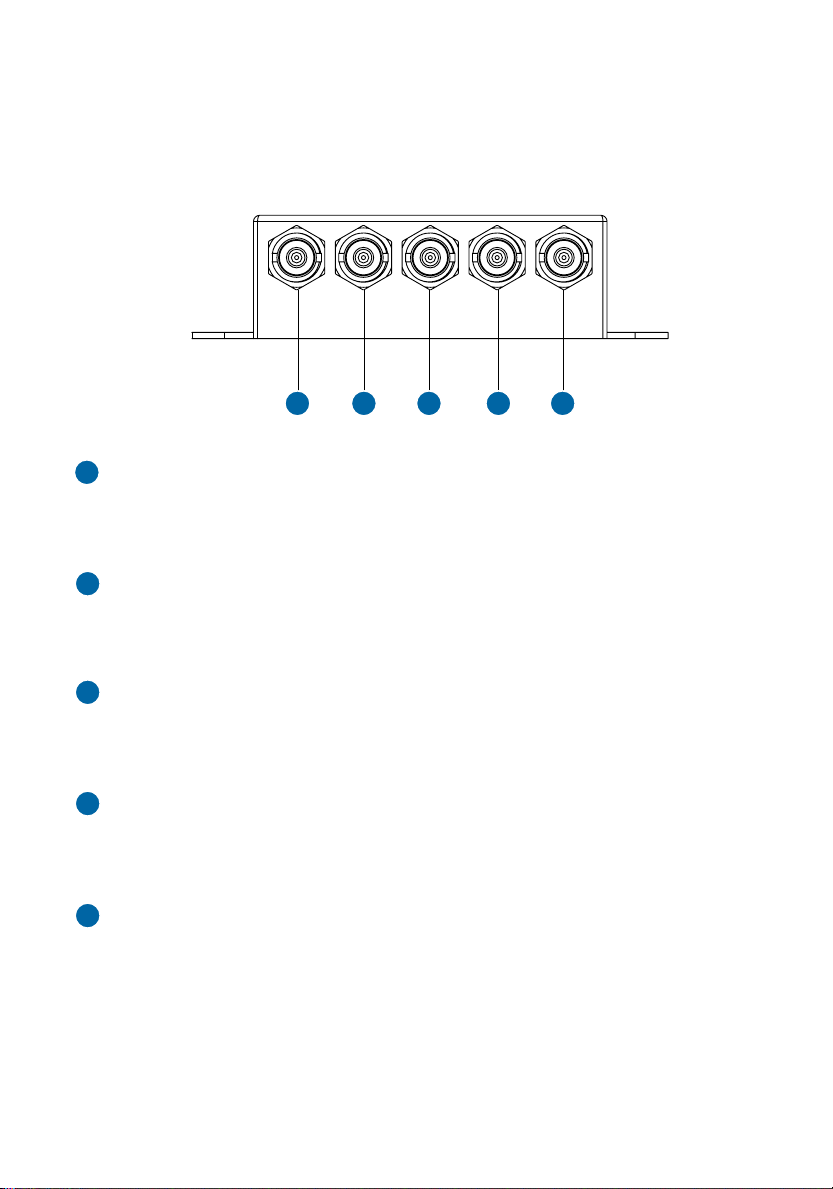
1
1
1. RED BNC VIDEO INPUT:
1
Connect the Red input to the Red output of the HXMINI5 Transmitter
using a 75 Ohm coax cable
2. GREEN BNC VIDEO INPUT:
2
Connect the Green input to the Green output of the HXMINI5 Transmitter
using a 75 Ohm coax cable
2
1
3
1
4
1
5
1
3
3. BLUE BNC VIDEO INPUT:
Connect the Blue input to the Blue output of the HXMINI5 Transmitter
using a 75 Ohm coax cable
4
CLOCK INPUT:
Connect the Clock input to the Clock output of the HXMINI5 Transmitter
using a 75 Ohm coax cable
5
POWER INPUT:
Connect the Power input to the Power output of the HXMINI5 Transmitter
using a 75 Ohm coax cable
5
Page 7
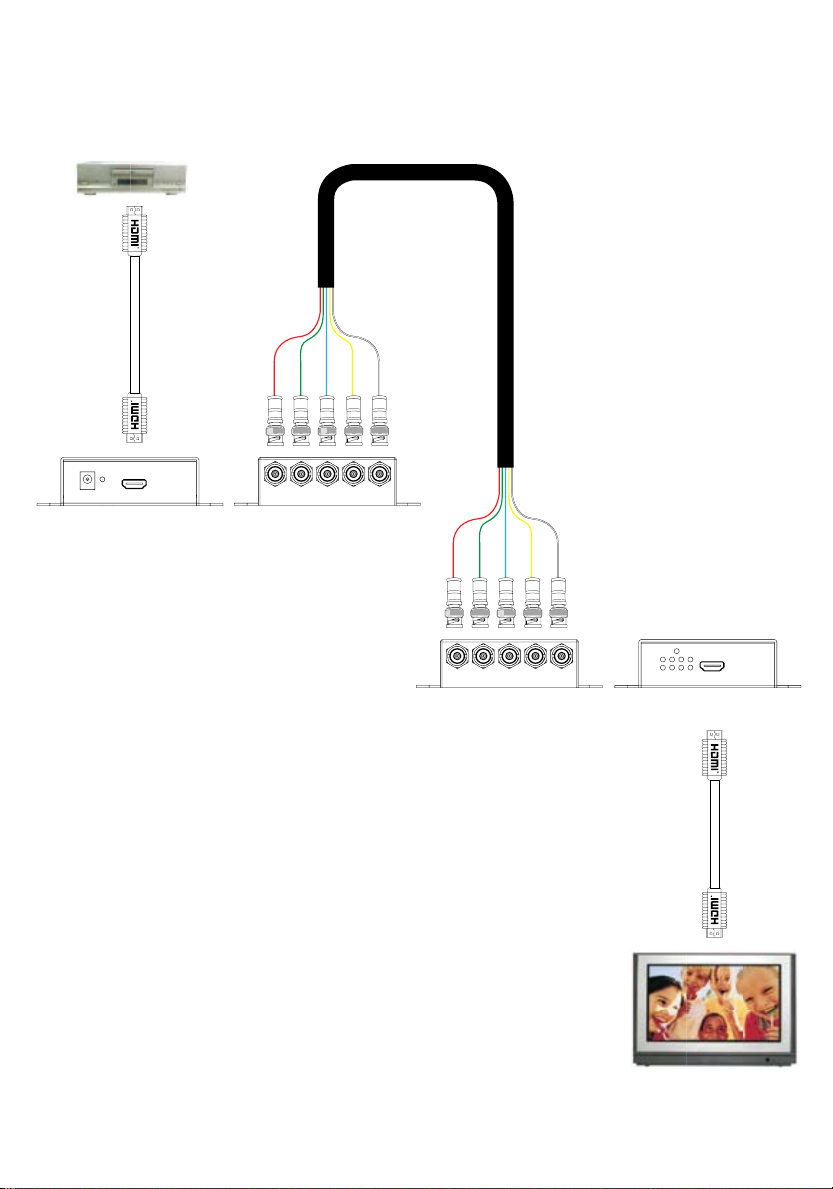
Connection and Installation
DVD Player, Satellite Receiver Cable,
STB, or Gaming Console
™
HDMI
Cable
Transmitter Unit
Front
TRIBMINI5
or (5) 75 Ohm Coax Cables
Transmitter Unit
Rear
Transmitter Unit
Rear
Transmitter Unit
Front
™
HDMI
Cable
6
Page 8

Transmitter Specifications
1. Supported Resolutions: HDMI 480i/480p, 720i/720p, 1080i/1080p & 1440p
2. Supported refresh rates: up to 120Hz
3. Input: 1 HDMI Female Receptacle
4. Output: 5 BNC Female Receptacles, Red, Green, Blue, Clock & Power
5. Power: Input 6 volt / 1 amp DC power supply
6. Dimensions: 6.25” (W) x 3.0” (D) x 1.25” (H)
Receiver Specifications
1. Supported Resolutions: HDMI 480i/480p, 720i/720p, 1080i/1080p & 1440p
2. Supported refresh rates: up to 120Hz
3. Output: 1 HDMI Female Receptacle
4. Input: 5 BNC Female Receptacles, Red, Green, Blue, Clock & Power
5. Dimensions: 6.25” (W) x 3.0” (D) x 1.25” (H)
©2008 Gordon J. Gow Technologies, Inc. All rights reserved.
TRIBUTARIES® is a registered trademark of Gordon J. Gow Technologies, Inc. All other trademarks are
the property of their respective owners. As we continually strive to improve our products, TRIBUTARIES®
reserves the right to change product specifications without notice. The technical and other information
contained herein is not intended to set forth all technical and other specifications of TRIBUTARIES®
products. Additional information can be obtained on-line at www.tributariescable.com
Gordon J. Gow Technologies, Inc.
Orlando, FL 32809
www.tributariescable.com
 Loading...