

Page 1

USER'S GUIDE
Optical Time Domain Reflectometer
Page 2

Page 3
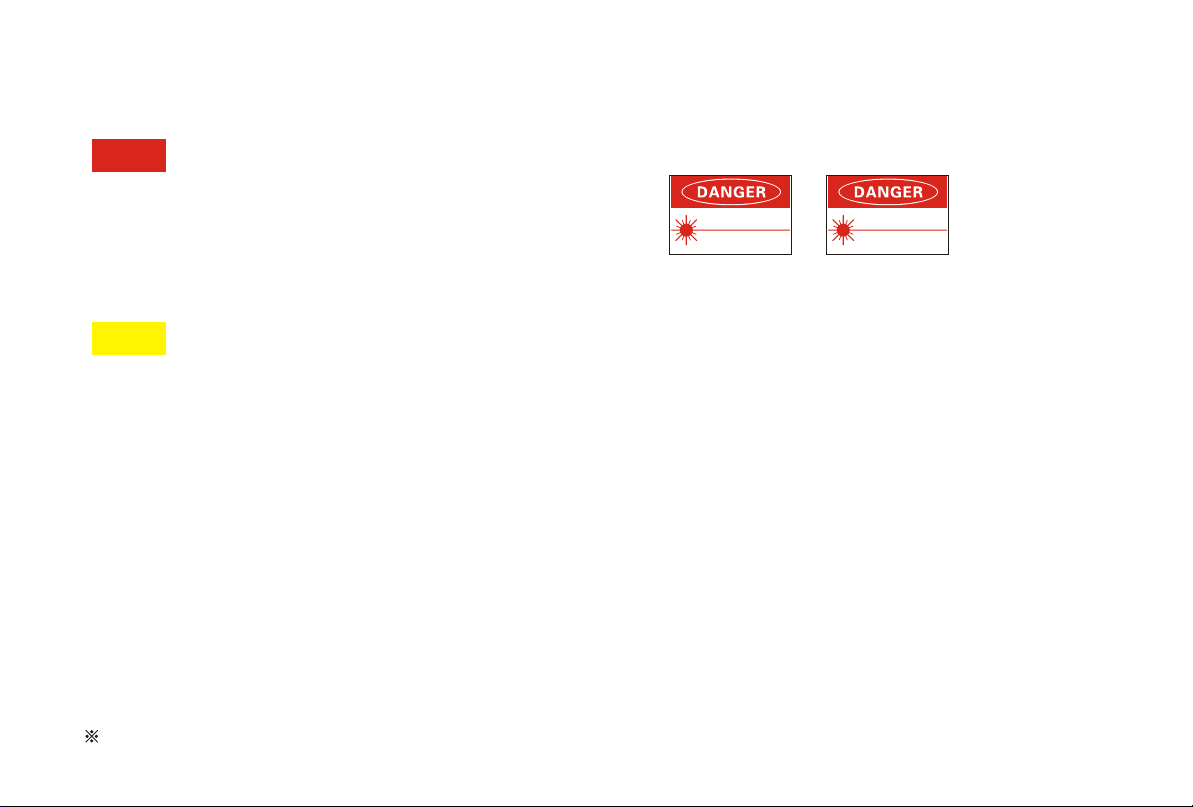
WARNINGWARNING
Warning and note
You are cautioned that changes or modifications not espressly
approved in this document could void yout authority to operate this
equipment.
To reduce the risk of fire or electric shock,do not expose this
VISIBLE LASER RADIATIONVISIBLE LASER RADIATION
AVOD EYE OR SKIN EXPOSUREAVOD EYE OR SKIN EXPOSURE
TO DIRECT OR SCATTERED RADIATIONTO DIRECT OR SCATTERED RADIATION
SEMICONDUCTOR LASERSEMICONDUCTOR LASER
Wavelength:635-650nmWavelength:635-650nm
INVISIBLE LASER RADIATIONINVISIBLE LASER RADIATION
AVOD EYE OR SKIN EXPOSUREAVOD EYE OR SKIN EXPOSURE
TO DIRECT OR SCATTERED RADIATIONTO DIRECT OR SCATTERED RADIATION
SEMICONDUCTOR LASERSEMICONDUCTOR LASER
Wavelength:800-1700nmWavelength:800-1700nm
CLASS I LASER PRODUCTCLASS I LASER PRODUCT
apparatus to rain or moisture.
To avoid electrical shock, do not open the cabinet. Refer servicing to qualified personnel only.
NOTENOTE
As the laser is harmful to the eyes, do not attempt to disassemble the cabinet.
Precautions for Use
Use batteries
At the same time, can not use different style or different capacitance batteries. And only use and charge the batteries the
product equipped..
Avoiding condensation problems
As much as possible, avoid sudden temperature changes. Do not attempt to use the drive immediately after moving it
from a cold to a warm location, to raising the room temperature suddenly, as condensation may form with in the drive. If the
temperature changes suddenly while using the drive, Stop using it and take out batteries for at least an hour.
Storage
When long time no use, must take out the batteries to avoid destroying the device.
All is subject to the object, the manual is for reference only.
Page 4
P1
Summarize
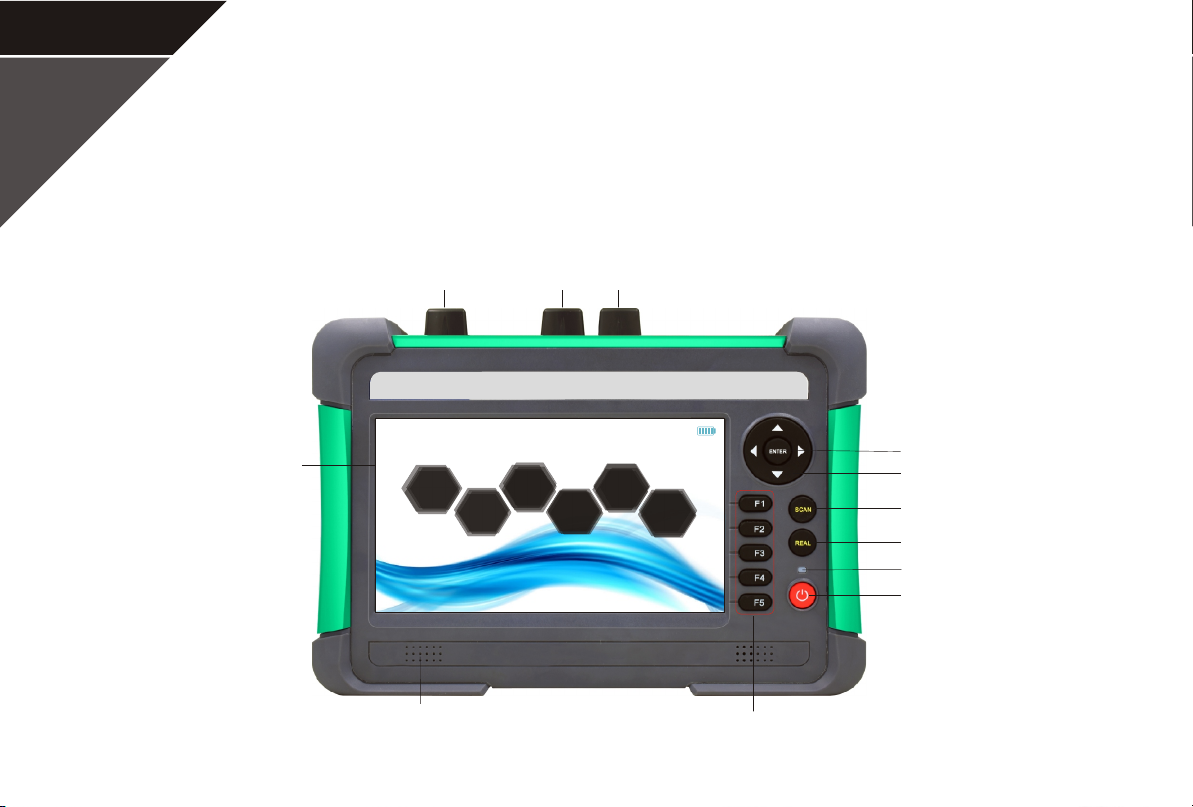
The device uses the module design, includes the host, battery module and function module for
customizing. The user's guide describes the use of OTDR, OPM, VFL, iOLA and VIP function modules
and detailed parameters.
Touched screen
Optic fiber
connector
OTDR
Beep
OPM
VFL
ca
i
t
Op
VFL
OPM
n
i
st
e
T
l
iOLA
m
or
f
t
la
P
g
100%
Confirm Button
VIP
System
Navigation Button
Average measure
Real-time measure
Power indicator
Power button
Function button
Page 5
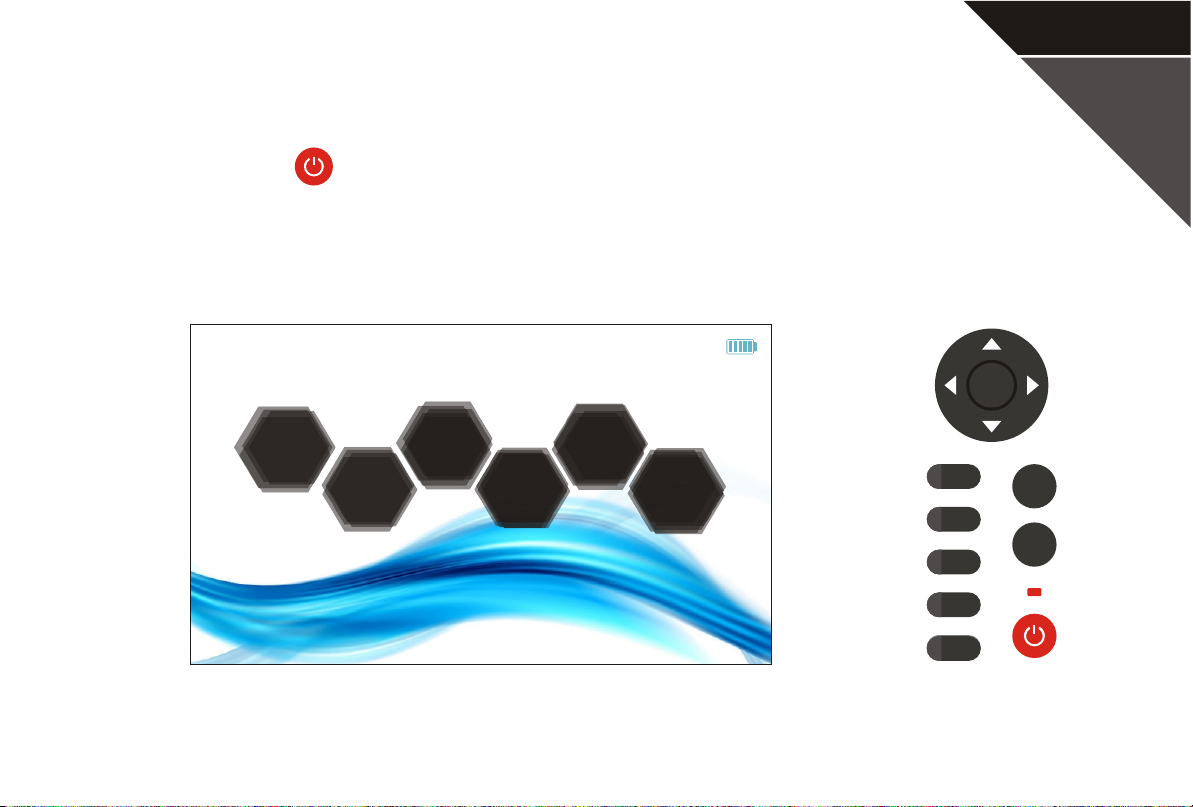
Power on/off
Press and hold " " button for 2 seconds to turn on the device, click on the required function to enter
the function interface.
100%
ENTER
P2
OTDR
OPM
VFL
iOLA
VIP
System
F1
F2
F3
F4
F5
F5
SCAN
REAL
Page 6
P3
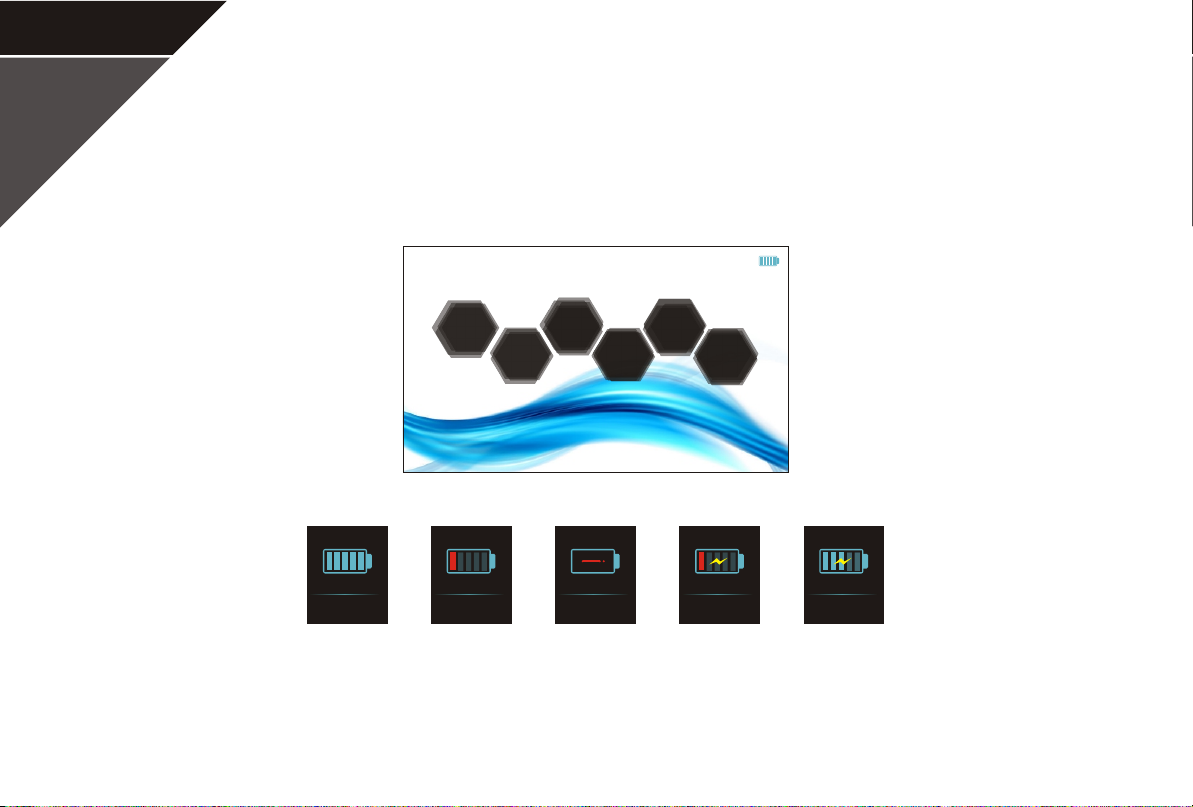
Battery information
The upper right corner of the interface is the battery status and power indication. It will show up
different colors in different status, just as followed. Also user can check the battery information in system
menu.
100%
OTDR
100% 20% 0% 15% 65%
Remain 100%
Remain less than
20%, displayed in
red icon
VFL
OPM
No battery
VIP
iOLA
Low battery, Connect
to charger,show up
charging
System
Charging, Connect
to charger, show up
charging
Page 7
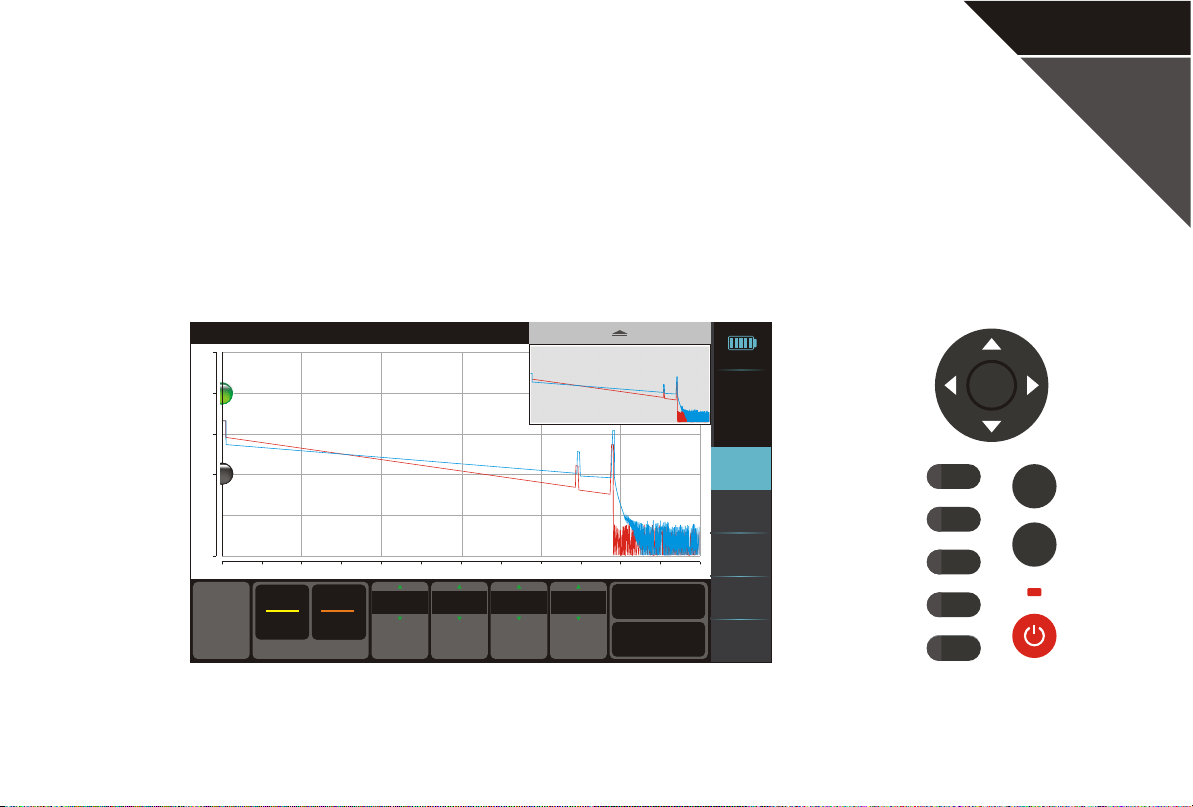
OTDR
Click on " OTDR " to enter the measurement interface. In OTDR measurement interface, press "SCAN"
or " REAL " button to the start optic fiber measurement work directly. User can insert two external storage
devices to our device, and it will show up the USB icons below the "date time" .
File name:
50
wavelength:1550nm range:60km pulse:2.5us
0.0000m
40
A
0.000dB
30
0.0000m
20
20
B
0.000dB
10
0
0 10,000 20,000
1310nm 1550nm
OTDR
Settings
Wavelength
60Km
Range
30,000
m
2.5us 30s
Pulse Time Mode
40,000 60.00050,000
Manual
Average
measure
Real-time
measure
100%
2017-01-01
21:35
Measure
settings
Events
Analyse
Save/File
Back to
menu
F1
F2
F3
F4
F5
F5
ENTER
SCAN
REAL
P4
Page 8
P5
OTDR
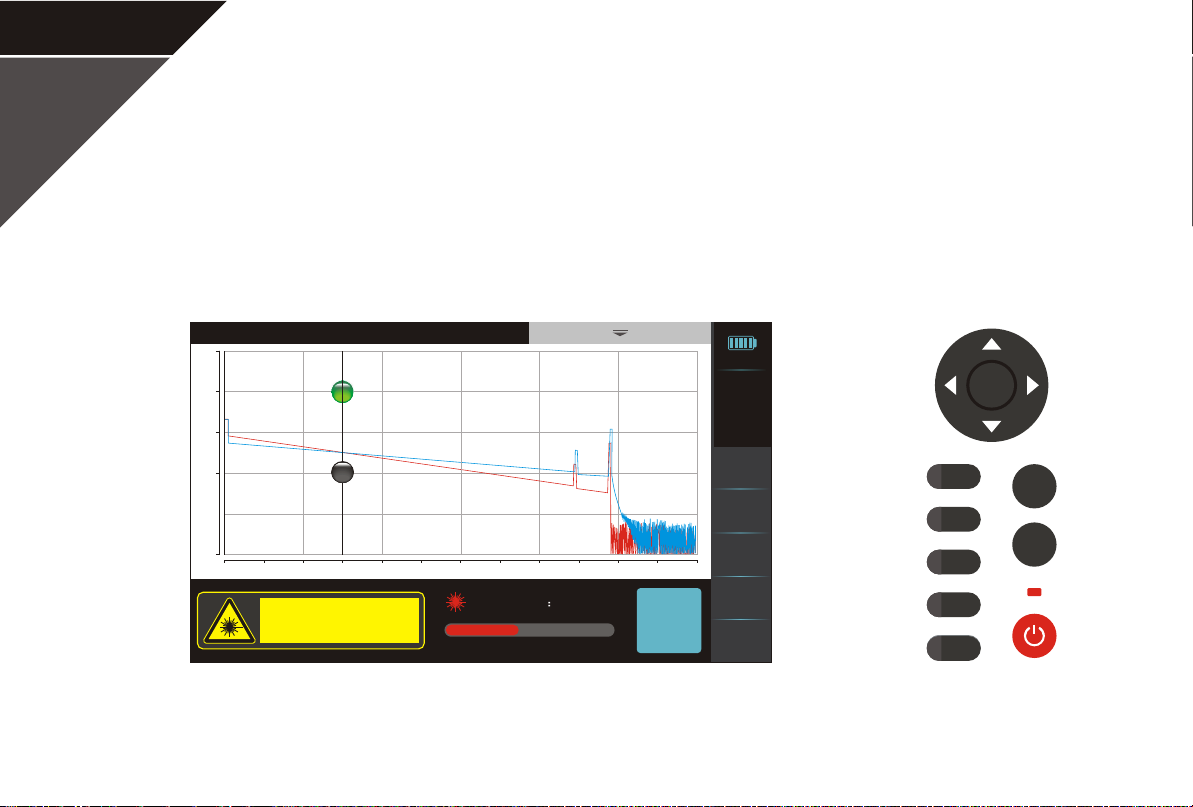
During optic fiber measuring, the information window will show the warning sign and the progress bar
of remaining time. During measuring, click on "Stop measuring" or press " SCAN " or " REAL " button to
stop at anytime.
File name:
50
wavelength:1550nm range:60km pulse:2.5us
40
30
20
10
0
0 10,000 20,000
IEC 60825-1:2007 21 CFR 1040.10
INVISIBLE LASER RADIATION DO NOT VIEW DIRECTLY
WITH OPTICAL INSTRUMENTS CLASS 1M LASER PRODUCT
800nm~1700nm, PW<20usec, P<600mW
20
A
B
15.0011km
25.225dB
15.0011km
25.225dB
30,000
m
40,000 60.000
time left 16s
50,000
Stop
measuring
100%
2017-01-01
21:35
Measure
settings
Events
Analyse
Save/File
Back to
menu
F1
F2
F3
F4
F5
F5
ENTER
SCAN
REAL
Page 9

OTDR-Storage device
Insert USB or TF CARDS to display the corresponding icon. And contain the corresponding options
when storing the path and file operation to save the file.
P6
100%
2017-01-01
21:35
Select
device
TF-Card
Choose a device
Internal
Quit
TF-Card USB
Page 10
P7
OTDR- Measure settings
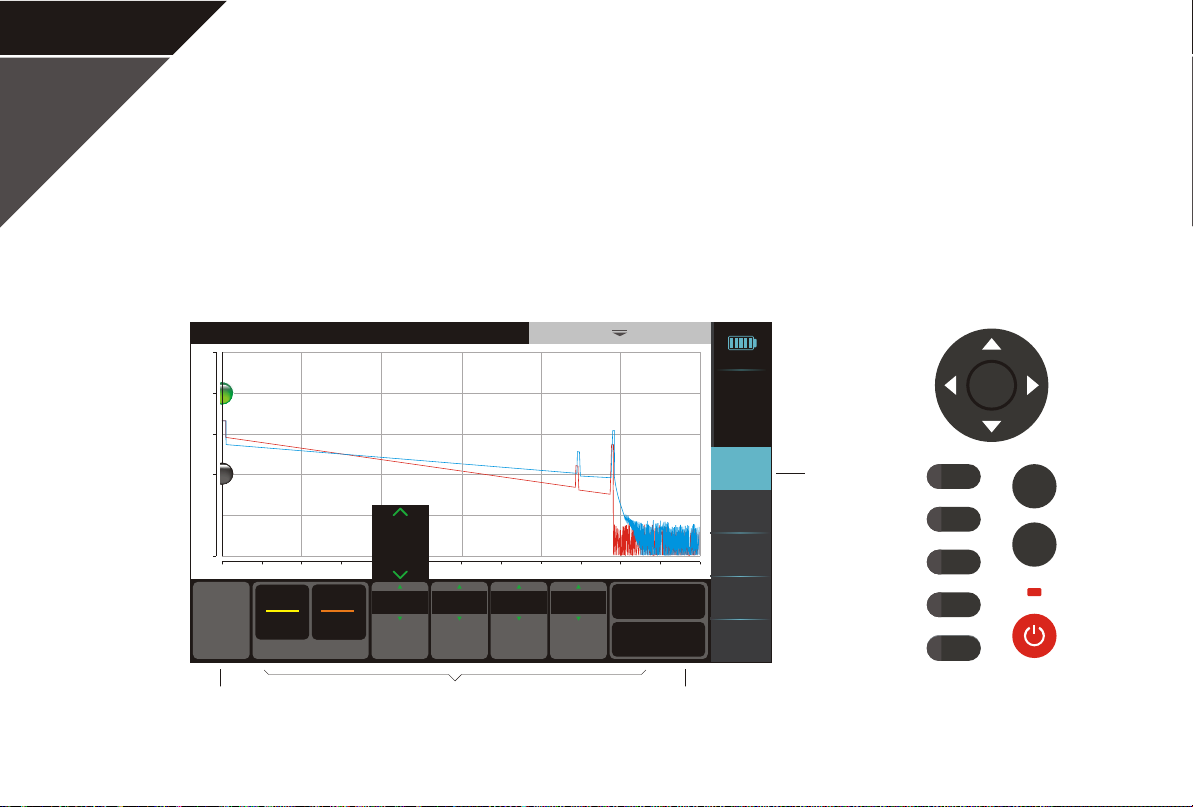
Click on " Measure settings" to enter the measurement interface, which shows the buttons of OTDR
settings, general settings and start measuring. User can select the mode to be manual or auto. Under
manual mode, users can set the range, pulse and time by themself. User can select the wavelength
measured, default are yellow 1310nm and orange 1550nm.
File name:
50
wavelength:1550nm range:60km pulse:2.5us
0.0000m
40
A
0.000dB
30
0.0000m
20
20
B
0.000dB
10
0
0 10,000 20,000
1310nm 1550nm
OTDR
Settings
Wavelength
80Km
60Km
40Km
60Km
Range
30,000
m
2.5us 30s
Pulse Time Mode
40,000 60.00050,000
Manual
Average
measure
Real-time
measure
100%
2017-01-01
21:35
Measure
settings
Events
Analyse
Save/File
Back to
menu
Measure
settings
F1
F2
F3
F4
F5
F5
ENTER
SCAN
REAL
OTDR settings Start measuringGeneral settings
Page 11
OTDR-Average measure
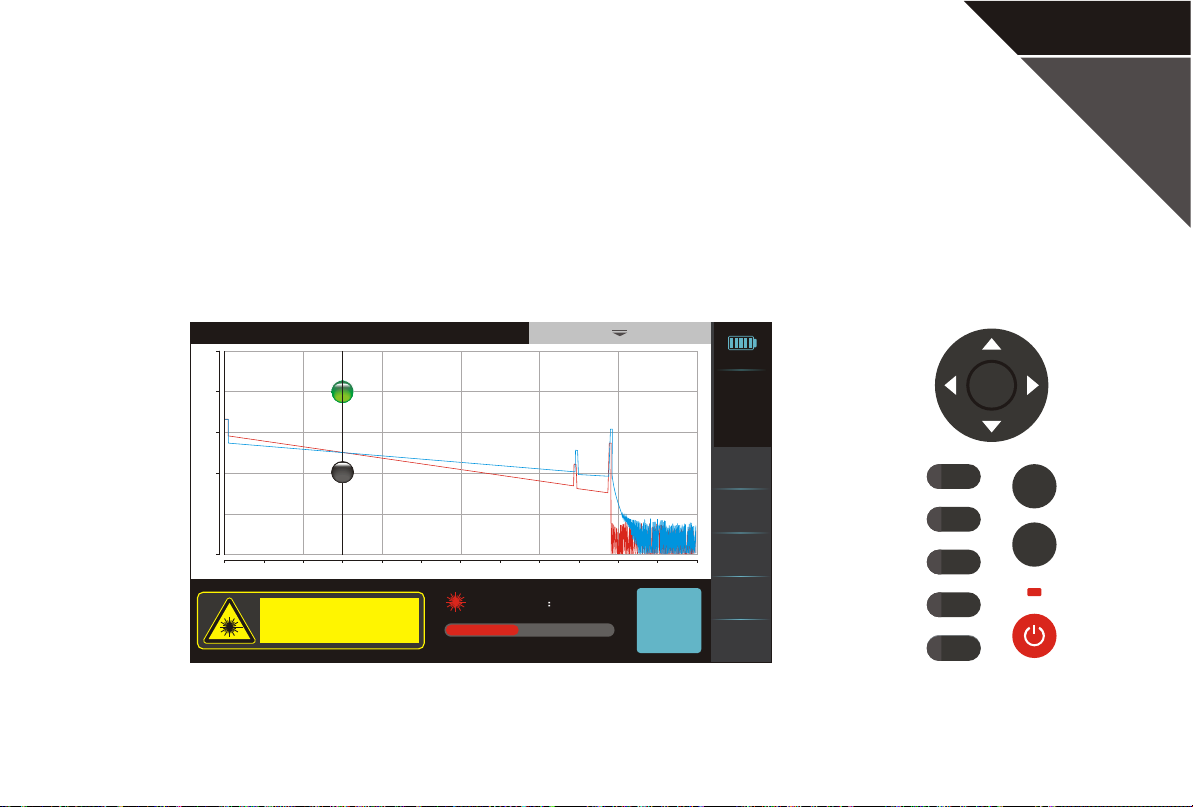
Click on "Average measure" button or press "SCAN" button to enter the average measure interface.
During measuring, click on "Stop measuring" or press " SCAN " or " REAL " button to stop at anytime. The
average measure can measure two wavelengths at the same time.
File name:
50
wavelength:1550nm range:60km pulse:2.5us
40
30
20
10
0
0 10,000 20,000
IEC 60825-1:2007 21 CFR 1040.10
INVISIBLE LASER RADIATION DO NOT VIEW DIRECTLY
WITH OPTICAL INSTRUMENTS CLASS 1M LASER PRODUCT
800nm~1700nm, PW<20usec, P<600mW
20
A
B
15.0011km
25.225dB
15.0011km
25.225dB
30,000
m
40,000 60.000
time left 16s
50,000
Stop
measuring
100%
2017-01-01
21:35
Measure
settings
Events
Analyse
Save/File
Back to
menu
F1
F2
F3
F4
F5
F5
ENTER
SCAN
REAL
P8
Page 12
P9
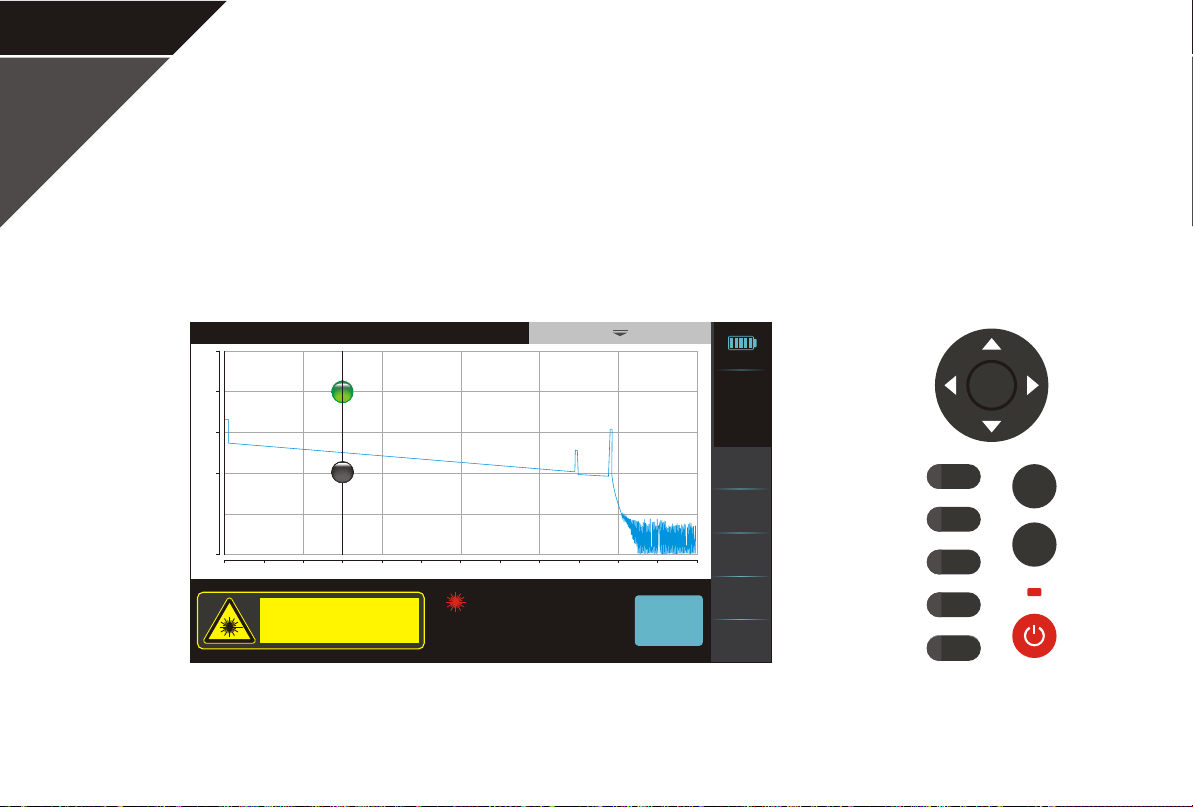
OTDR-Real-time measure
Click on "Real-time measure" button or press "REAL" button to enter the real-time measure interface.
User can press navigation button up and down keys to increase or decrease the range, and click on "Stop
measuring" or press " SCAN " or " REAL " button to stop at anytime. Real-time measurement can only
measure one wavelength at a time.
File name:
50
wavelength:1550nm range:60km pulse:2.5us
40
30
20
10
0
0 10,000 20,000
IEC 60825-1:2007 21 CFR 1040.10
INVISIBLE LASER RADIATION DO NOT VIEW DIRECTLY
WITH OPTICAL INSTRUMENTS CLASS 1M LASER PRODUCT
800nm~1700nm, PW<20usec, P<600mW
20
A
B
15.0011km
25.225dB
15.0011km
25.225dB
30,000
m
40,000 60.000
50,000
Stop
measuring
100%
2017-01-01
21:35
Measure
settings
Events
Analyse
Save/File
Back to
menu
F1
F2
F3
F4
F5
F5
ENTER
SCAN
REAL
Page 13
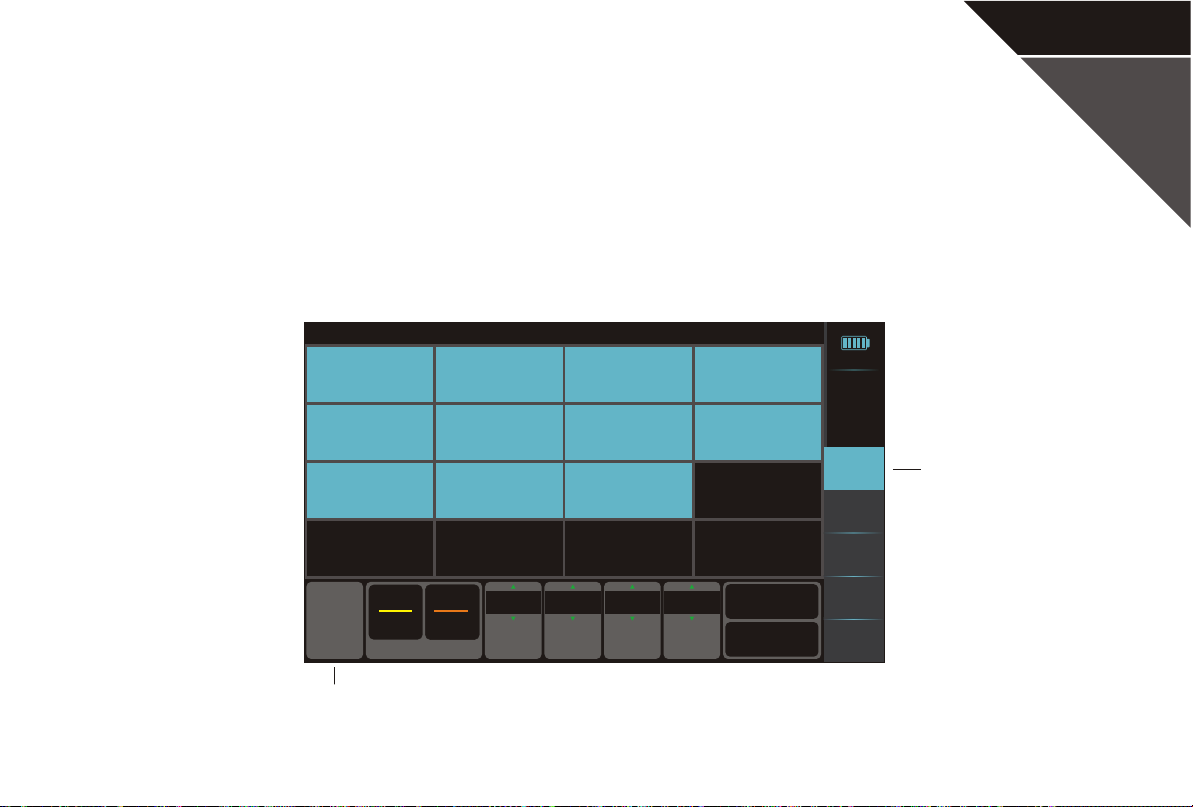
OTDR- OTDR Settings
Click on "OTDR Settings" to show the OTDR settings menu. There are 10 options in the menu, and
click on each one can set the parameters. Click on "Confirm and exit" to save the changes. Click on
"Restore" to restore system defaults. After finishing setting, click on "OTDR Settings" again to quit.
OTDR Settings
Reflection threshold
65.0dB
Refractive rate
Sampling resolution
Standard
End threshold
3.0dB
Real-time analyse
Off
International units
m
Splice loss
0.05
Optical detect
On
Version
S_OTDR_V0.0.0
Scatter coefficient
Fiber section detect
Off
100%
2017-01-01
21:35
Measure
settings
Events
Analyse
Measure
settings
P10
OTDR
Settings
OTDR settings
1310nm 1550nm
Wavelength
60Km
Range
2.5us 30s
Pulse Time Mode
Manual
Average
measure
Real-time
measure
Save/File
Back to
menu
Page 14

P11
OTDR- OTDR settings
Reflection threshold
65.0dB
Splice loss
0.05
Refractive rate
Optical detect
On
Sampling resolution
Standard
Version
S_OTDR_V0.0.0
Treat as an event when the reflection is higher than
setting value.
Treat as an event when the loss is higher than setting
value.
Set the optic fiber's refractive rate for each wavelength,
which can improve the measurement accuracy.
Detect whether signal in fiber or not.
Display the sampling resolution.
Display the version.
End threshold
3.0dB
Scatter coefficient
Real-time analyse
Off
Fiber section detect
Off
International units
m
Treat as the end of optic fiber when the loss is higher
than setting value.
The intrinsic value of Rayleigh Scattering.
Set whether analyses events after real-time measuring
or not.
Detect the quality of the connector. The device will
remind user if in poor quality.
Select the international units in m, Km and Kft.
Page 15
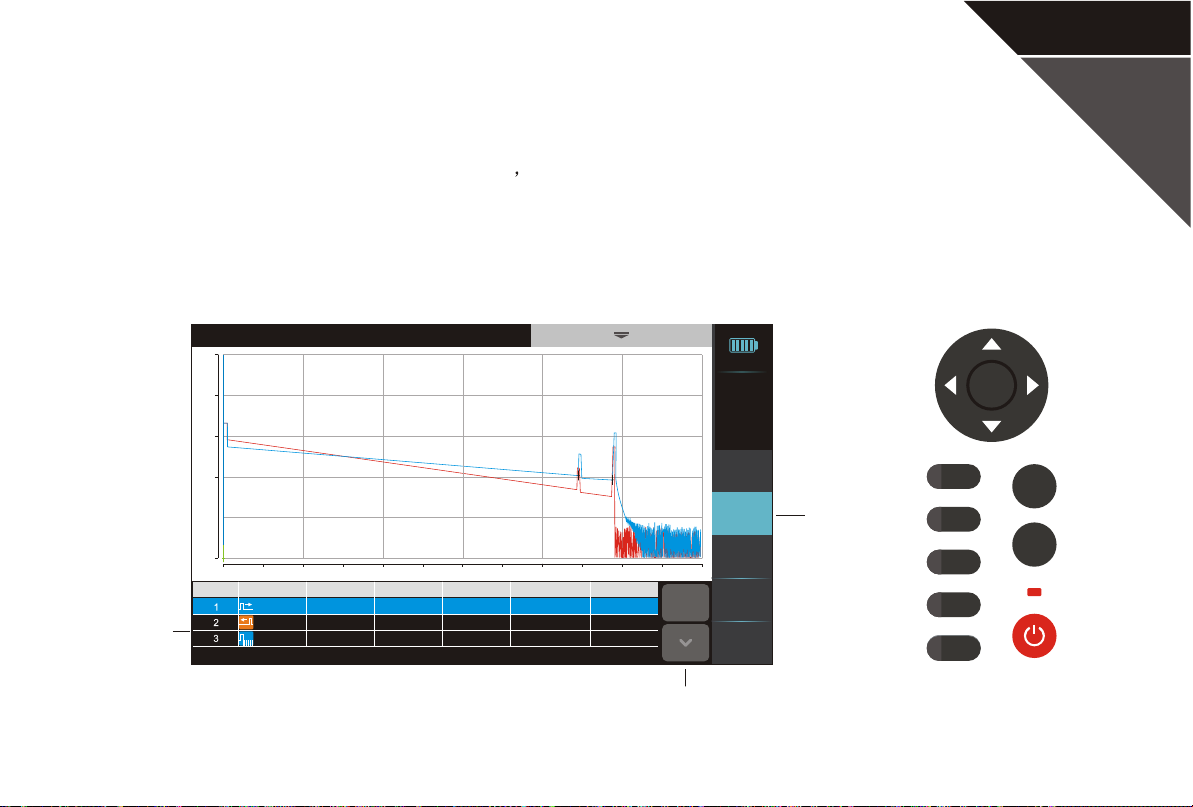
OTDR- Events
Click on "Events" to show the events list One page shows four event log. Click on the select buttons
or slide in the events list area to turn the page up/down. If the arrow to the select button disappears, it
means that there are no more events in that direction. Click on each event, the marker will locate to the
record automatically.
File name:
50
Information bar
wavelength:1550nm range:60km pulse:2.5us
40
30
20
10
0
0 10,000 20,000
Type Dist.(km) Loss(dB) Ref.(dB) Atten.(dB/Km)
NO.
Start
Reflect
End
0.000 0.00
44.626 0.66 0.18-36.08
48.617
--.--
30,000
m
-34.04
40,000
--.--
0.18 8.75-20.95
50,000
C.loss(dB)
0.00
8.03
60.000
100%
2017-01-01
21:35
Measure
settings
Events
Analyse
Save/File
Back to
menu
Events list
F1
F2
F3
F4
F5
F5
ENTER
SCAN
REAL
P12
Select buttons
Page 16
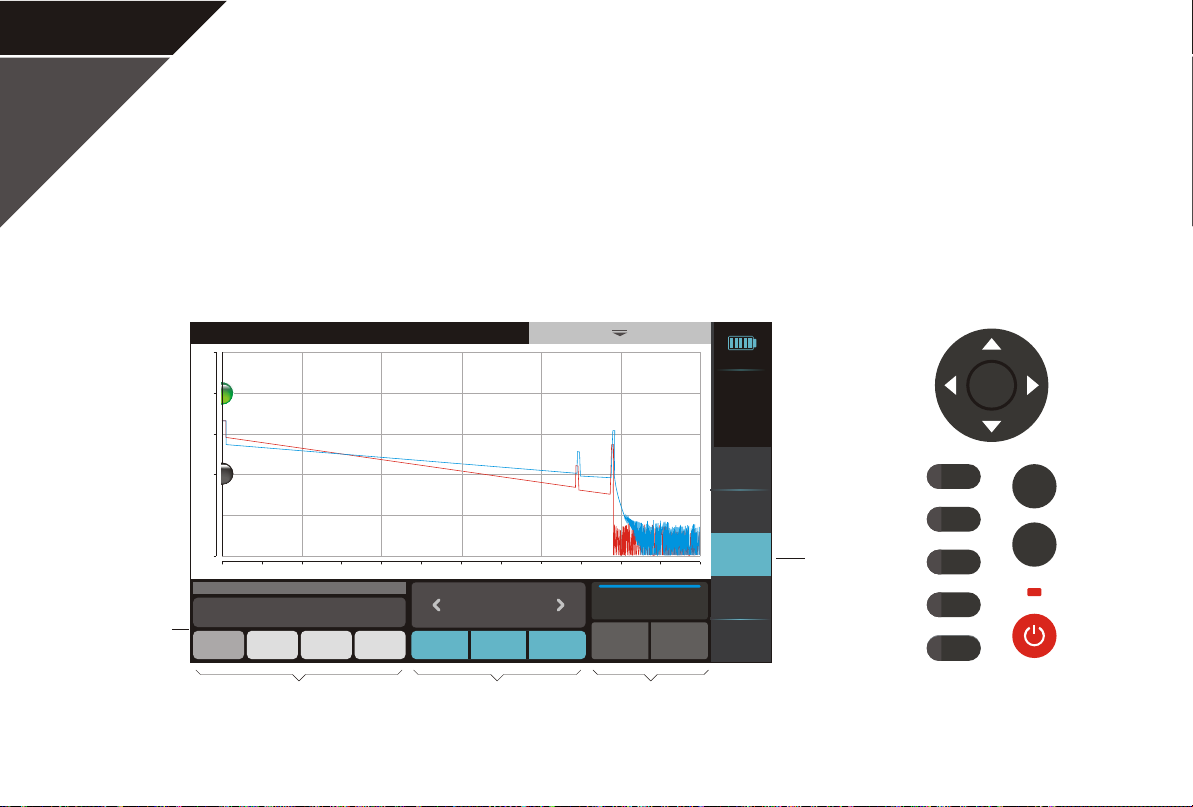
P13
OTDR- Analyse
Click on "Analyse" to show the waveform analyse. This function can analyze the problem which is
difficult to find in the auto measurement mode. It includes analyse of the type and result, marker control
and waveform control.
File name:
50
Information bar
wavelength:1550nm range:60km pulse:2.5us
0.0000m
40
A
0.000dB
30
0.0000m
20
20
B
0.000dB
10
0
0 10,000 20,000
-- dB -- dB
4 points event loss
Attenuation
Loss
0.0000dBB-A=0.0000km
A-B LSA loss
Reflectance
ORL
Markers
centered
30,000
m
Select marker
A
Hide
markers
40,000 60.00050,000
Blue curve
Markers
reposition
Replace
Hide
100%
2017-01-01
21:35
Measure
settings
Events
Analyse
Save/File
Back to
menu
Waveform
analyse
F1
F2
F3
F4
F5
F5
ENTER
SCAN
REAL
Analyse of the type and result Marker control Waveform control
Page 17
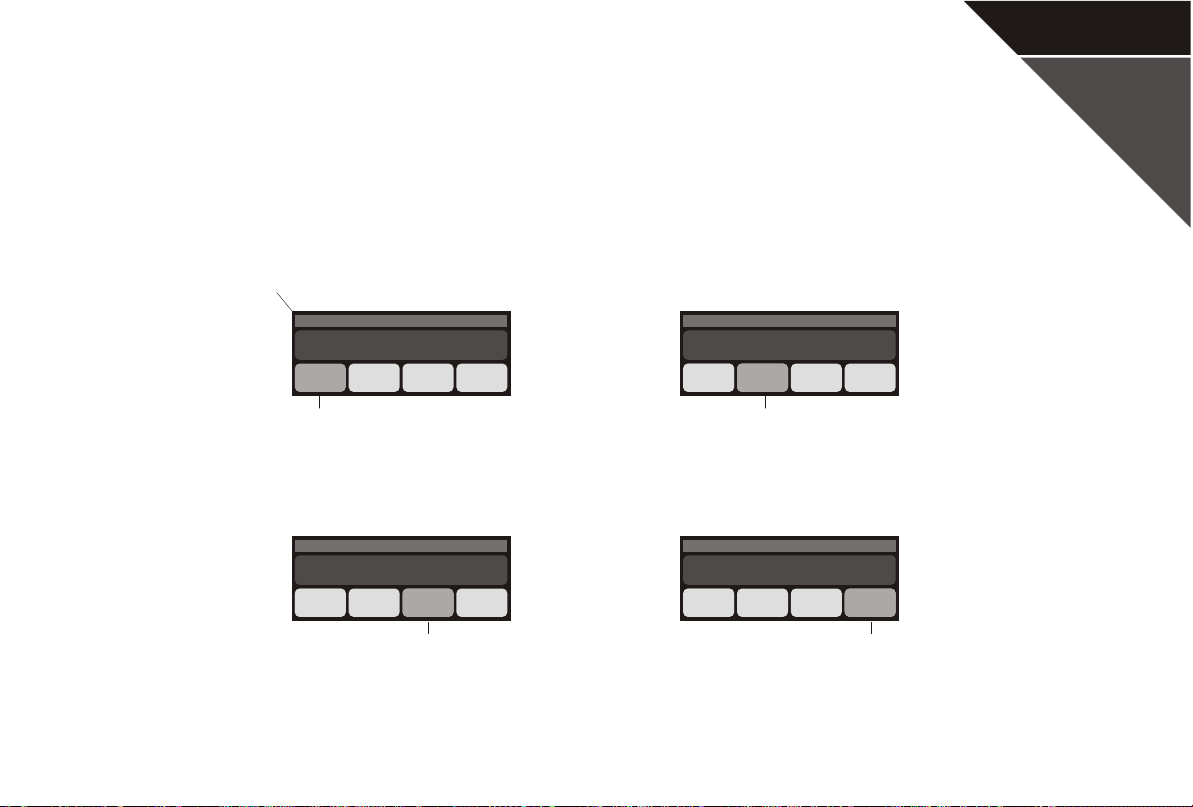
OTDR- Analyse- Analyse of the type and result
Analyse of the type and result shows the distance difference and power difference between marker A
and B.
The distance and attenuation between marker A and B
P14
-- dB -- dB
4 points event loss
Attenuation
Loss
4 points event loss: marker a, A, b and B in 4 points
algorithm. Move the markers appropriately, the
difference between the LSA value in "a, A" and
"b, B" can be used to judge the loss more accurately.
A-B LSA loss: marker A and B in 2 points algorithm.
Calculate the difference between A and B by the LSA
slope.
Attenuation
Loss
Reflectance: marker a, A and B in 3 points algorithm.
Set "a, A" in the flat position before reflection and set
B in the highest point of reflection to show the
reflectance value.
0.0000dBB-A=0.0000km
A-B LSA loss
Reflectance
-- dB
Reflectance
Reflectance
ORL
0.0000dBB-A=0.0000km 0.0000dBB-A=0.0000km
ORL
-- dB -- dB
2 points attenuation
Attenuation
Loss
2 points attenuation: calculate the real attenuation between
marker A and B, then unitized to the loss per kilometer, which
makes the noise interference larger.
A-B LSA attenuation: obtained after calculating the LSA
slope between marker A and B, and the attenuation is
relatively stable.
-- dB -- dB
Total ORL A-B ORL
Attenuation
Loss
0.0000dBB-A=0.0000km
A-B LSA attenuation
Reflectance
Reflectance
ORL
ORL
A-B ORL: the ORL value between marker A and B,
Total ORL: the ORL value in the entire circuit.
Page 18
P15
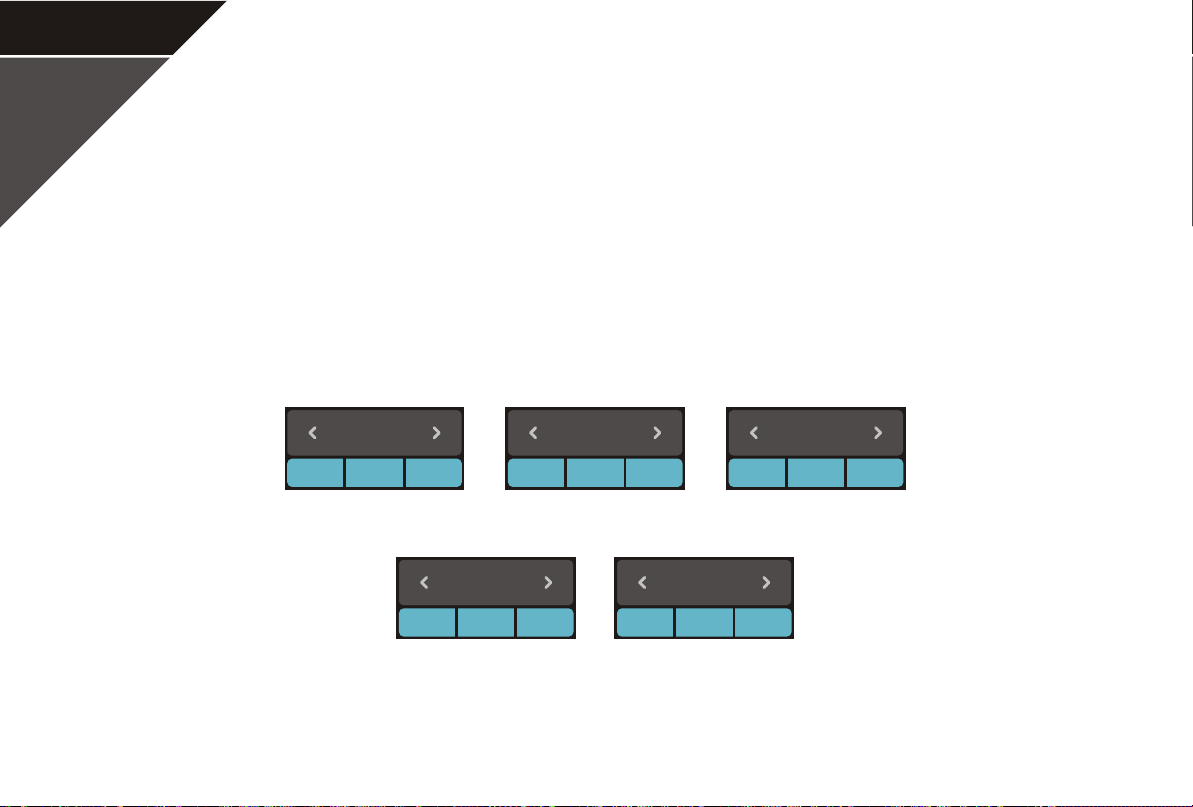
OTDR- Analyse- Marker control
According to the option of analyse of the type and result, user can select different markers by clicking
on "Select marker".
Markers centered--- locate the markers in the middle of the waveform region.
Hide markers--- hide/display all the markers.
Markers reposition--- locate the markers to the zero position.
Markers
centered
Select market
a
Hide
markers
Markers
reposition
Markers
centered
B
Hide
markers
Select market Select market
A
Markers
centered
Markers
reposition
Hide
markers
Markers
reposition
Markers
centered
Select marketSelect market
AB
Hide
markers
Markers
centered
Markers
reposition
b
Hide
markers
Markers
reposition
Page 19
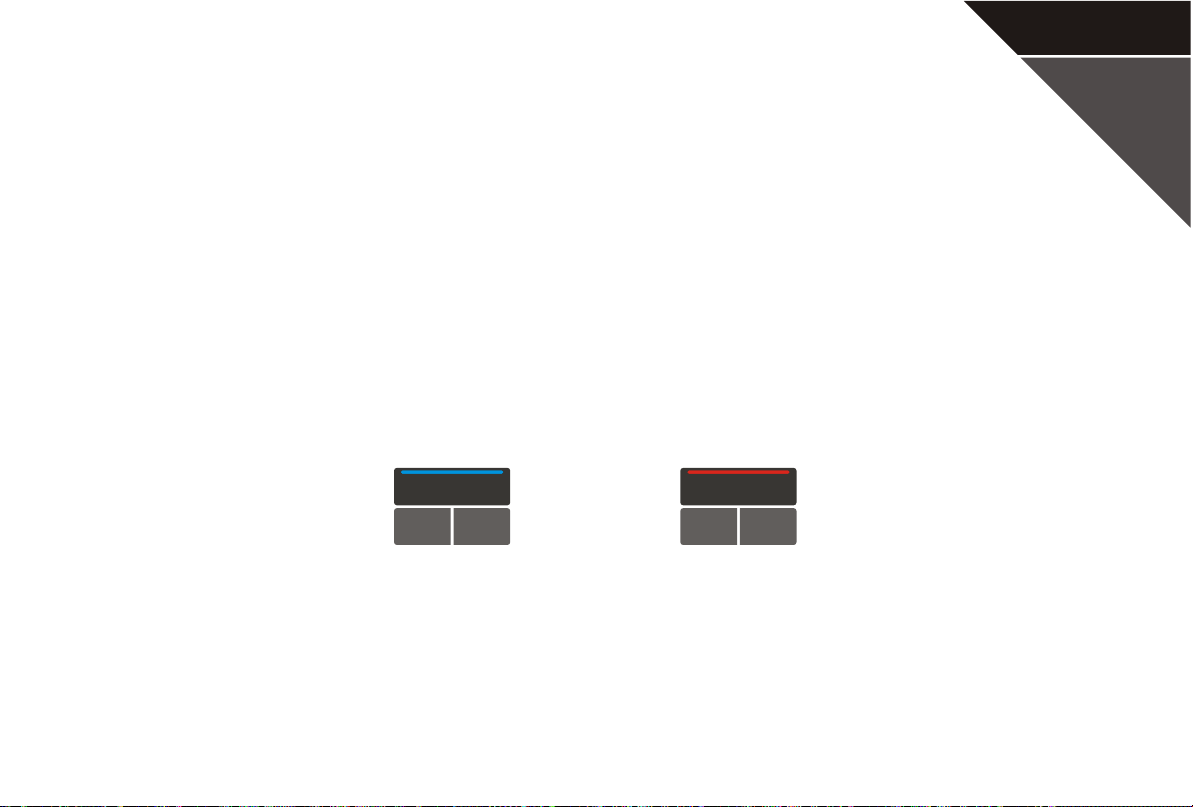
OTDR- Analyse- Waveform control
OTDR can display the double curves for user to contrast and analysis.
Replace--- replace the selected curve.
Hide--- hide the selected curve.
P16
Blue curve
Replace Replace
Hide Hide
Red curve
Page 20
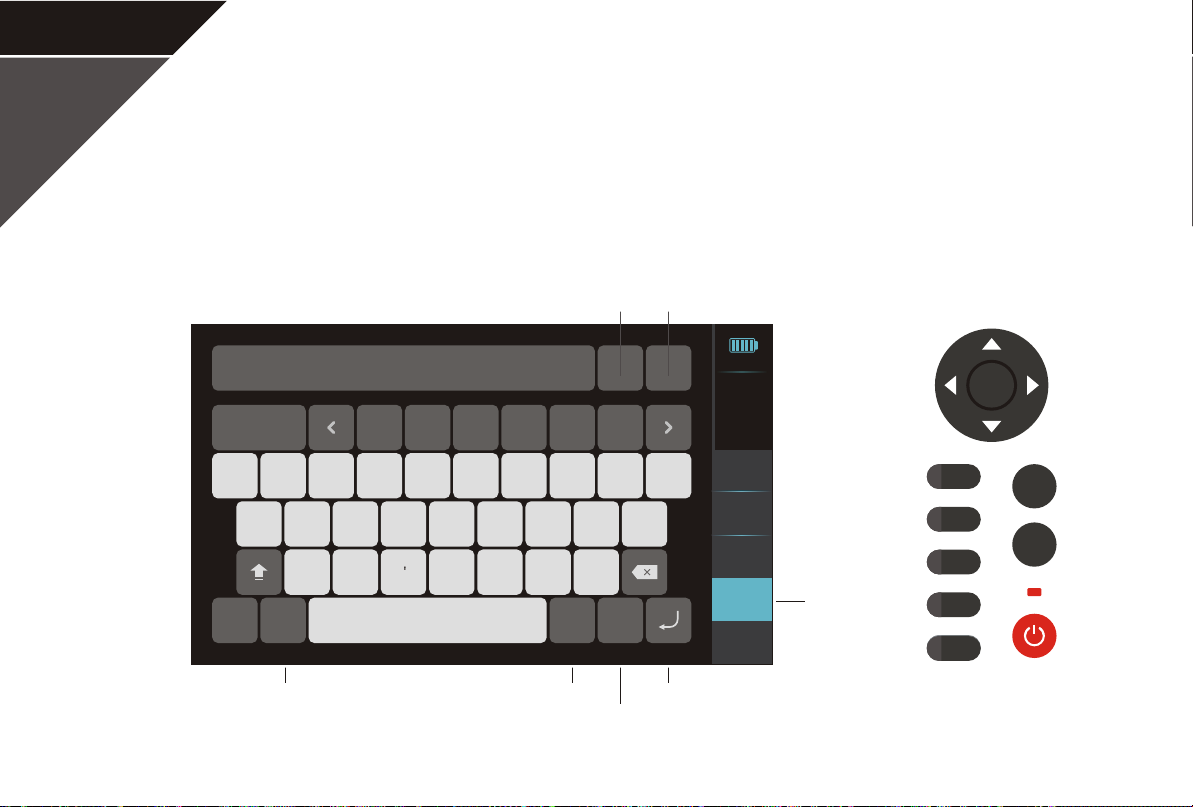
P17
OTDR- Save/File-Save
After measuring, click on "Save/File" to enter the save interface. The user needs to insert the USB
external storage device in advance. User can set the auto name function to be on/off and select the save
path. The longest filename can be 40 characters.
Save format Cancel and quit button
5_0001
3
1
123
2
@
!
:
EN
4
%
#
;
Space
Language and symbolic input keyboard
ESC
.SOR
5
*
,
6
7
( )
. ?
8 9 0
-
/
Auto name
Save path
On
Internal
+
100%
2017-01-01
21:35
Measure
settings
Events
Analyse
Save/File
Back to
menu
Save/File
F1
F2
F3
F4
F5
F5
ENTER
SCAN
REAL
Confirm buttonAuto name
Modify save path
Page 21
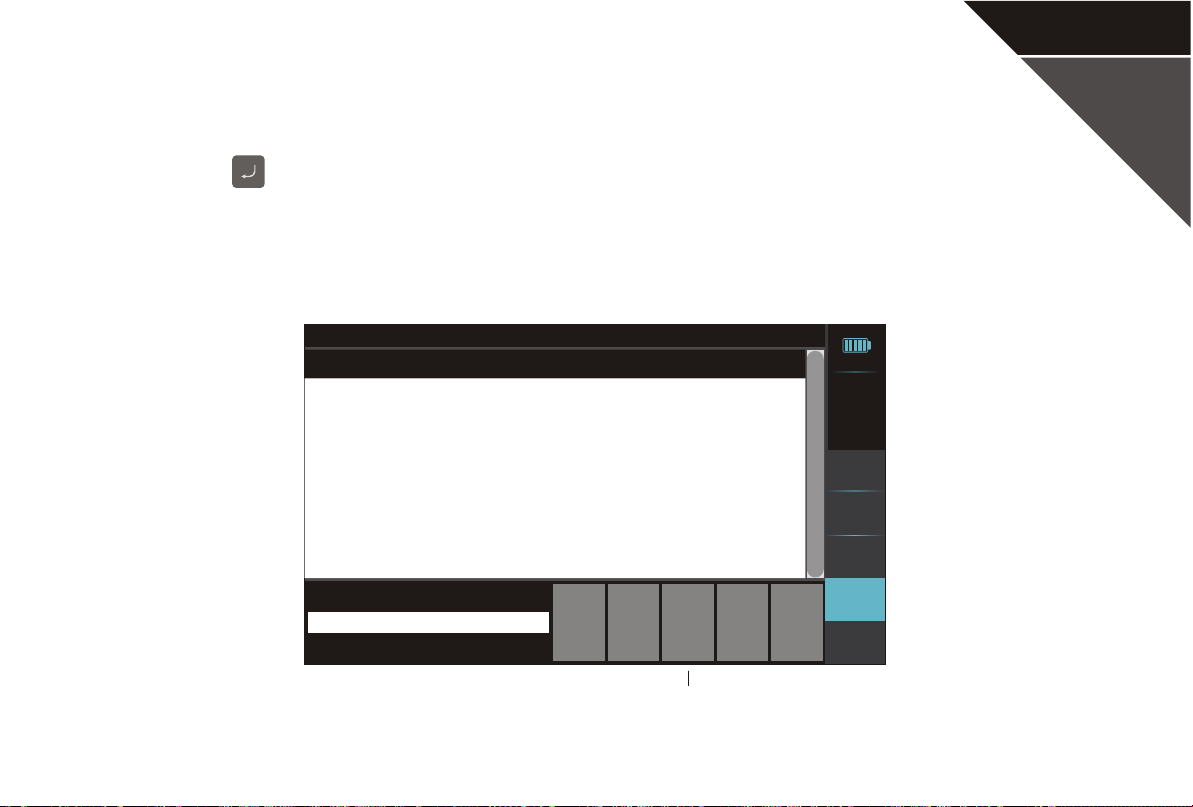
OTDR- Save/File-Save
Click on " " to enter the save settings interface after the file name is entered . Click on "Save" to
confirm and exit.
Internal/20170101
100%
2017-01-01
21:35
Measure
settings
Events
Analyse
Save/File
Back to
menu
5_0001.sor
File name
Open
Create
new folder
Date Modified
Save
Quit
Size
Return to
previous
P18
Save File
Page 22
P19
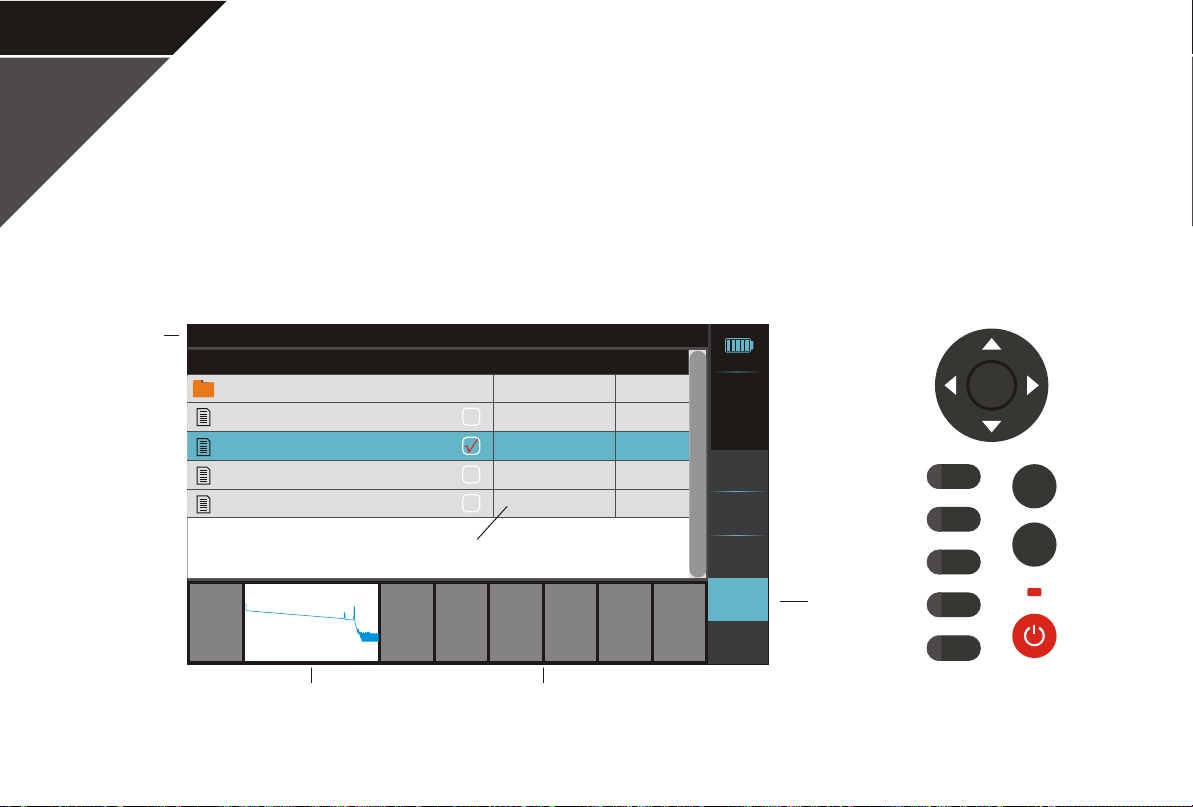
OTDR- Save/File
Without new measurement, click on "Save/File" show the file menu. Slide the screen up/down to browse
the files, double click to enter the folder or open one file. When a file be chosen, it will show up the file
thumbnail at the bottom of the screen. Files can be selected multiply for file operation.
File path
Internal/20170101
File name
5868868
5_0001[1310nm 2.5us].sor
5_0002[1550nm 2.5us].sor
8_0001[1310nm 2.5us].sor
8_0002[1550nm 2.5us].sor
2017-01-01 08:59:55
2017-01-01 10:53:55
2017-01-01 11:10:21
2017-01-01 12:59:55
2017-01-01 23:33:25
Check box
Storage
device
Delete
1550nm 60km 2.5us
Rename
Create
new folder
Thumbnail of the file Function buttons
Date Modified
Save as
Quit
Size
85Kb
85Kb
66Kb
14Kb
Return to
previous
100%
2017-01-01
21:35
Measure
settings
Events
Analyse
Save/File
Back to
menu
Save/File
F1
F2
F3
F4
F5
F5
ENTER
SCAN
REAL
Page 23
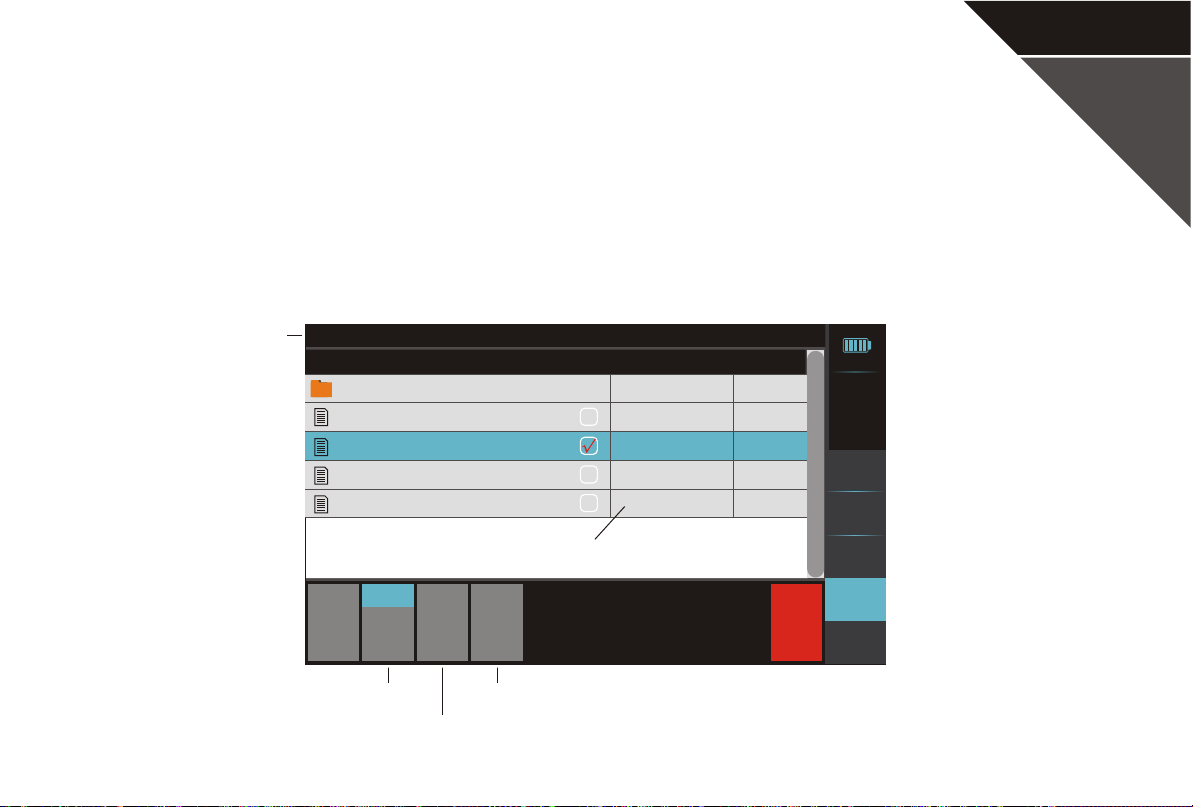
OTDR- Save/File- Storage device
Click on "Storage device" and choose the storage device. Click on "Confirm and exit" or "File operate"
to confirm and exit. Set the path will still save after shutdown.
P20
File path
Internal
5868868
5_0001[1310nm 2.5us].sor
5_0002[1550nm 2.5us].sor
8_0001[1310nm 2.5us].sor
8_0002[1550nm 2.5us].sor
Storage
device
File
Internal
operate
File name
Set to
default path
Confirm
and exit
Choose storage device Confirm and exit
Set to default path
Check box
Date Modified
2017-01-01 08:59:55
2017-01-01 10:53:55
2017-01-01 11:10:21
2017-01-01 12:59:55
2017-01-01 23:33:25
Size
85Kb
85Kb
66Kb
14Kb
Formatting
100%
2017-01-01
21:35
Measure
settings
Events
Analyse
Save/File
Back to
menu
Page 24
P21
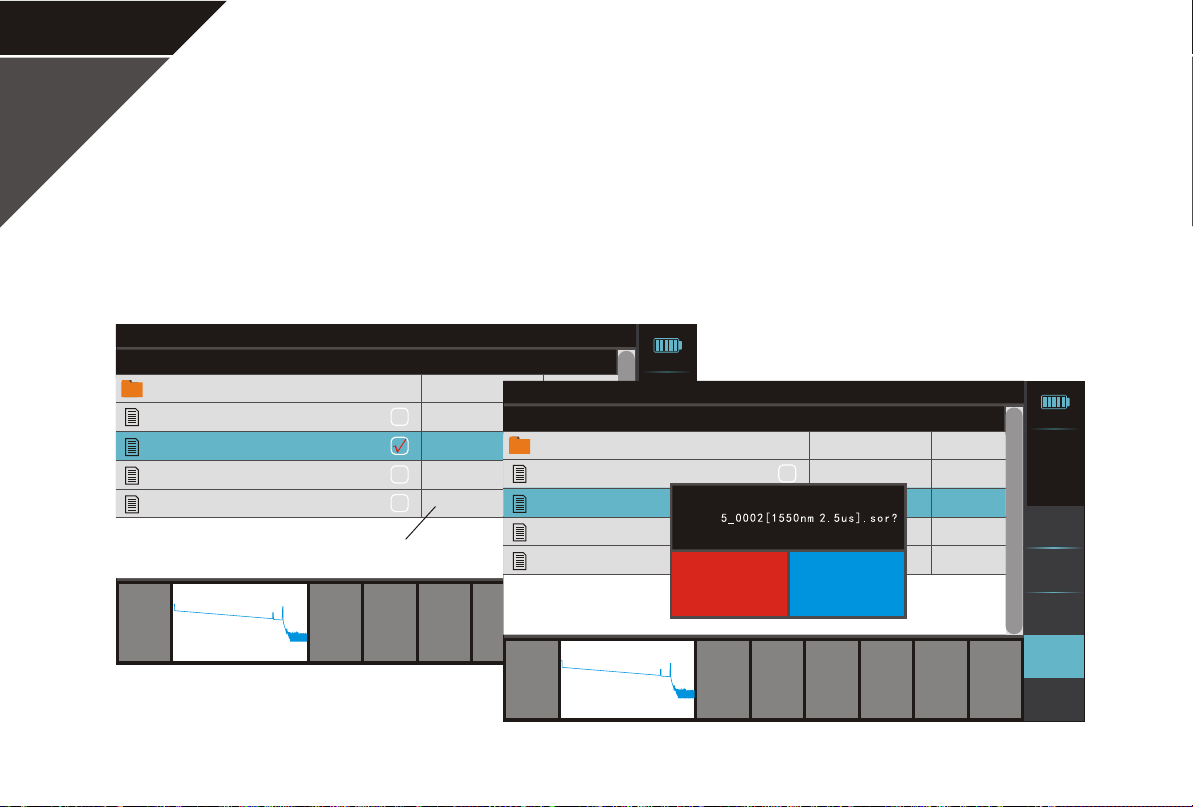
OTDR- Save/File- Delete
Select the file and click on "Delete", there will be deleting confirm box, click on "Confirm" will
delete the selected file. File can be multi-selected, the folder can only be single-selected.
Internal/20170101
5868868
5_0001[1310nm 2.5us].sor
5_0002[1550nm 2.5us].sor
8_0001[1310nm 2.5us].sor
8_0002[1550nm 2.5us].sor
Storage
device
File name
1550nm 60km 2.5us
Check box
Delete
Rename
Date Modified
2017-01-01 08:59:55
2017-01-01 10:53:55
2017-01-01 11:10:21
2017-01-01 12:59:55
2017-01-01 23:33:25
Create
new folder
Save as
Size
Internal/20170101
85Kb
5868868
85Kb
5_0001[1310nm 2.5us].sor
66Kb
5_0002[1550nm 2.5us].sor
14Kb
8_0001[1310nm 2.5us].sor
8_0002[1550nm 2.5us].sor
Return to
Quit
previous
Storage
device
1550nm 60km 2.5us
2017-01-01
File name
Measure
settings
Analyse
Save/File
100%
21:35
Events
Delete
Confirm Cancel
Check box
Back to
menu
Delete
Rename
Date Modified
2017-01-01 08:59:55
2017-01-01 10:53:55
2017-01-01 11:10:21
2017-01-01 12:59:55
2017-01-01 23:33:25
Create
new folder
Save as
Quit
Size
85Kb
85Kb
66Kb
14Kb
Return to
previous
100%
2017-01-01
21:35
Measure
settings
Events
Analyse
Save/File
Back to
menu
Page 25
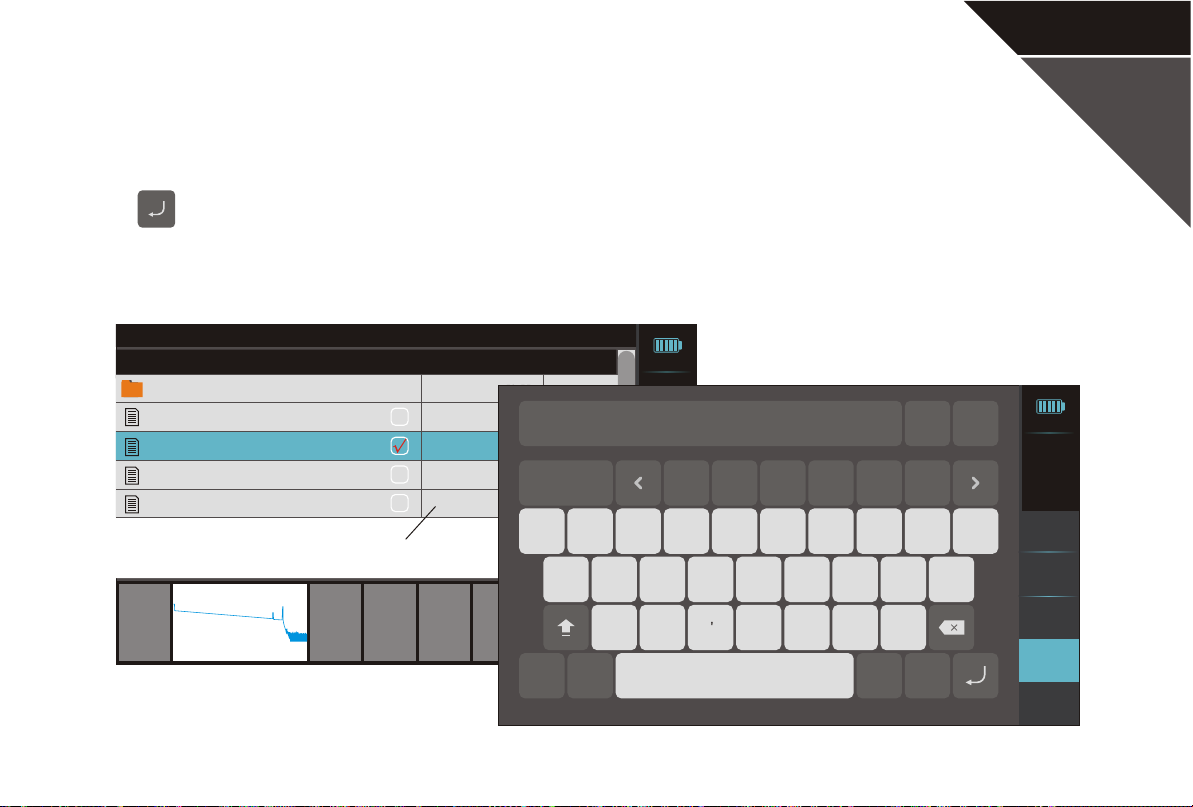
OTDR- Save/File- Rename
Select a file or a folder and click on "Rename" to enter the rename operation interface. User can click
on " " to save.
Internal/20170101
:
100%
2017-01-01
21:35
Measure
settings
Events
3
Analyse
#
Save/File
;
Back to
menu
4
5
%
Space
ESC
.SOR
7
6
( )
*
,
. ?
8 9 0
_
+
/
100%
2017-01-01
21:35
Measure
settings
Events
Analyse
Save/File
Back to
menu
5868868
5_0001[1310nm 2.5us].sor
5_0002[1550nm 2.5us].sor
8_0001[1310nm 2.5us].sor
8_0002[1550nm 2.5us].sor
Storage
device
File name
1550nm 60km 2.5us
Check box
Delete
Rename
Date Modified
2017-01-01 08:59:55
2017-01-01 10:53:55
2017-01-01 11:10:21
2017-01-01 12:59:55
2017-01-01 23:33:25
Create
new folder
Save as
Size
85Kb
5_0001[1550nm 2.5us]
85Kb
66Kb
14Kb
2
1
@
!
Return to
Quit
previous
123
EN
P22
Page 26
P23
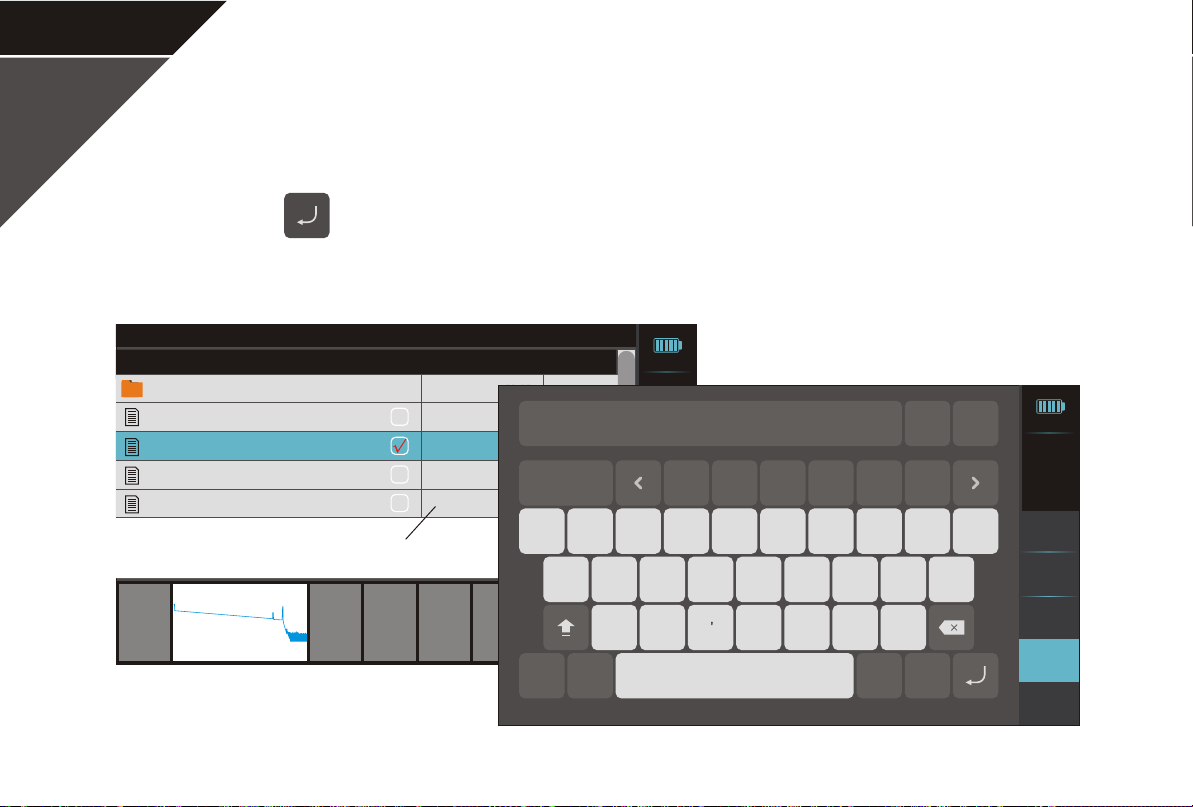
OTDR- Save/File- Create new folder
Select a hierarchy and click on "Create a new folder" to create a new folder. User can input the folder
name and click on " " to finish creating.
Internal/20170101
:
100%
2017-01-01
21:35
Measure
settings
Events
3
Analyse
#
Save/File
;
Back to
menu
4
5
%
Space
Folder
ESC
7
6
( )
*
,
. ?
8 9 0
_
+
/
5868868
5_0001[1310nm 2.5us].sor
5_0002[1550nm 2.5us].sor
8_0001[1310nm 2.5us].sor
8_0002[1550nm 2.5us].sor
Storage
device
File name
1550nm 60km 2.5us
Check box
Delete
Rename
Date Modified
2017-01-01 08:59:55
2017-01-01 10:53:55
2017-01-01 11:10:21
2017-01-01 12:59:55
2017-01-01 23:33:25
Create
new folder
Save as
1
123
Quit
Size
85Kb
85Kb
66Kb
14Kb
!
2
Return to
previous
EN
@
100%
2017-01-01
21:35
Measure
settings
Events
Analyse
Save/File
Back to
menu
Page 27
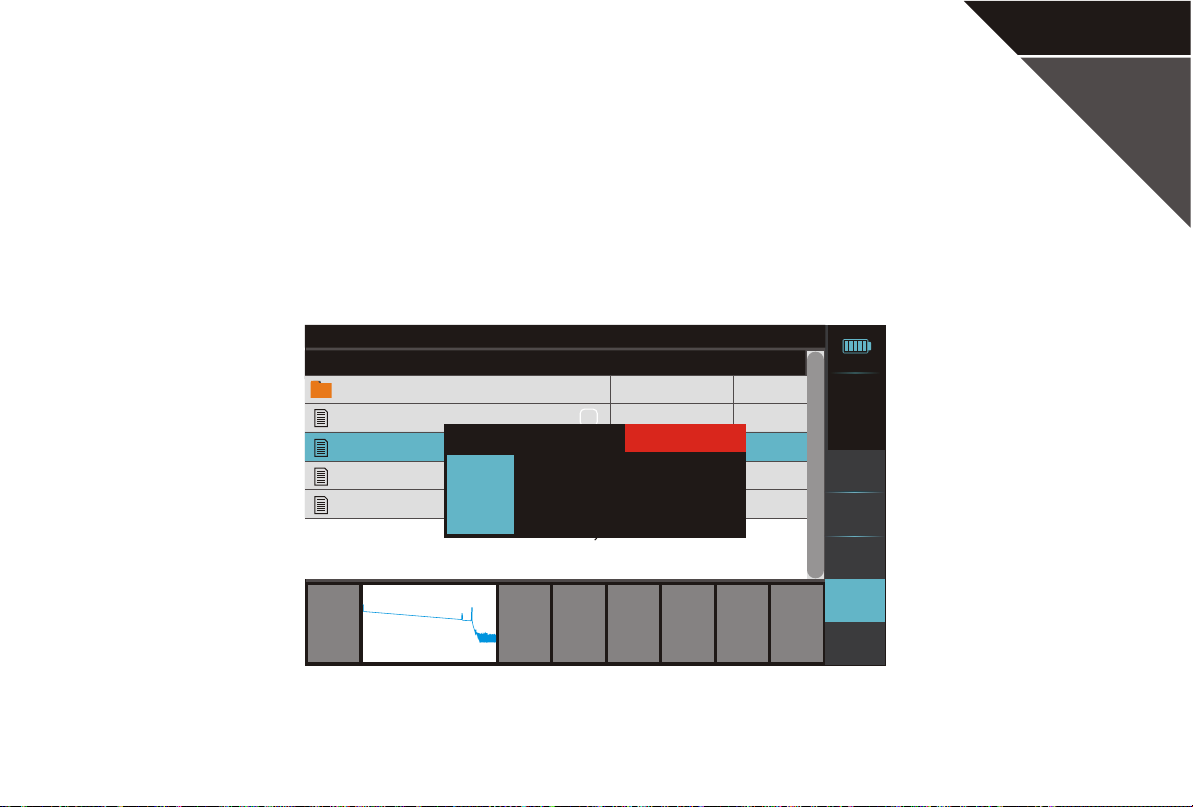
OTDR- Save/File- Save as
Select some files or a folder and click on "Save as" to save the files into the current storage device or
others.
Internal/20170101
100%
2017-01-01
21:35
Measure
settings
Events
Analyse
Save/File
Back to
menu
5868868
5_0001[1310nm 2.5us].sor
5_0002[1550nm 2.5us].sor
8_0001[1310nm 2.5us].sor
8_0002[1550nm 2.5us].sor
Storage
device
File name
Internal
1550nm 60km 2.5us
Choose a device
Check box
Rename
Delete
Date Modified
2017-01-01 08:59:55
2017-01-01 10:53:55
Quit
2017-01-01 11:10:21
2017-01-01 12:59:55
2017-01-01 23:33:25
Create
new folder
Save as
Quit
Size
85Kb
85Kb
66Kb
14Kb
Return to
previous
P24
Page 28
P25
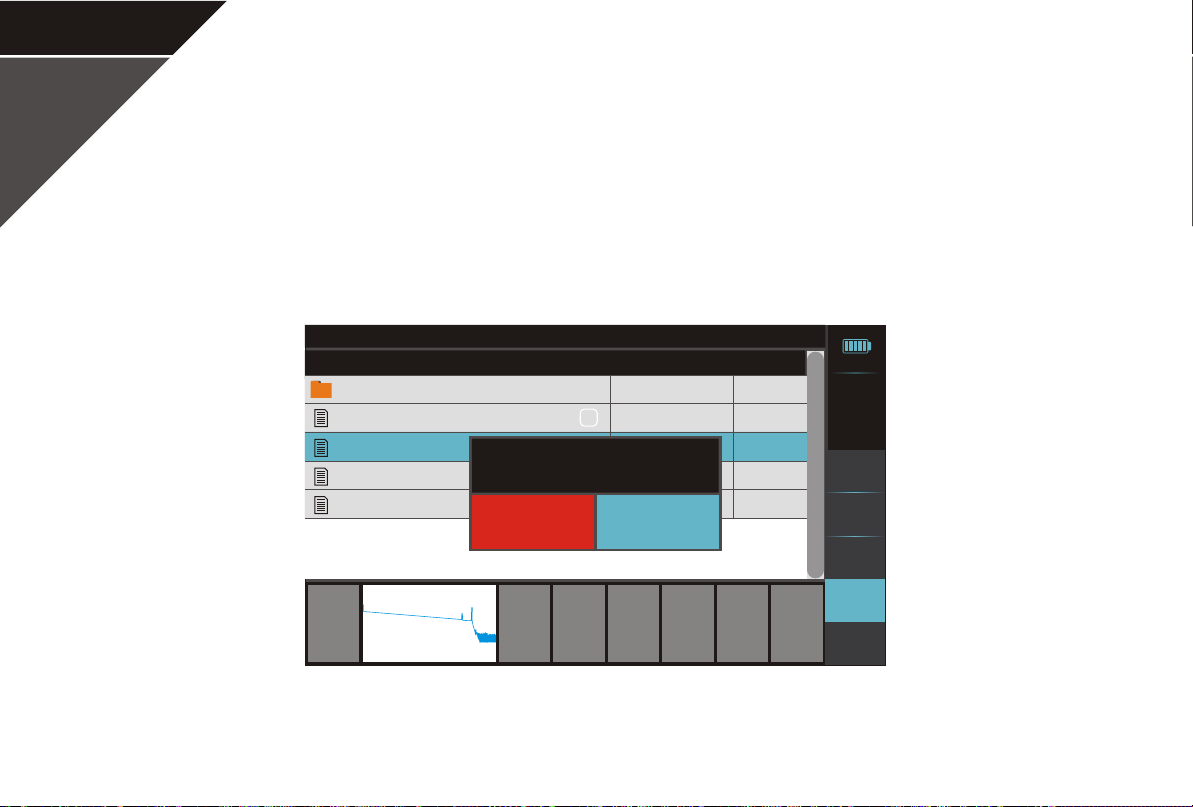
OTDR- Save/File- Save as
The file name in a folder can not be the same, otherwise the original file would be overed.
Internal/20170101
100%
2017-01-01
21:35
Measure
settings
Events
Analyse
Save/File
Back to
menu
5868868
5_0001[1310nm 2.5us].sor
5_0002[1550nm 2.5us].sor
8_0001[1310nm 2.5us].sor
8_0002[1550nm 2.5us].sor
Storage
device
File name
1550nm 60km 2.5us
Date Modified
2017-01-01 08:59:55
2017-01-01 10:53:55
5_0002[1550nm 2.5us].sor
this file already exists, do you want to continue?
2017-01-01 11:10:21
2017-01-01 12:59:55
2017-01-01 23:33:25
CancelConfirm
Check box
Create
Rename
Delete
new folder
Save as
Quit
Size
85Kb
85Kb
66Kb
14Kb
Return to
previous
Page 29
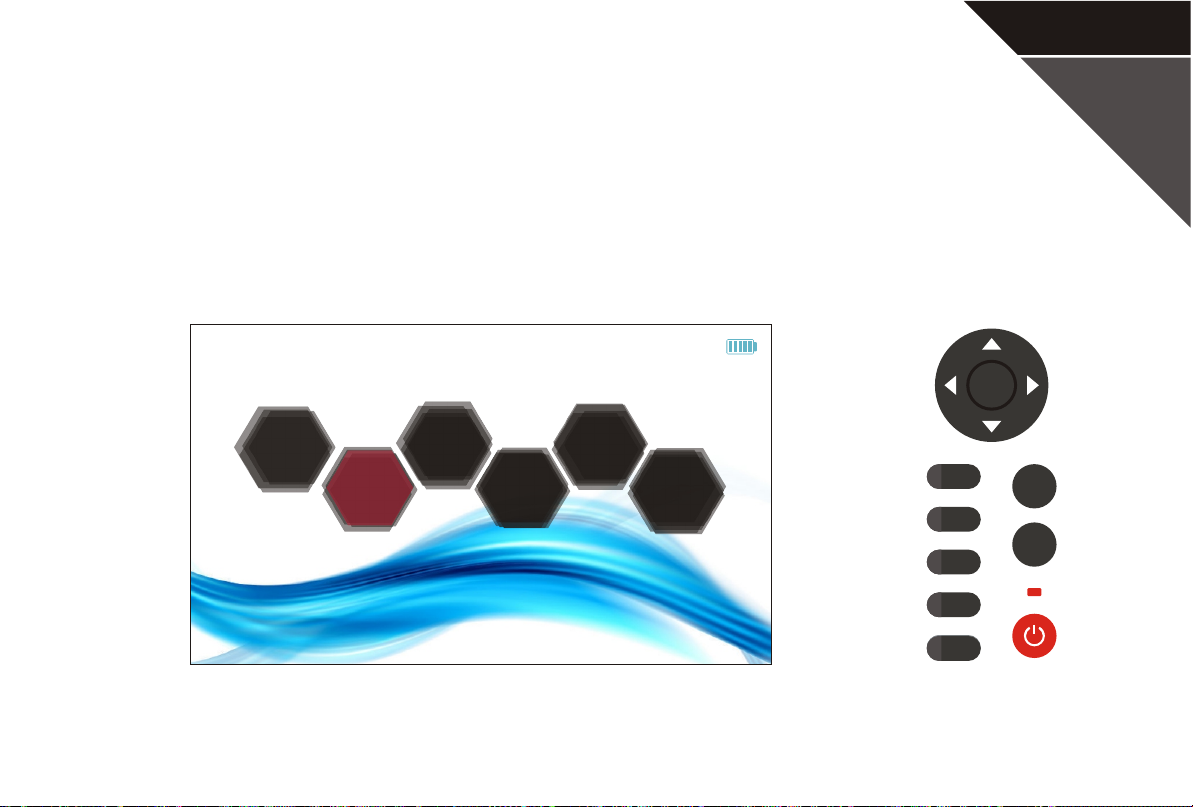
OPM
Click on " OPM " to enter the optical power meter interface.
P26
100%
ENTER
OTDR
OPM
VFL
iOLA
VIP
System
F1
F2
F3
F4
F5
F5
SCAN
REAL
Page 30
P27
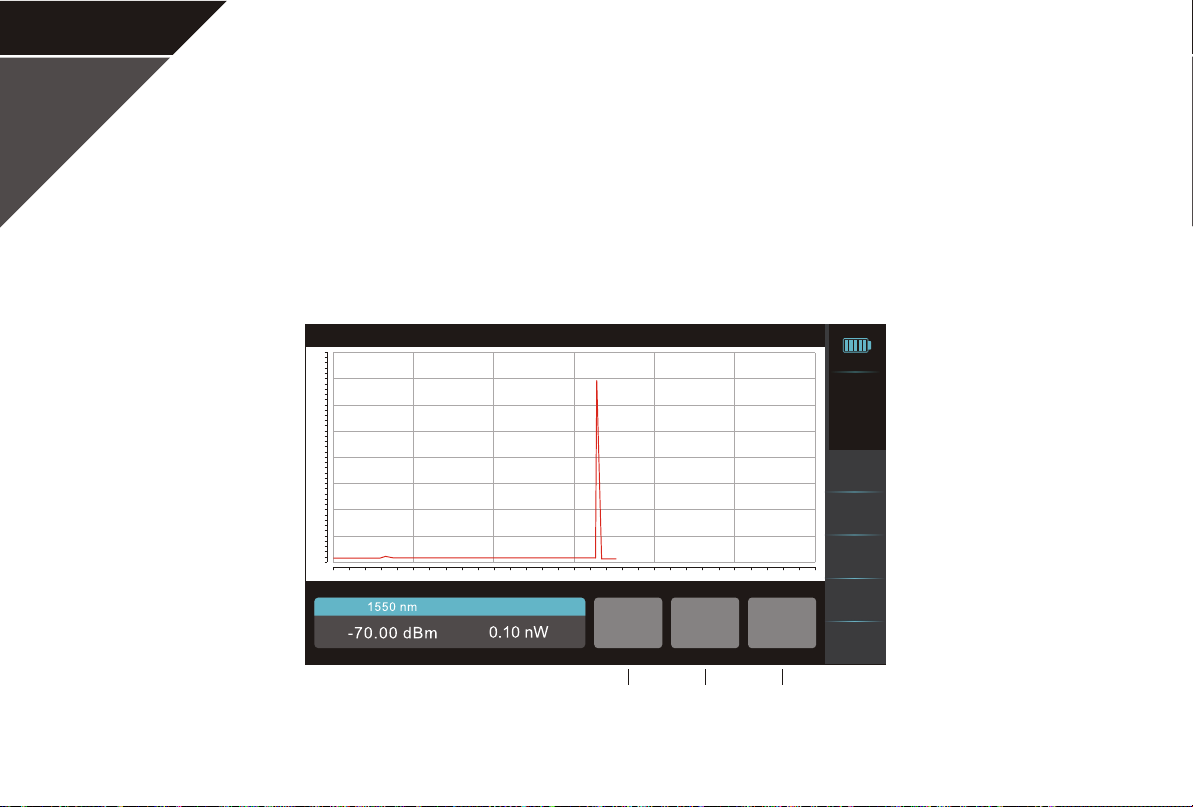
OPM
During measuring, click on "Clear Waveshape" to clear up the current waveform, click on "Suspend"
to suspend or continue the measurement, click on "Auto" to .set the waveform to adjust to the screen
10
0
-10
-20
-30
-40
-50
-60
-70
0 10 20
100%
2017-01-01
21:35
Wave
REF
30
Auto
Auto
40 6050
Suspend
Suspend
Clear
Waveshape
Clear waveshape
File
System
Back to
menu
Page 31
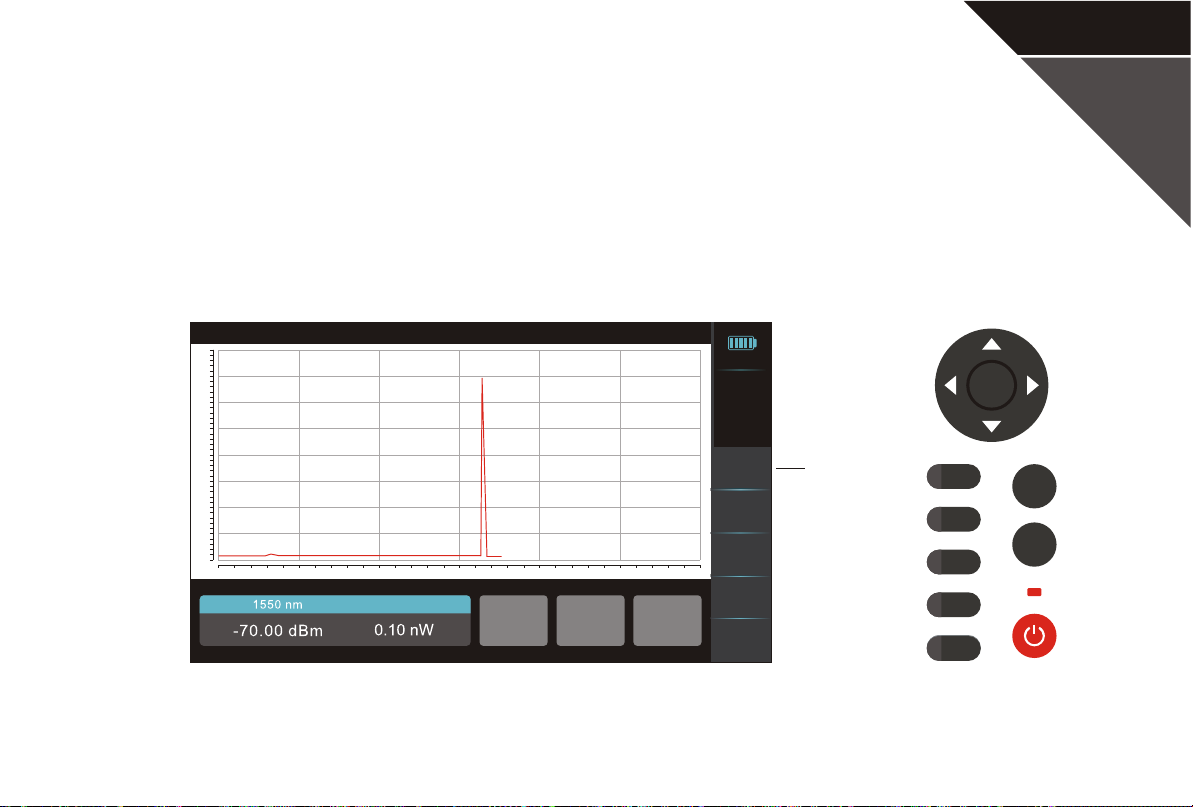
OPM- Wave
Click on " Wave " to select wavelengths, include 850nm/1300nm/1310nm/1490nm/1550nm/1625nm.
P28
10
0
-10
-20
-30
-40
-50
-60
-70
0 10 20
100%
F1
F2
F3
F4
F5
F5
ENTER
SCAN
REAL
2017-01-01
21:35
Wave
REF
30
40 6050
Auto
Suspend
Clear
Waveshape
File
System
Back to
menu
Wave
Page 32
P29
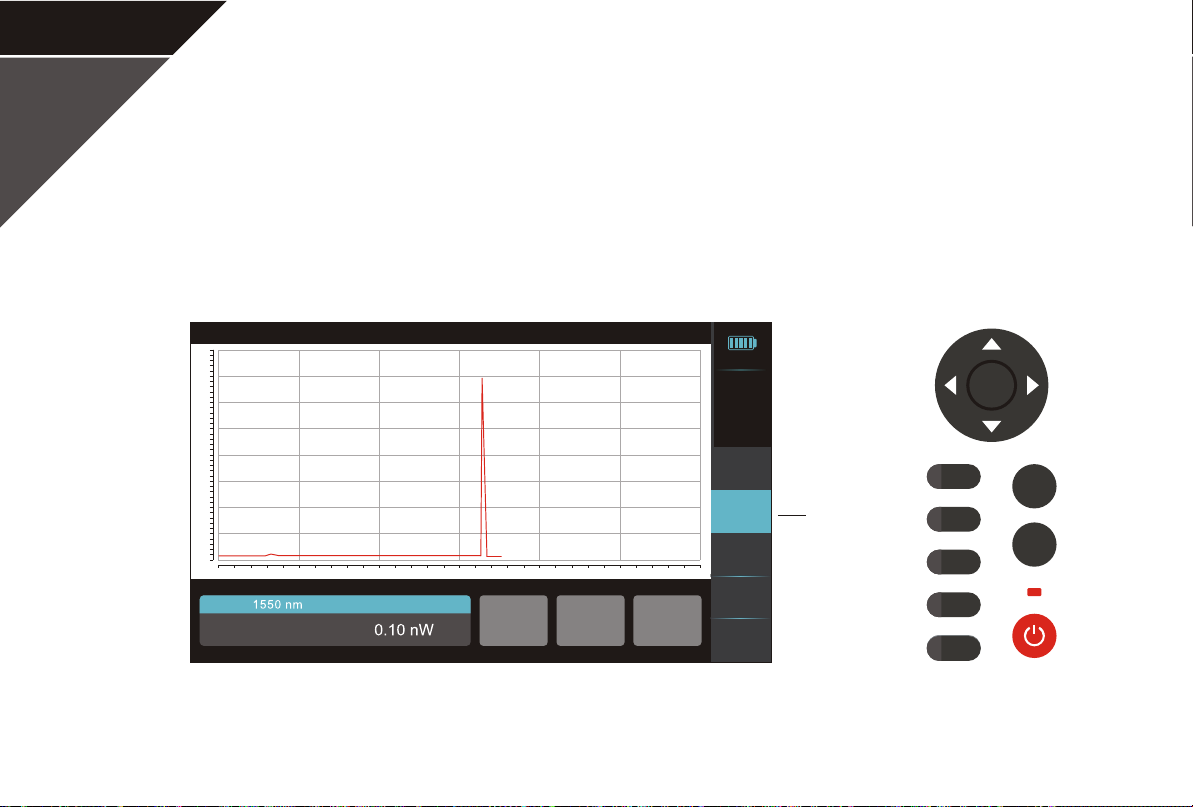
OPM- REF
Click on " REF " to turn on/off this function. When turn on it, the displayed value is the difference
between the current value and the power value at activation.
10
0
-10
-20
-30
-40
-50
-60
-70
0 10 20
0.00dB
REF:-70.00dBm
100%
F1
F2
F3
F4
F5
F5
ENTER
SCAN
REAL
2017-01-01
21:35
Wave
REF
30
40 6050
Auto
Suspend
Clear
Waveshape
File
System
Back to
menu
REF
Page 33
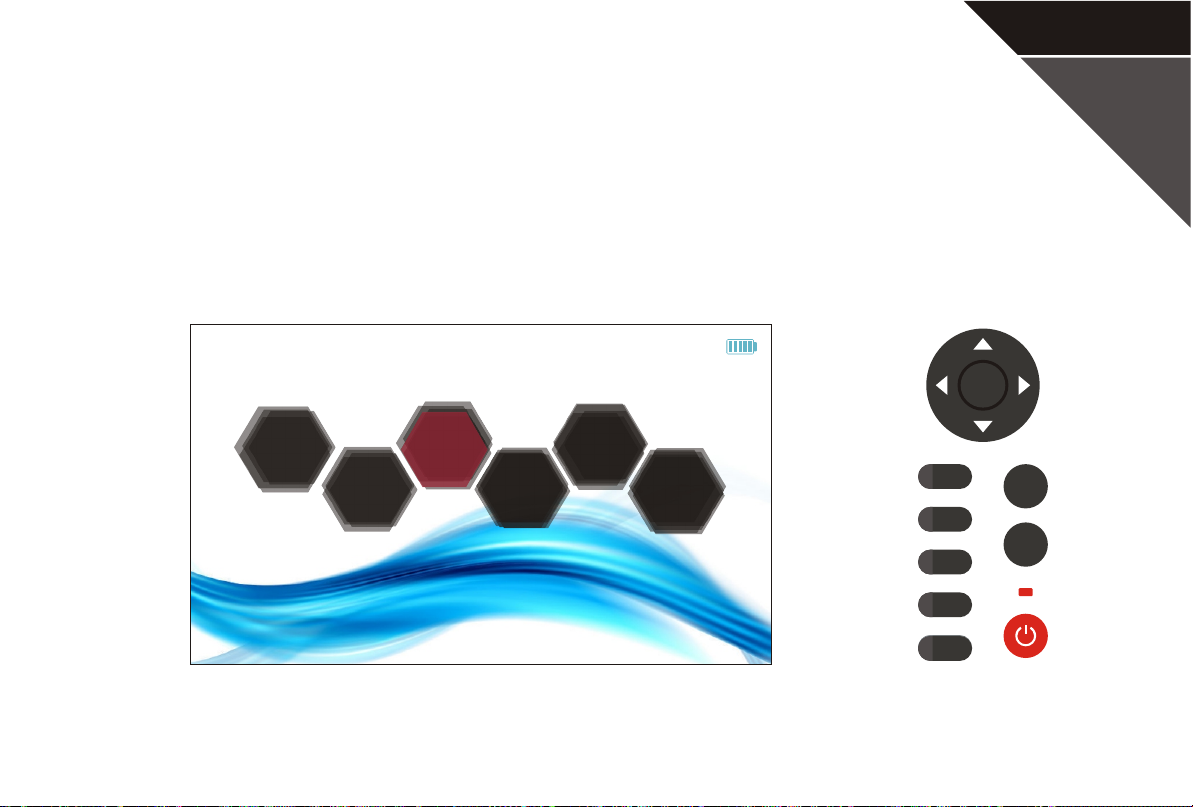
VFL
Click on " VFL " to enter the visual fault locator interface.
P30
100%
ENTER
OTDR
OPM
VFL
iOLA
VIP
System
F1
F2
F3
F4
F5
F5
SCAN
REAL
Page 34
P31
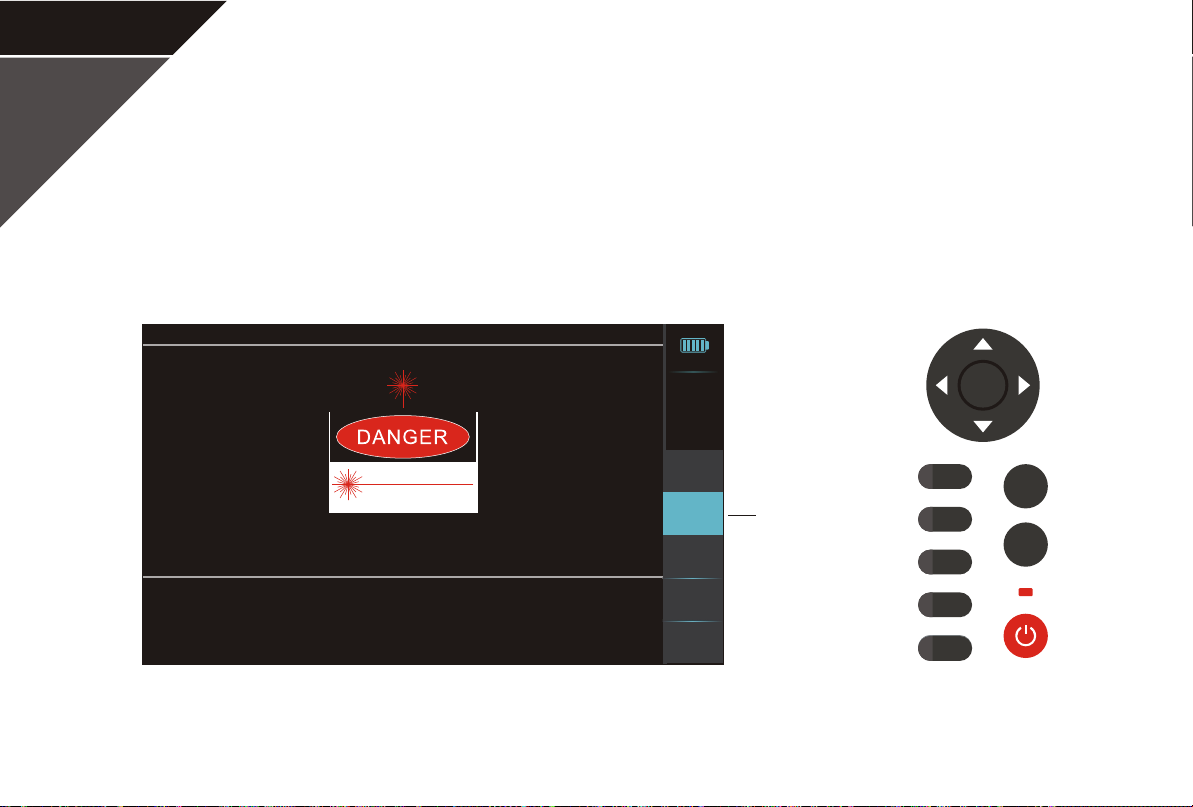
VFL- Open/Close
Click on "Close" to turn off the laser. Click on "Open" to turn on it.
100%
2017-01-01
21:35
ENTER
LASER RADIATION
AVOID DIRECT EYE EXPOSURE
DIODELASER
10mW MAX OUTPUT at 630-670nm
CLASS lllb LSAER PRODUCT
Laser Radiation!Do not stare into beam!
Blink
Close
System
Back to
menu
Open/Close
F1
F2
F3
F4
F5
F5
SCAN
REAL
Page 35
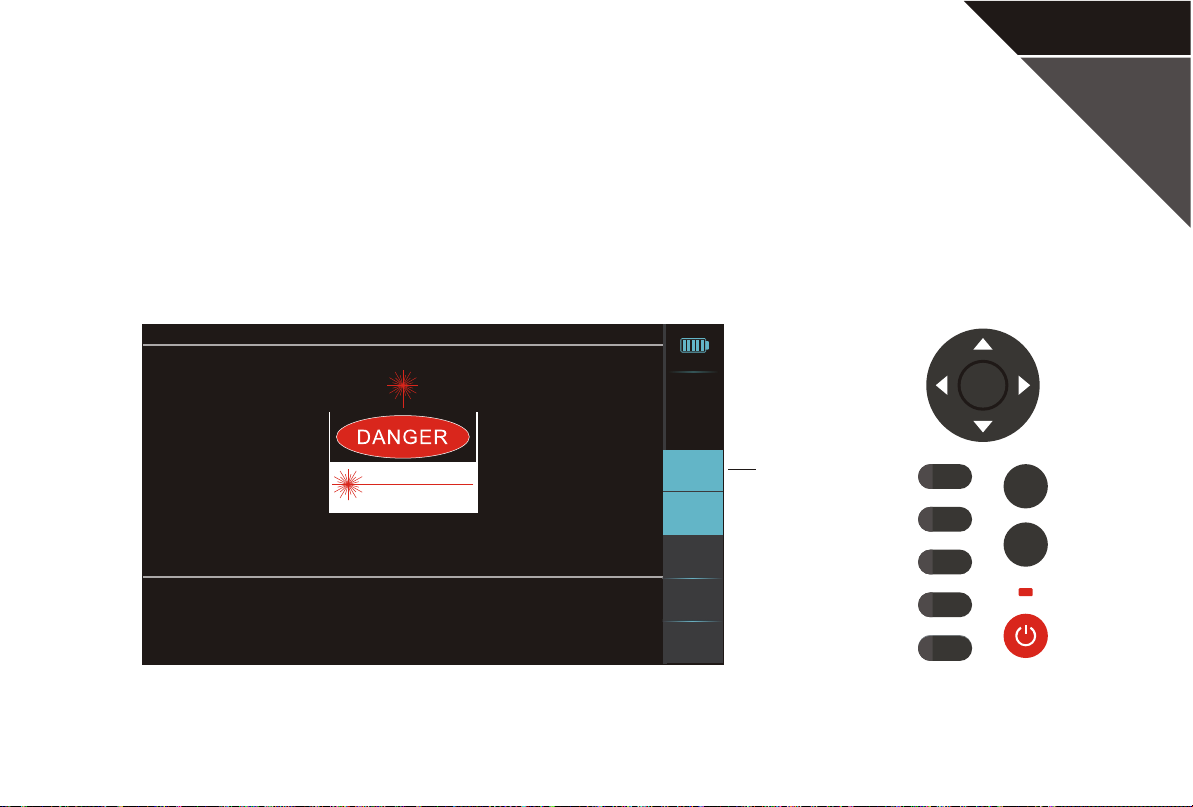
VFL- Blink
When the laser is on, click on "Blink" to turn the laser blink.
Blink
2017-01-01
P32
100%
ENTER
21:35
LASER RADIATION
AVOID DIRECT EYE EXPOSURE
DIODELASER
10mW MAX OUTPUT at 630-670nm
CLASS lllb LSAER PRODUCT
Laser Radiation!Do not stare into beam!
Blink
Close
System
Back to
menu
Blink
F1
F2
F3
F4
F5
F5
SCAN
REAL
Page 36
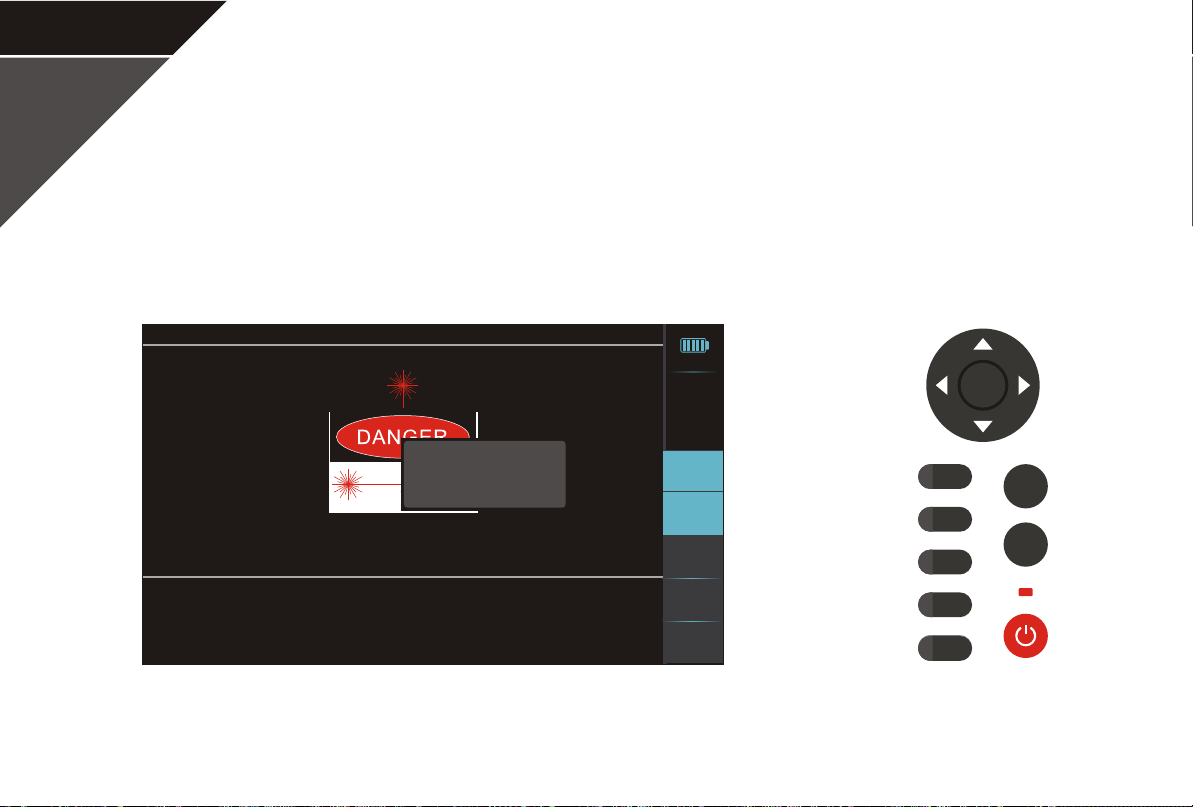
P33
Click on "System" to view system information.
Blink
VFL System Information
LASER RADIATION
Software version: S_VFL_V0.0.0
AVOID DIRECT EYE EXPOSURE
DIODELASER
10mW MAX OUTPUT at 630-670nm
CLASS lllb LSAER PRODUCT
Laser Radiation!Do not stare into beam!
VFL- System
2017-01-01
100%
21:35
Blink
Close
F1
F2
F3
ENTER
SCAN
REAL
System
Back to
menu
F4
F5
F5
Page 37
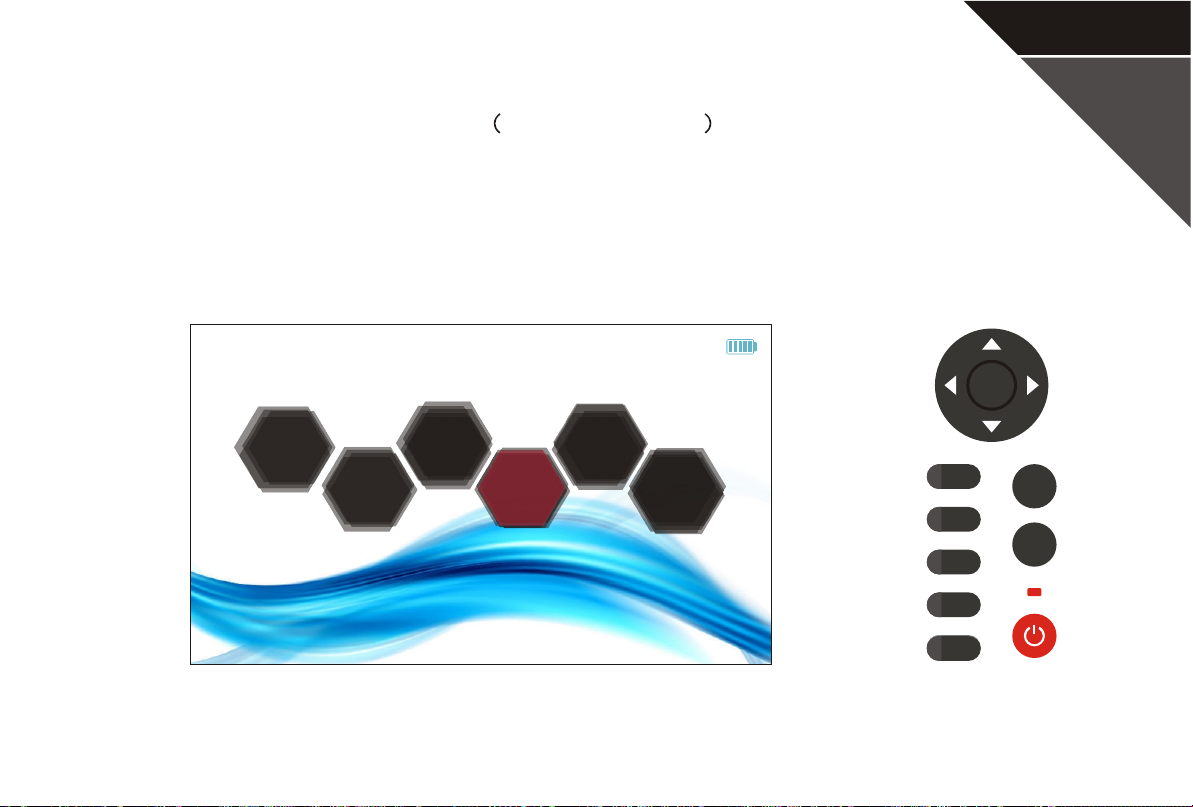
iOLA
Optional function
Click on " iOLA " to enter the intelligent optical link go function.
P34
100%
ENTER
OTDR
OPM
VFL
iOLA
VIP
System
F1
F2
F3
F4
F5
F5
SCAN
REAL
Page 38
P35
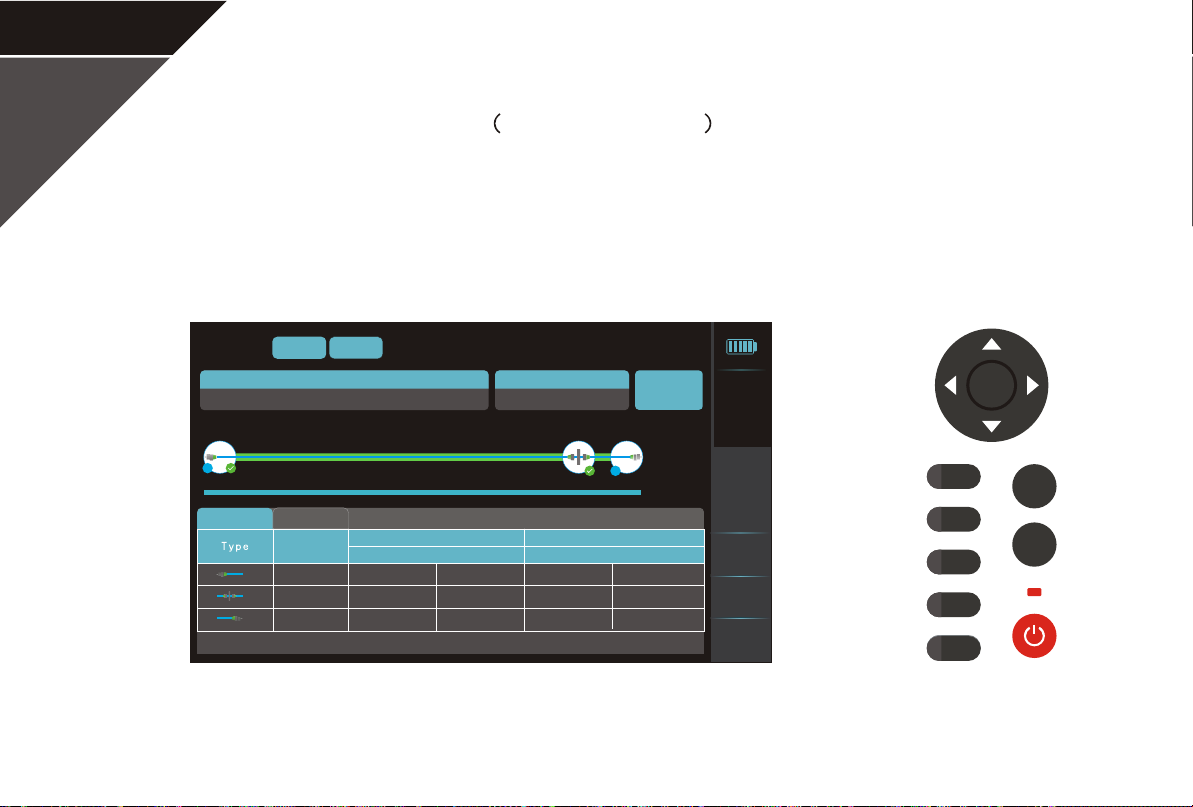
iOLA
Optional function
Click on "Start Test" to start the measurement, and after the measurement is completed, it will show
the status of the optical fiber link.
WaveLength
0.000 44.61840.629
A
EventList
1310nm
Fiber total loss
MeasureSet
Dist.(km)
0.00000 0.000 -29.526 -25.314
40.62895 -36.3040.367 -36.120
44.61769 ---.--- -14.634 -14.738---.---
1550nm
---.--- ---.---
Loss(dB)
1310nm
0.000
1550nm
0.881
Pass/Not pass1310 nm 1550 nm
Pass
1310nm
B
Ref.(dB)
Start Test
44.618
Km
1550nm
100%
2017-01-01
21:35
File
Save
Back to
menu
F1
F2
F3
F4
F5
F5
ENTER
SCAN
REAL
Page 39
iOLA
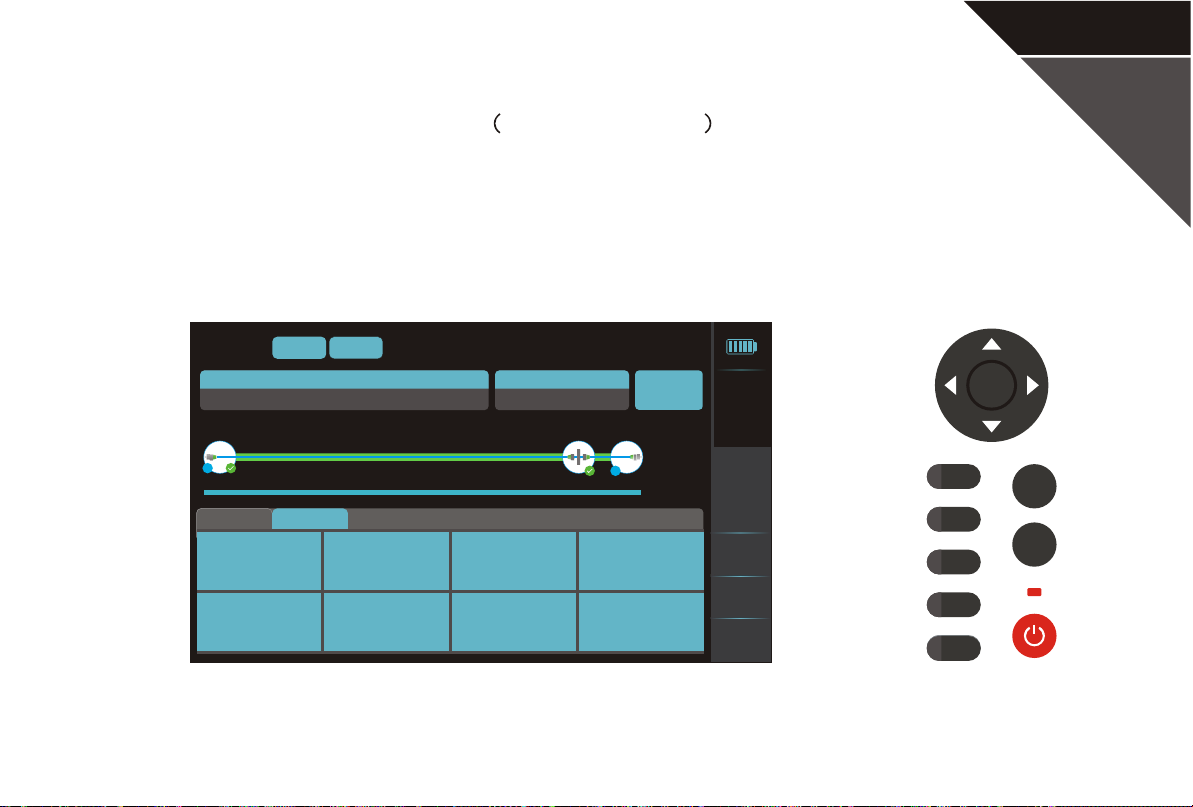
Optional function
Click on "Measure Set" to show the measure settings menu. There are 8 options in the menu, and
click on each one can set the parameters.
P36
WaveLength
0.000 44.61840.629
A
EventList
Total loss threshold
Refractive rate
1310nm
Fiber total loss
MeasureSet
20.000dB
1550nm
---.--- ---.---
ORL threshold
15.000dB
Scatter coefficient
Pass/Not pass1310 nm 1550 nm
Pass
Loss threshold
0.300dB
Reflection loss threshold
0.750dB
Start Test
44.618
Km
B
Reflection threshold
40.000dB
Restore factory settings
100%
2017-01-01
21:35
File
Save
Back to
menu
F1
F2
F3
F4
F5
F5
ENTER
SCAN
REAL
Page 40
P37
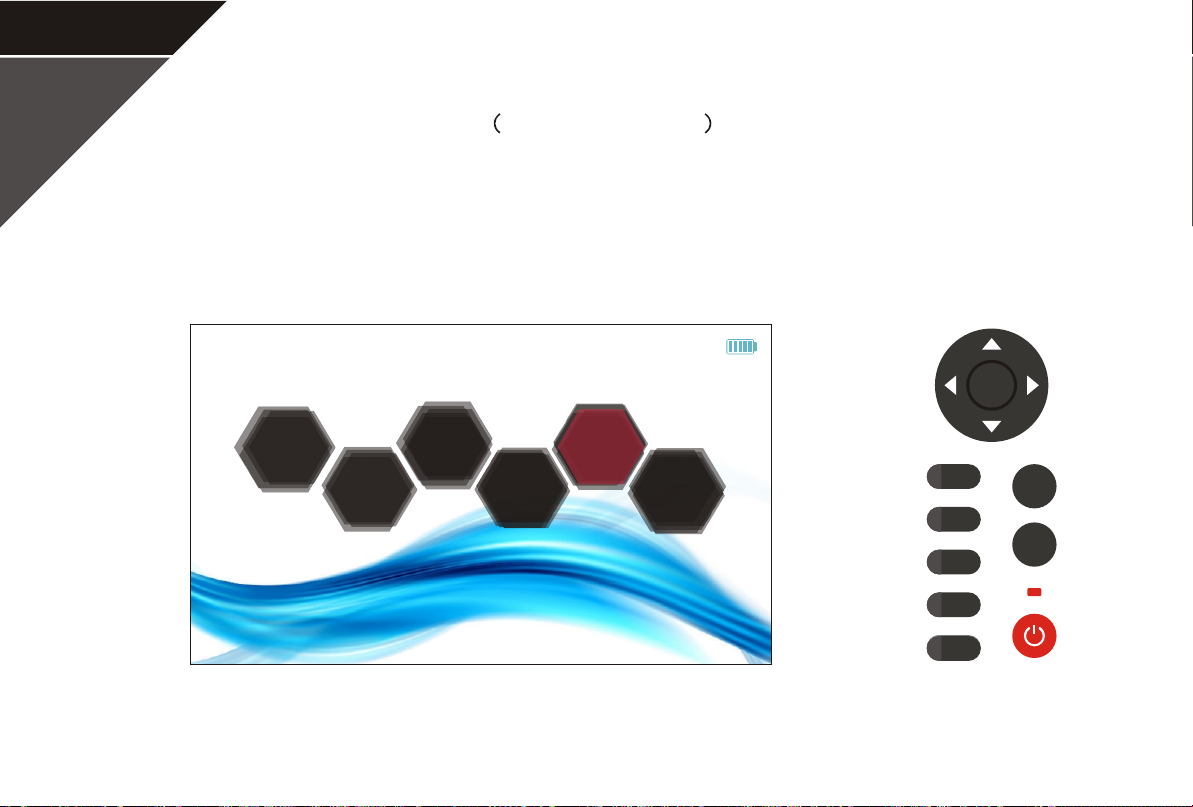
Optional function
Click on " VIP " to enter the Fiber Microscope interface.
VIP
100%
ENTER
OTDR
OPM
VFL
iOLA
VIP
System
F1
F2
F3
F4
F5
F5
SCAN
REAL
Page 41
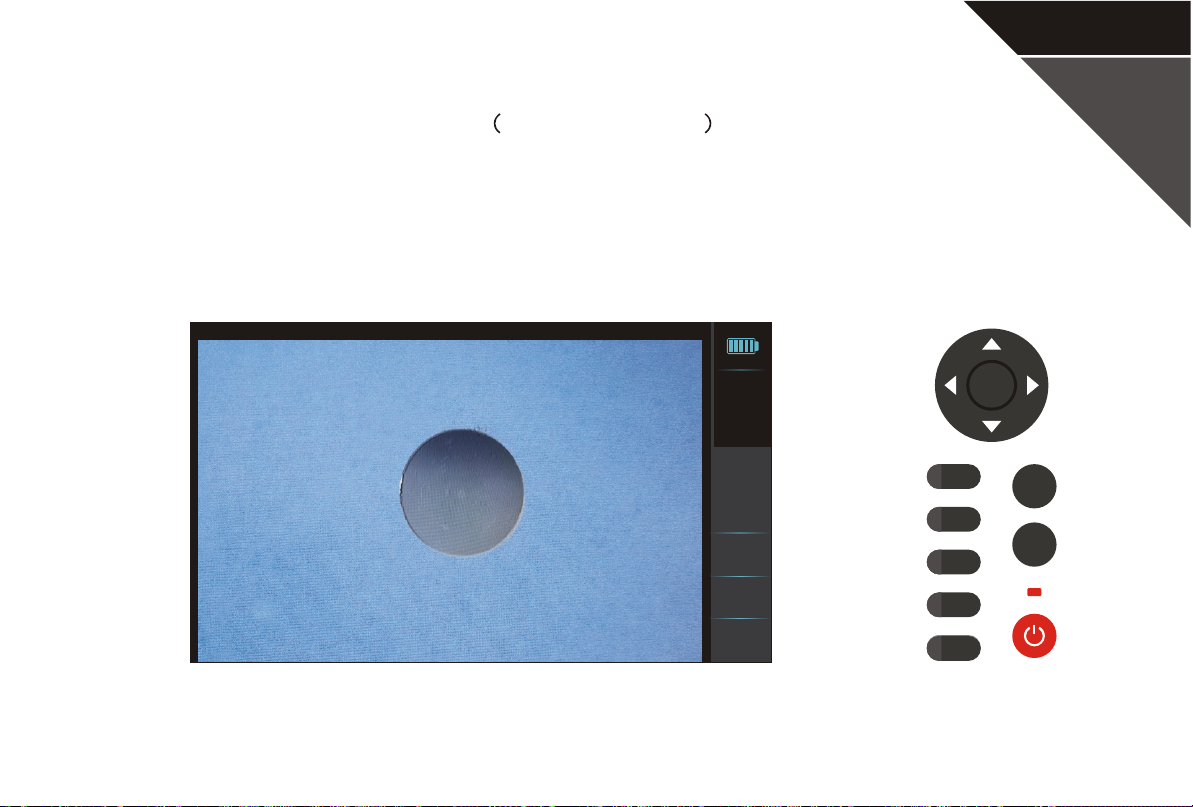
Click on "Start" to start the measurement.
Video inspection probe
VIP
Optional function
100%
2017-01-01
21:35
P38
ENTER
Start
Stop
Back to
menu
F1
F2
F3
F4
F5
F5
SCAN
REAL
Page 42
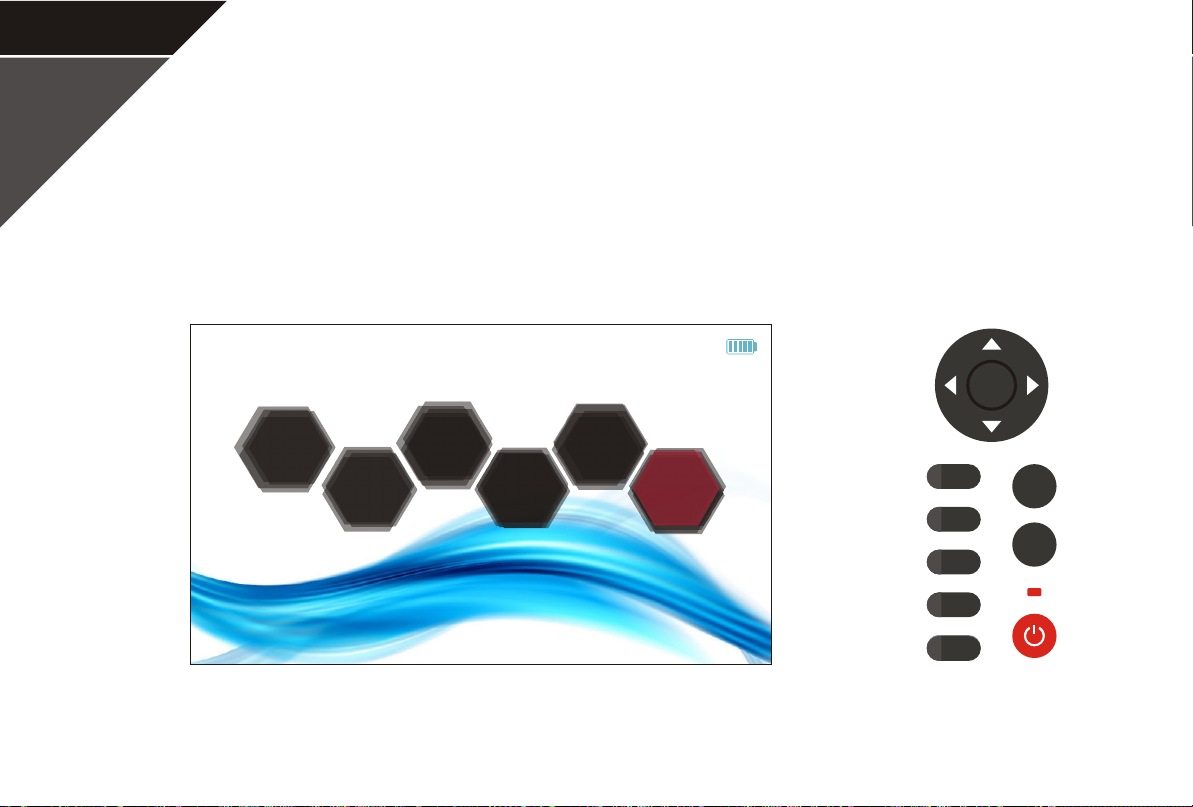
P39
System
Click on "System" icon to enter the system setting interface.
100%
ENTER
OTDR
OPM
VFL
iOLA
VIP
System
F1
F2
F3
F4
F5
F5
SCAN
REAL
Page 43
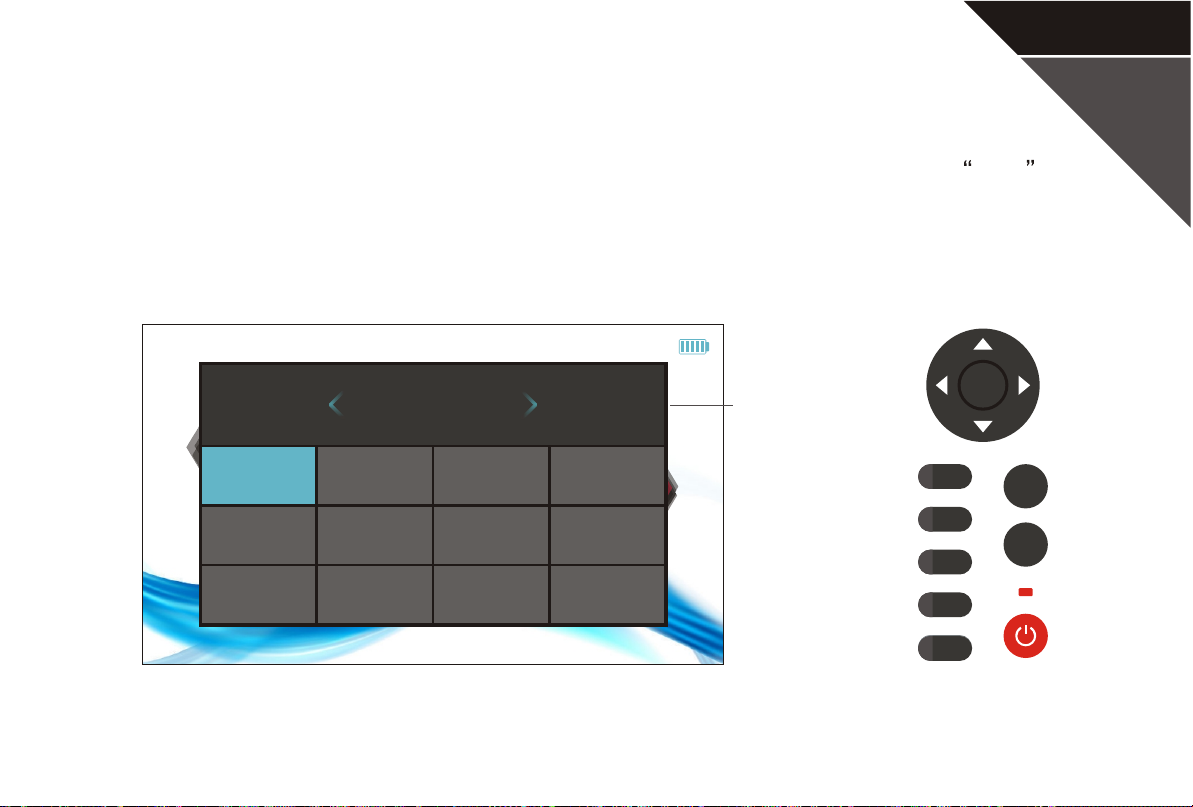
System settings
There are nine options. Click on each one to enter the setting interface and then press Enter button
or click on blank space to save and quit the system setting.
100%
ENTER
English
Information bar
P40
OTDR
Language
International units
Security settings
Date/Time
OPM
Factory settings
VFL
Energy saving mode Backlight brightness
iOLM
Version information
VIP
System
Battery information
F1
F2
F3
F4
F5
F5
SCAN
REAL
Page 44
P41
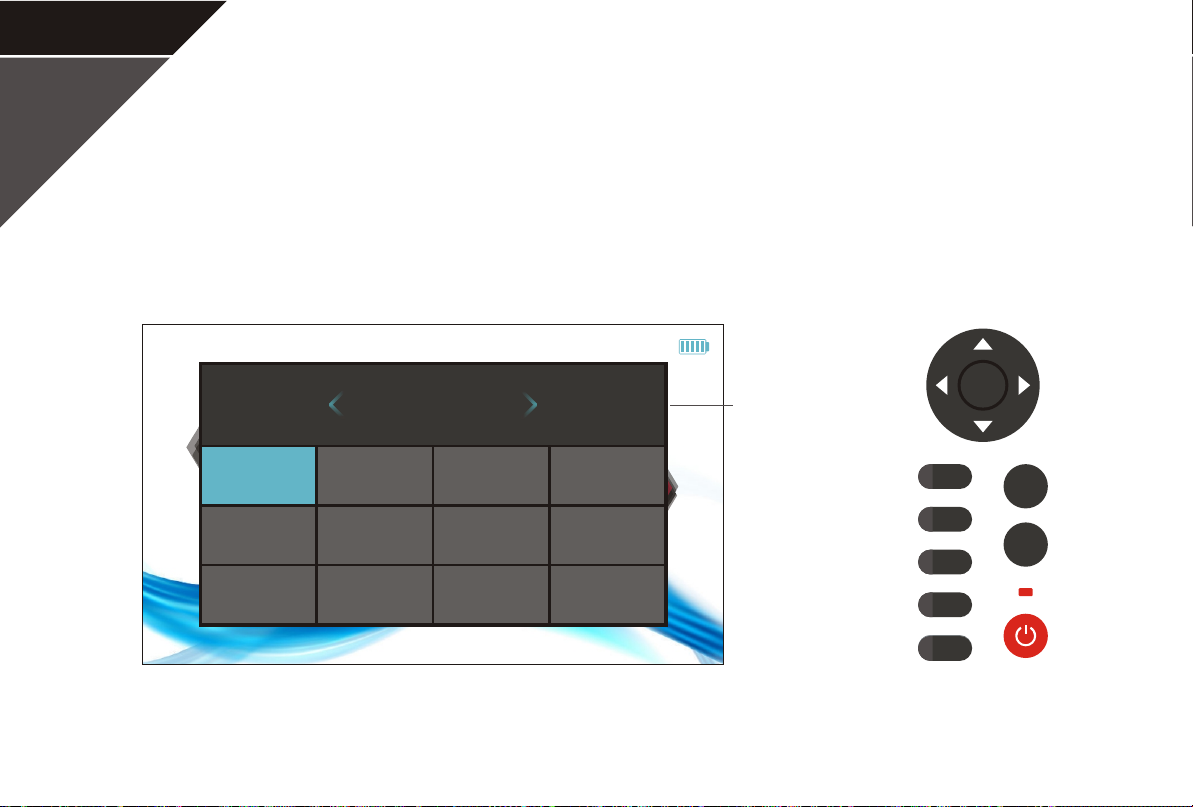
System settings- Language
Click on "System" icon to enter the system setting interface. The default is the local language. The
user can slide your finger left/right in the information bar or click the blue button to switch the language.
100%
English
Information bar
ENTER
OTDR
Language
International units
Security settings
Date/Time
OPM
Factory settings
VFL
Energy saving mode Backlight brightness
iOLM
Version information
VIP
System
Battery information
F1
F2
F3
F4
F5
F5
SCAN
REAL
Page 45
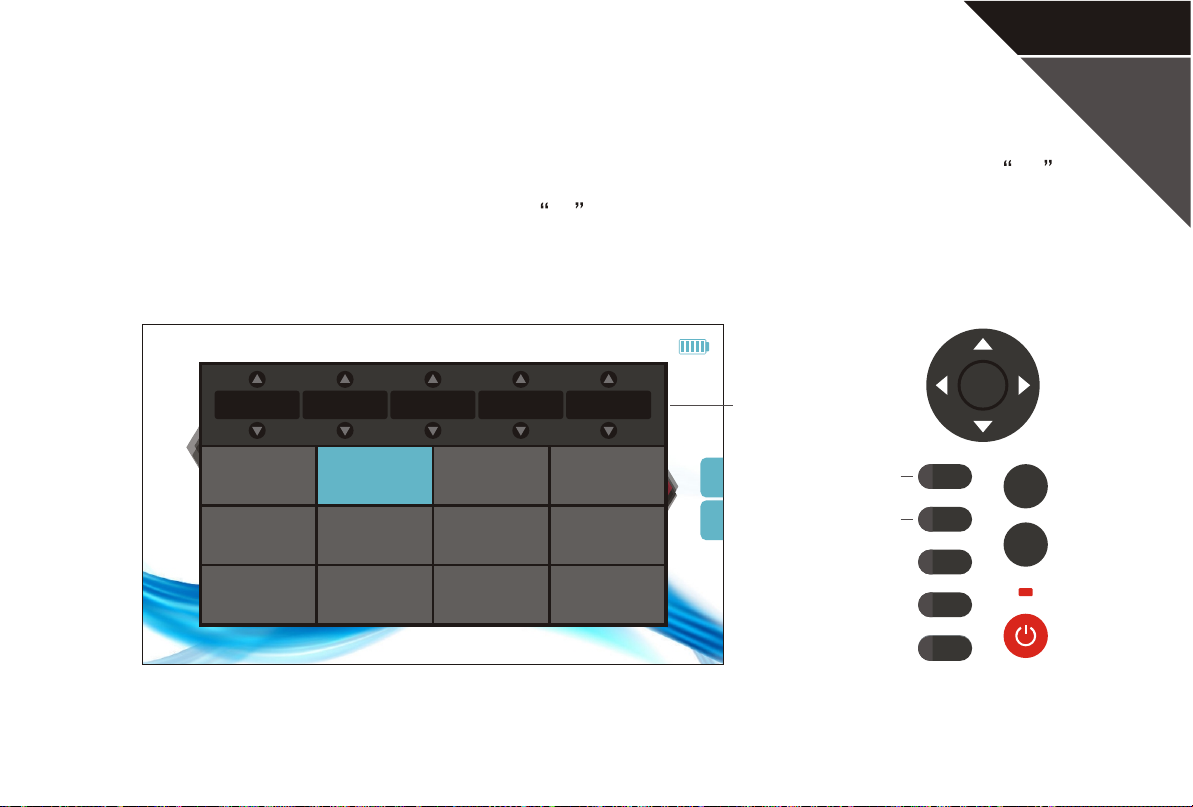
System settings- Date/Time
Click on "Date/Time " icon to set the year, month, day, hour and minute information. Press F1
button to switch to 12 or 24 time format. Press F2 button to switch to Y/M/D or M/D/Y date
format.
100%
ENTER
2017Y
01M
01D
English
21H
35Min
Information bar
P42
OTDR
Language
International units
Security settings
Date/Time
OPM
Factory settings
VFL
Energy saving mode Backlight brightness
iOLM
Version information
VIP
System
Battery information
24
Switch time format
Y
/M
Switch date format
/D
F1
F2
F3
F4
F5
F5
SCAN
REAL
Page 46
P43
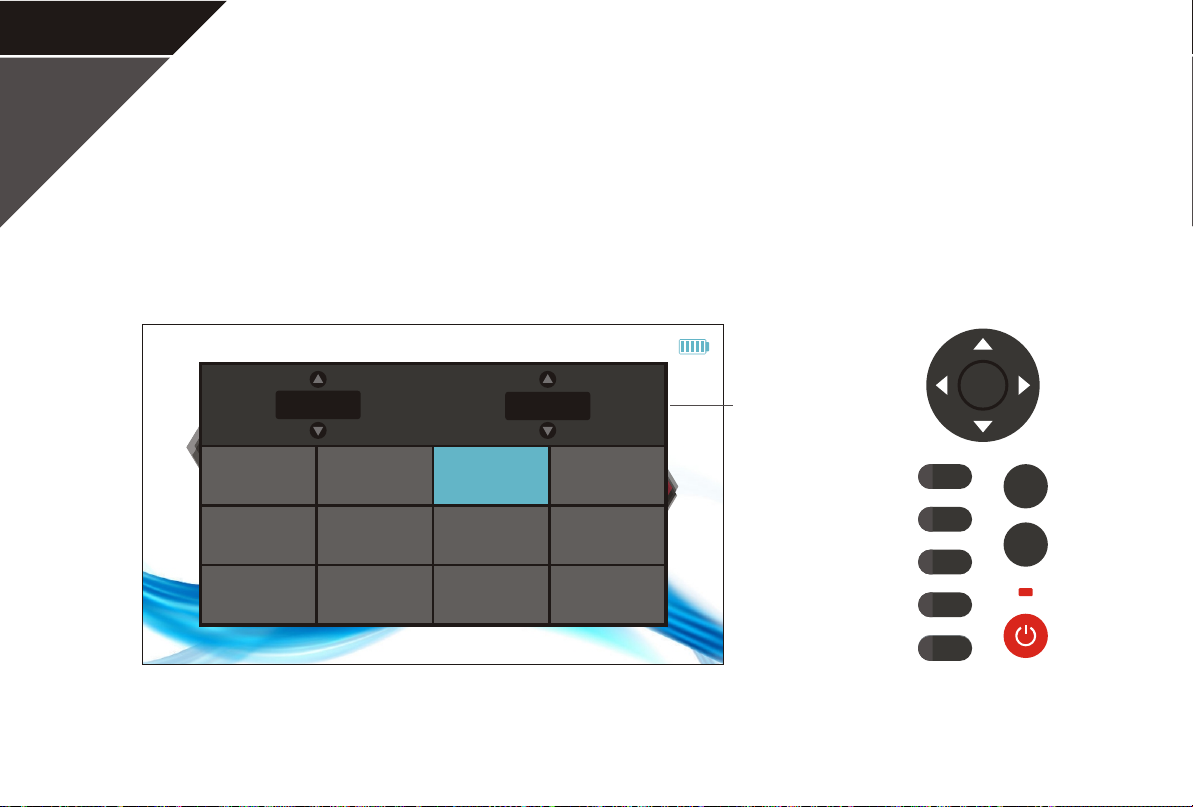
System settings- Energy saving mode
Click on "Energy saving mode " to set the time of backlight and automatic off. With no operation in the
setting time, the backlight will be off or the device will shutdown automatically.
100%
F1
F2
F3
F4
F5
F5
ENTER
Backlight
OTDR
Language
International units
Security settings
15Sec
Date/Time
OPM
Factory settings
later will be off
VFL
device
Energy saving mode Backlight brightness
iOLM
Version information
10Min
later will
shutdown
VIP
System
Battery information
Information bar
SCAN
REAL
Page 47
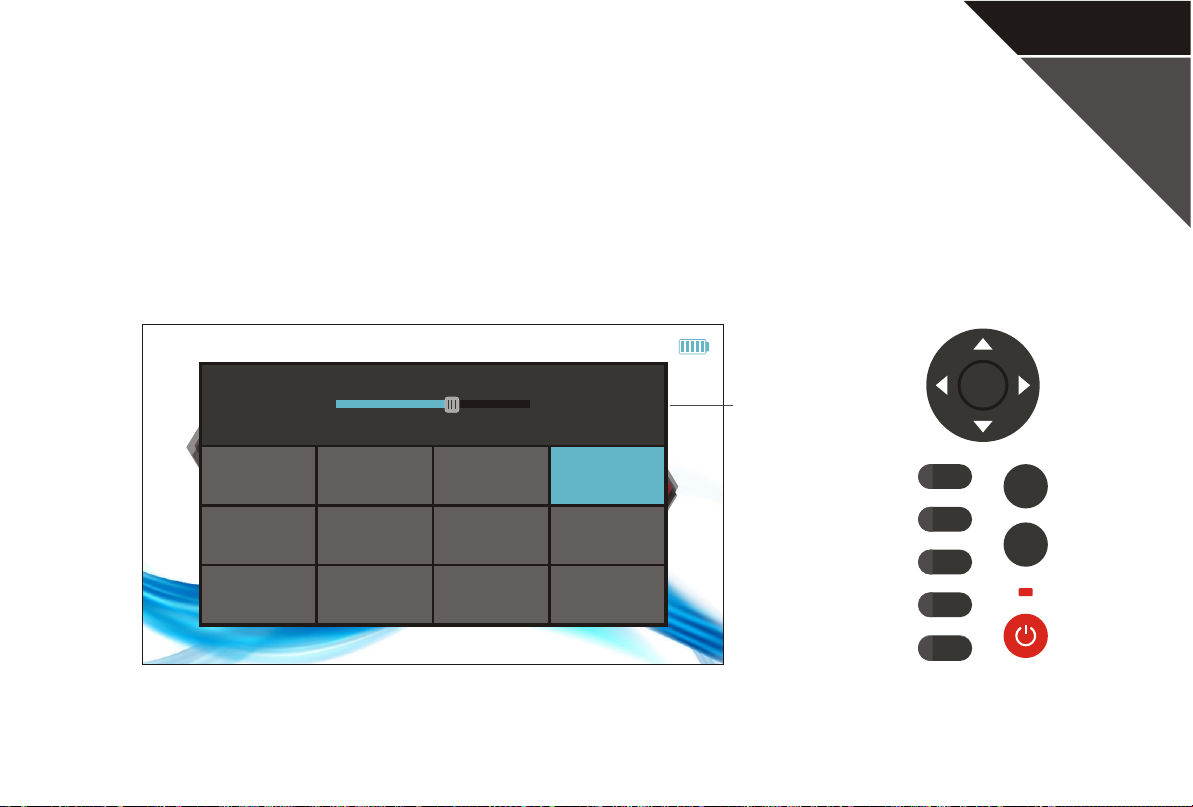
System settings- Backlight brightness
Click on "Backlight brightness " to set the brightness. Dragging the black handle to set the brightness.
100%
ENTER
Information bar
P44
OTDR
Language
International units
Security settings
Date/Time
OPM
Factory settings
VFL
Energy saving mode Backlight brightness
iOLM
Version information
VIP
System
Battery information
F1
F2
F3
F4
F5
F5
SCAN
REAL
Page 48
P45
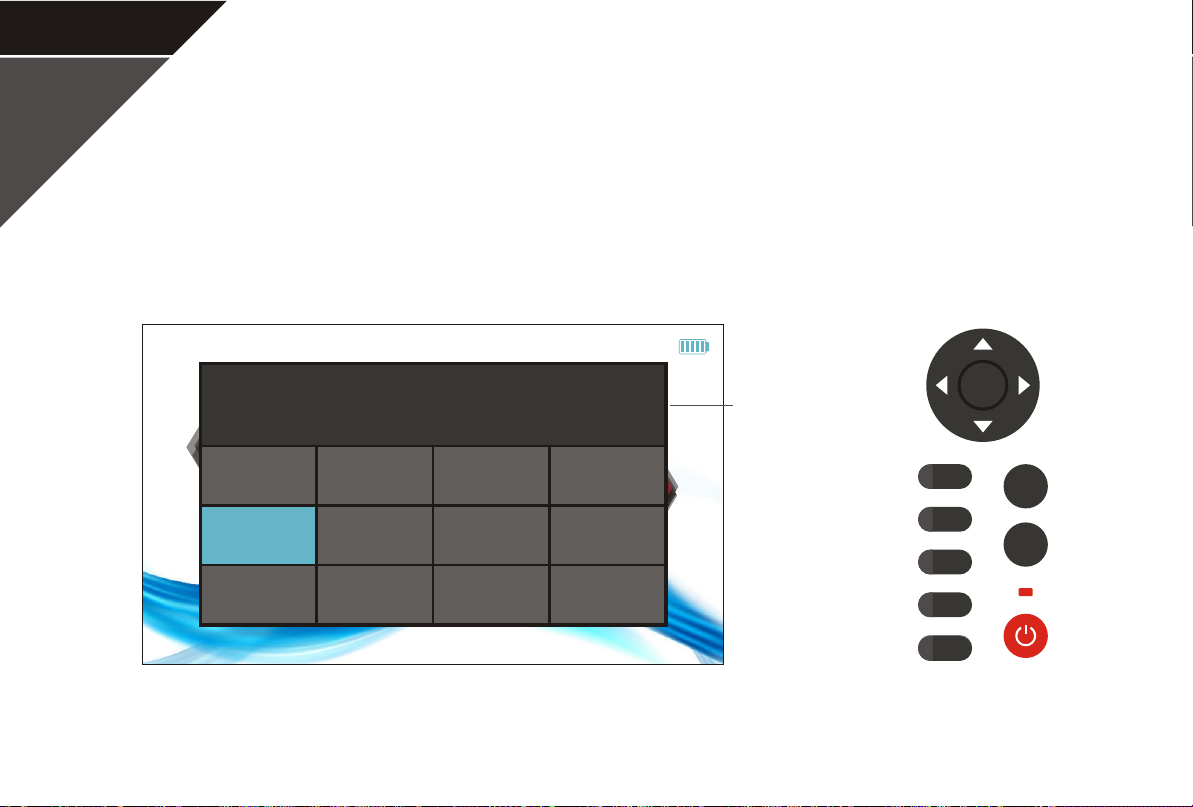
System settings- International units
Click on "International units" to show the unit selected.
Metric
100%
ENTER
Information bar
OTDR
Language
International units
Security settings
Date/Time
OPM
Factory settings
VFL
Energy saving mode Backlight brightness
iOLM
Version information
VIP
System
Battery information
F1
F2
F3
F4
F5
F5
SCAN
REAL
Page 49
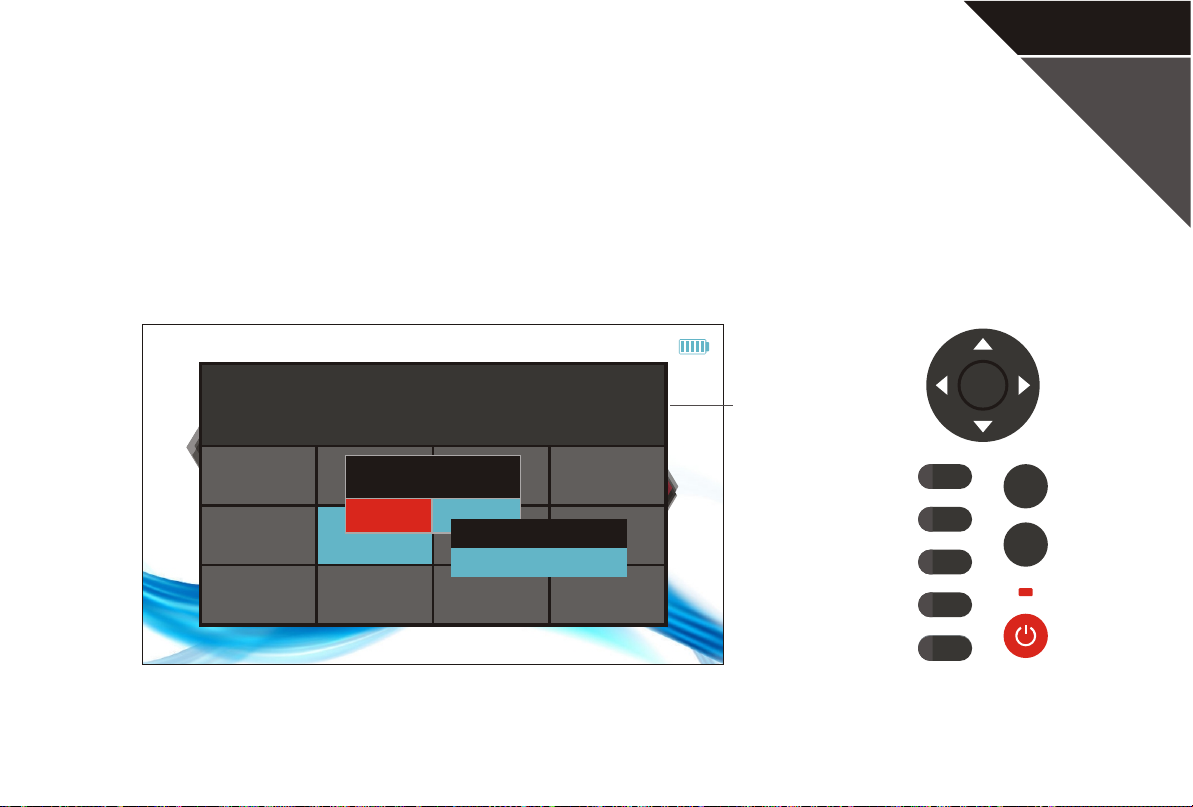
System settings- Factory settings
Click on "Factory setting" to return the factory settings. Click on "Yes" in the prompt box to clear up
all the setting data. Be careful when using this function.
100%
ENTER
Click here to return the factory settings.
Information bar
P46
OTDR
Language
International units
Security settings
All settings will be reset!
Date/Time
OPM
Confirm Cancel
Factory settings
VFL
Energy saving mode Backlight brightness
Continue?
iOLM
Version information
Reset completed!
System will restart automatically!
OK
VIP
System
Battery information
F1
F2
F3
F4
F5
F5
SCAN
REAL
Page 50
P47
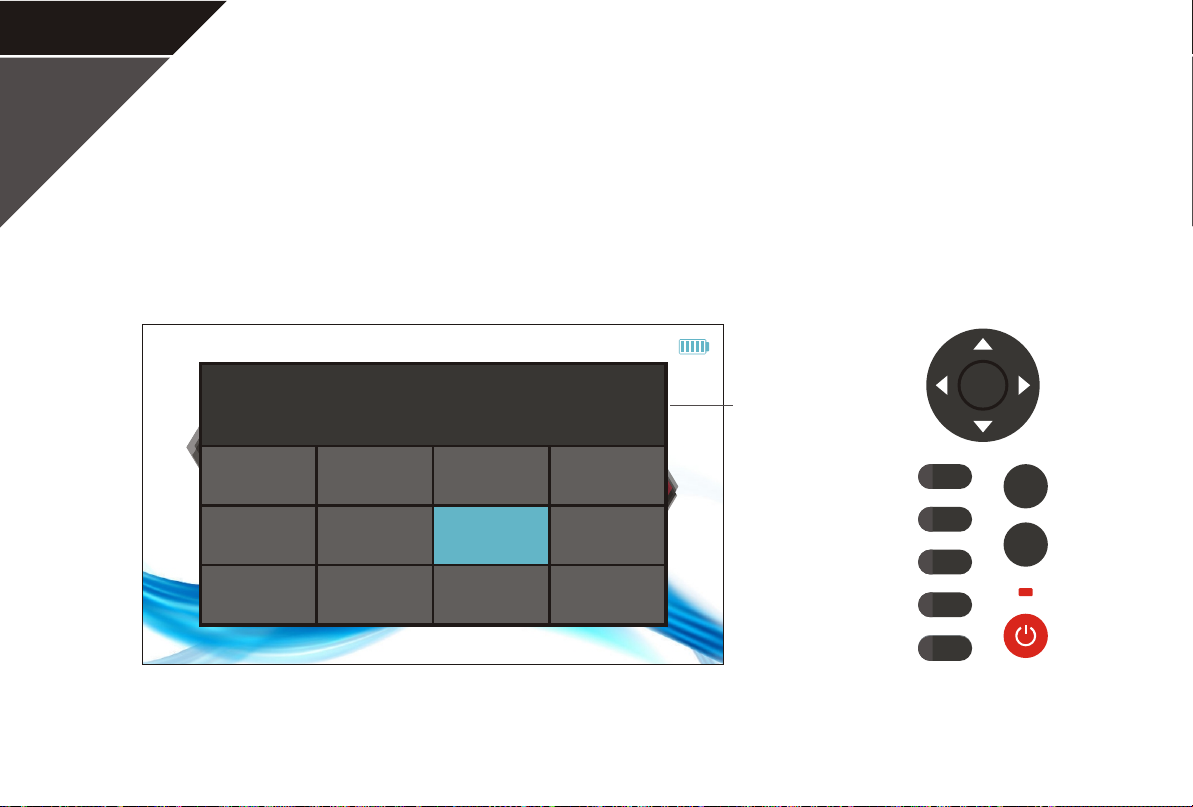
System settings- Version information
Click on "Version information" to check the CPU ID, hardware version, firmware version and software
version.
100%
Hardware version:
Firmware version:
Module version:
OTDR
Language
International units
Security settings
H_DIGITAL_V0.0
S_MAIN_V0.0.0
MODULE_V0.0.0_C
Date/Time
OPM
Factory settings
VFL
Energy saving mode Backlight brightness
iOLM
Version information
VIP
System
Battery information
Information bar
F1
F2
F3
F4
F5
F5
ENTER
SCAN
REAL
Page 51
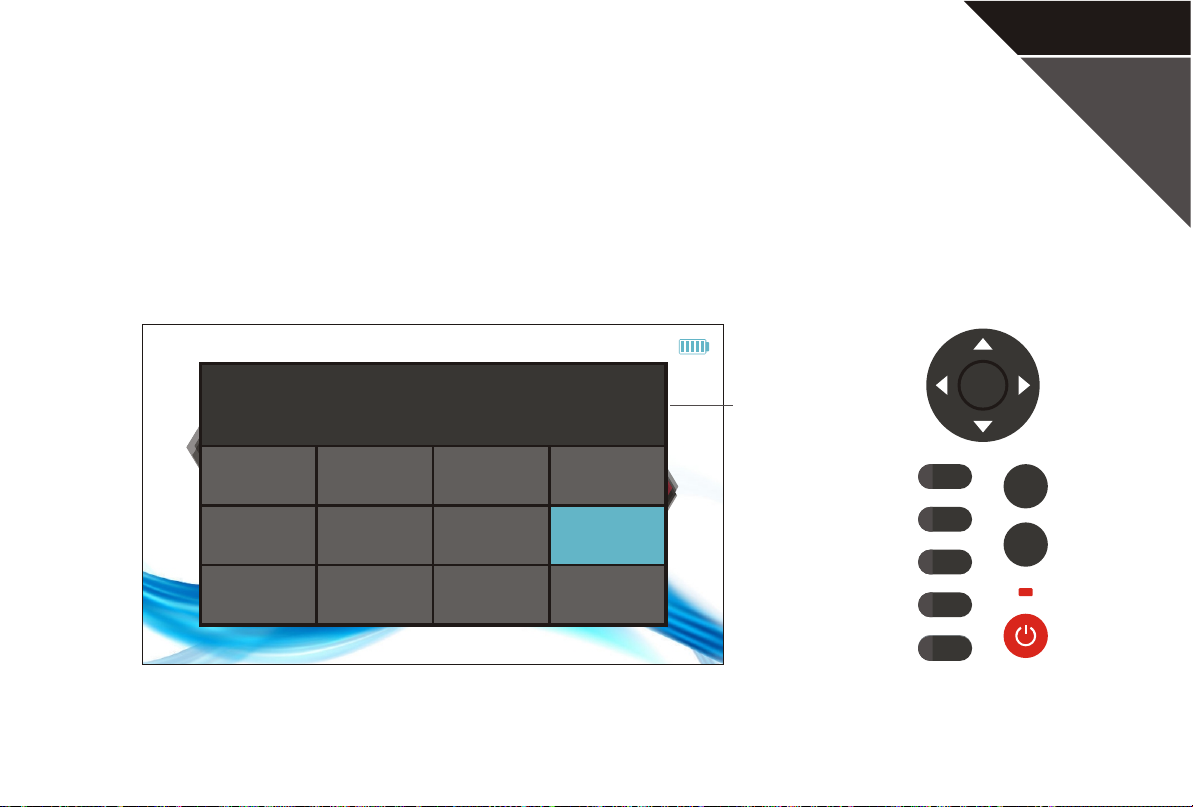
System settings-Battery information
Click on "Battery information" to display the battery capacity and current battery status.
100%
Current capacity:65%,the battery is Good
Information bar
ENTER
P39
P48
OTDR
Language
International units
Security settings
Date/Time
OPM
Factory settings
VFL
Energy saving mode Backlight brightness
iOLM
Version information
VIP
System
Battery information
F1
F2
F3
F4
F5
F5
SCAN
REAL
Page 52
P49
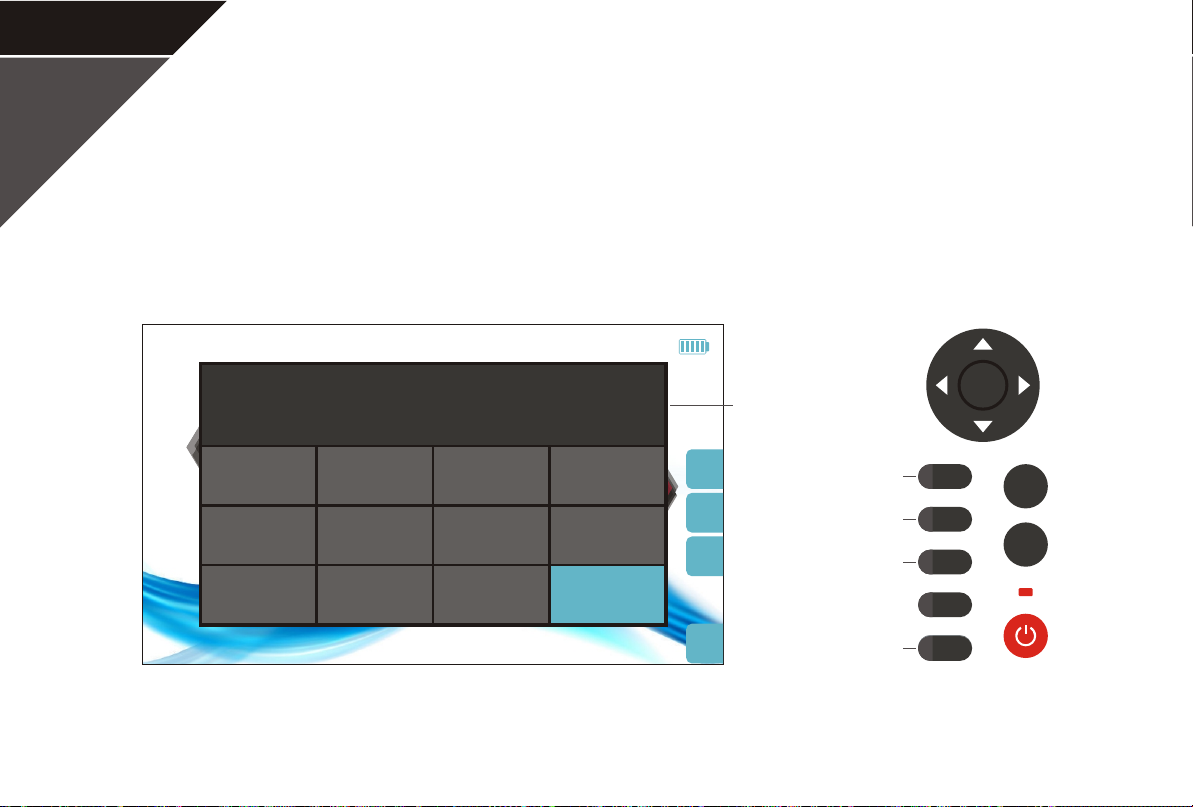
System settings- Security settings
Security settings is used in the process of production and maintenance. All the code displayed is
internal code, user should not operate by themself, otherwise may cause the device abnormal.
100%
00#365**145|
Information bar
ENTER
OTDR
1 2
4
7
OPM
VFL
iOLM
5
8 9
VIP
3
6
0
System
Space
Security settings
clear
back
space
change
back
clear
back space
change
back
F1
F2
F3
F4
F5
F5
SCAN
REAL
Page 53
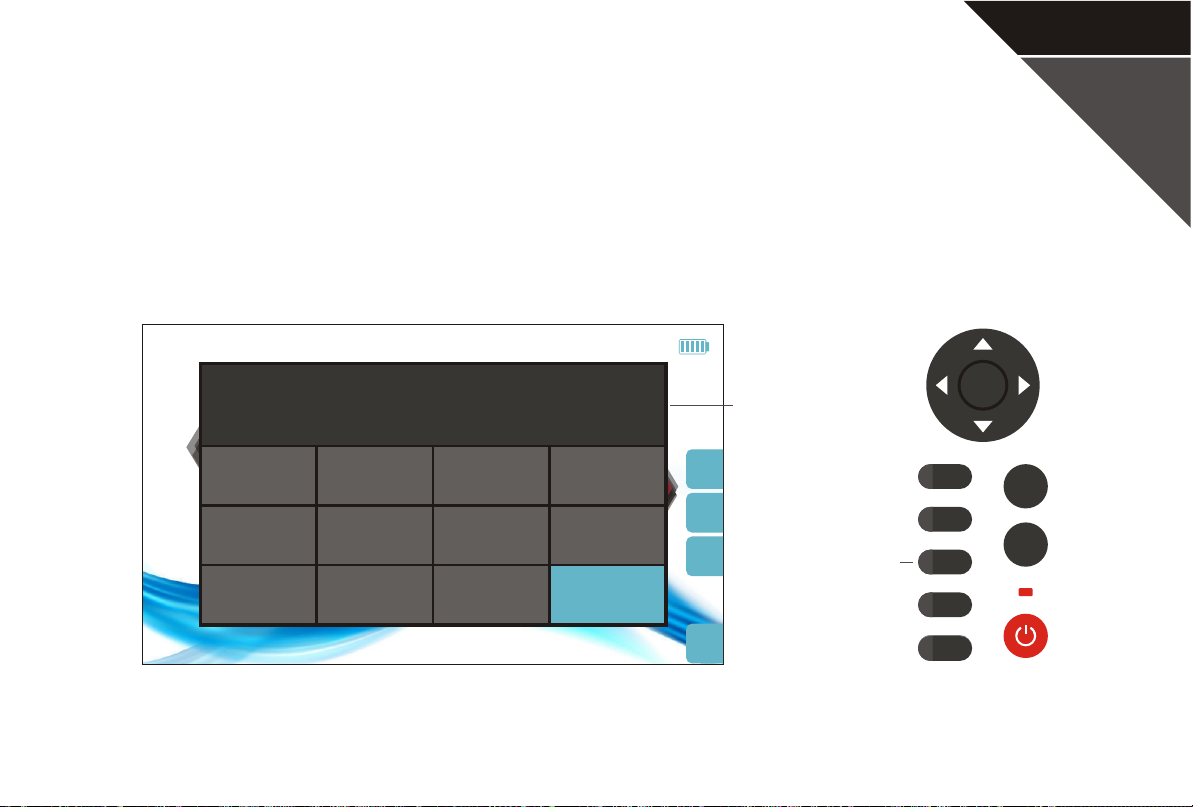
System settings- Security settings
Click on "Security settings" to display the project menu, Press" F3" to switch between digital, English,
and symbolic input.
100%
00#365**145|
Information bar
ENTER
P50
OTDR
1 2
4
7
OPM
VFL
iOLM
5
8 9
VIP
3
6
0
System
Space
Security settings
clear
back
space
change
back
change
F1
F2
F3
F4
F5
F5
SCAN
REAL
Page 54
P51
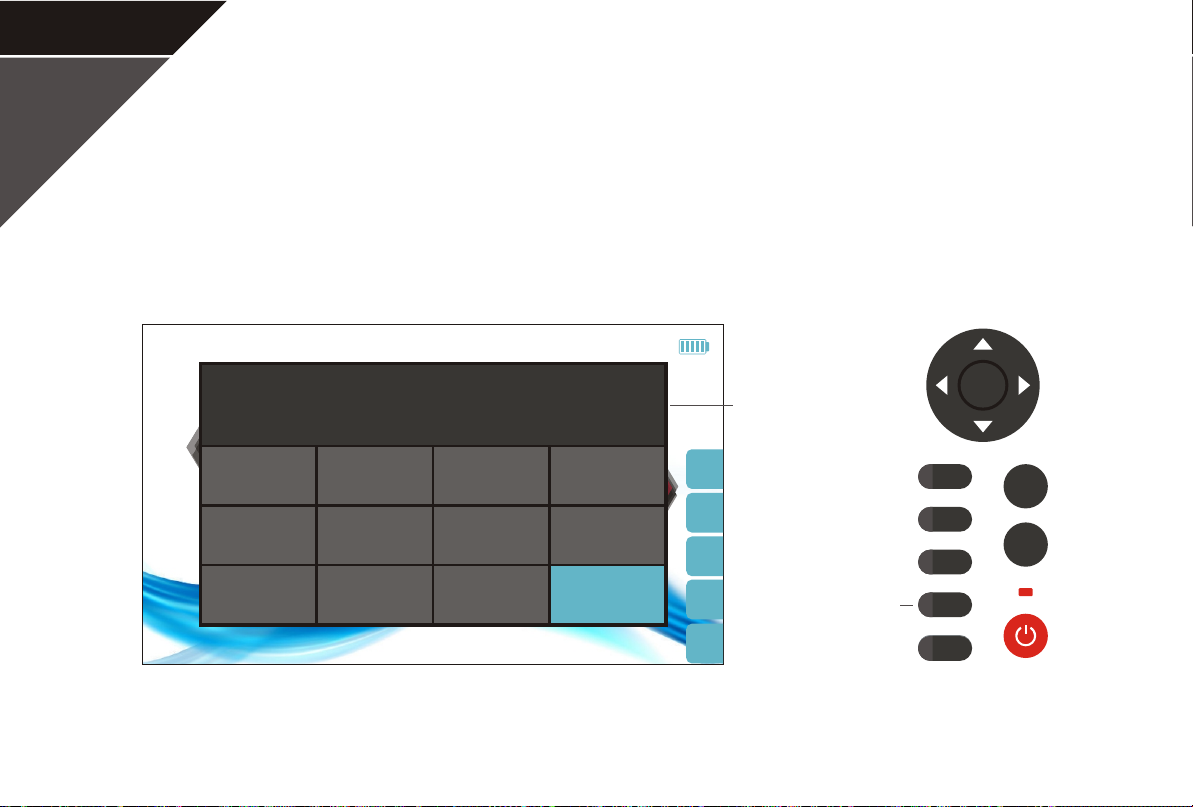
System settings- Security settings
In the English input interface, you can press "F4" button to switch the input of the case.
100%
00#365**145|
Information bar
ENTER
OTDR
#
OPM
ghl jkl
pqrs
abc
tuv
VFL
iOLM
def
mno
wxyz
VIP
Space
Security settings
*
System
clear
back
space
change
en
back
en
F1
F2
F3
F4
F5
F5
SCAN
REAL
Page 55
System settings- Security settings
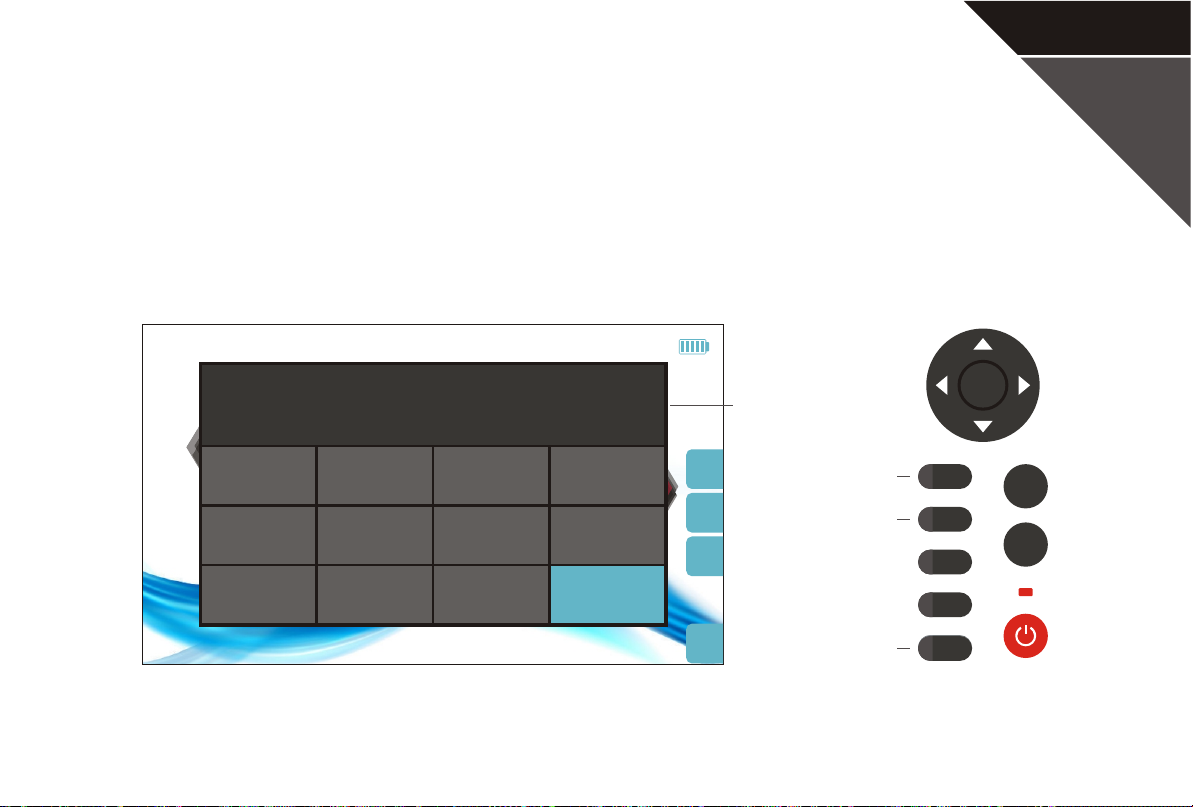
Press "F1" to clear all content, and press "F2" to enter the content one by one to clear, press "F5"
or click "Security Settings" again to exit the security settings.
100%
00#365**145|
Information bar
ENTER
P52
OTDR
1 2
4
7
OPM
VFL
iOLM
5
8 9
VIP
3
6
0
System
Space
Security settings
clear
back
space
change
back
Clear
Back space
Back
F1
F2
F3
F4
F5
F5
SCAN
REAL
Page 56

P53
Basic parameters
Display
Touch Type
USB HOST
Number of Internal Stores (SOR)
Network port
Audio port
Buzzer
Backlight adjustment
Energy saving mode
Language
Power supply
Battery life
Size
Weight
Parameters
7-inch color screen with a resolution of 1024 * 600
Multi-touch capacitive screen
USB 2
>10000
RJ45, 10M / 100M
3.5mm headphone jack
14mm voltage buzzer
Ten levels
No operation auto power off and backlight dim (can cancel)
English
7.4V, 5200mAh lithium polymer battery (A more powerful battery can be selected)
Standby> 15 hours, measurement> 8 hours (A more powerful battery can be selected)
245mm 170mm 70mm
1.55kg
Page 57

Page 58

 Loading...