

Page 1

English
USER'S GUIDE
OPTICAL POWER METER
Page 2
1
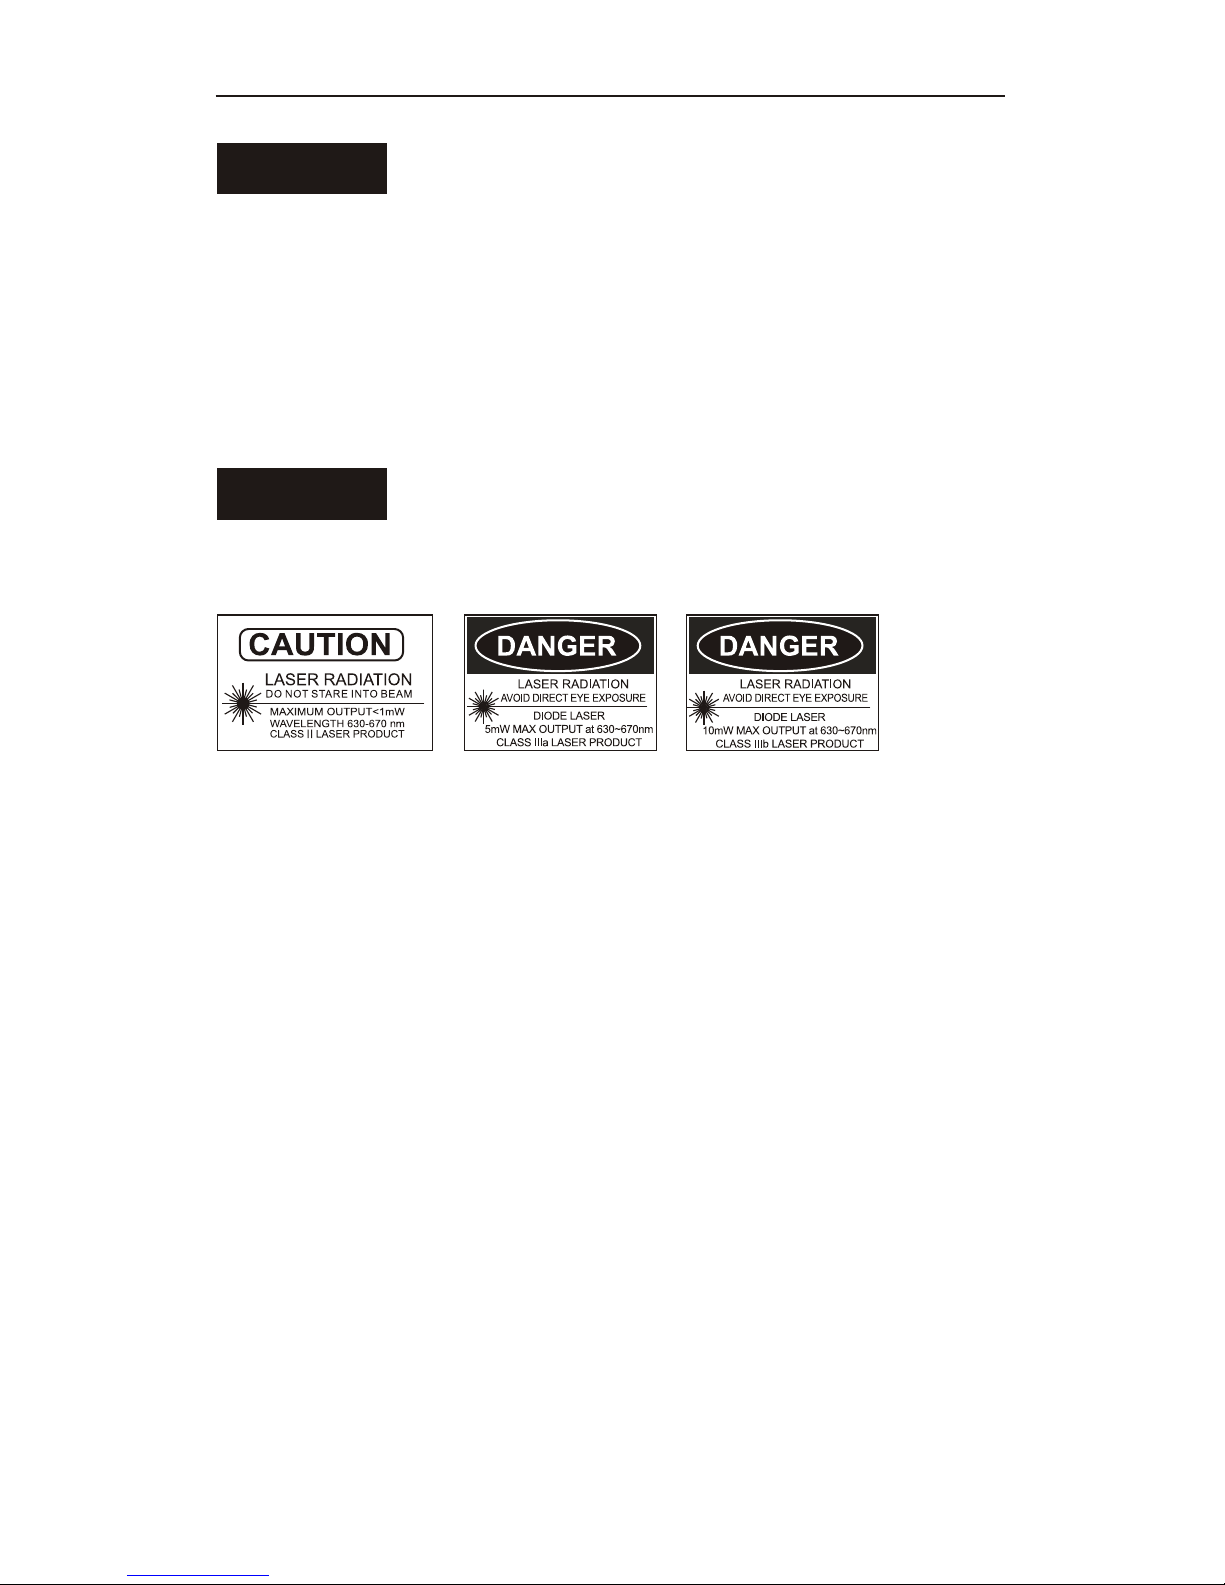
WARNINGWARNING
You are cautioned that changes or modifications not espressly approved
in this document could void yout authority to operate this equipment.
To reduce the risk of fire or electric shock,do not expose this apparatus
to rain or moisture.
To avoid electrical shock, do not open the cabinet. Refer servicing to
qualified personnel only.
NOTENOTE
As the laser is harmful to the eyes, do not attempt to disassemble the
cabinet.
CLASS I LASER PRODUCT
Precautions for Use
Use batteries
At the same time, can not use different style or different capacitance
batteries.
And only charge the rechargeable batteries.
Avoiding condensation problems
As much as possible, avoid sudden temperature changes. Do not
attempt to use the drive immediately after moving it from a cold to a
warm location, to raising the room temperature suddenly, as
condensation may form with in the drive. If the temperature changes
suddenly while using the drive, Stop using it and take out batteries for
at least an hour.
Storage
When long time no use,must take out the batteries to avoid destroying
the device.
Page 3
2
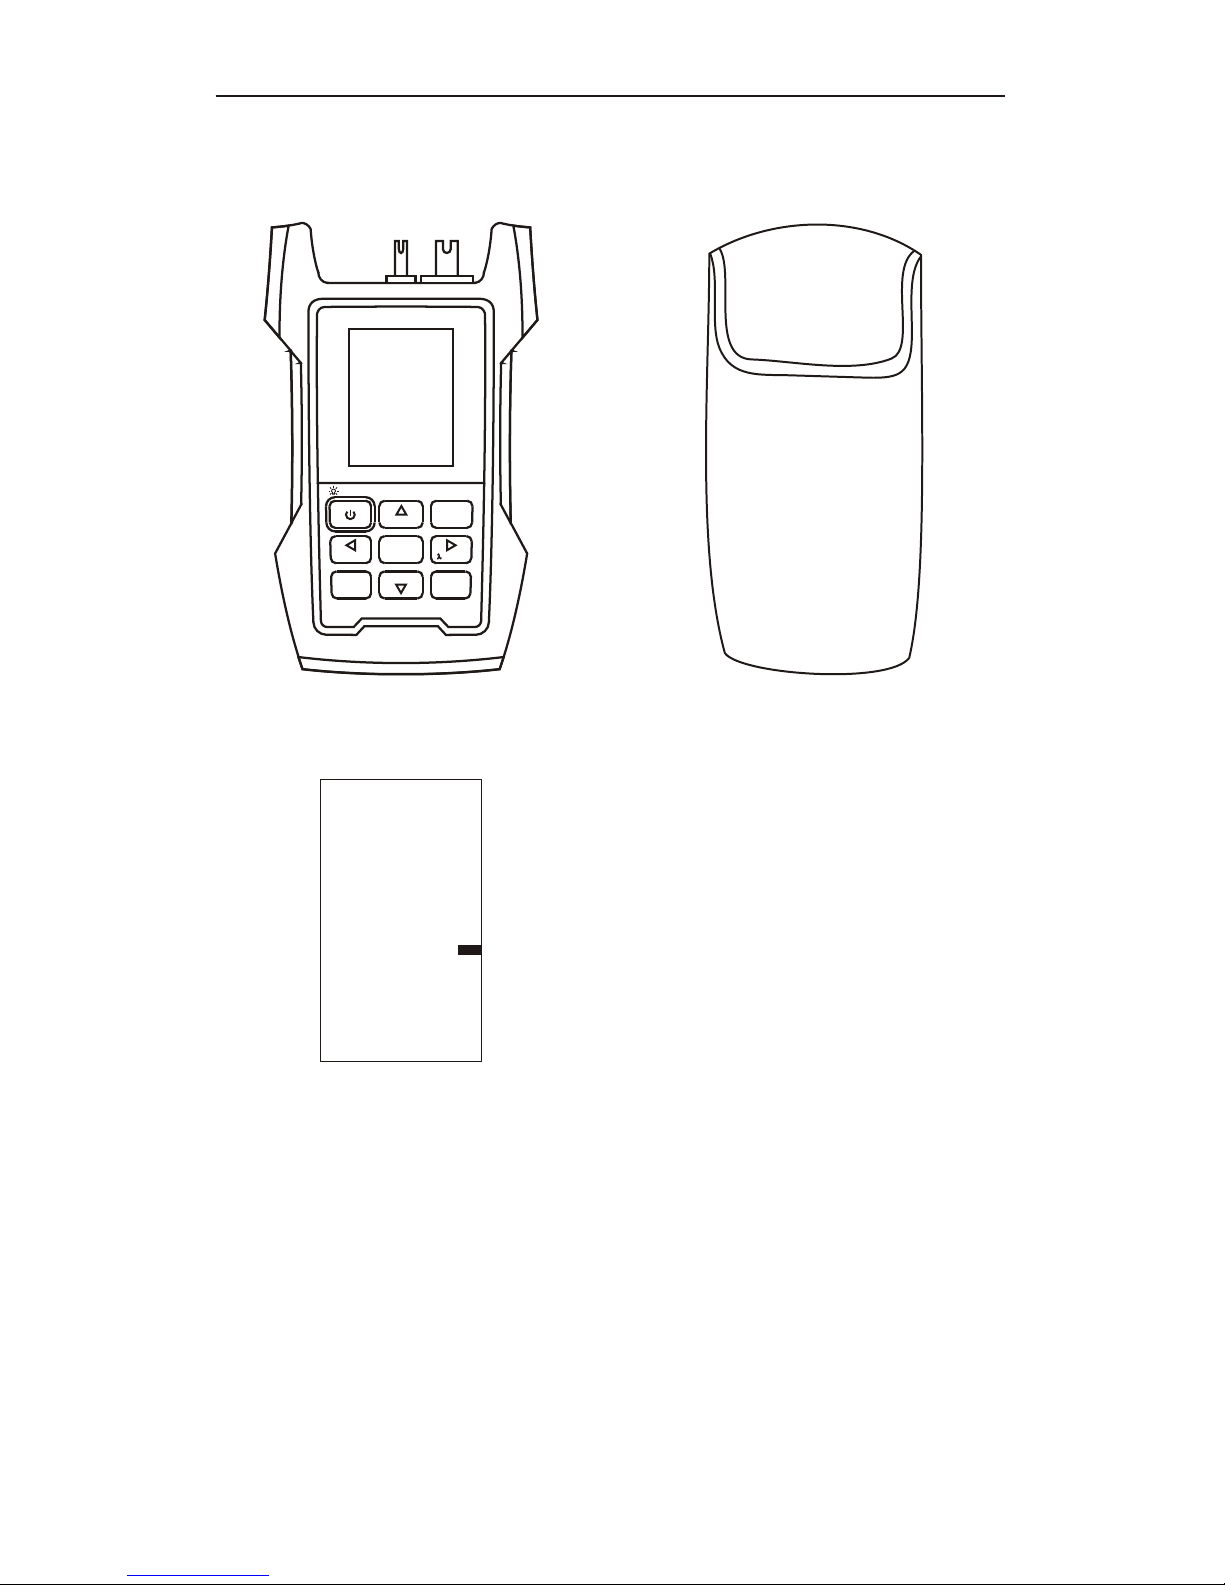
Standard
Host
Bag
Manual
English
USER'S GUIDE
OPTICAL POWER METER
Optical Multi Meter
>2s PERM
MENU
VFL
REF
ESC
ENTER
SAVE
SELECT
AUTOTEST
Page 4
3
1
3
4
2
7
13
5
6
USB
8
9
10
11
12
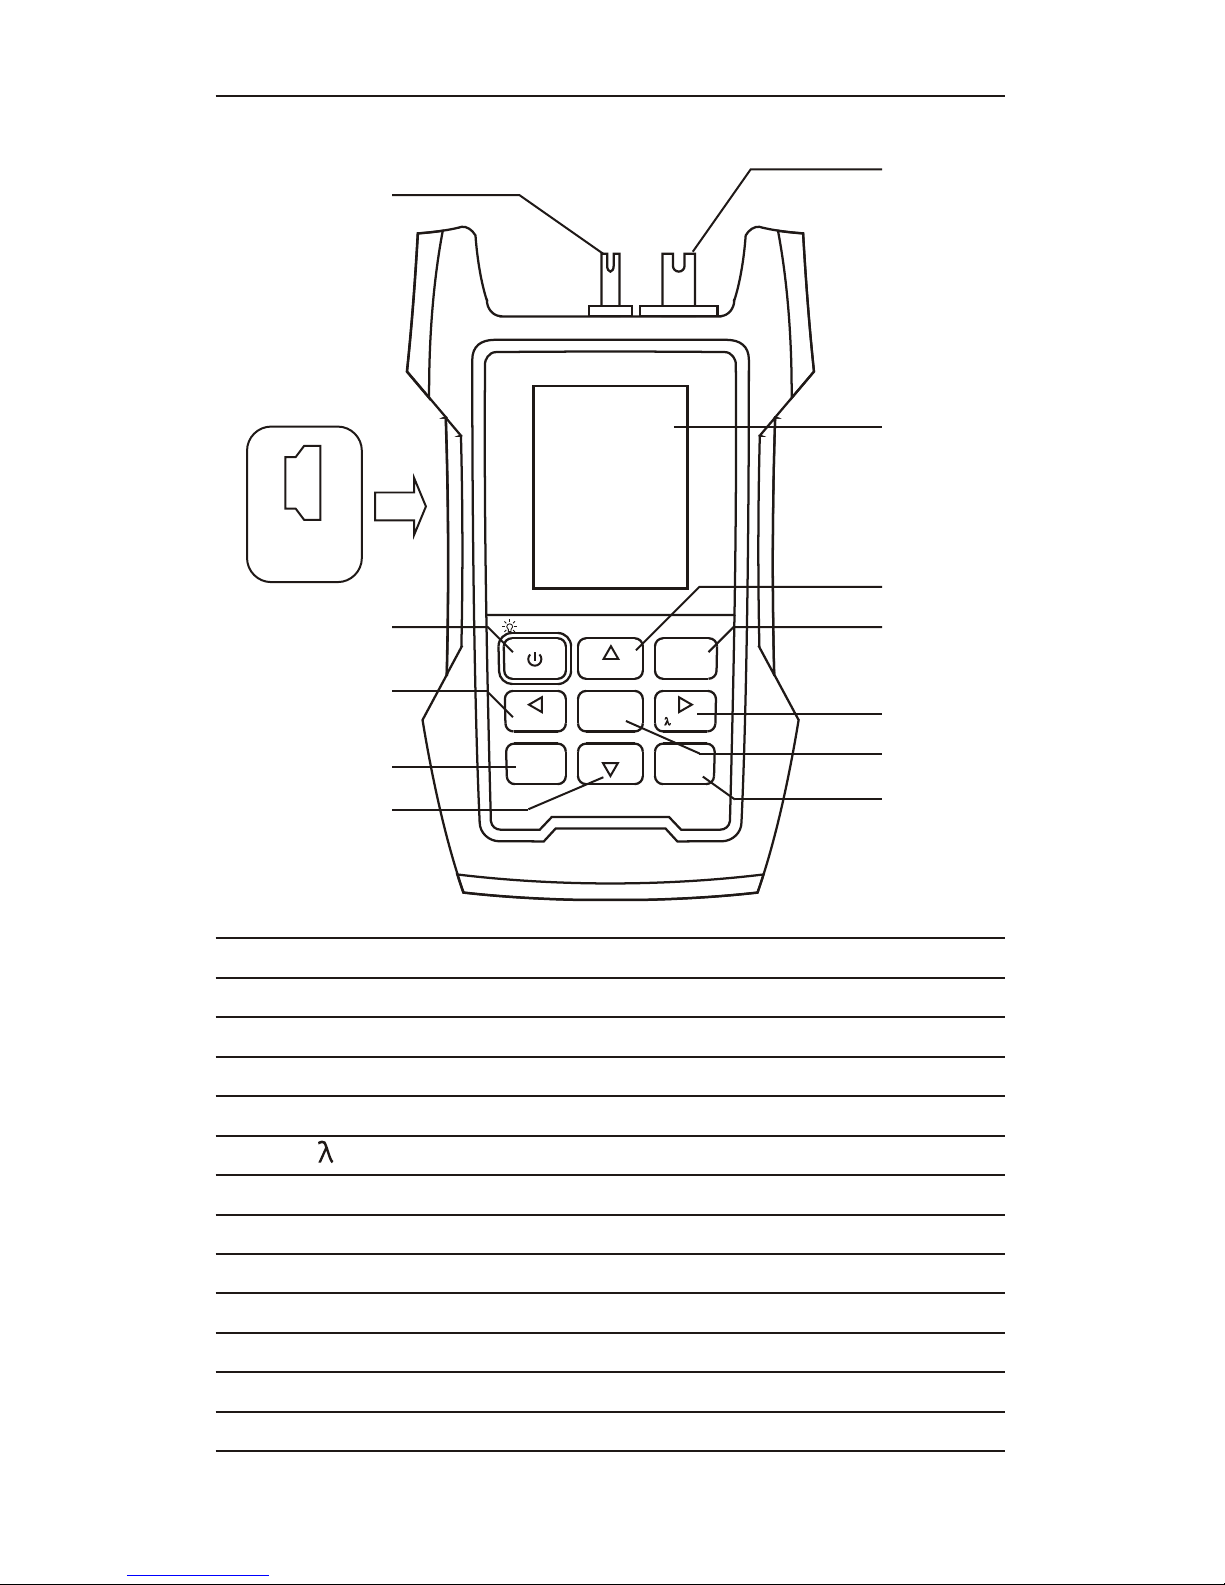
1- Optical Power Meter connector
3- Color LCD
4- REF key/Up key
5- Visual Fault Locator key
6- Select key/Right key
7- Menu key
8- USB charging port
9- Power key
10- AutoTest key/Left key
11- ESC key
12- Save key/ Down key
13- Enter key
Optical Multi Meter
>2s PERM
MENU
VFL
REF
ESC
ENTER
SAVE
SELECT
AUTOTEST
Description
2- Visual Fault Locator optional)connector(
Page 5
4
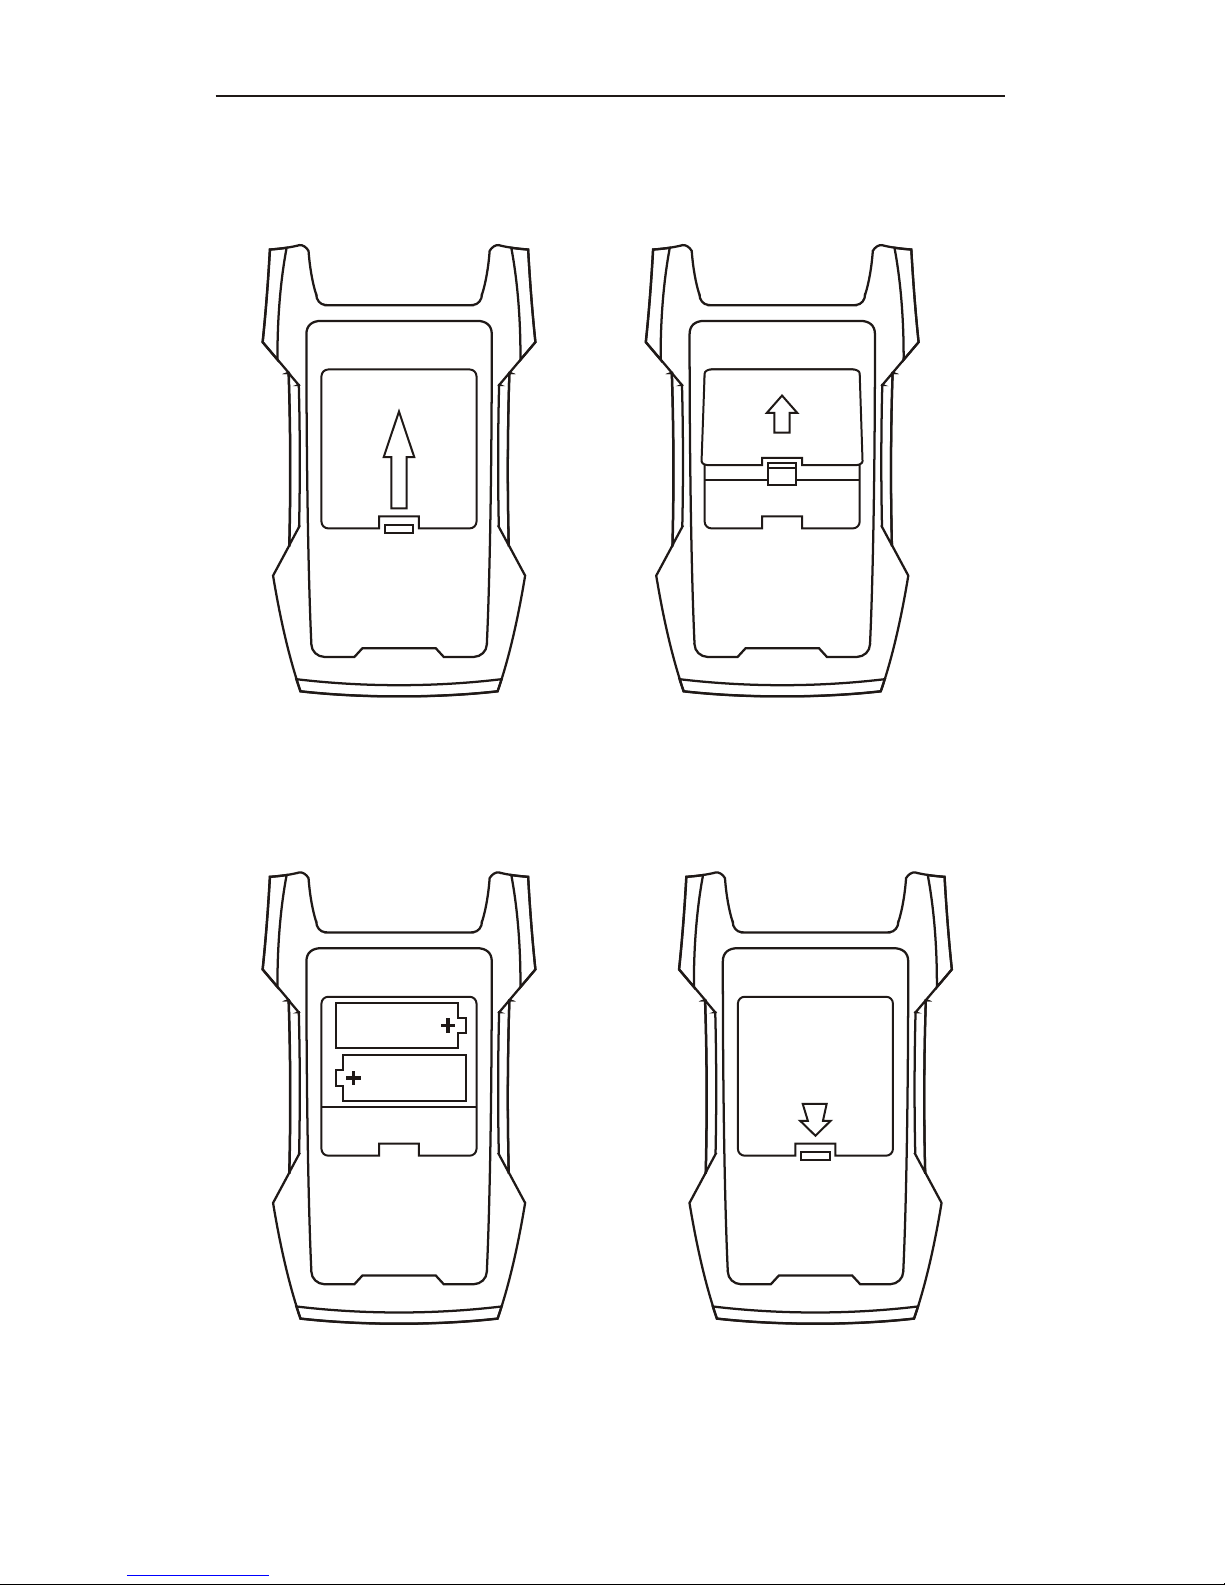
1.Press and push up
2.Open the lid
3.Installing the batteries
4.Push down and press
Installing the batteries
Page 6
5
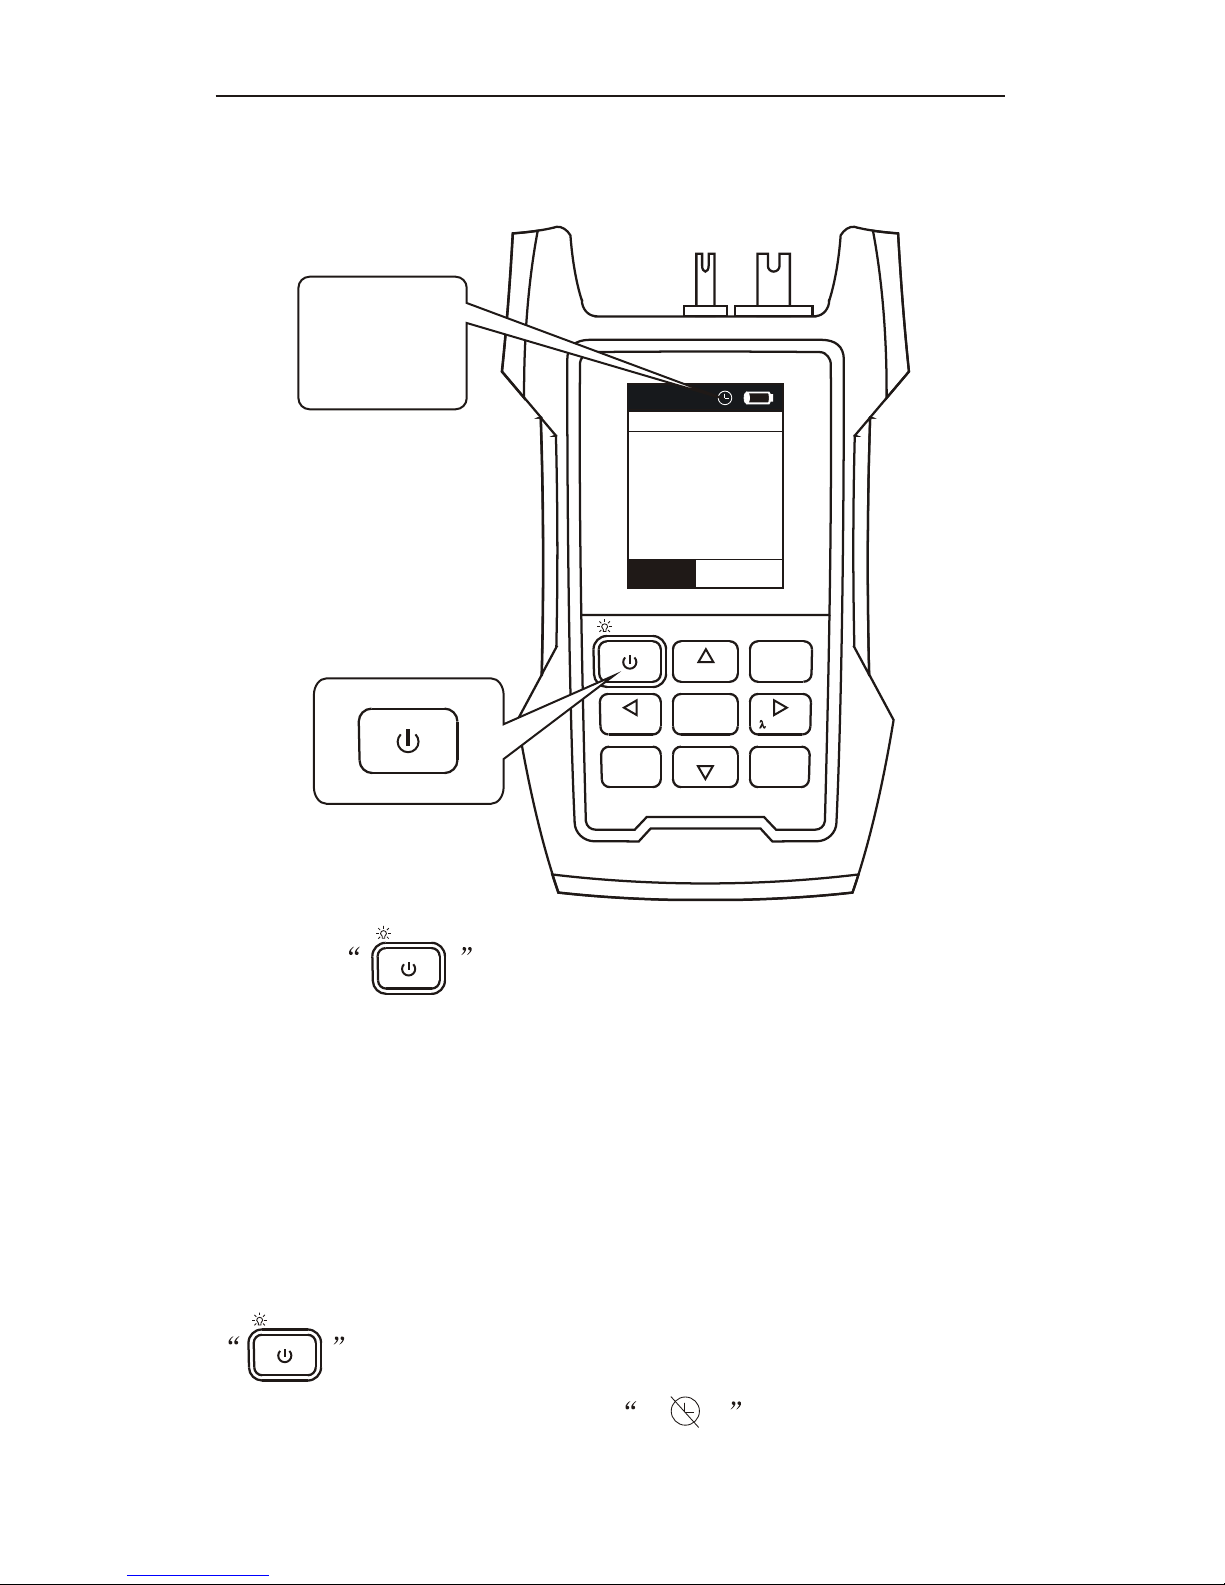
Press key to turn on the device. Press it again
for 2 seconds to shut down the device.
Device has power saving function. User can set the auto
off time in the menu. After the setting time no key pressing,
the device will auto power off.
U ressing
key to turn on device and keeping holding it over 2
seconds until the screen shows and auto off time in
the menu will turn to 0.
ser can cancel the auto power off function by p
Optical Multi Meter
>2s PERM
17:57
Auto
Power
Off
>2s PERM
>2s PERM
MENU
VFL
REF
ESC
ENTER
SAVE
SELECT
AUTOTEST
Power on/off, auto power off
1550nm AUTO
-57.02
dBm
1.72 nW
Tone Freq
----
Page 7
6
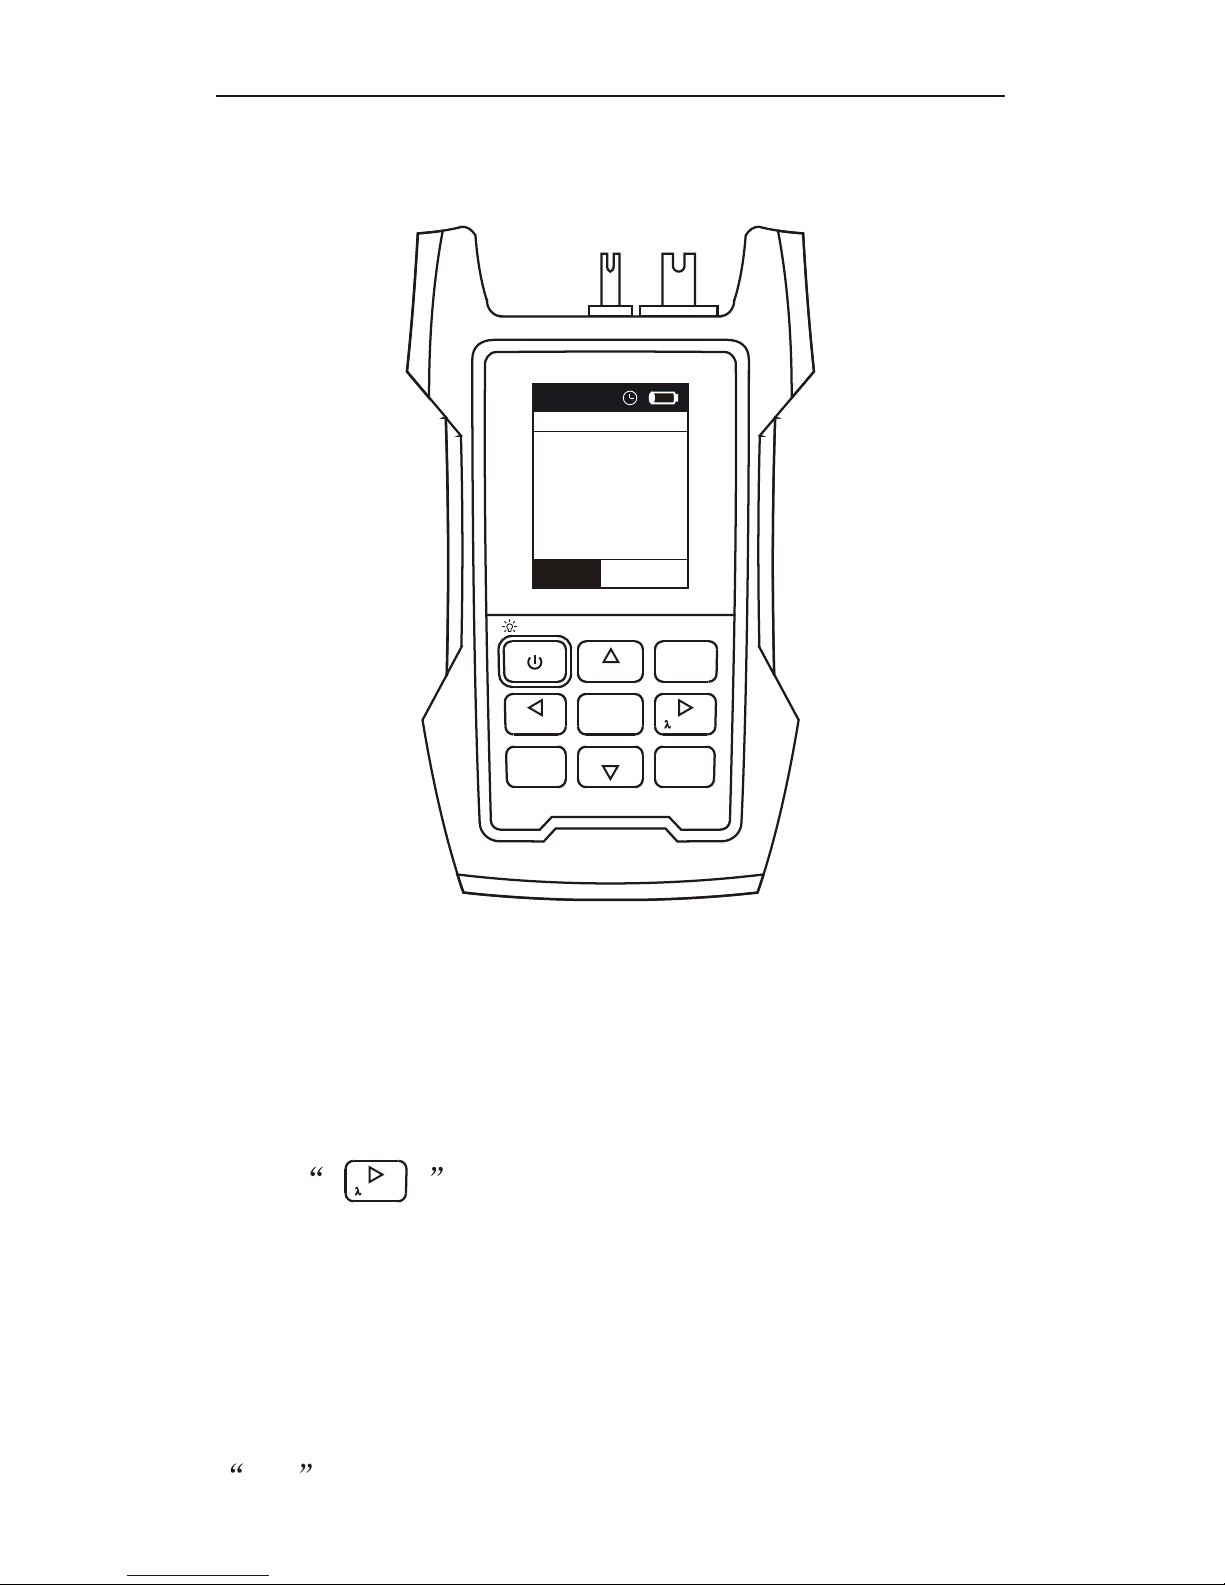
After turning on the device, it shows the
measurement interface of optical power meter. In the
middle of screen, shows the measuring power value.
Press key can select the wavelength. When
wave detecting is ON, the screen will show AUTO. At
the bottom of screen, shows the tone frequency. If no
frequency detected or this function is OFF, it will show
---- .
SELECT
OPM- Measurement
Optical Multi Meter
>2s PERM
17:57
MENU
VFL
REF
ESC
ENTER
SAVE
SELECT
AUTOTEST
1550nm AUTO
-57.02
dBm
1.72 nW
Tone Freq
----
Page 8
7
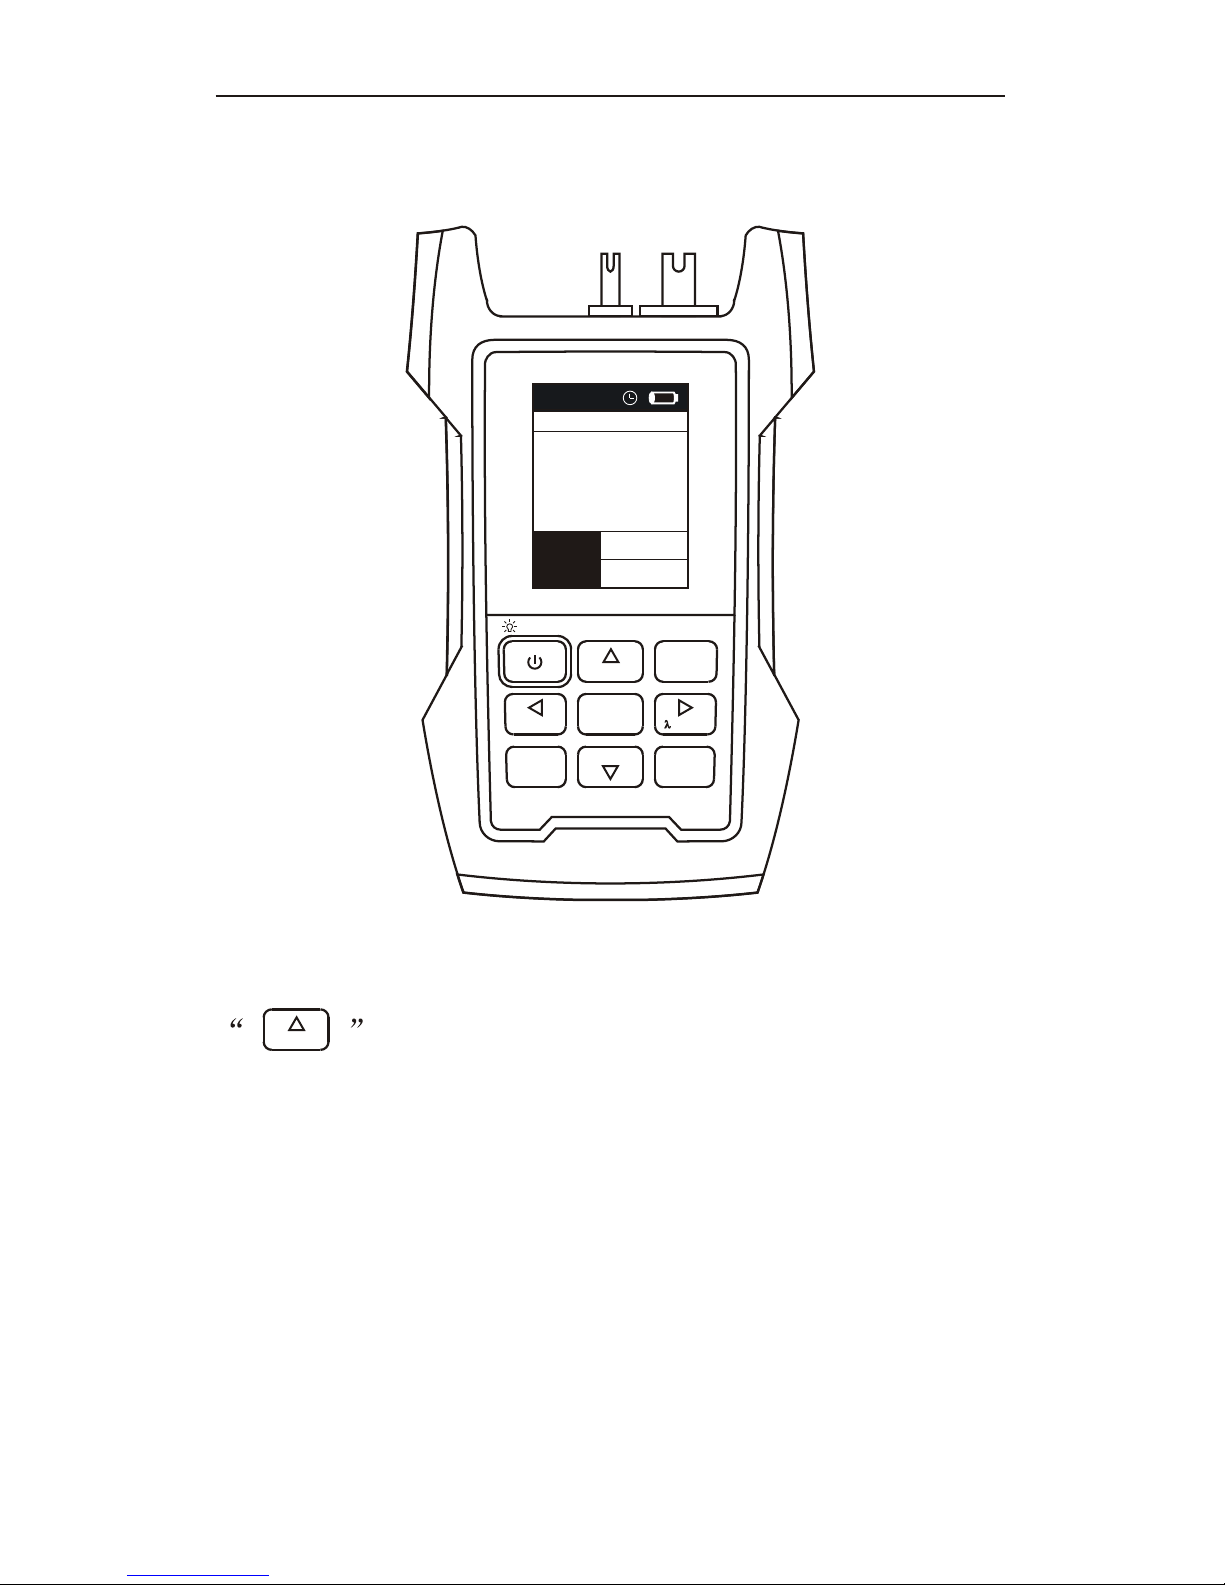
At the main measurement interface, short press
key, it will show you the reference value you
stored before, and the unit will turn to dB. Long press
this key for 2 seconds, you can save the current value
as a new reference.
REF
OPM- REF set
Optical Multi Meter
>2s PERM
17:57
MENU
VFL
REF
ESC
ENTER
SAVE
SELECT
AUTOTEST
1550nm AUTO
7.02
dB
1.72 nW
REF Value
Tone Freq
-50.0 dBm
----
Page 9
8
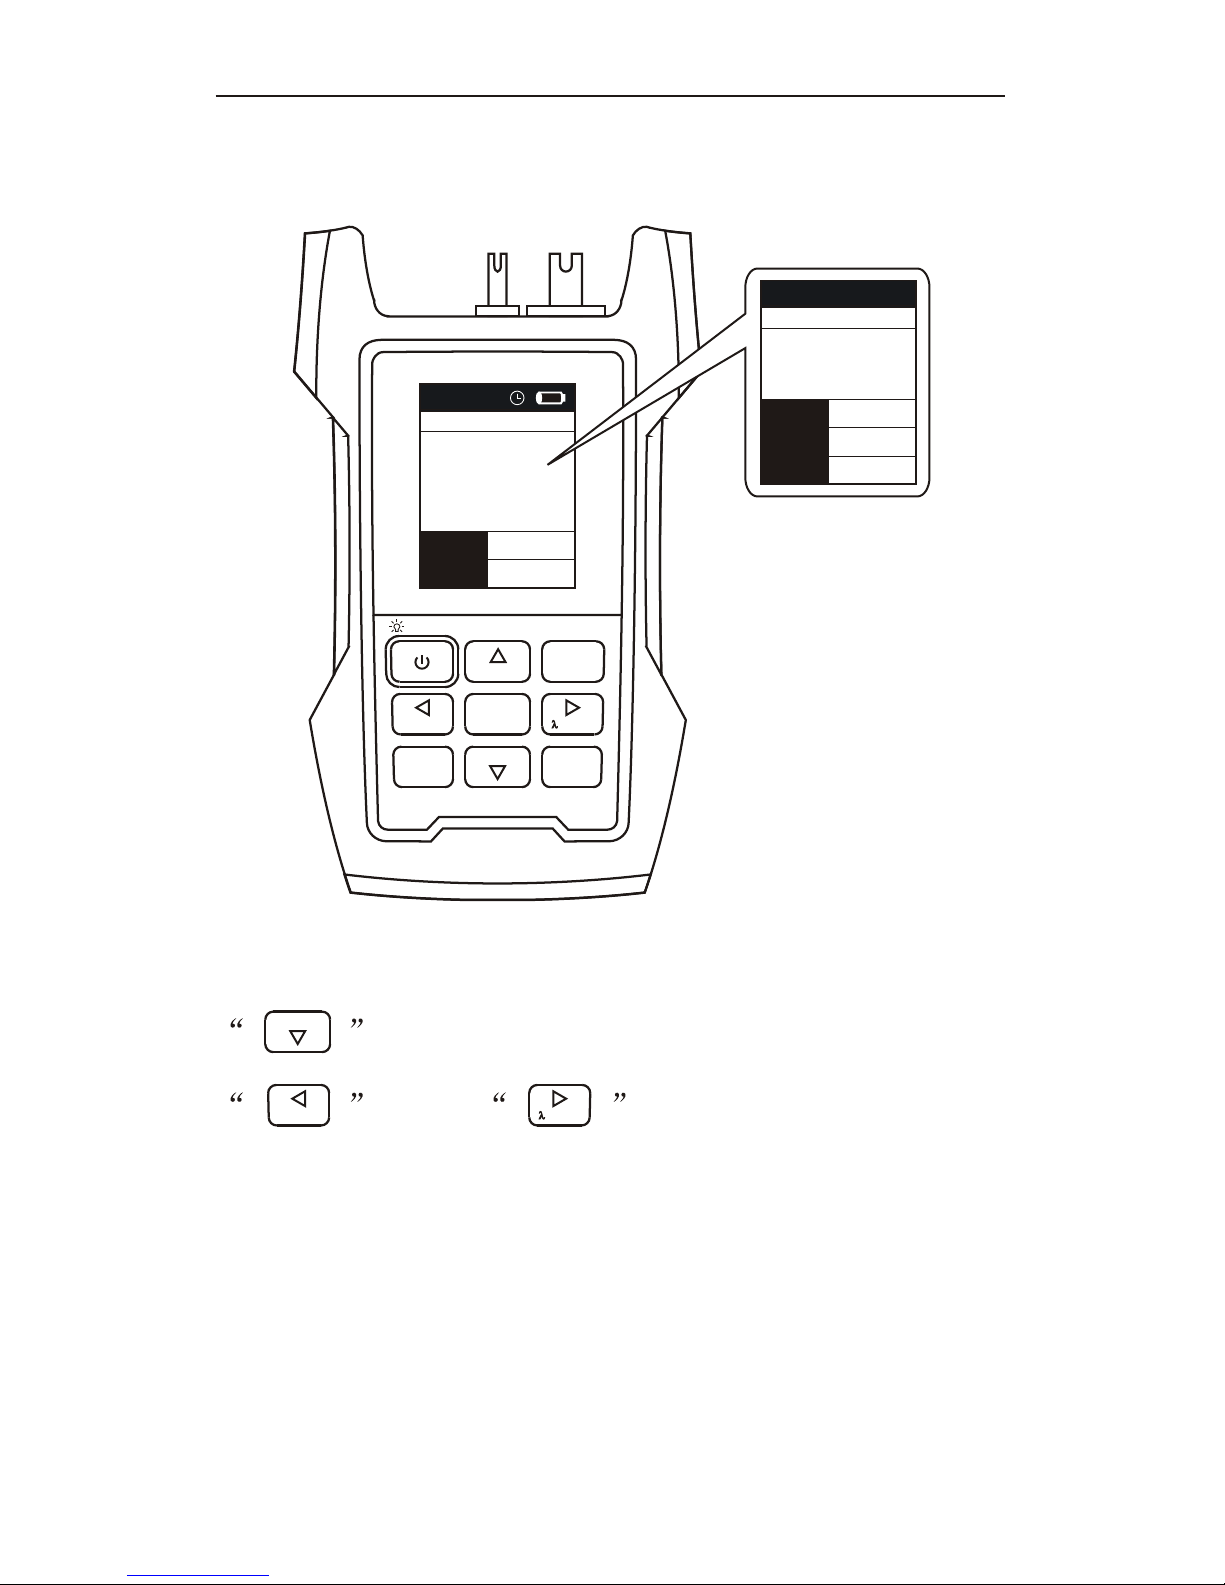
At the main measurement interface, short press
key , it can read the stored data. Press
key or key can select the
different record data.
SAVE
SELECT
AUTOTEST
OPM- Data reading
Optical Multi Meter
>2s PERM
17:57
MENU
VFL
REF
ESC
ENTER
SAVE
SELECT
AUTOTEST
1550nm AUTO
7.02
dB
1.72 nW
REF Value
Tone Freq
-50.0 dBm
----
(*---020
Data
1550nm
LOW
NO.0019
REF Value
Tone Freq
-50.0 dBm
----
Page 10
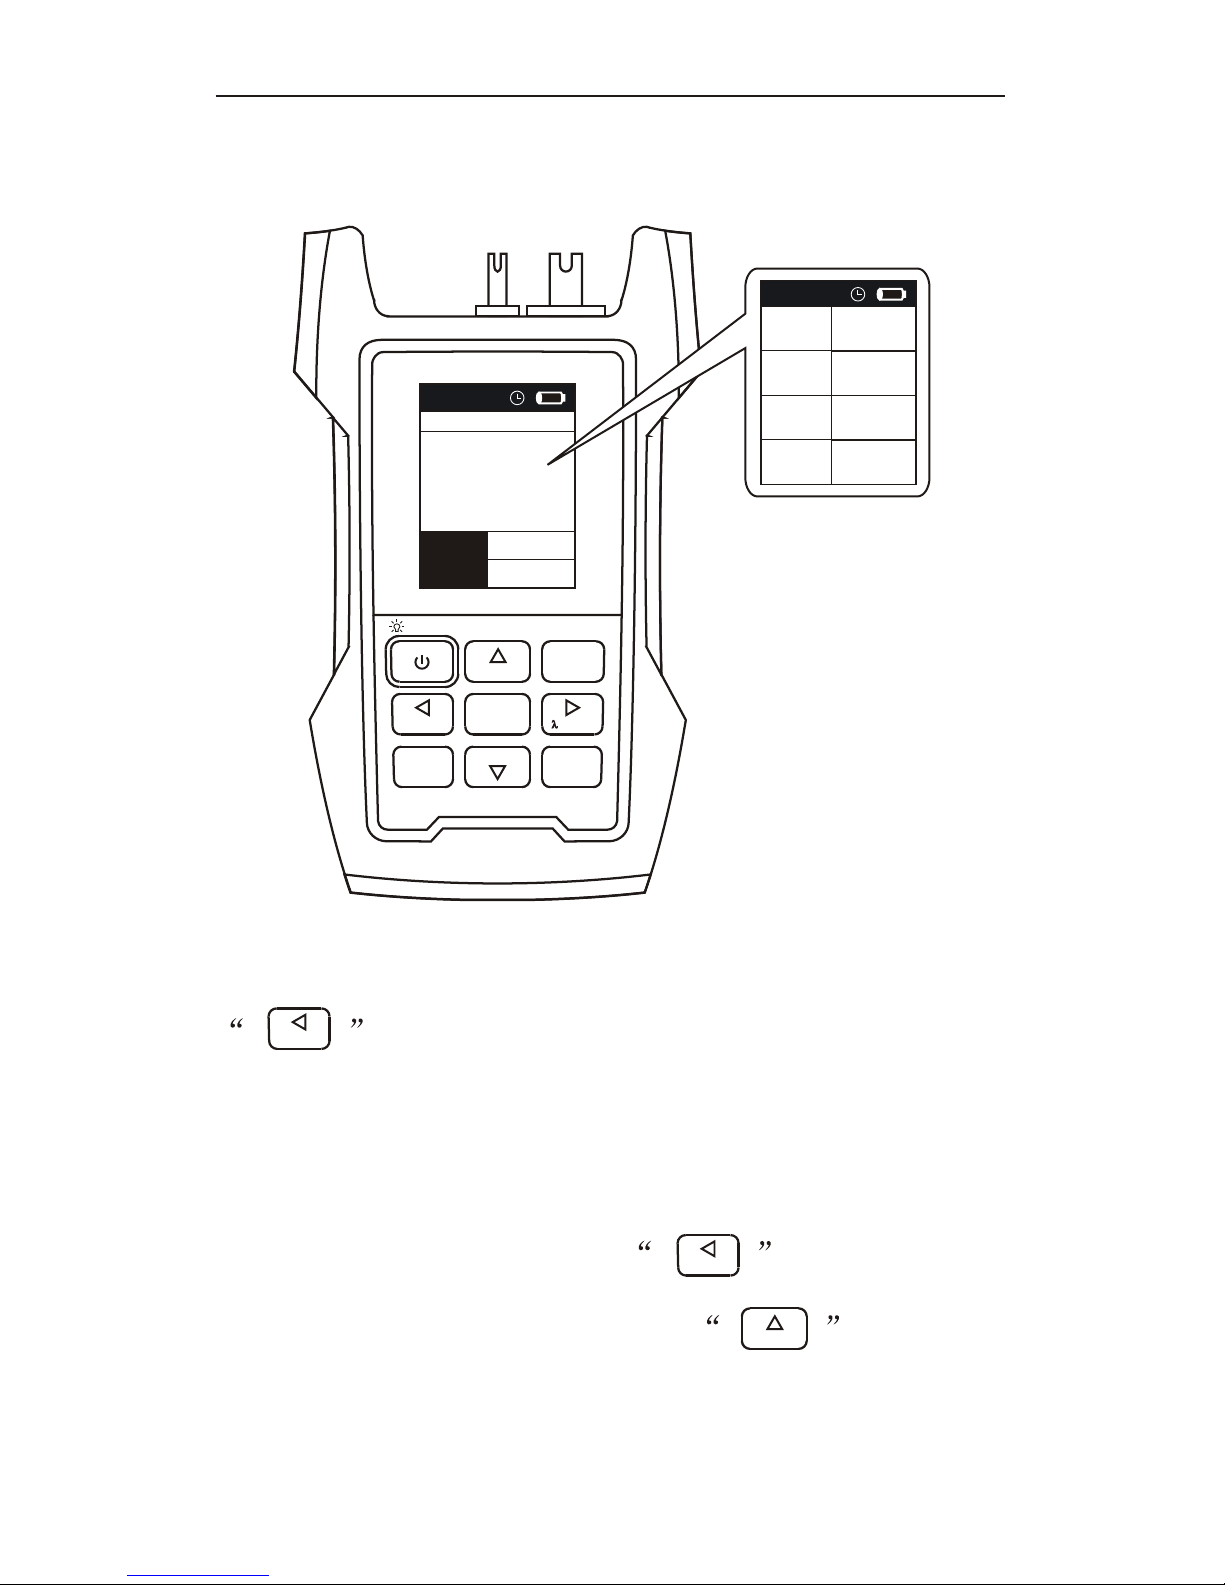
9
At the main measurement interface, short press
key , it can enter to auto test mode for
single wavelength. Press it again to enter to auto test
mode for multiple wavelengths. If you want to quit
this function, you can press key again.
During auto test, short press key can
check the references for each wavelength.
REF
AUTOTEST
AUTOTEST
OPM- Auto Test
Optical Multi Meter
>2s PERM
17:57
MENU
VFL
REF
ESC
ENTER
SAVE
SELECT
AUTOTEST
1550nm AUTO
7.02
dB
1.72 nW
REF Value
Tone Freq
-50.0 dBm
----
17:57
1625nm
1550nm
1490nm
1310nm
LOW
LOW
LOW
LOW
Page 11
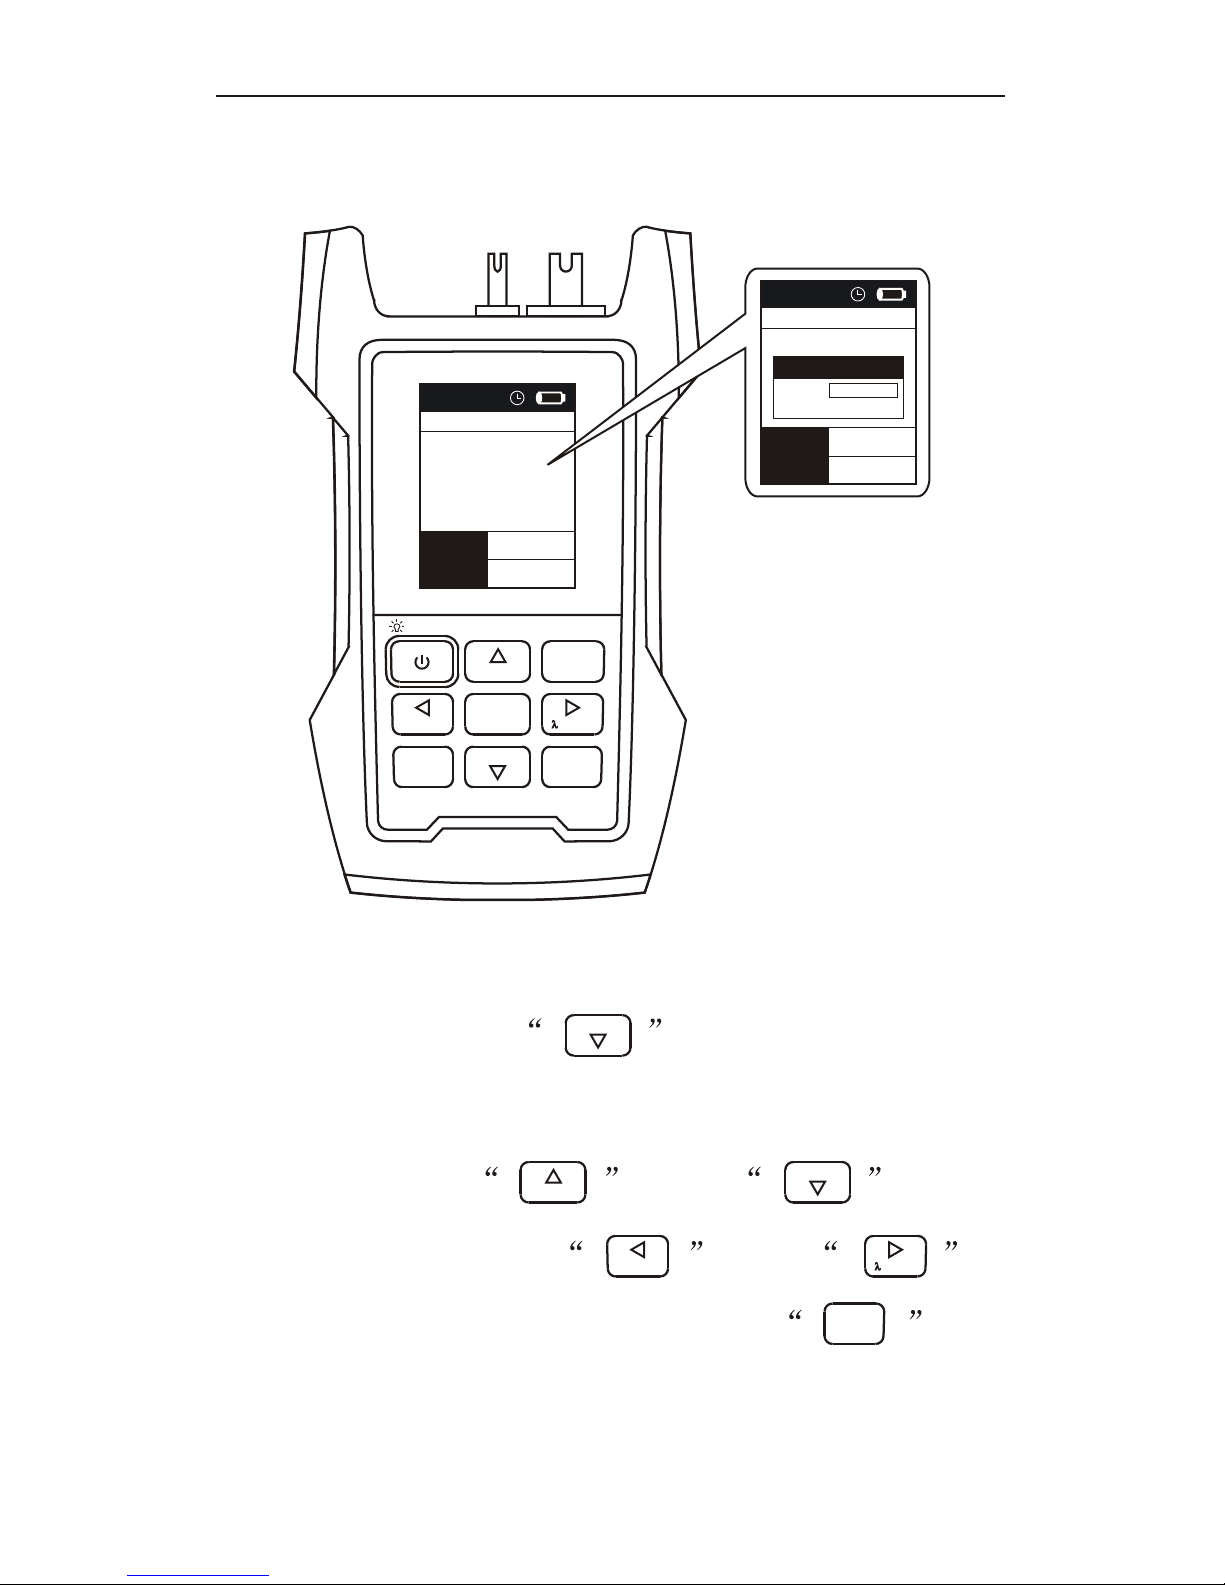
10
At the main measurement interface or auto test
interface, long press key, it can store the
measuring data. You need to input the filename with 8
characters. Press key or key to
select characters, press key or
key to shift. When finish naming, press key
to save the data and back to the measuring interface.
The device can save 1000 records totally.
REF
SAVE
SAVE
SELECT
AUTOTEST
ENTER
OPM- Data storage
Optical Multi Meter
>2s PERM
17:57
MENU
VFL
REF
ESC
ENTER
SAVE
SELECT
AUTOTEST
1550nm AUTO
7.02
dB
1.72 nW
REF Value
Tone Freq
-50.0 dBm
----
17:57
1550nm AUTO
7.02
dB
1.72 nW
REF Value
Tone Freq
-50.0 dBm
----
Save Data
Name
Remain 980Files
--------
Page 12
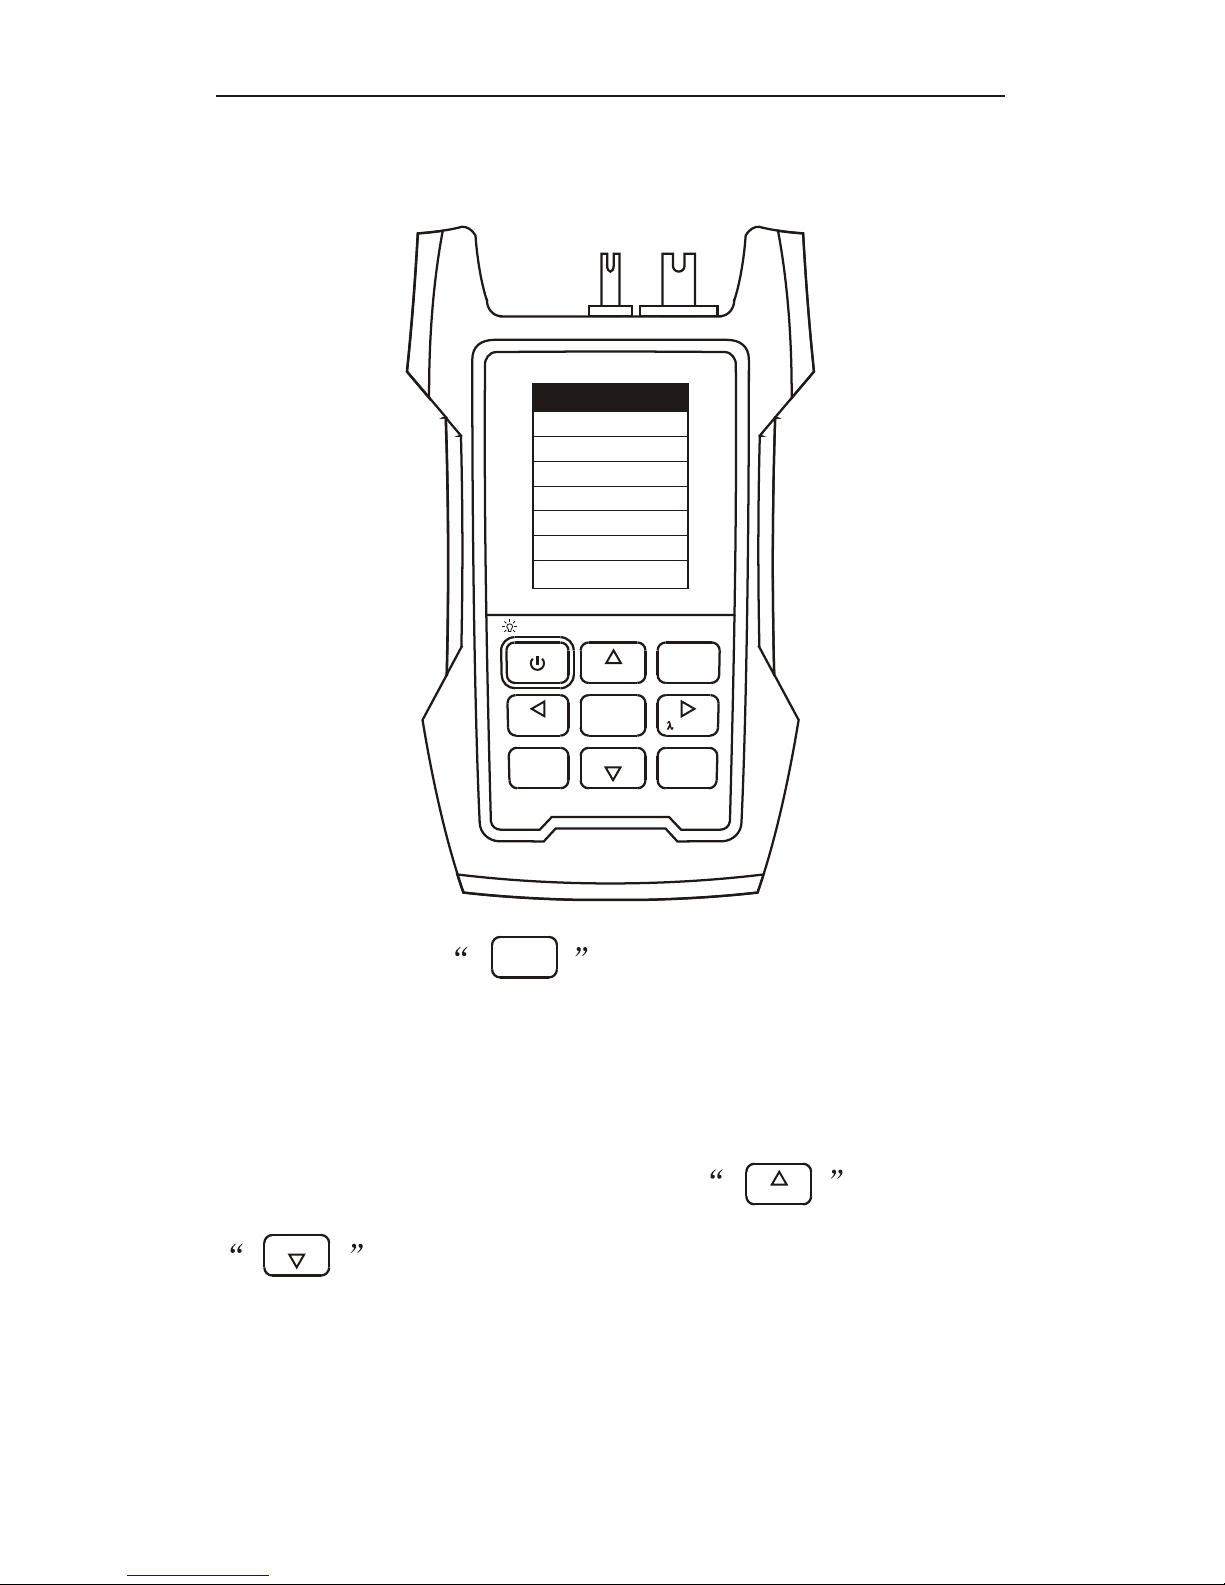
11
Optical Multi Meter
>2s PERM
Menu
File Operating
User Defined Wave
Manual Calibrate
Threshold
Time Setting
System Setting
SN:1290100012020
Short press key, device will enter to
setting menu. Setting menu includes File Operating,
Optional Wave, Hand calibrate, Threshold, Time
Setting and System Setting. Press key or
key to select the function you need.
REF
SAVE
MENU
MENU
VFL
REF
ESC
ENTER
SAVE
SELECT
AUTOTEST
Setting menu
Page 13
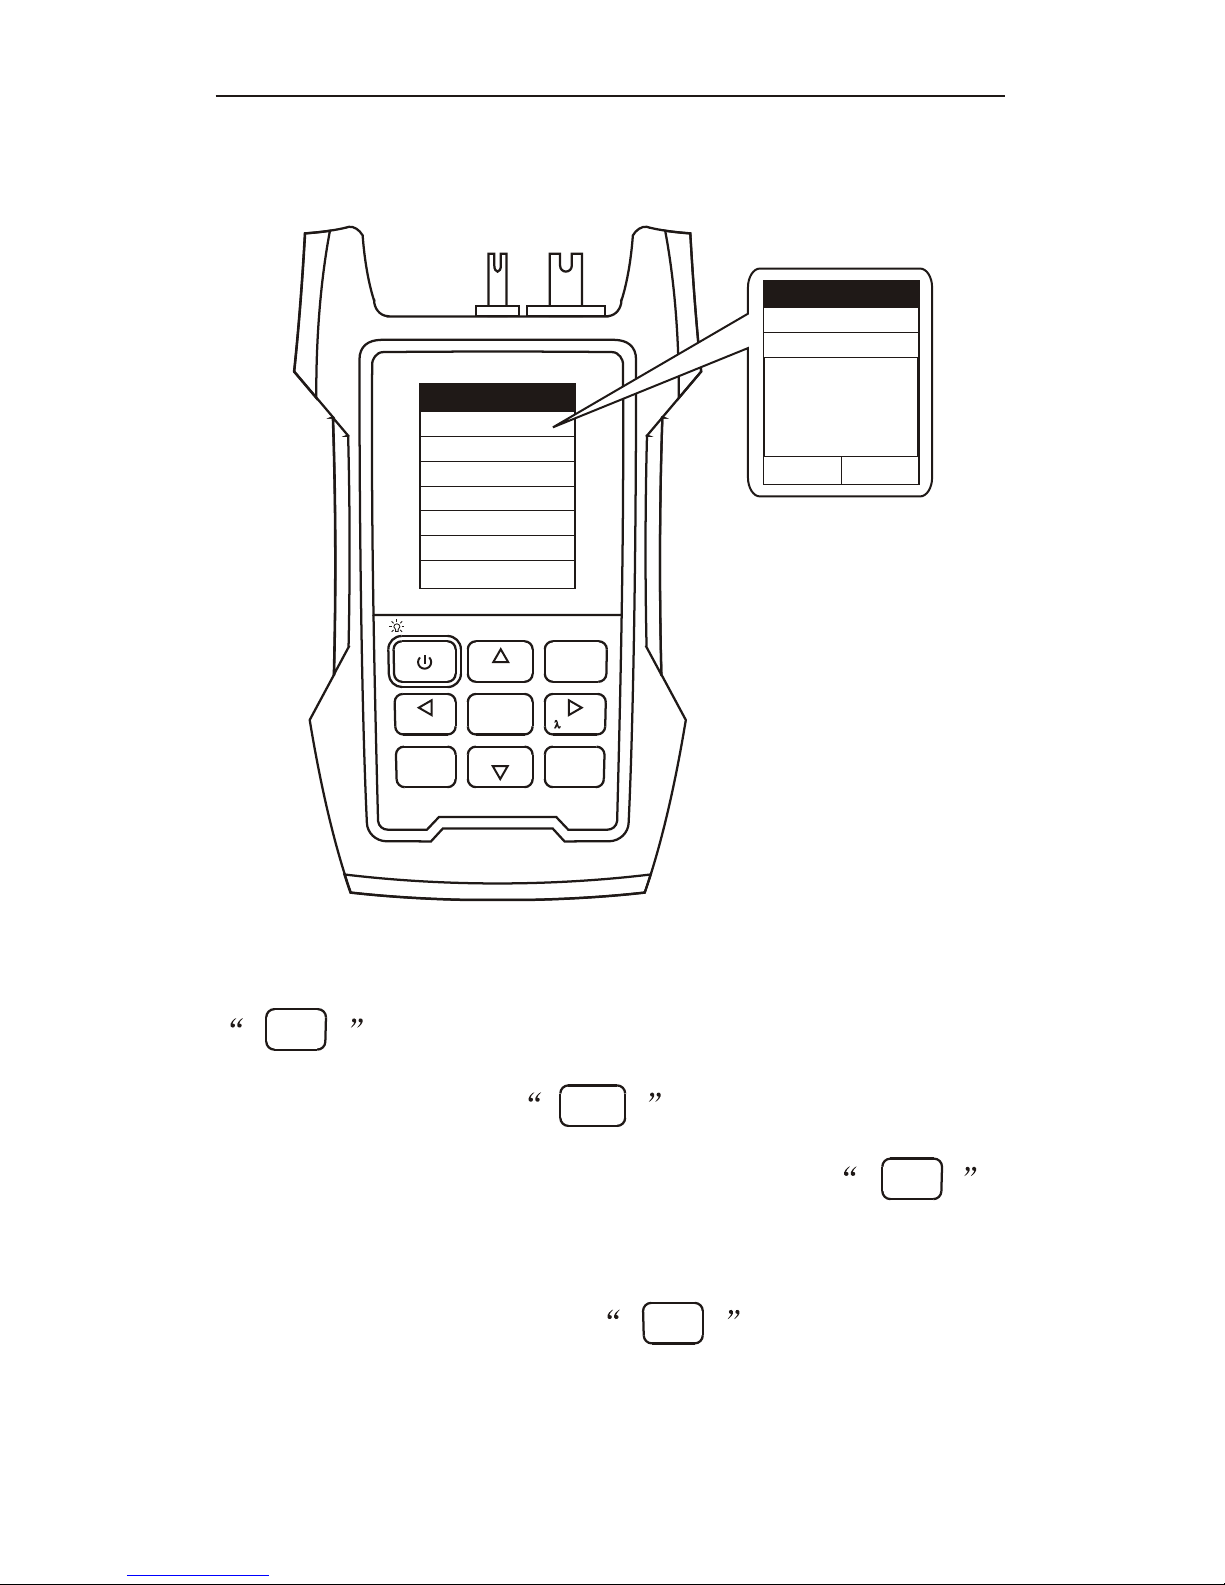
12
ESC
ENTER
ENTER
Move the cursor to File Operating and press
key to enter. File includes Single wave and
Multiple wave. Press key to select open or
delete the file. If you select open and press
to enter wave data. For each data record, you can
open, edit or delete. Press key to cancel
the operation.
MENU
Setting menu- File Operating
Optical Multi Meter
Menu
File Operating
User Defined Wave
Manual Calibrate
Threshold
Time Setting
System Setting
SN:1290100012020
File Operating
Single
Multiple wave
wave
open
delete
1
0
>2s PERM
MENU
VFL
REF
ESC
ENTER
SAVE
SELECT
AUTOTEST
Page 14
13
Optical Multi Meter
>2s PERM
MENU
VFL
REF
ESC
ENTER
ENTER
ENTER
SAVE
SELECT
AUTOTEST
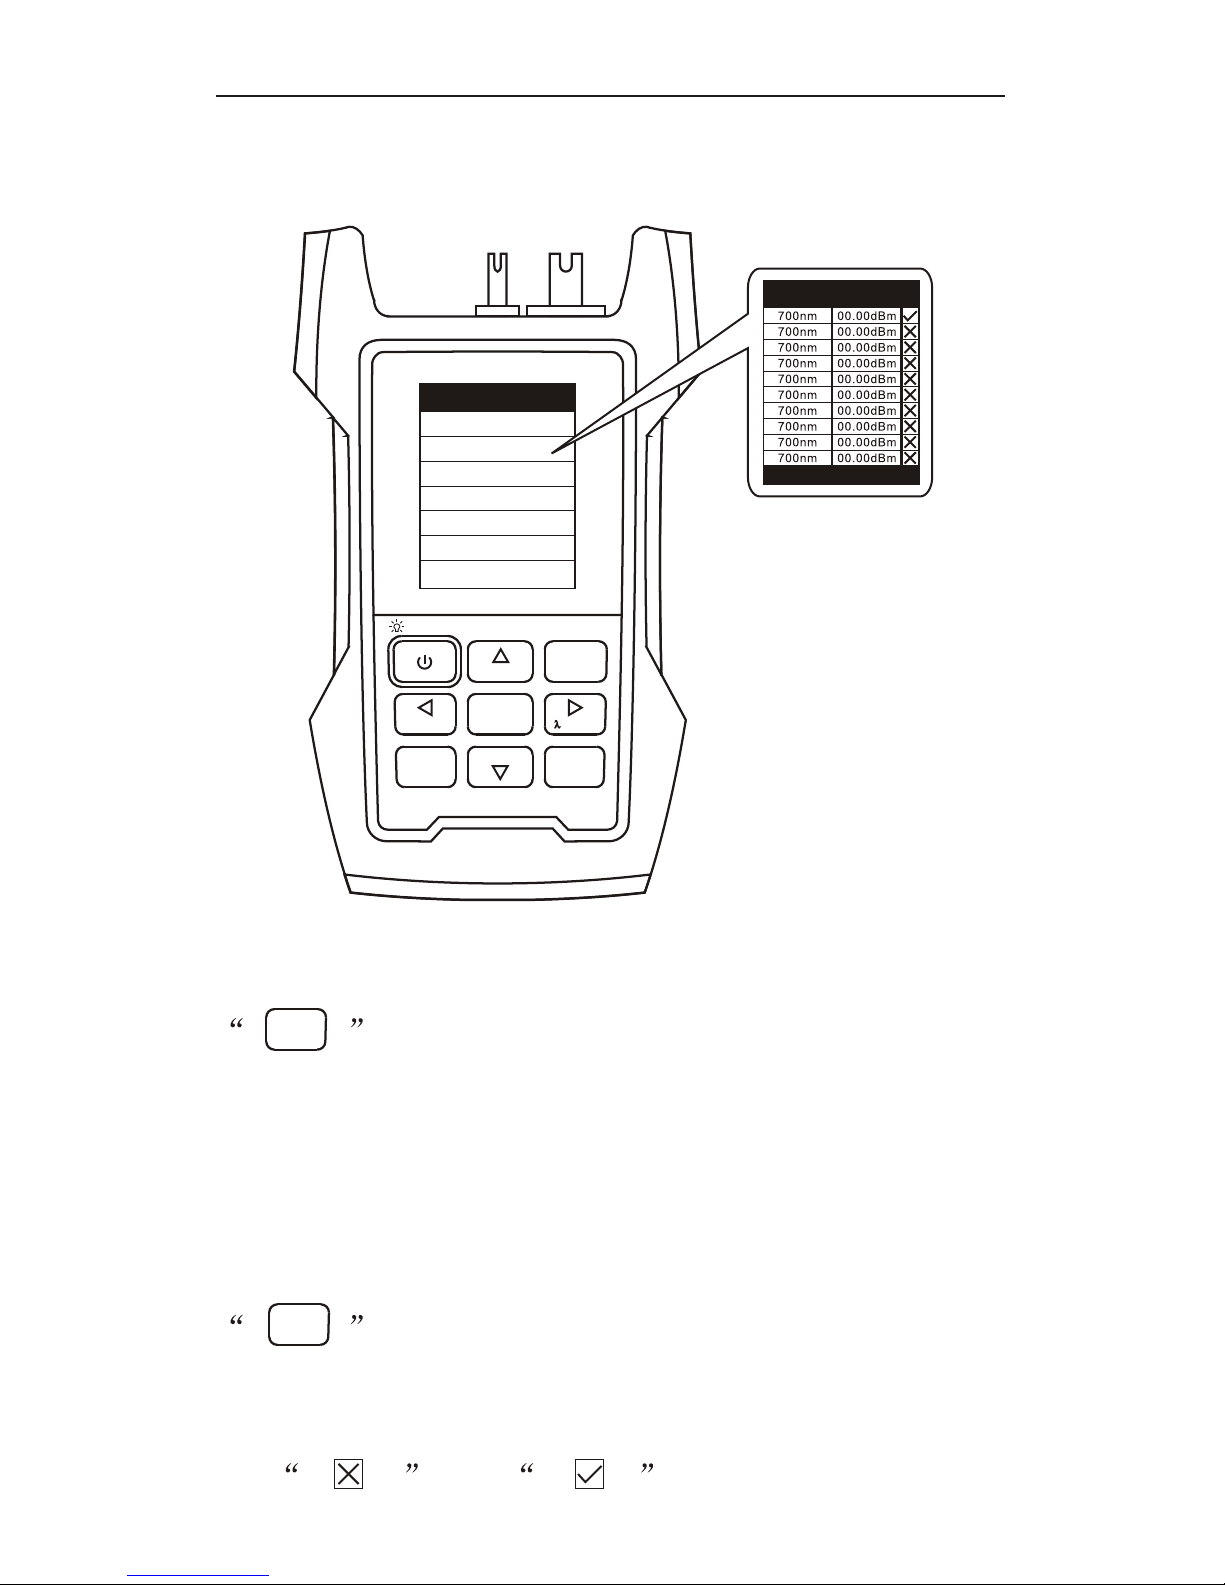
Move the cursor to User Defined Wave and press
key to enter. You can set 10 groups of
wavelength calibration values except for wavelengths
of 850/1300/1310/1490/1550/1625nm. The range of
calibration value is -30dBm~+0.00dBm. Press
key to enter to set and press it again to save
and quit setting. It only can be used when you change
the into .
Setting menu- User Defined Wave
Menu
File Operating
User Defined Wave
Manual Calibrate
Threshold
Time Setting
System Setting
SN:1290100012020
User Defined Wave
Factory Reset
Page 15
14
Optical Multi Meter
>2s PERM
MENU
VFL
REF
ESC
ENTER
ENTER
ENTER
SAVE
SELECT
AUTOTEST
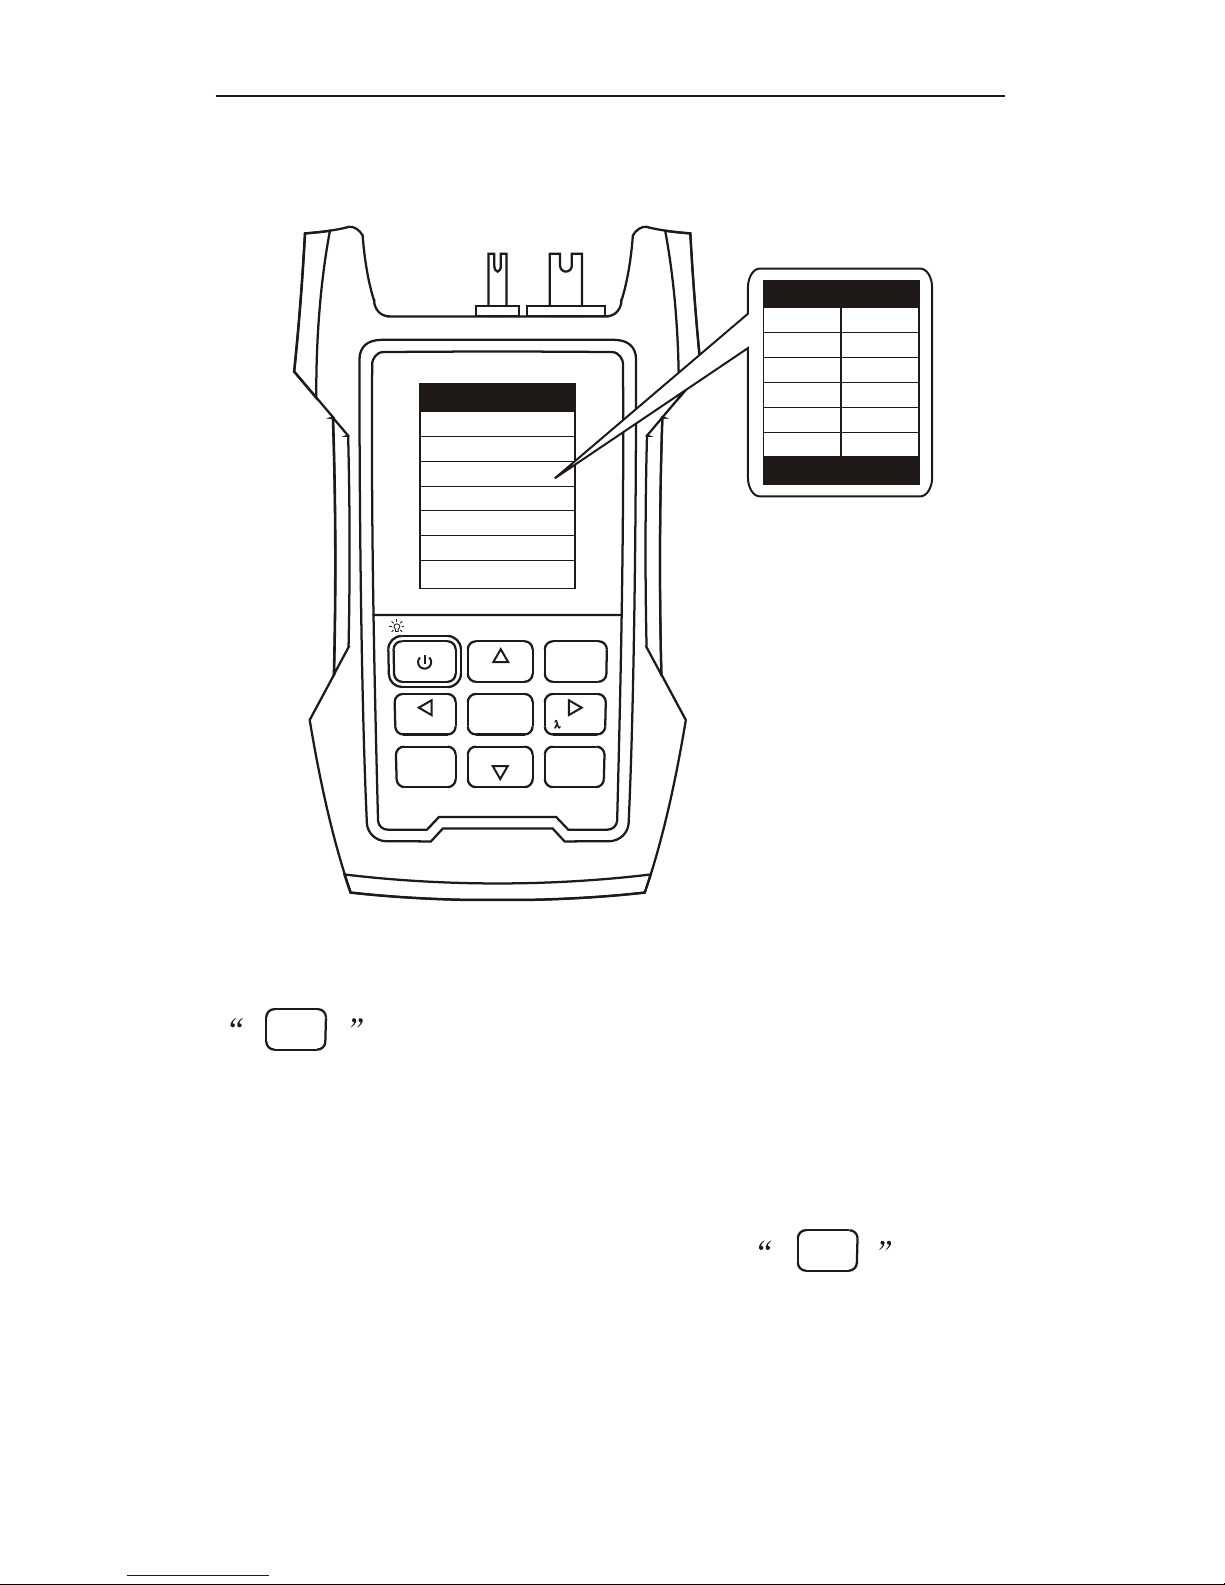
Move the cursor to Manual Calibrate and press
key to enter. You can set offsets for six
wavelengths, include
850/1300/1310/1490/1550/1625nm. The range of
offset value is -5dBm~+5dBm.Press key to
enter to set and press it again to save and quit setting.
Setting menu- Manual Calibrate
Menu
File Operating
User Defined Wave
Manual Calibrate
Threshold
Time Setting
System Setting
SN:1290100012020
Manual Calibrate
Factory Reset
850nm
1300nm
1310nm
1490nm
1550nm
1625nm
+0.00dBm
+0.00dBm
+0.00dBm
+0.00dBm
+0.00dBm
+0.00dBm
Page 16
15
Optical Multi Meter
>2s PERM
MENU
VFL
REF
ESC
ENTER
SAVE
SELECT
AUTOTEST
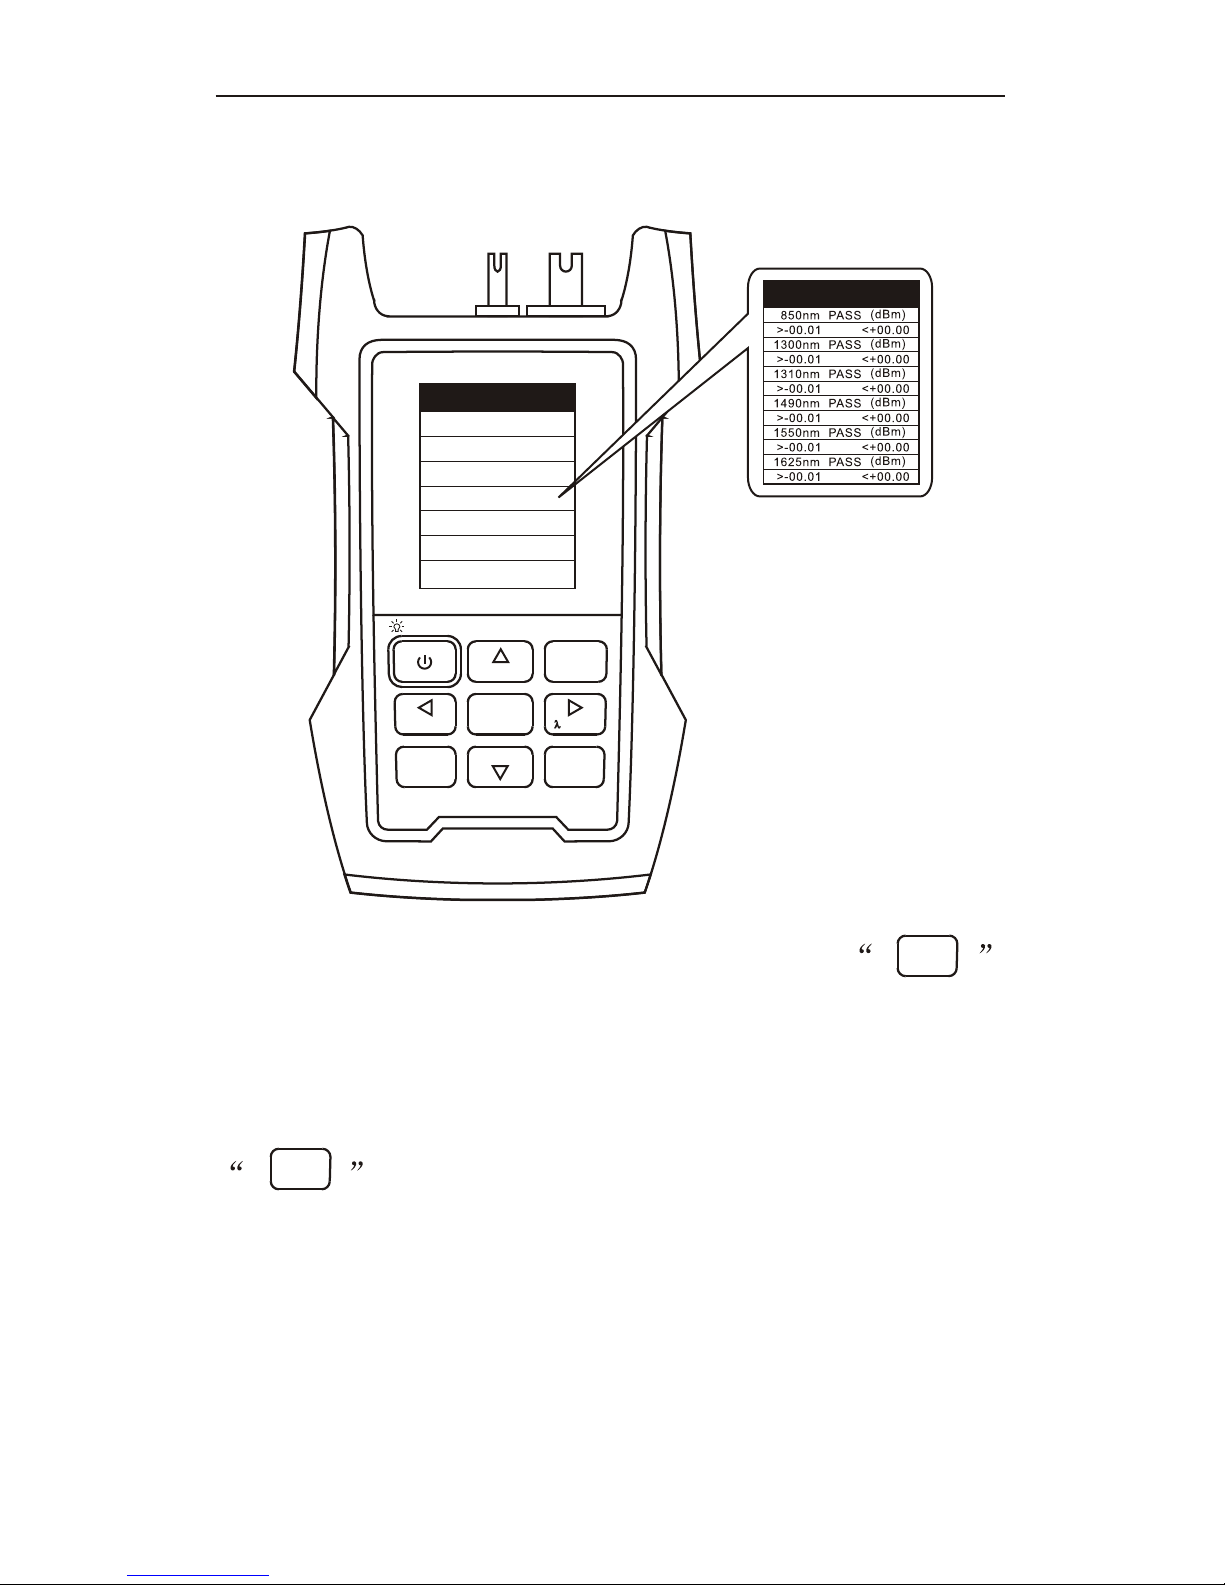
Move the cursor to Threshold and press
keyto enter. You can set threshold for six wavelengths,
include 850/1300/1310/1490/1550/1625nm. Press
key to enter to set and press it again to
save and quit setting.
At the Auto Test interface, if the measuring value is
over threshold value, it will show in red words,
otherwise it will be in black words.
ENTER
ENTER
Setting menu- Threshold
Menu
File Operating
User Defined Wave
Manual Calibrate
Threshold
Time Setting
System Setting
SN:1290100012020
Threshold
Page 17
16
Optical Multi Meter
>2s PERM
MENU
VFL
REF
ESC
ENTER
ENTER
ENTER
SAVE
SELECT
AUTOTEST
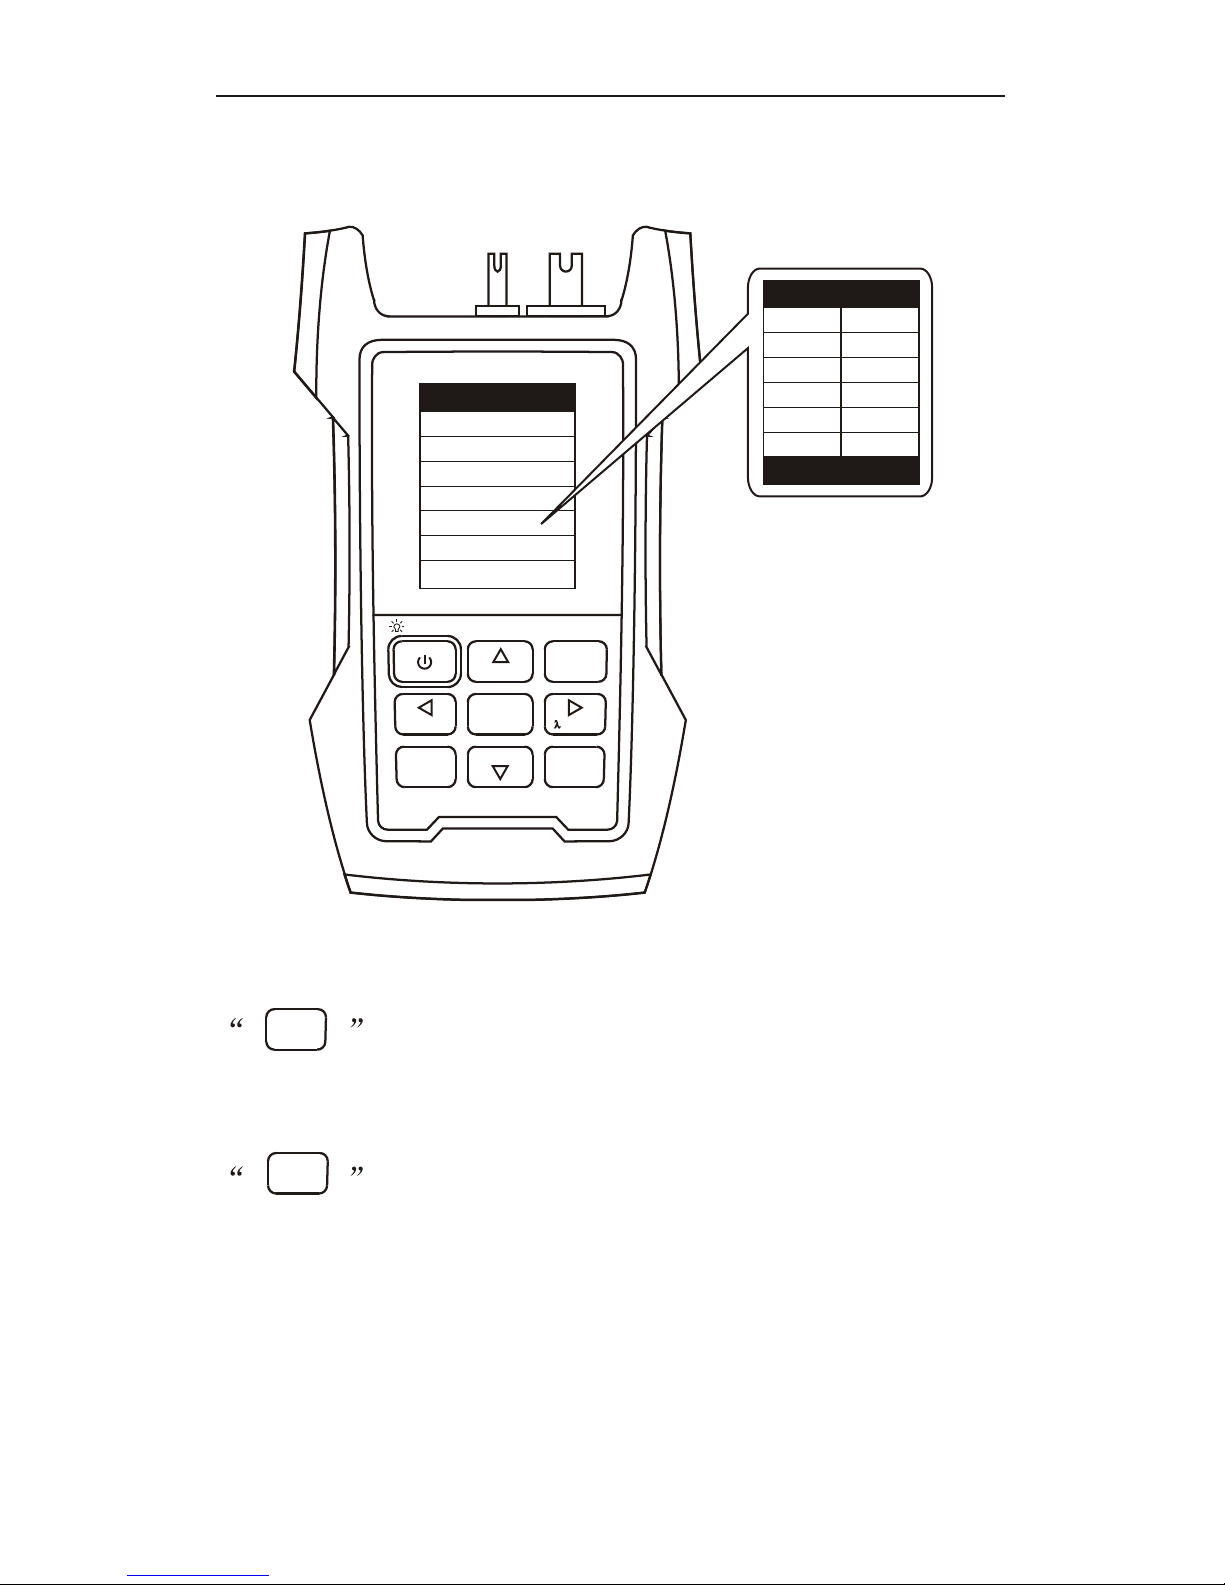
Move the cursor to Time Setting and press
key to enter. You can set the time
information of year, month, day, hour, minute. Press
key to enter to set and press it again to
save and quit setting.
Setting menu- Time Setting
Menu
File Operating
User Defined Wave
Manual Calibrate
Threshold
Time Setting
System Setting
SN:1290100012020
Time Setting
Factory Reset
Year
2016
01
24
21
14
57
Month
Day
Hour
Minute
Second
Page 18
Optical Multi Meter
>2s PERM
17
MENU
VFL
REF
ESC
ENTER
SAVE
SELECT
AUTOTEST
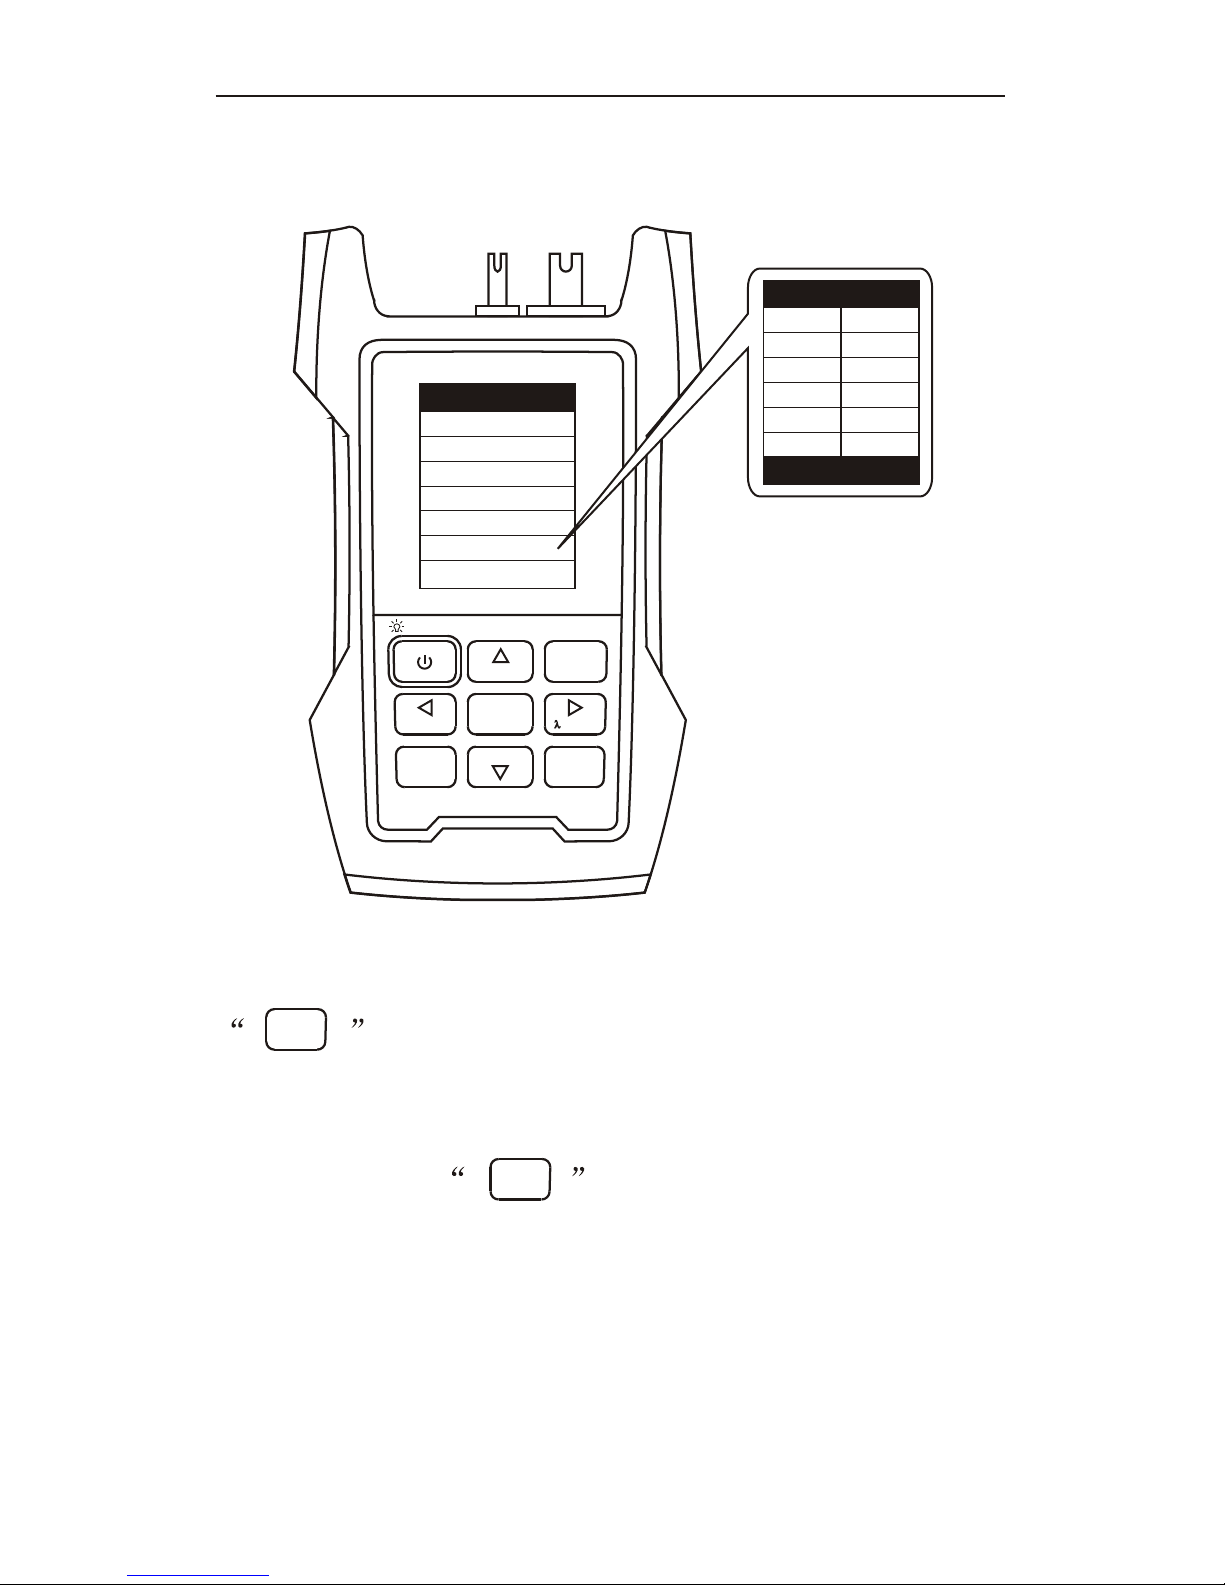
Move the cursor to System Setting and press
key to enter. System Setting includes Tone
Detec, Wave Detec, Sound, Auto-named, Backlight and
Auto Off. Press key to enter to set and press
it again to save and quit setting.
ENTER
ENTER
Setting menu- System Setting
Menu
File Operating
User Defined Wave
Manual Calibrate
Threshold
Time Setting
System Setting
SN:1290100012020
System Setting
Factory Reset
Tone Detec
Wave Detec
Sound
Auto-named
Backlight
Auto Off
On
On
On
On
30 sec
10 min
Page 19
Optical Multi Meter
>2s PERM
18
MENU
VFL
REF
ESC
ENTER
SAVE
SELECT
AUTOTEST
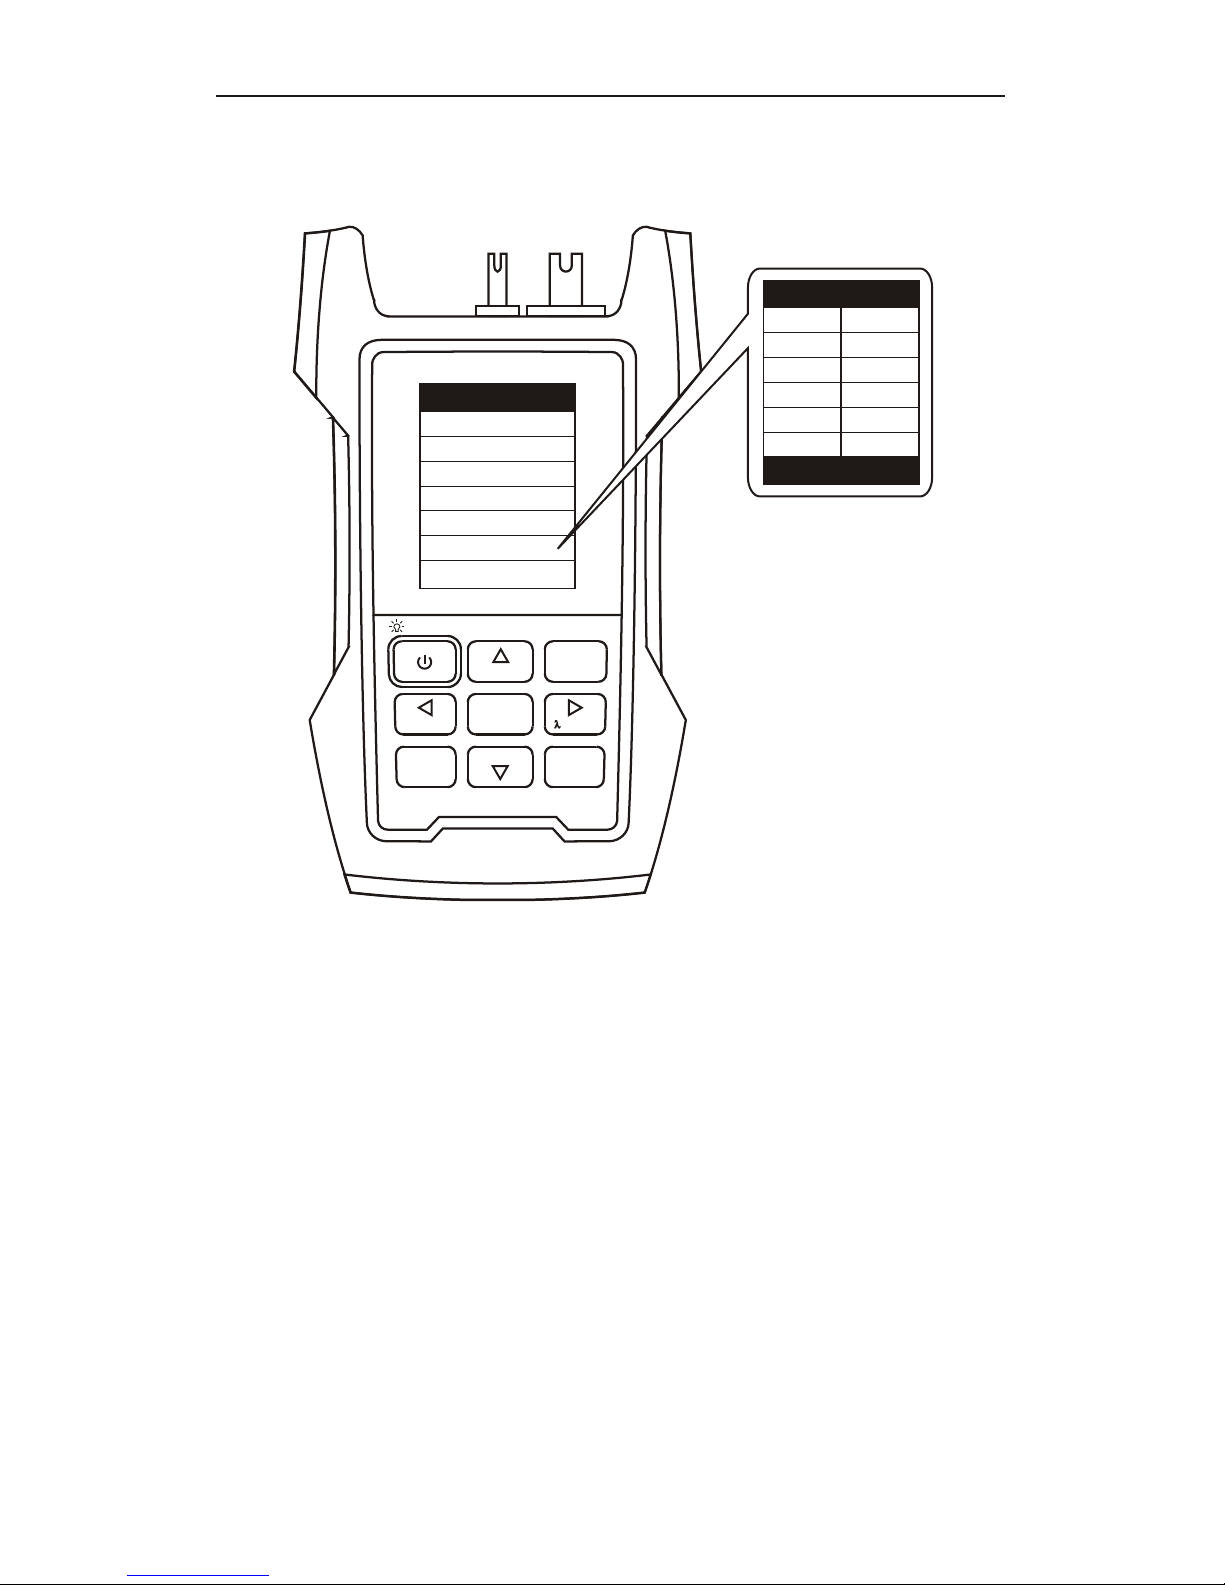
Tone Detec: when set it On and detected frequency is
270Hz, 330Hz, 1kHz or 2kHz, it shows in red words in
measuring interface.
Wave Detec: when set it On and device detects the specific
frequency, it will switch to the wavelength automatically.
Sound: when set it On, the device will have beep when it
turns on, identifies frequency or press the keys.
Auto-named: when set it On and save data, it can have
memory about filenames, last three digits of filename will plus
one automatically.
Backlight: set backlight time between 3sec and 120sec.
Auto Off: set auto off time between 1min and 10min.
Setting menu- System Setting
Menu
File Operating
Optional Wave
Hand Calibrate
Threshold
Time Setting
System Setting
SN:1290100012020
System Setting
Factory Reset
Tone Detec
Wave Detec
Sound
Auto-named
Backlight
Auto Off
On
On
On
On
30 sec
10 min
Page 20

19
Optical Multi Meter
>2s PERM
17:57
The device builds in a VFL module. In the main
measurement interface or auto test interface, press
key to shift the conditions:
ON-> GLINT->OFF.
>2s PERM
MENU
VFL
VFL
REF
ESC
ENTER
SAVE
SELECT
AUTOTEST
Visual Fault Locator
1550nm AUTO
-57.02
dBm
1.72 nW
Tone Freq
----
Page 21
20
Optical Multi Meter
>2s PERM
17:57
1550nm AUTO
-57.02
dBm
1.72 nW
Tone Freq
----
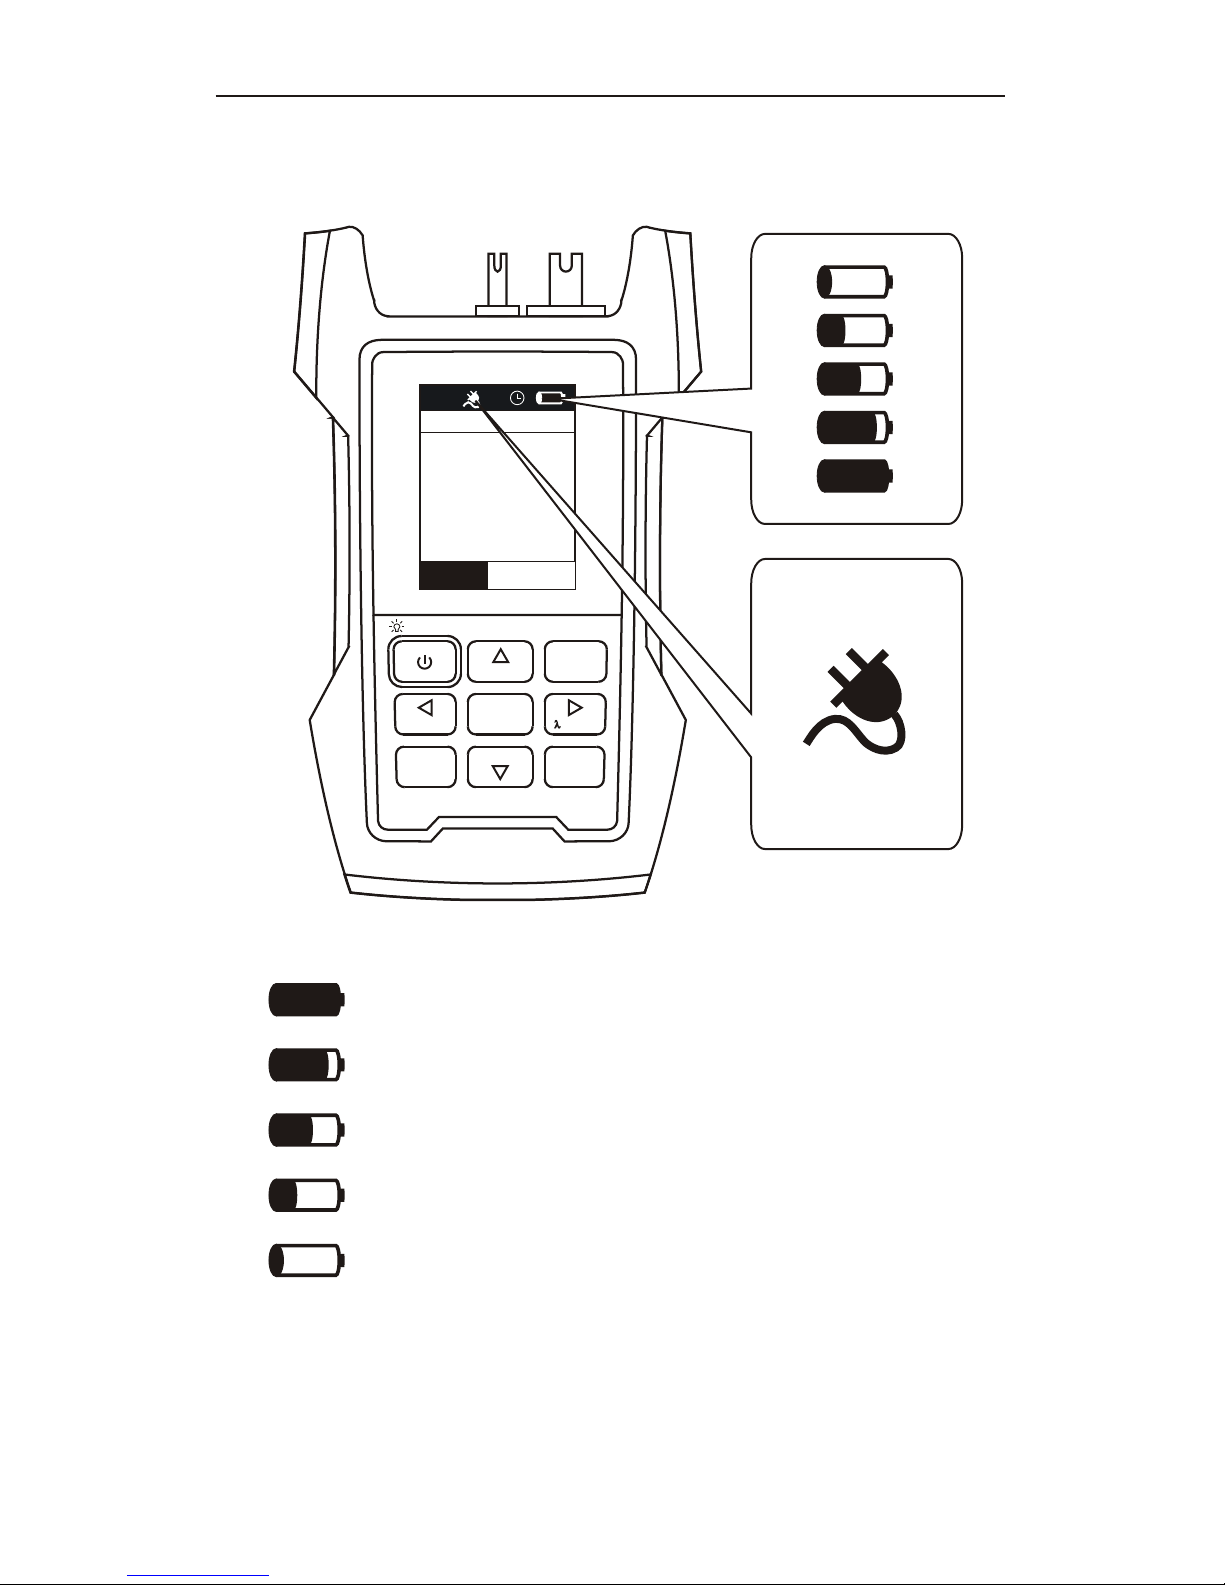
Battery energy detect has five levels:
remain 80%---100%
remain 60%---80%
remain 40%---60%
remain 20%---40%
remain less than 20%
if the energy is too low, the beep will be on and the device
will auto power off. If you plug in the AC adapter, it shows the
charging icon. It chargeable batteries inside, it starts to charge.
MENU
VFL
REF
ESC
ENTER
SAVE
SELECT
AUTOTEST
Battery energy detect
Page 22
21
USB cable
First you must use the rechargeable batteries.
When the energy is less than 20%, you should charge
the batteries. Long time low energy, the life of the
batteries will be short.
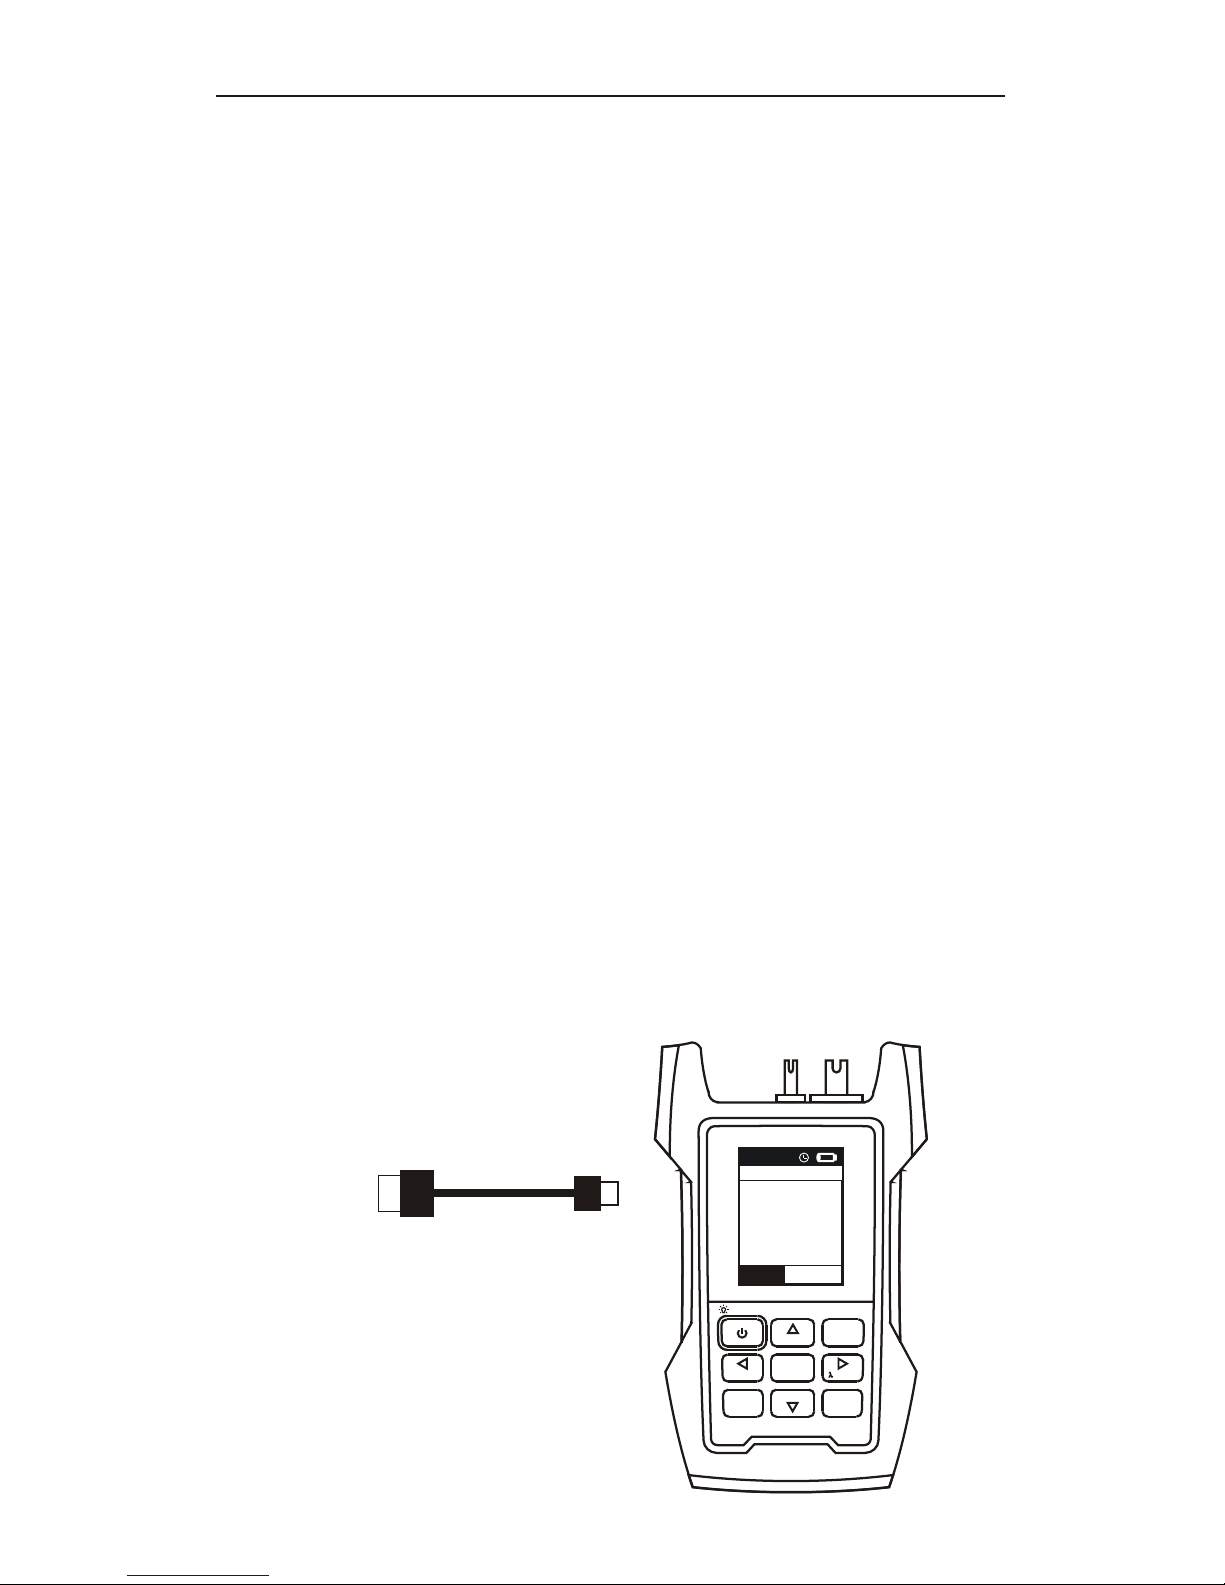
The device is charged throw an USB cable. For the
batteries of 1300mAh, do not charge for more than 10
hours. If you do not stop recharging when it charges
fully, the device will continue the trickle charge state,
using small current to supply natural discharge. But
this process is not more than 48 hours. And do not
charge the non-rechargeable batteries, or the device
will be destroyed and also lose the guarantee.
Battery charge
Optical Multi Meter
>2s PERM
17:57
>2s PERM
MENU
VFL
REF
ESC
ENTER
SAVE
SELECT
AUTOTEST
1550nm AUTO
-57.02
dBm
1.72 nW
Tone Freq
----
Page 23
22
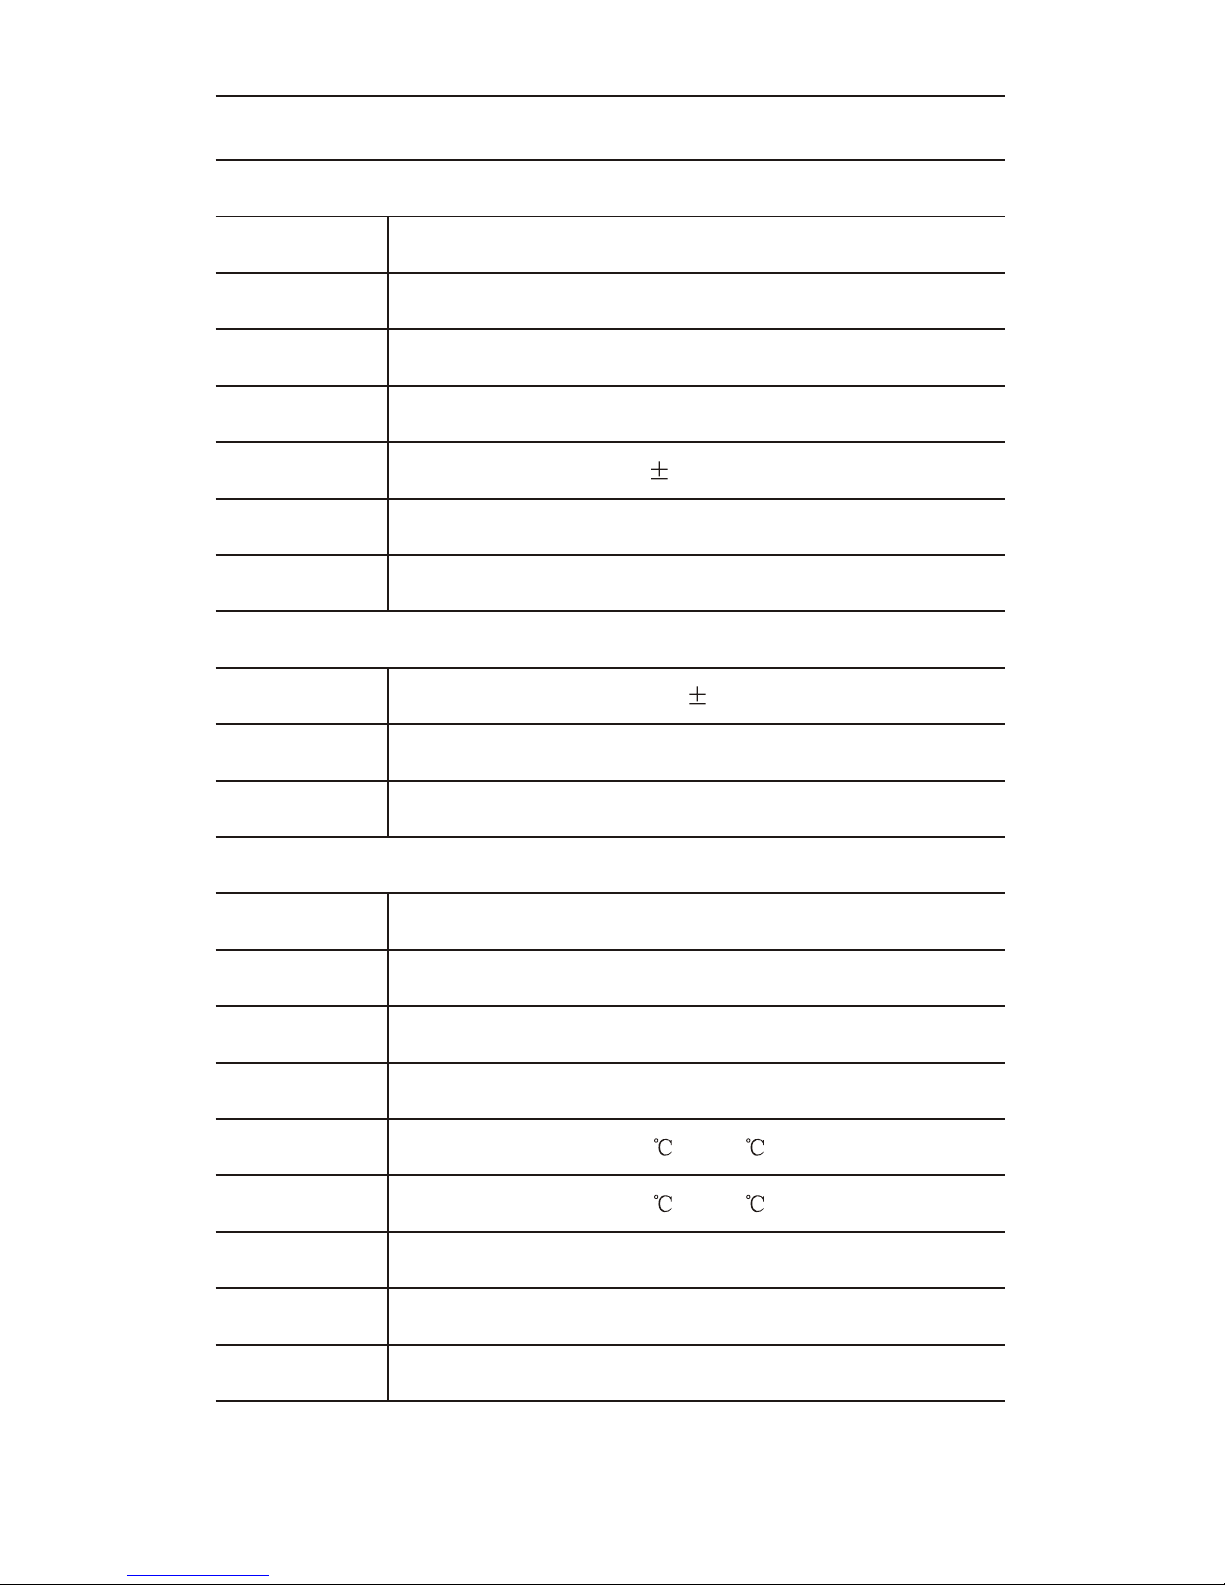
700~1700nm
850nm,1300nm,1310nm,1490nm,1550nm,1625nm
0.2dB
InGaAs
650nm 20nm
-10 ~+50
-20 ~+60
<90% no drew
Wave response
range
OPMOPM
Calibrate
wavelength
Measurement
range
Linearity
Accuracy
Chargeable
Resolution
Store temp
Humidity
Size
Weight
Output
wavelength
Battery supply
VFL(optional)VFL(optional)
Detector type
Water proof
Operate temp
Battery lifetime
T:-70dB~+10dB(850nm@-60dB~+10dB )
0.01dB(>60dBm), 0.1dB(<60dBm)
2%
Output power
Glint
OthersOthers
1mW or 10mW
2Hz
168mm*95mm*38mm
330g
Ye s
Prevent small splash
>50H
AA*3
Detailed
C:-50dB~+26dB(850nm@-40dB~+26dB )
Page 24

 Loading...