

Page 1
MANUALE UTENTE ITALIANO
USER MANUAL ENGLISH
MANUAL DE USURAIO ESPANOL
BEDIENUNGSANLEITUNG DEUTSCH
GUIDE DE L’UTILISATEUR FRANCAIS
Page 2

TO SET YOUR LANGUAGE DEVICE
- Swicth on the appliance
- Go to the page with all applications
- Select the “IMPOSTAZIONI” icon
- Scroll through the list and select the icon
- Select “LINGUA” and fi nd their own language from those available.
* For information and updates of this product: www.trevi.it
POUR CONFIGURER LANGUE DE VOTRE APPAREIL:
- Mettre l’appareil
- Aller à la page avec toutes les applications
- Sélectionez l’icône “IMPOSTAZIONI”
- Faites défi ler la liste et sélectionnez l’icône
- Selectionnez “LINGUA” et à trouver leur proper langue parmi celles
disponibles.
* Pour plus d’informations et pour obtenir des mises à jour sur ce produit, consultez :
www.trevi.it
IHRE SPRACHE GERÄT EIN:
- Auf dem Gerät einschalten
- Gehen Sie zur Seite mit allen Anwendungen
- Wählen Sie die ““IMPOSTAZIONI””-Symbol
- Blättern Sie durch die Liste und wählen Sie das Symbol
- Wählen Sie “LINGUA”und fi nden ihre eigene Sprache aus den verfügbaren.
* Ergänzende Informationen und Aktualisierungen zu diesem Produkt fi nden Sie unter:
www.trevi.it
- LINGUA
- LINGUA
- LINGUA
2
Page 3

PARA CONFIGURAR EL DISPOSITIVO IDIOMA:
- Conectar el aparato
- Ir a la página con todas las aplicaciones
- Seleccione el icono “IMPOSTAZIONI”
- Desplácese por la lista y seleccionar el icono
- Seleccione “LINGUA” y encontar su proprio idioma entre los disponibles
* Para información adicional y actualizaciones para este producto, véase: www.trevi.it
PARA DEFINIR O DISPOSITIVO IDIOMA:
- Ligue o aparelho
- Vá para a página com todos os aplicativos
- Selecione o icone “IMPOSTAZIONI”
- Role a lista e selecione o icone
- Selecione “LINGUA” e encontrar sua própria lingua entre os disponiveis
* Para mais informações e atualizações deste produto, consulte: www.trevi.it
Να ρυθμίσετε τη συσκευή ΓΛΩΣΣΑ ΣΑΣ:
- Ενεργοποιήστε τη συσκευή
- Πηγαίνετε στη σελίδα με όλες τις εφαρμογές
- Επιλέξτε “IMPOSTAZIONI” εικονίδιο
- Μετακινηθείτε στη λίστα και επιλέξτε το εικονίδιο
- Επιλέξτε “LINGUA” και να βρουν τη δική τους γλώσσα από
εκείνες που είναι διαθέσιμες.
* Για περισσότερες πληροφορίες και ενημερώσεις του προϊόντος
αυτού βλέπε: www.trevi.it
- LINGUA
- LINGUA
- LINGUA
* Per informazioni integrative e aggiornamenti di questo prodotto vedi: www.trevi.it
3
Page 4

GUIDA D’USO ITALIANO ..........................................................................................pag. 4
USER GUIDE ENGLISH ........................................................................................... pag.36
MANUAL DE USUARIO ESPANOL ............................................................................ pag.67
BEDIENUNGSANLEITUNG DEUTSCH ........................................................................ pag.92
GUIDE DE L’UTILISATEUR FRANCAIS ...................................................................... pag.110
ITALIANO
INDICE
1. Prefazione e Avvertenze ........................................................................................4
2. Inserimento di una scheda SIM e della Batteria ......................................................8
3. Ricarica del Telefono .............................................................................................9
4. Inserimento di una memoria esterna Micro SD .......................................................10
5. Descrizione Comandi ............................................................................................11
6. Icone ....................................................................................................................12
7. Accensione e spegnimento ....................................................................................12
8. Utilizzo del display Touch Screen ...........................................................................13
9. Descrizione della pagina principale (Schermata Home) ..........................................14
10. Personalizzazione della Phablet 4S........................................................................16
11. Inserimento di un testo .........................................................................................16
12. Scaricare le applicazioni dal Market ......................................................................18
13. Comunicazione ....................................................................................................18
14. Messaggi .............................................................................................................19
15. E-mail ..................................................................................................................21
16. Funzioni Multimediali ............................................................................................22
17. Internet ................................................................................................................26
18. Connettività ..........................................................................................................27
19. Collegamento al PC ..............................................................................................29
20. Impostazioni ........................................................................................................29
21. Informazioni sulla certifi cazione SAR ....................................................................32
22. Informativa sullo smaltimento della batteria ...........................................................33
23. Risoluzione dei problemi ......................................................................................34
1. PREFAZIONE E AVVERTENZE
Grazie per aver scelto lo smartphone Trevi PHABLET 4S. Vi consigliamo di leggere attentamente questo manuale per imparare l’uso del telefono e apprezzare le sue funzioni e la
facilità d’uso.
I servizi e le funzioni disponibili possono variare in base al software dell’apparecchio o ai
piani tariffari del gestore telefonico, di conseguenza, alcune voci del menù potrebbero non
4
Page 5

essere disponibili. I collegamenti ai menù e le caratteristiche possono variare da telefono
a telefono.
La nostra società si riserva il diritto di modifi care il contenuto del manuale senza preavviso.
• Il sistema operativo Android, essendo un sistema open source è in continuo sviluppo
ed è utilizzato in differenti dispositivi, pertanto le parole Telefono, Cellulare, MID o TABLET,
che potrebbero apparire sul display del dispositivo, equivalgono ad indicare “Apparecchio
Dispositivo”.
• Non tentare di aggiornare il sistema operativo Android con versioni più recenti o versioni
differenti non fornite da TREVI S.p.A., potreste causare danneggiamenti non riparabili al
dispositivo.
• Le impostazioni descritte in questo manuale sono quelle pre defi nite dell’apparecchio.
• TREVI non è responsabile dei problemi che software di terze parti potrebbero causare
nella velocità e nelle prestazioni dell’apparecchio.
• TREVI non è responsabile dei problemi di incompatibilità o prestazioni dovuti alla modifi ca
da parte dell’utente delle impostazioni di sistema dell’apparecchio.
• TREVI non è responsabile di eventuali “virus” o “danneggiamenti” del software dovuti
alla navigazione internet dell’utente.
• TREVI declina ogni responsabilità sulla violazione delle leggi sul copyright da parte
dell’utente.
• Accertarsi che il prodotto non sia danneggiato, in tal caso rivolgersi al venditore.
• Controllare che siano presenti tutti gli accessori.
• Non aprire l’apparecchio: all’interno non vi sono ne comandi manipolabili dall’utente ne
parti di ricambio. Per tutte le operazioni rivolgersi ad un Centro Assistenza Autorizzato
Trevi.
• Tutti i marchi e diritti d’autore sono proprietà dei rispettivi possessori dei diritti.
CONTENUTO DELLA CONFEZIONE:
Nella confezione sono presenti:
• Apparecchio
• Alimentatore AC/DC
• Cavo USB
• Auricolari
• Batteria
• Manuale Istruzioni
NOTE D’USO
Questo apparecchio è uno strumento elettronico di alta precisione; evitate quindi di utilizzarlo
nei seguenti casi:
• Vicino a forti fonti di calore come caloriferi e stufe.
5
ITALIANO
Page 6

• In ambienti troppo freddi o troppo caldi.
• In luoghi molto umidi come stanze da bagno, piscine, ecc.
• In luoghi molto polverosi.
• In ambienti immersi in campi magnetici.
• In luoghi soggetti a forti vibrazioni.
• L’uso prolungato del telefono cellulare provoca un’eccessiva esposizione alle onde
elettromagnetiche e può essere nocivo per la salute: alcuni consigli per usare il telefonino
ITALIANO
con “prudenza”.
- Utilizzare sistemi a “mani libere” (auricolari e sistemi viva-voce) che consentono di
allontanare il telefono dalla testa e dal corpo.
- Limitare le telefonate non necessarie, ridurre numero e durata.
- Educare i bambini ad un uso non indiscriminato, limitato alle situazioni di necessità.
AVVERTENZE
• Posizionate l’apparecchio in modo che ai suoi lati ci sia sempre abbastanza spazio per
la libera circolazione di aria (almeno 5 cm).
• Non ostruite le feritoie di ventilazione.
• Non sottoporre il display LCD a nessun impatto e non utilizzare lo schermo per colpire
le cose. Se il Display LCD si dovesse danneggiare e ci fossero delle perdite del cristallo
liquido, evitare che la sostanza del cristallo liquido entri a contatto con gli occhi, vi è il
rischio di cecità. In quel caso sciacquare immediatamente gli occhi con acqua pulita (in
nessun caso strofi narsi gli occhi) e andare subito in ospedale per il trattamento.
• Non utilizzate l’apparecchio se il Display è rotto o danneggiato.
• Non utilizzare il telefono in prossimità di gas infi ammabili o esplosivi, questo potrebbe
causare un malfunzionamento del telefono cellulare o un pericolo di incendio.
• Tenere il telefono fuori dalla portata dei bambini. Il telefono non è un giocattolo. L’apparecchio
è composto da parti smontabili di piccole dimensioni che, se ingerite, possono provocare
soffocamento.
• Non appoggiare il telefono su superfi ci irregolari o instabili.
• Se dei liquidi penetrano all’interno dell’apparecchio scollegate immediatamente la spina
dalla presa e portate l’apparecchio al più vicino centro assistenza autorizzato TREVI.
• Controllate sempre prima di accendere l’apparecchio che i cavi di alimentazione e di
collegamento siano installati correttamente e non riportino danneggiamenti.
• Utilizzare solamente accessori forniti nella confezione, altri prodotti potrebbero causare
perdite nella batteria, surriscaldamento, esplosione o incendio.
• Non scollegate il dispositivo durante la for mattazione o il caricamento di fi le, si potrebbero
produrre errori nel programma.
• Spegnere il telefono cellulare nelle zone in cui il telefono non è consentito, come ad
esempio in aeroporto o negli ospedali.
6
Page 7

• Non utilizzare il telefono cellulare nei luoghi in cui può infl uenzare l’operatività normale
di dispositivi elettronici e strumenti medici.
• Si prega di non utilizzare il telefono cellulare in prossimità di dispositivi elettronici di alta
precisione. Interferenze RF potrebbero causare malfunzionamenti di dispositivi elettronici
(apparecchi acustici, pacemaker e altri dispositivi medici elettronici) e creare altri problemi.
• Non toccare il Display con oggetti appuntiti per non danneggiarlo.
SICUREZZA IN AUTO
Fare riferimento alle leggi e le normative che riguardano l’utilizzo dei cellulari in auto quando
si circola sulle reti stradali.
• Evitare l’uso del telefono cellulare durante la guida, poiché la diminuita capacità di
attenzione causata dall’utilizzo del telefono è in grado di aumentare sensibilmente
il rischio di incidenti automobilistici, anche quando si utilizzino dispositivi a “mani libere”.
• Utilizzare, eventualmente un kit vivavoce.
• Accostare e parcheggiare prima di telefonare o rispondere a una chiamata.
• RF può infl uire sugli apparecchi elettronici del veicolo, ad esempio sullo stereo o sulle
apparecchiature di sicurezza.
• Se il veicolo è dotato di airbag, non collocarvi accanto apparecchi wireless portatili
per evitare lesioni gravi causate da un errato funzionamento dell’air bag.
• Durante la guida assicurarsi che il volume del dispositivo sia regolato in modo da
permettervi di udire e capire quanto avviene attorno a voi.
AVVERTENZE SULL’UTILIZZO DELLA BATTERIA
• La batteria ha una durata limitata. Quando la durata si accorcia i tempi di ricarica
aumentano. Se la batteria è debole anche dopo la carica, signifi ca che il suo ciclo è fi nito
e occorre sostituirla.
• Non smaltire le batterie usate con i rifi uti domestici. Consegnare il prodotto presso gli
appositi “centri di raccolta differenziata” predisposti dalle amministrazioni comunali.
• Non gettare le batterie nel fuoco, per evitare esplosioni.
• Quando si installa la batteria, non usare la forza o fare pressione, ciò potrebbe causare
perdite dalla batteria, surriscaldamento, rotture e prendere fuoco.
• Si prega di non utilizzare fi li, aghi o altri oggetti metallici a cortocircuitare la batteria.
Inoltre, non mettere la batteria in prossimità di collane o altri oggetti metallici ciò potrebbe
causare perdite di liquido dalla batteria, surriscaldamenti, rotture e prendere fuoco.
• Si prega di non saldare i punti di contatto della batteria, ciò causerebbe perdite dalla
batteria, surriscaldamento, rotture e prendere fuoco.
• Se il liquido nelle batterie entra a contatto con gli occhi, vi è il rischio di cecità. Non
strofi nare gli occhi, ma sciacquare immediatamente con abbondante acqua pulita e
andare in ospedale per il trattamento.
7
ITALIANO
Page 8
• In caso di surriscaldamento della batteria, questa cambia colore o diventa distorta durante
l’uso, sostituirla immediatamente con una nuova.
• Non ricaricare per più di 24 ore.
CURA E MANUTENZIONE
Per la pulizia si consiglia l’uso di un panno morbido, leggermente inumidito. Evitate solventi
o sostanze abrasive.
ITALIANO
IMPORTANTE
La buona costruzione di questo apparecchio ne garantisce per lungo tempo il perfetto
funzionamento. Se tuttavia dovesse presentarsi qualche inconveniente, sarà opportuno
consultare il più vicino Centro Assistenza Trevi autorizzato.
2. INSERIMENTO DELLE SCHEDE SIM E DELLA BATTERIA
Assicurasi che il telefono sia spento prima di effettuare le seguenti procedure:
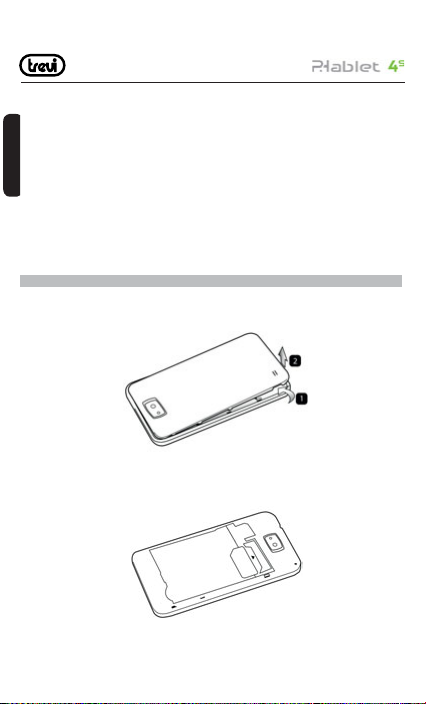
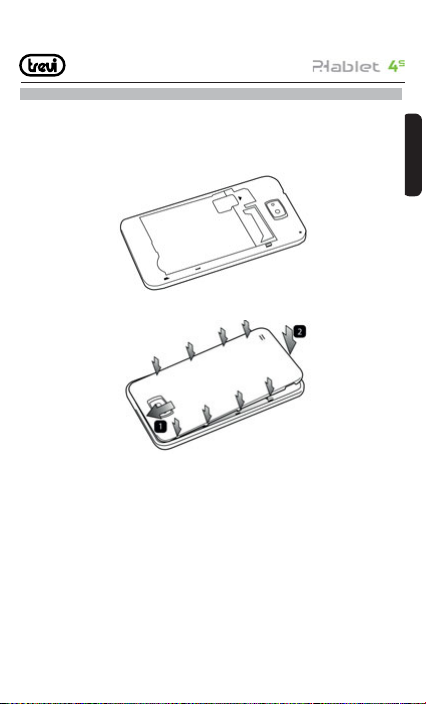
1. Rimuovere il coperchio posteriore con cautela come raffi gurato di seguito.
2. Inserire la scheda SIM nella slot 1 con i contatti metallici rivolti verso il basso e facendo
attenzione a rispettare la posizione dell’angolo tagliato della SIM.
Nota Bene: Slot SIM 2 non funzionante.
Attenzione: non inserire schede di memoria nella Slot della SIM e viceversa.
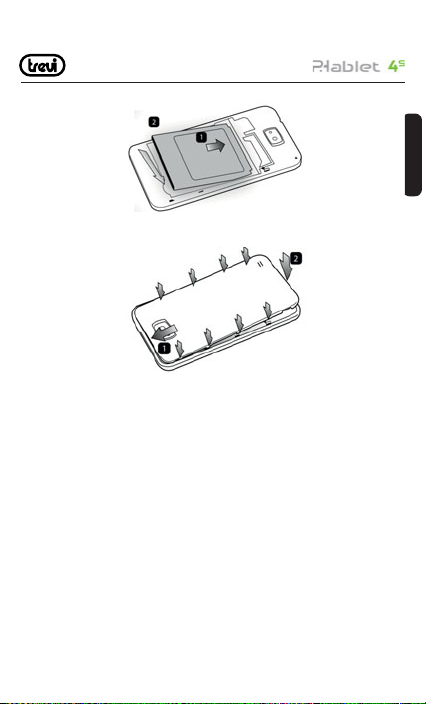
3. Inserire la batteria facendo attenzione ai contatti metallici e rispettando la sequenza
8
Page 9
numerica.
4. Riposizionate il coperchio posteriore con cautela come in fi gura rispettando la sequenza
numerica.
5. Prima di utilizzare l’apparecchio per la prima volta occorre caricare completamente la
batteria, per far ciò potete utilizzare l’alimentatore in dotazione o collegarlo ad un computer
e utilizzare il suo cavo USB.
Note:
• Se la batteria è completamente scarica il telefono non si accende, saranno necessari 4
minuti per consentire al telefono di raggiungere uno stato di carica suffi ciente per l’avvio.
• Quando la batteria è scarica l’apparecchio emetterà un suono di avviso, se la carica è
insuffi ciente l’apparecchio si spegnerà automaticamente
Attenzione:
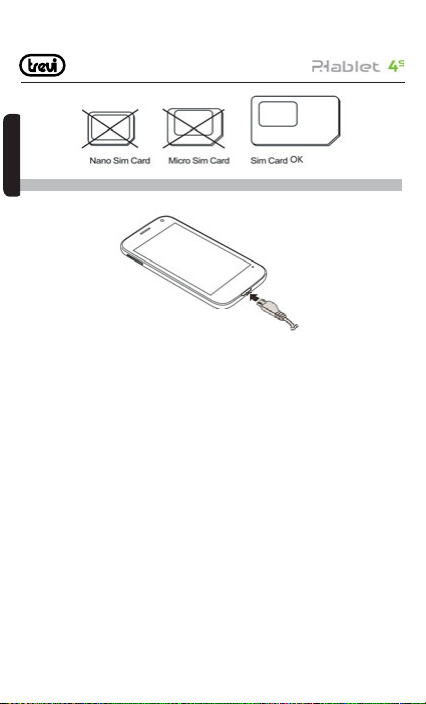
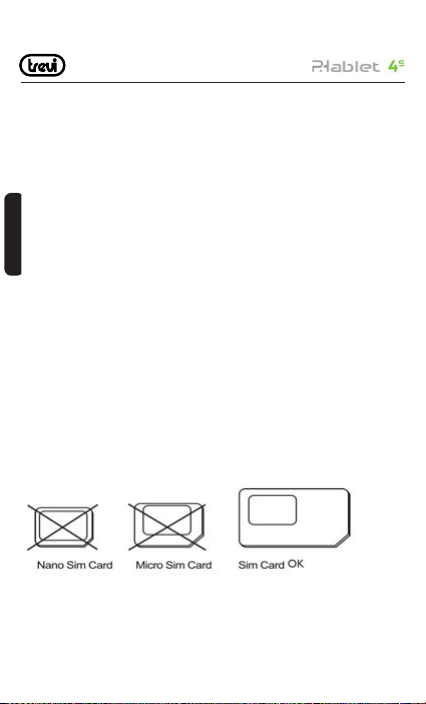
Nota sull’utilizzo di micro/nano SIM con adattatore su prodotti TREVI. Gli smartphone
ed i tablet TREVI dotati di alloggiamento per scheda SIM sono progettati per ospitare
esclusivamente SIM nel formato standard. L’uso di micro e nano SIM con relativo adattatore
e’ sconsigliato in quanto si possono causare rotture al dispositivo ed alla micro/nano SIM
stessa. TREVI non risponde di danni causati dall’uso di adattatori alle micro/nano SIM.
TREVI si riserva il diritto di non effettuare assistenza gratuita in garanzia sui prodotti che
presentano difettosità’ al modulo SIM causata dall’uso di adattatori per micro/nano SIM.
9
ITALIANO
Page 10
3. RICARICA DEL TELEFONO
ITALIANO
1. A dispositivo spento, collegare la presa Micro USB dell’alimentatore al telefono.
2. Collegare l’alimentatore ad una presa di rete standard.
3. Il dispositivo si accenderà a mostrare per qualche secondo l’icona della batteria con
la fase di ricarica.
4. Quando la batteria sarà completamente carica (l’icona non sarà più in movimento),
scollegate la presa Micro USB dal telefono e poi scollegate l’alimentatore dalla presa di
rete.
Note:
• Utilizzare solamente l’alimentatore in dotazione, differenti alimentatori potrebbero
danneggiare la batteria.
• Potete utilizzare il dispositivo anche quando è sotto carica, ma, per una maggiore durata
della batteria, se ne sconsiglia l’utilizzo; inoltre, utilizzando l’apparecchio, i tempi di
ricarica si allungano.
• Durante la ricarica della batteria i comandi sul Touch Screen potrebbero non funzionare
correttamente, questo è dovuto all’alimentazione instabile, basterà staccare l’alimentatore
per far funzionare correttamente l’apparecchio.
• Durante la ricarica l’apparecchio può aumentare di temperatura, questo non infl uisce
sulle prestazioni e la durata dell’apparecchio.
• Per la ricarica tramite collegamento USB da PC sarà necessario un tempo maggiore.
10
Page 11
4. INSERIMENTO DI UNA MEMORIA ESTERNA MICRO SD
Per ampliare la sua memoria e quindi poter archiviare un maggior numero di fi le, questo
dispositivo e’ dotato di una slot capace di ospitare una memoria esterna di tipo micro SD.
• Rimuovere il coperchio posteriore con cautela.
• Inserire la scheda micro SD tenendo la superfi cie con i contatti elettrici rivolta verso
il basso (lato display).
Riposizionate il coperchio posteriore con cautela
Note:
• Non inserire o rimuovere la memoria quando l’apparecchio sta leggendo i fi le o trasferendo
dei dati. Questo potrebbe causare errori. L’inserimento della memoria deve avvenire solo
con il telefono spento e scollegato dal PC. Per rimuovere la scheda, utilizzare sempre la
“rimozione sicura”.
• Alcune marche di schede potrebbero non essere compatibili con il telefono. L’utilizzo di
una memoria incompatibile potrebbe danneggiare l’apparecchio o la scheda di memoria
stessa.
• L’apparecchio suppor ta solo memorie formattate in FAT. Se inserite schede formattate
differentemente il telefono chiederà di riformattare la scheda di memoria.
11
ITALIANO
Page 12
5. DESCRIZIONE COMANDI
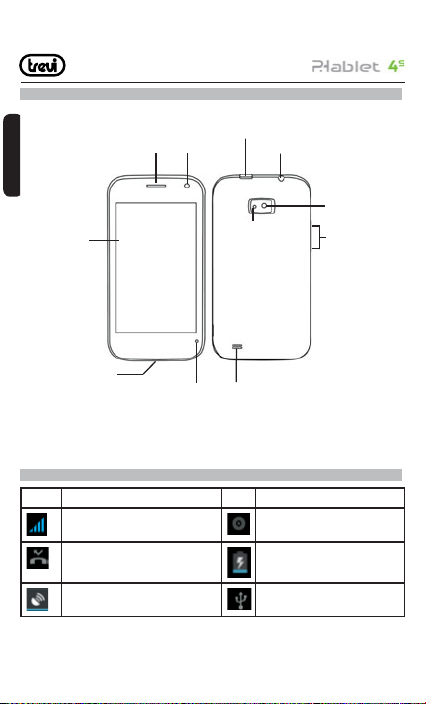
Altoparlante
Fotocamera
anteriore
Tasto accensione/spegnimento
Connettore Auricolari da 3.5
ITALIANO
Fotocamera
Display
Connettore Micro USB
TASTO ACCENSIONE/SPEGNIMENTO: Per accendere/spegnere l’apparecchio e attivare/
disattivare la funzione Stand-by del Display.
TASTO VOLUME: Per regolare il volume durante una chiamata o nella riproduzione di un brano.
Microfono
Flash
Coperchio posteriore
Altoparlante
posteriore
Tasti Volume
6. ICONE
Icone Descrizione
Icona di intensità del segnale di
rete
Icona chiamate perse Il telefono stà ricaricando la
Posizione da satellite USB attiva
Il telefono stà riproducendo un
brano musicale
batteria
12
Page 13
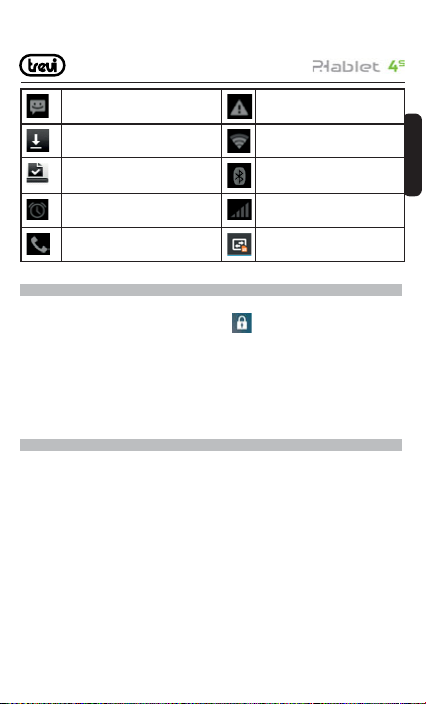
Ricezione di un nuovo messaggio Accesso bloccato
Un’applicazione è in download Collegamento alla rete Wireless
Download terminato Bluetooth attivato
La sveglia è stata impostata e
attivata
Chiamata in corso Connessione dati GPRS attiva
7. ACCENSIONE E SPEGNIMENTO
• Per accendere il telefono, tenere premuto per 5 secondi il tasto di Accensione. Quando
apparirà la pagina Home, trascinare il cursore
1 Trascinarlo verso destra per entrare direttamente nella pagina Home.
• Per spegnere il telefono, tenere premuto per 2 secondi il tasto di Accensione, selezionare
“Spegni” e confermare toccando “OK”.
• Per attivare la “Modalità Aereo”, e quindi utilizzare solamente i servizi che non necessitano
di collegamenti alla rete, tenere premuto per 2 secondi il tasto di Accensione, selezionare
“Modalità Aereo”.
8. UTILIZZO DEL DISPLAY TOUCH SCREEN
Il display con tecnologia Touch Screen è un dispositivo che consente all’utente di selezionare/
attivare le varie applicazioni con il semplice tocco delle dita sul display. Questo apparecchio
adotta un display di tipo Capacitivo pertanto NON OCCORRE fare pressione sul pannello o
utilizzare pennini, basterà semplicemente sfi orare con le dita il Display.
• Non utilizzate oggetti taglienti che potrebbero graffi are o danneggiare il Display.
• Evitare il contatto del display con l’acqua.
• Pulire il Display con un panno morbido senza aggiunta di detersivi/solventi.
Il Touch screen si controlla nel seguente modo:
• Toccare una volta con il dito: per selezionare o avviare un’applicazione.
• Toccare e tenere premuto: toccando e tenendo premuto per 2 secondi compare un Menu
“Opzioni” a scomparsa.
• Toccare due volte: toccare rapidamente il display due volte per ingrandire o ridurre la
fuori dal cerchio:
13
Nessuna SIM è inserita nel
telefono
ITALIANO
Page 14
visualizzazione delle pagine Web.
• Trascinare: trascinate il dito a destra, a sinistra, in alto o in basso per scorrere nelle varie
direzioni.
• Trascinare un elemento: toccate e tenete premuto per 2 secondi un elemento, questo
si ingrandirà leggermente, quindi trascinate il dito per spostare l’elemento e, raggiunta
la posizione desiderata, sollevare il dito dal pannello.
• Quando guardate un Video o ascoltate la musica potete spostarvi direttamente in un
ITALIANO
determinato punto semplicemente toccando la barra di progressione, oppure, utilizzando
il dito, trascinare il cursore della barra di progressione in un determinato punto.
• Nell’esplorazione delle cartelle (File, Musica, Video, Photo, ecc...), potete trascinare il
dito dal basso verso l’alto o viceversa per scorrere la lista delle cartelle.
• Nella navigazione Internet, potete muovervi su o giù semplicemente toccando la pagina
e trascinandola in alto o in basso.
Per ingrandire la pagina toccare velocemente per due volte lo schermo oppure utilizzare
due dita e farle scivolare verso l’esterno (verso l’interno per rimpicciolire l’immagine).
• Toccare il link per aprire la pagina.
Rotazione dell’immagine
Questo apparecchio integra al suo interno un sensore di movimento (G-sensor) che automaticamente rileva l’orientamento del dispositivo.
Se il dispositivo viene ruotato, l’immagine ruoterà automaticamente seguendo il nuovo
orientamento. Per attivare o disattivare questa funzione andare in “Impostazioni”, “Display”,
“Rotazione automatica”.
9. DESCRIZIONE DELLA PAGINA PRINCIPALE (schermata Home)
Nella schermata principale è visibile lo stato del telefono ed è possibile personalizzarla
aggiungendo applicazioni, Widget con le varie combinazioni di collegamenti:
Estensione della schermata principale:
La pagina principale (Home) ha 4 estensioni (due verso destra e due verso sinistra) per avere
un maggior numero di icone di collegamento sul Desktop. Per visualizzare le estensioni:
• Dalla pagina principale (Home), far scivolare il dito orizzontalmente sul Display verso
destra o verso sinistra.
Portare nella pagina principale le Applicazioni desiderate:
• Per portare le icone delle applicazioni maggiormente usate direttamente nella pagina
principale (Home), toccare l’icona “Applicazioni”
si aprirà una schermata con tutte le applicazioni disponibili sul vostro dispositivo. Toccare
presente nella pagina principale,
14
Page 15
e tenere premuta l’icona che desiderate portare sul Desktop fi no a quando, in sottofondo,
non comparirà l’immagine del vostro Desktop. Trascinare l’elemento fi no alla posizione
desiderata e rilasciare il dito.
Spostamento degli elementi:
• Toccare e tenere premuto l’elemento da spostare fi no a quando questo non risalta.
• Trascinare l’elemento fi no alla posizione desiderata e rilasciare il dito.
Rimozione di elementi:
• Toccare e tenere premuto l’elemento da rimuovere fi no a quando questo non risalta.
Centralmente sulla parte alta del pannello comparirà
• Trascinare l’elemento sulla X, quando l’elemento diventa rosso rilasciare il dito.
Selezione/Modifi ca sfondo sulla pagina principale:
• Dalla pagina principale toccare e tenere premuto una zona vuota, apparirà una fi nestra
di dialogo dove potrete scegliere l’immagine da inserire come sfondo sul Desktop tra le
opzioni: Galleria, Sfondi Animati, Sfondi.
Aggiungere Widgets alla pagina principale:
• Per inserire dei Widgets direttamente nella pagina principale (Home), toccare l’icona
“Applicazioni”
applicazioni, da questa toccare la scritta WIDGET.
• Toccare e tenere premuto il Widget desiderato, fi no a quando, in sottofondo, non comparirà
l’immagine del vostro Desktop. Trascinare l’elemento fi no alla posizione desiderata e
rilasciare il dito.
Pannello Scelta Rapida:
• Nella pagina principale (Home) toccare la barra alta dove è presente l’ora e trascinare il
Per visualizzare il pannello scelta Rapida trascinare in basso la parte
inferiore della tendina e selezionare l’icona
• Per nascondere il pannello, trascinare in alto la parte inferiore della tendina.
Dal Pannello scelta Rapida è possibile attivare/disattivare le seguenti funzioni:
Modalità Aereo
Stato Batteria
WiFi
Bluetooth
GPS
presente nella pagina principale, si aprirà la pagina delle
.
15
.
ITALIANO
Page 16
Connessione Dati
Utilizzo Dati
Profi li Audio
Luminosità
Timeout
Rotazione Automatica
ITALIANO
Accesso alle applicazioni più recenti:
• Tenere premuto il tasto Home per qualche secondo, si aprirà un elenco delle ultime
applicazioni aperte.
• Selezionare l’applicazione desiderata.
10. PERSONALIZZAZIONE DEL PHABLET 4S
In base all’utilizzo dell’apparecchio potete personalizzarvi il telefono in modo da soddisfare
le vostre esigenze
Impostare Data e Ora:
1. Dalla schermata Home toccare l’icona “Applicazioni”
“Data e Ora”
2. Impostare la Data e Ora più le varie Opzioni.
Impostazione della suoneria e suono sui tocchi:
1. Dalla schermata Home toccare l’icona “Applicazioni”
e “Profi li Audio”. Compariranno dei profi li pre impostati.
2. Selezionare “Generale” e impostare i toni per le chiamate vocali, video e in più attivare
o meno i suoni sui tocchi.
Attivazione modalità silenziosa:
Per attivare o disattivare la modalità silenzionsa seguire una delle procedure indicate:
1. Aprite il “Pannello di Scelta Rapida” e selezionate l’icona
- Selezionare “Profi li Audio” e poi scegliere “Silenzioso”.
2. Tenere premuto il tasto di accensione e selezionare l’icona
Regolazione luminosità Display:
E’ possibile regolare la luminostà del display che infl uisce sul consumo della batteria:
Dalla schermata Home toccare l’icona “Applicazioni”
16
, selezionare “Impostazioni”,
, selezionare “Impostazioni”
.
con l’altoparlate barrato.
, selezionare “Impostazioni”,
Page 17
“Display” e “Luminosità”. Spostare verso destra o verso sinistra la barra di regolazione
oppure selezionare “Luminosità Automatica” se si vuole che l’apparecchio gestisca
automaticamente la luminosità in base alla luce presente nell’ambiente in cui vi trovate.
11. INSERIMENTO DI UN TESTO
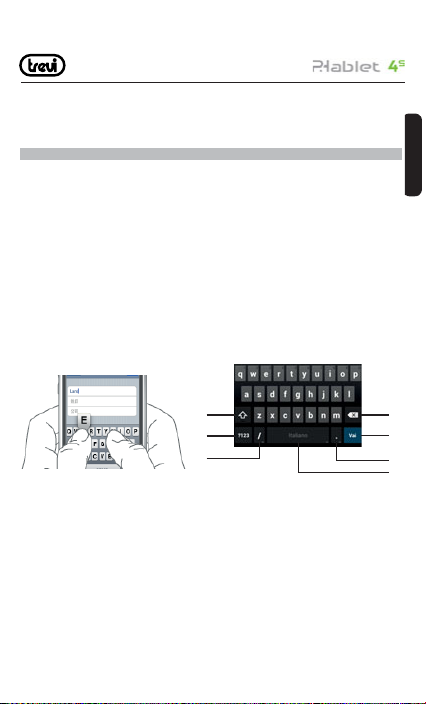
E’ possibile inserire un testo digitando i caratteri sulla tastiera virtuale. Non è possibile
inserire il testo in alcune lingue. Per selezionare una lingua differente da quella di default
selezionare “Impostazioni”, “Lingua e immissione” e selezionare la lingua desiderata.
La tastiera fornisce le funzioni di previsione ortografi ca, correzione dell’ortografi a e
l’apprendimento durante l’utilizzo.
Inserire un testo:
1. Toccare la casella di testo (memo, o un nuovo contatto) per richiamare la tastiera.
2. Toccare i tasti della tastiera.
Inizialmente è possibile toccare i tasti utilizzando l’indice della mano. Una volta acquisita
familiarità con la tastiera, si può provare a toccare i tasti con entrambi i pollici.
Toccando un tasto, la lettera corrispondente apparirà sopra al dito. Se si digita un tasto
sbagliato, si può scorrere tra le frasi suggerite per scegliere quella corretta. Solo quando il
dito viene sollevato dalla lettera, la lettera corrispondente viene inserita nella casella di testo.
ITALIANO
1
2
3
1. Per passare dalle maiuscole alle minuscole e viceversa.
2. Per passare dalla modalità Simboli e numeri alla modalità lettere.
3. Per immettere il testo vocalmente tramite l’appilicazione Google “Ricerca vocale”.
4. Per cancellare dall’ultimo carattere/numero inserito.
5. Per confermare la parola scritta.
6. Per inserire un punto o, premendolo a lungo, visualizza una tabella di simboli.
7. Per inserire uno spazio o, premendolo a lungo, si accede alle impostazioni “Seleziona
metodo di inserimento”.
17
4
5
6
7
Page 18
12.SCARICARE LE APPLICAZIONI DAL MARKET
Il Telefono viene fornito con diverse applicazioni al suo interno, ma è in grado di supportare
anche applicazioni di terze parti. Il Market permette di scaricare e acquistare applicazioni
e giochi per personalizzare il proprio dispositivo.
Installare un’applicazione dallo Store:
• Dalla pagina principale (Home) toccare l’icona “Applicazioni”
ITALIANO
Store.
• Inserire il proprio account di Gmail oppure crearsene uno seguendo i passi che vengono
proposti.
• Accettare i termini e le condizioni che vengono esposte.
• Ricercare l’applicazione desiderata e scaricarla.
Cancellare un’applicazione:
• Dalla pagina principale (Home) toccare l’icona “Applicazioni”
“Impostazioni” e poi “Applicazioni”.
• Selezionare l’applicazione che si vuole cancellare e selezionare “Disinstalla”.
, selezionare Play
, selezionare
13. COMUNICAZIONE
TELEFONO
Effettuare delle chiamate
1. Toccare l’icona
2. Immettere il numero tramite la tastiera numerica. Per eliminare un numero premere
3. Toccare l’icona per avviare la chiamata.
4. Toccare l’icona
Nota: Per immettere “+” ed effettuare chiamate internazionali, toccare e tenere premuto [0+] .
Chiamare i contatti dalla Rubrica
1. Toccare l’icona
2. Scorrere l’elenco dei contatti o immettere la prima lettera del contatto che si desidera
chiamare toccando l’icona
3. Nell’elenco, toccare il contatto che si desidera chiamare e selezionare il numero da
usare, in caso esistano più numeri associati al contatto.
per avviare l’interfaccia del telefono.
per terminare la chiamata.
per aprire la rubrica.
18
Page 19
Accettare una chiamata
1. Quando ricevete una chiamata, selezionate l’icona
all’esterno del cerchio grande.
2. Toccare l’icona
Rifi utare una chiamata
1. Quando ricevete una chiamata, selezionate l’icona
all’esterno del cerchio grande.
2. Per inviare un messaggio quando rifi utate le chiamate in entrata, selezionate l’icona
e trascinate il dito verso l’alto.
Regolazione del volume durante la chiamata
Per regolare il volume durante una chiamata, utilizzare i rispettivi tasto su e giù sulla parte
destra del telefono.
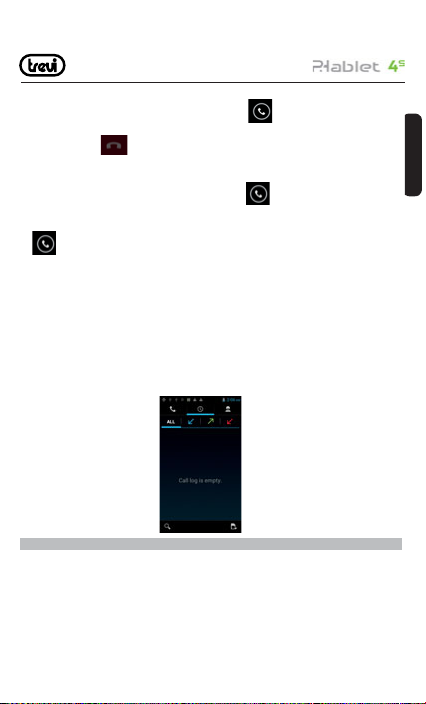
Visualizzazione della cronologia delle chiamate
Selezionando la registrazione delle chiamate, è possibile visualizzare le chiamate perse,
le chiamate in uscita e le chiamate ricevute. Il tempo di chiamata di ogni telefonata viene
visualizzato su ogni record e, nella stessa interfaccia grafi ca, è possibile impostare la
chiamata, l’invio di messaggi e aggiungere nuovi contatti.
14. MESSAGGI
Con Phablet 4S potete inviare messaggi di testo e messaggi multimediali a chiunque dei
vostri contatti. I messaggi multimediali comprendono foto, video clip, informazioni, contatti
e memo vocali. Inoltre è possibile inviare messaggi a più contatti contemporaneamente.
Note:
• L’invio e la ricezione dei messaggi in roaming potrebbe determinare costi aggiuntivi. Per
informazioni, rivolgetevi al gestore telefonico.
per terminare la chiamata.
19
e trascinate il dito verso destra
e trascinate il dito verso sinistra
ITALIANO
Page 20
• Verifi care con il proprio gestore i costi per l’invio di SMS e MMS.
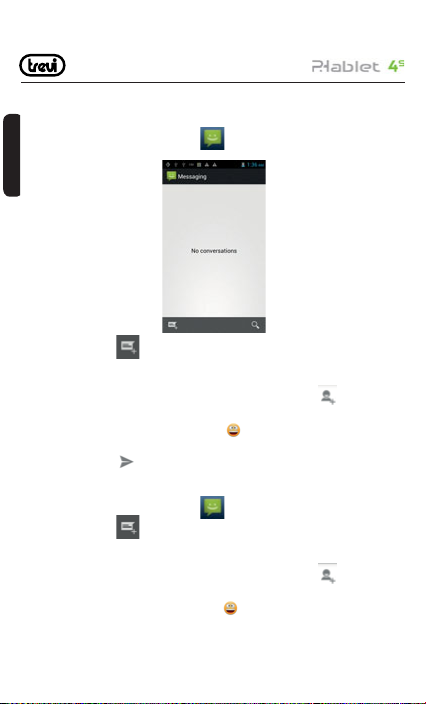
Inviare un messaggio SMS:
1. Nella schermata Home toccare l’icona
ITALIANO
2. Selezionare l’icona
3. Aggiungete i destinatari del messaggio.
• Inserite manualmente i numeri di telefono, separandoli con punto e virgola o virgola.
• Selezionate i numeri di telefono dalla Rubrica selezionando l’icona
4. Selezionate “Scrivi messaggio di testo”e inserite il testo del messaggio.
Per inserire gli emoticon, selezionate l’icona
“Scrivi messaggio di testo”
5. Selezionare l’icona
Inviare un messaggio MMS:
1. Nella schermata Home toccare l’icona
2. Selezionare l’icona
3. Aggiungete i destinatari del messaggio.
• Inserite manualmente i numeri di telefono, separandoli con punto e virgola o virgola.
• Selezionate i numeri di telefono dalla Rubrica selezionando l’icona
4. Selezionate “Scrivi messaggio”e inserite il testo del messaggio.
Per inserire gli emoticon, selezionate l’icona
“Scrivi messaggio di testo”
per inviare il messaggio.
presente sulla sinistra della fi nestra.
presente sulla sinistra della fi nestra.
20
Page 21
5. Selezionate l’icona e aggiungete uno degli elementi che compariranno nella fi netsra.
Potete selezionare un fi le dall’elenco o scattare foto, registrare video o suoni, ecc...
6. Selezionare l’icona
15. E-MAIL
Con Phablet 4S potete ricevere le votre E-mail direttamente sul telefonino. Potete utilizzare
GMail oppure inserire il vostro account e-mail personale o di lavoro.
per inviare il messaggio.
GMail:
1. Dalla pagina principale (Home) toccare l’icona “Applicazioni” , selezionare l’icona
GMail.
2. Se possedete già un vostro account su GMail selezionate “Esistente” e seguite i passi
inserendo i dati che vi verranno richiesti.
3. Se non possedete un vostro account su GMail selezionate “Nuovo” per crearvene uno.
Seguite i passi inserendo i dati che vi verranno richiesti.
Invio di una e-mail tramite GMail:
1. Dalla pagina principale (Home) toccare l’icona “Applicazioni”
GMail.
2. Selezionare l’icona
3. Inserite un nome o l’indirizzo nel campo destinatario.
4. Inserite un oggetto e il messaggio.
5. Per allegare un fi le immagine, premete il tasto Menu e selezionare “Allega foto” o “Allega
Video”.
6. Selezionare l’icona
Visualizzazione e-mail tramite GMail:
1. Dalla pagina principale (Home) toccare l’icona “Applicazioni”
GMail.
2. Selezionate un messaggio e-mail.
Dalla vista messaggi, utilizzate le seguenti opzioni:
• Per rispondere al messaggio, selezionate
• Per rispondere al messaggio includendo tutti i destinatari, selezionate
• Per inoltrare il messaggio ad altri, selezionate
• Per visualizzare un allegato, selezionate VISUALIZZA. Per salvarlo sul dispositivo,
.
per inviare il messaggio.
.
“Inoltra”.
21
, selezionare l’icona
, selezionare l’icona
“Rispondi a tutti”.
ITALIANO
Page 22
selezionate SALVA.
• Per archiviare il messaggio, selezionate
• Per eliminare il messaggio, selezionate il messaggio da eliminare, toccate il Tasto Menu
e selezionate “Elimina”.
• Per spostarvi al messaggio precedente o successivo, scorrete a destra o a sinistra.
Email:
ITALIANO
1. Dalla pagina principale (Home) toccare l’icona “Applicazioni” , selezionare l’icona
Email.
2. Immettete il vostro indirizzo e-mail e password.
3. Selezionare “Avanti”.
4. Seguite le istruzioni visualizzate sullo schermo.
Dopo aver confi gurato l’account e-mail, i messaggi vengono scaricati sul dispositivo. Se avete
creato più di due account, potete passare da un account e-mail all’altro. Selezionate un nome
account e scegliete quello da cui desiderate recuperare i messaggi.
.
16. FUNZIONI MULTIMEDIALI
Fotocamera:
Il telefono dispone di 2 fotocamere (una frontale e una posteriore) e della funzione di
registratore video. Ovunque voi siate potrete scattare foto ad alta risoluzione e fare dei
video. Phablet 4S supporta funzioni fotografi che avanzate, come abbellimento viso, la
modalità panorama, una elevata gamma dinamica e tempi di scatto ridotti (che possono
anche essere personalizzati).
Note:
• La capacità di memoria potrebbe variare in base alla scena o alle condizioni di scatto.
• La fotocamera si spegne automaticamente se non viene usata per un periodo di tempo.
Scattare una foto:
A. Dalla pagina principale (Home) toccare l’icona “Applicazioni”
camera.
B. Inquadrare il soggetto da fotografare ed eseguire le regolazioni desiderate (la fotocamera
fornisce impostazioni predefi nite per varie scene. Potete semplicemente selezionare la
modalità adeguata alla condizione di scatto e ai soggetti).
C. Agire sullo Zoom digitale per ingrandile o allargare l’immagine.
D. Toccate sul display il soggetto da mettere a fuoco. Il riquadro di messa a fuoco si sposterà
sul punto in cui avrete toccato e diventerà verde quando il soggetto sarà messo a fuoco.
22
, selezionare l’icona
Page 23
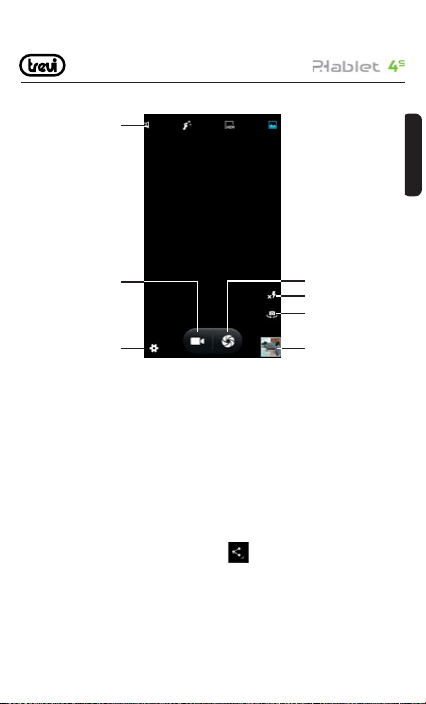
E. Selezionare il comando di scatto. La foto verrà salvata automaticamente e verrà mostrato
un riquadro di anteprima.
1
ITALIANO
2
3
1. Selezione rapida per le “Modalità di acquisizione”.
2. Comando per la funzione Videocamera.
3. Per modifi care le impostazioni generali, le impostazioni della fotocamera e quelle della
Videocamera.
4. Anteprima Video/Immagine scattata.
5. Per passare alla fotocamera frontale e viceversa.
6. Impostazioni Flash.
7. Tasto di scatto, funzione Fotocamera.
Visualizzare una foto scattata:
Selezionare il riquadro di anteprima.
• Per aumentare o ridurre lo zoom, posizionate due dita sul touch Screen e separatele
(riavvicinatele per ridurre), oppure toccate due volte il touch screen.
• Per inviare una foto ad altri, selezionate l’icona
volete effettuare (selezionate l’icona con il fumetto se volete inviarla come MMS, oppure
l’icona Bluetooth se volete inviarla tramite Bluetooth).
• Per eliminare la foto, selezionatela, toccate il tasto Menu e selezionate “Elimina”.
• Per impostare una foto come sfondo o come immagine dell’ID chiamante per un contatto,
selezionate l’immagine, toccate il tasto Menu, “Imposta foto come”.
corrispondente alla condivisione che
23
7
6
5
4
Page 24
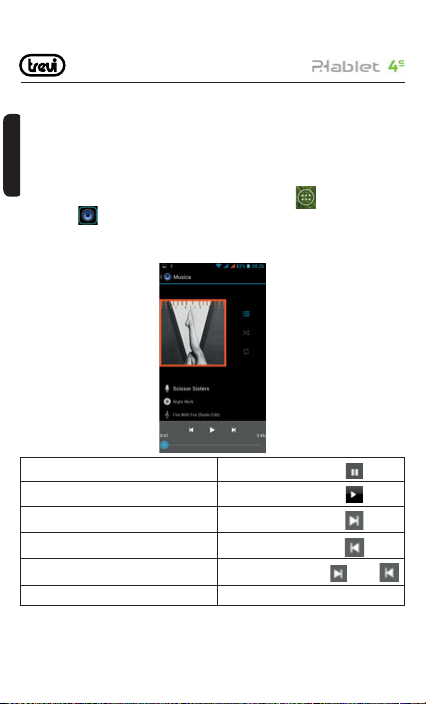
Videocamera:
Come in modalità Fotocamera anche in Videocamera potete effettuare video utilizzando
entrabe le camere. I comandi e le modalità sono le stesse descritte nel paragrafo
Fotocamera.
Lettore fi le Musicali:
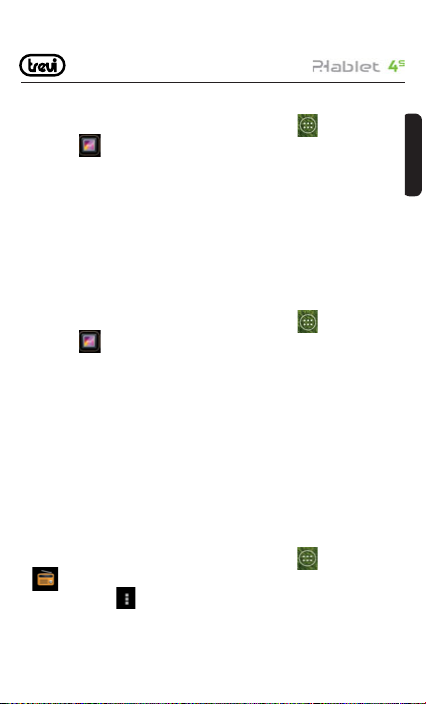
Dopo aver caricato la vostra Musica all’interno del Phablet 4S:
ITALIANO
• Dalla pagina principale (Home) toccare l’icona “Applicazioni”
“Musica”
Avrete la possibilità di scegliere tra Artista, Album, Brani o Playlist. Dopo la selezione si aprirà
un lettore multimediale dove poter gestire I brani e visualizzare la copertina dell’album se
disponibile nel fi le.
.
, selezionare l’icona
Per mettere in pausa un brano
Per riavviare la riproduzione
Per passare al brano successivo
Per ritornare al brano precedente
Per muoversi velocemente Avanti o Indietro
Per passare ad un punto preciso del brano Trascinare la barra di avanzamento
Toccare il comando
Toccare il comando
Toccare il comando
Toccare il comando
Toccare e tenere premuto
24
oppure
Page 25
Lettore fi le Video:
Dopo aver caricato i vostri Video all’interno del Phablet 4S:
1. Dalla pagina principale (Home) toccare l’icona “Applicazioni”
“Galleria”
2. Selezionare il Video che volete riprodurre.
Note:
• In base al software installato nel dispositivo, alcuni formati di fi le possono non essere
supportati.
• Se la dimensione del fi le supera la memoria disponibile, potrebbe verifi carsi un errore
all’apertura dei fi le.
Lettore di immagini:
É possibile vedere, mostrare e anche modifi care le vostre immagini sul Phablet 4S. Dopo
aver caricato i vostri fi le:
1. Dalla pagina principale (Home) toccare l’icona “Applicazioni”
“Galleria”
2. Selezionare l’immagine desiderata per vederla a schermo intero
3. Scorrere a Destra o a Sinistra per visualizzare le altre immagini.
4. Stringere o allargare l’immagine utilizzando due dita.
5. Toccate il tasto Menu e selezionare “Presentazione” se si vuole avviare un presentazione
di tutte le immagini.
Radio:
Per ascoltare la Radio in banda FM, dovete collegare gli auricolari che fungono da antenna radio.
Nota:
• Utilizzate gli auricolari in dotazione che hanno lo spinotto più lungo, altri auricolari
potrebbero non funzionare correttamente.
Ascoltare la Radio:
1. Collegate gli auricolari al dispositivo.
2. Dalla pagina principale (Home) toccare l’icona “Applicazioni”
3. Selezionare l’icona
le stazioni disponibili.
.
.
“Trasmissione FM”
e poi “Ricerca”, verranno così memorizzate automaticamente
25
, selezionare l’icona
, selezionare l’icona
, selezionare l’icona
ITALIANO
Page 26
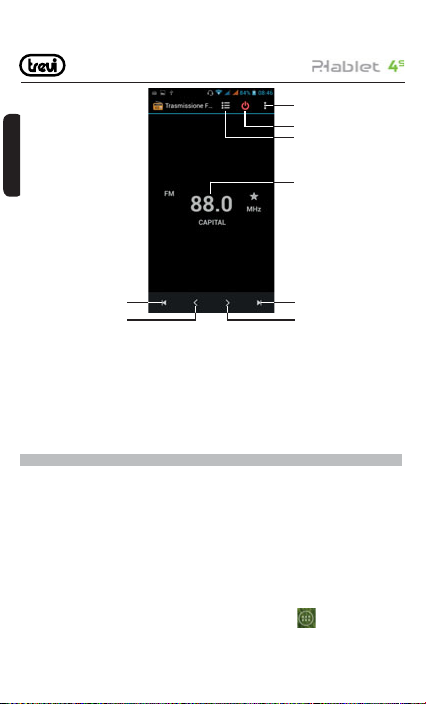
8
7
6
ITALIANO
1
1. Per ritornare alla stazione radio precedente.
2. Per spostarsi manualmente indietro.
3. Per spostarsi manualmente in avanti.
4. Per passare alla stazione radio successiva.
5. Frequenza radio in ascolto.
6. Elenco canali radio memorizzati.
7. Per disattivare la funzione Radio.
8. Impostazioni funzione Radio.
17. INTERNET
Il servizio internet richiede una connessione dati. Il browser permette di navigare in rete e
consultare la pagina, proprio come sul computer. È possibile creare al telefono un segnalibro
e sincronizzarlo con il computer. Si può avere un rapido accesso ai tuoi siti preferiti nella
schermata principale.
La visualizzazione delle pagine web può avvenire verticalmente o orizzontalmente. La
pagina ruota a seconda della rotazione del telefono e viene regolata automaticamente per
adattarla alla pagina:
• L’accesso al Web e il download dei dati potrebbero determinare costi aggiuntivi. Per
informazioni, rivolgetevi al gestore telefonico.
• Le icone disponibili potrebbero variare in base al Paese o al gestore telefonico.
1. Dalla pagina principale (Home) toccare l’icona “Applicazioni”
“Browser”.
2
26
5
4
3
, selezionare l’icona
Page 27
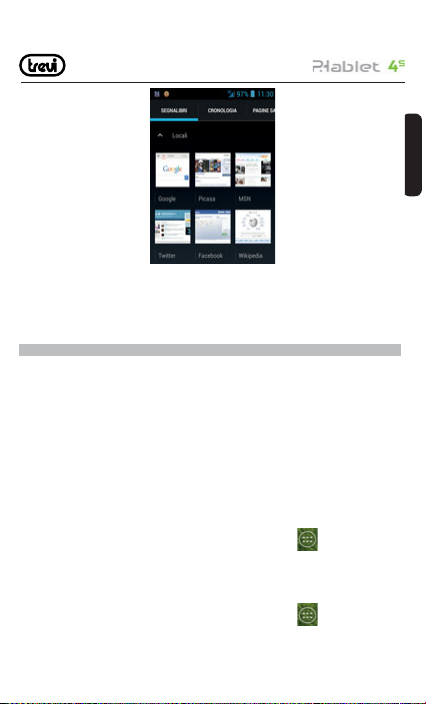
2. Selezionare una delle pagine pre caricate oppure selezionare il campo URL e digitare
l’indirizzo Web.
3. Selezionare il tasto Menu se si vogliono regolare le impostazioni della navigazione.
18. CONNETTIVITA’
Bluetooth:
Bluetooth è una tecnologia di comunicazione senza fi li a cor to raggio in grado di scambiare
dati entro distanze di circa 10 metri senza richiedere una connessione con cavi.
Non è necessario allineare i dispositivi per trasmettere i dati tramite Bluetooth. Se i dispositivi
sono accoppiati, potete scambiare dati tra di loro anche se si trovano in stanze diverse.
Note:
• Verifi cate sempre di condividere e ricevere dati da dispositivi affi dabili e adeguatamente
protetti.
• In presenza di ostacoli tra i dispositivi, la distanza operativa può diminuire.
• Alcuni dispositivi possono essere incompatibili con il vostro apparecchio.
Attivazione della funzione Bluetooth:
1. Dalla pagina principale (Home) toccare l’icona “Applicazioni”
“Impostazioni”.
2. Selezionare “ON” accanto alla scritta “Bluetooth”
Ricerca e accoppiamento ai dispositivi Bluetooth:
1. Dalla pagina principale (Home) toccare l’icona “Applicazioni”
27
, selezionare l’icona
, selezionare l’icona
ITALIANO
Page 28
“Impostazioni”.
2. Selezionare la scritta “Bluetooth” dopo averlo attivato.
3. Dall’elenco che comparirà selezionare il dispositivo e inserire il PIN Bluetooth se presente.
4. Selezionare “OK” per avviare l’accoppiamento.
Quando il proprietario dell’altro dispositivo immetterà lo stesso PIN o accetta la connessione,
l’accoppiamento verrà completato.
ITALIANO
Note:
- Se l’abbinamento avrà esito positivo, il dispositivo cercherà automaticamente i servizi
disponibili.
- Alcuni dispositivi, in particolare auricolari o kit vivavoce per auto, possono avere un
codice PIN Bluetooth fi sso, ad esempio 0000. Se l’altro dispositivo ha un PIN,
occorre immetterlo.
GPS:
Alla prima accensione attivare la funzione GPS in ambiente aperto e attendere che avvenga
l’aggancio al segnale. Il tempo di attesa dipende dalla qualità di segnale nel punto in cui
viene attivato.
WiFi:
La connessione WiFi consente di attivare o collegarsi a qualsiasi rete WLAN compatibile
con gli standard IEEE 802.11 b/g/n.
E’ possibile collegarsi a Internet o ad altri dispositivi di rete ovunque sia disponibile un
punto di accesso o hotspot wireless.
Attivazione Wi-Fi:
1. Dalla pagina principale (Home) toccare l’icona “Applicazioni”
“Impostazioni”.
2. Selezionare “ON” accanto alla scritta “Wi-Fi”.
Note:
Il collegamento WiFi scarica la batteria, per una maggiore autonomia si consiglia di attivarlo
solamente quando è necessario.
Ricerca di una rete Wi-Fi:
1. Dalla pagina principale (Home) toccare l’icona “Applicazioni”
“Impostazioni”.
2. Selezionare “Wi-Fi”. L’apparecchio ricercherà automaticamente le reti WiFi disponibili.
3. Selezionare una rete.
28
, selezionare l’icona
, selezionare l’icona
Page 29
4. Inserire una password se richiesta.
5. Selezionare “Connetti”.
Inserimento manuale di una rete Wi-Fi:
1. Dalla pagina principale (Home) toccare l’icona “Applicazioni”
“Impostazioni”.
2. Selezionare “WiFi”.
3. Selezionare “Aggiungi rete”.
4. Inserire l’SSID della rete e selezionare il tipo di protezione.
5. Confi gurate le impostazioni di protezione in base al tipo di protezione selezionata.
6. Selezionare “Salva”.
19. COLLEGAMENTO AL PC
Per utilizzare i collegamenti PC, dovete disattivare la modalità di debug USB.
Aprite il menù Applicazioni e selezionate “Impostazioni”, “Opzioni sviluppatore”, quindi
deselezionate la casella di controllo accanto a “Debug USB”.
Collegamento come dispositivo di massa:
Potete collegare il dispositivo a un computer come un disco rimovibile e accedere alla
directory dei fi le.
Se inserite una scheda di memoria nel dispositivo, potete accedere alla directory della
scheda utilizzando il dispositivo come lettore di schede di memoria.
La directory della scheda comparirà come disco rimovibile, separata dalla memoria interna.
Per scollegare il dispositivo dal computer, fate clic sull’icona del dispositivo USB nella
barra delle applicazioni di Windows e fate clic sull’opzione per rimuovere in modo sicuro il
dispositivo di archiviazione di massa. Quindi rimuovete il cavo dati dal computer. Altrimenti
potreste perdere i dati salvati sulla scheda di memoria o danneggiare la scheda di memoria.
, selezionare l’icona
20. IMPOSTAZIONI
Dalla pagina principale (Home) toccare l’icona “Applicazioni” , selezionare l’icona
“Impostazioni”.
Note:
Alcune impostazioni potrebbero non essere disponibili, ciò può essere dovuto al vostro
contratto o dal vostro gestore.
29
ITALIANO
Page 30
ITALIANO
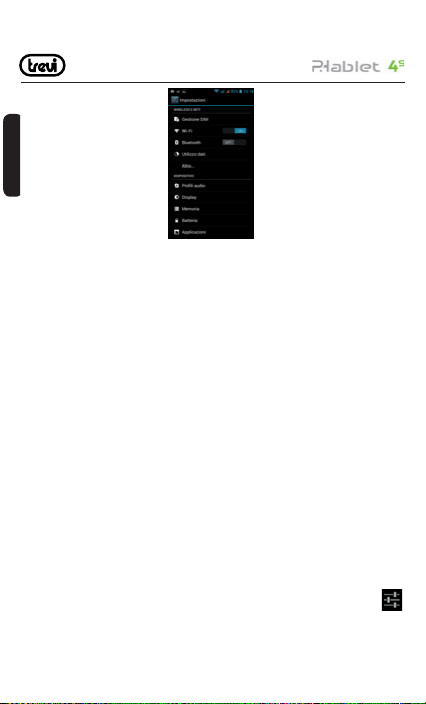
Gestione SIM
Comando per gestire le SIM presenti sull’apparecchio.
1) Selezionarlo per disattivare la scheda SIM, la scheda disattivata sarà di colore Grigio e
sulla barra di stato verrà visualizzata la modalità di volo.
2) Sulla schede SIM attive è possibile scegliere su quale SIM gestire la “Chiamata vocale”,
la “Chiamata video”,“Messaggistica” e “Connessione dati”.
Wi-Fi
Comando per attivare ed effettuare una ricerca delle reti. Verrà mostrata una lista di reti
Wi-Fi disponibili, sceglierne una e inserire la password se richiesta.
Bluetooth
Comando per attivare ed effettuare una ricerca dei dispositivi Bluetooth. Verrà mostrata una
lista di apparecchi disponibili, sceglierne uno e inserire la password se richiesta.
Utilizzo dati
Visualizzazione grafi ca e impostazione del limite dei dati mobili.
Altro…
Elenco reti utilizzabili per la connessione del Phablet 4S diversamente dalla rete Wi-Fi,
attivazione/disattivazione modalità Aereo.
Profi li Audio
Comando per regolare le impostazioni dei toni del telefono in “Ricezione delle chiamate”
Audio, Video e Messaggi. Regolazione della Vibrazione, Volume, suoni di notifi ca, suono
pressione tasti, al fi ne di adeguare l’apparecchio ad ogni ambiente in cui ci si trova.
1) Selezionare uno dei profi li “Generale / Silenzioso / Riunione / Esterno”, comparirà un punto
sulla sinistra.
2) Per modifi care le impostazioni del profi lo “Generale”, selezionare l’icona Impostazioni
3) Selezionare il comando “+” per aggiunger dei profi li.
30
.
Page 31

Display
Comando per regolare la luminosità, lo sfondo, impostare la rotazione automatica, regolare
il tempo di spegnimento pannello e selezionare le dimensioni dei caratteri.
Memoria
Comando per visualizzare grafi camente lo stato della memoria interna o delle memorie
sterne collegate all’apparecchio.
NOTA BENE: Le applicazioni pre installate e il sistema operativo Android OS occupano
una considerevole parte della capacità della memoria interna del dispositivo, quindi risulta
normale avere una differenza tra “Spazio di memoria disponibile” e “Capacità totale”.
Batteria
Comando per visualizzare grafi camente lo stato di carica della batteria e i tempi di utilizzo.
Applicazioni
Selezionando questa voce è possibile gestire le varie applicazioni presenti sul dispositivo.
Accesso alla posizione
Per acconsentire o meno all’invio dei propri dati di posizione per i risultati di ricerca di
Google e altri servizi Google e attivazione dei Satelliti GPS.
Sicurezza
Impostazioni per inserire un blocco schermo o informazioni riguardanti l’amministratore.
Lingua e immissione
Selezionando questa voce è possibile impostare la lingua desiderata, la correzione ortografi ca, impostare alcune funzioni della tastiera virtuale, impostare i comandi vocali e la
velocità del puntatore.
Backup e Ripristino
Selezionando questa voce è possibile effettuare un Back up dei propri dati o ripristinare
l’apparecchio con i dati di fabbrica.
Aggiungi Account
Visualizza gli account attivi e gestisce la loro sincronizzazione.
Data e ora
Selezionando questa voce è possibile impostare la data e l’ora del dispositivo, il fuso orario,
il formato e la visualizzazione del giorno/mese/anno.
Programma accensione/spegnimento
Selezionando questa voce è possibile impostare l’ora di accensione e quella di spegnimento
automatico.
Accessibilità
Selezionando questa voce è possibile impostare alcuni parametri come Testo grande,
31
ITALIANO
Page 32

Rotazione automatica, Pronuncia della password, Ritardo del tocco, installazione Script
web e l’avvio rapido del dispositivo.
Info sul telefono
Selezionando questa voce è possibile visualizzare tutte le informazioni che riguardano
l’apparecchio.
ITALIANO
21. INFORMAZIONI SULLA CERTIFICAZIONE SAR
Specifi c Absorption Rate, tasso specifi co di assorbimento)
(
IL DISPOSITIVO RISPETTA LE LINEE GUIDA INTERNAZIONALI SULL’ESPOSIZIONE
ALLE ONDE RADIO
Il dispositivo mobile è un ricetrasmettitore radio. È stato ideato e prodotto per non superare
i limiti per l’esposizione all’energia a radiofrequenza (RF) raccomandati dalle direttive
internazionali (ICNIRP). Questi limiti sono parte integrante delle direttive generali e ser vono
a defi nire i livelli consentiti di energia RF per l’intera popolazione.
Le suddette direttive sono state stilate da organizzazioni scientifi che indipendenti in seguito
ad analisi approfondite e periodiche di studi scientifi ci. Queste direttive garantiscono un
considerevole margine di sicurezza mirato alla salvaguardia di tutti gli individui, indipendentemente dall’età o dalle condizioni di salute.
Lo standard di esposizione a dispositivi mobili utilizza un’unità di misura nota come SAR
(Specifi c Absorption Rate, tasso specifi co di assorbimento). Il limite SAR stabilito dalle direttive
internazionali è di 2 W/kg (calcolati su una media di dieci grammi di massa corporea. Le
direttive prevedono un notevole margine di sicurezza per offrire maggiore protezione al
pubblico e per compensare qualsiasi variazione nelle misurazioni. I valori SAR possono
variare a seconda dei requisiti delle legislazioni nazionali e della banda di rete). I test per
i livelli SAR vengono eseguiti utilizzando le normali posizioni d’utilizzo del dispositivo che
trasmette al massimo livello di potenza certifi cato su tutte le bande di frequenza testate.
Sebbene il livello SAR venga calcolato in base al massimo livello di potenza certifi cato,
l’effettivo SAR del dispositivo in funzione può essere nettamente inferiore rispetto al valore
massimo. Il dispositivo infatti è stato progettato per funzionare a diversi livelli di potenza in
modo da utilizzare soltanto quella necessaria per il collegamento alla rete. Generalmente, più
si è vicino a una stazione base, minore sarà l’emissione di potenza. Prima che un modello
di telefono venga introdotto sul mercato, deve essere comprovata la sua conformità alla
direttiva europea R&TTE. Tale direttiva comprende come requisito essenziale la protezione
della salute e della sicurezza dell’utente e di ogni altra persona.
Il valore SAR più elevato registrato per questo dispositivo per l’uso a contatto con l’orecchio
è pari a 0.452 W/kg.
Questo dispositivo è conforme alle direttive sull’esposizione alle radiofrequenze quando
utilizzato nella normale posizione d’uso vicino all’orecchio o posizionato a una distanza di
32
Page 33
almeno 2 cm dal corpo. Se una custodia, una clip per cintura o altro sostegno vengono
posizionati a stretto contatto con il corpo, tali accessori non devono contenere metallo ed è
importante mantenere il dispositivo a una distanza di almeno 2 cm dal corpo. Il dispositivo
richiede una connessione ottimale alla rete per poter trasmettere fi le di dati o messaggi. In
alcuni casi, la trasmissione di fi le di dati o messaggi potrebbe essere ritardata fi no a che
tale connessione diventi disponibile. Le istruzioni relative alla separazione del dispositivo
dal corpo devono essere rispettate fi no alla fi ne della trasmissione.
22. INFORMATIVA SULLO SMALTIMENTO DELLA BATTERIA
Qualunque sia il tipo di batteria esaurita, essa non deve essere gettata tra i rifi uti domestici,nel
fuoco o nell’acqua. Ogni tipo di batteria esaurita deve essere, riciclata oppure smaltita
presso gli appositi centri di raccolta dedicati.
Avvertenze per il corretto smaltimento del prodotto.
Il simbolo riportato sull’apparecchiatura indica che il rifi uto deve essere oggetto di “raccolta
separata” pertanto il prodotto non deve essere smaltito insieme ai rifi uti urbani.
L’utente dovrà consegnare il prodotto presso gli appositi “centri di raccolta differenziata”
predisposti dalle amministrazioni comunali, oppure consegnarlo al rivenditore contro
acquisto di un nuovo prodotto.
La raccolta differenziata del rifi uto e le successive operazioni di trattamento, recupero e
smaltimento favoriscono la produzione di apparecchiature con materiali riciclati e limitano
gli effetti negativi sull’ambiente e sulla salute causati da una gestione impropria del rifi uto.
Lo smaltimento abusivo del prodotto comporta l’applicazione di sanzioni amministrative.
TREVI persegue una politica di continua ricerca e sviluppo, pertanto i prodotti possono
presentare caratteristiche diverse da quelle descritte.
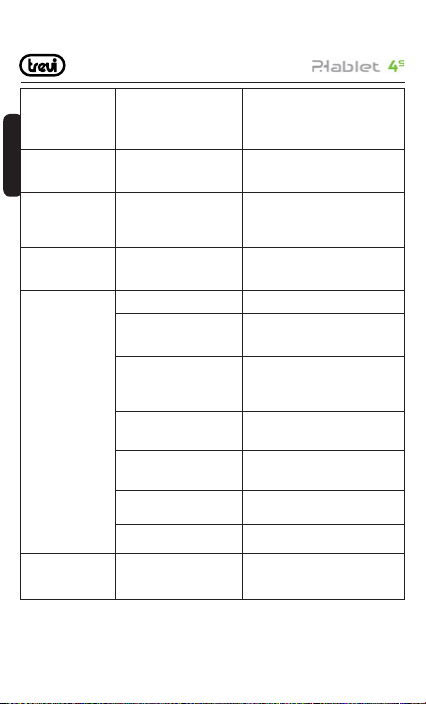
23. RISOLUZIONE DEI PROBLEMI
Questo capitolo descrive alcuni problemi che potrebbero verifi carsi durante l’uso del telefono.
Alcuni di questi richiedono l’intervento da parte del provider di ser vizi, ma la maggior parte
può essere risolta facilmente dall’utente.
Messaggio Cause Possibili soluzioni
Errore SIM Non vi è alcuna scheda SIM
inserita nel telefono oppure
è stata inserita in modo errato.
Accertarsi che la scheda SIM sia
inserita in modo corretto.
33
ITALIANO
Page 34
Impossibile
accendere il telefono.
Nessuna connessione
alla rete
ITALIANO
I codici non
corrispondono
Impossibile impostare
la funzione
Errore di ricarica
La connessione del
telefono alla rete è
interrotta
Il pulsante On/Off non è stato
premuto abbastanza a lungo.
Batteria scarica. Contatti della
batteria sporchi.
Segnale debole. Fuori dalla
portata della rete GSM.
Per modifi care un codice
di sicurezza, è necessario
confermare il nuovo codice
inserendolo nuovamente.
Non è supportata dal gestore
dei servizi o è necessario
eseguire la registrazione.
Batteria esaurita. Caricare la batteria.
Temperatura fuori
dall’intervallo consigliato.
Problema di contatto. Verifi care l’alimentazione e il
Nessuna alimentazione di rete. Collegare il telefono a un’altra presa o
Caricabatterie difettoso. Se il caricabatterie non si scalda,
Caricabatterie errato. Utilizzare solo accessori Trevi originali.
Batteria difettosa. Sostituire la batteria.
Segnale troppo debole. La connessione a un altro gestore di
Premere il pulsante On/Off per almeno
due secondi.
Lasciare il caricabatteria collegato più a
lungo. Pulire i contatti.
Spostarsi verso una fi nestra o
all’esterno.Controllare la mappa di
copertura del provider di servizi.
Rivolgersi al proprio provider di servizi.
Rivolgersi al proprio provider di servizi.
Accertarsi che la temperatura ambiente
sia corretta, attendere qualche secondo
e caricare di nuovo.
collegamento al telefono. Controllare i
contatti della batteria e, se necessario,
pulirli.
controllare il voltaggio.
sostituirlo.
servizi è automatica.
34
Page 35
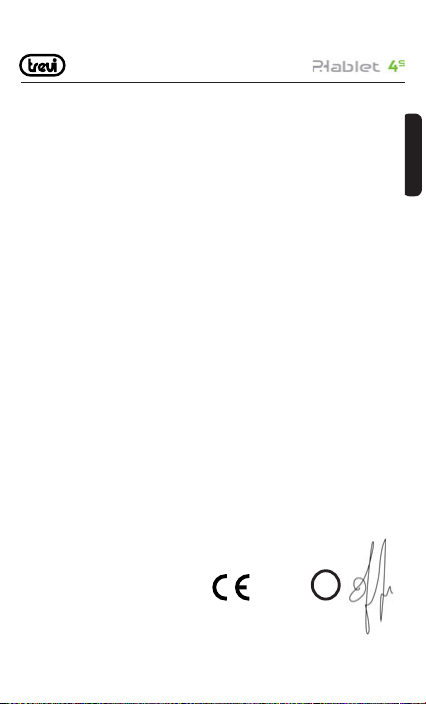
DICHIARAZIONE DI CONFORMITÀ
con sede legale in Rimini (RN), Strada Consolare Rimini-San Marino, 62 in qualità di distributore
Dichiara che il prodotto:
Descrizione: WCDMA Mobile Phone, GSM, WLAN e GPS
Marca: TREVI
Modello: PHABLET 4S
È conforme alla: direttiva 1999/5/CE (R&TTE) del Parlamento Europeo e del Consiglio
del 9 marzo 1999 riguardante le apparecchiature radio e le apparecchiature terminali di teleco-
municazione e il reciproco riconoscimento della loro conformità.
a.Sicurezza elettrica - LVD (direttiva CEE 72/23) EN 60950-1: 2006+A11:2009+ A1:2010+A12:
b.Compatibilità elettromagnetica-
EMC (direttiva CEE 89/336)
c.Spettro di frequenza-
Allegato IV (direttiva 1999/5/EC)
d.SAR EN 50371:2002
e.RoHS – (direttiva 2011/65/EU) Riguardo la restrizione dell’uso di sostanze chi-
Il prodotto è pertanto marcato con il marchio
di conformità europea:
La sottoscritta TREVI S.p.A.
sul territorio comunitario
2011
EN 301 489-1 V1.9.1
EN 301 489-7 V1.3.1
EN 301 489-17 V2.1.1
EN 301 489-19 V1.2.1
EN 301 489-24 V1.5.1
EN 301 489-34 V1.1.1
EN 300 328 V1.7.1
EN 301 511 V9.0.2
EN 300 440-1 V1.6.1
EN 300 440-2 V1.4.1
EN 301 908-1 V5.1.1
EN 301 908-2 V5.1.1
EN 62311:2008
EN 50360:2001
EN 62209-1:2006
EN 62209-2:2010
miche pericolose nelle apparecchiature elettriche
ed elettroniche
0700
Il Presidente Trevi S.p.A.
35
!
ITALIANO
Page 36

1 The Basics
1.1 Overview
Thank you for choosing the GSM/GPRS digital mobile phone. After reading this guide you will
be able to fully master the use of your phone and appreciate all its functions and ease of use.
Not only does the smartphone provide you with basic call functions such as call Register,
but also with many practical functions and services, to improve the time you spend working
and playing.
The color screen mobile phone complies with the GSM/GPRS technology and has been
approved by certifi cation authorities both domestically and abroad.
The availability of some services and features described in this manual depends on the
network and your subscription. Therefore, some menu items may not be available in your
phone. The shortcuts to menus and features may also vary from phone to phone.
Our company reserves the right to revise this manual content without prior notice.
ENGLISH
1.2 Safety guide
• If your mobile phone is lost or stolen, please contact the telecommunications authorities
or a sales agent immediately to have a hold on the phone and the SIM card. This will
prevent economic loss caused by unauthorized calls made from your mobile phone.
• When you contact the telecommunications authorities or a sales agent, they will need to
know the IMEI number of our mobile phone (remove battery to expose number located
on the label on back of phone). Please copy this number and keep in a safe place for
future use.
• In order to avoid the misuse of your mobile phone take the following preventative measures:
- Set the PIN number of your mobile phone’s SIM card and change this number
immediately if it becomes known to a third party.
- Please keep the phone out of sight when leaving it in a vehicle. It is better to carry the
phone with you, or lock it in the trunk.
- Set call barring.
1.3 Safety warnings and notices
Before using your mobile phone, read and understand the following notices carefully to
ensure you will use it safely and properly.
1.3.1 General attention
• Only the battery and battery charger specifi ed by our company should be used in your
mobile phone. Other product might result in battery leakage, overheating, explosion or
fi re.
• To avoid your phone malfunctioning or catching fi re, please do not violently impact, jolt
or throw your phone.
36
Page 37

• Please do not place the battery, phone or charger in a microwave oven or high-pressure
equipment. Otherwise it could lead to unexpected accidents such as damage to circuit
or fi re hazard.
• Please do not use your phone near fl ammable or explosive gases, otherwise it could
cause malfunction of your phone or fi re hazard.
• Please do not subject your phone to high temperatures, high humidity or dusty places;
otherwise this may lead to the malfunction of your phone.
• Keep your phone out of the reach of small children. Your phone is not a toy. Children
could hurt themselves.
• To avoid your phone falling and malfunctioning or being damaged, please do not place
it on uneven or unstable surfaces.
1.3.2 Notices when using your phone
• Turn off your mobile phone where the phone is not allowed, such as on the airpor t or
in hospitals. Using the mobile phone in those places may impact the normal operation
of electronic devices and medical instruments. Follow relevant regulations when using
your mobile phone in those places. Your mobile phone has the auto turn-on feature.
Check your alarm clock settings to confi rm that your mobile phone will not be turned
on automatically during fl ight.
• Please do not use your mobile phone near the weak signal or high precision electronic
devices. RF interference might cause malfunctioning of such electronic devices and
other problems. Special tips must be paid near the following equipment: hearing aids,
pace makers and other medical electronic devices, fi re detectors, automatic doors and
other automatic control installations. To fi nd out the effect of mobile phones on a
pacemaker or other pieces of electronic medical equipment please contact the
manufactures or local sales agents of the equipment.
• Please do not subject the LCD to impact or use the screen to strike things, as this will
damage the LCD board and cause leakage of the liquid crystal. There is a risk of blindness
if the liquid crystal substance gets into the eyes. If this occurs rinse eyes immediately
with clear water (under no circumstances rub your eyes) and go immediately to a hospital
for treatment.
• Do not dissemble or modify your mobile phone, as it will lead to damage to the phone
such as battery leakage or circuitry failure.
• Under very rare circumstances using the mobile phone in certain model cars may
negatively affect the internal electronic equipment. In order to assure your safety under
such circumstances please do not use the mobile phone.
• Please do not use needles, pen tips or other sharp objects on the keypad as this may
damage the mobile phone or cause it to malfunction.
• In the event of antenna malfunction, do not use your phone as it could be harmful to
37
ITALIANOENGLISH
Page 38

human body.
• Avoid letting the phone come into close contact with magnetic objects such as magnetic
cards as the radiation waves of the mobile phone may erase the information stored on
fl oppy disks, pay cards and credit cards.
• Please keep small metal objects, such as thumbtacks far away from the receiver. When
the receiver is in use it becomes magnetic and may attract these small metal objects
and thus these may cause injury or damage the mobile phone.
• Avoid having the mobile phone come into contact with water or other liquids. If liquids
enter the phone, this could cause a short circuit, batter y leakage or other malfunction.
1.3.3 Notices when using battery
• The battery has a limited service life. The remaining life gets shorter as the times of
charging increase. If the battery becomes feeble even after the charging, this indicates
ENGLISH
the service life is over and you have to use a new specifi ed battery.
• Do not dispose of old batteries with everything domestic garbage. Please dispose of old
batteries at the directed places with specifi c rules for their disposal.
• Please do not throw batteries into a fi re, as this will cause the battery to catch fi re and
explode.
• When installing the battery, do not use force or pressure, as this will cause the battery
to leak, overheat, crack and catch fi re.
• Please do not use wires, needles or other metal objects to short-circuit the batter y. Also,
do not put the batter y near necklaces or other metal objects as this will cause the battery
to leak, overheat, crack and catch fi re.
• Please do not solder the contact points of the battery, as this will cause the battery to
leak, overheat, crack and catch fi re.
• If the liquid in the batteries goes into the eyes, there is a risk of blindness. It this occurs
do not rub the eyes, but immediately rinse eyes with clear water and go to the hospital
for treatment.
• Please do not disassemble or modify the battery, as this will cause the battery to leak,
overheat, crack and catch fi re.
• Please do not use or place the batteries near high temperature places such as near a
fi re or heating vessel as this will cause the battery to leak, overheat, crack and catch
fi re.
• If the battery overheats, changes color or becomes distorted during use, charging or
storage, please stop using and replace it with a new battery.
• If the liquid from the battery comes in contact with skin or clothing this could cause
burning of the skin. Immediately use clear water to rinse and seek medical tips if necessary.
• If the battery leaks or gives off a strange odor, please remove the battery from the vicinity
of the open fi re to avoid a fi re or explosion.
38
Page 39

• Please do not let the battery become wet as this will cause the battery to overheat,
smoke and corrode.
• Please do not use or place batteries in places of high temperature such as in direct
sunlight, as this will cause the battery to leak and overheat, lower per formance and
shorten the batter y’s life.
• Please do not continuously charge for more than 24 hours.
1.3.4 Charging your phone
• Connect the connector of charge to the mobile phone. The battery level indicator fl ashes
on the screen. Even if the phone has been turned off, the charging image still appears,
indicating that the battery is being charged. If the phone is overused when the current
is insuffi cient, it may take longer time for the charging indicator to appear on the screen
after the charging begins.
• When the battery level indicator does not fl ash and indicates the battery is full, this
indicates the charging has been completed. If the phone is off during charging,
the charging being completed image also appears on the screen. The charging
process of ten takes 3 to 4 hours. During the charging, the battery, phone and
charger gets warm, this is a normal phenomenon.
• Upon the completion of charging, disconnect the charger from AC power socket, and
from the mobile phone.
Notes:
• During charging, the phone must be places in well-ventilated environment of +5° ~
+40°.
Always use the charger supplied by your phone manufacturer. Using an unauthorized
charger might cause danger and invalidate the authorization and warranty clauses for
your phone.
• The standby time and call duration provided by the manufacturer are based on ideal
operating environment. In practice, the battery’s operating time varies depending on
network conditions, operating environment and usage methods.
• Make sure the battery has been installed before charging. It is best not to remove the
battery while charging.
• Upon completion of charging, disconnect the charger from your phone and the power
supply.
If you have not disconnected the charger from your phone and the power supply, the
charger will continue to charge the battery after 5 to 8 hours when the batter level decreases
substantially. We advise you not to do like this, as it lowers your phone performance and
shortens your phone life.
39
ENGLISH
ITALIANO
ITALIANO
Page 40

Notices when using your charger
• Please use AC 220 volts. The use of any other voltage will cause battery leakage, fi re
and cause damage to the mobile phone and charger.
• It is forbidden to short circuit the charger, as this will cause electrical shock, smoking
and damage the charger.
• Please do not use the charger if the power cord is damaged, as this will cause fi re or
electrical shock.
• Please immediately clean any dust gathered on the electrical outlet.
• Please do not place vessels with water near the charger in order to avoid water splashing
onto the charger and causing an electrical shortage, leakage or other malfunction.
• If the charger comes in contact with water or other liquid the power must immediately
be switched off to avoid an electrical short or shock, fi re or malfunction of the charger.
• Please do not disassemble or modify the charger, as it will lead to bodily harm, electrical
ENGLISH
shock, fi re or damage to the charger.
• Please do not use the charger in the bathroom or other excessively moist areas, as this
will cause electrical chock, fi re or damage to the charger.
• Please do not touch the charger, power cord or power socket with wet hands, as this
will cause electrical shock.
• Do not modify or place heavy objects on the power cord, as this will cause electrical
shock or fi re.
• Before cleaning or car rying out maintenance please unplug the charger from the electrical
outlet.
• When unplugging charger, do not pull on the cord, but rather hold on to the body of the
charger, as pulling on the cord will damage the cord and lead to electrical shock or fi re.
1.3.5 Cleaning and maintenance
• The mobile phone, battery and charger are not water resistant. Please do not use them
in the bedroom or other excessively moist areas and likewise avoid allowing them to get
wet in the rain.
• Use a soft, dry cloth to clean the mobile phone, battery and charger.
• Please do not use alcohol, thinner, benzene or other solvents to wipe the mobile phone.
• A dirty outlet will cause poor electrical contact, lose of power and even inability to
recharge. Please clean regularly.
2 Getting Started
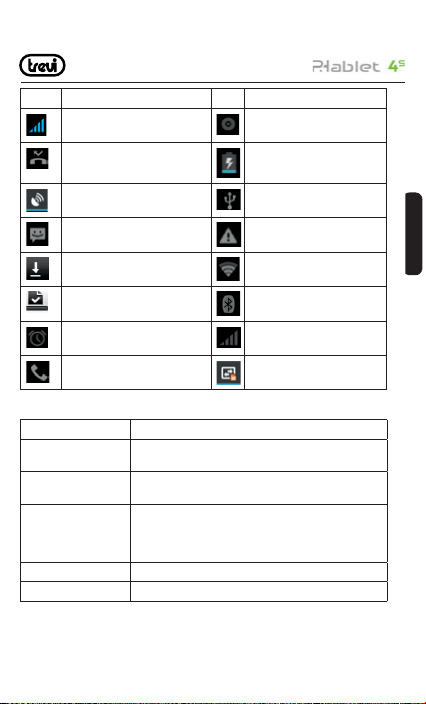
2.1 Icons
In the standby mode, the following icons may appear in standby sceen.
40
Page 41
Icon Description
Indicate the intensity of network
signals
The phone is playing a song
Show missed calls The phone is being charged
Location by satellite Enable USB
Receive a new message The access is blocked
An application is being downloaded
Get connected to the wireless
network
The downloading is over Turn on the Bluetooth
The alarm clock has been set
and activated
No SIM card is installed in
the phone
A call is in progress GPRS data connection is on
2.2 Key explanations
Key Explanation
Home key At any status, press the key to return to the standby
Power key • Hold down this key to turn your phone off and on.
Side volume keys • During the conversation, press the two keys to adjust
Menu key Show options of current menu.
Return key Return to the previous menu.
Note: In this guide, the phrase “press the key” refers to pressing and thereafter releasing
screen.
• Generally, press this key to lock the mobile phone.
the volume.
• While playing an audio fi le, press the two keys to
adjust the volume.
41
ITALIANOENGLISH
Page 42
a key. “Hold down a key” refers to pressing a key and keeping it depressed for 2 seconds
or longer.
The descriptions and functions of keys depend on the model of your phone.
2.3 Using the touchscreen
Your phone provides many touch keys in the Main screen. To use these keys cor rectly, calibrate
the touch screen in advance (see “Calibrator”). Meanwhile please follow the instructions:
• Do not touch the screen with wet hands.
• Do not touch the screen with great forces.
• Do not touch the screen with metallic or conductive objects.
2.4 Connecting to the network
2.4.1 Inserting and removing the SIM card
ENGLISH
• Turn off the phone; remove the battery and unplug other external power supplies. Inser t
the SIM card into the SIM holder as shown in the phone.
• When you need to remove the SIM card, turn off the phone, remove the battery and then
remove the SIM card from the holder.
Warning: Do turn off your phone before removing the SIM card. Never insert or remove
the SIM card when an external power supply is connected, as this may cause damage to
the SIM card.
Attention:
Note regard the use of micro/nano SIM adapter on TREVI products Smartphone and tablet
TREVI with SIM card slot are designed to accommodate only SIM in the standard format.
The use of micro/nano SIM card with the adapter it’s not recommended as it can cause
breakage of device and micro/nano SIM card. TREVI is not liable for damage caused by the
use of micro/nano SIM adapters. TREVI reserves the right to refuse warranty on products
with defects to the SIM slot caused by the use of micro/nano SIM adapters.
2.4.2 Turning your phone on and off
To turn on your phone, hold down the power key on the top; to turn off the phone, hold
down the power key.
42
Page 43

If you have turned on your phone without inserting the SIM card, the phone will prompt
you to install the SIM card. With the SIM card already inserted, your phone automatically
verifi es the availability of the SIM card.
Then, the screen shows the following in order:
Enter PIN1—if you have set the SIM card password.
Enter phone password—if you have set your phone password.
Search for network—the phone searches for the appropriate network.
Notices:
If when you turn on the mobile phone, an exclamation mark appears on the screen and
does not disappear, this is possibly caused by misoperation, that is, you press the Power
key and the Volume Up key at the same time. Such misoperation activates the recovery
mode, hence the occurrence of exclamation mark. If you just turn off the phone, next time
when you turn it on, it will still come to the recovery mode.
Solution:
Press the home key when the exclamation mark and robot appear, a menu will pop up. Use
the menu key to select “reboot system now” to restart the phone.
2.4.3 Unlocking the SIM card
The PIN 1 (personal identifi cation number) secures your SIM card from being misused by
others. If you have selected this function, you must enter the PIN1 code each time you
turn on the phone so that you may unlock the SIM card and then make or answer calls.
You can deactivate SIM card protection (see “Safety settings”). In this case, the misuse of
your SIM card cannot be prevented.
• Press the Hang Up key to turn your phone;
• Enter your PIN1 code. Clear the incorrect digits by using the right soft key and press OK
for confi rmation. e.g. if your PIN1 is1234, please enter: 1 2 3 4
If you enter incorrect numbers for three times in succession, your SIM card will be locked
and your phone will ask you to enter PUK 1 number. If you do not know the PUK 1 code,
do not try. Instead, contact your network service provider. See “Safety settings”.
Note: your network service provider sets a standard PIN 1 code (4 to 8 digits) for your SIM
card. You should immediately change this number. See “Safety settings”
2.4.4 Unlocking your phone
To prevent unauthorized use, you can set phone protection. If you have selected this function,
you must draw unlocking pattern each time you turn on your phone, to unlock the phone
and then make or answer calls. You may clear the unlocking pattern (see Safety settings).
43
ITALIANOENGLISH
Page 44

In this cause, the unauthorized use of your phone cannot be protected.
If you forget your phone password, you must contact the retailer or local authorized service
center to unlock the phone.
2.4.5 Connecting to the network
• Once your SIM card is unlocked, your phone searches for available network automatically
(the screen will show the network searching is underway). If your phone has found the
available network, the name of network ser vice provider appears at the center of screen.
Note: If “only for emergency calls” appears on the screen, it indicates that you are beyond
the network coverage (service area), and that you can still make emergency calls depending
on the signal intensity.
ENGLISH
2.4.6 Making a call
When the logo of network service provider appears on the screen, you can make or answer
a call. The bars at the upper left corner of screen indicate the intensity of network signal.
Conversation quality is signifi cantly affected by obstacles, thus moving within a small area
while making or answering a call can improve the conversation quality.
2.4.7 Making a domestic call
In the Dial screen, enter a number, and press the Dial key to make a call. To change the
number, delete the digits you have entered. During dialing, the animation appears on the
screen. After the call is picked up, the screen will show call status information. If the connection alert tone has been set, your phone will ring the aler t tone (network dependent).
To end a call, press the Hang Up key.
Zone code Phone number Dial key
2.4.8 Making an international call
To make an international call, hold down the 0 key on the Dialing screen until the international
prefi x “+” for appears. This allows you to dial an international number without knowing its
international fi x (e.g. 00 for China).
Following the entry of international prefi x, enter the country code and complete phone
number. For the country codes, follow the general conventions, for example, 49 for Germany,
44 for UK, and 46 for Sweden.
Like making an international call via a fi xed telephone, omit the “0” at the head of a city code.
For example, to call our hotline from another country, you can dial:
+86 21 114
+ Country code Complete phone number Dial key
44
Page 45
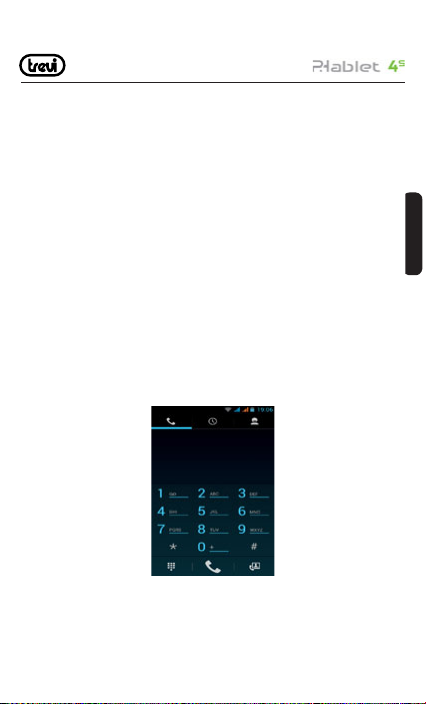
2.4.9 Making a call from the list
All calls dialed and received are stored within a list in your phone. Those dialed and received
recently are exhibited at the top of the list (see “Call Register”). All the numbers are sorted
by Dialed Calls, Received Calls and Missed Calls. Your phone also provides options for you
to view all calls. When the call Register is full, the old numbers will be deleted automatically.
To view the list, do the following:
• To view the dialed calls, press the Dial key
• You can dial any number from the list by pressing the Dial key.
When the call list appears, press OK to see details, or go to Options Save to place the
number into your Phonebook.
2.4.10 Making an emergency call
If you are beyond the network coverage (see network-signal-intensity bars at the upper left
corner of the screen), you can still make emergency calls. If your network service provider
does not provide roaming service to the area, the screen will show “only for emergency
calls”, alerting you that you can only make such calls. If you are within the network coverage,
you can also make emergency calls even without the SIM card.
2.4.11 Call menu
The Call menu is only visible during an active call, and features such as Call Waiting, Call
Diverting, and Multiple-party Call are network dependent. Contact your network service
provider.
The call options include:
• Mute: Do not send local voice.
• Hands free: Switch on the loudspeaker to amplify the voice.
• Hold: Put the current call on hold or retrieve the call on hold.
• End a call: End the current call.
45
ITALIANOENGLISH
Page 46
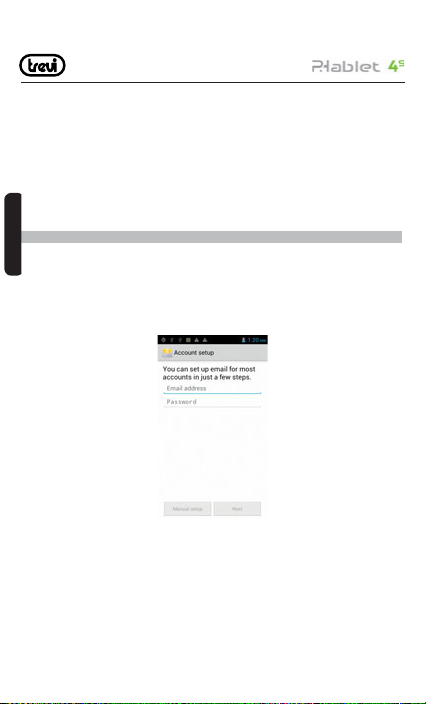
• More
*Start voice recording
Start voice recording.
*Turn on Bluetooth
The Bluetooth device, if any, can be used.
*New call
Make another new call.
3 Functional Menu
3.1 Sending an Email
ENGLISH
You can send an Email to anyone who has an Email address.
Entering the procedure and set an account, you can click the account so that you come
into the account already created, you can also activate, compile and create an account
and then delete the operating. The email can be sent and received just like in a computer.
This procedure requires the network support.
3.2 Dialing
When dialing, you can have a quick acess to the call records, contacts and digit dial
keyboard(used for manual dialing) by the menu key on the screen.
46
Page 47
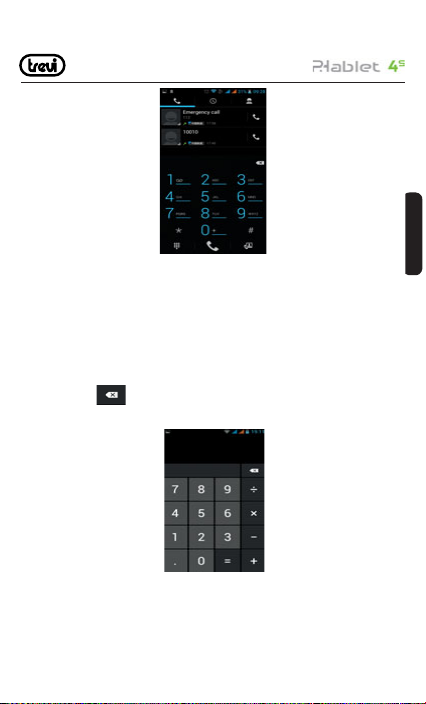
3.3 3G video call
Click a number portrait in the phonebook, and you can do these things instantly: dial,
send a message and make a video call. During the video call, you can select applications
such as adjusting it to mute mode, switching to robot portrait, turning off the voice and
intercepting photos to SD card.
3.4 Calculator
Your phone provides a calculator with 4 basic functions for the convenience of your calculating.
Press this button
Notice: this calcutor is of limited accuracy and sometimes it causes error, please forgive
us for the inconvenience.
3.5 Browser
The browser allows you to surf on the net and browse the page just like on the computer.
You can create on the phone a bookmark and synchronize it with computer. You can have
a quick access to your favorite sites on the main screen.
, and you delete the input and output in bitwise.
47
ENGLISH
ITALIANOITALIANO
ITALIANO
Page 48
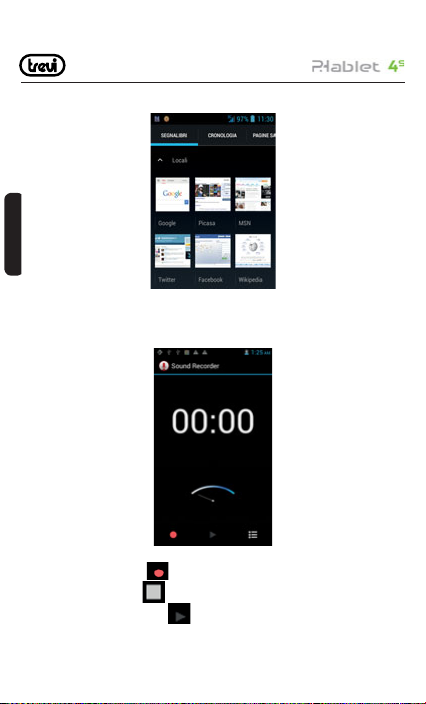
You could view web pages in longitudinal or transverse mode. The page rotates according
to the rotation of the phone and automatically adjusts to fi t the page.
ENGLISH
3.6 Voice Recorder
The recorder could be used to record audio fi les.
To start voice recording: Tap
To end voice recording: Tap
To play back voice recording: Tap
The audio fi les are automatically stored on your phone. Click the Menu key,
48
Page 49
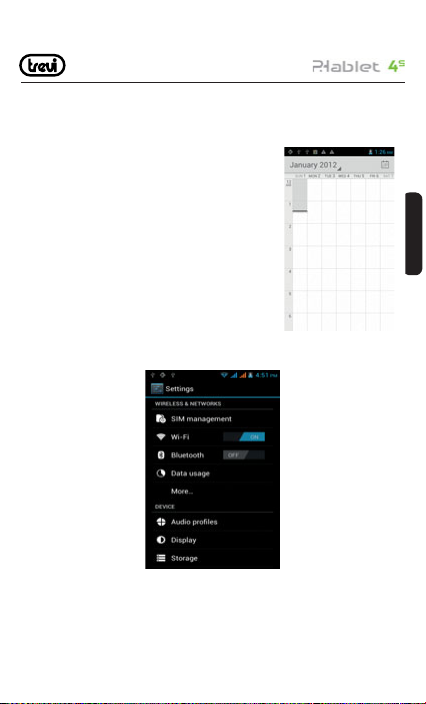
and you can operate and set the recorded voice. The fi le can be in document management
and various players can be selected to play the voices.
3.7 Calendar
Calendar allows you to view your schedules and events at
any time. You may view schedules one by one or several
ones at the same time.
Select to show calendar by day, week or month.
If “by week (or month)”, the calendar will be shown by
week (or month). This application is convenient for you
to view schedule or add events.
3.8 Settings
Reach the menu and customize your phone settings.
SIM card management: SIM card can be managed and made settings.
Wi-Fi: WLAN can be turned on and off and made some settings.
Bluetooth: Bluetooth can be turned on and off and settings are made.
49
ITALIANOENGLISH
Page 50
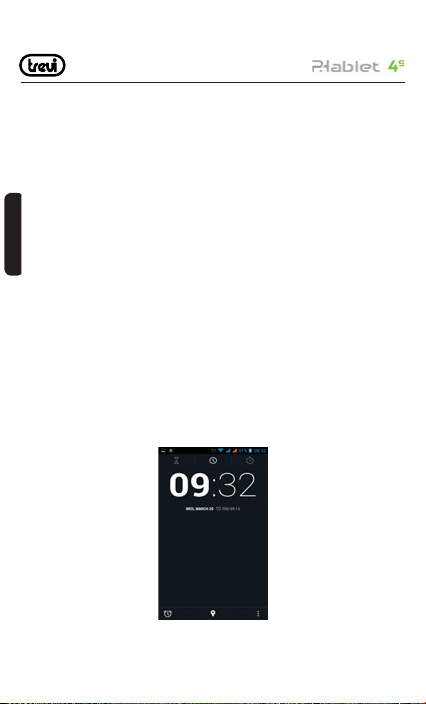
The information fl ow usage: It makes you in full awareness of the usage of the information.
More: Click more and you will set up fl ight mode and VPN and more.
Audio profi les: General, silent, meeting and outdorr optional. In the meanwhile, customized
setting-up of some scene modes are allowed.
Select a mode and enter the customized setting-up, operational are vibration, volume,
ring tones, notifi cations and key beep, etc.
Display: Customized setting-up of the phone luminance, wallpaper, the screen and screen
time-out and font size is allowed.
Storage: The internal memory of the storage card and of the phone is shown.
Battery: The usage detail of the batteryis shown.
Applications: View, manage and delete the applications on your phone.
Account and synchronization: Set the synchronization of your phone account with your phone.
Location service: Set the service during the locating.
ENGLISH
Safety: Set unlocking pattern; lock the SIM card; set the SD card.
Language and keypad: Select a language and input method.
Backup and reset: Reset DRM and restore factory settings to clear all personal data on
your phone.
Date and time: Set current time and date.
Schedule power on/off: set the time to turn on or off your phone.
Auxiliary function: Some auxiliary functions can be set.
Developers’ options: Set some options used by developers.
About phone: View the model, service status, mobile software and hardware information, etc.
3.9 Clock
• Clock
Enter the menu to display the current time.
50
Page 51
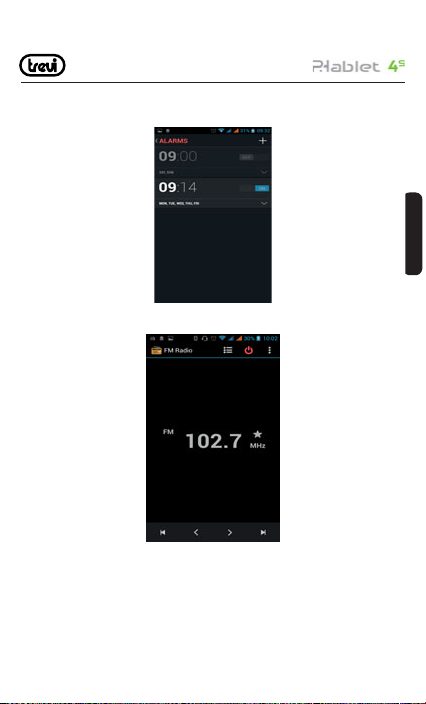
• Alarms
Your phone provides many groups of alarm clocks. Select one of them to edit and customize alarm clock.
3.10 Radio
Wear your earpieces of radio before searching for channels.
Glossary:
Channel list: Display the list of FM radio channels. You can select to play one of them. (the
list can contain 20 channels maximum)
Search: Select this option to automatically search for channels and generate the list of
channels.
Loudspeaker: Press the button to use the radio loudspeaker.
51
ENGLISH
ITALIANO
ITALIANO
Page 52
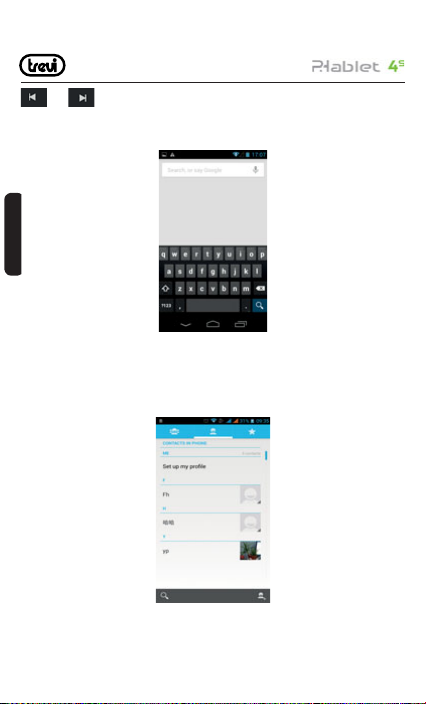
and : Tap to move to another channel.
3.11 Google Search
You can locally search for the information you need.
ENGLISH
3.12 Contacts
The “contacts ” lets you easily call your colleagurs or friends, or send emails or short
messages to them. You may add contacts directly from your phone, or synchronize
“contacts” with any application on your computer. You may open “contacts ” directly
from the Main screen, or open it via the “Dialing” application.
Add a contact:
To add a contact, directly enter the name and phone number, or impor t the name and
52
Page 53
phone number from the SIM card. (The number of contacts you can add is limited by the
memory of your phone.)
Search for contacts:
To search for a contact, press the Search key in search screen, and a search box will
pop up. In the search box, enter the key words, such as fi rst name, second name
and company name. While you are entering the key word, the matching contacts
immediately appear.
Edit a contact:
To edit details of a contact, select “Edit a contact”.
Delete a contact:
To delete the current contact, select “Delete a contact”.
From the menu, you can also synchronize with or share an account or import or export
a contact.
3.13 Gallery
Gallery is a picture manager that typically exhibits miniatures, supports the features of
“save picture”, “set pictures as desktop” and “share picture”.
3.14 Camera
Your phone provides the camera and video recorder features. Wherever you go, you can take
high-resolution photos and videos. It also supports advanced camera features such as image
stabilization, face embelishment, panorama shooting, high dynamic range and zero delay
shutter, which can also be customized.
53
ENGLISH
ITALIANO
ITALIANO
Page 54
ENGLISH
3.15 Messaging
Messaging lets you send text and multimedia messages to any contact that has an SMS
device. The multimedia messages include photos, video clips (for iPhone 3GS or other
new style phones), contacts information, and voice memos. What’s more, you can send
messages to several contacts at the same time.
Note: Perhaps Messaging is not available in all countries and regions. Probably you need
pay for using Messaging. For more information, consult your network operator.
As long as you are within the network, you can use “Messaging”. As long as you can
make a call, you can send messages. You probably have to pay for sending or receiving
messages, depending on your network operator.
54
Page 55
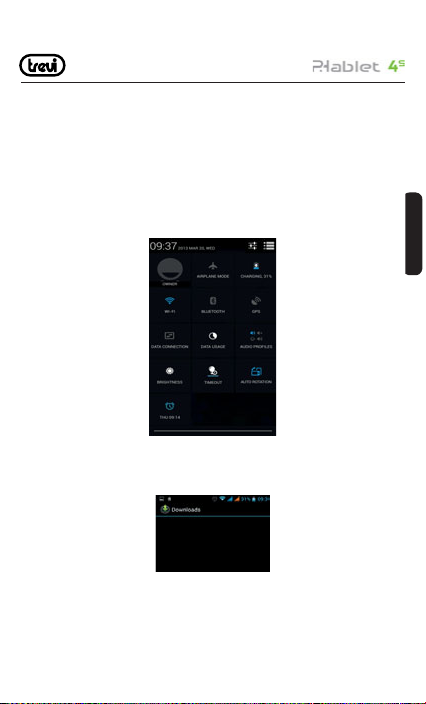
Send a message: Tap it, enter the number and name of the contact or select the contact
from Contacts. Tap the text box above keypad, enter the information and then tap “Send”.
After selecting the number, you can select such options as Call, Add subject, Attach, Insert
facial expression, and more.
Tap Settings to set ringtone, Delivery reports, and maximum quantity of messages.
3.16 Notifi cation Menu
Slide and pull down menu on the main interface, you can see the message notice
and choose whether to turn on or off WIFI, Bluetooth, GPS, off-line mode. In the data
connection, the current SIM is available to make data connection of GPRS. Slide it
around you can see the options of profi le for your convenience.
3.17 Download Content
You can download through the browser things and pictures you want and list them in the
Download Content menu.
3.18 Music
Music is used for enjoying the stored audio fi les. Select Music, you can see the menus of
“ List of played songs”, “Songs”, “Specialists” and “Artists”.
55
ENGLISH
ITALIANO
ITALIANO
Page 56
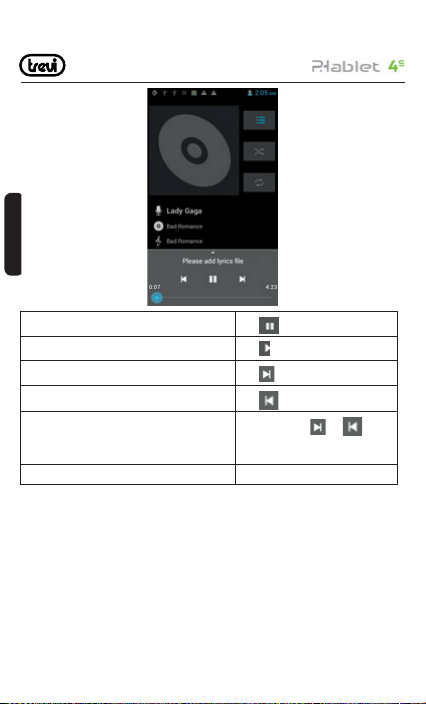
ENGLISH
To pause playing a song
To resume playing a song
To skip to the next song or reading material
Return to the previous song or reading material
To move fast backward or forward
To skip to any point in a song Drag the progress bar.
3.19 Call Records
Come into the call records, you can view missed calls, reveived calls and outgoing calls.
The calling time is viewed in each record and features such as calling, sending messages
and adding to new contacts can be set. Deleting call records and seting up speed dial can
be done in the menu.
Tap
Tap
Tap
Tap
Touch and hold
longer you hold, the more songs
you skipped.
56
or . The
Page 57
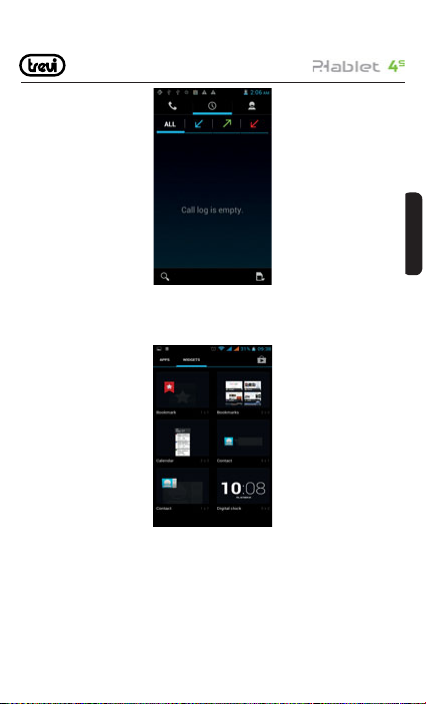
3.20 Widget
The widget is on the right of applications in Main Menu, holding down this widget, you can
drag it anywhere you want in the main screen. It is convenient for you to enter that procedure.
3.21 Selecting Wallpaper Source
Hold down the main screen, the options of selecting wallpaper source will appear, then
you can set up wallpapers you like.
57
ENGLISH
ITALIANO
ITALIANO
Page 58
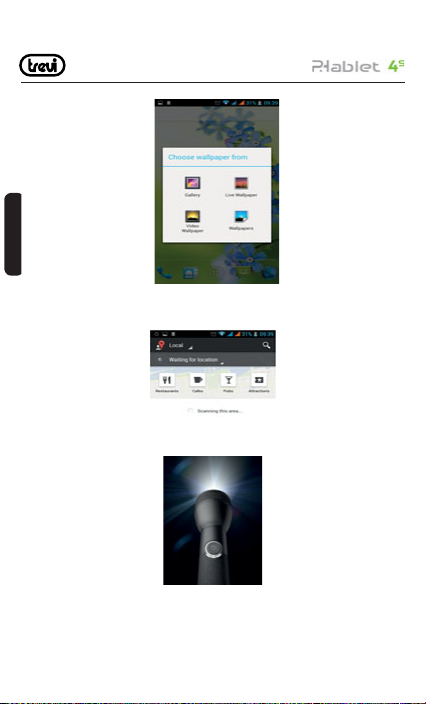
ENGLISH
3.22 Local search
You can fi nd some merchants and service facilities near a location, which you can fi nd
through GPS navigation.
3.23 Flashlight
Enter fl ashlight app,click the turn on button,can open to light,user-friendly.
3.24 Maps
The Map application provides the street maps, pictures, mixed views, and street views of
58
Page 59
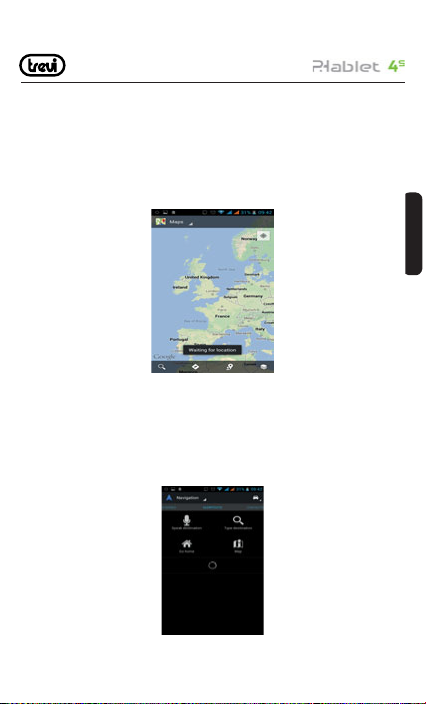
many countries and regions in the world. You can get real-time traffi c conditions, as well
as detailed directions of driving, public transit, or walking. To get the direction of driving,
fi nd the starting point, and then enter the destination.
The maps, directions and location-based information are provided by relevant data services.
These data services may vary from time to time, and be not available in some regions, thus
the provided maps, directions and location-based information may be invalid, incorrect
or incomplete.
If the location service is closed when you open the “Map”, the system may ask you to enable
the service. But you can use the “map” without enabling the location service.
3.25 Navigation
By virtue of GPS signal receiver, your current location is shown on the electronic map.
If you have set the destination, the system will tell you the route. This saves your time.
Signals from GPS satellites can be received only when you are using your phone outdoors
or at the window through which you can see the sky. How to use the feature: In the Main
screen, select “Settings”, click “Location and Safety”, tick “Use GPS satellite”, and then
reach the navigation menu. Note that it may take 10 minutes or more for your phone
to determine your current location for the fi rst time.
59
ENGLISH
ITALIANO
ITALIANO
Page 60
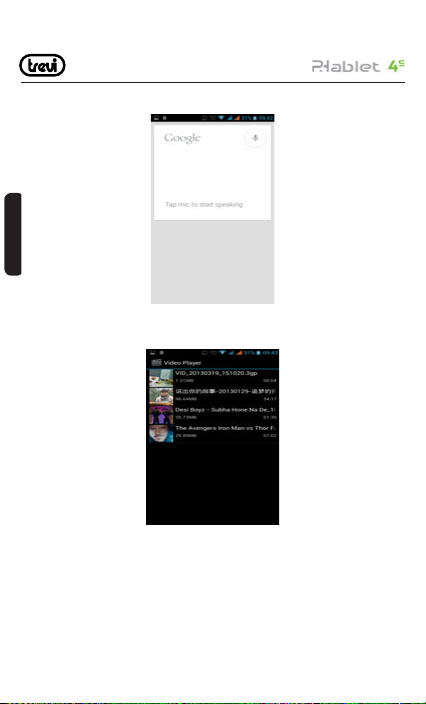
3.26 Voice Search
Support voice search,through voice search website on google.
ENGLISH
3.27 Video player
A view play software,can detect mobile video and auto generate play list,you can easily
paly stored video fi les.
3.28 Backup and Reset
Backup personal data and applications to sdcard,can restore at anytime if want.
60
Page 61
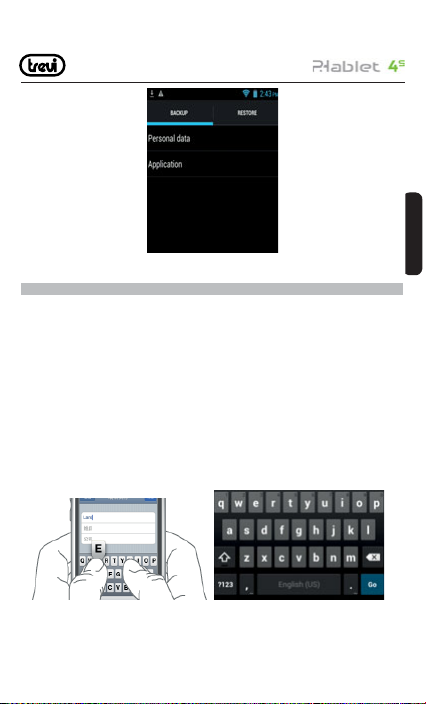
4 Text Input
Enter text via the keypad. Examples of text include contact details, emails, short messages,
and websites. The keypad provides the functions of spelling prediction, spelling correction
and learning while using.
The smart keypad may give you prompts of correct spelling, depending on which application you are using.
Enter text:
1. Tap the text box (memo, or new contact) to call the keypad.
2. Tap the keys on keypad.
At the initial stage, you can tap keys using either of your index fi ngers. Once you get familiar
with the keypad, you can try tapping keys using both of your thumbs.
While tapping a key, the corresponding letter will appear above your thumb or another fi nger.
If you are tapping a wrong key, you may slide to the correct one. Only when your tapping
fi nger leaves a key, can the corresponding letter be entered in the text box.
61
ITALIANOENGLISH
Page 62
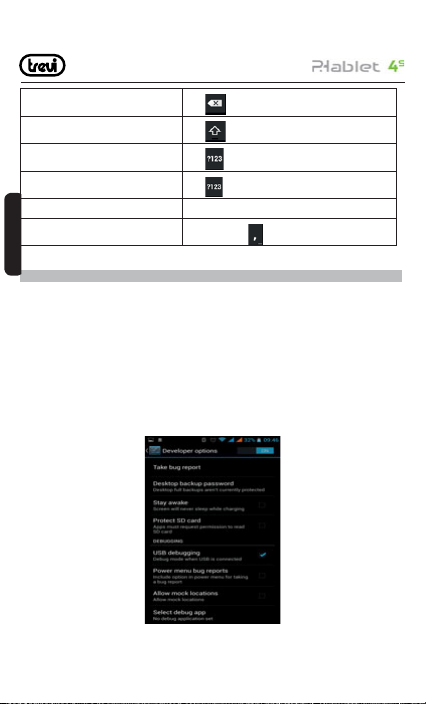
To delete a character
To enter an upper-case letter
To enter a digit
To enter a symbol
Quickly enter a space Press the space key twice successively.
To toggle input methods
ENGLISH
5 SD Card Introduction
Your mobile phone supports SD card to expand the memory. Install the SD card according
to the indication.
As one of storages for your phone, SD card has been set as the default storage at factory.
You can directly use it without making any settings.
Use as fl ash disk: If “Phone——Data Wire——PC” is well connected, the PC will prompt
“New hardware is found”, and “Phablet 4S Android Phone requires to be installed” will
appear in the dialog box.
Check the relevant menus in the phone are opened or closed, selecting one by one as follows:
Main Menu - Settings - Application - Development - USB debugging. Uncheck “USB
debugging”.
Tap
, and then tap that letter.
Tap
Tap
, and then tap that digit.
Tap
, and then tap that symbol.
Hold down to
62
to bring up the keyboard.
Page 63
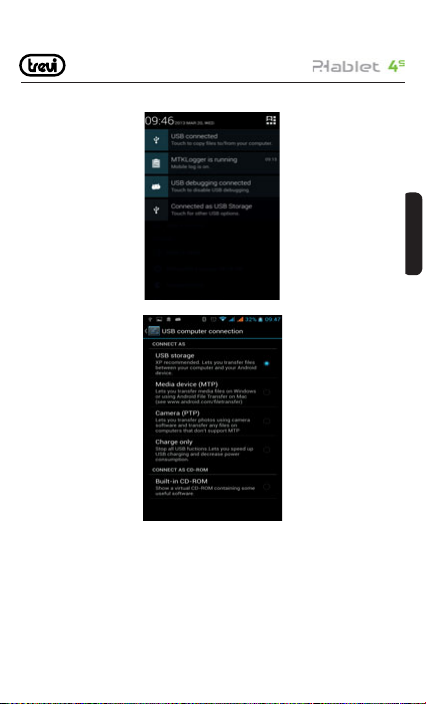
After checking and confi rmation, reconnect “Phone - Data Wire - PC”, and pull down
notifi cation menu in the standby interface:
Select “used as USB storage device”, and the following screen pops up.
Select “USB storage device”, and such dialogue box pops up:
You can synchronize fi les on the computer with those on the phone according to your needs
or you can manage fi les on the storage card.
Select “MTP storage” to support the phone to function as a U-disk. If your computer is not
supported by WIN7, you need to install MTP drive (you can directly update window player
to the latest wmp11 which comes with MTP drive).
Follow the prompts appearing in the phone to operate, so that data uploading and downloading with U disk can be achieved.
63
ITALIANOENGLISH
Page 64
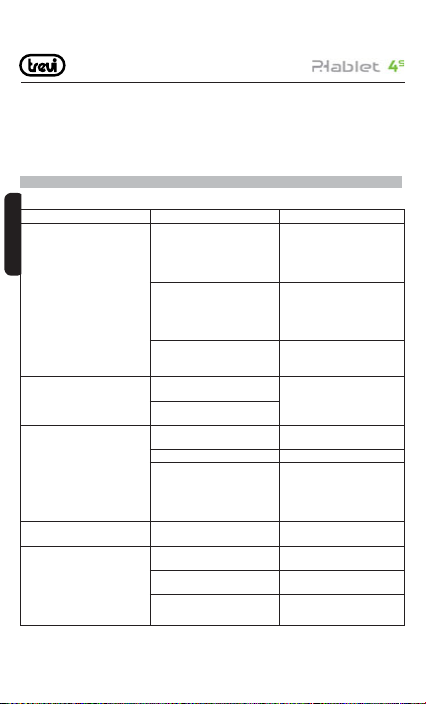
Select “Camera PTP”, you can export photos on the phone to the computer.
Note: Your mobile phone supports the plug-in feature. Without turning off your phone,
however, it does not support inserting or remove T card. Generally, it is not recommended
to remove and install the SD card.
6 FAQS and Solutions
If you have any questions about the phone, please fi nd the solutions from the table below.
FAQs Causes Solutions
ENGLISH
Poor reception
Echoes or noises The trunk line of network is in bad
Shorter standby time The standby time is relevant to
Failed to turn on your phone The batter y power is used up. Check the battery power level or
SIM card error The SIM card is damaged. Contact your network service
When you use your phone at poor
reception areas, for example, near
high rise buildings or base rooms,
the radio wave cannot be transmitted
effectively.
When you use your phone at
network traffi c congestion, such
as working time and off-duty time,
the congestion can result in poor
reception.
This is related to the distance to base
station in question.
condition. It is a regional problem.
In some areas, the call lines are in
bad condition.
network settings.
Replace the batteries Change with a new battery.
When no signals are received, your
phone will continue searching for
base stations, thus consuming a
large amount of battery power and
reducing standby time.
The SIM card is not properly installed. Ensure the SIM card is properly
The metallic face of the SIM card is
contaminated.
64
Avoid this as far as you can.
Avoid this as far as you can.
You may ask the network service
provider to provide service coverage
map.
Hang off the call and dial again.
Choose another better line.
In poor reception areas, turn off
your phone temporarily.
Use your phone at strong signal
areas or Turn off the phone
temporarily.
charge the battery.
provider.
installed.
Wipe the face with a clean cloth.
Page 65
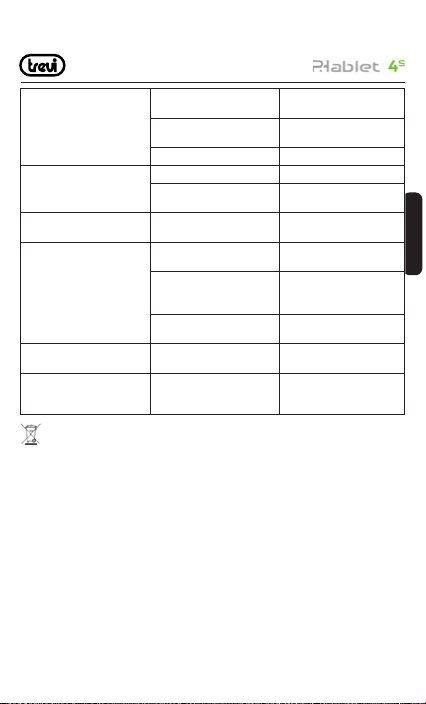
Failed to connect to the network The SIM card is invalid. Contact your network service
Beyond the GSM coverage. Consult the network ser vice
Failed to make a call The call barring feature is used. Cancel the call barring settings.
PIN code error Enter incorrect PIN codes for three
Failed to charge the battery The battery or the charger is
Failed to add contacts to phonebook The storage space of phonebook
Failed to set up some features Your network service provider does
Precautions for correct disposal of the product.
The symbol shown on the equipment indicates that waste must be disposed of in “separate
collection” and so the product must not be disposed of together with urban waste.
The user must take the product to special “separate waste collection centres” provided
by local government, or deliver it to the retailer against the purchase of a new product.
Separate collection of waste and subsequent treatment, recycling and disposal operations
promotes the production of equipment with recycled materials and limits negative effects
on the environment and on health caused by improper handling of waste.
Illegal disposal of the product leads to the enforcement of administrative penalties.
The signal is feeble. Retry at a stronger signal area.
The fi xed dialing number feature
is used.
times in succession.
damaged.
Charge the battery when ambient
temperature is lower than -10°C or
above 55°C.
Poor connection. Check whether the plug is properly
is used up.
not provide the services, or you
haven’t subscribed them.
provider.
provider for service areas.
Cancel the fi xed dialing number
settings.
Contact your network service
provider.
Change a new battery or charger.
Change the environment.
connected.
Delete some contacts from the
phonebook.
Contact your network service
provider.
65
ITALIANOENGLISH
Page 66
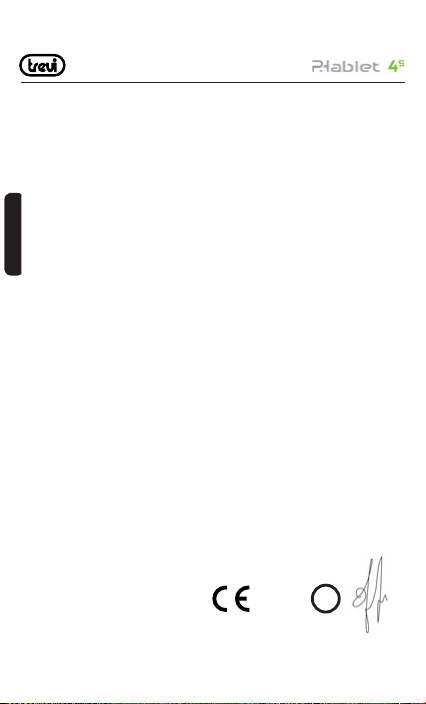
DECLARATION OF CONFORMITY
The undersigned TREVI S.p.A.
with registered offi ce in Rimini (RN), Strada Consolare Rimini-San Marino, 62 as a distributor
Declares that the product:
Description: WCDMA Mobile Phone, GSM, WLAN e GPS
Brand: TREVI
Model: PHABLET 4S
It conforms to: Directive 1999/5/EC (R & TTE) Directive of the European Parliament and of the Council
of 9 March 1999 on radio equipment and telecommunications terminal equipment and the mutual
ENGLISH
recognition of their conformity.
a.Electrical Safety - LVD (directive CEE 72/23) EN 60950-1: 2006+A11:2009+ A1:2010+A12:
b.electromagnetic compatibility-
EMC (directive CEE 89/336)
c.Frequency spectrum-
Allegato IV (directive 1999/5/EC)
d.SAR EN 50371:2002
e.RoHS – (directive 2011/65/EU) Regarding the restriction of the use of hazardous
Therefore, the product is labeled with the
European conformity mark:
within the Community
2011
EN 301 489-1 V1.9.1
EN 301 489-7 V1.3.1
EN 301 489-17 V2.1.1
EN 301 489-19 V1.2.1
EN 301 489-24 V1.5.1
EN 301 489-34 V1.1.1
EN 300 328 V1.7.1
EN 301 511 V9.0.2
EN 300 440-1 V1.6.1
EN 300 440-2 V1.4.1
EN 301 908-1 V5.1.1
EN 301 908-2 V5.1.1
EN 62311:2008
EN 50360:2001
EN 62209-1:2006
EN 62209-2:2010
chemicals in electrical and electronic equipment
0700
Trevi S.p.A. President
66
!
Page 67
1. GUÍA DE SEGURIDAD
• En caso de pérdida o robo del teléfono contacte inmediatamente con las autoridades de
telecomunicación para que temporalmente anulen la SIM. De este modo evitará pérdidas
económicas.
• Cuando contacte con su operador deberá darle el número IMEI de su teléfono. Quite la
batería para acceder al número, apúnteselo y manténgalo en lugar seguro.
• Cambie su número PIN inmediatamente si sospecha de que sea conocido.
• No deje el teléfono a la vista en el auto, mejor téngalo encima.
• Utilice solo la batería y el cargador que se suministra. El uso de otro distinto podría
provocar un accidente.
• No maltrate su teléfono, podría romperlo.
• No deje el teléfono, la batería o el cargador en un horno de microondas o en equipos
de alta presión.
• No utilice su teléfono cerca de gases explosivos o infl amables.
• No utilice su teléfono en zonas de gran humedad o temperatura o suciedad.
• Mantenga el teléfono fuera del alcance de los niños.
• No deje su teléfono en lugares donde podría ser tratado con brusquedad.
• Apague su teléfono en lugares donde así se notifi que (aeropuertos, hospitales, etc.)
podría provocar un mal funcionamiento. Su teléfono dispone de la función Auto Turn-On,
vigile no se vaya a poner en marcha en lugares donde está prohibido.
• No utilice el teléfono cerca de equipos de precisión como un marcapasos, puertas y
otros sistemas automáticos, detectores de fuego etc.
• No someta el display LCD a golpes o un uso brusco. El líquido del LCD es potencialmente
peligroso.
• No desmonte o modifi que su teléfono.
• En caso de avería de antena no use su teléfono pues podría representar un peligro.
• No deje su teléfono cerca de objetos magnéticos como tarjetas de crédito. Podría
inhabilitarlas.
• Mantenga pequeños objetos de metal apartados del receptor pues éste se magnetiza
y los podría atraer.
• No ponga su teléfono en contacto con líquidos.
• La batería tiene un periodo de vida limitado. Cuando después de cargar, la batería está
fl oja deberá reemplazarla.
• Las baterías no pueden tirarse a la basura. Debe deshacerse de ellas en lugares
cualifi cados para ello.
• No lance la batería al fuego, podría explotar.
• Al manipular la batería no la someta a esfuerzos que podrían provocar un deterioro.
• No utilice cables agujas u otros objetos para cortocircuitar la batería.
• No suelde los puntos de contacto de la batería.
67
ESPANOL
Page 68
• Si el líquido de la batería va a parar a sus ojos existe un grave riesgo, límpiese con agua
y vaya al hospital.
• No desmonte ni modifi que la batería.
• No deje las baterías cerca de fuentes de calor.
• Si la batería se recalienta al usarla o recargarla reemplácela.
• Si el líquido de la batería entra en contacto con la piel hay riesgo de quemadura.
• No deje que la batería se humedezca pues se deteriora.
CONSIDERACIONES SOBRE EL CARGADOR
• Utilice solamente corriente alterna de 220V. El uso de otro voltaje dañaría la batería.
• Está prohibido cortocircuitar el cargador ya que dañaría el equipo.
• No utilice el cargador si el cable de toma de tensión está dañado.
• No deje el cargador cerca de recipientes con líquido.
• No desmonte ni modifi que el cargador. Podría dañarlo y producirse lesiones.
• No utilice el cargador en ambientes excesivamente húmedos (ducha o cuarto de baño).
• No toque el cargador ni el cable de toma de tensión con las manos húmedas.
• Mantenga el cable de toma de tensión a salvo de agresiones.
• Antes de limpiar o hacer cualquier otra acción con el cargador desenchúfelo de la
corriente.
• Cuando desenchufe el cable de la toma no lo haga tirando de él, hágalo tomando el
ESPANOL
enchufe.
LIMPIEZA Y MANTENIMIENTO
• El teléfono la batería y el cargador no son resistentes al agua. No los use en la ducha
o el lavabo.
• Utilice un paño suave y seco para limpiar el teléfono, la batería y el cargador.
• No utilice alcohol, disolvente o benceno para limpiar.
• Un enchufe de corriente sucio perjudica el rendimiento del cargador. Asegúrese de
que el zócalo está limpio.
2. INSERTAR UNA TARJETA SIM Y LA BATERIA
Asegúrese de que el teléfono está apagado antes de efectuar el siguiente procedimiento:
1. Separar la tapa posterior tal como se indica en el dibujo.
68
Page 69
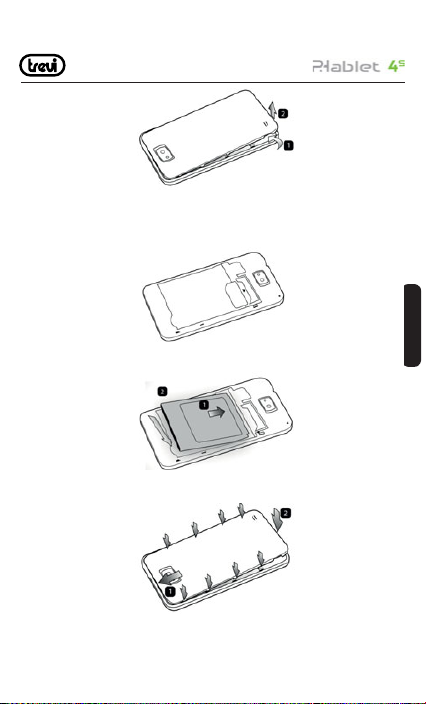
2. Inser tar la tarjeta SIM en uno de los slots con los contactos metálicos hacia abajo y
respetando la posición del ángulo cor tado de la tarjeta.
Atención: Slot SIM 2 no está funcionando.
Atención: no insertaruna tarjeta de memoria en el slot de la SIM.
3. Insertar la batería con atención a los contactos metálicos y respetando la secuencia del
dibujo.
4. Riposizionate il coperchio posteriore con cautela come in fi gura rispettando la sequenza
numerica
.
5. Antes de utilizar el teléfono recargue completamente la batería
69
ESPANOL
Page 70
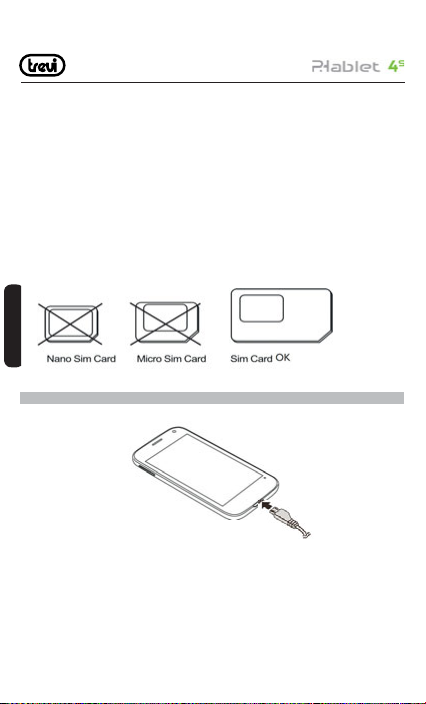
Nota:
Si la batería está completamente descargada el teléfono no se enciende. Serán necesarios
4 minutos de carga para que pueda encender el teléfono.
Si la batería está descargada el equipo emitirá un ruido de aviso. Si la carga es insufi ciente
se apagará.
Atención:
Nota por el uso de adaptador de micro/nano SIM en los productos TREVI TREVI
Smartphone y tablet con ranuras para tarjetas SIM están diseñados para dar cabida sólo
a SIM en el formato estándar. El uso de la tarjeta micro/nano SIM con el adaptador no es
recomendable, ya que puede provocar la rotura de los dispositivos y de la tarjeta micro/
nano SIM. TREVI no se hace responsable por daños causados por el uso de adaptadores
de micro/nano SIM. TREVI se reserva el derecho a denegar la garantía de los productos
con defectos en la ranura SIM causado por el uso de adaptadores de micro/nano SIM.
ESPANOL
3. RECARGA DEL TELEFONO
1. Conectar la toma micro USB del alimentador al teléfono.
2. Conectar el alimentador a una toma de red estándar.
3. El dispositivo se encenderá y mostrará el icono de la batería con la fase de carga.
4. Cuando la batería está totalmente cargada (el icono no se mueve) desconectar el micro
USB del teléfono y del cargador.
Notas:
• Utilizar solamente el cargador suministrado.
• Puede utilizar el equipo durante la carga de la batería pero no se recomienda.
70
Page 71
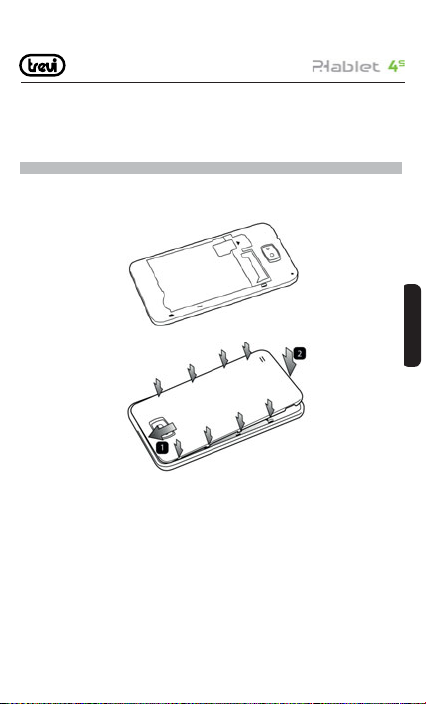
• Durante la carga de la batería la pantalla táctil podría no funcionar correctamente, esto
es debido a la inestabilidad de la carga.
• Durante la carga de la batería el equipo podría calentarse un poco, es normal.
• Para cargar a través de la conexión USB hará falta más tiempo.
4. INSERTAR UNA MEMORIA EXTERNA MICRO SD
• Para ampliar la memoria disponible podrá conectar una memoria micro SD.
• Quitar la tapa posterior con cautela
• Insertar la tarjeta micro SD con los contactos hacia abajo.
• Reponer la tapa posterior
Notas:
• No insertar o sacar la memoria cuando el equipo esta leyendo o transfi riendo datos,
podría causar errores. Solo actúe sobre la memoria con el equipo apagado y
desconectado del PC.
• Alguna marca de memorias podría no ser compatible con el teléfono.
• El equipo solo acepta memorias formateadas FAT.
71
ESPANOL
Page 72
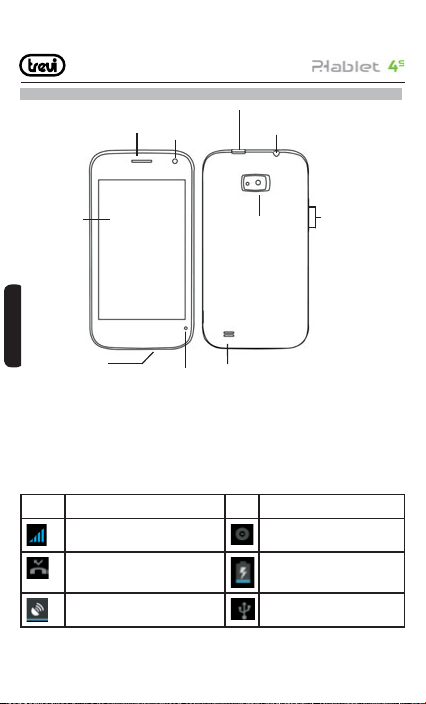
5. DESCRIPCION DE LOS MANDOS
Altavoz
Display
ESPANOL
Conector Micro USB
BOTON ENCENDER/APAGAR: para encender/apagar el equipo y para activar/desactivar la función
Stand-by de la pantalla.
CONTROL VOLUMEN: para regular el volumen
Cámara anterior
Micrófono
Control ON/OFF
Flash
Cámara posterior
Tapa posterior
Altavoz
Conector auriculares
Control de Volumen
6. ICONOS
ICONO DESCRIPCION
72
El teléfono hace sonar una
canción
Indica la intensidad de la señal
Enseña llamadas perdidas El teléfono está cargándose
Localización por satélite USB listo
Page 73
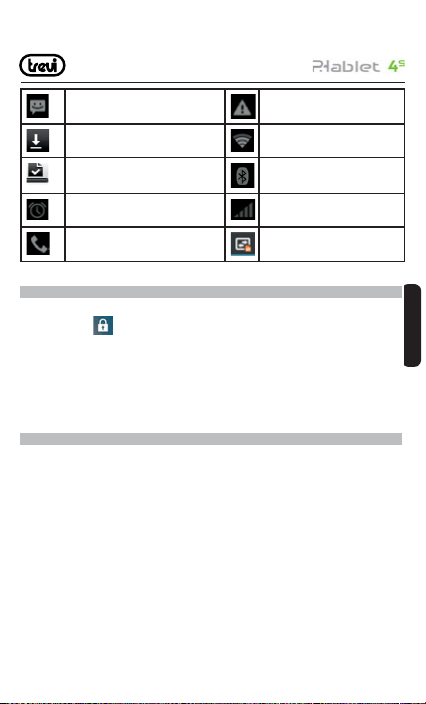
Mensaje recibido Acceso bloqueado
Descarga de app Conexión a la red wireless
Descarga terminada Bluetooth
73
No hay tarjeta SIM en el
teléfono
Alarma activada
Llamada en curso GPRS data conexión
7. ENCENDER Y APAGAR
Presionar tres segundos el control Apagar/Encender. Cuando aparece la página Home
arrastre el icono
1. Arrástrelo hacia la derecha para entrar en la página Home.
• Para apagar mantenga presionado el control Apagar/Encender durante 2 segundos.
Seleccionar apagar y aceptar.
• Para activar la modalidad Avión y por consiguiente no utilizar servicios de red mantenga
presionado 2 segundos y escoja modalidad Avión.
8. USO DE LA PANTALLA TACTIL
Todas las funciones de su equipo, excepto el encendido y el volumen, se realizan en la
pantalla táctil. Por lo tanto, es imprescindible saber cómo usar la pantalla táctil.
Las siguientes acciones lo ayudarán a entender fácilmente cómo usar la pantalla táctil.
Pulse: Toque un elemento (por ejemplo, aplicación o control) que aparece en la pantalla
una vez con el dedo, para ejecutarlo o para acceder a un menú o a una opción
Pulse dos veces: Pulse un elemento dos veces con su dedo
Arrastre:Mantenga pulsado un elemento ymuévalo sin perder contacto con la pantalla
Hojee: Apoye un dedo sobre un lugar vacío de la pantalla y muévalo hacia arriba o abajo,
o hacia la izquierda o la derecha
fuera del círculo.
ESPANOL
Page 74
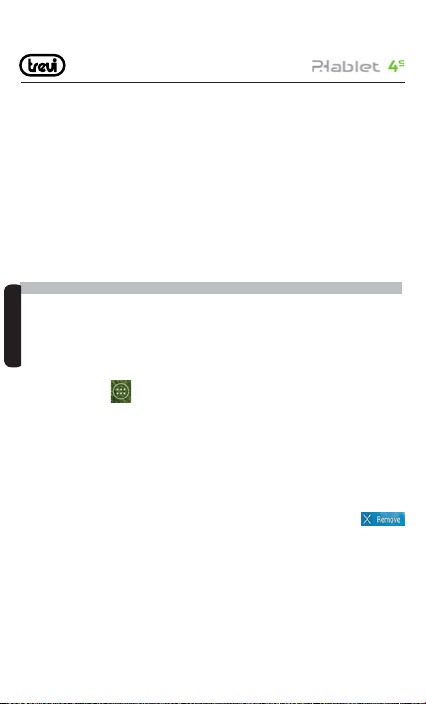
Pellizque: Coloque dos dedos sobre la pantalla y sepárelos para ampliar una imagen, un
documento o página web, o júntelos para alejar
Seleccione y pulse: Pulse un elemento de la lista de opciones disponibles
Mantenga presionado: Pulse una tecla o un elemento durante algunos segundos hasta que
aparezca una lista de opciones.
Rotación de la imagen
Este equipo dispone de un sensor de movimiento (G Sensor) que detecta la posición de
aparato en todo momento. La imagen se irá adaptando a la posición del aparato. En el
apartado de Ajustes veremos como se activa y desactiva el sensor.
9. DESCRIPCION DE LA PAGINA PRINCIPAL
Extensión de la página principal
La página principal (Home) tiene 4 extensiones, dos a la izquierda y dos a la derecha. Esto
nos permite disponer de accesos directos a aplicaciones y programas. Para pasar de la
página principal a sus extensiones debemos arrastrar con el dedo.
ESPANOL
Traer aplicaciones a la página principal
Presionando el icono
sobre aquella aplicación que queremos traer a la pantalla principal. Debemos mantener
el dedo sobre la aplicación hasta que el fondo de pantalla pase a ser la pantalla principal
(Home) y entonces levantamos el dedo dejando la aplicación en la pantalla principal.
Moverelementos
Poner el dedo encima y mantenerlo. Mover el dedo y semoverá el elemento.
Eliminar elementos
Poner el dedo encima y mantenerlo. En la parte alta de la pantalla aparecerá
deberemos llevar, con el dedo, el elemento a éste icono y cuando el elemento se vea rojo
levantamos el dedo para eliminarlo.
Modifi car el fondo
En la pantalla principal mantener el dedo sobre una zona vacía. Aparecerá una ventana de
dialogo que le permitirá escoger la imagen a añadir como fondo de pantalla.
ir a la pantalla donde se muestran las aplicaciones. Poner el dedo
74
Page 75
Afi adir Widgets a la página principal
Para insertar Widgets directamente a la página principal toque el icono aplicaciones y
escoja la pantalla de los widgets. Ponga el dedo encima del widget hasta que el fondo de
pantalla sea el desktop de la pantalla principal.
Retire el dedo cuando el widget esté en la posición deseada.
Panel de búsqueda rápida
Estando en la página principal tocar la parte alta donde está la hora y bajar el dedo. Se
abrirá una nueva pantalla que es el panel de búsqueda rápida. Presionando el icono
en este podremos activar o desactivar las siguientes funciones:
Avión
Estado della Batteria
WiFi
Bluetooth
GPS
Conexión de datos
El uso de Datos
Per fi les de Audio
Luminosidad
Timeout
Rotación automática
Acceso a las aplicaciones más recientes
Mantenga presionado el botón Home hasta que aparezca una lista de las últimas aplicaciones
utilizadas. Seleccione la que desee operar.
10. PERSONALIZACION DEL PHABLET
Establecer fecha y hora
Desde la página de inicio (home) presionar sobre aplicaciones y escoger ajustes / Fecha y hora.
De las varias opciones de presentación escoge una.
Establecer el sonido del timbre y otros sonidos
Desde la página de inicio (home) presionar sobre aplicaciones y escoger ajustes / Perfi les
de audio. De los posibles seleccionar “General” y escoger los tonos para las llamadas.
Activación modalidad silenciosa
Para activar la modalidad silenciosa puede hacerlo de dos maneras:
1 Ir al panel de búsqueda rápida y seleccionar Silencio
75
ESPANOL
Page 76
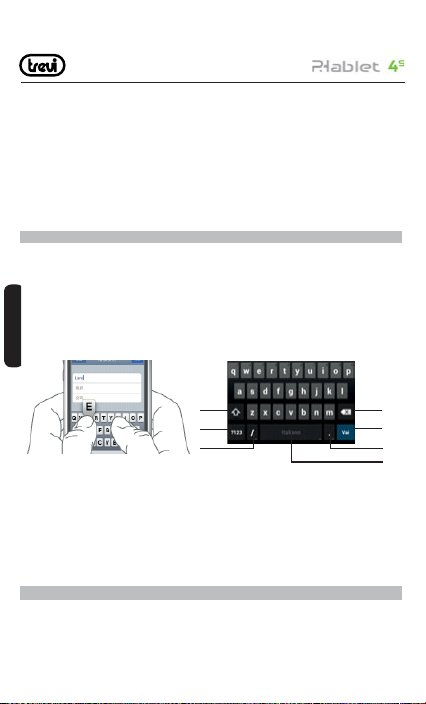
2 Presionar dos segundos del botón apagar y seleccionar el icono del altavoz tachado
Seleccionar el salvapantallas de la página principal
Mantener el dedo en una zona vacía aparecerá una ventana de dialogo que permitirá asignar
un fondo (fondos de pantalla, galería, wallpapers).
Regulación de la luminosidad del display
De la página principal escoger el icono aplicaciones y en ajustes escoge pantalla. En
pantalla escoger brillo. Podemos seleccionar automático o determinar nosotros el brillo.
11. INSERCION DE UN TEXTO
Es posible insertar un texto digitalizando los caracteres con el teclado vir tual.
Para escribir un texto:
1. Tocar la barra de texto para activar el teclado virtual
2. Tocar las teclas del teclado virtual
Al principio toque las teclas con su dedo índice. Una vez coja práctica utilice ambos pulgares. Cuando le de a una tecla la letra aparecerá encima de su dedo. Si se ha equivocado
de tecla corra el dedo hasta la tecla correcta. Solo cuando el dedo se levanta de la tecla
aparece la entrada de la letra.
ESPANOL
1
2
3
1. Pasar de minúsculas a mayúsculas
2. Para pasar de modo letras amodo números
3. Manteniéndolo apretado se accede a la opción insertar
4. Para cancelar el último carácter o número escrito
5. Para confi rmar la palabra escrita
6. Para insertar un punto o manteniéndolo apretado aparece una tabla de símbolos
7. Para insertar un espacio o manteniéndolo apretado aparece la opción de insertar
12. DESCARGAR APLICACIONES DEL MARKET
El teléfono se suministra con algunas aplicaciones incluidas. No obstante puede alojar
muchas otras aplicaciones que podrá comprar y descargar en elMarket.
76
4
5
6
7
Page 77
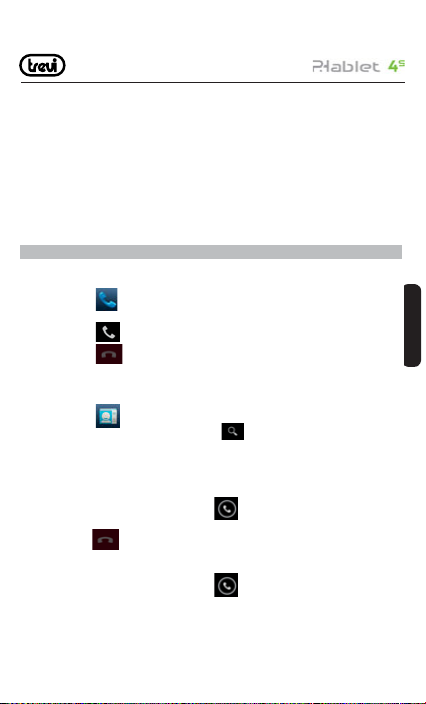
Instalaruna aplicación de Play Store
- Desde la página principal presionar aplicaciones y seleccionar Play Store
- Insertar la cuenta de Gmail o crear una nueva siguiendo los pasos que se proponen
- Aceptar los términos y condiciones que se exponen
- Buscar la aplicación deseada y descargarla
Cancelar una aplicación
-Desde la página principal seleccionar aplicaciones y ajustes.Estando en ajustes seleccionar
aplicaciones
- Seleccionar la aplicación que se desea desinstalar
13. COMUNICACIÓN
TELEFONO
Efectuaruna llamada
1. Tocar el icono
2. Insertar el número
3. Tocar el icono
4. Tocar el icono
Nota: para poner “+” de llamada internacional tocar y mantener presionado (0+)
Llamara un contacto de la libreta de direcciones
1. Tocar el icono
2. Recorrer los contactos o mediante el icono
3. Tocar el contacto al que se desea llamar y escoger el número en caso de que haya más
de uno.
Aceptaruna llamada
1.Cuando reciba una llamada toque el icono
círculo grande.
2.Tocar el icono
Rechazaruna llamada
1.Cuando reciba una llamada toque el icono
del círculo grande.
para ir al interfaz del teléfono
para iniciar la llamada
para terminar la llamada
para abrir la libreta de direcciones
poner la primera letra
y arrástrelo hacia la derecha fuera del
para terminar la llamada.
y arrástrelo hacia la izquierda fuera
77
ESPANOL
Page 78
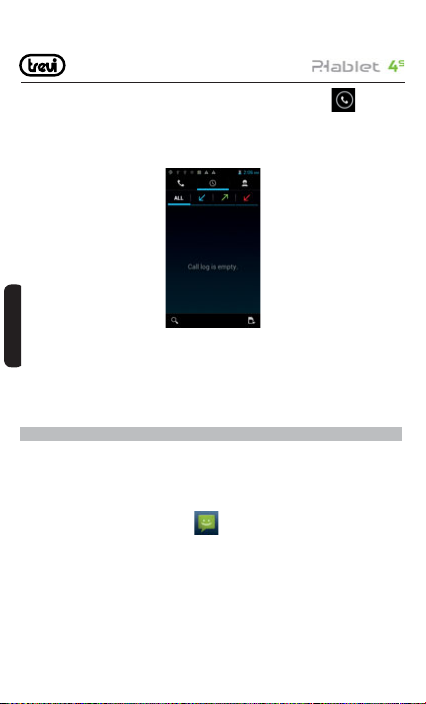
2.Para enviar un mensaje cuando rechaza la llamada, seleccione el icono y arrástrelo
hacia arriba.
Regulación del volumen durante una llamada
Utilice la tecla del lado derecho del teléfono.
Visualización del historial de llamadas
ESPANOL
Podrá ver las llamadas perdidas las llamadas salientes y las llamadas recibidas.
El tiempo de llamada aparece en cada registro.
En la misma interfaz gráfi ca se puede llamar enviar mensajes y añadir contacto.
14. MENSAJES
El equipo le permite enviar mensajes de texto y mensajes multimedia a cualquiera de sus
contactos. Los mensajes multimedia comprenden foto, video y mensajes de voz.También
puede enviar mensajes a varios contactos a la vez.
Nota: consulte con su operador el coste de envío de los mensajes SMS,MMS.
Enviarun mensaje SMS
1. En la pantalla principal tocar el icono
78
Page 79
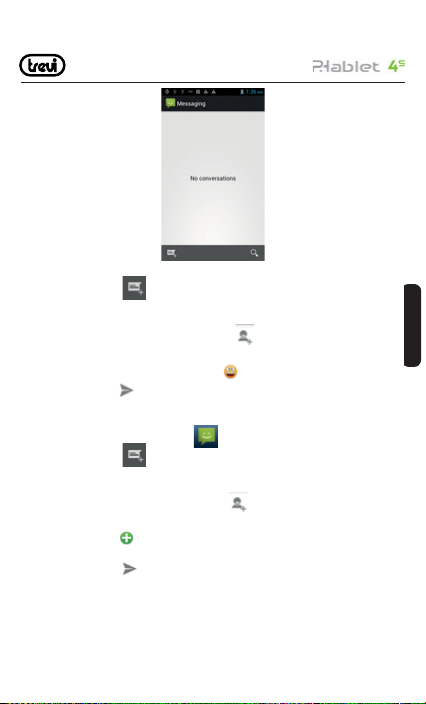
2. Seleccionar el icono
3. Añada destinatarios a su mensaje
- Inserte manualmente el número de teléfono separándolos con punto y coma
- Seleccione el teléfono de su agenda en el icono
4.Seleccione “escribir mensaje” e inserte el texto del mensaje
Para insertar un emoticón seleccione el icono
5.Seleccione el icono
Enviarun mensajeMMS
1. En la pantalla principal tocar el icono
2. Seleccionar el icono
3. Añada destinatarios a su mensaje Inserte manualmente el número de teléfono separándolos con punto y coma -
Seleccione el teléfono de su agenda en el icono
4. Seleccione “escribir mensaje” e inserte el texto del mensaje
5. Seleccione el icono
seleccionar un archivo de la lista o tomar fotografías, grabar vídeo o de sonido, etc ...
6. Seleccione el icono
para enviar el mensaje
y añadir uno de los elementos que aparecen en fi netsra. Puede
para enviar el mensaje.
de la izquierda de la ventana.
79
ESPANOL
Page 80
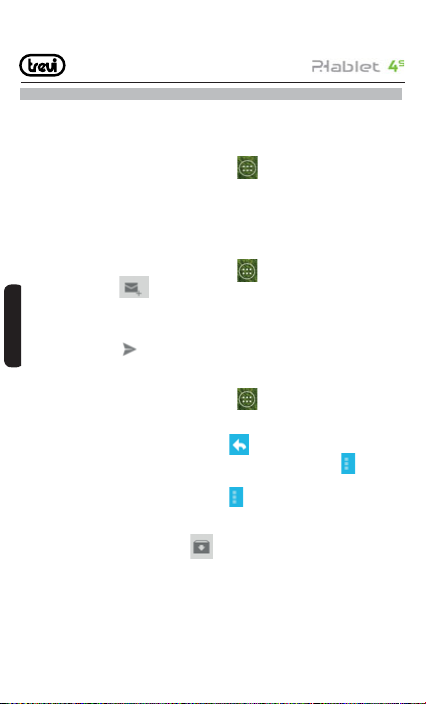
15. E-MAIL
Puede recibir su e-mail directamente en su teléfono. Puede utilizar Gmail o su email
personal o laboral.
Gmail:
1. De la página principal seleccionar aplicaciones
2. Si ya posee cuenta en Gmail seleccione “existente” y siga los pasos de introducción
de datos que se le piden
3. Si no posee cuenta Gmail seleccione “nuevo” y siga los pasos de introducción de
datos que se le piden.
Envío de un email a través deGmail
1. De la página principal seleccionar aplicaciones
2. Seleccione el icono
3. Inserte un nombre o una dirección en el campo destinatario
4. Introduzca un asunto y el mensaje
5. Para insertar un archivo de imagen tocar Menu y seleccionar “Agrega archivo”
6. Seleccione el icono
ESPANOL
Viendo email a través deGmail
1. De la página principal seleccionar aplicaciones
2. Seleccionar un mensaje email
En la vista mensajes utilizar las siguientes opciones
- Para responder al mensaje seleccionar icono
- Para responder al mensaje incluyendo todos los destinatarios seleccione
a todos”.
- Para reenviar el mensaje a otros, seleccionar
- Para visualizar un archivo adjunto, seleccione VISUALIZA. Para guardarlo seleccione
GUARDA
- Para archivar el mensaje seleccione
- Para eliminar el mensaje, seleccione el mensaje que desea eliminar, pulse la tecla Menú
y seleccione “Eliminar”.
- Para pasar al mensaje anterior o siguiente, desplácese hacia la izquierda o hacia la derecha.
Email
para enviar el mensaje.
y Gmail
y Gmail
y Gmail
“responder
80
Page 81
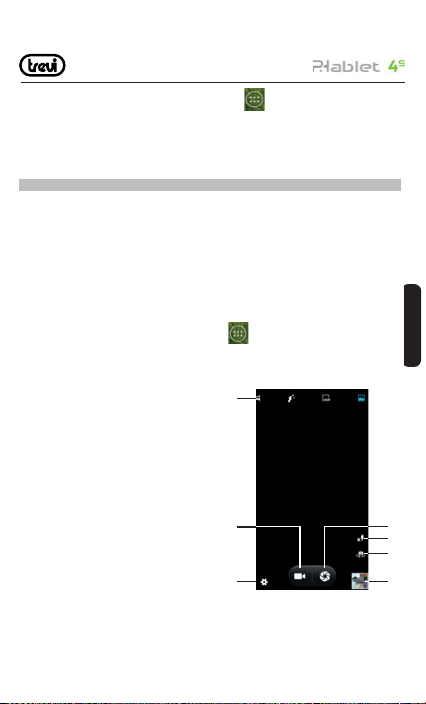
1. De la página principal (home) tocar aplicaciones y seleccionar el icono email.
2. Poner dirección email y contraseña
3. Seleccionar “Adelante”
4. Siga las instrucciones que aparecen en pantalla
16. FUNCIONES MULTIMEDIA
Cámara de Fotos
Dispone de dos cámaras (una frontal y una posterior) y capacidad para registrar video.
Donde quiera que esté podrá sacar fotos de alta resolución y videos. Dispone de funciones
de fotografía avanzadas como estabilización de la imagen, embellecimiento facial, modalidad
panorámica y una alta gama de velocidad de obturación.
Nota: la capacidad de memoria puede variar en función de la escena y las condiciones.
Nota: la cámara se apaga automáticamente si no se utiliza durante un tiempo.
Tomar una fotografía
A De la página principal presionar aplicaciones
cámara.
B Encuadre el objeto de la fotografía y siga los ajustes y
opciones que le proporciona la cámara.
C Actúe sobre el zoom para acercar
o alejar el motivo.
D Toque en la pantalla para enfocar el sujeto.
El objeto del panel cambiará hasta el punto
en que ha tocado y se convertirá en verde
cuando el sujeto esté enfocado.
E Seleccione la orden de disparo.
La fotografía se guarda automáticamente y
semostrará un panel de vista previa.
1. Marcación rápida al “Modo de captura”.
2. Comando para la función de cámara.
3. Para cambiar la confi guración general,
la confi guración de la cámara y los de la cámara
de vídeo.
4. Preview Video / Imagen tomada.
5. Para cambiar a la cámara frontal, y viceversa.
y el icono
1
2
3
81
7
6
5
4
ESPANOL
Page 82
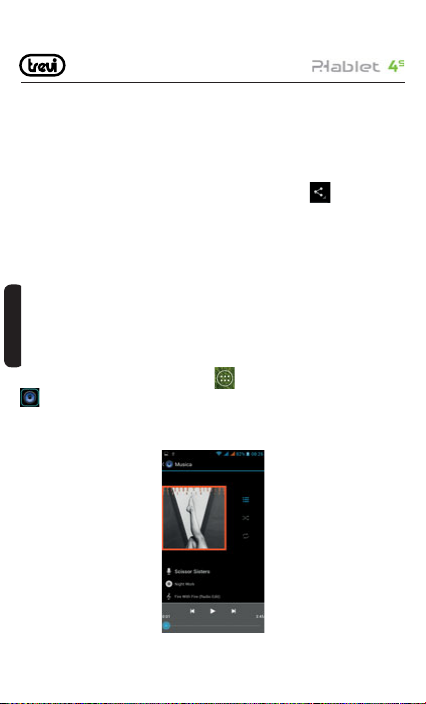
6. Ajustes Flash.
7. Botón del obturador, función de cámara.
Visualizar una fotografía
Seleccione el panel de vista previa
- Para aumentar o disminuir el Zoom coloque los dedos en la pantalla y sepárelos (júntelos
para alejar la imagen) o doble toque en la pantalla táctil.
- Para enviar una fotografía a otras personas, seleccione el icono
desee hacer (seleccione el icono con el cómic si quieres enviarlo como MMS o
el icono de Bluetooth si desea enviar a través de Bluetooth).
- Para eliminar una foto pulsa la tecla menú y seleccione “Eliminar”.
- Para establecer una foto como fondo de pantalla o como ID de llamada para un contacto
selecciona una imagen y pulsa la tecla menú “establecer como”.
Videocámara
Al igual que el modo cámara también puede grabar videos. Los controles y procedimientos
son los mismos que los descritos para la cámara.
Lector de fi cheros musicales
ESPANOL
Después de cargar lamúsica en el Phablet:
- Desde la página principal ir aAplicaciones
.
Tendrá la posibilidad de elegir por artista, álbumes, canciones o listas de reproducción.
Después de la selección se abrirá un lectormultimedia desde donde se podrá gestionar la
reproducción y ver la portada del álbum si está disponible.
y después seleccionar el icono Música
82
de la parte que
Page 83
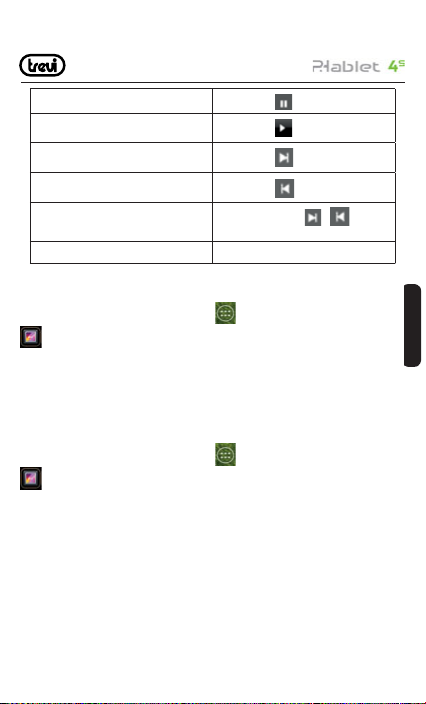
Pausa
Reproducción
Salto a la siguiente canción
Salto a la canción anterior
Para moverse rápidamente hacia delante o atrás
Para pasar a un punto preciso de la canción. Actuar sobre la barra de reproducción
Lector de archivos de video
Después de cargar los videos en el Phablet:
- Desde la página principal ir aAplicaciones
.
- Acontinuación seleccione el video que desea reproducir.
Nota: en base al software instalado podrá haber videos que no se puedan reproducir.
Si el tamaño del archivo supera la memoria libre nos indicará error.
Lector de Imágenes
Es posible ver, mostrar e incluso modifi car las imágenes con el Phablet. Después de haber
cargado las imágenes:
1. Desde la página principal ir aAplicaciones
.
2. Seleccionar la imagen que desea ver a pantalla completa
3. Arrastrar a izquierda y derecha para ver las otras imágenes.
4. Use los dos dedos para agrandar o reducir la imagen.
5. Presiona la tecla Menú y seleccione “Acerca de”, si desea iniciar una presentación
de todas las imágenes.
Radio
Para escuchar la radio en FM, tiene que conectar los auriculares que sirven como antena
de la radio.
Tocar el botón
Tocar el botón
Tocar el botón
Tocar el botón
Mantener presionado
presionado
Mantener
y después seleccionar el icono Galería
y después seleccionar el icono Galería
83
ESPANOL
Page 84
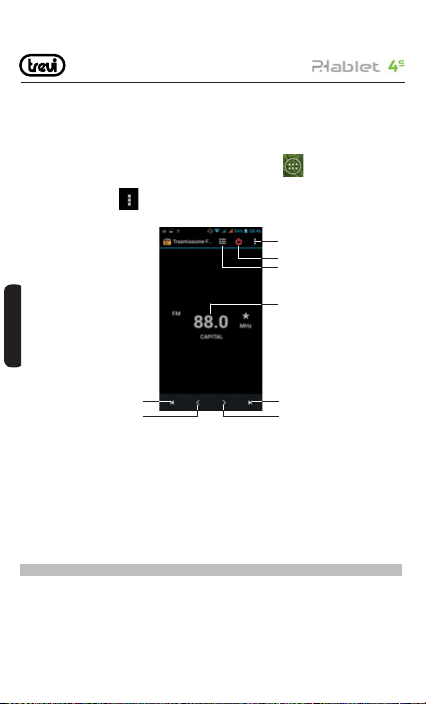
Nota: Utilice los auriculares suministrados que tengan el enchufe, ya otros auriculares
puede no funcionar correctamente.
Escuchar la radio
1. Conectar los auriculares
2. Estando en la página principal tocar el icono aplicaciones
Transmisión FM
3. Seleccione el icono
estaciones disponibles.
y luego “buscar” se almacenarán automáticamente todas las
y tocar el icono
8
7
6
5
ESPANOL
1
2
1. Para volver a la estación de radio anterior.
2. Para hacer manualmente.
3. Para reenviar manualmente.
4. Para pasar a la siguiente estación.
5. Radiofrecuencia de escucha.
6. Lista de canales rara vez almacenada.
7. Para apagar la radio.
8. Confi guración de la función de radio.
17. INTERNET
El servicio de Internet requiere una conexión a la red. El buscador le permitirá navegar
como lo haría en un ordenador.
Puede crear un marcador en el teléfono y sincronizar con el ordenador. Podrá crear un rápido
acceso directo a sus páginas preferidas. Puede ver la página horizontal o verticalmente.
84
4
3
Page 85
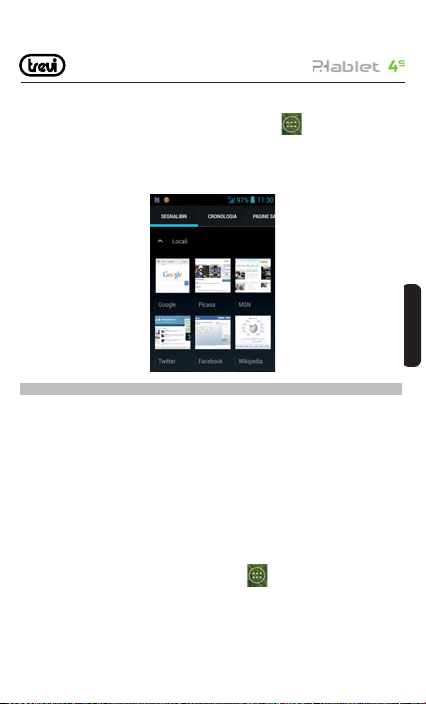
- El acceso y descarga de datos en la red puede tener un coste.
- Los iconos podrán variar en función del país y del operador de telefonía.
1. De la página principal (home) tocar el icono aplicaciones
icono Navegador.
2. Seleccione una de las páginas precargadas o escriba una dirección.
3. Seleccione la tecla Menu si desea ajustar la confi guración de la barra de navegación.
18. CONECTIVIDAD
Bluetooth
Es una tecnología de comunicación sin hilos tal que en radios cortos de unos 10 metros
se intercambia información sin conexión. No es necesario alinear los dispositivos para
transmitir información con Bluetooth. Si los dispositivos se emparejan podrá intercambiar
información entre ellos aunque estén en habitaciones distintas.
Nota:
- Asegúrese siempre de compartir datos con dispositivos fi ables que cuenten con una
adecuada protección.
- En presencia de obstáculos la distancia operativa puede disminuir.
- Algunos dispositivos pueden ser incompatibles con su equipo.
Activación de la funciónBluetooth
1. De la página principal toque el iconoAplicaciones
2. En Bluetooth seleccione ON
Buscar y emparejar dispositivos Bluetooth
85
y a continuación el
, seleccione el icono Ajustes
ESPANOL
Page 86
1- De la página principal toque el icono Aplicaciones , seleccione el icono Ajustes
2- Seleccione Bluetooth después de haberlo activado
3- En la lista que aparece, seleccione su dispositivo e introduzca el PIN bluetooth si está
presente.
4- SeleccioneAceptar para iniciar el emparejamiento.
Cuando el propietario del otro dispositivo emite el mismo PIN o acepta la conexión el
emparejamiento se ha completado.
Notas:
- Si la vinculación se realiza correctamente el dispositivo buscará automáticamente los
servicios disponibles.
WiFi
La conexión WiFi le permite activar o conectarse a cualquier red compatible con WLAN
con los estándares IEEE 802.11 a/b/g/n.
Es posible conectarse a Internet o a otros dispositivos de red siempre que haya disponible
un punto de acceso.
ActivaciónWiFi
ESPANOL
1. De la página principal (home) tocar el iconoAplicaciones
ajustes.
2. Seleccionar “ON”donde aparece WiFi.
Nota; al conectarse aWiFi aumenta el consumo de la batería solo se debe conectar cuando
sea necesario.
Búsqueda de una redWiFi
1. De la página principal (home) tocar el iconoAplicaciones
ajustes.
2. SeleccioneWiFi; el aparato buscará automáticamente las redes disponibles en el lugar
3. Seleccionar una red
4. Insertar la contraseña
5. Seleccionar “Conectar”
Introducción manual de una redWiFi
1. De la página principal (home) tocar el icono Aplicaciones
2. Seleccione WiFi.
3. Seleccione añadir una red
86
y seleccionar el icono
y seleccionar el icono
y seleccionar el icono ajustes.
Page 87
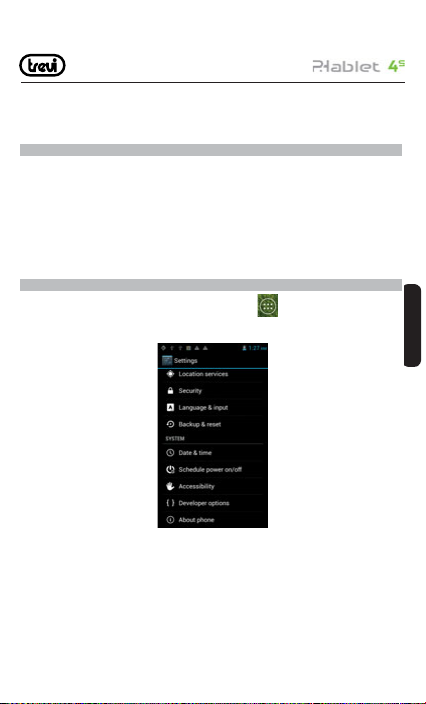
4. Insertar el SSID de la red y seleccionar el tipo de protección.
5. Confi gure las opciones de seguridad de acuerdo con el tipo de protección seleccionado
6. Seleccione “Guardar”
19. CONEXIÓN A UN PC
Primero deberá desactivar la función debug.
De la página principal (home) tocar el icono Aplicaciones y seleccionar el icono Ajustes. En
Ajustes seleccione “Opciones desarrollo” donde deberá deseleccionar la casilla “Debug USB”
Si inserta una tarjeta de memoria en el dispositivo podrá acceder al directorio de la tarjeta.
Para desconectar el dispositivo del ordenador haga clic en el icono USB de la barra de
aplicaciones deWindows y haga clic en la opción de desconectar con seguridad.
Acontinuación proceda a desconectar. Si no lo hace así podría perder datos.
20. AJUSTES
De la página principal (home) tocar el iconoAplicaciones y seleccionar el iconoAjustes.
Nota: en su Phablet podría faltar alguno de los ajustes que aquí se presentan.Eso se debe
a su contrato con el operador.
Administracion de la tarjeta SIM
Comando para gestionar la tarjeta SIM.
1. Seleccione esta opción para desactivar la tarjeta SIM, la tarjeta se verá de color gris y
la barra de estadomostrará el modo de vuelo.
2. En los activos de la tarjeta SIM podrá escoger la SIM para gestionar la llamada de voz,
la llamada de video y Mensagistica.
ESPANOL
87
ESPANOL
Page 88

WiFi
Comando para activar y buscar redes. Verá mostrada una lista de redes wifi disponibles,
escoja una e inserte la contraseña.
Bluetooth
Comando para activar y llevar a cabo una búsqueda de dispositivos Bluetooth. Se mostrará una
lista de los dispositivos disponibles, escoger uno e introducir la contraseña si es necesario.
Uso de datos
Diagrama del uso de los datos
Mas...
Perfi les de audio
Mando para regular los ajustes del tono del teléfono en recepción de llamada, audio, video
y mensajes. Regulación de la vibración, volumen, sonido de notifi cación sonido de toque
de pantalla etc.
1. Seleccionar uno de los perfi les general, silencio, reunión, exterior.
2. Seleccione “+” para añadir un perfi l.
Pantalla
Permite regular la luminosidad, el fondo, la rotación automática, el tamaño de los caracteres.
ESPANOL
Almacenamiento
Puede visualizar gráfi camente el estado de la memoria interna o de la memoria externa.
Batería
Comando para ver gráfi camente el estado de carga de la batería y el tiempo de uso.
Aplicaciones
Al seleccionar este elemento le permite gestionar las distintas aplicaciones del dispositivo.
Accesso a tu ubicación
Para permitir o no permitir el envío de sus datos de localización y la activación de otros
servicios Google. Y la activación del satélite GPS.
Seguridad
Confi rmación para entrar en un bloqueo de pantalla o información relacionada con el
administrador.
Idioma y entrada de texto
Al seleccionar esta opción permite establecer el idioma deseado, la corrección ortográfi ca,
confi gurar algunas funciones del teclado vir tual, confi gurar comandos de voz y la velocidad
del puntero.
88
Page 89
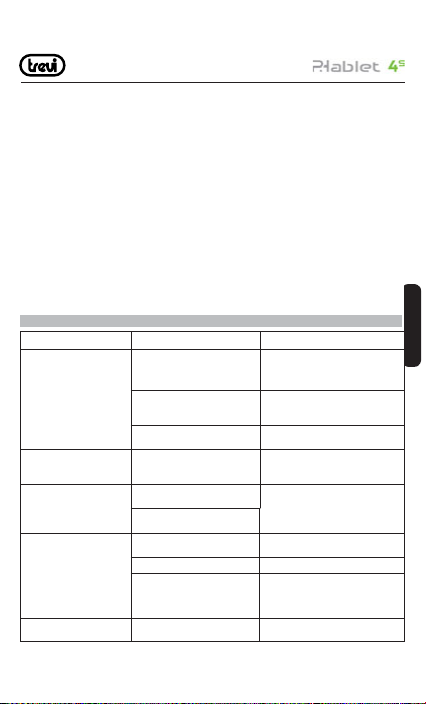
Copia de seguridad
Al seleccionar esta opción permite realizar una copia de seguridad o restaurar los registros
de fábrica.
Fecha y hora
Al seleccionar esta opción permite establecer la fecha y la hora del dispositivo, la zona
horaria, el formato de la presentación día /mes /año.
Programar encendido y apagado
Al seleccionar esta opción le permite establecer la hora de encendido y apagado.
Accesibilidad
Al seleccionar esta opción le permite seleccionar ciertos parámetros como tamaño del
texto, rotación automática,retraso de pulsación etc.
Información del teléfono
Le permite ver toda la información del teléfono.
21. SOLUCIÓN DE PROBLEMAS
PREGUNTA CAUSAS SOLUCIÓN
Mala recepción
algunas características del
teléfono no están disponibles
Ruidos y ecos
La batería dura poco
No se enciende
Estar en áreas de baja cobertura como
al lado de edifi cios altos, en sótanos
Utilizar el teléfono en momentos de
alta densidad de tráfi co de teleco-
municaciones
Distancia hasta el repetidor pida al operador un mapa de
su proveedor no ofrece estas características o usted no está abonado
a ellas
la línea general está en mala
condición
la línea local está en mala
condición
El tiempo de duración está
relacionado con la red
Baterías en mal estado reemplace las baterías
cuando no se reciba señal el
teléfono estará constantemente buscando señal y consumiendo mucha
batería
se ha ter minado la batería mire el nivel de batería o reemplace la batería
evite estos lugares en la medida de lo posible
evite estos momentos en la
medida de lo posible
cobertura
contacte con el operador del
servicio de telefonía
telefonee otra vez escogiendo otra línea
en áreas de mala recepción apague el
teléfono temporalmente
use su teléfono en áreas con
fuerte señal o apáguelo
temporalmente
89
ESPANOL
Page 90
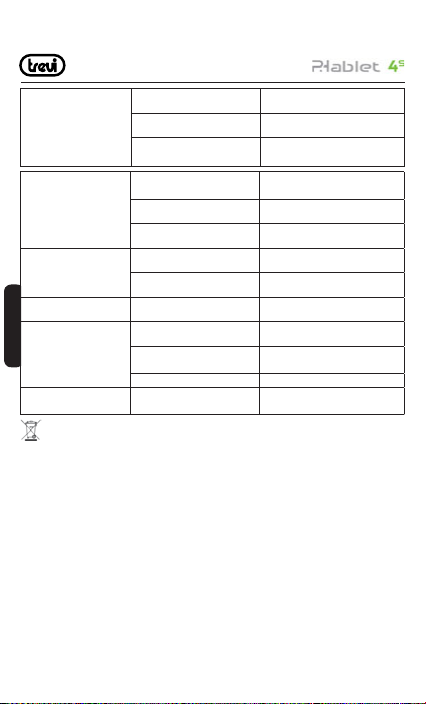
la tarjeta SIM está dañada contacte con el operador del
Error en la tarjeta SIM
No se conecta a la red
no hace la llamada
Error en el número PIN
la batería no se carga
ESPANOL
no carga teléfonos a la lista
Précautions à prendre pour l’élimination correcte du produit.
Le symbole fi gurant sur l’appareil indique que les déchets doivent être éliminés “collecte
séparée” et que le produit ne doit pas être éliminé avec les déchets urbains.
L’utilisateur doit prendre le produit de “centres de collecte séparée des déchets” spéciaux
fournis par le gouvernement local, ou de le livrer au détaillant contre l’achat d’un nouveau
produit.
La collecte sélective des déchets et le traitement ultérieur, le recyclage et les opérations
d’élimination favorise la production de l’équipement avec des matériaux recyclés et limite les
effets négatifs sur l’environnement et sur la santé causés par une mauvaise manipulation des
déchets. L’élimination illégale du produit conduit à l’application de sanctions administratives.
la tarjeta no está correctamente
instalada
la parte metálica de la tarjeta
está sucia
la tarjeta SIM no es válida contacte con el operador del
fuera de cobertura GSM contacte con el operador del
la señal es débil vuelva a probar donde la señal sea más
función llamada prohibida desactive función llamada
la función de llamada
automática está activa
entrar número PIN incorrecto tres veces contacte con el operador del
la batería o el cargador están
estropeados
la temperatura es de menos de -10grados o más de 55grados
mala conexión mire que el conector esté bien inser tado
ha usado toda su memoria libere memoria
servicio de telefonía
asegúrese de instalar bien la
tarjeta
asegúrese de limpiarla
servicio de telefonía
servicio de telefonía
fuerte
prohibida
desactive la función de llamada
automática
servicio de telefonía
cambie batería o cargador
cambie de entorno
90
Page 91
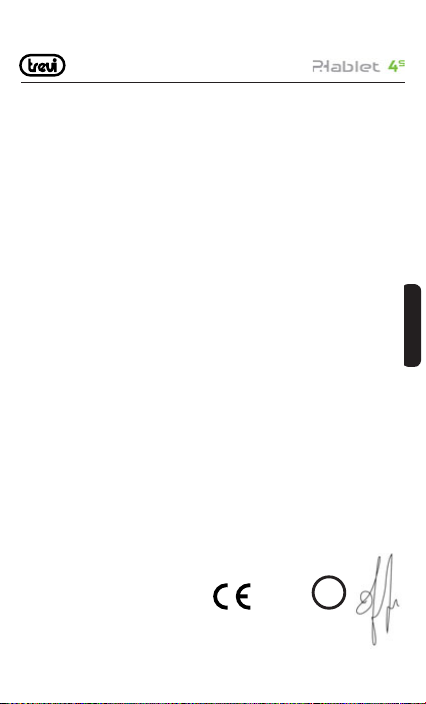
DECLARACIÓN DE CONFORMIDAD
con domicilio social en Rimini (RN), Consular carretera Rimini-San Marino, de 62 años como
Declara que el producto:
Descripción: WCDMA Mobile Phone, GSM, WLAN e GPS
Marca: TREVI
Modelo: PHABLET 4S
Se ajusta a: Directiva 1999/5/CE (R & TTE) La Directiva del Parlamento Europeo y del Consejo
de 9 de marzo de 1999, sobre equipos radioeléctricos y equipos terminales de telecomunicación
y reconocimiento mutuo de su conformidad.
a.Seguridad eléctrica LVD (directiva CEE 72/23)
b.compatibilidad electromagnética -
EMC (directiva CEE 89/336)
c.Espectro de frecuencia -
Allegato IV (directiva 1999/5/EC)
d.SAR EN 50371:2002
e.RoHS - (directiva 2011/65/EU) En cuanto a la restricción del uso de sustancias
Por lo tanto, el producto se etiqueta con la
marca europea de conformidad:
La TREVI S.p.A. fi rmante
distribuidor en la Comunidad
EN 60950-1: 2006+A11:2009+ A1:2010+A12:
2011
EN 301 489-1 V1.9.1
EN 301 489-7 V1.3.1
EN 301 489-17 V2.1.1
EN 301 489-19 V1.2.1
EN 301 489-24 V1.5.1
EN 301 489-34 V1.1.1
EN 300 328 V1.7.1
EN 301 511 V9.0.2
EN 300 440-1 V1.6.1
EN 300 440-2 V1.4.1
EN 301 908-1 V5.1.1
EN 301 908-2 V5.1.1
EN 62311:2008
EN 50360:2001
EN 62209-1:2006
EN 62209-2:2010
químicas peligrosas en aparatos eléctricos y
electrónicos
0700
El Presidente Trevi S.p.A.
91
!
ESPANOL
Page 92
1 Die Grundlagen
Überblick
Vielen Dank, dass Sie sich für die GSM / GPRS digitales Mobiltelefon. Nach dem Lesen
dieser Anleitung werden Sie in der Lage, vollständig beherrschen die Nutzung von Telefon und
schätzen alle ihre Funktionen und Benutzerfreundlichkeit. Nicht nur, dass das Smartphone
bieten Ihnen die grundlegenden Anruffunktionen wie Anrufregister, aber auch mit vielen
praktischen Funktionen und Dienstleistungen, um die Zeit, die Sie arbeiten und spielen
verbringen zu verbessern.
Das Farbdisplay -Handy erfüllt die GSM / GPRS-Technologie und wurde von Zertifi zierungs-
stellen sowohl im Inland und im Ausland genehmigt. Die Verfügbarkeit einiger Dienste und
Funktionen in diesem Handbuch beschrieben, hängt von der Netzwerk-und Ihr Abonnement.
Daher können einige Menüpunkte nicht in Ihrem Telefon zur Verfügung. Die Verknüpfungen,
Menüs und Funktionen kann auch variieren von Telefon zu Telefon. Unser Unternehmen
behält sich das Recht vor, dieses Handbuch ohne gesonderte Ankündigung zu überarbeiten.
Sicherheitsleitfaden
• Wenn Ihr Mobiltelefon verloren geht oder gestohlen wird, kontaktieren Sie bitte das
Fernmeldebehörden oder eine Verkaufsstelle sofort einen Halt auf dem Handy und der
SIM- Kar te haben. Dies wird verhindern wirtschaf tlichen Verlust durch unbefugte Anrufe
von Ihrem Mobiltelefon gemacht verursacht .
• Wenn Sie die Fernmeldebehörden oder eine Verkaufsstelle in Verbindung treten, die sie
benötigen, wissen, die IMEI-Nummer unserer Mobiltelefon ( Batterie entfernen, um
Nummer befi ndet aussetzen auf dem Etikett auf der Rückseite des Telefons ). Bitte
kopieren Sie diese Zahl und an einem sicheren Or t zu halten für zukünftige Verwendung.
• Um den Missbrauch von Ihrem Mobiltelefon zu vermeiden, führen Sie folgende vorbeugende
Maßnahmen :
- Stellen Sie die PIN-Nummer von Ihrem Handy die SIM-Karte und ändern Sie diese Nummer
sofort, wenn es bekannt, einen Dritten wird.
DEUTSCH
- Bitte halten Sie das Telefon aus den Augen beim Verlassen es in einem Fahrzeug. Es ist
besser, tragen die Telefon mit Ihnen oder sperren ihn in den Kofferraum.
- Set Anrufsperre.
Sicherheitswarnungen und Hinweise
Bevor Sie Ihr Mobiltelefon, zu lesen und zu verstehen, die folgenden Hinweise sorgfältig,
um sicherzustellen, Sie werden es sicher und richtig zu verwenden.
Allgemeine Aufmerksamkeit
• Nur der Akku und Ladegerät von unserem Unternehmen spezifi ziertes sollte verwendet
werden, Ihre Handy. Andere Produkt könnte der Batterien, zu Überhitzung, Explosion
92
Page 93
oder zu Feuer.
• Um das Telefon defekt oder Brand zu vermeiden, bitte nicht heftig auswirken, ruck oder
werfen Sie Ihre Telefon.
• Bitte stellen Sie den Akku, Ladegerät Telefon oder in der Mikrowelle oder Hochdruck
Ausrüstung. Ansonsten könnte es zu unerwar teten Unfällen wie Schäden an Schluss
führen oder Brandgefahr.
• Verwenden Sie das Telefon nicht in der Nähe von brennbaren oder explosiven Gasen,
sonst könnte es Fehlfunktionen des Telefons oder Brandgefahr.
• Bitte unterziehen Sie Ihr Telefon keinen hohen Temperaturen, hoher Luftfeuchtigkeit oder
Staub; da es sonst zu Fehlfunktionen des Telefons führen.
• Halten Sie Ihr Telefon außerhalb der Reichweite von kleinen Kindern. Ihr Telefon ist kein
Spielzeug. Kinder könnte sich verletzen.
• Um das Telefon zu fallen und Fehlfunktionen oder Beschädigungen, bitte stellen Sie keine
es auf unebenen oder instabilen Oberfl ächen.
Hinweise , wenn Sie Ihr Telefon
• Schalten Sie Ihr Handy aus, wo das Telefon ist nicht erlaubt, wie auf dem Flughafen oder
in Krankenhäusern. Mit dem Handy in diesen Orten können den normalen Betrieb
auswirken von elektronischen Geräten und medizinischen Instrumenten. Folgen Sie
relevanten Vorschriften bei der Verwendung Ihr Mobiltelefon in diesen Orten. Ihr Mobiltelefon
verfügt über die Auto- Turn-On-Funktion. Überprüfen Sie Ihren Wecker Einstellungen zu
bestätigen, dass Ihr Handy nicht eingeschaltet werden automatisch während des Fluges.
• Verwenden Sie das Mobiltelefon nicht in der Nähe des schwachen Signals oder hochpräzise
elektronische Geräte. HF-Störungen können zu Fehlfunktionen wie elektronische Geräte
und andere Probleme. Besondere Tipps muss in der Nähe der folgenden Ausrüstung
bezahlen: Hörgeräte, Herzschrittmacher und andere medizinische elektronische Geräte,
Feuermelder, automatische Türen und andere automatische Steuerungsanlagen. Um
herauszufi nden, die Auswirkungen von Mobiltelefonen auf ein Herzschrittmacher oder
andere Stücke von elektronischen medizinischen Geräten kontaktieren Sie bitte die
herstellt oder lokalen Verkaufsstellen der Ausrüstung.
• Bitte unterziehen Sie nicht die LCD- Stößen oder verwenden Sie den Bildschirm, um die
Dinge zu schlagen, als dieser Wille den LCD- Board und zu Undichtigkeiten der Flüssigkristall
beschädigen. Es besteht die Gefahr von Blindheit wenn die Flüssigkristallsubstanz in die
Augen. Wenn dies geschieht spülen Augen sofort mit klarem Wasser ( auf keinen Fall
die Augen reiben ) und sofort in ein Krankenhaus für die Behandlung.
• Sie nicht verstellen oder zu modifi zieren Ihr Mobiltelefon, da sie zu Schäden am Telefon führen
wie Auslaufen der Batterie oder Schaltkreisausfall.
• In sehr seltenen Fällen mit dem Handy in bestimmte Modellautos kann negativ auf die
interne Elektronik. Um Ihre Sicherheit zu gewährleisten, unter solchen Umständen
93
DEUTSCH
Page 94
benutzen Sie bitte nicht das Handy.
• Bitte Nadeln, Stiftspitzen oder andere spitze Gegenstände auf der Tastatur nicht verwenden,
da dies zu das Mobiltelefon beschädigen oder zu Fehlfunktionen führen .
• Im Falle einer Fehlfunktion Antenne , verwenden Sie Ihr Telefon , wie es könnte schädlich
zu sein menschlichen Körper.
• Vermeiden Sie, dass das Telefon in engen Kontakt mit magnetischen Gegenständen wie
magnetische kommen Karten wie die Strahlungswellen des Mobiltelefons kann auf die
gespeicherten Daten löschen Disketten, zahlen -und Kreditkar ten.
• Halten Sie kleine Gegenstände aus Metall, wie Reißzwecken weit weg vom Empfänger. Wann
der Empfänger im Einsatz wird es magnetisch und kann diese kleine Metallobjekte
anziehen und somit können diese zu Verletzungen führen oder das Mobiltelefon
beschädigen.
• Vermeiden Sie es, das Mobiltelefon in Kontakt mit Wasser oder anderen Flüssigkeiten
kommen. Wenn Flüssigkeiten geben Sie die Telefon , könnte dies zu einem Kurzschluss,
Auslaufen der Batterie oder andere Fehlfunktion.
Hinweise bei Verwendung von Akku
• Der Akku hat eine begrenzte Lebensdauer. Die Restlaufzeit wird immer kürzer, die Zeiten der
Lade Anstieg . Wenn der Akku auch nach dem Aufl aden schwach, zeigt dies die
Nutzungsdauer vorüber ist und Sie eine neue Batterie angegeben verwenden.
• Werfen Sie keine alten Batterien mit allem Hausmüll . Bitte entsorgen Sie alte Batterien
an den gerichtet Orte mit spezifi schen Vorschriften für die Entsorgung .
• Bitte werfen Sie Batterien nicht ins Feuer , da sonst der Akku Feuer fangen und explodieren.
• Beim Einbau der Batterie , keine Gewalt oder Druck, da dies die Batterie verursachen
auslaufen, sich überhitzen, Crack und Feuer fangen.
• Bitte verwenden Sie keine Drähte , Nadeln oder andere Metallgegenstände Kurzschluss
der Batterie. auch haben Sie den Akku nicht in der Nähe von Halsketten oder andere
Metallgegenstände, da dies die Batterie verursachen auslaufen, sich überhitzen, Crack
DEUTSCH
und Feuer fangen.
• Bitte löten Sie die Kontaktstellen der Batterie dürfen, da dies die Batterie verursachen
Leck, Überhitzung, Crack und Feuer fangen.
• Wenn die Flüssigkeit in den Batterien in die Augen geht gibt es eine Gefahr der Erblindung.
Es in diesem Fall nicht die Augen reiben, aber die Augen sofort mit klarem Wasser
abspülen und ins Krankenhaus für die Behandlung.
• Bitte nicht zerlegen oder modifi zieren Sie die Batterie, da dies dazu führen, die Batterie
auslaufen, hitzen, Crack und Feuer fangen.
• Bitte verwenden Sie keine oder legen Sie die Batterien in der Nähe von Hochtemperatur Orten wie in der Nähe ein Feuer oder Heizkessel dies dazu führen, dass die Batterie
ausläuft, überhitzt zu knacken und zu fangen Feuer.
94
Page 95
• Wenn der Akku überhitzt, oder ändert sich die Farbe während des Gebrauchs verzerr t,
Laden oder Lagerung, bitte nicht mehr verwenden und ersetzen sie durch eine neue
Batterie.
• Wenn die Batteriefl üssigkeit in Kontakt mit Haut oder Kleidung kommt dies könnte dazu
führen, Brennen der Haut. Sofor t mit klarem Wasser, wenn nötig, spülen und ärztlichen
Tipps.
• Wenn die Batterie ausläuft oder gibt ein seltsamer Geruch, entfernen Sie bitte die Batterie
aus der Umgebung dem offenen Feuer, ein Feuer oder eine Explosion zu vermeiden.
• Bitte lassen Sie die Batterie nass werden, da dies der Akku überhitzen, rauchen und
korrodieren.
• Bitte verwenden Sie keine Batterien oder Ort in Or ten mit hohen Temperaturen, wie im
direkten Sonne, dadurch wird der Akku über hitzen und zu lecken, geringere Leistung und
verkürzen die Lebensdauer der Batterie.
• Bitte nicht kontinuierlich für mehr als 24 Stunden lang aufl aden.
Mobiltelefon aufl aden
• Schließen Sie den Stecker des Lade auf das Mobiltelefon. Die Akkuanzeige blinkt auf dem
Bildschirm. Auch wenn das Telefon ausgeschaltet wurde, scheint immer noch die Lade
Bild, anzeigt, dass die Batterie geladen wird. Wenn das Telefon überstrapaziert, wenn
die aktuelle nicht ausreichend ist, kann es längere Zeit für die Ladeanzeige zu ergreifen,
um auf dem Bildschirm angezeigt nachdem der Ladevorgang beginnt.
• Wenn die Batterieanzeige nicht blinkt und zeigt die Batterie voll ist , bedeutet dies,
der Ladevorgang abgeschlossen ist. Wenn das Telefon ausgeschaltet ist, während
des Ladevorgangs , wobei die Lade fertige Bild erscheint auch auf dem Bildschirm.
Der Ladevorgang dauert of t 3 bis 4 Stunden. Während des Lade, die Batterie, Telefon
und Ladegerät warm wird, ist dies eine normale Phänomen.
• Nach Abschluss des Lade, trennen Sie das Ladegerät von der Netzsteckdose, und
aus dem Mobiltelefon.
Hinweise:
• Während des Ladevorgangs muss das Telefon Plätze in gut belüfteten Umgebung von
+5 ° ~ +40 ° sein. Verwenden Sie immer die von Ihrem Handy-Hersteller mitgeliefer te
Ladegerät . Bei Verwendung eines nicht Ladegerät kann Gefahren verursachen und zum
Verlust der Zulassung und Garantie Klauseln für Ihr Handy.
• Die Standby-Zeit und Gesprächsdauer vom Hersteller bereitgestellt werden auf ideale Basis
Betriebsumgebung. In der Praxis hängt die Betriebszeit des Akkus je nach
Netzwerkbedingungen, Betriebsumgebung und Nutzungsverfahren.
• Achten Sie darauf, die Batterie vor dem Laden installiert. Es ist am besten nicht zu
entfernen, die Batterie während des Ladevorgangs.
• Nach Beendigung des Lade, trennen Sie das Ladegerät vom Telefon und der
95
DEUTSCH
Page 96
Stromversorgung.
Wenn Sie das Ladegerät vom Telefon und die Stromversorgung nicht unterbrochen haben,
wird das Ladegerät weiterhin den Akku nach 5 bis 8 Stunden aufgeladen, wenn der Teig
Pegel sinkt erheblich. Wir beraten Sie nicht zu tun, wie diese, wie es senkt Ihre Telefon
Leistung und verkürzt Ihre Telefon Leben.
Hinweise, wenn Sie Ihr Ladegerät
• Bitte verwenden Sie AC 220 Volt. Die Verwendung eines anderen BatteriespannungLeckage,
Brand verursachen und zu Schäden an dem Handy und Ladegerät.
• Es wird einen Kurzschluss das Ladegerät verboten , da dies einen elektrischen Schlag
verursachen, Rauchen und beschädigen das Ladegerät.
• Verwenden Sie das Ladegerät nicht, wenn das Stromkabel beschädigt ist, da dies zu
Feuer oder Stromschlag.
• Bitte den Staub auf der Steckdose versammelten sofort reinigen.
• Bitte stellen Sie keine Gefäße mit Wasser in der Nähe der Ladestation, um Spritzwasser
zu vermeiden auf das Ladegerät und verursacht eine elektrische Mangel, Leckage oder
andere Fehlfunktion.
• Wenn das Ladegerät kommt in Kontakt mit Wasser oder anderen Flüssigkeiten müssen
sofort die Strom um einen elektrischen Kurzschluss oder Schlag, Brand oder eine
Fehlfunktion des Ladegerätes zu vermeiden ausgeschaltet werden.
• Bitte nicht zerlegen oder modifi zieren Sie das Ladegerät, da es zu Verletzungen führen,
Elektro-Schlag, Brand oder Schäden am Ladegerät.
• Bitte verwenden Sie das Ladegerät nicht im Badezimmer oder anderen übermäßig
feuchten Gebieten, da diese verursachen elektrische Keil, Feuer oder Schäden am
Ladegerät.
• Bitte berühren Sie nicht das Ladegerät, Netzkabel oder Steckdose mit nassen Händen,
da dies wird einen elektrischen Schlag verursachen.
DEUTSCH
• Verändern Sie keine schweren Gegenstände auf das Netzkabel , da dies zu einem elektrischen
Schlag oder Brand.
• Vor der Reinigung oder Wartungsarbeiten ziehen Sie bitte das Ladegerät von der elektrischen
Steckdose.
• Netzstecker -Ladegerät, ziehen Sie nicht am Kabel , sondern halten Sie sich an den Körper der
Ladegerät, das Ziehen am Kabel wird das Kabel beschädigt werden und führen zu
Stromschlägen oder Feuer.
Reinigung und Pfl ege
• Das Mobiltelefon , Akku und Ladegerät sind nicht wasserfest . Bitte verwenden Sie sie nicht
im Schlafzimmer oder anderen übermäßig feuchten Gebieten und ebenfalls vermeiden,
dass sie zu bekommen nass in der regen.
96
Page 97
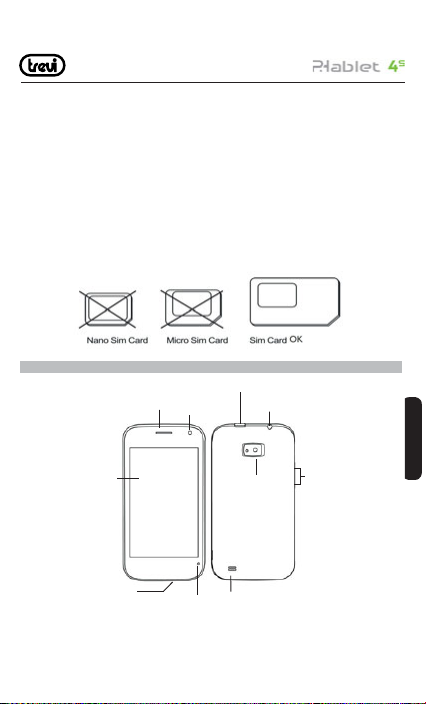
• Verwenden Sie ein weiches, trockenes Tuch zum Reinigen des Handy, Akku und Ladegerät.
• Verwenden Sie keinen Alkohol, Verdünner, Benzin oder andere Lösungsmittel, das
Mobiltelefon zu wischen.
• Eine schmutzige Steckdose verursacht schlechten elektrischen Kontakt, der Macht zu
verlieren und sogar Unfähigkeit, wieder aufzuladen. Bitte reinigen Sie regelmäßig.
Hinweise halten den Einsatz von Mikro/Nano SIM-Adapter auf TREVI Produkte Smartphoneund Tablet-TREVI mit SIM-Steckplätze sind entwor fen, um Platz für SIM nur im StandardFormat. Der Einsatz von Mikro/Nano SIM-Karte mit dem Adapter ist es nicht zu empfehlen,
da es Bruch der Geräte und Mikro/Nano SIM-Karte kann verursachen. TREVI haftet nicht
für Schäden, die durch den Einsatz von Mikro/Nano SIM-Adapter verursacht. TREVI behält
sich das Recht vor, Garantieleistungen für Produkte mit Defekten auf der SIM-Slot durch
den Einsatz von Mikro/Nano SIM-Adapter verursacht verweigern.
2 Erste Schritte
Mehrzweck-Buchse
Anzeige
Hörmuschel
Kamera auf der Vorderseite
Mikrofon
97
Power-Taste
Blitz
Rückfahrkamera
Back cover
Lautsprecher
Headset-Buchse
Lautstärke-Taste
DEUTSCH
Page 98
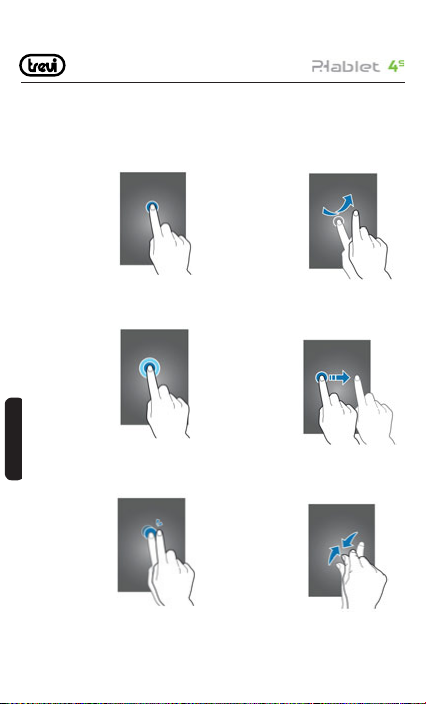
Finger-Gesten
Tapping
Um eine Anwendung zu öffnen, um einen
Menüpunkt auszuwählen, drücken Sie ein
On-Screen-Taste, oder um ein Zeichen zu
geben mit dem On-Screen-Tastatur, tippen
Sie mit einem Finger.
Flicking
Blättern Sie nach links oder rechts auf der
Startseite oder der Bildschirm Anwendungen, um eine andere Platte zu sehen.
Streichen Sie nach oben oder unten, um
über eine Webseite oder eine Liste, wie
Kontakte blättern.
Tippen und Halten
Tippen und halten Sie ein Element für mehr
als 2 Sekunden, um alle verfügbaren Optionen zuzugreifen.
Doppeltippen
Doppeltippen Sie auf eine Webseite, eine
Karte oder ein Bild, in einem Stück zu
DEUTSCH
vergrößern. Tippen Sie erneut zweimal, um
zurückzukehren.
Schleppen
Um ein Symbol, Thumbnail, Vorschau oder
an einen neuen Standort zu wechseln, tippen
und halten Sie ihn und ziehen Sie es auf die
Zielposition.
Kneifen
Verbreiten Sie zwei Finger auf einer Webseite,
Karte, oder ein Bild in einem Teil zu vergrößern. Pinch zu verkleinern.
98
Page 99
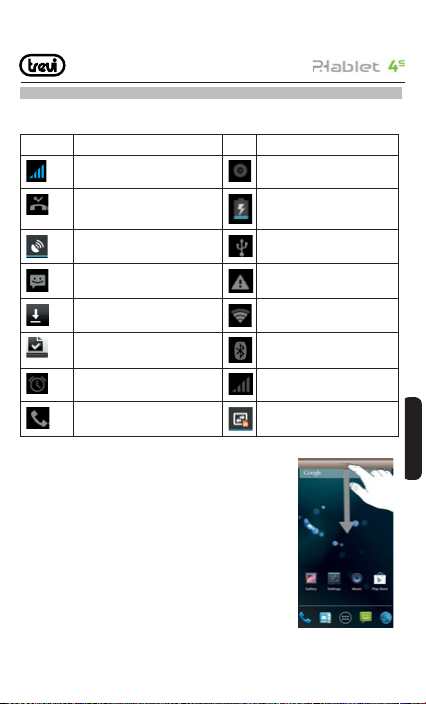
3 Anzeigesymbole
Die an der Oberseite des Bildschirms angezeigt Icons geben Auskunft über den Status des
Gerätes. Die in der folgenden Tabelle aufgeführten Symbole sind am gebräuchlichsten.
Symbol Beschreibung
Geben Sie die Intensität der
Netzwerksignale
Anrufe verpasst anzeigen Das Telefon geladen wird
Standort per Satellit aktivieren USB
Erhalten Sie eine neue
Nachricht
Eine Anwendung wird heruntergeladen
Der Download ist über Schalten Sie die Bluetooth
Das Telefon spielt ein Lied
Der Zugang ist gesperrt
Lass dich mit dem drahtlosen
Netzwerk verbunden
Der Wecker ist eingestellt und
aktiviert
Ein Anruf im Gange GPRS-Datenverbindung wird
4 Status-und Benachrichtigungs
Die Symbole in der Statusleiste informiert Sie über neue
Nachrichten, Kalenderbenachrichtigungen, Signalstärke,
Batteriestatus, und Aktivitäten im Gange wie Datei-Downloads.
Sie können per Drag unten in der Statusleiste, um das
Benachrichtigungsfeld öffnen und bearbeiten Ihre Meldungen.
Um das Benachrichtigungsfeld zu öffnen:
Streichen von oben in Home-Bildschirm
Zur Aktion auf einer Notifi kation
Tippen Sie auf die Benachrichtigung
99
Keine SIM-Karte in das
Telefon installiert
DEUTSCH
Page 100
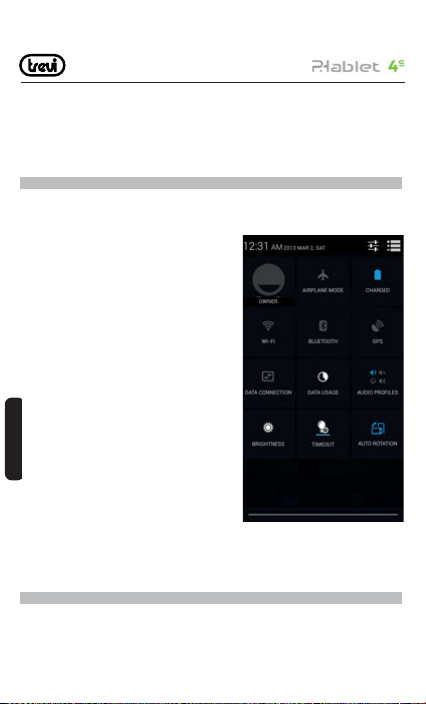
Um eine Benachrichtigung von der Benachrichtigungsfeld entlassen
Legen Sie den Finger auf eine Benachrichtigung und Flick links oder rechts
Um alle Mitteilung von der Benachrichtigungsfeld zu löschen
Tippen Sie auf Clear (in der oberen rechten Ecke des Fensters)
5 Schnelleinstellung Steuerung
Von der schnellen Einstellung Panel können Sie die aktuellen Einstellungen des Geräts
anzuzeigen. Ziehen Sie nach unten in der Statusleiste, tippen Sie auf die Schnelleinstellung
zu öffnen, und verwenden Sie dann die folgenden Optionen:
Wi-Fi: Aktivieren oder die WLAN-Funktion zu
deaktivieren.
Bluetooth: Aktivieren oder Deaktivieren der
Bluetooth Funktion.
GPS: Aktivieren oder die GPS-Funktion zu
deaktivieren.
Datenverbindung: Aktivieren oder deaktivieren Sie
die Datenverbindung.
Datennutzung: Prüfen und die Datenverbindung zu
begrenzen. Kann die Verbindung innerhalb SIMKarten zu wechseln.
Audio-Profi l: Aktivieren oder deaktivieren Silent-
Modus. Sie können im Silent-Modus vibrieren
DEUTSCH
oder stumm Ihrem Gerät.
Helligkeit: Stellen Sie die Monitorhelligkeit
Timeout: Stellen Sie den Zeitbereich, zu wechseln Schlafmodus
Auto-Rotation: Zulassen oder verhindern, dass die Schnittstelle dreht, wenn Sie das Gerät
drehen.
6 Anpassen Home Screen
Tippen und halten Sie ein Element und ziehen Sie es an eine neue Position.
100
 Loading...