

Page 1
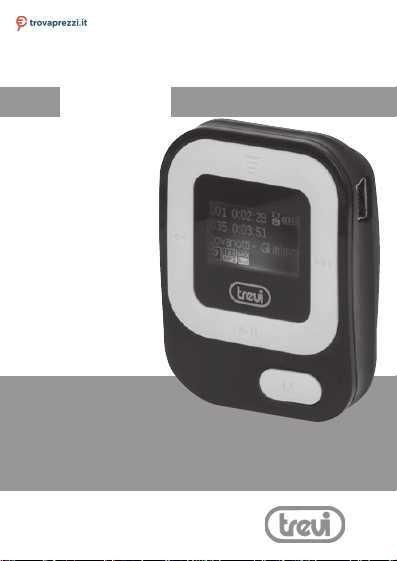
MPV
1705 SR
Mini lettore MP3 con Radio
Mini MP3 player with Radio
Mini lecteur MP3 avec Radio
Mini MP3 Player mit Radio
Mini reproductor MP3 con Radio
Questo manuale d’istruzione è fornito da trovaprezzi.it. Scopri tutte le offerte per Trevi MPV 1705 o
cerca il tuo prodotto tra le migliori offerte di Lettori MP3 e MP4
Page 2

Italiano
MANUALE UTENTE
Le informazioni contenute in questo documento sono soggette a variazioni senza preavviso.
Il presente documento non può essere riprodotto o trasferito, neppure parzialmente, in
alcun modo e con nessun mezzo, elettronico o meccanico, né tanto meno fotocopiato,
copiato o tradotto verso altre lingue per nessun scopo senza esplicito consenso da
parte del costruttore.
I nomi, i disegni e i marchi registrati presenti in questo manuale sono proprietà dei
rispettivi proprietari.
Leggere attentamente il presente libretto di istruzioni e seguire attentamente le informazioni riportate prima di utilizzare il prodotto.
MPV 1705 SR
AVVERTENZA PER IL CORRETTO UTILIZZO DELLA
BATTERIA RICARICABILE
- Ricaricare la batteria ad una temperatura compresa tra i 5°C e i 35°C.
- Quando la ricarica è completa viene segnalata con un messaggio (controllare il manuale
d’uso).
- Non prolungare la ricarica oltre i tempi indicati per evitare il rischio di surriscaldamento
e scoppio.
- La ricarica della batteria oltre i tempi indicati o un prolungato periodo di inattività
possono ridurne la durata.
- La batteria ricaricabile è soggetta ad usura e la sua capacità diminuisce gradualmente.
- Per prolungare la durata della batteria, utilizzarla quando è completamente carica
no al completo scaricamento, quindi ricaricarla completamente di nuovo prima di
utilizzarla nuovamente. Mettendo in carica una batteria non completamente esaurita, la
sua durata risulterà ridotta. In questo caso, ripetere il ciclo caricamento/scaricamento
completo più volte.
- Evitare di tenere la batteria sottocarica tutta la notte.
L’uso inappropriato della batteria può causare esplosioni
2
Attenzione!
o surriscaldamenti della stessa.
Page 3
MPV 1705 SR
Per evitare possibili danni all’udito, limitare il tempo di ascolto a volumi elevati.
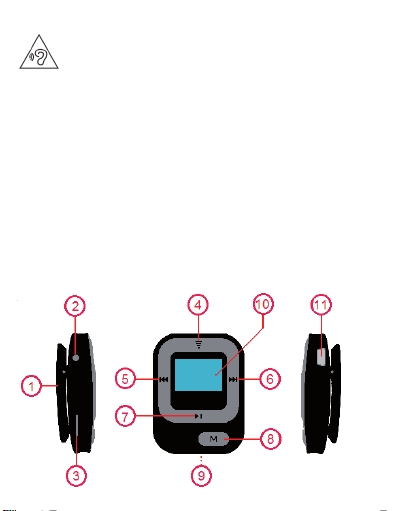
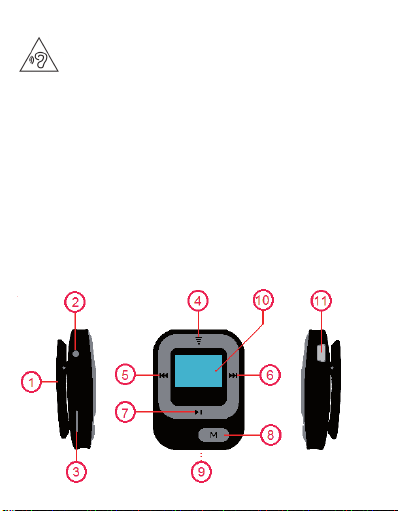
DESCRIZIONE COMANDI
1. Clip a molla
2. Presa cufa
3. Ingresso microSD Card
4. Tasto Volume
5. Tasto I<< PREV
6. Tasto >>I NEXT
7. Tasto >II PLAY/PAUSA / Accensione/Spegnimento
8. Tasto MENU
9. Tasto RESET (sul retro)
10. Display
11. Presa Micro-USB
Italiano
3
Page 4
Italiano
COLLEGAMENTO AL PC E TRASFERIMENTO FILE
MPV 1705 SR
NELLA SCHEDA DI MEMORIA DEL LETTORE +
RICARICA BATTERIA
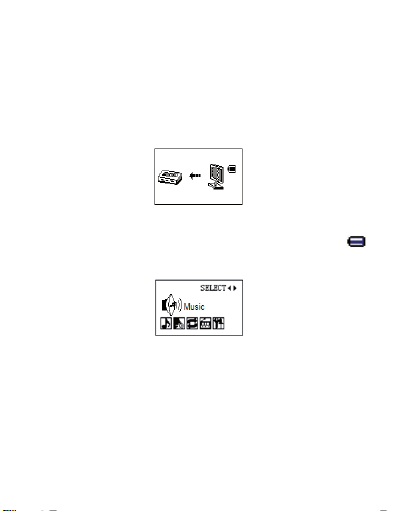
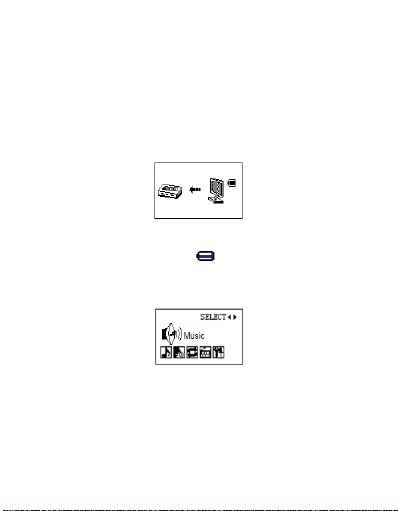
1. Inserire la microSD (non in dotazione) nello slot apposito (3), tenendo la
supercie con il lato scritto rivolto verso il basso, no a sentire un click.
2. Inserire il cavo USB fornito in dotazione nella presa USB del lettore (11).
3. Collegare il cavo USB ad una presa USB del vostro pc. La memoria della
microSD verrà riconosciuta automaticamente dal computer.
4. Copiare i le audio MP3/WMA dal computer alla microSD.
5. Contemporaneamente la batteria si ricaricherà. Al termine della carica il
simbolo di livello di carica della batteria mostrerà batteria piena .
6. Per scollegare il lettore dal pc, tenere premuto il tasto MENU (8) no alla
comparsa del menù, dopodichè sarà possibile sconnettere il cavo USB.
NOTE: La durata della ricarica non deve superare le 2 ore.
La durata della batteria completamente carica si aggira intorno alle
4 ore e mezza di riproduzione continua.
ACCENSIONE/SPEGNIMENTO
1) Premere il tasto PLAY/PAUSA (7) per 2 secondi per accendere il lettore.
2) Premere il tasto PLAY/PAUSA (7) per 2 secondi per mettere in
stand-by il lettore.
4
Page 5
MPV 1705 SR
MODALITÀ MUSIC
1) Accendere l’MPV 1705SR e portarsi in modalità MUSIC tramite i tasti
PREV (5) o NEXT (6).
2) Premere il tasto MENU (8) per accedere alla modalità MUSIC.
3) Premere il tasto PLAY/PAUSA (7) per avviare la riproduzione.
4) Premere il tasto PLAY/PAUSA (7) per arrestare momentaneamente la
riproduzione.
5) Premere nuovamente il tasto PLAY/PAUSA (7) per tornare alla normale
riproduzione.
6) Premere il tasto PREV (5) per selezionare il brano precedente.
7) Premere il tasto NEXT (6) per selezionare il brano successivo.
8) Premere il tasto V (4) per modicare il volume. Premere il tasto PREV
(5) per diminuirlo o il tasto NEXT (6) per aumentarlo.
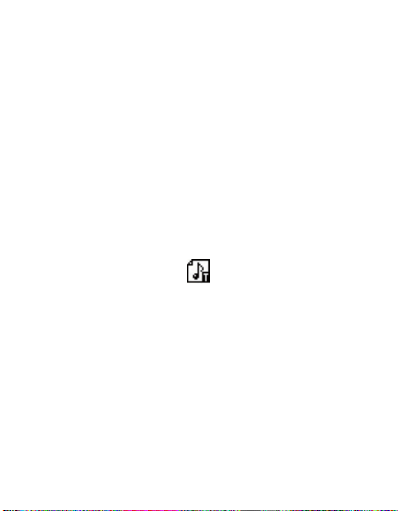
Lyrics
Nel caso di presenza di lyrics (testo del brano) sarà visualizzata l’icona in
basso a sinistra come di seguito:
1) Tenere premuto il tasto MENU (8) per visualizzare le lyrics.
2) Ripremere il tasto MENU (8) per tornare alla visualizzazione della modalità
MUSIC.
NOTE: La presenza di lyrics è caratterizzata dalla presenza del le
nomele.LRC, dove nomele sta per lo stesso nome del le MP3. Il
le LRC deve essere nella stessa posizione del le MP3.
Italiano
MENÙ MODALITÀ MUSICA
A riproduzione ferma premere il tasto MENU (8).
Card folder: selezionare la cartella o il brano desiderato tramite i tasti PREV
(3) o NEXT (7) e confermare con tasto MENU (8).
Delete le: elimina il le selezionato.
Delete all: elimina tutti i le.
Exit: uscita dal menù e ritorno alla lista dei brani.
5
Page 6

Italiano
A riproduzione avviata premere il tasto MENU (8).
Repeat: selezionare la modalità di riproduzione. È possibile selezionare fra
sette modalità di ripetizione: Normal, Repeat One (ripetizione singolo brano),
Folder, Repeat Folder, Repeat all (ripetizione di tutti i brani), Random, Intro
(riproduzione dei primi 10 secondi di ogni brano).
Equalizer: selezionare l’equalizzazione dell’audio. E’ possibile selezionare fra
sette modalità di equalizzazione: Normal, Rock, Pop, Classic, Soft, Jazz, DBB.
Replay mode - Replay: Questa funzione permette di ripetere particolari
di un brano.
Una volta selezionata la funzione, sul display in alto a destra la lettera A
dell’icona A-B inizia a lampeggiare, indicando che è attiva la funzione.
Premere il tasto NEXT (6) per avviare la memorizzazione. Sul display in alto
a sinistra la lettera B dell’icona A-B inizia a lampeggiare.
Premere il tasto NEXT (6) per terminare la memorizzazione. A questo punto
il lettore riprodurrà continuamente l’intervallo del brano memorizzato.
Premere il tasto MENU (8) per tornare alla normale riproduzione.
Replay mode - Replay times: Premere i tasti PREV (5) o NEXT (6) per
selezionare quante volte far ripetere l’intervallo del brano memorizzato.
Replay mode - Replay gap: Premere i tasti PREV (5) o NEXT (6) per
selezionare l’intervallo di tempo in secondi tra una ripetizione e l’altra.
Exit: uscita dal menù e ritorno alla riproduzione.
MPV 1705 SR
MODALITÀ RADIO
1) Accendere l’MPV 1705SR e portarsi in modalità RADIO tramite i tasti
PREV (5) o NEXT (6).
2) Premere il tasto MENU (8) per accedere alla modalità RADIO.
3) Premere il tasto PLAY/PAUSA (7) per selezionare le stazioni radio
memorizzate.
4) Premere il tasto PREV (5) per diminuire la frequenza visualizzata di 0.1MHz.
5) Premere il tasto NEXT (6) per aumentare la frequenza visualizzata di 0.1MHz.
6) Premere il tasto V (4) per modicare il volume. Premere il tasto PREV
(5) per diminuirlo o il tasto NEXT (6) per aumentarlo.
6
Page 7
MPV 1705 SR
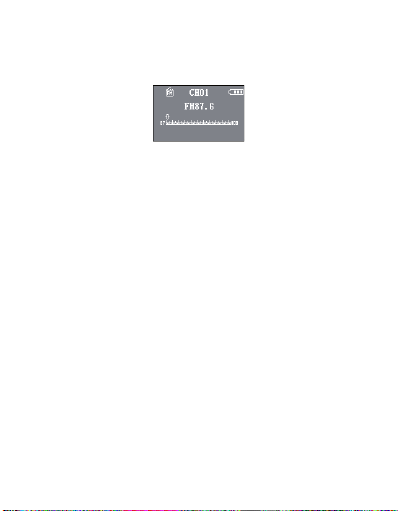
MENÙ MODALITÀ RADIO
Premere il tasto MENU (8).
Save: permette di salvare la stazione radio desiderata, in alto al centro
comparirà CH seguito dal numero di memorizzazione.
Delete: permette di eliminare la stazione radio corrente.
Delete all: permette di eliminare tutte le stazioni radio memorizzate.
Auto Search: permette di effettuare una scansione automatica delle stazioni
radio. Le stazioni radio con il migliore segnale verranno automaticamente
memorizzate. È possibile memorizzare no a 20 stazioni radio.
Normal Band: permette di selezionare la scala di sintonia europea
(87-108MHz).
Japan Band: permette di selezionare la scala di sintonia giapponese
(76-92MHz).
Italiano
MENÙ SETTINGS
1) Accendere l’MPV 1705SR e portarsi sul menù SETTINGS tramite i tasti
PREV (5) o NEXT (6).
2) Premere il tasto MENU (8) per accedere al menù SETTINGS.
Backlight
Permette di regolare la durata in secondi dell’illuminazione del display
(0=sempre acceso).
Language
Permette di scegliere la lingua del menù.
Power Off - Off Time
Permette di regolare l’intervallo in secondi di inattività dopo il quale il lettore
si spegne automaticamente (0=sempre acceso).
7
Page 8

Italiano
Power Off - Sleep Time
Permette di regolare l’intervallo in minuti di inattività dopo il quale il lettore
si spegne automaticamente (0=sempre acceso).
Contrast
Permette di regolare il contrasto dell’illuminazione del display.
Memory Info
Visualizza la memoria utilizzata della microSD.
Firmware Version
Visualizza la versione del rmware.
MPV 1705 SR
SPECIFICHE TECNICHE
Sistema operativo .................... Windows® 2000/XP/Vista/7/8 - Mac OS 9.2
Versione USB ...........................Micro USB 2.0
Capacità ..................................... Micro SD Card no a 32GB
Formati audio supportati ....... MP3, WMA
Risposta in frequenza ............. 20-20000Hz
Banda di ricezione: ..................87.0-108.0 MHz
..................................................... 76.0-92.0 MHz
Rapporto S/N ........................... >70dB
Alimentazione .......................... Batteria al Lithio ricaricabile tramite presa USB
Dimensioni ................................ 52 mm x 39 mm x 18 mm
8
Page 9
MPV 1705 SR
INFORMATIVA SULLA RIMOZIONE
Italiano
E LO SMALTIMENTO DELLA BATTERIA
Attenzione: Questa operazione è riservata esclusivamente al
personale tecnico specializzato!
PROCEDURA PER LA RIMOZIONE DELLA BATTERIA
Operare esclusivamente in assenza di collegamento dell’apparecchio
alla rete elettrica!
1. Rimuovere il mobile inferiore dagli incastri;
2. Individuare la batteria, scollegarla e rimuoverla.
Qualunque sia il tipo di batteria esaurita, essa non deve essere gettata tra i
riuti domestici,nel fuoco o nell’acqua. Ogni tipo di batteria esaurita deve
essere, riciclata oppure smaltita presso gli appositi centri raccolta dedicati.
INFORMAZIONI AGLI UTENTI ai sensi del Decreto Legislativo N°
49 del 14 Marzo 2014
“Attuazione della Direttiva 2012/19/UE sui riuti di apparecchiature
elettriche ed elettroniche (RAEE)”
Il simbolo del cassonetto barrato riportato sull’apparecchiatura indica che il prodotto alla
ne della propria vita utile deve essere raccolto separatamente dagli altri riuti. L’utente
dovrà, pertanto, conferire l’apparecchiatura integra dei componenti essenziali giunta a
ne vita agli idonei centri di raccolta differenziata dei riuti elettronici ed elettrotecnici,
oppure riconsegnarla al rivenditore al momento dell’acquisto di nuova apparecchiatura di
tipo equivalente, in ragione di uno a uno, oppure 1 a zero per le apparecchiature aventi
lato maggiore inferiore a 25 cm. L’adeguata raccolta differenziata per l’avvio successivo
dell’apparecchiatura dimessa al riciclaggio, al trattamento e allo smaltimento ambientale
compatibile contribuisce ad evitare possibili effetti negativi sull’ambiente e sulla salute e
favorisce il riciclo dei materiali di cui è composta l’apparecchiatura. Lo smaltimento abusivo
del prodotto da parte dell’utente comporta l’applicazione delle sanzioni amministrative di
cui al D.Lgs n. Decreto Legislativo N° 49 del 14 Marzo 2014.
TREVI persegue una politica di continua ricerca e sviluppo, pertanto i prodotti possono
presentare caratteristiche diverse da quelle descritte.
9
Page 10
English
USER’S MANUAL
MPV 1705 SR
MPV 1705 SR
To avoid possible hearing damage, limit the time listening at high volumes.
10
Page 11
MPV 1705 SR
Warnings
Don’ts
• Do not place naked flames, such as lighted candles on or near the product.
• Do not place objects filled with liquids, such as vases on or near the product.
• Do not use or store this product in a place where it is subject to direct sunlight, heat,
excessive dust or vibration.
• Do not use this product with wet hands.
• Do not clean this product with water or other liquids.
• Do not block or cover the slots and holes in the product.
• Do not push foreign objects into the slots or holes in the product.
• Do not attempt to open this product yourself. There are no user serviceable parts inside.
• Do not allow children access to plastic bags.
SAFETY WARNINGS
• Before using this product, read and follow all warnings and instructions.
• This product is not inten ded for use by young children. Young children should be properly
supervised.
• This product is intended for household use only and not for commercial or industrial use.
• Do not expose to dripping or splashing.
• No naked flame sources, such as lighted candles, should be placed on the product.
• Ventilation should not be impeded by covering ventilation openings with items such as
newspapers, table cloths, curtains and the like.
• Make sure the unit is adjusted to a stable position. Damage caused by using this product in
an unstable position or by failure to follow any other warning or precaution contained within
this user manual will not be covered by warranty.
We, suggests retaining the packaging in case for future transport of the product.
If at any time in the future you should need to dispose of this product please note that: All batteries
and accumulators need to be removed from this product (Removal of Waste Batteries and
Accumulators).
WARNING: Prolonged exposure to loud sounds from personal music players may
lead to temporary or permanent hearing loss. When participating in the traffic
listening to a personal music player can make the listener less aware of potential
dangers such as approaching cars.
English
11
Page 12
English
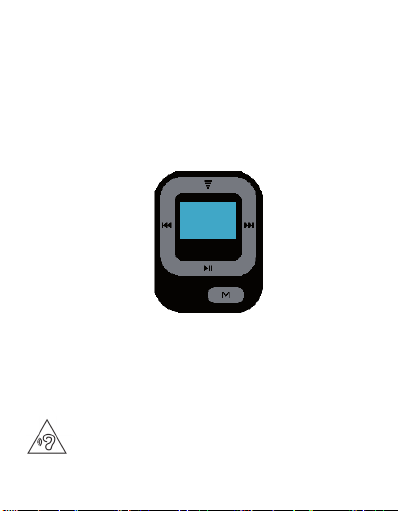
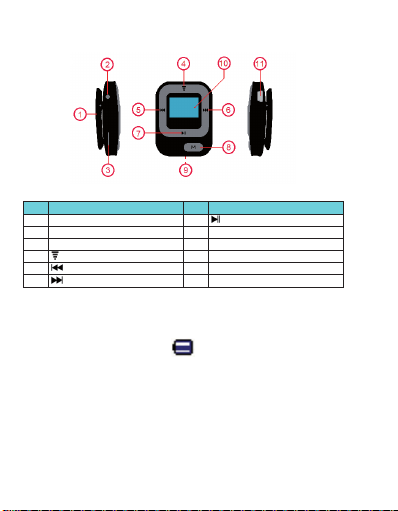
1. Get to know the controls on Player
MPV 1705 SR
Item Description Item Description
1 Clip 7
2 Earphone Output Jack (3.5mm Stereo) 8 M (Menu / Enter / Select)
3 Micro SD Memory Card Slot 9
Button (Volume Control)
4
(Previous / Fast-Rewind / Tune -)
5
(Next / Fast-Forward / Tune +)
6
2. About Player Battery
Player has an internal, non–user-replaceable battery. For best results, the first time you use
player, let it charge for about 2 -3 hours or until the battery status icon in the “Connect” scr een
shows that the battery is in full.
Note: Player continues to use battery power after it’s been turned off, if unit isn’t used for a while,
the battery might need to be charged.
a. Charging the Battery:
You can charge the player battery in two ways:
Connect player to your computer. Or,
Use the USB power charger. (not included)
b. Connection and Charging:
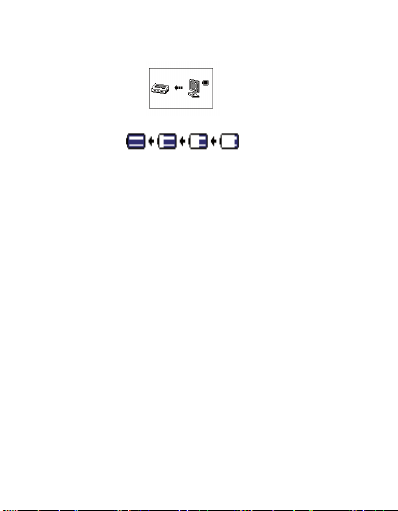
Once you have connected player with computer / power charger, then you will see the
“Connect” screen appear on screen,
12
10 LCD Display
11 Mini USB Port
Battery is in full
(Play / Pause / Power ON - OFF)
Reset Button (
Micro
On the back side)
Page 13
MPV 1705 SR
The level bars are running in batt ery status icon at the “Connect” screen. The batter y is in
charging.
Important: The batter y does not charge when your computer is in sleep. The USB port on most
keyboards does not provide enough power to charge the player. Connect player to a USB 2.0 port
on your computer only to prevent charge problem.
3. Connecting and Disconnecting Player
You can connect the player with your computer to transfer those media files and recorded
voice memos when necessary, and to charge the battery. Disconnect the player when you’re done.
a. To Connecting Player
Plug the USB cable to the Player’s mini USB port and into a USB port on your computer, then
the computer will detect and install the driver automatically. Once the installation is complete
the player will be displayed in “My Computer” or for MAC users on the desktop.
Now the player is ready for media files transfer with your computer and the battery is
charging.
You can transfer the media files by using the computer mouse use drag and place, or copy and
paste, in between the player and your computer. Disconnect it when you’re done.
b. To Disconnecting Player
It’s important not to disconnect player while it’s syncing or transferrin g files. Eject the player
before disconnect it.
To eject player, press and hold M butt on for about 2 seconds, the “Connect” screen will switch
to “Main Menu” screen. And now is safe to disconnect the player with your computer. Unplug
the player from you computer. Or,
If you’re using a Windows PC, you can also eject p layer in My Computer or by clicking the
“Safely Remove Hardware” icon in the Windows system tray, select the correspondence name
of USB Device and choose “Stop” > choose “Confirm” > choose “Confirm” follow by the pop
up windows you’re your computer.
If you’re using a Mac, you can also eject player by dragging the player icon on the desktop to
the Trash.
“Connect” Screen
In Charging
Micro
English
13
Page 14
(always On) / 3 / 6 / 9 / 12 / 15 / 18 / 21 / 24 / 27 / 30 seconds” as you desired by using M and
English
If you accidentally disconnect player without ejecting it, reconnect it to your computer and
sync again. However, some media file may loss.
4. Getting Start the Player
Turn ON / OFF the player and use of Main Menu:
To Turn On the player, press and hold the
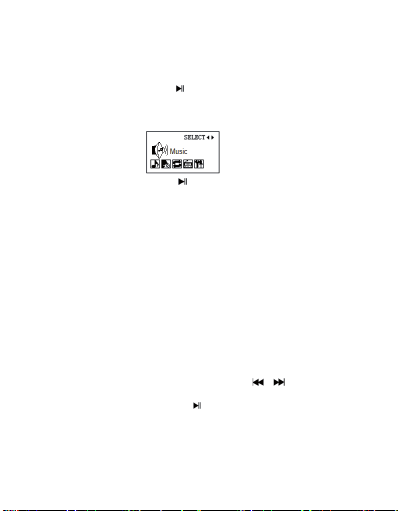
Then, you will see the following shown Main Menu screen (Music / Radio / S ys Set ) will
appear on LCD after the Loading and Opening screen have displayed.
button for 2 – 3 seconds.
“Main Menu” Screen
MPV 1705 SR
To turn OFF the player, press and hold the
5. Use Memory Card Slot
This player allows you to play those support media files from your Micro SD memory card
(T-Flash). Also it will increase the mobile hard disk memory capacity of the player if you use
this option.
a. Play From Memory Card :
Turn Off the player. Now insert your Micro SD memory card into the memory card slot on side
of player.
Turn On the player and now the Micro SD memory card, T-Flash, is ready to use.
The “Card folder” item will be existed to use when you enter in Music mode.
Go into the card folder and choose you desired folder(s) and file(s) to play.
Before to take out the Micro SD memory card from card slot, please turn Off the player.
6. Sys Set Menu
You might need to set date & time or change some default setting as you desired in setup sub
menu before you start to use the player.
To go into setup menu, from main menu, choose “Sys Set” by use
press M button to enter. A “Sys Set” menu appears to use.
You can go back to previous menu by press the
hold the M button to return to main menu.
a. To change “Backlight”
You can set the backlight to illuminate the screen for a certain amount of time as you desired
or make the backlight to always ON when every time you turn ON the player.
To change LCD backlight, choose “Backlight”, a level bar with number appear then choose “0
14
button for 2 – 3 seconds.
/ button and then
button during in setup menu. Or, press and
Page 15
MPV 1705 SR
/ buttons. Choose “0” to prevent the LCD backlight from turning to off. (choosing
this option decrease battery performance).
b. To Change “Language”
This player can use difference OSD languages.
To set the language, choose “Language”, and then choose which language as you desired by
using M and
c. To Set “Power Off”
when you are not using the controls or no operation. Also, Sleep function provided for more choice.
To set power off time, choose “Power off”, then choose “Off time”, a levels bar with number
To set sleep time, choose “Power off”, then choose “Sleep time”, a l evels bar with number
d. To Change “Contrast”
To adjust contrast of display, choose “Contrast”, a level bar with number appear then choose
e. To View “Memory info”
space available and the percentage of memory hav e used.
To view the status, choose “Memory info” by using M and
To return to setup menu or main menu press
f. To View “Firmware Version”
Choose “Firmware version” by using M and
To return to setup menu or main menu, press button or press and hold M button.
g. To “Exit”
Select Exit to back to main menu. Or, press and hold the M button to go back main menu.
7. Music Menu
and MP3 are supported by the player. To open the music player:
From main menu, choose “Music” by using
/ buttons.
The Power Off setting can extend the ti me between battery charges by turning OFF the playe r
menu appear, then choose “0 - 60 seconds” as you want by using M and
menu appear, choose “0 / 10 / 20 /30 / 40 / 50 / 60 / 80 / 90 / 100 / 110 / 120 minutes” as you
want by using M and
level “1 - 10” as you desired by using M and
You can view about the memory status of player, such as the numbers of remaining memory
information screen, remaining memory space avai lable and percentage of memory used,
appear for view.
You might need to view the details about firmware information inside the Player.
appear for view.
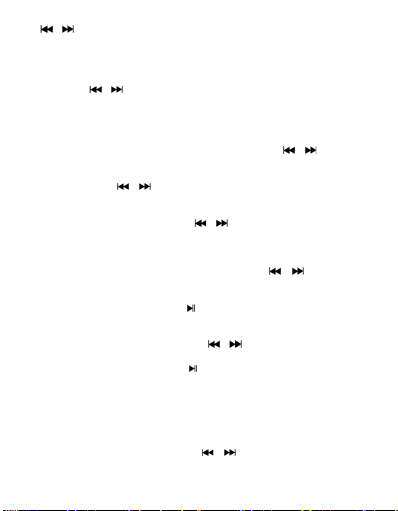
You can use music player to playback with supported music file format of audio coding; WMA
Playing” screen appears to use.
/ buttons.
/ buttons.
button or press and hold M button
/ buttons, an information screen
/ and M button, a “Music Now
“Music Now Playing” Screen
English
/ buttons.
/ buttons. An
15
Page 16
English
MPV 1705 SR
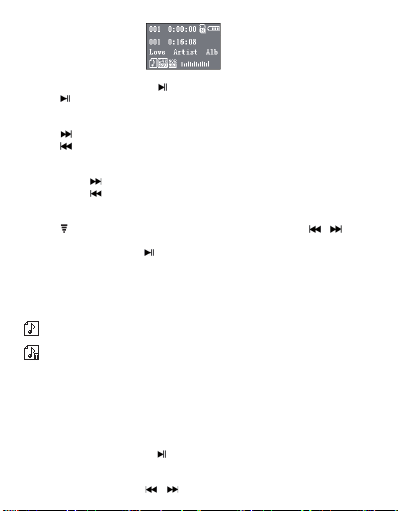
a. To Play Music
In Music Now Playing screen, press
button to pause the playing music. Press it again to play.
Press
b. Play Previous or Next Music
button to play next music.
Press
button to play previous music.
Press
c. Play Fast-backward or Fast-forward
Press and hold
Press and hold
d. Ad just volume level
Press
button to decrease or increase the volume levels as you desired.
Wait for 8 - 10 seconds or press
e. Use Lyric Display
This player supports “*.LRC” lyric files and lyrics can synchronous displayed while playing
music if you music has lyric included. How to know whether the lyrics exist? If the current song has
matching lyric files, the letter “T” will exist beside the music icon:
Music only
Music with Lyric Message
Playing the music with lyrics, and then press and hold M button to enter the lyric display mode
and the lyrics is displaying and moving up accordingly with the playing music.
Press M button to cancel the lyrics display and go back to Music Now Play screen if you want.
8. Use Music Submenu in Music Stop Mode
You might need to selecting folders for music play and delete music files. To do this:
a. Card Folder
In Music Now Playing screen, press
then press M button to call up the Music Submenu.
In Music Submenu screen, choose “Card folder” a list menu appear, and then select folder and
/ or choose a music file by using
16
button to use fast-forward
button to use fast-backward.
button, a levels bar with number menu appear, then press or pressing /
button to return to music now playing screen.
/ and M button.
button to start the pla y.
button to stop the playing music if player is in playing,
Page 17
MPV 1705 SR
It will go back to music now playing screen once a music file is selected. Then press
button to play.
b. Del f ile
In Music Submenu screen, choose “Del file” to delete the current music in Music Now Playing
screen. A dialog box appears to confirm, then choose “Ye s” or “No” by using
button and then press M button to confirm.
c. Del All
In Music Submenu screen, choose “Del all”, a dialog box appears to confirm, then choose
“Yes ” or “No” by using
All music files will be deleted once “YES” is selected and confirmed, a “Deleting” scr een
appear for a while and deleting process is in progress, all music fil es have be deleted, then the
screen will go back to Voice Now Playing screen
d. Exit
Select Exit to back to music now playing screen.
9. Use Play Menu in Music Playing Mode
You might need to do some changes for music playing, such as repeat, EQ settings for music
files… etc. To change setting:
a. To Se t Play mode
In music playing mode, press M button, a play menu appear, then choose “Play Mode”, choose
“Normal / Repeat one / Folder / Repeat folder / Repeat all / Random / In tro” as you
desired by using
b. To Change Equalizer
In music playing mode, press M button, a play menu appear, the choose “Equalizer”, then
choose “Natural / Rock / Pop / Classic / Soft / Jazz / DBB” as you desired.
c. To s et Replay
Set Repeat A-B:
In play menu, press M button, a list menu appear, then choose “Replay”, then a letter “A” is
flashing in Music Now Playing screen, then press
track “A”.
Then a letter “B” is flashing once “A” is selected, use
point of track “B” which you want. And now the A – B distance of track is repeating.
However, the repeating time and the repla y gap time is depend on the set values of Replay
Time and Replay Gap have mentioned in below items.
To create another A – B distance of track to repeat, press
/ button and then press M button to confirm.
/ and M buttons.
button to select the starting point of
English
button again to select the ending
button again and then again. A
/
17
Page 18
English
new created A – B distance of track is repeating.
To cancel the repeat A – B function, press the M button. Or press
d. Set Replay Times:
In music playing mode, press M button, a play menu appear, the choose “Replay times”, then
choose “1 / 2 / 3 / 4 / 5 / 6 / 7 / 8 / 9 / 10” as you desired by using
The Player will replay those music file as your selected number of times accordingly.
e. Set Replay Gap:
In music playing mode, press M button, a play menu appear, the choose “Replay Gap”, then
choose “1 / 2 / 3 / 4 / 5 / 6 / 7/ 8 /9 / 10 second(s)” as you desired by using
buttons. The replay gap time in between music to music or in repeat A- B will replay and stop
according the selected number of time.
f. Exit
Select Exit to back to music now playing screen.
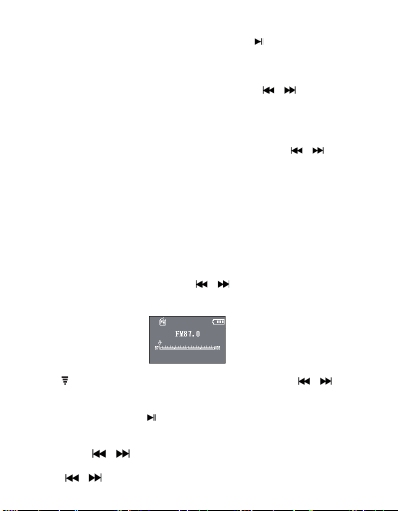
10. FM Radio
This player is use the wire of earphone set as antenna for FM radio, plug in the earphone set
into the earphone output jack.
From main menu, choose “Radio” by using
screen appears to use.
/ and M button, a “ Radio Tune ”
“Radio Tune” Screen
MPV 1705 SR
button to pause.
/ and M buttons.
/ and M
a. Adjust Volu me Lev el
button, a levels bar with number menu appear, then press or pressing /
Press
button to decrease or increase the volume levels as you desired.
Wait for 8 - 10 seconds or press
b. Manual Search Stations
Press and hold
searching will stops and show the next received radio station to listening.
/ button for fine tune the frequency down / up, each press will step down /
Press
up by 0.1MHz.
18
button to return to music now playing screen.
/ button for searching down / up to receive next station. The radio
Page 19
MPV 1705 SR
c. Use Radio Menu
In radio tune screen, press M button to call up the radio menu, a list screen “Save / Record /
Delete / Del All / Auto Search / Normal Band / Japan Band / Exit” is appears to use for few
seconds.
/ button to choose one of them and then press M button to entering.
Press
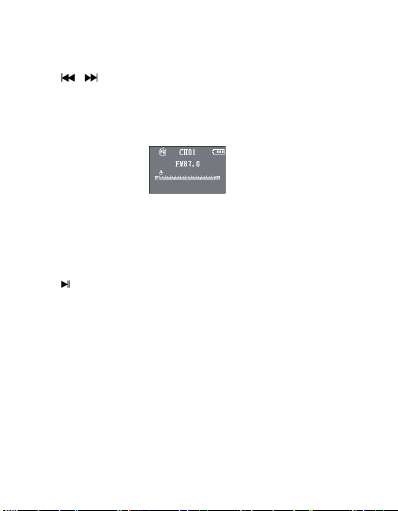
d. Save (save the manual tuned station)
In radio menu, choose “Save” to store the tuned radio station into player’s memory. The tuned
radio station will be stored at the last empty location in channel list internally. The stored
channel number, example CH01, will show on top of the channel frequency.
English
Note: In default internal channel list there have total 20 preset stations, CH01 – CH20, can be used
to store the wanted radio stations.
e. Delete
In radio menu, choose “Delete” to delete the unwanted stations. The current receiving
frequency will be deleted immediately once “Delete” is chosen by using th e M button. The
channel number will switch to the first station CH01 in channel list.
button to find the next unwanted station for delete if you want.
Press
f. Del All
In radio menu, choose “Del All” to delete all stations in channel list. All stored stations will be
deleted immediately once “Del All” is chosen by using the M button. No radio station and
channel number will show in radio tune screen.
g. Auto Search
In radio menu, choose “Auto Search” to enter to auto search and auto preset mode, the radio is
searching stations in the range of frequency “76MHz – 92MHz or 87MHz – 108MHz”.
All found radio stations will be stored at the channel list into player’s memory. The radio
searching will stop and show the first received radio station to listening.
h. Normal Band
To suit your region frequency, choose “Normal Band” to switch the receiving frequency range
to 87MHz – 108MHz. (common for Europe, USA , China area)
Note: All stored stations may be deleted when every time the region has set or changed.
19
Page 20
i. Japan Band
To suit your region frequency, choose “Japan Band” to switch the receiving frequency range
to 76MHz – 92MHz. (common for Japan area)
j. Exit
Choose “Exit” to back to radio tune screen.
k. Change Stored Radio Stations From Channel List
Once you have tuned and stored the radio station into channel list by Manual tune / Auto
Search function, and then you can recall them by press or pressing button.
The channel number (CH01 – CH20) will change up from low number when each time you
press button and the stored radio station will change for listening accordingly.
11. Reset
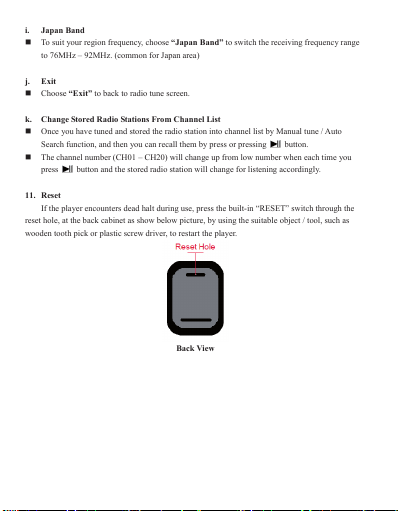
If the player encounters dead halt during use, press the built-in “RESET” switch through the
reset hole, at the back cabinet as show below picture, by using the suitable object / tool, such as
wooden tooth pick or plastic screw driver, to restart the player.
Back View
English
20
MPV 1705 SR
Page 21
MPV 1705 SR
12. Trouble Shooting
Unit cannot turn ON * Check battery is it charged with enough energy.
No sound is heard from headphone. * Check whether Volume is set “0” and con nect the
Characters in LCD are corrupted * Check whether the right language has been
Download of music files fails. * Check whether USB plug is dirty and is
13. Sp ecification
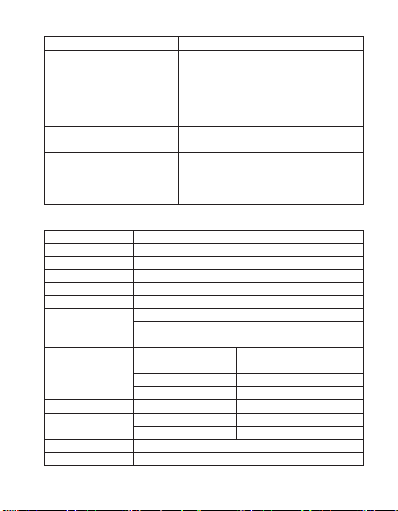
Dimension 52 mm (H) x 38.6 mm (W) x 17.8mm (D) (Approximate)
Weig ht 22g (Approximate)
LCD 20mm x 13mm (B&W), Resolution 128 x 64 dots
PC connection USB 2.0 (High Speed)
Earphone Impedance 32 Ohm
External Memory Slot Micro SD Card (supports up to 32GB)
Battery
Audio
Music Format MP3 32Kbps – 320kbps
FM Radio
Operating Temperature
Operating System Window 2000/XP/Vista/Win 7, Mac 9.2 or above
headphone plugs firmly.
* Check whether the headphone plug is dirty.
* Corrupted MP3 may make a static noise and the
sound may cut off. Make sure that the music files
are not corrupted.
selected.
connected properly.
* Check whether driver is installed correctly.
* Check whether the player’s memory is in full.
Micro Usb 2.0
Li-ion 3.7V, 110mAh
Max. Play Time: 8 - 10 Hours (MP3 music with power saving
mode)
Output Power of Earphone L = 275 mV(rms) at 32 Ohm
Frequency Responses 20Hz to 20000Hz
SNR > 70dB
Normal Band 87 – 108 MHz
Japan Band 76 – 92MHz
0 to 40℃
R = 275 mV(rms) at 32 Ohm
English
21
Page 22
English
WARNING FOR A CORRECT USE OF RECHARGEABLE
BATTERY
- Recharge the battery in an ambient temperature between 5°C and 35°C.
- When the recharge is complete the device shows a message/signal (check
the user’s guide).
- Don’t recharge more than the suitable period to prevent the risk of
overheating and burst.
- Recharging the battery over the suitable period or an extended period
of inactivity may reduce battery duration.
- Rechargeable battery is liable to wear and tear and its performance will
reduce gradually.
- To extend the duration of the battery use it when is completely charged
up to the complete discharging, then recharge it fully before use it again.
Recharge a battery not completely consumed, will result a reduced duration.
In this case, repeat the full charging/discharging cycle many times.
- Avoid recharge the battery for the whole night.
Misuse of the battery may cause explosion or overheating
Warning!
of the battery.
MPV 1705 SR
INFORMATION NOTE ON THE REMOVAL AND
DISPOSAL OF BATTERIES
Warning: Only high-qualified personnel should perform this
operation!
BATTERY REMOVAL
1) Remove the back part of the appliance from cogs;
2) Select the battery;
3) Disconnect and remove the battery.
Used batteries should not be disposed of with household waste or thrown
into re or water. Used batteries should be recycled or disposed of in separate
waste collection centres.
22
Page 23

MPV 1705 SR
USERS INFORMATION pursuant to Legislative Decree
No. 49 of March 14, 2014
“Implementation of Directive 2012/19 / EU on Waste Electrical
and Electronic Equipment (WEEE)”
This wheeled bin symbol on the product indicates that at the end of its life
must be collected separately from other waste. The user must, therefore,
take the remote control integrates the essential components that got to
its life to the appropriate differentiated collection centers for electronic
and electro-technical waste, or return it to the dealer when purchasing a
new appliance of equivalent type, in terms of one to one, or one to zero
for equipment having longer side of less than 25 cm. Appropriate separate
collection for the decommissioned equipment for recycling, processing and
environmentally compatible disposal helps prevent negative impact on the
environment and human health and promotes recycling of the materials
making up the product. Illegal dumping of the product by the user entails
the application of administrative sanctions stated in Legislative Decree n.
Legislative Decree No. 49 of March 14, 2014.
English
23
Page 24

Français
MANUEL DE L’UTILISATEUR
Les informations contenues dans ce document sont sujet à changement sans préavis.
Ce document ne peut pas être reproduit ou transféré, même partiellement, de quelque
manière et par quelque moyen, électronique, mécanique, photocopie, ni copié ou traduit
dans d’autres langues pour n’importe quel but sans autorisation expresse du fabricant.
Noms, dessins et marques de commerce gurant dans ce manuel sont la propriété de
leurs propriétaires respectifs.
Attentivement lire ce mode d’emploi et suivre attentivement les informations suivantes
avant d’utiliser ce produit.
MPV 1705 SR
AVERTISSEMENT POUR UNE UTILISATION CORRECTE DE LA BATTERIE RECHARGEABLE
- La température de recharge doit être comprise entre 5°C et 35°C.
- Quand la recharge est complète, cela est indiqué par un message (Contrôlez
le manuel d’utilisation)
- Ne prolongez pas la recharge plus du temps indiqué pour éviter le risque
de surchauffement et explosion.
- Recharger la batterie plus du temps indiques ou temps prolongés de
inactivité peuvent diminuer la durée de la batterie.
- La batterie rechargeable est susceptible à l’usure et sa capacité diminue
graduellement
- Pour prolonger la durée de la batterie, utilisez-le jusqu’à quand elle est
complètement déchargée, ensuite rechargez-le complètement avant de
l’utiliser une autre fois. Recharger une batterie pas complètement déchargée
peut diminuer sa capacité. Dans ce cas, répétez le cycle charge/décharge
plusieurs fois.
- Evitez de recharger la batterie pour toute la nuit.
Utilisation abusive de la batterie peut provoquer une explosion
24
Attention!
ou une surchauffe de la même.
Page 25
MPV 1705 SR
Pour éviter d’éventuels dommages auditifs, limiter le temps d’écoute à
volume élevé.
DESCRIPTION ET FONCTIONS CLÉS
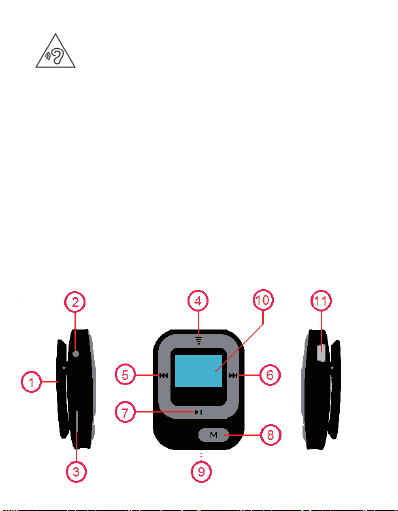
1. Pince à ressort
2. Prise pour casque.
3. microSD Card
4. Volume
5. I<< PREV
6. >>I NEXT
7. >II PLAY/PAUSA / Alimentation marche/arrêt
8. MENU
9. RESET (sur la face arrière)
10. Afchage
11. Micro-USB
Français
25
Page 26
Français
CONNEXION À VOTRE PC ET LE TRANSFERT DES
MPV 1705 SR
FICHIERS DANS LE LECTEUR DE CARTE MÉMOIRE
+ RECHARGE DE LA BATTERIE
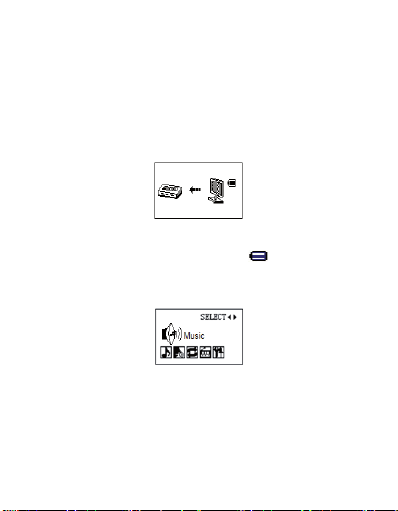
1. Insérez la carte microSD (non incluse) dans le logement correspondant
(3), gardant la surface avec le côté écrit vers le bas, jusqu’à ce que vous
entendiez un clic.
2. Insérez le câble USB fourni dans la prise USB du lecteur (11).
3. Connectez le câble USB à un port USB de votre pc prea. La mémoire de
microSD sera reconnue automatiquement par ordinateur.
4. Copier les chiers audio MP3/WMA de votre ordinateur vers microSD.
5. Dans le même temps, la batterie se rechargera. À la n du chargement,
l’icône de la batterie indique batterie pleine .
6. Pour déconnecter le lecteur de votre pc, appuyez et maintenez le bouton
MENU (8) jusqu’à l’apparition du menu, puis vous pouvez déconnecter le
câble USB.
REMARQUE: Le temps de charge ne doit pas dépasser 2 heures.
Vie de la batterie complètement chargée rôde autour de 4 heures et
demie de lecture en continu.
MARCHE/ARRÊT
1) Appuyez sur la touche PLAY/PAUSA (7) pendant 2 secondes pour allumer le lecteur.
2) Appuyez sur la touche PLAY/PAUSA (7) pendant 2 secondes pour mettre
en mode veille le lecteur.
26
Page 27
MPV 1705 SR
MODE MUSIQUE
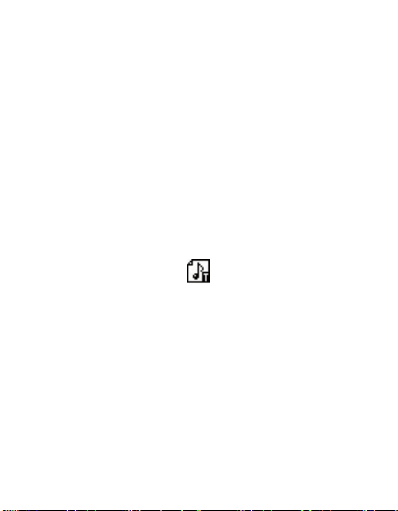
1) Allumez le lecteur et aller en mode MUSIC en appuyant sur PREV (5) ou
NEXT (6).
2) Appuyez sur la touche MENU (8) pour passer en mode MUSIC.
3) Appuyez sur la touche PLAY/PAUSA (7) pour démarrer la lecture.
4) Appuyez sur la touche PLAY/PAUSA (7) pour arrêter temporairement la lecture.
5) Appuyez de nouveau sur la touche PLAY/PAUSA (7) pour revenir en
lecture normale.
6) Appuyez sur la touche PREV (5) pour sélectionner la piste précédente.
7) Appuyez sur la touche NEXT (6) pour sélectionner la chanson suivante.
8) Appuyez sur la touche V (4) pour modier le volume. Appuyez sur la
touche PREV (5) pour diminuer le volume ou a touche NEXT (6) pour
augmenter le volume.
Lyrics
En cas de présence de lyrics (texte de chanson) afchera l’icône dans le coin
inférieur gauche comme ci-dessous:
1) Appuyez et maintenez sur la touche MENU (8) pour afcher le texte de la chanson.
2) Appuyez sur la touche MENU (8) pour revenir à l’afchage du mode MUSIC.
REMARQUE: la présence de lyrics se caractérise par la présence
du chier nom_de_chier.LRC, où nom_de_chier représente le
nom_de_chier MP3. Le chier LRC doit être au même endroit du
chier MP3.
Français
MENU MODE MUSIQUE
Appuyez sur la touche MENU (8) pour arrêter la lecture.
Card folder: sélectionner la plage souhaitée ou un dossier en utilisant le
bouton PREV (3) ou NEXT (7) et validez avec la touche MENU (8).
Delete le: supprime le chier sélectionné.
Delete all: supprimez tous les chiers.
Exit: quitter le menu et retourner à la liste des chansons.
27
Page 28

Français
Pendant la lecture, appuyez sur la touche MENU (8).
Repeat: sélectionnez le mode de lecture. Vous pouvez choisir entre sept
modes de répétition: Normal, Repeat One (répéter la voie unique), Folder,
Repeat Folder, Repeat all (répéter toutes les pistes), Random, Intro (reproduction des 10 premières secondes de chaque plage).
Equalizer: sélectionnez l’égaliseur audio. Vous pouvez choisir entre sept
modes EQ: Normal, Rock, Pop, Classic, Soft, Jazz, DBB.
Replay mode - Replay: cette fonction vous permet de répéter un morceau de la piste.
Une fois que vous sélectionnez la fonction, en haut à droite sur l’écran, la lettre
A de l’icône A-B commence à clignoter, indiquant que la fonction est activée.
Appuyez sur la touche NEXT (6) pour démarrer l’enregistrement. Dans le coin
supérieur gauche de l’écran la lettre B de l’icône A-B commence à clignoter.
Appuyez sur la touche NEXT (6) pour arrêter l’enregistrement. Le joueur
va jouer en permanence la gamme de la chanson stockée.
Appuyez sur la touche MENU (8) pour revenir en lecture normale.
Replay mode - Replay times: appuyez sur les touches PREV (5) ou NEXT
(6) pour sélectionner le nombre de fois que vous voulez répéter l’intervalle
de la chanson stockée.
Replay mode - Replay gap: appuyez sur les touches PREV (5) ou NEXT
(6) pour sélectionner l’intervalle en secondes entre la répétition et l’autre.
Exit: quitter le menu et revenir à jouer.
MPV 1705 SR
MODE RADIO
1) Allumez le lecteur et aller en mode RADIO en appuyant sur PREV (5)
ou NEXT (6).
2) Appuyez sur la touche MENU (8) pour passer en mode RADIO.
3) Appuyez sur la touche PLAY/PAUSA (7) pour sélectionner des stations
de radio mémorisées.
4) Appuyez sur la touche PREV (5) pour diminuer la fréquence de 0,1MHz.
5) Appuyez sur la tou che NEXT (6) pour augmenter la fréquence de 0,1MHz.
28
Page 29
MPV 1705 SR
6) Appuyez sur la touche V (4) pour modier le volume. Appuyez sur la
touche PREV (5) pour diminuer le volume ou a touche NEXT (6) pour
augmenter le volume.
Français
MENU MODE RADIO
Appuyez sur la touche MENU (8).
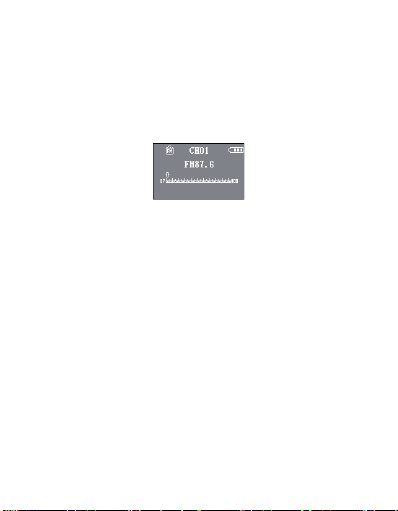
Save: il vous permet de sauvegarder la station de radio désirée. Sur le haut
au centre de l’écran apparaîtra CH suivi du numéro de stockage.
Delete: il vous permet de supprimer l’actuelle station de radio.
Delete all: il vous permet de supprimer tous les la station de radio
mémorisée.
Auto Search: il vous permet de numériser automatiquement les stations
de radio. La station de radio avec la meilleure qualité de signal sont automa-
tiquement sauvegardée. Vous pouvez stocker jusqu’à 20 stations de radio.
Normal Band: il vous permet de choisir l’échelle des stations européenne
(87-108MHz).
Japan Band: il vous permet de choisir l’échelle des stations japonaise
(76-92MHz).
MENU PARAMÈTRES
1) Allumez le lecteur et aller en mode SETTINGS en appuyant sur PREV
(5) ou NEXT (6).
2) Appuyez sur la touche MENU (8) pour passer en mode SETTINGS.
Backlight
Il vous permet d’ajuster la durée en secondes du rétroéclairage de l’écran
(0=toujours allumé).
29
Page 30

Français
Language
Il vous permet de choisir la langue du menu.
Power Off - Off Time
Il permet de régler l’écartement d’inactivité en secondes après lequel le
lecteur s’éteint automatiquement (0=toujours allumé).
Power Off - Sleep Time
Il permet de régler l’écartement d’inactivité en quelques minutes, après quoi
le lecteur s’éteint automatiquement (0 = toujours allumé).
Contrast
Il vous permet d’ajuster le contraste de l’écran.
Memory Info
Il afche la mémoire de microSD.
Firmware Version
Il montre la version du rmware.
MPV 1705 SR
FICHE TECHNIQUE
Système d’exploitation ........... Windows® 2000/XP/Vista/7/8 - Mac OS 9.2
Version USB ..............................Micro USB 2.0
Stockage .................................... Micro SD Card jusqu’à 32GB
Formats audio pris en charge MP3, WMA
Réponse en fréquence ........... 20-20000Hz
Bande de réception: ................87.0-108.0 MHz
..................................................... 76.0-92.0 MHz
Rapport signal/bruit ................ >70dB
Bloc d’alimentation ................. Batterie au Lithium rechargeable via le port USB
Dimensions ............................... 52 mm x 39 mm x 18 mm
30
Page 31
MPV 1705 SR
NOTE D’INFORMATION SUR LE RETRAIT ET
Français
ÉLIMINATION DES BATTERIES
Attention: Seul le personnel de haute qualié doit effectuer cette
opération!
RETRAIT DE LA BATTERIE
1) Retirer le carter inférieur de joints;
2) Trouver la batterie, débrancher et retirer.
Les piles usagées ne doivent pas être jetés avec les déchets ménagers ou jetés
dans le feu ou l’eau. Les batteries usagées doivent être recyclés ou éliminés
dans les centres de collecte de déchets séparés.
UTILISATEURS INFORMATION conformément au décret législatif
n ° 49 du 14 Mars, 2014
“La mise en œuvre de la directive 2012/19 / UE relative aux déchets d’équipements électriques et électroniques (DEEE)”
Ce symbole de poubelle sur roues sur le produit indique que, à la n de sa durée de vie doit
être collecté séparément des autres déchets. L’utilisateur doit donc prendre le contrôle à
distance intègre les éléments essentiels qui ont obtenu à sa vie dans les centres de collecte
différenciés appropriés pour les déchets électroniques et électro-technique, ou le retourner
chez le concessionnaire lors de l’achat d’un nouvel appareil de type équivalent, en termes
de un à un, ou un à zéro pour les équipements ayant plus côté de moins de 25 cm. collecte
séparée appropriée pour l’équipement mis hors service pour le recyclage, le traitement
et l’élimination respectueuse de l’environnement contribue à éviter les effets négatifs sur
l’environnement et la santé humaine et favorise le recyclage des matériaux qui composent
le produit. le dumping illégal du produit par l’utilisateur entraîne l’application des sanctions
administratives prévues par le décret législatif n. Décret législatif n ° 49 du 14 Mars 2014.
31
Page 32

Deutsch
BENUTZERHANDBUCH
In diesem Dokument enthaltene Informationen ist ohne vorherige Ankündigung
vorbehalten.
IDieses Dokument darf nicht reproduziert oder übertragen, auch nur teilweise, in
keiner Weise und mit welchen Mitteln, elektronisch oder mechanisch, fotokopiert, noch
kopiert oder anderen Zwecken ohne ausdrückliche Genehmigung vom Hersteller in
andere Sprachen übersetzt.
Namen, Designs und in diesem Handbuch enthaltenen Marken sind Eigentum ihrer
jeweiligen Inhaber.
Sorgfältig lesen Sie diese Bedienungsanleitung und befolgen Sie sorgfältig die folgende
Informationen, bevor Sie dieses Produkt verwenden.
MPV 1705 SR
HINWEISE FÜR DEN KORREKTEN GEBRAUCH DER
AUFLADBAREN BATTERIE
- Die Ladung der Batterie sollte bei einer Temperatur zwischen 5°C und 35°C erfolgen.
- Der Abschluss des Ladevorgangs wird mit einer Meldung angezeigt (siehe Bedie-
nungshandbuch).
- Die Ladezeit sollte die angegebenen Zeiten nicht überschreiten, um die Gefahr der
Überhitzung und Explosion zu vermeiden.
- Die Ladung der Batterie über die angegebenen Zeiträume hinaus oder eine längere
Nichtbenutzung können deren Lebensdauer reduzieren.
- Die auadbare Batterie ist ein Verschleißteil, ihre Ladekapazität reduziert sich allmählich.
- Um die Lebensdauer der Batterie zu erhöhen, sollte diese stets komplett aufgeladen
und vollständig entleert werden. Vor der erneuten Benutzung sollte sie wieder komplett
aufgeladen werden. Wird eine nicht vollständig entleerte Batterie aufgeladen, so wird
deren Ladeautonomie reduziert. In diesem Falle sollte der Zyklus der vollständigen
Ladung/Entleerung mehrmals wiederholt werden.
- Der Ladevorgang über die ganze Nacht sollte vermieden werden.
Missbrauch der Batterie kann Explosion oder der gleichen
32
Achtung!
Überhitzung verursachen.
Page 33
MPV 1705 SR
Um Hörschäden zu vermeiden, begrenzen Sie die Zeit bei hoher Lautstärke zu hören.
Deutsch
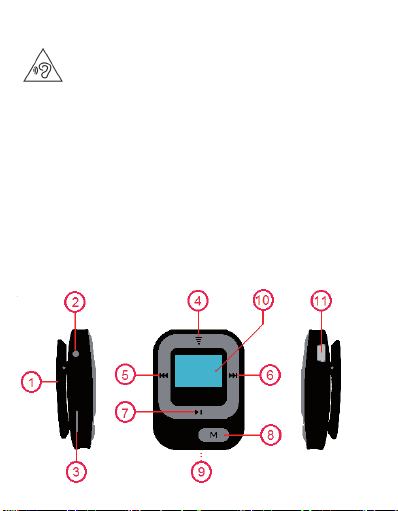
TASTEN BESCHREIBUNG UND FUNKTIONEN
1. Federklemme
2. Kopfhörer-Buchse
3. microSD Card
4. Volume
5. I<< PREV
6. >>I NEXT
7. >II PLAY/PAUSA / Ein-/ausschalten
8. MENU
9. RESET (auf der Rückseite)
10. Display
11. Micro-USB
33
Page 34
Deutsch
HERSTELLEN EINER VERBINDUNG ZU IHREM PC
MPV 1705 SR
UND ÜBERTRAGEN VON DATEIEN IM
SPEICHERKARTEN-LESEGERÄT +
BATTERIE AUFLADEN
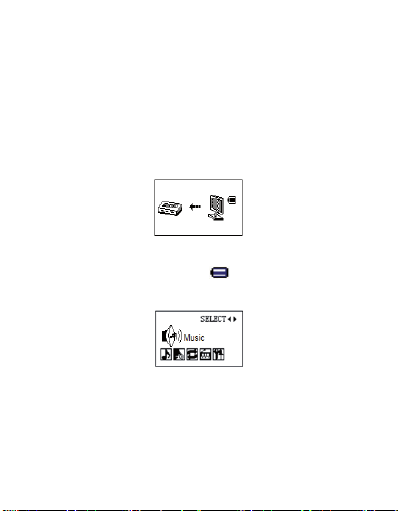
1. Legen Sie die MicroSD (nicht enthalten) in den Steckplatz zur Verfügung
gestellt (3), halten die Oberäche mit der schriftlichen Seite nach unten,
bis Sie ein Klicken hören.
2. Legen Sie das mitgeliefer te USB-Kabel in die USB-Buchse des Players (11).
3. Schließen Sie das USB-Kabel an einen USB-Port Ihres pc-Prea. Die Erin-
nerung an MicroSD wird automatisch vom Computer erkannt.
4. Kopieren Sie die MP3/WMA-Audiodateien von Ihrem Computer auf microSD.
5. Gleichzeitig wird die Batterie aufgeladen werden. Am Ende der Erhebung
zeigt das Akkusymbol volle Batterie .
6. Um den Player vom pc zu trennen, drücken Sie und halten Sie die MENU-Taste
(8) bis zum Erscheinen des Menüs, und Sie können das USB-Kabel trennen.
HINWEIS: Die Ladezeit sollte 2 Stunden nicht überschreiten.
Lebensdauer der Batterie ist vollständig aufgeladen geht um 4 und
eine halbe Stunden kontinuierliche Wiedergabe.
EINSCHALTEN AUSSCHALTEN
1) Drücken Sie die Taste PLAY/PAUSA (7) für 2 Sekunden, um den Player zu aktivieren.
2) Drücken Sie die Taste PLAY/PAUSA (7) für 2 Sekunden, im Standby-Modus
den Spieler setzen.
34
Page 35
MPV 1705 SR
MUSIKMODUS
1) Schalten Sie den Player und gehen im MUSIC-Modus durch Drücken der
PREV (5) oder NEXT (6).
2) Drücken Sie die MENU-Taste (8) in den MUSIC-Modus.
3) Drücken Sie die PLAY/PAUSA-Taste (7) zum Starten der Wiedergabe.
4) Drücken Sie die PLAY/PAUSA-Taste (7) vorübergehend stoppen der Wiedergabe.
5) Drücken Sie erneut PLAY/PAUSA-Taste (7) um zur normalen Wiedergabe
zurückzukehren.
6) Drücken Sie die PREV-Taste (5) um die vorherigen Titel.
7) Drücken Sie die NEXT-Taste (6) um den nächsten Titel.
8) Drücken Sie die V-Taste (4) um die Lautstärke. Drücken Sie die PREV-
Taste (5) um die Lautstärke zu verringern oder NEXT-Taste (6) um die
Lautstärke zu erhöhen.
Lyrics
Bei Vorhandensein von Lyrics (Liedtext) zeigt das Symbol in der linken
unteren Ecke als unten:
1) Drücken Sie und halten Sie die MENU-Taste (8) den Text des Liedes angezeigt.
2) Drücken Sie die MENU-Taste (8) um die Musik-Modus-Anzeige wieder.
HINWEIS: das Vorhandensein von songtexte / / das Vorhandensein
der Dateiname.LRC, zeichnet sich durch wobei Dateiname für
den Namen der MP3-Datei steht. Die LRC-Datei muss am selben
Speicherort der MP3-Datei.
Deutsch
MODUS MENÜ “MUSIK”
Drücken Sie die MENU-Taste (8) zum Stoppen der Wiedergabe.
Card folder: wählen Sie den gewünschten Titel oder Ordner mithilfe der
PREV (3) oder NEXT (7) und bestätigen Sie mit MENU-Taste (8).
Delete le: löscht die ausgewählte Datei.
Delete all: löschen Sie alle Dateien.
Exit: das Menü zu verlassen und zurück zur Liste der Lieder.
35
Page 36

Deutsch
Während der Wiedergabe drücken Sie die MENU-Taste (8).
Repeat: Wählen Sie im Wiedergabemodus. Sie können zwischen sieben wiederholen Modi auswählen.: Normal, Repeat One (Einzelne Titel wiederholen),
Folder, Repeat Folder, Repeat all (Alle Titel wiederholen), Random, Intro
(Reproduktion der ersten 10 Sekunden jedes Tracks).
Equalizer: Wählen Sie den audio-Equalizer. Sie können zwischen sieben
EQ-Modi auswählen.: Normal, Rock, Pop, Classic, Soft, Jazz, DBB.
Replay mode - Replay: Mit dieser Funktion können Sie ein Stück der
Strecke.
Sobald Sie die Funktion in der oberen rechten Ecke auf dem Display auswählen,
startet der Buchstabe A für das A-B-Symbol blinkt, darauf hinweist, dass die
Funktion aktiv ist.
Drücken Sie die NEXT-Taste (6) um die Aufzeichnung zu starten. In der
oberen linken Ecke des Displays blinkt der Buchstabe B das A-B-Symbol.
Drücken Sie die NEXT-Taste (6) um die Aufzeichnung zu stoppen. Der Spieler
spielt kontinuierlich den Bereich des Liedes gespeichert.
Drücken Sie die MENU-Taste (8) um zur normalen Wiedergabe zurückzukehren.
Replay mode - Replay times: Drücken Sie die Tasten PREV (5) oder
NEXT (6), um auszuwählen, wie oft Sie das Intervall des gespeicherten Songs
wiederholen möchten.
Replay mode - Replay gap: Drücken Sie die Tasten PREV (5) oder NEXT
(6) um die Lücke zwischen einer Wiederholung und das andere in Sekunden.
Exit: das Menü zu verlassen und zurück zu spielen.
MPV 1705 SR
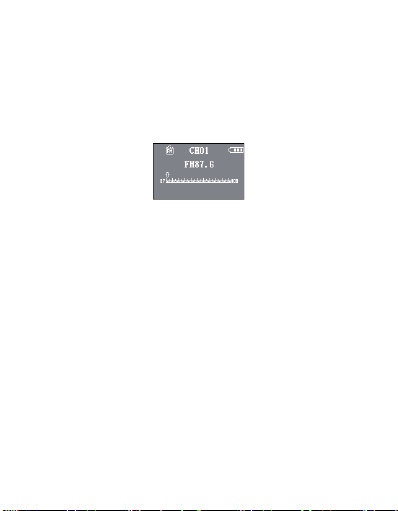
RADIO-MODUS
1) Schalten Sie den Player und gehen im RADIO-Modus durch Drücken der
PREV (5) oder NEXT (6).
2) Drücken Sie die MENU-Taste (8) in den RADIO-Modus.
3) Drücken Sie die PLAY/PAUSA-Taste (7) gespeicherte Radiosender
auswählen.
4) Drücken Sie die PREV-Taste (5) um die Frequenz von 0,1MHz zu verringern.
5) Drücken Sie die NEXT-Taste (6) um die Häugkeit von 0,1 MHz erhöht.
36
Page 37
MPV 1705 SR
6) Drücken Sie die V-Taste (4) um die Lautstärke. Drücken Sie die PREV-
Taste (5) um die Lautstärke zu verringern oder NEXT-Taste (6) um die
Lautstärke zu erhöhen.
Deutsch
MODUS MENÜ “RADIO”
Drücken Sie die MENU-Taste (8).
Save: Es können Sie den gewünschten Radiosender speichern. Auf oben in
der Mitte des Displays erscheint CH gefolgt von der Nummer des Speichers.
Delete: Es erlaubt Ihnen, den aktuellen Radiosender löschen.
Delete all: Es erlaubt Ihnen, alle gespeicherten Radiosender löschen.
Auto Search: Es erlaubt Ihnen, die Radiosender automatisch überprüft. Der
Radiosender mit dem besten Signal wird automatisch gespeichert. Sie können
bis zu 20 Radiosender speichern.
Normal Band: Es ermöglicht Ihnen, wählen die europäischen tuning-Skala
(87-108MHz).
Japan Band: Es ermöglicht Ihnen, wählen die japanischen tuning-Skala
(76-92MHz).
MENÜ “EINSTELLUNGEN”
1) Schalten Sie den Player und gehen im SETTINGS-Modus durch Drücken
der PREV (5) oder NEXT (6).
2) Drücken Sie die MENU-Taste (8) in den SETTINGS-Modus.
Backlight
Es ermöglicht Ihnen, die Dauer in Sekunden für die Hintergrundbeleuchtung
des Displays anpassen (0=immer eingeschaltet).
37
Page 38

Deutsch
Language
Es ermöglicht Ihnen die Auswahl die Menüsprache.
Power Off - Off Time
Es ermöglicht Ihnen, die Lücke der Inaktivität in Sekunden anpassen, woraufhin
der Spieler automatisch abgeschaltet (0=immer eingeschaltet).
Power Off - Sleep Time
Es können Sie die Lücke der Inaktivität in Minuten einstellen, woraufhin der
Spieler automatisch abgeschaltet (0 = immer eingeschaltet).
Contrast
Es können Sie den Kontrast des Displays einstellen.
Memory Info
Es zeigt den Speicher, microSD.
Firmware Version
Es zeigt die Firmware-version.
MPV 1705 SR
TECHNISCHE DATEN
Betriebssystem......................... Windows® 2000/XP/Vista/7/8 - Mac OS 9.2
USB-Version .............................Micro USB 2.0
Speicher ..................................... Micro SD Card bis zu 32GB
Unterstützte Audioformate ..MP3, WMA
Frequenzgang ........................... 20-20000Hz
Empfangsband: ..........................87.0-108.0MHz
..................................................... 76-92 MHz
SIGNAL-/Rauschabstand ....... >70dB
Netzteil ...................................... Lithium-Akku über USB-port
Abmessungen ........................... 52 mm x 39 mm x 18 mm
38
Page 39
MPV 1705 SR
INFORMATIONEN HINWEIS AUF DIE ENTFERNUNG
Deutsch
UND ENTSORGUNG VON BATTERIEN
Achtung: Nur qualitativ qualiziertes Personal darf diese Operation
durchzuführen!
BATTERIE AUSBAUEN
1) Das untere Gehäuse aus Fugen entfernen;
2) Suchen Sie den Akku, trennen Sie sie und entfernen Sie es.
Verbrauchte Batterien gehören nicht in den Hausmüll entsorgt werden oder
in Feuer oder Wasser geworfen. Gebrauchte Batterien müssen recycelt oder
in separaten Sammelstellen entsorgt werden.
Benutzer Information gemäß Gesetzesdekret Nr 49 von 14, März
2014
“Die Umsetzung der Richtlinie 2012/19 / EU über die Entsorgung von Elektround Elektronik-Altgeräte (WEEE)”
Dieses Mülleimers Symbol auf dem Produkt zeigt an, dass muss am Ende seines Lebens
von anderen Abfällen getrennt gesammelt werden. Der Benutzer muss daher nehmen
die Fernbedienung die wesentlichen Komponenten integriert, die für elektronische und
elektrotechnische Abfälle in die entsprechenden differenzierten Sammelstellen zu seinem
Leben bekam, oder es an den Händler zurückgeben, wenn ein neues Gerät gleichwertiger
Art Kauf in Bezug auf 12.59, oder eine für Geräte mit längeren Seite von weniger als 25 cm
auf Null. Die angemessene, getrennte Sammlung für die stillgelegte Anlagen für Recycling,
Aufbereitung und umweltgerechte Entsorgung trägt dazu bei, die Umwelt und die menschliche
Gesundheit negative Auswirkungen zu vermeiden und begünstigt das Recycling der Materialien das Produkt zusammengesetzt. Illegal Dumping des Produkts durch den Benutzer bringt
die Anwendung von Verwaltungssanktionen in Lgs angegeben. Dekr 49 von 14. März 2014.
39
Page 40

Español
MANUAL DE USUARIO
La información contenida en este documento está sujeta a cambios sin previo aviso.
Este documento no puede ser reproducido o transferido, aunque sea parcialmente, en
cualquier forma y por cualquier medio, electrónico, mecánico, fotocopiado, ni copiados o
traducidos a otros idiomas para ningún propósito sin autorización expresa del fabricante.
Nombres, diseños y marcas registradas contenidas en este manual son propiedad de
sus respectivos propietarios.
Cuidadosamente Lea y siga cuidadosamente la siguiente información antes de usar
este producto.
MPV 1705 SR
COMO UTILIZAR CORECTAMENTE LA BATERIA
RECARGABLE
- Recargar la baterìa en un ambiente de temperatura compresa entre 5°C y 35°C.
- Un mensaje avisarà cuando la recarga serà completa. (Controlar el manual de
instrucciones).
- No alargar la recarga màs del tiempo indicado para evitar riesgos de recalenta-
miento o de explosiòn.
- Cargar la baterìa por màs del tiempo aconsejado o un largo periodo de inactividad
pueden perjudicarne la duraciòn.
- La baterìa recargable està sometida a desgasto y su capacidad se reduce pro-
gresivamente.
- A n de prolongar la duraciòn de la baterìa utilizarla desde cuando es completa-
mente carga hasta su completa descarga, luego recargarla completamente de nuevo
antés de utilizarla. Si se pone en carga una baterìa que no està completamente
descargada, su duraciòn serà reducida. En esto caso repetir el ciclo carga/descarga
completo màs veces.
- Evitar de poner en carga la baterìa por toda la noche.
Uso incorrecto de la batería puede causar explosión o
sobrecalentamiento de las mismas.
40
Atención!
Page 41
MPV 1705 SR
Para evitar posibles daños a la audición, limitar el tiempo de escuchar a un
volumen alto.
Español
DESCRIPCIÓN Y FUNCIONES DE LAS TECLAS
1. Clip de resorte
2. Toma de auriculares
3. microSD Card
4. Volumen
5. I<< PREV
6. >>I NEXT
7. >II PLAY/PAUSA / Encendido On/Off
8. MENU
9. RESET (en la parte trasera)
10. Pantalla
11. Micro-USB
41
Page 42
Español
CONEXIÓN A SUS PC Y LA TRANSFERENCIA DE
MPV 1705 SR
ARCHIVOS EN EL LECTOR DE TARJETAS DE
MEMORIA + RECARGA DE LA BATERÍA
1. Inserte la microSD (no incluida) en la ranura (3), manteniendo la supercie
con el lado escrito hacia abajo, hasta que oiga un clic.
2. Inserte el cable USB suministrado en el conector USB del reproductor
(11).
3. Conecte el cable USB a un puerto USB de su pc prea. La memoria de
microSD será reconocida automáticamente por la computadora.
4. Copiar los archivos de audio MP3/WMA desde la computadora a microSD.
5. Al mismo tiempo volver a cargar la batería. Al nal de la carga, el icono
de batería mostrará batería llena .
6. Para desconectar el reproductor del ordenador, pulse y mantenga pul-
sado el botón MENU (8) hasta la aparición del menú, y luego ya puede
desconectar el cable USB.
NOTA: El tiempo de carga no debe exceder 2 horas.
Duración de la batería completamente cargada rondas alrededor de
4 horas y media de reproducción continua.
ENCENDIDO ON/OFF
1) Presione el botón PLAY/PAUSA (7) durante 2 segundos encender el reproductor.
2) Presione el botón PLAY/PAUSA (7) durante 2 segundos para poner el
reproductor en modo stand-by.
42
Page 43
MPV 1705 SR
MODO DE LA MÚSICA
1) Encienda el reproductor e ir en el modo MUSIC apretando la PREV (5)
o NEXT (6).
2) Pulse el botón MENU (8) para entrar en el modo MUSIC.
3) Pulse el botón PLAY/PAUSA (7) para iniciar la reproducción.
4) Pulse el botón PLAY/PAUSA (7) para detener temporalmente la reproducción.
5) Presione nuevamente el botón PLAY/PAUSA (7) para volver a la repro-
ducción normal.
6) Pulse el botón PREV (5) para seleccionar la pista anterior.
7) Pulse el botón NEXT (6) para seleccionar la pista siguiente.
8) Pulse el botón V (4) para cambiar el volumen. Pulse el botón PREV (5) para
disminuir el volumen o el botón NEXT (6) para aumentar el volumen.
Lyrics
En caso de presencia de lyrics (texto de la canción) mostrará el icono en la
esquina inferior izquierda de la siguiente:
1) Presione y mantenga presionado el botón MENU (8) para mostrar el
texto de la canción.
2) Presione el botón MENU (8) para volver a la pantalla de modo MUSIC.
NOTA: la presencia de letras se caracteriza por la presencia del
archivo nombre_de_archivo.LRC, donde nombre_de_archivo es el
nombre del archivo MP3. El archivo LRC debe estar en la misma
ubicación del archivo MP3.
Español
MENÚ DE MODO DE MÚSICA
Pulse el botón MENU (8) para detener la reproducción.
Card folder: seleccione la carpeta o la pista que desee utilizando el botón
PREV (3) o NEXT (7) y conrme con el botón MENU (8).
Delete le: elimina el archivo seleccionado.
Delete all: elimine todos los archivos.
Exit: salir del menú y volver a la lista de canciones.
43
Page 44

Español
Durante la reproducción, pulse el botón MENU (8).
Repeat: seleccione el modo de reproducción. Puede elegir entre siete modos de repetición: Normal, Repeat One (repetir pista única), Folder, Repeat
Folder, Repeat all (repetir todas las pistas), Random, Intro (reproducción de
los primeros 10 segundos de cada pista).
Equalizer: seleccione el ecualizador de audio. Puede elegir entre siete modos
de ecualización: Normal, Rock, Pop, Classic, Soft, Jazz, DBB.
Replay mode - Replay: Esta función le permite repetir un pedazo de la pista.
Una vez que se selecciona la función, en la esquina superior derecha de
la pantalla, la letra A del icono A-B empieza a parpadear, indicando que la
función está activa.
Pulse el botón NEXT (6) para iniciar el registro. En la esquina superior
izquierda de la pantalla parpadea la letra B del icono A-B.
Pulse el botón NEXT (6) para detener la grabación. El reproductor reproducirá continuamente la gama de la canción almacenada.
Pulse el botón MENU (8) para volver a la reproducción normal.
Replay mode - Replay times: Presione las teclas PREV (5) o NEXT (6)
para seleccionar cuántas veces que desea repetir el intervalo de la canción
almacenado.
Replay mode - Replay gap: Presione las teclas PREV (5) o NEXT (6) para
seleccionar la brecha en segundos entre una repetición y el otro.
Exit: salir del menú y volver a jugar.
MPV 1705 SR
MODO DE RADIO
1) Encienda el reproductor e ir en el modo RADIO apretando la PREV (5)
o NEXT (6).
2) Pulse el botón MENU (8) para entrar en el modo RADIO.
3) Pulse el botón PLAY/PAUSA (7) para seleccionar emisoras almacenadas.
4) Pulse el botón PREV (5) para disminuir la frecuencia de 0,1MHz.
5) Pulse el botón NEXT (6) para aumentar la frecuencia de 0,1MHz.
6) Pulse el botón V (4) para cambiar el volumen. Pulse el botón PREV (5) para
disminuir el volumen o el botón NEXT (6) para aumentar el volumen.
44
Page 45
MPV 1705 SR
MENÚ DE MODO DE RADIO
Pulse el botón MENU (8).
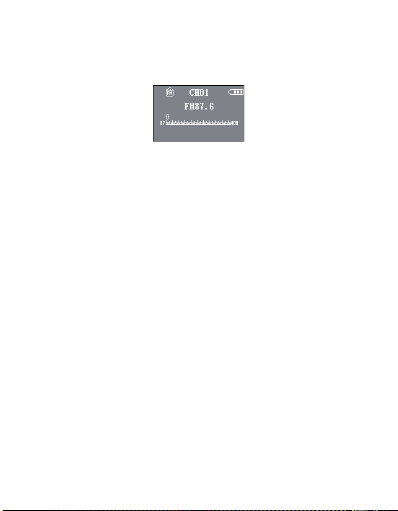
Save: permite guardar la emisora deseada. En la parte central superior de la
pantalla aparecerá CH seguido del número de almacenamiento.
Delete: permite eliminar la actual estación de radio.
Delete all: permite eliminar toda la emisora almacenada.
Auto Search: permite escanear automáticamente las emisoras de radio. La
emisora de radio con la mejor señal se almacenarán automáticamente. Puede
almacenar hasta 20 emisoras de radio.
Normal Band: le permite seleccionar la escala de sintonización Europea
(87-108MHz).
Japan Band: le permite seleccionar la escala de sintonización Japonés
(76-92MHz).
Español
MENÚ DE CONFIGURACIÓN
1) Encienda el reproductor e ir en el modo SETTINGS apretando la PREV
(5) o NEXT (6).
2) Pulse el botón MENU (8) para entrar en el modo SETTINGS.
Backlight
Le permite ajustar la duración en segundos de la retroiluminación de la
pantalla (0=siempre encendido).
Language
Le permite elegir el idioma del menú.
Power Off - Off Time
Le permite ajustar la separación de inactividad en segundos después de que
el jugador se apagará automáticamente (0=siempre encendido).
45
Page 46

Español
Power Off - Sleep Time
Le permite ajustar la separación de inactividad en minutos después de lo cual
el jugador se apagará automáticamente (0 = siempre encendido).
Contrast
Le permite ajustar el contraste de la pantalla.
Memory Info
Muestra la memoria de microSD.
Firmware Version
Muestra la versión del rmware.
MPV 1705 SR
ESPECIFICACIONES TÉCNICAS
Sistema operativo .................... Windows® 2000/XP/Vista/7/8 - Mac OS 9.2
Versión USB ..............................Micro USB 2.0
Almacenamiento de información Micro SD Card hasta 32GB
Formatos de audio compatibles MP3, WMA
Respuesta de frecuencia ........ 20-20000Hz
Banda de recepción: ................ 87.0-108.0 MHz
..................................................... 76.0-92.0 MHz
S/N Ratio ................................... >70dB
Fuente de alimentación .......... Batería de litio recargable mediante puerto USB
Dimensiones ............................. 52 mm x 39 mm x 18 mm
46
Page 47
MPV 1705 SR
NOTA INFORMATIVA SOBRE LA ELIMINACIÓN Y
Español
TRATAMIENTO DE LAS PILAS
Advertencia: Sólo el personal de alta cualicación deberían poder
realizar esta operación!
REMOCIÓN DE LA BATERÍA
1) Retire la carcasa inferior de las articulaciones;
2) Localice la batería, desconecte y retírela.
Las pilas usadas no se deben tirar con la basura doméstica o arrojados al
fuego o al agua. Las baterías usadas deben reciclarse o desecharse en centros
de recogida de residuos separados.
Usuarios de la información de conformidad con el Decreto Legislativo N ° 49 del 14 de marzo 2014
“Aplicación de la Directiva 2012/19 / UE sobre residuos de aparatos eléctricos
y electrónicos (RAEE)”
Este símbolo de contenedor de ruedas en el producto indica que al nal de su vida útil debe
ser recogido separadamente de los demás residuos. El usuario debe, por lo tanto, tomar
el control remoto integra los componentes esenciales que llegaron a su vida útil a los
centros adecuados de recogida de residuos electrónicos y electrotécnicos, o devolverlo al
distribuidor al comprar un nuevo aparato de tipo equivalente, en términos de uno a uno, o
uno a cero para el equipo que tiene lado más largo de menos de 25 cm. la recogida selectiva
apropiado para el equipo fuera de servicio para su reciclaje, tratamiento y eliminación
ambientalmente compatible ayuda a prevenir el impacto negativo sobre el medio ambiente
y la salud, favoreciendo el reciclaje de los materiales que componen el producto. el vertido
ilegal del producto por parte del usuario implica la aplicación de sanciones administrativas
establecidas en el Decreto Legislativo n. Decreto Legislativo N ° 49 de 14 de marzo de 2014.
47
Page 48
DICHIARAZIONE DI CONFORMITÀ UE SEMPLIFICATA
Il fabbricante TREVI dichiara che il tipo di apparecchiatura radio MPV 1705 SR è
conforme alla direttiva 2014 / 53 / UE.
Il testo completo della dichiarazione di conformità EU è disponibile al seguente indirizzo
Internet www.trevi.it
SIMPLIFIED EU DECLARATION OF CONFORMITY
Hereby TREVI Spa declares that the radio equipment type MPV 1705 SR is in
The full text of the EU declaration of conformity is available at the following internet
compliance with directive 2014 / 53 / EU.
address www.trevi.it
Trevi S.p.A. - Strada Consolare Rimini-San Marino, 62
47924 Rimini (RN) Italy www.trevi.it - [email protected]
MADE IN CHINA
 Loading...