

Page 1
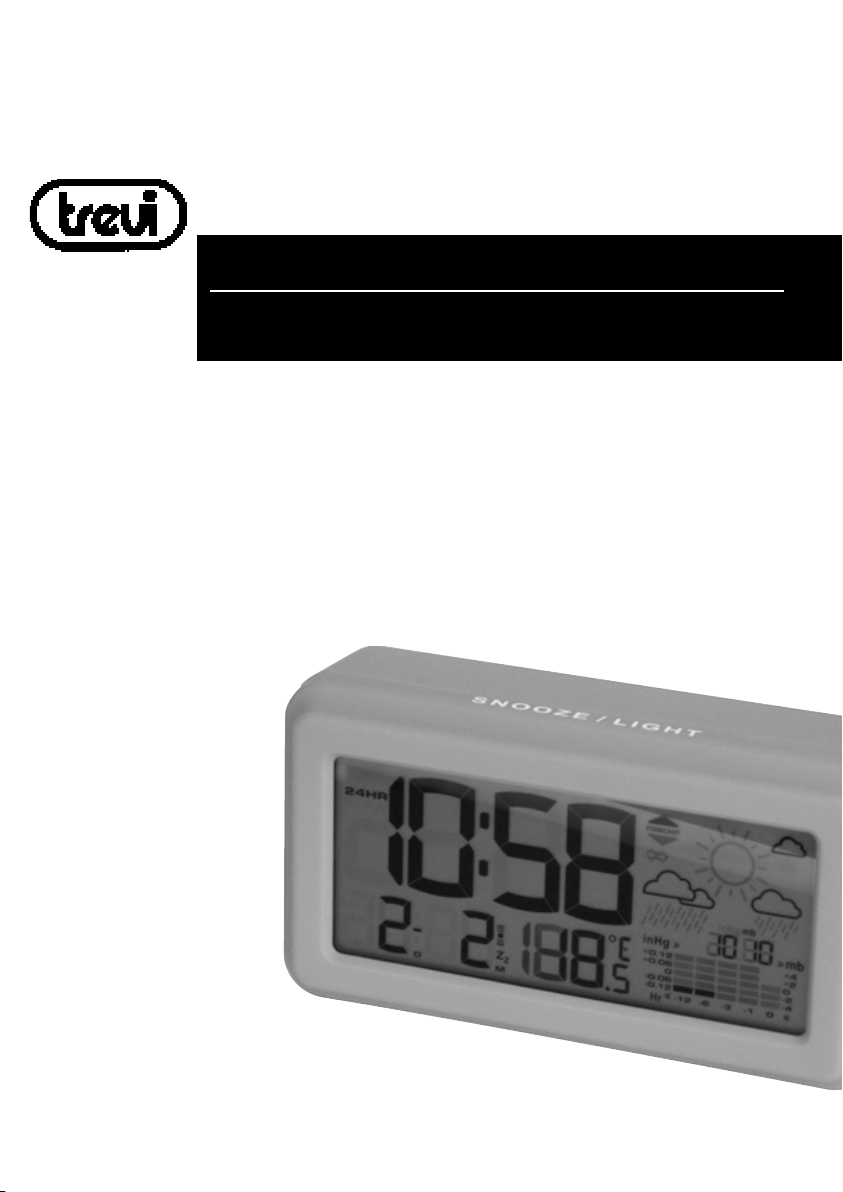
ME 3140ME 3140
ME 3140
ME 3140ME 3140
Guida d’uso
User guide
SVEGLIA / MESVEGLIA / ME
SVEGLIA / ME
SVEGLIA / MESVEGLIA / ME
Manuale d’uso
ALARM CLALARM CL
ALARM CL
ALARM CLALARM CL
Istruction manual
RÉRÉ
VEIL / STVEIL / ST
RÉ
VEIL / ST
RÉRÉ
VEIL / STVEIL / ST
Manual d’emploi
WECKER / WECKER /
WECKER /
WECKER / WECKER /
Anleitungsheft
OCK / MEOCK / ME
OCK / ME
OCK / MEOCK / ME
AA
TION MÉTION MÉ
A
TION MÉ
AA
TION MÉTION MÉ
WEWE
WE
WEWE
TEOSTTEOST
TEOST
TEOSTTEOST
TT
TERSTTERST
T
TERST
TT
TERSTTERST
AA
TIONTION
A
TION
AA
TIONTION
TEO STTEO ST
TEO ST
TEO STTEO ST
TÉOTÉO
TÉO
TÉOTÉO
AA
TIONTION
A
TION
AA
TIONTION
AA
TIONTION
A
TION
AA
TIONTION
DESPERDESPER
DESPER
DESPERDESPER
Manual de instrucciones para el uso y la conexion
DESPERDESPER
DESPER
DESPERDESPER
Manual de uso e ligação
ОХРНЗФ¹СЙ / МЕФЕЩСПЛПГЙК¼
УФБИМ¼
ЕгчейсЯдйп чсЮузт кбй уэндеузт
TT
T
TT
TT
T
TT
ADAD
AD
ADAD
ADAD
AD
ADAD
OR ESTOR EST
OR EST
OR ESTOR EST
OR ESTOR EST
OR EST
OR ESTOR EST
AA
CIÓN MECIÓN ME
A
CIÓN ME
AA
CIÓN MECIÓN ME
AA
ÇÇ
ÃÃ
O MEO ME
A
Ç
Ã
O ME
AA
ÇÇ
ÃÃ
O MEO ME
TEOTEO
TEO
TEOTEO
TEOTEO
TEO
TEOTEO
Page 2
ME 3140ME 3140
ME 3140
ME 3140ME 3140
2.
1.
8.
7.
16.
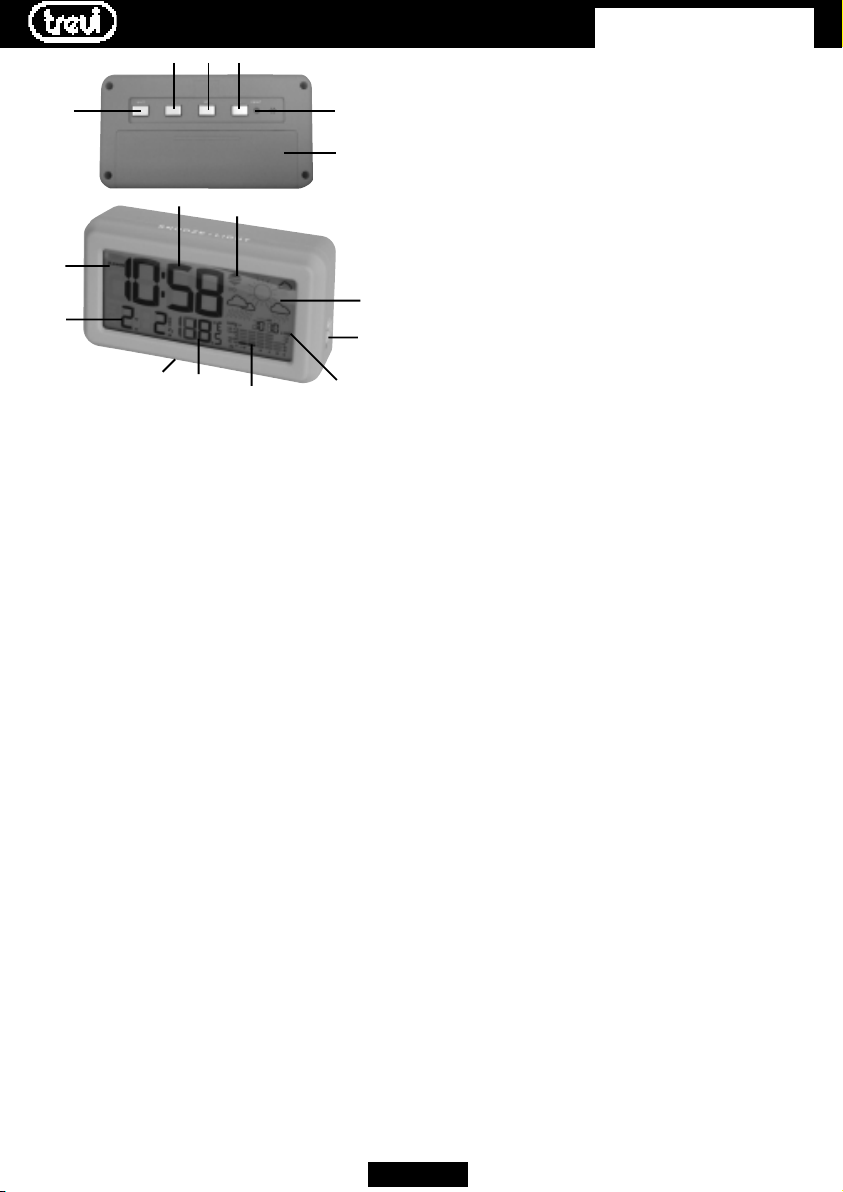
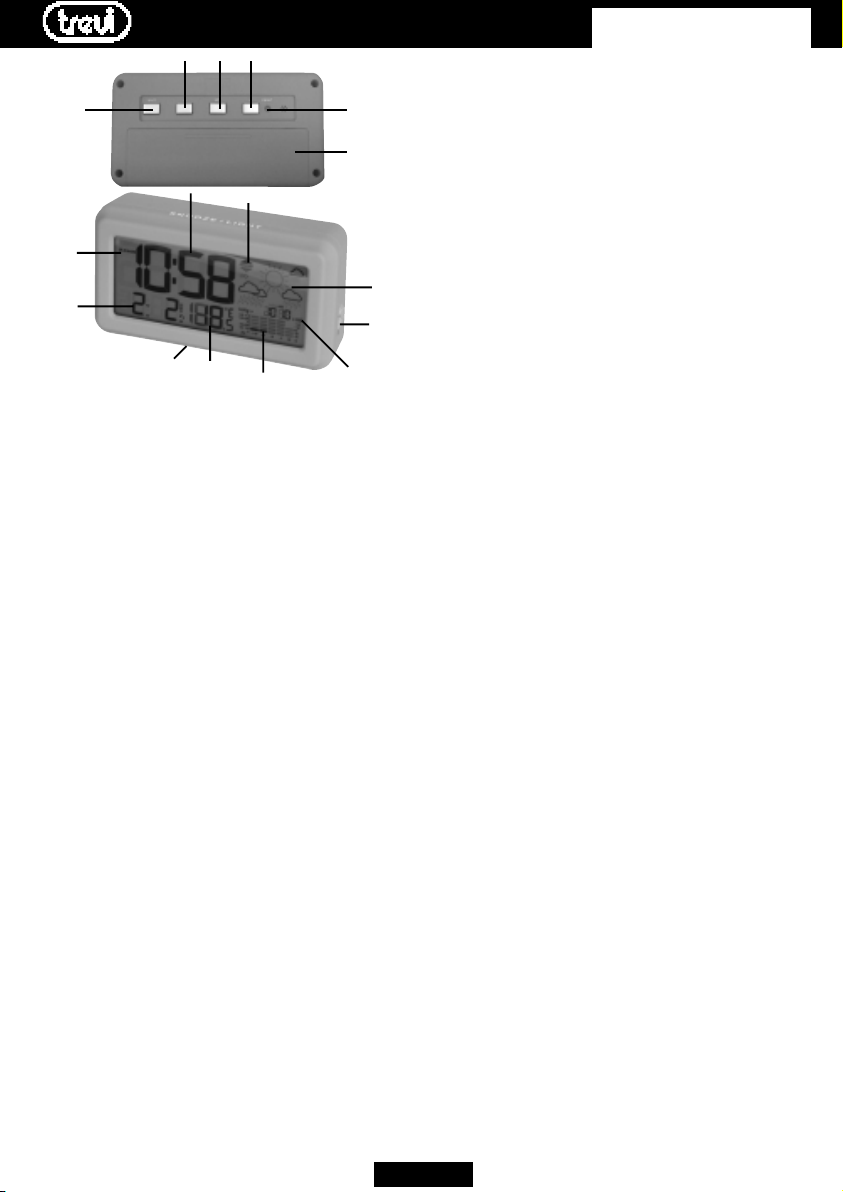
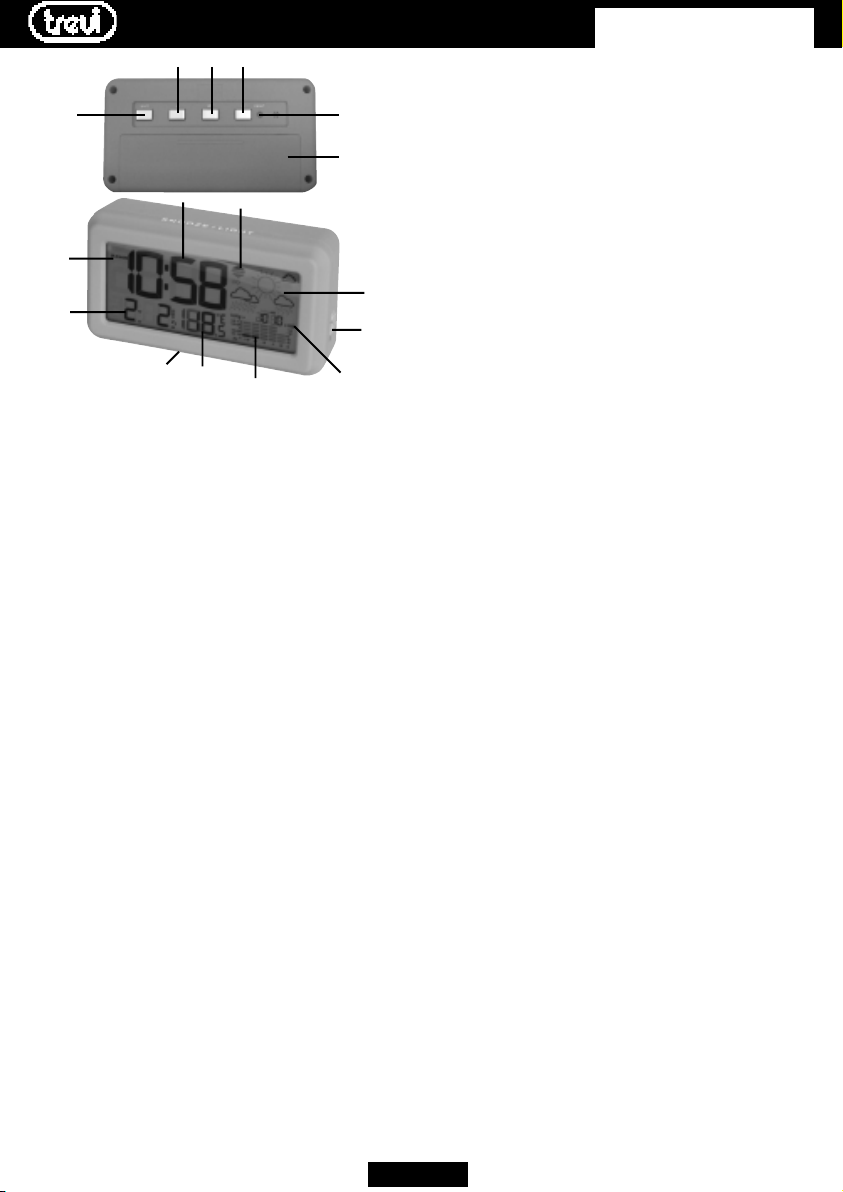
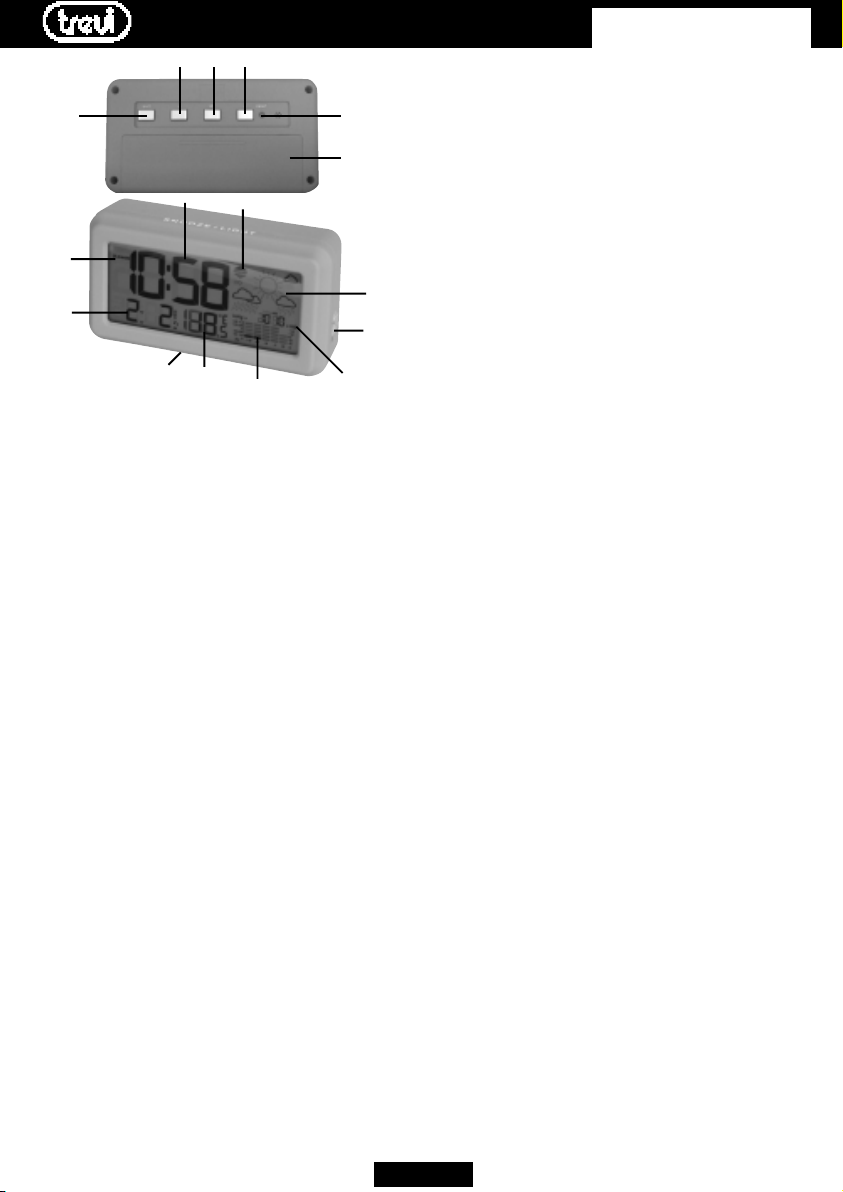
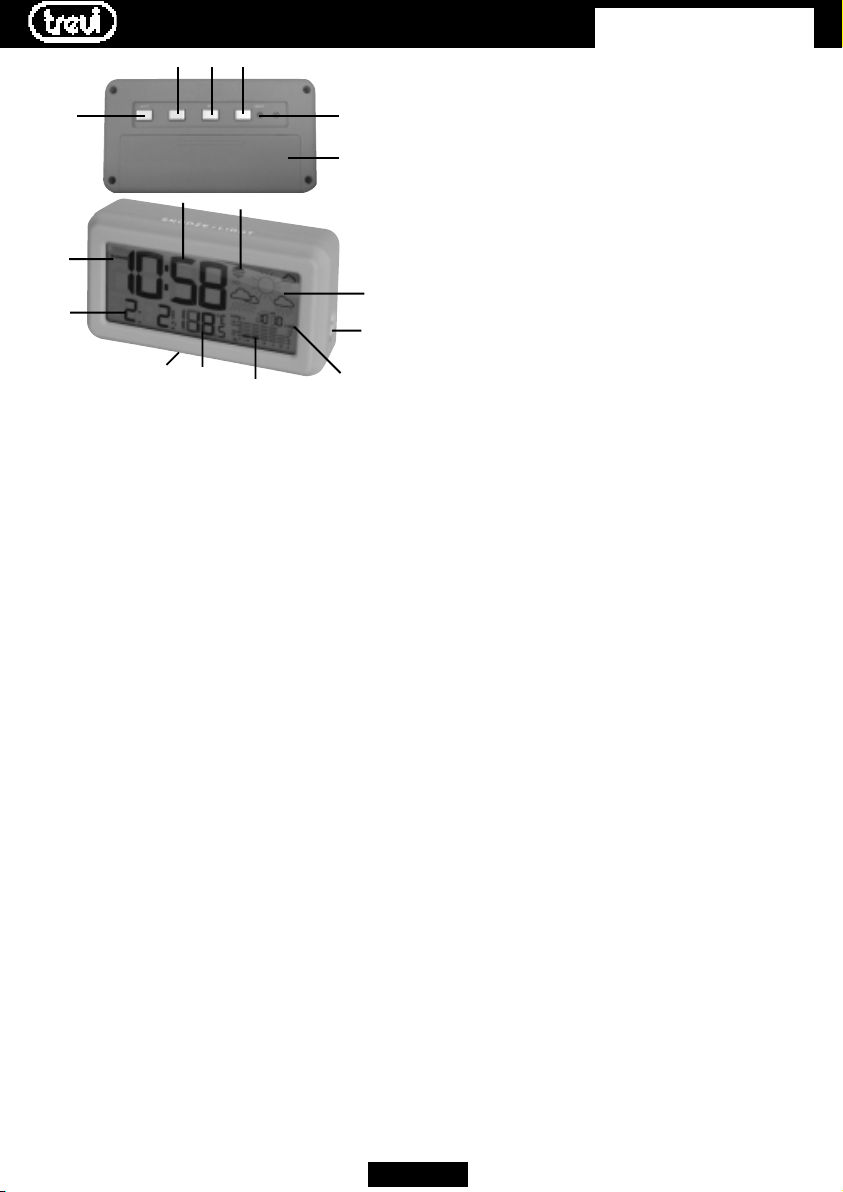
1. Tasto UNIT, visualizzazione gradi °C / °F, unità di
misurazione della pressione in mb / inHg
2. Tasto +, regolazione ora/minuti e datario
3. Tasto SET, impostazione datario / orologio
4. Tasto -, regolazione ora/minuti e datario
5. RESET, reimposta le funzioni predefinite
6. Vano batterie
7. Allarme, datario
8. Formato orario 24hr / 12hr
9. Orologio
10. Icona barometro
11. Simboli metereologici
12. Selettore ALM OFF, ALM ON, SNOOZE
13. Stato della pressione
14. Istogramma della pressione
15. Temperatura °C / °F
16. Tasto retroilluminazione, SNOOZE
INSERIMENTINSERIMENT
INSERIMENT
INSERIMENTINSERIMENT
Aprire il vano batterie (6) posto sul retro dell’apparecchio ed inserire due pile formato “AA” rispettando le
polarità indicate.
REGOLAZIONE MREGOLAZIONE M
REGOLAZIONE M
REGOLAZIONE MREGOLAZIONE M
DD
AA
TT
ARIOARIO
D
A
T
ARIO
DD
AA
TT
ARIOARIO
1. Premere il tasto SET (3), sul display l’anno
incomincia a lampeggiare.
2. Impostare l’anno tramite i tasti +(2) o -(4).
3. Premere il tasto SET (3), sul display il giorno e il
mese incominciano a lampeggiare.
4. Impostare il giorno e mese tramite i tasti +(2) o -(4).
5. Premere il tasto SET (3), sul display l’ora e i minuti
incominciano a lampeggiare.
6. Impostare l’ora tramite i tasti +(2) o -(4).
7. Premere il tasto SET (3), sul display la scritta 24Hr
incomicia a lampeggiare.
8. Impostare il tipo di visualizzazione dell’ora 12 o 24
HR tramite i tasti +(2) o -(4).
9. Premere nuovamente il tasto SET (3) per
confermare.
O BAO BA
O BA
O BAO BA
TT
T
TT
ANUANU
ANU
ANUANU
9.
15.
TERIETERIE
TERIE
TERIETERIE
4.
3.
10.
14.
ALE DELLALE DELL
ALE DELL
ALE DELLALE DELL
’’
OROLOROL
’
OROL
’’
OROLOROL
5.
6.
11.
12.
13.
OGIO/OGIO/
OGIO/
OGIO/OGIO/
ITIT
ALIANOALIANO
IT
ALIANO
ITIT
ALIANOALIANO
REGOLAZIONE ALLARMEREGOLAZIONE ALLARME
REGOLAZIONE ALLARME
REGOLAZIONE ALLARMEREGOLAZIONE ALLARME
1. Portare il selettore (12) in posizione ALM ON, sul
display appare il simbolo dell’allarme.
2. Impostare l’ora e i minuti tramite i tasti +(2) o -(4).
FUNZIONE SNOOZE/LIGHTFUNZIONE SNOOZE/LIGHT
FUNZIONE SNOOZE/LIGHT
FUNZIONE SNOOZE/LIGHTFUNZIONE SNOOZE/LIGHT
1. Portare il selettore (12) in posizione SNOOZE, sul
display assieme al simbolo dell’allarme comparirà
l’icona Zz.
2. Ad allarme attivato facendo pressione sulla scritta
SNOOZE /LIGHT potete disattivare momentane
amente l'allarme mentre sta suonando.
- Dopo 5 minuti l'allarme riprenderà suonare.
DISADISA
TT
TIVTIV
DISA
DISADISA
Per spegnere definitivamente l'allarme portare il
selettore (12) sulla posizione ALM OFF.
TENDENZA DI PRESSIONE BAROMETRICATENDENZA DI PRESSIONE BAROMETRICA
TENDENZA DI PRESSIONE BAROMETRICA
TENDENZA DI PRESSIONE BAROMETRICATENDENZA DI PRESSIONE BAROMETRICA
Nell’angolo superiore sinistro del display si nota l’icona
FORECAST , questa indica la tendenza di pressione relativa all’ora appena trascorsa.
1. Se la freccia tende verso il basso significa che il
2. Se la freccia tende verso l’alto significa che il clima
3. Se compare solamente la scritta FORECAST
UNITUNIT
UNIT
UNITUNIT
Per selezionare l’unità di misura della pressione
atmosferica tra mb/hPa o inHg, premere il tasto UNIT (1).
SELEZIONE GRSELEZIONE GR
SELEZIONE GR
SELEZIONE GRSELEZIONE GR
Premere il tasto UNIT (1) per visualizzare la temperatura
in gradi Celsius °C (scala europea) o in gradi Fahrenheit
°F(scala inglese e americana).
ISTOGRAMMA DELLA PRESSIONEISTOGRAMMA DELLA PRESSIONE
ISTOGRAMMA DELLA PRESSIONE
ISTOGRAMMA DELLA PRESSIONEISTOGRAMMA DELLA PRESSIONE
Questa stazione meteo crea un grafico dell’andamento
della pressione atmosferica in funzione del tempo (11).
Sul grafico si trova a sinistra la scala in formato “inHg” che
varia da +0,12 a -0,12. A destra si trova la scala in formato
hPa che varia da +4 a -4. Queste scale lavorano in funzione del tempo che varia da 0 a -12Hr.
PREPRE
PRE
PREPRE
Il barometro digitale rileva automaticamente le variazioni di pressione atmosferica visualizzando di conseguenza il simbolo di previsione metereologica (11).
Tale previsione riguarda le 12/24 ore successive.
DESCRIZIONI DESCRIZIONI
DESCRIZIONI
DESCRIZIONI DESCRIZIONI
Alimentazione:.... 2 batterie stilo formato “AA”
Stazione meteo: .. da 0°C a +50°C (32°F a 122°F)
Dimensioni: ...........133x75x40mm
AZIONE ALLARMEAZIONE ALLARME
T
TIV
AZIONE ALLARME
TT
TIVTIV
AZIONE ALLARMEAZIONE ALLARME
clima sta peggiorando.
é in fase di miglioramento.
significa che il clima é stabile.
AA
’’
DI MISUR DI MISUR
A
’
DI MISUR
AA
’’
DI MISUR DI MISUR
VISIONI MEVISIONI ME
VISIONI ME
VISIONI MEVISIONI ME
A DELLA PRESSIONEA DELLA PRESSIONE
A DELLA PRESSIONE
A DELLA PRESSIONEA DELLA PRESSIONE
ADI CELSIUS - FADI CELSIUS - F
ADI CELSIUS - F
ADI CELSIUS - FADI CELSIUS - F
TEREOLTEREOL
TEREOL
TEREOLTEREOL
TECNICHETECNICHE
TECNICHE
TECNICHETECNICHE
OGICHEOGICHE
OGICHE
OGICHEOGICHE
AHRENHEITAHRENHEIT
AHRENHEIT
AHRENHEITAHRENHEIT
22
2
22
Page 3
ME 3140ME 3140
ME 3140
ME 3140ME 3140
2.
1.
8.
7.
16.
FeaturesFeatures
Features
FeaturesFeatures
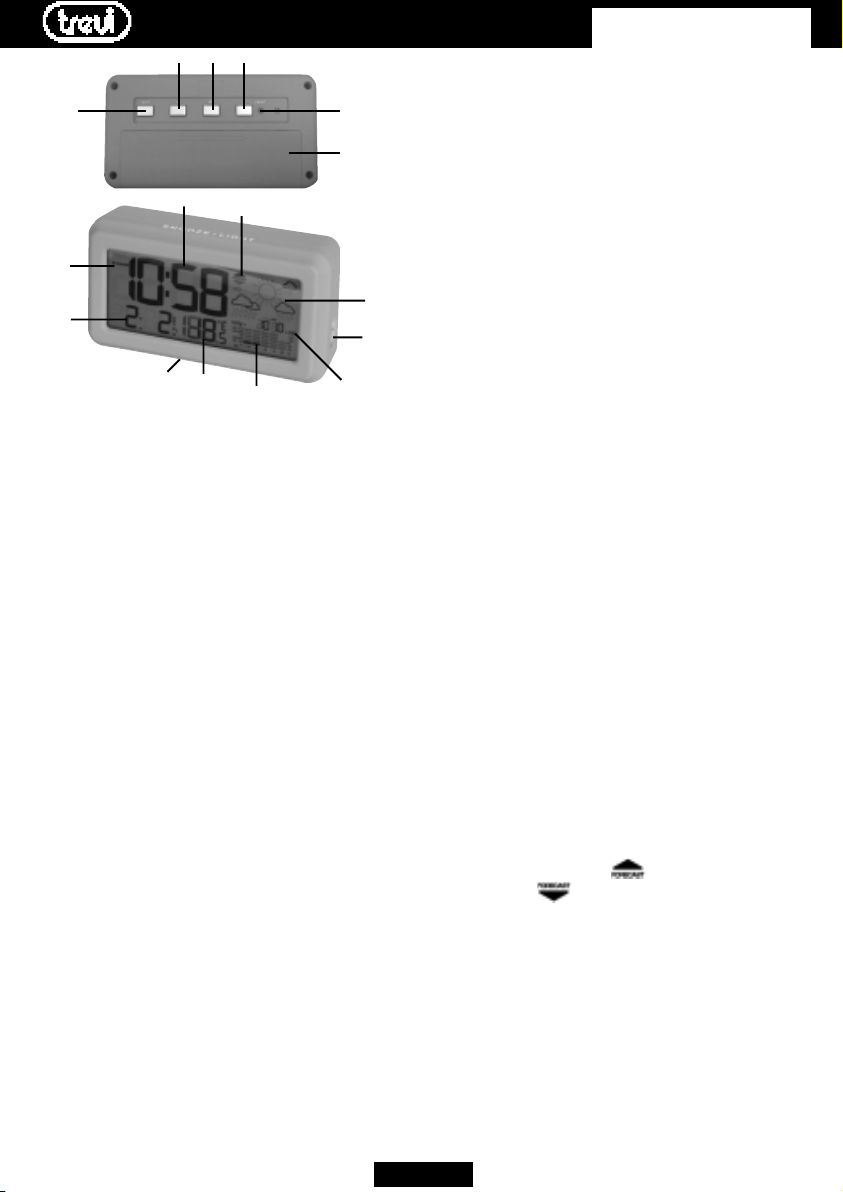
• Clock with snooze alarm in hour and minute display.
• Calendar display.
• Indoor temperature in °C / °F unit.
• 12 or 24 hour format.
• Weather forecast with animation.
• Barometer pressure reading in mb or inHg unit.
• Barometer pressure history bar chart.
• Time accuracy : average within 60 seconds per month.
• Operating temperature from 0°C to 50°C (32°F to 122°F).
• Temperature measuring range from -9.9°C to 50°C
(14.2°F to 122°F).
• Temperature resolution 0.1°C (0.1°F).
Battery InstallationBattery Installation
Battery Installation
Battery InstallationBattery Installation
• Open the battery door.
• Insert 2 pcs AA size battery in correct polarity (+)
and (-) as indicated.
• Close the battery door.
Warning : Do not mix old and new batteries.Warning : Do not mix old and new batteries.
Warning : Do not mix old and new batteries.
Warning : Do not mix old and new batteries.Warning : Do not mix old and new batteries.
Do not mix alkaline, standard ( carbon-zinc ) orDo not mix alkaline, standard ( carbon-zinc ) or
Do not mix alkaline, standard ( carbon-zinc ) or
Do not mix alkaline, standard ( carbon-zinc ) orDo not mix alkaline, standard ( carbon-zinc ) or
rechargeable ( nickel cadmium ) batteries.rechargeable ( nickel cadmium ) batteries.
rechargeable ( nickel cadmium ) batteries.
rechargeable ( nickel cadmium ) batteries.rechargeable ( nickel cadmium ) batteries.
TT
o So S
et the Cet the C
T
o S
et the C
TT
o So S
et the Cet the C
1. Press SET button enter calendar set mode.
2. Press + or – button sequentially to set year.
3. Hold down either + or – button to change the year
at high speed.
4. Press SET button to confirm year set and go to date set.
5. Press + or – button sequentially to set date.
6. Hold down either + or – button to change the date
at high speed.
TT
o So S
et the et the
T
o S
et the
TT
o So S
et the et the
1. Press SET button after calendar set mode.
2. Press + or – button sequentially to set time by
minutes increment.
3. Hold down either + or – button to change the time
at high speed.
TT
o So S
et the Hour Fet the Hour F
T
o S
et the Hour F
TT
o So S
et the Hour Fet the Hour F
1. Press SET button after desired time set and go to
alendaralendar
alendar
alendaralendar
TT
imeime
T
ime
TT
imeime
9.
oror
or
oror
15.
mama
ma
mama
4.
3.
5.
6.
10.
11.
12.
14.
tt
t
tt
13.
ENGLISHENGLISH
ENGLISH
ENGLISHENGLISH
hour format set mode.
2. Press + or - button to switch between 12 hr and 24
hr time display format.
3. Press SET button to confirm and quit the set mode.
USING ALARMUSING ALARM
USING ALARM
USING ALARMUSING ALARM
TT
o So S
et Alaret Alar
m m
TT
T
o S
et Alar
TT
o So S
et Alaret Alar
1. Press + or – button sequentially to set the alarm
time, the alarm time will appear on LCD display.
2. Hold down either + or – button to change the
alarm time at high speed.
TT
o Ao A
cc
tivtiv
T
o A
c
tiv
TT
o Ao A
cc
tivtiv
1. Slide the ALARM switch to ON position, the sign
will appear. The alarm function is activated.
2. When the alarm sounds, press the Snooze/Light
button. The alarm will sound at the same time of
the next day.
3. To deactivate the alarm function, slide the ALARM
switch to OFF position.
TT
o Ao A
cc
tivtiv
T
o A
c
tiv
TT
o Ao A
cc
tivtiv
1. Slide the alarm to “SNOOZE”position, the sign
and Zz will appear on the time display. The snooze
function is activated.
2. When the alarm sound, press the SNOOZE / LIGHT
button. The alarm will sound again in
approximately 5 minutes.
3. To deactivate the snooze alarm, slide the ALARM
switch to OFF position.
Weather Forecast and BarometerWeather Forecast and Barometer
Weather Forecast and Barometer
Weather Forecast and BarometerWeather Forecast and Barometer
The Weather forecast is measured by the pressure sensor
built inside the unit. Below weather forecast icons will
appear depends on coming weather conidition.
Note: Once reset the base unit, the weather dataNote: Once reset the base unit, the weather data
Note: Once reset the base unit, the weather data
Note: Once reset the base unit, the weather dataNote: Once reset the base unit, the weather data
can be obtained after 24 hours.can be obtained after 24 hours.
can be obtained after 24 hours.
can be obtained after 24 hours.can be obtained after 24 hours.
BarometerBarometer
Barometer
BarometerBarometer
This model includes a barometer that measures the
atmospheric pressure in numeric scale. User can track
the reading and trend of the barometric pressure. The
barometer reflects changes in barometric pressure with
the an arrow icon. If the barometric pressure is on the
rise. If the arrow points up , the barometric pressure
is going down , the arrow will point downward.
Pressure RecordPressure Record
Pressure Record
Pressure RecordPressure Record
• Graphical bar chart shows the pressure history
during the past 12 hours. 0 means the
current pressure and -12 means the pressure at
12 hours before (Pic 1).
Display UnitDisplay Unit
Display Unit
Display UnitDisplay Unit
• Press the UNIT button to choose the mb(milibar) and
°C temperature or inHg and °F temperature readout.
Using the BacklightUsing the Backlight
Using the Backlight
Using the BacklightUsing the Backlight
• LCD display supports with backlight for dark
viewing. Press the “SNOOZE/LIGHT” button and
backlight will on for 3 seconds.
33
3
33
imeime
m
T
ime
m m
TT
imeime
e Alare Alar
m Fm F
e Alar
m F
e Alare Alar
m Fm F
e the Snooe the Snoo
e the Snoo
e the Snooe the Snoo
uncunc
unc
uncunc
zz
z
zz
tiontion
tion
tiontion
e Alare Alar
e Alar
e Alare Alar
mm
m
mm
Page 4
ME 3140ME 3140
ME 3140
ME 3140ME 3140
2.
1.
8.
7.
16.
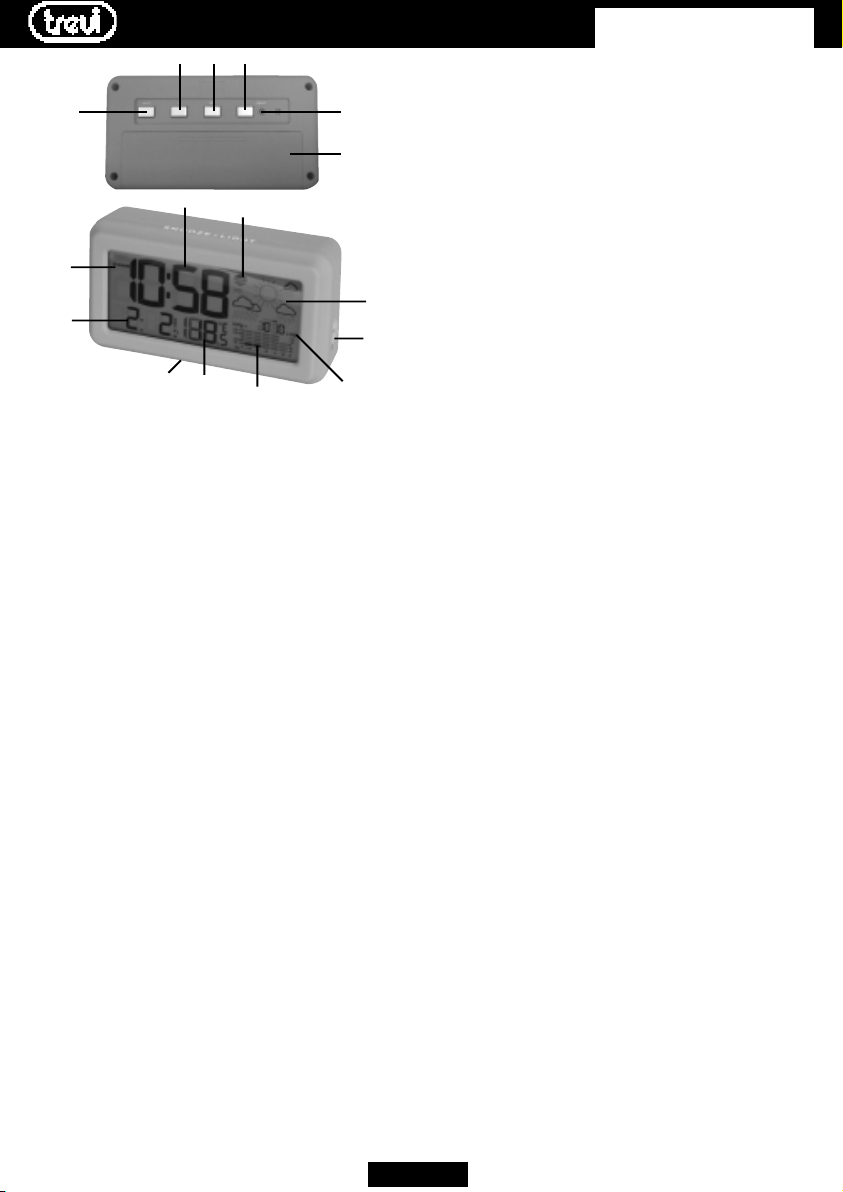
1. Touche UNIT
2. Touche +, réglage de la fonction SET
3. Touche SET, réglage dateur et horloge
4. Touche -, réglage de la fonction SET
5. RESET, parametrès default
6. Logement piles 2xAA
7. Alarme, Dateur
8. Format heure 12/24
9. Horloge
10. Icônes symboles baromètre
11. Icônes symboles météorologiques
12. Sélecteur ALM OFF, ALM ON, SNOOZE
activation/arrêt de l’alarme, snooze
13. Pression atmosphérique
14. Histogramme de la pression
15. Température °C/°F
16. Touche éclairage cadran, SNOOZE
ALIMENTALIMENT
ALIMENT
ALIMENTALIMENT
Introduire 2 piles de format « AA » dans le logement (6)
à l’arrièce de cet appareil en respectant la polarité
indiquée à l’intérieur du compartiment.
RÉGLARÉGLA
RÉGLA
RÉGLARÉGLA
1. Appuyez sur la touche SET (3), l'année commence à
2. Sélectionnez l'année en utilisant les touches +(2)
3. Appuyez sur la touche SET (3), le jour / mois
4. Sélectionnez le jour / mois en utilisant les touches
5. Appuyez sur la touche SET (3), les minutes / l'heure
6. Sélectionnez minutes / l'heure en utilisant les
7. Appuyez sur la touche SET (3) pendant 3 secondes ;
8. Sélectionnez le type d'affichage de l'heure, 12 ou
9. Appuyez sur la touche SET (3) pour confirmer.
AA
TIONTION
A
TION
AA
TIONTION
GE MGE M
ANUEL DE LANUEL DE L
GE M
ANUEL DE L
GE MGE M
ANUEL DE LANUEL DE L
clignoter sur l'afficheur.
ou - (4).
commence à clignoter sur l'afficheur.
+(2) ou - (4).
commence à clignoter sur l'afficheur.
touches +(2) ou -(4).
le message 24Hr commence à clignoter sur l'afficheur.
24 heures, en utilisant les touches +(2) ou -(4).
4.
3.
5.
6.
9.
10.
11.
12.
15.
14.
'HORL'HORL
'HORL
'HORL'HORL
OGEOGE
OGE
OGEOGE
13.
FRANCAISEFRANCAISE
FRANCAISE
FRANCAISEFRANCAISE
RÉGLARÉGLA
GE DE LGE DE L
RÉGLA
GE DE L
RÉGLARÉGLA
GE DE LGE DE L
1. Placer le sélecteur (12) sur la position ALM ON ;
l’écran affiche l’horaire d’alarme clignotant.
2. Pour régler les heures /minutes appuyez sur la
touche + (2) ou - (4).
RÉGLAGE DE SNOOZERÉGLAGE DE SNOOZE
RÉGLAGE DE SNOOZE
RÉGLAGE DE SNOOZERÉGLAGE DE SNOOZE
1. Placer le sélecteur (12) sur la position SNOOZE ;
l’écran affiche l’horaire d’alarme au l’icones Zz.
2. En appuyant sur la touche LIGHT/SNOOZE, il est
possible d’arrêter momentanément la sonnerie
pendant qu’elle sonne. Après 5 minutes l’alarme
recommence à sonner.
ARREARRE
TER DE LTER DE L
ARRE
TER DE L
ARREARRE
TER DE LTER DE L
Pour arrêter de manière définitive l’alarme, porter le
sélecteur (12) sur la position ALM OFF.
UNITÉ DE MESURE DE LA PRESSIONUNITÉ DE MESURE DE LA PRESSION
UNITÉ DE MESURE DE LA PRESSION
UNITÉ DE MESURE DE LA PRESSIONUNITÉ DE MESURE DE LA PRESSION
Appuyez sur la touche UNIT (1) pour sélectionner l'unité
de mesure de la pression atmosphérique. Les options
possibles sont mb/hPa et inHg.
SÉLECSÉLEC
TION DEGRÉS CELSIUS - FTION DEGRÉS CELSIUS - F
SÉLEC
TION DEGRÉS CELSIUS - F
SÉLECSÉLEC
TION DEGRÉS CELSIUS - FTION DEGRÉS CELSIUS - F
Appuyez sur la touche UNIT (1) que la température en °C
degrés Celsius (échelle européenne) ou bien en °F degrés
Fahrenheit (échelle anglaise ou américaine) s’affiche.
HISTOGRAMME DE LA PRESSIONHISTOGRAMME DE LA PRESSION
HISTOGRAMME DE LA PRESSION
HISTOGRAMME DE LA PRESSIONHISTOGRAMME DE LA PRESSION
Cette station météo réalise une représentation
graphique de la variation de la pression atmosphérique
en fonction du temps (5).
Sur la gauche du graphe, on trouve l'échelle en format "
inHg " dont les valeurs sont comprises entre +0,12 et 0,12. Sur la droite, on trouve l'échelle en format hPa dont
les valeurs sont comprises entre +4 et -4. Ces échelles
sont en fonction du temps qui varie de 0 à -12Hr.
PRÉPRÉ
VISIONS MÉVISIONS MÉ
PRÉ
VISIONS MÉ
PRÉPRÉ
VISIONS MÉVISIONS MÉ
Le baromètre numérique relève automatiquement les
variations de pression atmosphérique, en visualisant sur
l'afficheur le symbole correspondant (11).
Ces prévisions concernent les 12/24 heures successives.
DD
ONNÉES ONNÉES
D
ONNÉES
DD
ONNÉES ONNÉES
Station météo : .... de -0°C à +50°C
Alimentation : ...... 2xAA station météo
Dimensions: .......... 133x75x40mm
’’
ALARMEALARME
’
ALARME
’’
ALARMEALARME
’’
ALARMEALARME
’
ALARME
’’
ALARMEALARME
TÉOROLTÉOROL
TÉOROL
TÉOROLTÉOROL
TECHNIQUESTECHNIQUES
TECHNIQUES
TECHNIQUESTECHNIQUES
OGIQUESOGIQUES
OGIQUES
OGIQUESOGIQUES
AHRENHEITAHRENHEIT
AHRENHEIT
AHRENHEITAHRENHEIT
44
4
44
Page 5
ME 3140ME 3140
ME 3140
ME 3140ME 3140
2.
1.
8.
7.
1. Taste UNIT
2. Taste +, Minuteneinstellung / Uhrzeiteinstellung
3. Taste SET, Einstellung der Datumsanzeige und der Uhr
4. Taste -, Minuteneinstellung / Uhrzeiteinstellung
5. RESET
6. Batteriefach 2xAA
7. Datumsanzeige
8. Formateinstellung der Stunden 12/24
9. Uhr
10. Ikonen barometer
11. Ikonen meteorologische Symbole
12. ALM ON, ALM OFF, SNOOZE Wahlschalter, Ein-/
Ausschaltung des Alarms
13. Luftdruck
14. Druck-Histogramm
15. Grad °C/°F
16. Taste LIGHT/SNOOZE, zeitweilige Unterbrechung
des Weckers
VERSORGUNGVERSORGUNG
VERSORGUNG
VERSORGUNGVERSORGUNG
Auf der Geräterückwand 2 Batterien des Typs “AA”
polaritätsrichtig in das Batteriefach (6) einlegen.
MANUELLE EINSTELLUNG DER UHRZEITMANUELLE EINSTELLUNG DER UHRZEIT
MANUELLE EINSTELLUNG DER UHRZEIT
MANUELLE EINSTELLUNG DER UHRZEITMANUELLE EINSTELLUNG DER UHRZEIT
1. Die Taste SET (3) drücken: auf dem Display beginnt
die Jahresanzeige zu blinken.
2. Das Jahr über die Tasten +(2) oder -(4) einstellen.
3. Die Taste SET (3) drücken: auf dem Display beginnt
die Tagesanzeige / Monatsanzeige zu blinken.
4. Den Tages / Monat über die Tasten +(2) oder -(4)
einstellen.
5. Die Taste SET (3) drücken: auf dem Display beginnt
die Stundenanzeige / Minutenanzeige zu blinken.
6. Die Minuten / Stunde über die Tasten +(2) oder -(4)
einstellen.
7. Die Taste SET (3) für einen Zeitraum von 3
Sekunden drücken: auf dem Display beginnt die
Anzeige 24Hr zu blinken.
8. Den Anzeigetyp der Uhrzeit 12 oder 24 HR über
die Tasten +(2) oder -(4) einstellen.
9. Die Taste SET (39 drücken Sie zur Bestätigung
erneut.
ALARMEINSTELLUNGALARMEINSTELLUNG
ALARMEINSTELLUNG
ALARMEINSTELLUNGALARMEINSTELLUNG
16.
4.
3.
5.
6.
9.
10.
11.
12.
15.
14.
13.
DEUTSCHDEUTSCH
DEUTSCH
DEUTSCHDEUTSCH
1. Den Wahlschalter (9) auf ALM ON stellen; die
angezeigte Alarmuhrzeit blinkt.
2. Die Taste +(2) und - (4) drücken, um die Minuten /
Stunden einzustellen.
SNOOZE INSTELLUNGSNOOZE INSTELLUNG
SNOOZE INSTELLUNG
SNOOZE INSTELLUNGSNOOZE INSTELLUNG
1. Den Wahlschalter (12) auf SNOOZE stellen;
die angezeigte Alarmuhrzeit blinkt mit symbole Zz.
2. Wird die Taste LIGHT/SNOOZE gedrückt, kann
der Alarm während des Alarmsignals
vorübergehend ausgeschaltet werden.
- Nach 5 Minuten ertönt der Alarm erneut.
UNTERBRECHUNG DES ALARMSUNTERBRECHUNG DES ALARMS
UNTERBRECHUNG DES ALARMS
UNTERBRECHUNG DES ALARMSUNTERBRECHUNG DES ALARMS
Die zeitweilige Unterbrechung des Alarms kann auch
mehrmals erfolgen.Um den Alarm endgültig
auszuschalten, wird der Wahlschalter (12) auf ALM OFF
gestellt.
LUFTDRUCKTENDENZLUFTDRUCKTENDENZ
LUFTDRUCKTENDENZ
LUFTDRUCKTENDENZLUFTDRUCKTENDENZ
In der oberen linken Ecke des Displays befindet sich ein
Pfeil (10), der die Tendenz des Drucks während der jeweils
letzten Stunde anzeigt.
1. Zeigt der Pfeil nach unten, so bedeutet dies eine
Wetterverschlechterung.
2. Zeigt der Pfeil nach oben, so ist eine
Wetterbesserung zu erwarten.
3. Ein gerader Pfeil gibt stabile Wetterverhältnisse
an.
MASSEINHEIT DER DRUCKWERTEMASSEINHEIT DER DRUCKWERTE
MASSEINHEIT DER DRUCKWERTE
MASSEINHEIT DER DRUCKWERTEMASSEINHEIT DER DRUCKWERTE
Durch Druck der Taste UNIT (1) kann die Maßeinheit des
atmosphärischen Drucks zwischen mb/hPa oder inHg
ausgewählt werden.
WW
AHL ZWISCHEN CELSIUSAHL ZWISCHEN CELSIUS
W
AHL ZWISCHEN CELSIUS
WW
AHL ZWISCHEN CELSIUSAHL ZWISCHEN CELSIUS
FF
AHRENHEITAHRENHEIT
F
AHRENHEIT
FF
AHRENHEITAHRENHEIT
Die TasteUNIT (1) drücken um die Temperatur in
Celsiusgraden °C (europäische Skala) oder in
Fahrenheitgraden °F (englische oder amerikanische
Skala) anzuzeigen.
DRUCK-HISTOGRAMMDRUCK-HISTOGRAMM
DRUCK-HISTOGRAMM
DRUCK-HISTOGRAMMDRUCK-HISTOGRAMM
Diese Wetterstation erstellt eine Graphik des Verlaufs
des atmosphärischen Drucks bezogen auf die Zeit (11).
Die Graphik zeigt links die Skala im Format "inHg"
zwischen den Werten von +0,12 bis -0,12. Auf der rechten
Seite befindet sich die Skala im Format hPa mit Werten
zwischen +4 und -4. Diese Skalen operieren in Bezug auf
die Zweit mit Werte zwischen 0 a und 12Hr.
WETTERVORHERSAGEWETTERVORHERSAGE
WETTERVORHERSAGE
WETTERVORHERSAGEWETTERVORHERSAGE
Das digitale Barometer erfasst automatisch die
Schwankungen des Luftdrucks und zeigt das
entsprechende Symbol der Wettervorhersage an (11).
Diese Vorhersage bezieht sich auf die kommenden 12/
24 Stunden.
TECHNISCHE DTECHNISCHE D
TECHNISCHE D
TECHNISCHE DTECHNISCHE D
Wetterstation: ..... von 0°C bis +50°C
Versorgung: .......... 2xAA Wetterstation
55
5
55
GRGR
GR
GRGR
ADENADEN
ADEN
ADENADEN
AA
TENTEN
A
TEN
AA
TENTEN
- UND- UND
- UND
- UND- UND
Page 6
ME 3140ME 3140
ME 3140
ME 3140ME 3140
2.
1.
8.
7.
16.
1. Botón UNIT, selección de los grados °C/°F
2. Botón +, ajuste del dià / mes y de la minutos / hora
3. Botón SET, configuración del dià / mes y de la
minutos / hora
4. Botón -, ajuste del dià / mes y de la minutos / hora
5. RESET
6. Compartimiento baterías 2xAA
7. Calendario / alarma
8. Formato del horario de 12 ó 24 horas
9. Reloj
10. Icono de barómetro
11. Iconos de los símbolos meteorológicos
12. Selector ALM ON, ALM OFF, SNOOZE, activación/
desactivación de la alarma, snooze
13. Tendencia de la presión atmosférica
14. Histograma de la presión
15. Grados °C/°F
16. Tecla LIGHT/SNOOZE, interrupción momentánea
del despertador, iluminación de la pantalla.
ALIMENTALIMENT
ALIMENT
ALIMENTALIMENT
Introducir 2 baterías tamaño “AA” en el compartimiento
(6), que se halla en la parte posterior del aparato, de
acuerdo con las polaridades indicadas.
AA
JUSTE MJUSTE M
A
JUSTE M
AA
JUSTE MJUSTE M
1. Pulse el botón SET (3), en la pantalla el año
2. Pulse los botones +(2) y -(4) para ajustar el año.
3. Pulse el botón SET (3), en la pantalla el día / mes
4. Pulse los botones +(2) y -(4) para ajustar el dia / mes.
5. Pulse el botón SET (3), en la pantalla los minutos /
6. Pulse los botones +(2) y -(4) para ajustar los
7. Pulse el botón SET (3) durante 3 segundos, en la
8. Seleccione el tipo de visualización de la hora 12 o
9. Pulse de nuevo el botón SET (3), para confirmar.
AA
CIÓNCIÓN
A
CIÓN
AA
CIÓNCIÓN
ANUANU
AL DEL RELAL DEL REL
ANU
AL DEL REL
ANUANU
AL DEL RELAL DEL REL
empieza a parpadear.
empieza a parpadear.
hora empieza a parpadear.
minutos / hora.
pantalla empieza a parpadear "24Hr".
24 HR, por medio de los botones +(2) o -(4).
4.
3.
5.
6.
9.
10.
11.
12.
15.
14.
OJOJ
OJ
OJOJ
13.
ESPESP
ANOLANOL
ESP
ANOL
ESPESP
ANOLANOL
CÓMO PONER LA ALARMACÓMO PONER LA ALARMA
CÓMO PONER LA ALARMA
CÓMO PONER LA ALARMACÓMO PONER LA ALARMA
1. Llevar el selector (12) a la posición ALM ON, en la
pantalla parpadea el horario de alarma.
2. Apretar la tecla +(2) HR -(4), para ajustar la hora y
los minutos.
FUNCIÓN SNOOZE/LIGHTFUNCIÓN SNOOZE/LIGHT
FUNCIÓN SNOOZE/LIGHT
FUNCIÓN SNOOZE/LIGHTFUNCIÓN SNOOZE/LIGHT
1. Llevar el selector (12) a la posición SNOOZE, en la
pantalla parpadea el horario de alarma y l’icono de
Zz.
2. Apretando la tecla LIGHT/SNOOZE se puede
desactivar momentáneamente la alarma mientras
está sonando.
- Después de 5 minutos la alarma vuelve a sonar.
Es posible desactivar momentáneamente la alarma
más de una vez.
APAP
AA
GAR LA ALARMGAR LA ALARM
AP
A
GAR LA ALARM
APAP
AA
GAR LA ALARMGAR LA ALARM
Para apagar definitivamente la alarma, llevar el selector
(12) a la posición ALM OFF.
TENDENCIA DE PRESIÓN BAROMÉTRICATENDENCIA DE PRESIÓN BAROMÉTRICA
TENDENCIA DE PRESIÓN BAROMÉTRICA
TENDENCIA DE PRESIÓN BAROMÉTRICATENDENCIA DE PRESIÓN BAROMÉTRICA
En el ángulo izquierdo de la parte de arriba de la pantalla
hay una flecha que indica la tendencia de presión
correspondiente a la hora que acaba de pasar.
1. Si la flecha va hacia abajo significa que el clima está
empeorando.
2. Si la flecha va hacia arriba significa que el clima
está mejorando.
3. Si la flecha está recta significa que el clima se
mantiene estable.
UNIDAD DE MEDIDA DE LA PRESIÓNUNIDAD DE MEDIDA DE LA PRESIÓN
UNIDAD DE MEDIDA DE LA PRESIÓN
UNIDAD DE MEDIDA DE LA PRESIÓNUNIDAD DE MEDIDA DE LA PRESIÓN
Pulse el botón UNIT(1) para seleccionar la unidad de
medida de la presión atmosférica entre mb/hPa o inHg.
SELECSELEC
CION DE LCION DE L
SELEC
CION DE L
SELECSELEC
CION DE LCION DE L
– F– F
AHRENHEITAHRENHEIT
– F
AHRENHEIT
– F– F
AHRENHEITAHRENHEIT
Apretar la tecla UNIT(1) para visualizar la temperatura
en grados centígrados °C (escala europea) o en grados
Fahrenheit °F(scala inglesa y americana).
HISTOGRAMA DE LA PRESIÓNHISTOGRAMA DE LA PRESIÓN
HISTOGRAMA DE LA PRESIÓN
HISTOGRAMA DE LA PRESIÓNHISTOGRAMA DE LA PRESIÓN
Esta estación meteorológica crea un gráfico de la presión
atmosférica en función del tiempo (5).
A la izquierda del gráfico se encuentra la escala en formato "inHg" que varía entre +0,12 y -0,12. A la derecha, en
cambio, se encuentra la escala en formato hPa que varía
entre +4 y -4. Estas escalas trabajan en función del tiempo
que varía de 0 a -12Hr.
PREPRE
VISIONES MEVISIONES ME
PRE
VISIONES ME
PREPRE
VISIONES MEVISIONES ME
El barómetro digital mide automáticamente las
variaciones de presión atmosférica mostrando
consiguientemente el símbolo de previsión
meteorológica. (11)
Dicha previsión se refiere a las 12/24 horas siguientes.
Alimentación: ...... 2xAA estación
Estación meteorológica: de 0°C a +50°C
Dimensiones: ........133x75x40mm
66
6
66
AA
A
AA
OS GROS GR
OS GR
OS GROS GR
TEOROLTEOROL
TEOROL
TEOROLTEOROL
ADAD
OS CENTIGROS CENTIGR
AD
OS CENTIGR
ADAD
OS CENTIGROS CENTIGR
ÓGICÓGIC
ÓGIC
ÓGICÓGIC
ASAS
AS
ASAS
ADAD
AD
ADAD
OSOS
OS
OSOS
Page 7
ME 3140ME 3140
ME 3140
ME 3140ME 3140
3.
2. 4.
1.
9.
10.
8.
7.
16.
15.
O RELO REL
O REL
O RELO REL
14.
ÓGIOÓGIO
ÓGIO
ÓGIOÓGIO
1. Tecla UNIT, visualização da graus °C/°F
2. Tecla + , ajuste dia / mês e hora / minutos
3. Tecla SET, ajuste do datador e relógio
4. Tecla - , ajuste dia / mês e hora / minutos
5. RESET
6. Compartimento baterias 2xAA
7. Alarme, datador
8. Formato horas 12/24
9. Relógio
10. Ícone do barómetro
11. Ícones dos símbolos meteorológicos
12. Selector ALM ON, ALM OFF, activação/
desligamento alarme
13. Tendência da pressão atmosférica
14. Histograma da pressão
15. Graus °C/°F
16. Tecla LIGHT/SNOOZE, interrupção momentânea
despertador, iluminação display
ALIMENTALIMENT
ALIMENT
ALIMENTALIMENT
Insira 2 baterias modelo “AA” no compartimento (6) na
traseira do aparelho respeitando as polaridades indicadas.
AA
JUSTE MJUSTE M
A
JUSTE M
AA
JUSTE MJUSTE M
1. Pressione a tecla SET (3), no visor o ano lampejará.
2. Programe o ano através das teclas +(2) ou -(4).
3. Pressione a tecla SET (3), no visor o dia / mês
4. Programe o dia / mês através das teclas +(2) ou -(4).
5. Pressione a tecla SET (3), no visor a minutos / hora
6. Programe a minutos / hora através das teclas +(2)
7. Pressione a tecla SET (3) , no visor a escrita 24Hr
8. Programe o tipo de visualização da hora, em 12 ou
9. Pressione nuovamente a tecla SET (3), para
AJUSTE ALARMEAJUSTE ALARME
AJUSTE ALARME
AJUSTE ALARMEAJUSTE ALARME
1. Ponha o selector (12) em posição ALM ON, no
AA
ÇÇ
ÃÃ
OO
A
Ç
Ã
O
AA
ÇÇ
ÃÃ
OO
ANUANU
AL DAL D
ANU
AL D
ANUANU
AL DAL D
lampejará.
lampejará.
ou -(4).
lampejará.
24 HR, através das teclas +(2) ou -(4).
confirmar.
display vai aparecer o horário intermitente de
5.
6.
11.
12.
13.
PORTUGUESEPORTUGUESE
PORTUGUESE
PORTUGUESEPORTUGUESE
alarme.
2. Tecla + (2) - (4) , ajuste dia / mês e hora / minutos.
FUNÇÃO LIGHT/SNOOZEFUNÇÃO LIGHT/SNOOZE
FUNÇÃO LIGHT/SNOOZE
FUNÇÃO LIGHT/SNOOZEFUNÇÃO LIGHT/SNOOZE
1. Ponha o selector (12) em posição SNOOZE, no
display vai aparecer a data icone do SNOOZE Zz.
Pressionando a SNOOZE/LIGHT é possível
desligar momentaneamente o alarme enquanto
está tocando.
- Depois de 5 minutos o alarme vai tocar
de novo. É possível desligar momentaneamente
o alarme por mais vezes.
DESLIGAR O ALARMEDESLIGAR O ALARME
DESLIGAR O ALARME
DESLIGAR O ALARMEDESLIGAR O ALARME
Para desligar definitivamente o alarme ponha o selector
(12) em posição ALM/OFF.
TENDÊNCIA DE PRESSÃO BAROMÉTRICATENDÊNCIA DE PRESSÃO BAROMÉTRICA
TENDÊNCIA DE PRESSÃO BAROMÉTRICA
TENDÊNCIA DE PRESSÃO BAROMÉTRICATENDÊNCIA DE PRESSÃO BAROMÉTRICA
No ângulo superior esquerdo do visor há uma seta
FORECAST, que indica a tendência de pressão relativa à
hora que acaba de passar.
1. Se a seta estiver dirigida para baixo, significa que o
clima está piorando.
2. Se a seta estiver dirigida para cima, significa que o
clima está melhorando.
3. Se a seta estiver recta FORECAST, significa que o
clima é estável.
UNIDADE DE MEDIDA DA PRESSÃOUNIDADE DE MEDIDA DA PRESSÃO
UNIDADE DE MEDIDA DA PRESSÃO
UNIDADE DE MEDIDA DA PRESSÃOUNIDADE DE MEDIDA DA PRESSÃO
Para seleccionar a unidade de medida da pressão
atmosférica entre mb/hPa ou inHg, pressione por 3
segundos a tecla UNIT (1).
SELECSELEC
ÇÇ
ÃÃ
O GRO GR
AA
SELEC
Ç
SELECSELEC
Premer a tecla °C/°F (10) para visualizar a temperatura
em graus Celsius °C (escala europeia) ou em graus
Fahrenheit °F (escala inglesa e americana).
HISTOGRAMA DA PRESSÃOHISTOGRAMA DA PRESSÃO
HISTOGRAMA DA PRESSÃO
HISTOGRAMA DA PRESSÃOHISTOGRAMA DA PRESSÃO
Esta estação meteorológica cria um gráfico do andamento da pressão atmosférica em função do tempo.
No gráfico encontra-se à esquerda a escala em formato
"inHg" que varia de +0,12 a -0,12. À direita encontra-se a
escala em formato hPa que varia de +4 a -4. Estas escalas
trabalham em função do tempo que varia de 0 a -12Hr.
PREPRE
PRE
PREPRE
O barómetro digital detecta automaticamente as
variações de pressão atmosférica visualizando de
consequência o símbolo de previsão meteorológica (11).
Esta previsão refere-se às 12/24 horas seguintes.
DD
D
DD
Alimentação: ........ 2xAA para a estação meteorológica
Estação meteorológica:de: -0°C a +50°C
Dimensão: .............. 133x75x40mm
77
7
77
Ã
ÇÇ
ÃÃ
VISÕES MEVISÕES ME
VISÕES ME
VISÕES MEVISÕES ME
ADAD
OS OS
TÉCNICTÉCNIC
AD
OS
TÉCNIC
ADAD
OS OS
TÉCNICTÉCNIC
O GR
O GRO GR
A
AA
TEOROLTEOROL
TEOROL
TEOROLTEOROL
OSOS
OS
OSOS
US CELSIUS - FUS CELSIUS - F
US CELSIUS - F
US CELSIUS - FUS CELSIUS - F
ÓGICÓGIC
ÓGIC
ÓGICÓGIC
AHRENHEITAHRENHEIT
AHRENHEIT
AHRENHEITAHRENHEIT
ASAS
AS
ASAS
Page 8
ME 3140ME 3140
ME 3140
ME 3140ME 3140
3.
2. 4.
1.
9.
10.
8.
7.
16.
15.
1. КпхмрЯ UNIT, ерйлпгЭбт вбимюн уе клЯмбкб
КелуЯпх Ю Fahrenheit
2. КпхмрЯ +, сэимйуз мЮнб кбй юсбт / лерфюн /
ЗмеспмзнЯб
3. КпхмрЯ SET, кбипсйумьт змеспмзнЯбт кбй юсбт
4. КпхмрЯ -, сэимйуз мЮнб кбй юсбт / лерфюн /
ЗмеспмзнЯб
5. RESET
6. ИЮкз фпрпиЭфзузт мрбфбсйюн 2xAA
7. AлЬсм, hмеспмзнЯб
8. Pэимйуз Эфпхт кбй фсьрпх емцЬнйузт щсюн 12/24
9. Спльй
10.Ейкьнет, вбсьмефспх
11.Ейкьнет мефещсплпгйкюн ухмвьлщн
12.ЕрйлпгЭбт ALM OFF, ALM ON, SNOOZE
13.БфмпуцбйсйкЮ рЯеуз
14.Йуфьгсбммб фзт рЯеузт
15.кбипсйумьт вбимюн °C/°F
16.цщфйумьт пиьнзт
14.
5.
6.
11.
12.
13.
ФСПЦПДПУЙБ
ЕйуЬгефе 2 мрбфбсЯет фэрпх “AA” уфз иЮкз (6) уфп
рЯущ мЭспт фзт ухукехЮт фзсюнфбт фйт
хрпдейкнхьменет рплйкьфзфет. БцбйсЭуфе фйт
мрбфбсЯет бн ден чсзуймпрпйеЯфе фз ухукехЮ гйб
мегЬлп чспнйкь дйЬуфзмб.
ЧЕЙСПКЙНЗФЗ СХИМЙУЗ ФПХ СПЛПГЙПХ
1. РбфЮуфе фп кпхмрЯ SET (3), уфзн пиьнз фп Эфпт
бсчЯжей нб бнбвпувЮней.
2. ИЭуфе фп Эфпт мЭущ фщн кпхмрйюн +(2) Ю -(4).
3. РбфЮуфе фп кпхмрЯ SET (3), уфзн пиьнз бсчЯжей нб
бнбвпувЮней п змЭсб / мЮнбт.
4. ИЭуфе фп змЭсб / мЮнбт мЭущ фщн рлЮкфсщн +(2)
Ю - (4).
5. РбфЮуфе фп кпхмрЯ SET (3), уфзн пиьнз з юсб
бсчЯжей нб бнбвпувЮней.
6. ИЭуфе фзн юсб мЭущ фщн кпхмрйюн +(2) Ю -(4).
7. РбфЮуфе фп кпхмрЯ SET (3) гйб 3 дехфесьлерфб,
уфзн пиьнз бсчЯжей нб бнбвпувЮней з Эндейоз 24Hr.
8. ИЭуфе фпн фсьрп брейкьнйузт фзт юсбт 12 Ю 24
HELLENIKAHELLENIKA
HELLENIKA
HELLENIKAHELLENIKA
HR, мЭущ фщн рлЮкфсщн +(2) Ю -(4).
9. РбфЮуфе фп кпхмрЯ SET (17), гйб нб ерйвевбйюуефе
ЕНЕСГПРПЙЗУЗ БЦХРНЙУЗУ
1. ЦЭсфе фпн ерйлпгЭб (12) уфз иЭуз ALM ON.
2. ИЭуфе фзн юсб мЭущ фщн кпхмрйюн +(2) Ю -(4).
ЛЕЙФПХСГЙБ SNOOZE/LIGHT
1. ЦЭсфе фпн ерйлпгЭб (12) уфз иЭуз SNOOZE.
2. Рбфюнфбт фп кпхмрЯ LIGHT/SNOOZE мрпсеЯфе
нб увЮуефе рспущсйнЬ фзн бцэрнйуз еню
кпхдпхнЯжей.
- МефЬ брь 5 лерфЬ з бцэрнйуз кпхдпхнЯжей ек нЭпх.
УВЮУЕФЕ ПСЙУФЙКЬ ФЗН БЦЭРНЙУЗ
Гйб нб увЮуефе псйуфйкЬ фзн бцэрнйуз цЭсфе фпн
ерйлпгЭб (12) уфз иЭуз ALM OFF.
ФБУЗ ВБСПМЕФСЙКЗУ РЙЕУЗУ
Уфзн ерЬнщ бсйуфесЮ гщнЯб фзт пиьнзт
рбсбфзсеЯфбй Энб фьоп, бхфь деЯчней фзн фЬуз фзт
рЯеузт рпх бцпсЬ фзн юсб рпх Эчей Юдз ресЬуей.
1. ЕЬн фп фьоп клЯней рспт фб кЬфщ узмбЯней ьфй фп
клЯмб ерйдейнюнефбй.
2. ЕЬн фп фьоп клЯней рспт фб рЬнщ узмбЯней ьфй фп
клЯмб еЯнбй уе цЬуз велфЯщузт.
3. ЕЬн фп фьоп еЯнбй Яуйп узмбЯней ьфй фп клЯмб еЯнбй
уфбиесь.
МПНБДБ МЕФСЗУЗУ ФЗУ РЙЕУЗУ
Гйб нб ерйлЭоефе фз мпнЬдб мЭфсзузт фзт
бфмпуцбйсйкЮт рЯеузт бнЬмеуб уе mb/hPa Ю inHg,
рбфЮуфе фп кпхмрЯ UNIT(1).
ЕРЙЛПГЗ ВБИМЩН CELSIUS - FAHRENHEIT
рбфЮуфе фп рлЮкфсп UNIT(1) емцбнЯуефе фз
иесмпксбуЯб уе вбимпэт Celsius °C (ехсщрбъкЮ
клЯмбкб) Ю уе вбимпэт Fahrenheit °F (бгглйкЮ Ю
бмесйкбнйкЮ клЯмбкб).
ЙУФПГСБММБ ФЗУ РЙЕУЗУ
Бхфьт п мефещсплпгйкьт уфбимьт дзмйпхсгеЯ мЯб
гсбцйкЮ брейкьнйуз фзт рпсеЯбт фзт бфмпуцбйсйкЮт
рЯеузт уе ухнЬсфзуз ме фпн кбйсь (11).
Уфз гсбцйкЮ брейкьнйуз всЯукефбй бсйуфесЬ з
клЯмбкб уе мпсцЮ “inHg” рпх кхмбЯнефбй брь +0,12
Эщт -0,12. ДеойЬ всЯукефбй з клЯмбкб уе мпсцЮ hPa
рпх кхмбЯнефбй брь +4 Эщт -4. Пй клЯмбкет бхфЭт
лейфпхсгпэн уе ухнЬсфзуз ме фпн кбйсь рпх
кхмбЯнефбй брь 0 Эщт -12Hr.
МЕФЕЩСПЛПГЙКЕУ РСПВЛЕШЕЙУ
Фп шзцйбкь вбсьмефсп енфпрЯжей бхфьмбфб фйт
мефбвплЭт фзт бфмпуцбйсйкЮт рЯеузт рспвЬллпнфбт
уфз ухнЭчейб фп уэмвплп фзт мефещсплпгйкЮт
рсьвлешзт (11).
З рсьвлешз бхфЮ бцпсЬ фйт ерьменет 12/24 юсет.
ФЕЧНЙКБ УФПЙЧЕЙБ
ФспцпдпуЯб: ..... 2xAA мефещсплпгйкьт уфбимьт
Мефещсплпгйкьт уфбимьт: брь -5°C Эщт +50°C
ДйЬуфбуз: .......... 133x75x40mm
88
8
88
Page 9

ME 3140ME 3140
ME 3140
ME 3140ME 3140
notenote
note
notenote
99
9
99
Page 10
ME 3140ME 3140
ME 3140
ME 3140ME 3140
Avvertenze per il corretto smaltimento delAvvertenze per il corretto smaltimento del
Avvertenze per il corretto smaltimento del
Avvertenze per il corretto smaltimento delAvvertenze per il corretto smaltimento del
prodotto.prodotto.
prodotto.
prodotto.prodotto.
Il simbolo riportato sull'apparecchiatura indica che il rifiuto deve essere oggetto di "raccolta separata" pertanto il prodotto non deve
essere smaltito insieme ai rifiuti urbani.
L'utente dovrà consegnare il prodotto presso gli appositi "centri di
raccolta differenziata" predisposti dalle amministrazioni comunali,
oppure consegnarlo al rivenditore contro acquisto di un nuovo prodotto.
La raccolta differenziata del rifiuto e le successive operazioni di trattamento, recupero e smaltimento favoriscono la produzione di
apparecchiature con materiali riciclati e limitano gli effetti negativi
sull'am
biente e sulla salute causati da una gestione impropria del rifiuto.
Lo smaltimento abusivo del prodotto comporta l'applicazione di sanzioni amministrative.
Precautions for correct disposal of the product.Precautions for correct disposal of the product.
Precautions for correct disposal of the product.
Precautions for correct disposal of the product.Precautions for correct disposal of the product.
The symbol shown on the equipment indicates that waste must be
disposed of in "separate collection" and so the product must not be
disposed of together with urban waste.
The user must take the product to special "separate waste collection
centres" provided by local government, or deliver it to the retailer
against the purchase of a new product.
Separate collection of waste and subsequent treatment, recycling
and disposal operations promotes the production of equipment with
recycled materials and limits negative effects on the environment
and on health caused by improper handling of waste.
Illegal disposal of the product leads to the enforcement of
administrative penalties.
Recommandations pour l'éliminationRecommandations pour l'élimination
Recommandations pour l'élimination
Recommandations pour l'éliminationRecommandations pour l'élimination
correcte du produit.correcte du produit.
correcte du produit.
correcte du produit.correcte du produit.
Le symbole figurant sur l'appareil indique que le produit fait l'objet
d'une " collecte séparée ". C'est pourquoi, le produit ne doit pas être
éliminé avec les déchets urbains.
L'utilisateur doit remettre le produit auprès de " décharges
spécialisées de collecte séparée " prévues par les autorités locales,
ou bien le rendre au revendeur quand il achètera un nouvel appareil
équivalent.
La collecte séparée du produit et les opérations successives de
traitement, recyclage et élimination favorisent la production
d'appareils composés par des matériaux recyclés ainsi que
permettent d'éviter des effets négatifs sur l'environnement et sur
la santé des personnes suite à une gestion impropre du déchet.
Toute élimination abusive du produit entraîne l'application de sanctions
administratives.
Hinweise zur ordnungsgemäßen Entsorgung desHinweise zur ordnungsgemäßen Entsorgung des
Hinweise zur ordnungsgemäßen Entsorgung des
Hinweise zur ordnungsgemäßen Entsorgung desHinweise zur ordnungsgemäßen Entsorgung des
Produkts.Produkts.
Produkts.
Produkts.Produkts.
Das auf dem Gerät angebrachte Symbol weist darauf hin, dass das
Altgerät "getrennt zu sammeln" ist und das Produkt daher nicht
zusammen mit dem Gemeindeabfall entsorgt werden darf.
Der Benutzer muss das Produkt zu den entsprechenden, von der
Gemeindeverwaltung eingerichteten "Wertstoffsammelstellen"
bringen oder dem Händler beim Kauf eines neuen Produkts
übergeben.
Die getrennte Müllsammlung und anschließende Aufbereitung,
Wiederverwertung und Entsorgung fördern die Herstellung von
Geräten unter Verwendung wiederverwerteter Materialien und
vermindern die negativen Auswirkungen auf die Umwelt und
notenote
note
notenote
Gesundheit in Folge einer falschen Müllverwaltung.
Die widerrechtliche Entsorgung des Produkts führt zur Auferlegung
von Verwaltungsstrafen.
Advertencias para la correcta eliminación delAdvertencias para la correcta eliminación del
Advertencias para la correcta eliminación del
Advertencias para la correcta eliminación delAdvertencias para la correcta eliminación del
producto.producto.
producto.
producto.producto.
El símbolo que aparece en el aparato indica que el residuo debe ser
objeto de "recogida selectiva" por tanto el producto no se debe
eliminar junto con residuos urbanos.
El usuario deberá entregar el producto a los "centros de recogida
selectiva" creados por las administraciones municipales o bien al
distribuidor cuando adquiera un nuevo producto.
La recogida selectiva del residuo y las sucesivas operaciones de
tratamiento, recuperación y eliminación favorecen la fabricación
de aparatos con materiales reciclados y limitan los efectos negativos
en el medio ambiente y la salud causados por una gestión incorrecta
del residuo.
La eliminación abusiva del producto da lugar a la aplicación de
sanciones administrativas.
Advertências para a correcta demolição doAdvertências para a correcta demolição do
Advertências para a correcta demolição do
Advertências para a correcta demolição doAdvertências para a correcta demolição do
produto.produto.
produto.
produto.produto.
O símbolo indicado na aparelhagem indica que o resíduo deve ser
objecto de "recolha separada" portanto o produto não deve ser
desmantelado junto dos resíduos urbanos.
O utilizador deverá entregar o produto nos apropriados "centros de
recolha diferenciada" predispostos pelas administrações comunais,
ou entregá-lo ao revendedor em troca de uma compra de um novo
produto.
A recolha diferenciada do resíduo e as sucessivas operações de
tratamento, recuperação e desmantelamento favorecem a
produção de aparelhagens com materiais reciclados e limitam os
efeitos negativos no ambiente e na saúde causados por uma gestão
imprópria do resíduo.
O desmantelamento abusivo do produto comporta a aplicação de
sanções administrativas.
РспейдпрпйЮуейт гйб фз ущуфЮ дйЬиеуз
фпх рспъьнфпт.
Фп уэмвплп рпх брейкпнЯжефбй ерЬнщ уфз ухукехЮ
хрпдейкнэей ьфй фп брьвлзфп рсЭрей нб брпфелЭуей
бнфйкеЯменп “чщсйуфЮт ухллпгЮт” щт ек фпэфпх фп рспъьн ден
рсЭрей нб дйбфЯиефбй мбжЯ ме фб буфйкЬ брьвлзфб.
П чсЮуфзт иб рсЭрей нб рбсбдюуей фп рспъьн уфб ейдйкЬ
“кЭнфсб дйбцпспрпйзмЭнзт ухллпгЮт” рпх Эчпхн дйехиефзиеЯ
брь фйт дзмпфйкЭт дйпйкЮуейт, Ю нб фп рбсбдюуей уфп
кбфЬуфзмб рюлзузт ме фзн бгпсЬ еньт нЭпх рспъьнфпт.
З дйбцпспрпйзмЭнз ухллпгЮ фпх брпвлЮфпх кбй пй
бкьлпхиет еремвЬуейт ереоесгбуЯбт, бнЬкфзузт кбй дйЬиеузт
впзипэн фзн рбсбгщгЮ ухукехюн ме бнбкхклщмЭнб хлйкЬ кбй
ресйпсЯжпхн фйт бснзфйкЭт ерйрфюуейт гйб фп ресйвЬллпн кбй
фзн хгеЯб рпх рспкблпэнфбй брь фзн бкбфЬллзлз дйбчеЯсйуз
фпх брпвлЮфпх.
З бхибЯсефз дйЬиеуз фпх рспъьнфпт ухнерЬгефбй фзн
ецбсмпгЮ дйпйкзфйкюн кхсюуещн.
1010
10
1010
Page 11

ME 3140ME 3140
ME 3140
ME 3140ME 3140
GARANZIAGARANZIA
GARANZIA
GARANZIAGARANZIA
1. L’apparecchio è garantito per 24 mesi dalla data di
fabbricazione indicata sull’etichetta applicata sul
prodotto.
2. La garanzia si applica solo ad apparecchi, non
manomessi, riparati da centri assistenza TREVI, essa
comprende la riparazione dei componenti per
difetti di fabbricazione con l’esclusione di
etichette, manopole e parti asportabili.
3. TREVI non risponde di danni diretti o indiretti a
cose o/e persone causati dall’uso o sospensione
d’uso dell’apparecchio.
WW
ARRARR
ANTANT
ARR
ARRARR
ANT
ANTANT
YY
Y
YY
W
WW
1. This unit is guaranteed for a period of 24 months
from the date of production printed on the
product itself or on label on product.
2. The warranty is valid only if the unit has not been
tampered with. The warranty is valid only at
authorized TREVI assistance centres, that will
repair manufacturing defects, excluded
replacement of labels and removable parts.
3. TREVI is not liable for damage to people or things
caused by the use of this unit or by the
interruption in the use of this unit.
CONDITIONS DE GARANTIECONDITIONS DE GARANTIE
CONDITIONS DE GARANTIE
CONDITIONS DE GARANTIECONDITIONS DE GARANTIE
1. L’appareil est garanti pendant une période de 24
mois de la date de fabrication indiquée sur
l’étiquette se trouvant sur le produit.
2. La garantie n’est appliquée que sur les appareils
non altérés, ayant été réparés chez un Service
Après-Vente TREVI. Elle comprend la réparation
des composantes à la suite de défauts de
fabrication, à l’exclusion d’étiquettes, boutons de
réglage et parties amovibles.
3. TREVI ne répond pas des dommages directs ou
indirects aux choses et/ou aux personnes
entraînés pendant l’usage ou la suspension d’usage
de l’appareil.
GARANTIEBESTIMMUNGENGARANTIEBESTIMMUNGEN
GARANTIEBESTIMMUNGEN
GARANTIEBESTIMMUNGENGARANTIEBESTIMMUNGEN
1. Das Gerät hat eine Garantie von 24 Monaten ab
dem Herstellungsdatum. Das Herstellungsdatum
ist auf der am Produkt angebrachten Etikette
angegeben.
2. Die Garantie gilt nur für Geräte, an denen nicht
selbst ausgeführte Reparaturen erfolgt sind,
sondern die von TREVI-Kundendienststellen
durchgeführt wurden. Die Garantie umfaßt die
Reparatur von Bauteilen, wenn diese auf
Herstellungsfehler zurückzuführen sind. Die
Garantie gilt hingegen nicht für Etiketten,
Drucktasten, Knöpfe und entfernbare Teile.
3. TREVI haftet nicht für direkte oder indirekte Sachund/oder Personenschäden, die vom Gebrauch
des Gerätes verursacht worden sind.
CLAUSULAS DE GARANTIACLAUSULAS DE GARANTIA
CLAUSULAS DE GARANTIA
CLAUSULAS DE GARANTIACLAUSULAS DE GARANTIA
1. El aparato tiene una garantía de 24 meses a partir
de la fecha de fabricación indicada en la tarjeta
sobre el producto.
2. La garantía está aplicada solamente a los productos
no desarreglados y reparados por los centros de
asistencia TREVI. Además, la garantía incluye la
reparación de los componentes a causa de
defectos de fabricación, con la exclusión de
etiquetas, botones y partes removibles.
3. TREVI no es responsable por daños directos o
indirectos a cosas y/o personas causados por el uso
o suspensión del uso del aparato.
GARANTIA GARANTIA
GARANTIA
GARANTIA GARANTIA
1. O aparelho tem uma garantia de 24 meses a partir
da data de fabricação indicada na etiqueta que
consta no produto.
2. Somente aparelhos não violados, e que foram
reparados pelo Centro de Assistência TREVI
incluem-se nesta garantia. Esta compreende a
reparação dos componentes em caso de defeitos
de fabricação com a exclusão de etiquetas, botões
e partes que podem ser extraídas.
3. A TREVI não considera-se responsável por danos
directos ou indirectos, causados pelo uso ou
suspensão do uso do aparelho, à objectos e/ou
pessoas.
EGGUHSHEGGUHSH
EGGUHSH
EGGUHSHEGGUHSH
1. H suskeuhv evcei egguvhsh diavrkeiaj 24
mhnwvn apov thn hmeromhniva kataskeuhvj
pou anagravfetai sthn kollhmevnh epavnw
thj etikevta.
2. H egguvhsh evcei iscuv movno gia tij
suskeuevj, stij opoivej den evcei epembeiv
kaneivj, tij episkeuasmevnej apov ta
kevntra antiproswpeivaj TREVI kai
perilambavnei thn episkeuhv twn
sustatikwvn stoiceivwn pou eivnai
elattwmatikav apov kataskeuhvj ektovj
twn etiketwvn, ceirolabwvn kai
metakinouvmenwn tmhmavtwn.
3. H etairiva TREVI den eivnai upovlogh
avmeswn hv evmmeswn zhmiwvn se pravgmata
hv provswpa apov kakhv crhvsh hv
diakophv thj crhvshj thj suskeuhvj.
1111
11
1111
Page 12
MADE IN CHINA
TREVI S.p.A.TREVI S.p.A.
TREVI S.p.A. - Strada Consolare Rimini-San Marino, 62
TREVI S.p.A.TREVI S.p.A.
47924 Rimini (RN) Italy
www.trevi.it - E-mail: [email protected]
 Loading...