

Quick Installation Guide
TEW-P1UG

Table of Contents
Table of Contents
Deutsch .....................................................................................................
1. Bevor Sie anfangen ...........................................................................
2. Installation .........................................................................................
3. Konfiguration des Druckservers ........................................................
4. Hinzufügen des Netzwerkdruckers zu Ihren PC-Einstellungen .........
Troubleshooting ........................................................................................
1
1
2
3
6
8
Version 05.22.06

1. Bevor Sie anfangen
Systemanforderungen
CD-ROM-Laufwerk
Prozessor: Intel Pentium 100 MHz oder schneller
Speicher: 8 MB oder mehr
Windows 2003/XP/2000/ME/98SE, Unixware, Linux, Mac OS X
Anwendung
Packungsinhalt
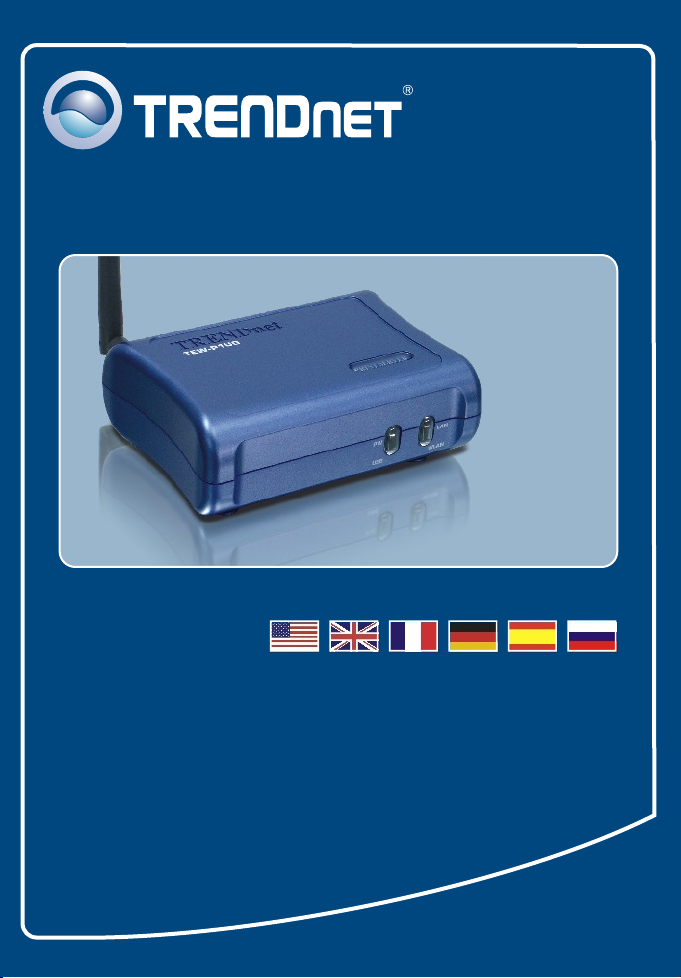
TEW-P1UG
Kurzanleitung zur Installation
Programm-CD
1 abnehmbare 2dBi-Antenne
Netzteil (5 V, 2,5 A)
54Mbps 802.11g Wireless
1-Port USB 2.0 Print Server
(TEW-P1UG)
Notebook with
Wireless PC Card
(TEW-421PC)
Workstation with
Wireless PCI Adapter
(TEW-423PI)
54Mbps Wireless
54Mbps 802.11g
Wireless Firewall Router
(TEW-432BRP)
1
Deutsch
USB Printer
Internet
Cable/DSL Modem
2. Installation
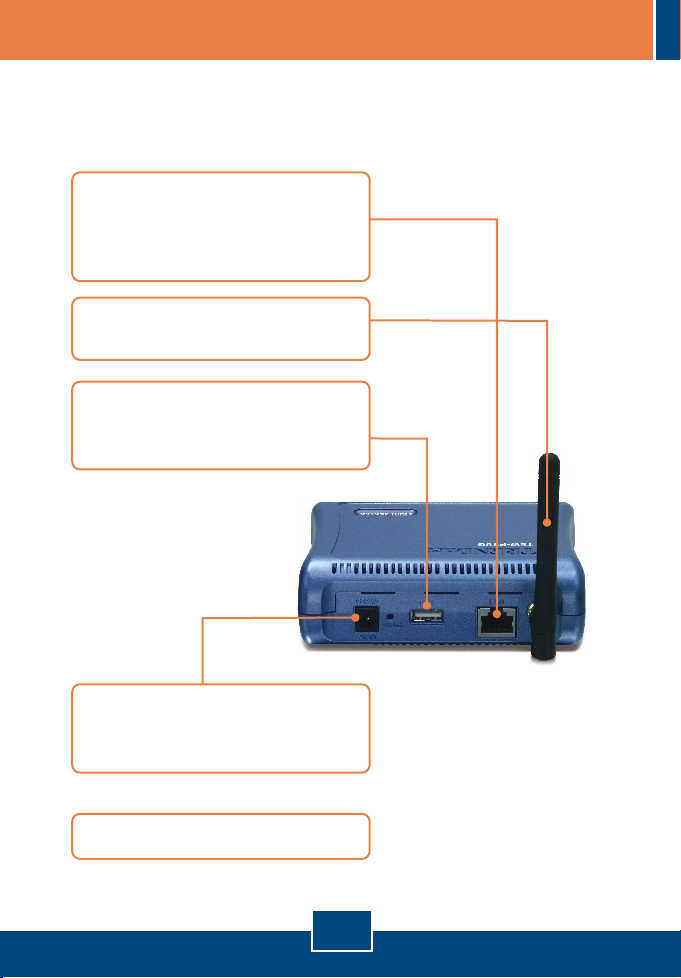
Hinweis: Schalten Sie bitte alle Drucker aus, bevor Sie sie mit dem
Druckserver verbinden.
1. Verbinden Sie den LAN-Port des
Druckservers über ein RJ-45-
Netzwerkkabel mit einem
Switch/Router.
2. Schließen Sie die abnehmbare
Antenne an.
3. Verbinden Sie den USB-Drucker
mit dem USB-Port des
Druckservers.
4. Verbinden Sie das Netzteil mit dem
Druckserver und stecken Sie es in
eine Steckdose.
5. Schalten Sie den Drucker ein.
2
Deutsch

3. Konfiguration des Druckservers
Hinweis: Der Druckserver kann über ein Druckserverprogramm oder einen
Webbrowser angesteuert werden. Benutzer von Macs ändern bitte die IPAdresse des Computers auf 192.168.0.X (X ist eine beliebige Nummer von 2
bis 254) Die standardmäßige IP-Adresse des Druckservers lautet 192.168.0.1.
Achten Sie also darauf, dass keine anderen Netzwerkgeräte mit dieser IPAdresse versehen sind. Geben Sie dann http://192.168.0.1 in Ihren
Webbrowser ein, um das Internetprogramm des Druckservers aufzurufen.
Für Benutzer von Windows
1. Legen Sie die Dienstprogramm-
CD in das CD-ROM-Laufwerk Ihres
Computers ein und klicken Sie auf
Install Utility (Programm
installieren).
2. Folgen Sie den Anweisungen des
Installationsassistenten. Klicken
Sie auf Finish (Fertigstellen).
3. Klicken Sie auf Start > All
Programs (Alle Programme) >
PS-Utility (Druckserverprogramm)
und dann erneut auf PS-Utility
(Druckserverprogramm).
3
Deutsch

4. Klicken Sie auf den Druckserver
und dann auf Change IP Address
(IP-Adresse ändern). Geben Sie die
IP-Adresse des Druckservers ein
und klicken Sie dann auf OK.
Hinweis: Die IP-Adresse muss zum
gleichen Netzwerksegment wie Ihr
Computer gehören.
5. Klicken Sie auf OK.
6. Klicken Sie auf Show Web Setup
(Web-Setup anzeigen).
7. Notieren Sie sich die Server- und
Printernamen.
4
Deutsch

8. Klicken Sie auf Configuration
(Konfiguration) und dort auf
Wireless (Drahtlos). Wählen Sie
die entsprechende SSID aus und
klicken Sie dann auf Save
(Speichern).
Der Druckserver ist jetzt vollständig konfiguriert.
5
Deutsch

4. Hinzufügen des Netzwerkdruckers zu Ihren
PC-Einstellungen
Hinweis: Detaillierte Hinweise zum TCP/IP-Druck entnehmen Sie bitte der
Bedienungsanleitung auf der CD.
Windows 2000/XP
1. Gehen Sie zu Control Panel
(Systemsteuerung) und
doppelklicken Sie dort auf das
Symbol Printers and Faxes
(Drucker und Faxgeräte).
2. Klicken Sie auf Add Printer
(Drucker hinzufügen) und dann auf
Next (Weiter).
3. Markieren Sie die Option Network
Printer (Netzwerkdrucker) und
klicken Sie auf Next (Weiter).
4. Markieren Sie Connect to this
printer (Verbindung mit folgendem
Drucker herstellen) und geben Sie
die Namen von Server und
Drucker im folgenden Format ein:
\\Servername\Druckername
klicken Sie auf Next (Weiter).
6
Deutsch

5. Klicken Sie auf OK.
6. Wählen Sie den geeigneten
Treiber für Ihren Drucker aus und
klicken Sie auf OK.
7. Markieren Sie Yes (Ja) und
klicken Sie auf Next (Weiter).
8. Klicken Sie auf Finish
(Fertigstellen).
9. Wiederholen Sie die Schritte 1 bis
8, wenn Sie den Drucker für
andere Netzwerk-PCs zugänglich
machen wollen.
Der Netzwerkdrucker ist jetzt vollständig installiert.
Weitere Informationen zu den Konfigurations- und erweiterten Einstellungen
des TEW-P1UG finden Sie in der Bedienungsanleitung auf der beiliegenden
Dienstprogramm-CD oder auf der Webseite von Trendnet unter
www.trendnet.com.
7
Deutsch

Troubleshooting
I correctly typed in the print server name and printer name, but I still cannot add a network
Q1.
printer. What should I do?
Double check your hardware connections; make sure that the print server and printer are
A1.
powered ON and are properly connected. Also verify that the spelling of the server name and
printer name are correct.
I verified that the hardware installation is correct and that the print server name and printer
Q2.
name are correct, but I still cannot find the network printer. What should I do?
Make sure that the print server name and printer name are entered correctly. There should be
A2.
no spaces, and the back slashes that separate the print server name and printer name should be
this, \\, instead of this, //.
I successfully added a network printer to my computer and I can print a test page, but I cannot
Q3.
print anything from Microsoft Word or other applications.
Make sure to set the newly installed network printer as your default printer. Click Start and
A3.
then click Printers & Faxes, verify that your printer icon has a check on it.
I configured my print server to automatically receive an IP Address from a DHCP server, and
Q4.
now I cannot go into the print server's web utility.
Open PS-Utility v3.00 (See 3. Configure the Print Server) to locate your print server's IP
A4.
Address. For Mac users, press the Reset button at the back of the TEW-P1UG, hold the button for
15 seconds, release the button, and enter in a web browser to access the web
utility features.
After I successfully configured the TEW-P1UG to match my wireless network settings, I can
Q5.
not print through the Print Server.
First, verify that the wireless settings match your wireless network settings. Second, verify that
A5.
the antenna is attached to the Print Server and the WLAN LED on the Print Server is lit.
If you still encounter problems or have any questions regarding the TEW-P1UG, please refer to the User’s
Guide included on the Utility CD-ROM or contact TRENDnet’s Technical Support Department.
Certifications
This equipment has been tested and found to comply with FCC and CE Rules. Operation is subject to the
following two conditions:
(1) This device may not cause harmful interference.
(2) This device must accept any interference received.
Including interference that may cause undesired operation.
http://192.168.0.1
Waste electrical and electronic products
must not be disposed of with household
waste. Please recycle where facilities
exist. Check with you Local Authority or
Retailer for recycling advice.
NOTE: THE MANUFACTURER IS NOT RESPONSIBLE FOR ANY RADIO OR TV
INTERFERENCE CAUSED BY UNAUTHORIZED MODIFICATIONS TO THIS
EQUIPMENT. SUCH MODIFICATIONS COULD VOID THE USER’S AUTHORITY TO
OPERATE THE EQUIPMENT.
8

TRENDnet Technical Support
.
US Canada
Toll Free Telephone: 1(866) 845-3673
24/7 Tech Support
Europe (Germany France Italy Spain Switzerland UK)
Toll Free Telephone: +00800 60 76 76 67
English/Espanol - 24/7
Francais/Deutsch - 11am-8pm, Monday - Friday MET
. . . . .
Worldwide
Telephone: +(31) (0) 20 504 05 35
English/Espanol - 24/7
Francais/Deutsch - 11am-8pm, Monday - Friday MET
Product Warranty Registration
Please take a moment to register your product online.
Go to TRENDnet’s website at http://www.trendnet.com
3135 Kashiwa Street
Torrance, CA 90505
USA
Copyright ©2006. All Rights Reserved. TRENDnet.
 Loading...