

Page 1
Page 2
TEW-P1P/TEW-P1U Quick Installation Guide
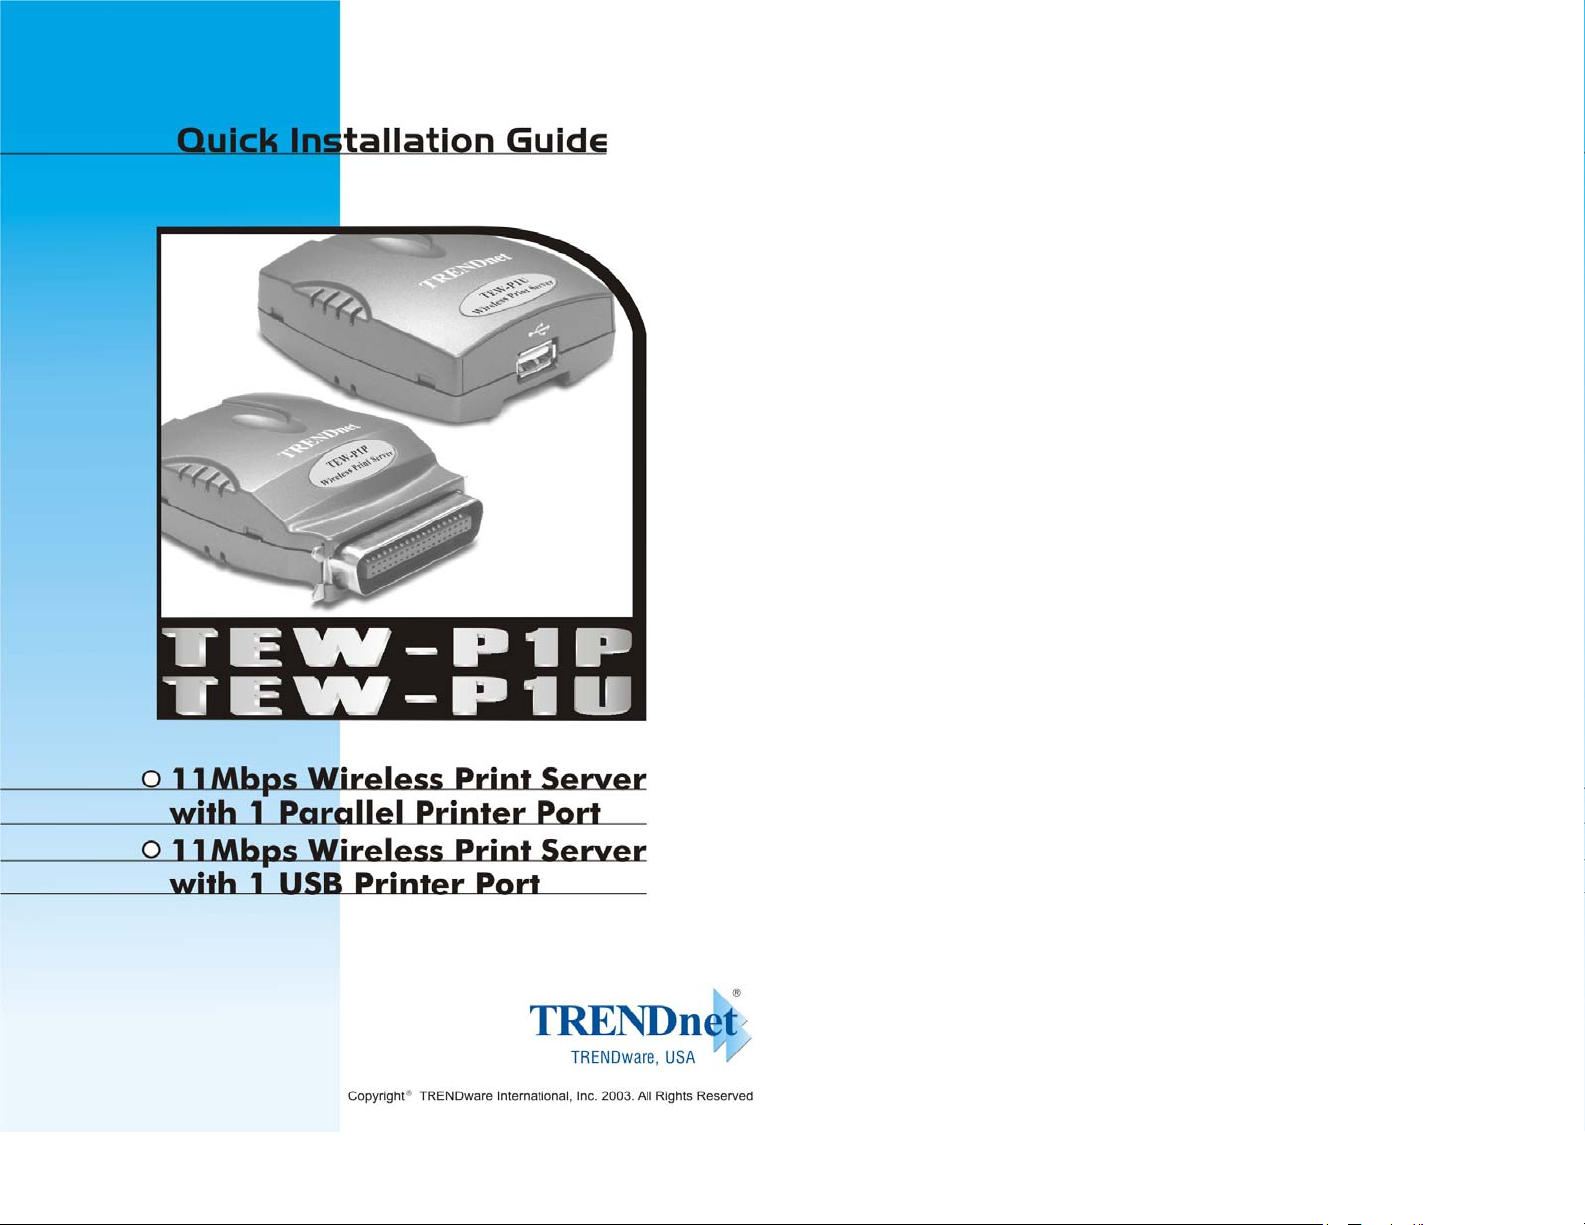
1. Print Server Layout
TEW-P1P
(IEEE 1284 Parallel Connector)
Back Side
Before you start the installation, you will need
z One Parallel or USB printer
z One computer with Windows Operating System and 802.11b compliant
wireless adapter
z One 802.11b Wireless Access Point (for Infrastructure wireless mode)
This Quick Installation Guide contains
brief instructions of the followings:
L
• Print Server Installation & Setup
• Network Printer Setup for Windows
95/98/Me/NT/2000/XP
For Unix, Netware and Mac. (Apple) environments,
please refer to the User’s Guide in the Manual folder
on the CD-ROM.
Page 1
TEW-P1U
(USB Connector)
1. Reset Button
2. Status LED (Orange)
3. WLAN LED (Green)
4. DIP Switch
Nor- Normal Mode (Infrastructure)
Diag-Diagnostics Mode (Ad-hoc)
5. Connector for Power Adapter
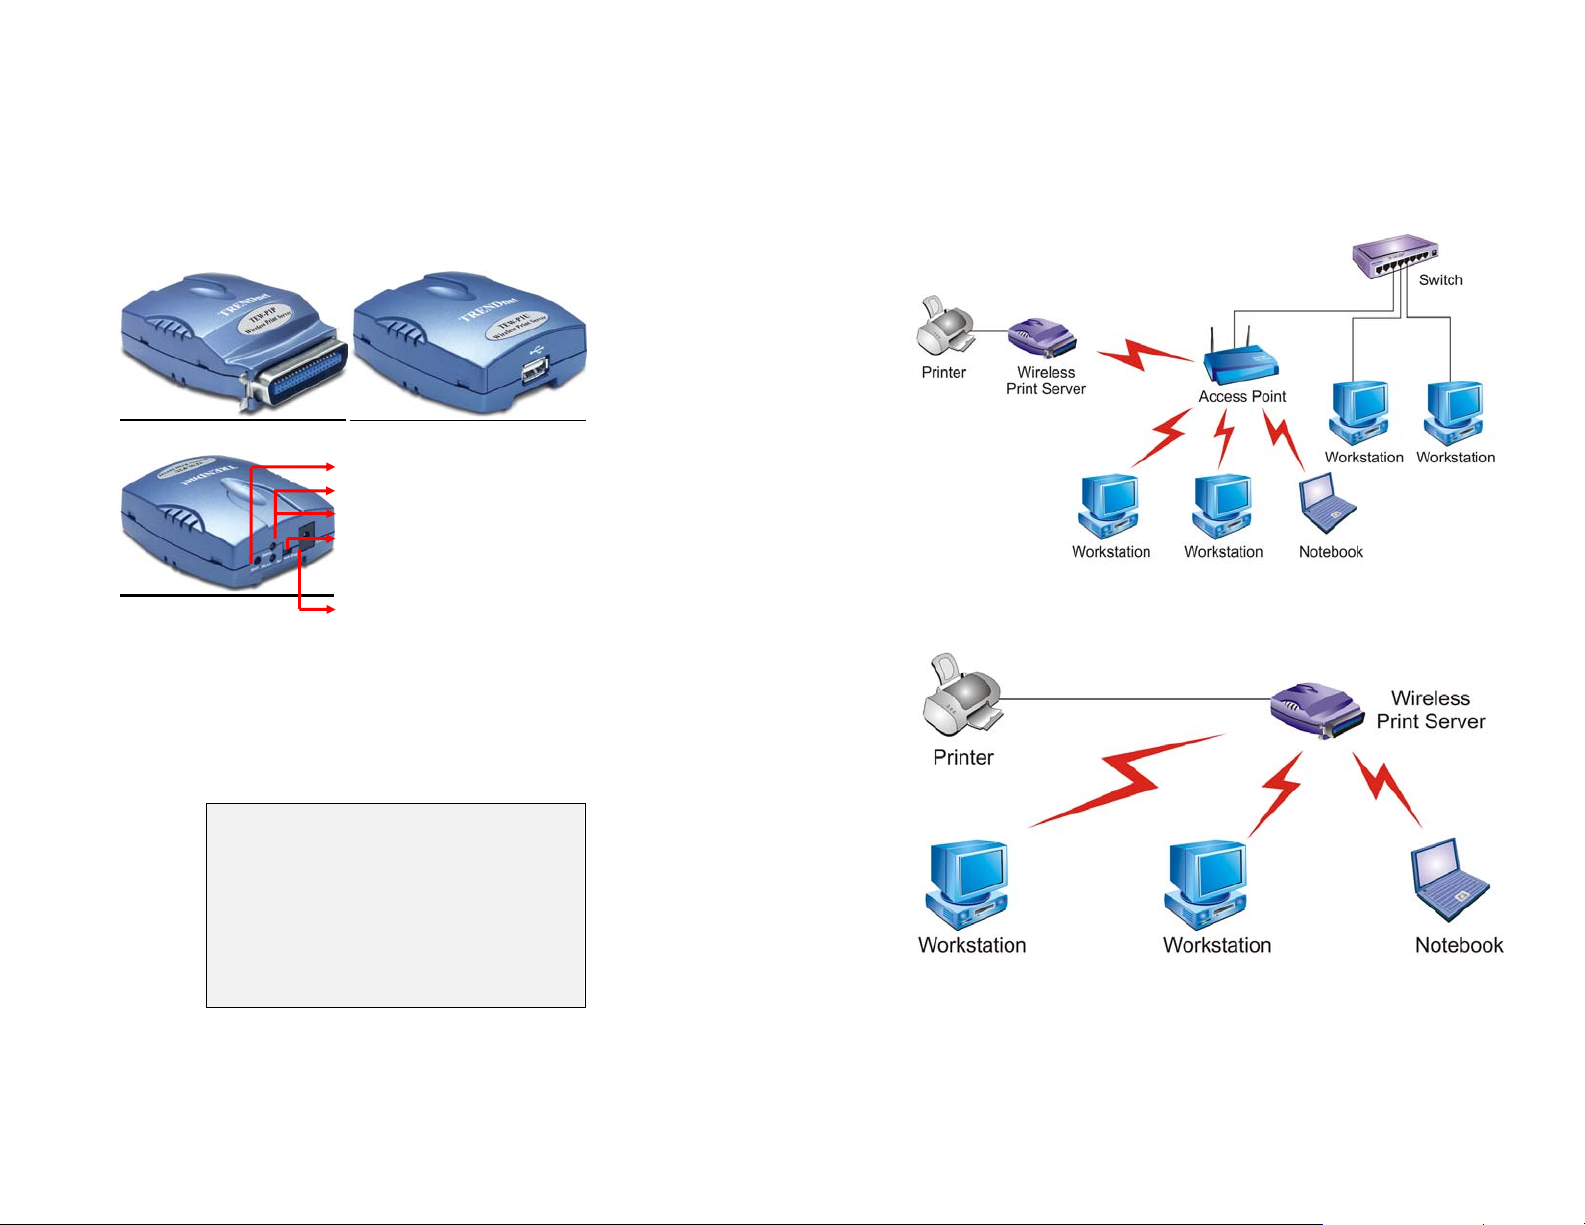
2. Wireless Network Environments
Infrastructure (AP) Mode
Ad-hoc (Peer-to-Peer) Mode
Page 2

3. Hardware Installation
1. Power off the Print Server and Printer.
2. Connect the Print Server’s printer port (USB or Parallel) to the printer.
3. Plug the AC power adapter into the power connector on the back of the
print server.
Note:
When the print server is powered on, the status indicator should
flash 5 times and then turn solid. If your print server does not do this,
please contact your local dealer for repair or replacement.
4. Power on the printer.
5. Hardware Installation Completed.
Wireless Installation Procedures
Ad-Hoc Mode (Peer-to-Peer):
- Switch the Print Server’s DIP switch to DIAG mode.
- Check on the Computer’s and see if TCP/IP protocol (for the wireless
adapter) is installed and an IP address assigned to the wireless
adapter. For example: IP address: 192.168.1.100, subnet:
255.255.255.0.
- Run the utility of your wireless adapter and set it to Ad-hoc
(Peer-To-Peer) mode.
- Set the wireless adapter’s SSID to WLAN-PS, wireless channel to 6,
and disable WEP (or use Site Survey tool to connect to the unit).
- Run the Wireless Setup Wizard and refer to the Software
Installation step 2 ~ 14
meet your wireless network environment.
- Run Network Print Server Wizard and refer to the Printer
Installation step 1 to 7(page 10).
- Done
(page 4) to configure your wireless printer to
Infrastructure Mode:
- Switch the Print Server’s DIP switch to DIAG mode.
- Check on the Computer’s and see if TCP/IP protocol (for the wireless
adapter) is installed and an IP address assigned to the wireless
adapter. For example: IP address: 192.168.1.100, subnet:
255.255.255.0.
- Run the utility of your wireless adapter and set it to Ad-hoc
(Peer-To-Peer) mode.
- Set the wireless adapter’s SSID to WLAN-PS, wireless channel to 6,
and disable WEP (or use Site Survey tool to connect to the unit).
- Run the Wireless Setup Wizard and refer to the Software
Installation step 2 ~ 14
(page 4) to configure your wireless printer to
meet your wireless network environment.
- Switch the DIP back to Normal mode
- Configure your wireless adapter and connect it back to your Access
Point
- Run Network Print Server Wizard and refer to the Printer
Installation step 1 to 7(page 10).
- Done.
4. Software Installation (For Win95/98/ME/NT/2000/XP)
Wireless Installation
1. Insert the Utility CD into your CD-ROM.
2. The Autorun program starts and the following window appears.
If the setup program does not start automatically, run Autorun.exe in the
root folder from the CD-Rom.
Page 3
Page 4
 Loading...