

TRENDnet TEW-P1PG - Wireless Parallel Print Server, TE100-P1P, TEW-P1PG Installation Instructions Manual
Page 1
TE100-P1P/TEW-P1PG Windows 7 Installation Instruction
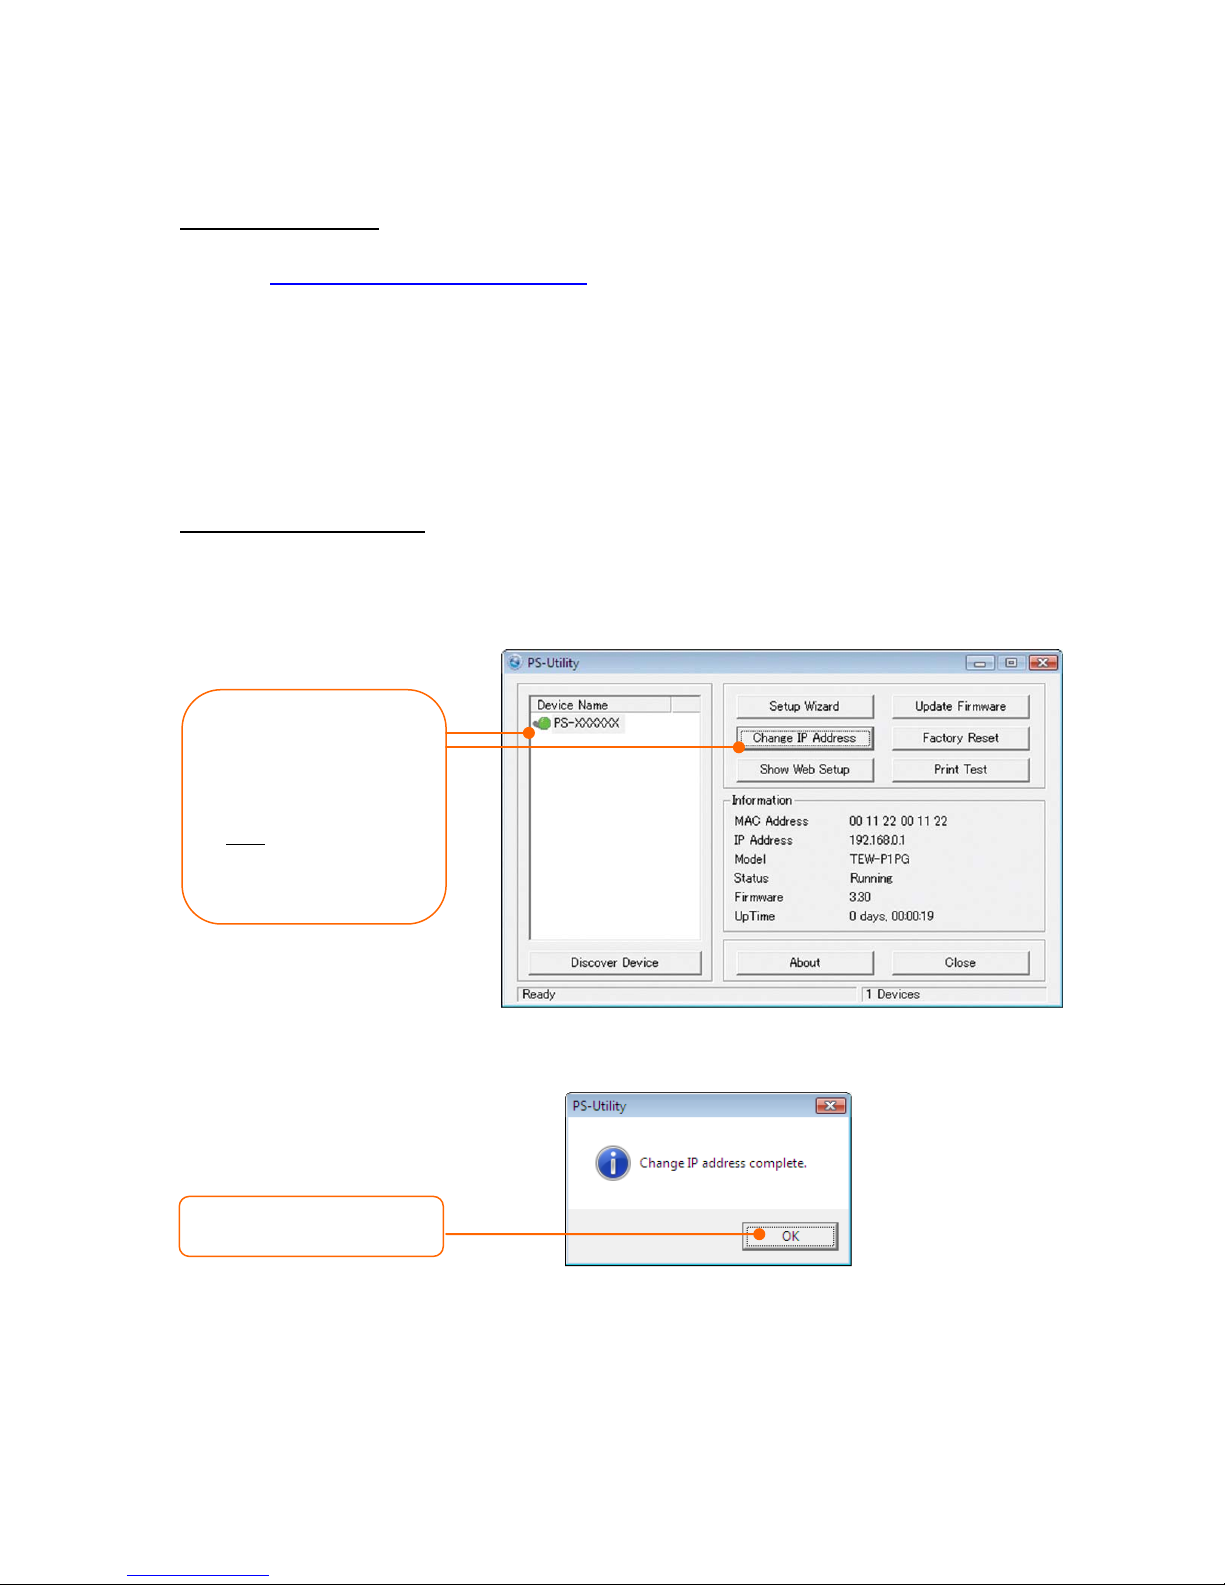
b. Click OK
a. Select the Print Server and
Hardware Installati on
1. Go to
2. Right click on the file and select Extract All. Follow the wizard to uncompress the file.
3. Connect a RJ-45 Network cable from a switch/router to the LAN port of the Print Server
4. Connect the detachable antenna (for TEW-P1PG only)
5. Connect the AC power adapter to the Print Server and then to a power outlet
6. Connect the Parallel Printer to the Parallel port on the Print Server
7. Power on the Printer
Configure the Print Server
1. Double click on PSUtilitySetup_v3.13.exe
2. Follow the steps to configure the Print server
http://www.trendnet.com/downloads/ to download the Windows 7 Utility. Save the file to
your desktop.
click Change IP Address.
Manually assign the IP
Address of the Print
Server and then click OK.
Note: The IP Address must
match the network
segment of your network.
Page 2
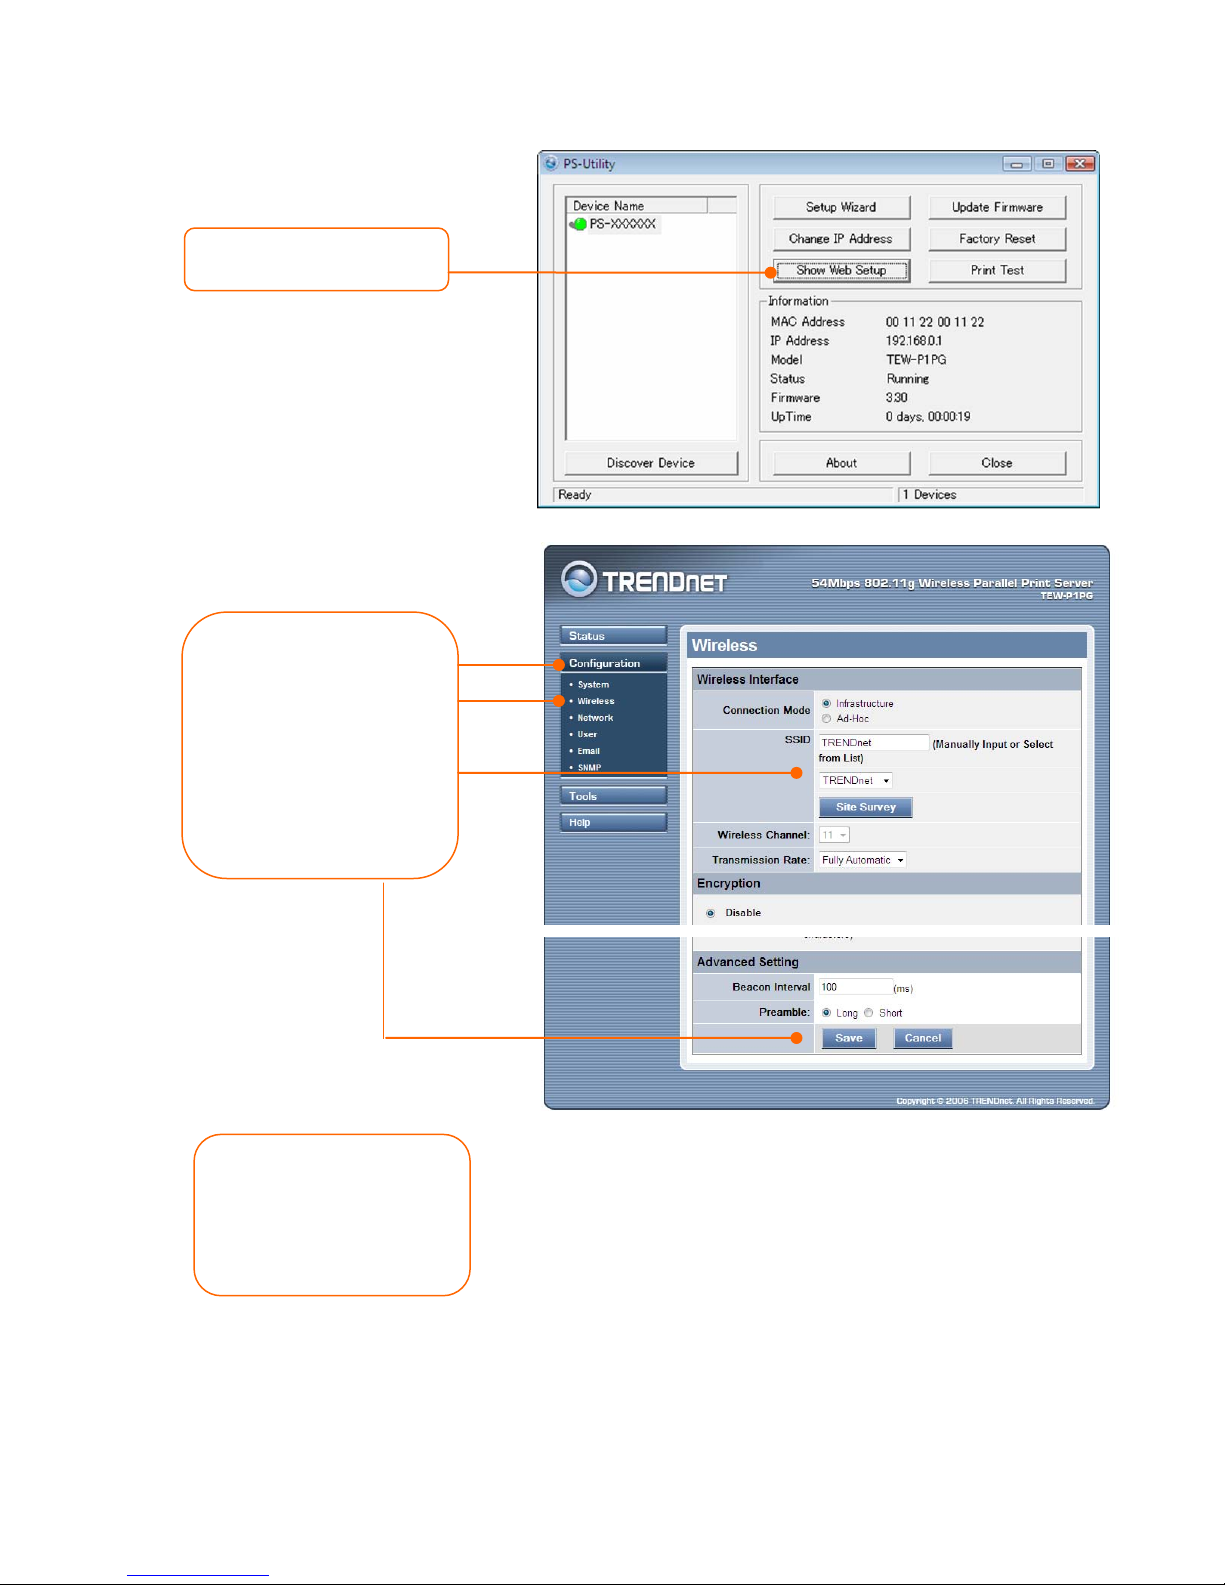
e. Unplug the Ethernet cable
d. Click on Configuration,
key)(TEW-P1PG only).
c. Click Show Web Setup.
then Wireless. Select the
proper SSID and then click
Save. (Enable and enter the
encryption key if your
wireless network is
encrypted. Please contact
your Network Administrator
for the encryption
and the power adapter from
the print server. Wait 15
seconds, then plug the power
adapter back in (TEW-P1PG
Page 3
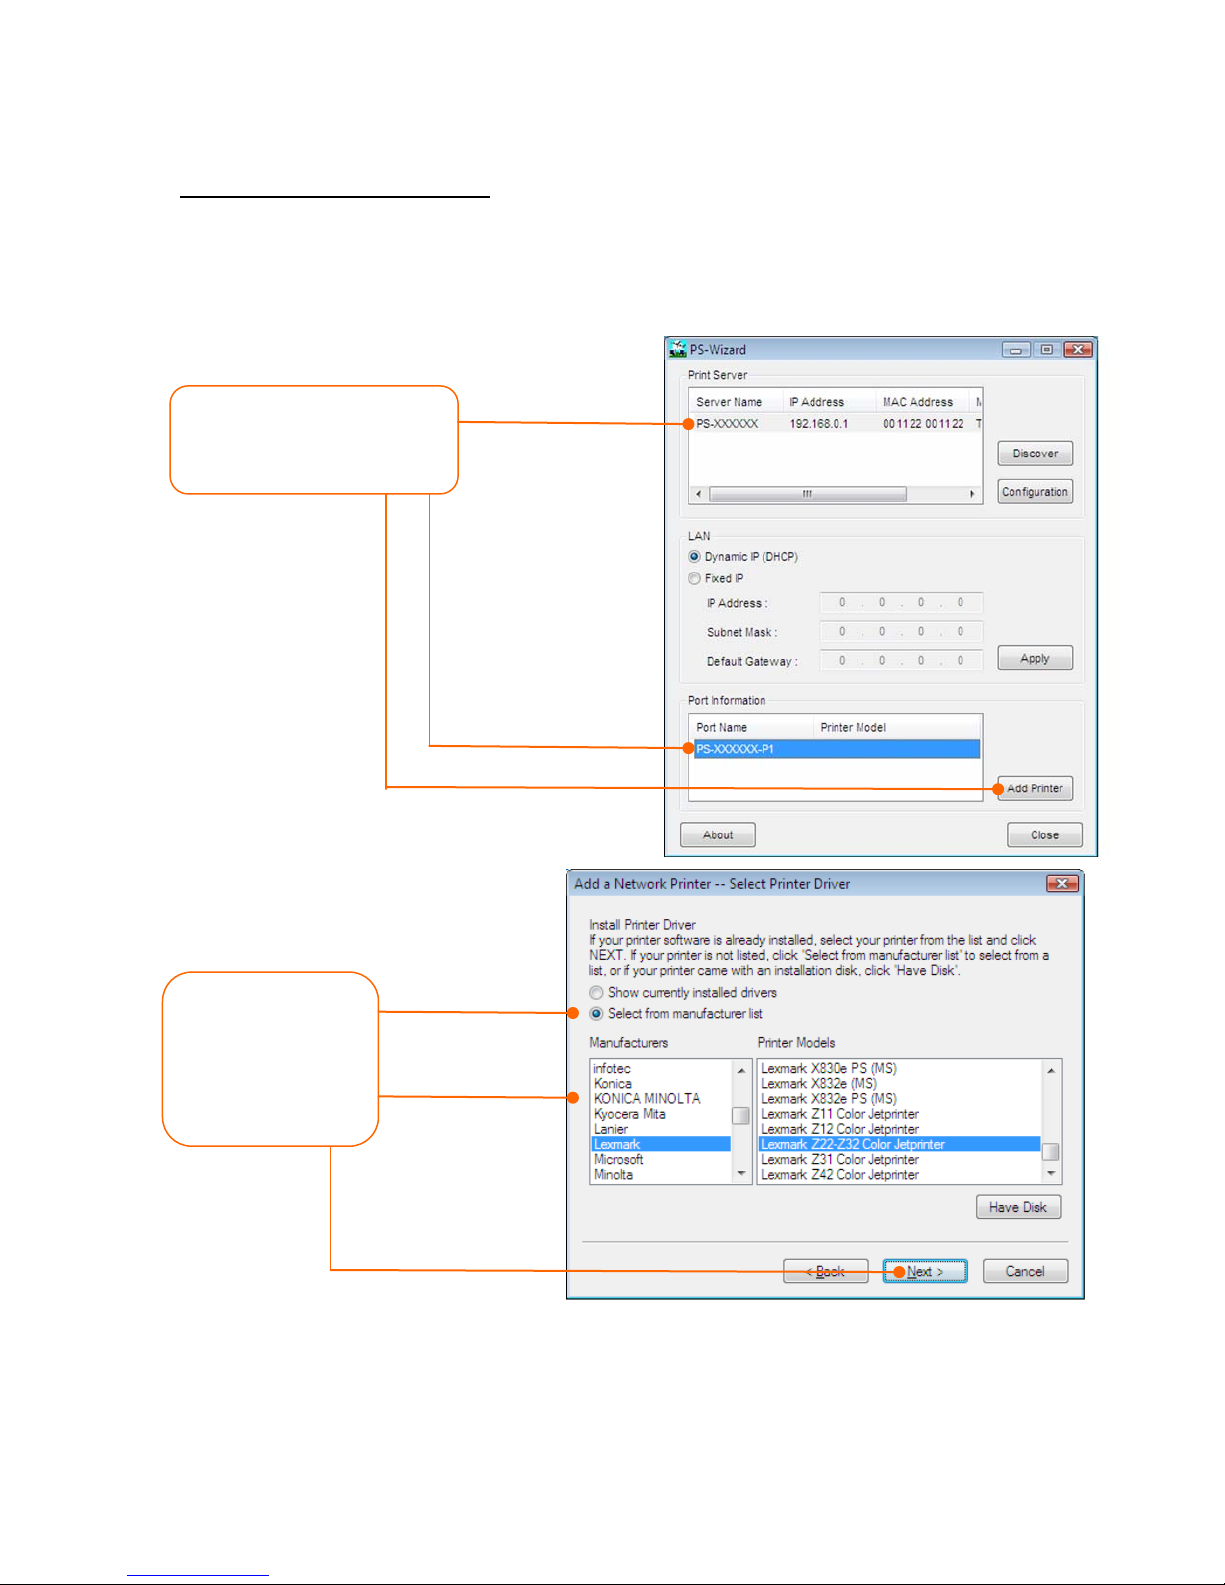
b. Click Select from
a. Select the print server, select
Add the Printer to your computer
1. Double click on PSWizardSetup_v2.20.exe
2. Follow the steps to add the printer to your computer
the desired port and then click
Add Printer.
manufacturer list.
Select the
appropriate driver for
your printer and then
click Next.
Page 4
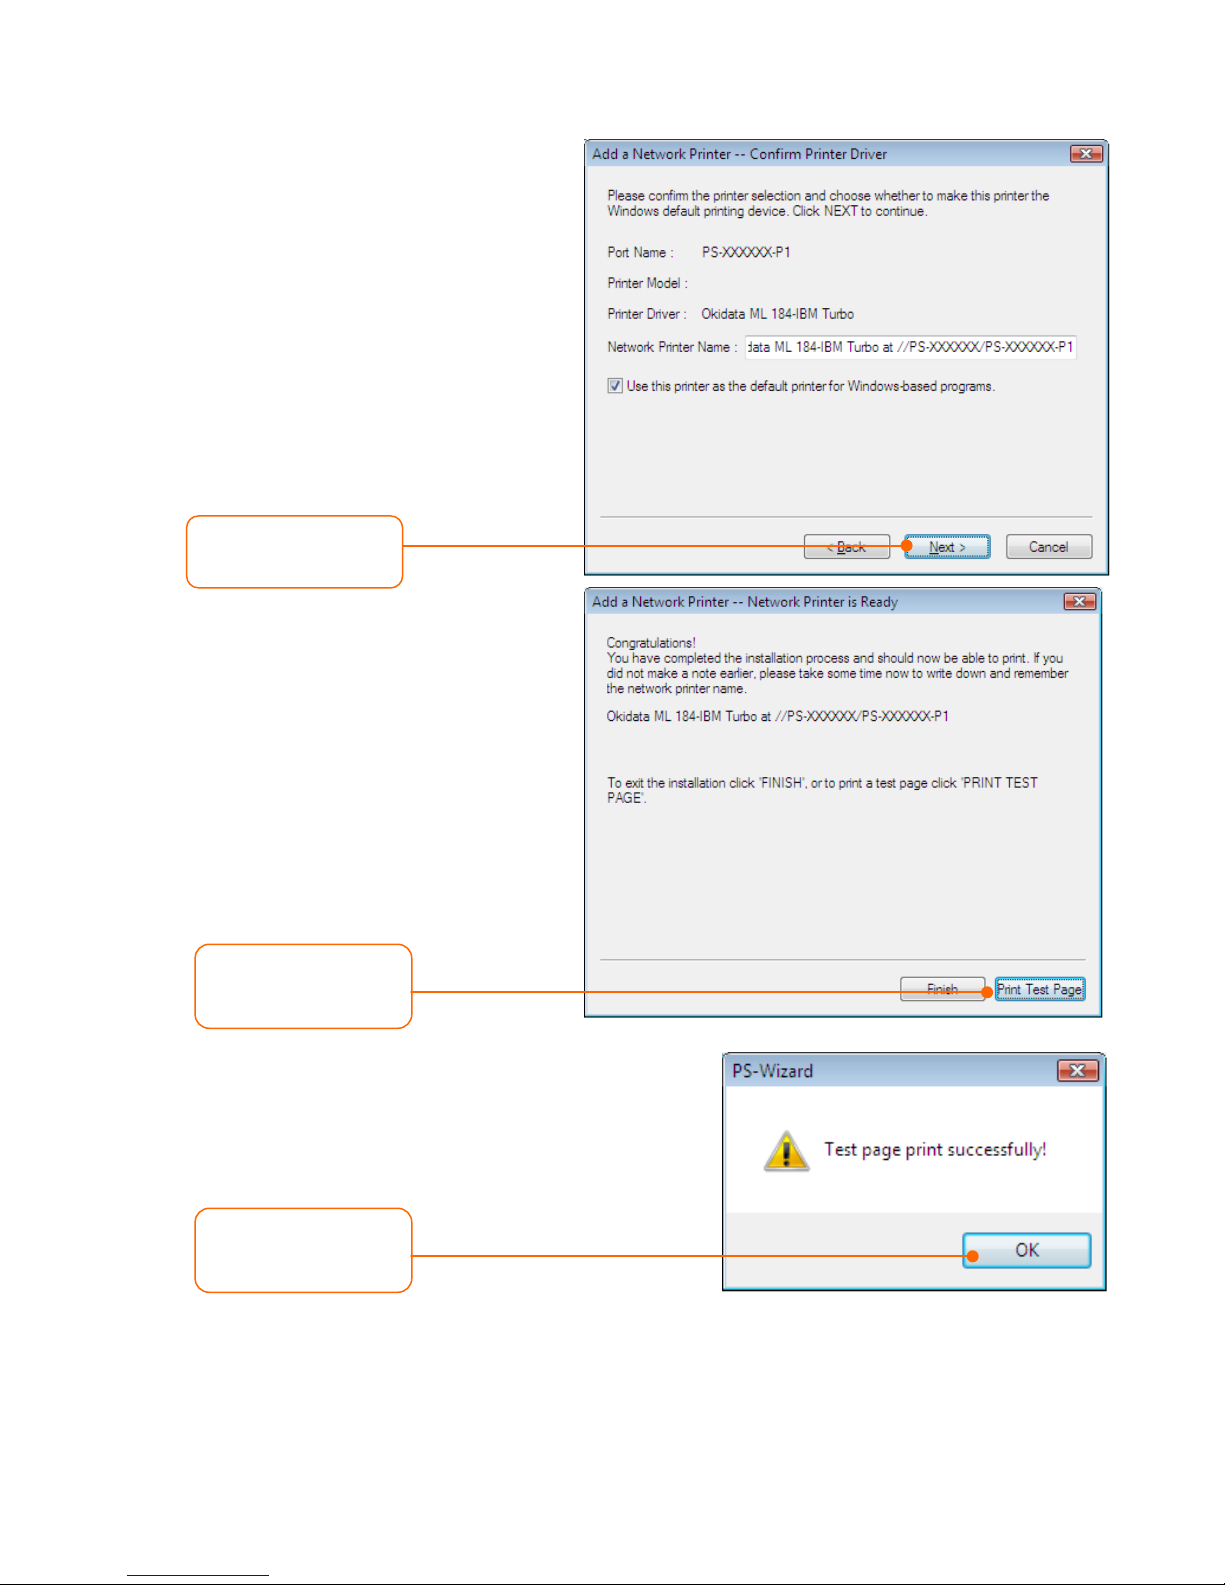
c. Click Next.
d. Click Print Test Page.
e. Click OK.
Page 5

g. Repeat the above steps to add the
f. Click Finish.
printer to other computers on the
Page 6

Troubleshooting
The PS Wizard / PS Utility is unable to see my printer server. What should I do?
1. Double check your hardware connections; make sure that the print server and printer are powered ON
and are properly connected.
2. Click Discover.
3. Disable any software firewall programs (e.g. ZoneAlarm). Also disable the built in Windows firewall
program.
My printer does not print the entire document. What should I do?
Windows 7
1. Click on the Windows icon on the bottom left-hand corner of the screen.
2. Click Devices and Printers.
3. Right click on the printer and select Printer Properties.
4. Click the Advanced tab.
5. Uncheck Enable advanced printing features.
6. Click Apply.
7. Click OK.
I successfully added a printer to my computer and I can print a test page, but I cannot print anything from
Microsoft Word or other applications.
Make sure the printer is set as your default printer. Click the Windows icon -> Devices and Printers and verify
that your printer icon has a check on it.
I configured my print server to automatically receive an IP Address from a DHCP server, and now I cannot go
into the Print Server’s web utility.
Open PS Wizard (See Add the Printer to your PC) to locate your print server’s IP Address.
After I successfully configured the TEW-P1PG to match my wireless network settings, I can not print through
the Print Se rver.
1. Verify that the wireless settings match your wireless network settings.
2. Verify that the antenna is attached to the Print Server and the WLAN LED on the Print Server is lit.
I forgot the administration password. How do I reset my print server?
Factory reset the print server using the following procedure. This procedure will reset all settings to default.
By default, there is no password.
1. Open up PS-Utility.
2. Copy down the last 4 digits of the MAC address.
3. Press the Factory Reset button.
4. When prompted for a password, enter SYSXXXX, where XXXX represents the last 4 digits of the MAC
address. Note: All letters must be uppercase.
 Loading...