

Page 1
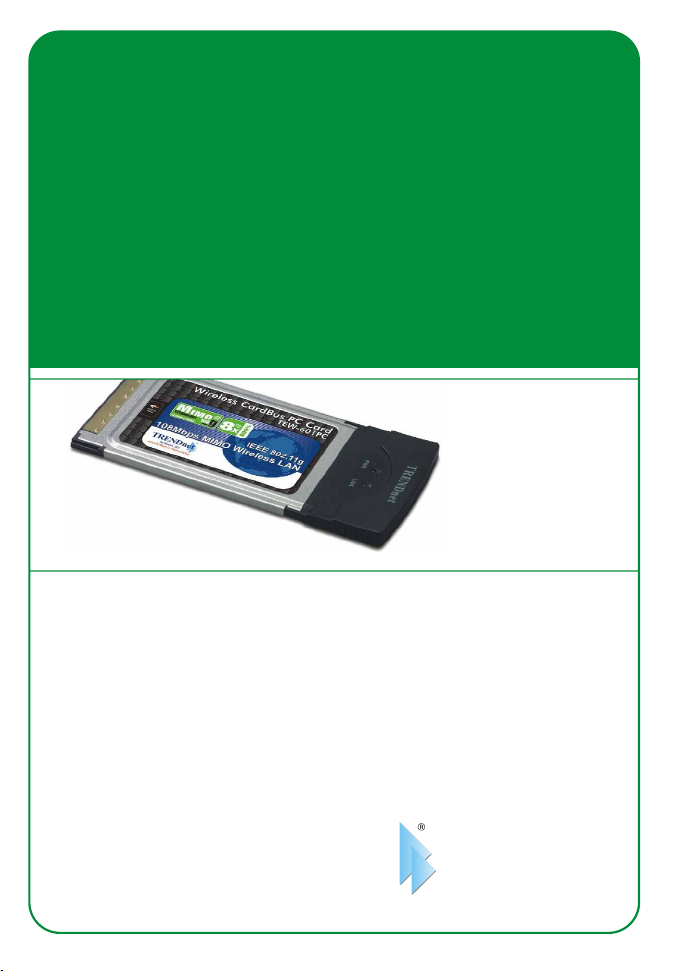
TEW-601PC
Quick Installation Guide
Version 08.05.2005
TRENDnet
TRENDware, USA
What's Next in Networking
Copyright ©2005. All Rights Reserved. TRENDware International, Inc.
Page 2

Table of Contents
Deutsch ......................................................................................................
1. Vorbereitung der Installation ..............................................................
2. Installation des Konfigurationsprogramms ........................................
3. Installation der Hardware ..................................................................
4. Installation der Treiber .......................................................................
5. Drahtlose Konfiguration .....................................................................
Troubleshooting...........................................................................................
1
1
2
5
6
8
9
Page 3

Deutsch QIG
1. Vorbereitung der Installation
Packungsinhalt
Prüfen Sie bitte, ob alle erforderlichen Einzelteile in der Packung enthalten
TEW-601PC
Quick Installation Guide
Version 08.05.2005
TRENDnet
TRENDware, USA
What's Next in Networking
Copyright ©2005. All Rights Reserved. TRENDware International, Inc.
TEW-601PC
CD mit Bedienungsanleitung
Prüfung Ihrer Ausrüstung
Bevor Sie diese PC-Karte installieren, sollten Sie über folgendes verfügen:
1. Computer mit einem verfügbaren 32-Bit-CardBus
2. 300-MHz-Prozessor und 32 MB Arbeitsspeicher (empfohlen)
3. CD-ROM-Laufwerk
4. Korrekt installierter CardBus-Controller
5. 802.11g/802.11b Access Point (für den Infrastrukturmodus) oder
einen anderen drahtlosen 802.11g/802.11b -Adapter (für den Ad-
Hoc/Peer-to-Peer-Netzwerkmodus).
Wichtig! Installieren Sie die PC-Karte NICHT im Computer, bevor Sie dazu
aufgefordert werden. Befolgen Sie bitte zuerst die in Abschnitt 2 aufgeführten
Schritte und installieren anschließend den Adapter in Ihrem Computer.
Kurzanleitung zur Installation
1
Deutsch
Page 4
2. Installation des
Konfigurationsprogramms
Windows 2000/XP
1. Legen Sie die TEW-601PC-CD in das CD-ROM-Laufwerk Ihres
Computers ein. Daraufhin erscheint automatisch das Installationsmenü.
Wenn das Menü nicht angezeigt wird, klicken Sie bitte auf Start, dann auf
Run (Ausführen) und geben in das Textfeld E:\Autorun.exe ein. Klicken Sie
auf OK, um die Installation zu starten.
Hinweis: Ersetzen Sie „E“ in „E:\Autorun.exe“ mit dem Buchstaben, der
Ihrem CD-ROM-Laufwerk zugeordnet ist.
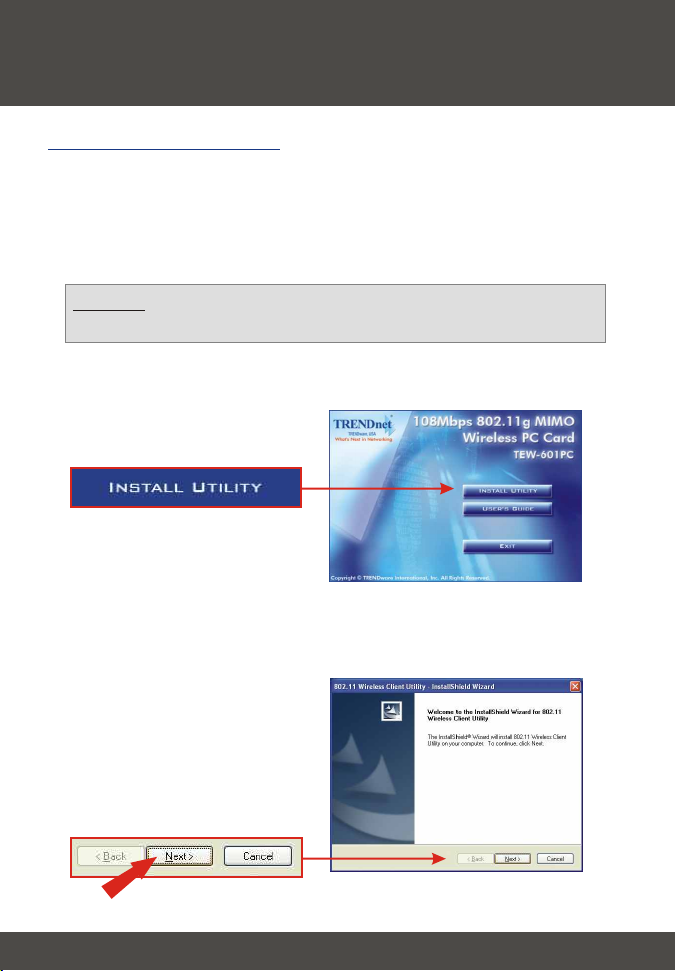
2. Klicken Sie im Installationsmenü auf Install Utility (Programm installieren).
3. Klicken Sie auf Next (Weiter).
2
Deutsch
Page 5

4. Klicken Sie auf Next (Weiter).
5. Klicken Sie auf Install (Installieren).
3
Deutsch
Page 6

6. Daraufhin erscheint die Warnung, dass das Gerät, das Sie gerade
installieren, noch nicht als kompatibel mit Windows XP zertifiziert worden ist.
Klicken Sie auf Continue Anyway (Vorgang dennoch fortsetzen). Klicken
Sie bei Windows 2000 auf Yes (Ja).
7. Klicken Sie auf Finish (Fertigstellen).
4
Deutsch
Page 7

3. Installation der Hardware
Wenn Sie die drahtlose PC-Karte TEW-601PC installieren:
Führen Sie die Installation nur durch, wenn Sie die Schritte in Abschnitt 2
umgesetzt haben.
1. Fahren Sie Ihren Computer herunter.
2. Stecken Sie die PC-Karte fest in den offenen PC-Karten-Steckplatz Ihres
Notebooks ein. Aus dem Steckplatz sollte nur noch das Plastikende
herausschauen.
3. Starten Sie Ihren Computer neu.
5
Deutsch
Page 8

4. Installation der Treiber
Windows 2000
1. Nach dem Neustart Ihres Computers erscheint die Nachricht, dass der
Treiber, den Sie installieren, keine digitale Signatur enthält („does not
contain a digital signature“). Sie werden gefragt, ob Sie die Installation
fortsetzen möchten. Klicken Sie auf Yes (Ja).
2. Setzen Sie die Konfiguration Ihrer drahtlosen Karte entsprechend den
Angaben im Abschnitt Konfiguration der drahtlosen Verbindung fort.
Windows XP
1. Nach dem Neustart Ihres Computers erscheint der „Found New Hardware
Wizard“ (der Assistent „Neue Hardwarekomponente gefunden“). Markieren
Sie Install the software automatically (Software automatisch installieren)
und licken Sie auf Next (Weiter).
6
Deutsch
Page 9

2. Daraufhin erscheint die Warnung, dass das Gerät, welches Sie gerade
installieren, noch nicht als kompatibel mit Windows XP zertifiziert worden ist.
Klicken Sie auf Continue Anyway (Vorgang dennoch fortsetzen).
3. Klicken Sie auf Finish (Fertigstellen).
Setzen Sie die Konfiguration Ihrer drahtlosen Karte entsprechend den Angaben
im Abschnitt 5 dieser Anleitung fort.
7
Deutsch
Page 10

5. Drahtlose Konfiguration
1. Doppelklicken Sie auf das Symbol für die drahtlose Kommunikation in der
Symbolleiste (neben der Uhrzeit in der rechten unteren Ecke Ihres
Bildschirms).
2. Klicken sie auf Site Survey (Standort-Übersicht). Klicken Sie dann auf
Refresh (Aktualisieren) und wählen Sie den gewünschten Access Point aus.
Klicken Sie auf Connect (Verbindung herstellen).
3. Klicken Sie auf OK.
4. Prüfen Sie bitte Ihren Verbindungsstatus.
Herzlichen Glückwunsch! Ihre Installation ist beendet!
8
Deutsch
Page 11

Troubleshooting
I completed all the steps in the quick installation guide, but my card isn't
Q1:
connecting to my access point. What should I do?
You should first verify that the Network card’s SSID matches your wireless
A1:
router or access point's SSID. If they already match, you should check your TCP/IP
properties to ensure that Obtain an IP address automatically is selected. Refer to
your Windows User's Manual if you are unable to locate your TCP/IP properties.
Windows is unable to recognize my hardware. What should I do?
Q2:
Make sure your computer meets the minimum requirements as specified in
A2:
Section 1 of this quick installation guide. Also, you must install the wireless
configuration utility (as described in Section 2) BEFORE you physically install your
network card. Lastly, you may consider moving the card to a different PC Card
Slot.
I cannot open the wireless configuration utility. What should I do?
Q3:
Go to your device manager (control panel > system) to make sure the adapter
A3:
is installed properly. If you see a networking device with a yellow question mark or
exclamation point, you will need to reinstall the device and/or the drivers.
If you still encounter problems, please refer to the User's Guide CD-ROM or contact
technical support.
Certifications
This equipment has been tested and found to comply with FCC and CE Rules. Operation is
subject to the following two conditions:
(1) This device may not cause harmful interference.
(2) This device must accept any interference received including interference that may cause
undesired operation.
NOTE: THE MANUFACTURER IS NOT RESPONSIBLE FOR ANY RADIO OR TV
INTERFERENCE CAUSED BY UNAUTHORIZED MODIFICATIONS TO THIS
EQUIPMENT. SUCH MODIFICATIONS COULD VOID THE USER’S AUTHORITY TO
OPERATE THE EQUIPMENT.
9
Page 12

@
TRENDnet
TRENDware, USA
What's Next in Networking
Product Warranty Registration
Please take a moment to register your product online.
Go to TRENDware’s website at http://www.TRENDNET.com
TRENDnet Technical Support
US/Canada Support Center European Support Center
Contact
Telephone:
Fax:
Email:
Tech Support Hours
7:30am - 6:00pm Pacific Standard Time
Monday - Friday
1(310) 626-6252
1(310) 626-6267
support@trendnet.com
TRENDware International, Inc.
3135 Kashiwa Street. Torrance, CA 90505
Contact
Telephone
Deutsch : +49 (0) 6331 / 268-460
Français : +49 (0) 6331 / 268-461
Español : +49 (0) 6331 / 268-462
English : +49 (0) 6331 / 268-463
Italiano : +49 (0) 6331 / 268-464
Dutch : +49 (0) 6331 / 268-465
Fax:
Tech Support Hours
8:00am - 6:00pm Middle European Time
Monday - Friday
08-00-90-71-61 (numéro vert)
+49 (0) 6331 / 268-466
http://www.TRENDNET.com
Copyright ©2004. All Rights Reserved. TRENDware International, Inc.
 Loading...