

Page 1
TEW-429UB
802.11g Wireless USB 2.0 Adapter with WiFi Detector
Adaptateur USB 2.0 sans fil 802.11g avec détecteur WiFi
Drahtloser 802.11g USB-2.0-Adapter mit WiFi-Detektor
Adaptador USB 2.0 inalámbrico 802.11g con detector WiFi
Адаптер стандарта 802.11g Wireless USB 2.0 с локатором WiFi
Quick Installation Guide
Guide d'installation rapide
Kurzanleitung zur Installation
Guía de instalación rápida
Руководство по быстрой установке
Version 07.05.2005
TRENDnet
TRENDware, USA
What's Next in Networking
Copyright ©2005. All Rights Reserved. TRENDware International, Inc.
Page 2

Table of Contents
English ..................................................................................................................
1. Prepare for Installation ..................................................................................
2. Using the Hot Spot Detector...........................................................................
3. Install Wireless Configuration Utility .............................................................
4. Install Hardware ............................................................................................
5. Install Drivers ................................................................................................
6. Wireless Configuration ..................................................................................
Troubleshooting .....................................................................................................
1
1
2
5
8
9
12
14
Page 3
English QIG
1. Prepare for Installation
Thank you for purchasing the TEW-429UB. Your new 54Mbps 802.11g
Wireless USB 2.0 Adapter will allow you to connect to 802.11g or 802.11b
networks and begin wirelessly sharing the Internet, files, and other resources.
You can also locate various Hot Spots by using the LCD display.
This guide will help you set up and configure your Wireless USB Adapter.
Following this installation should be quick and easy. If you run into problems,
please refer to the Troubleshooting section or the more detailed installation
procedures on the User's Guide CD-ROM. If you need further technical
support, please visit www.TRENDNET.com or call technical support by phone.
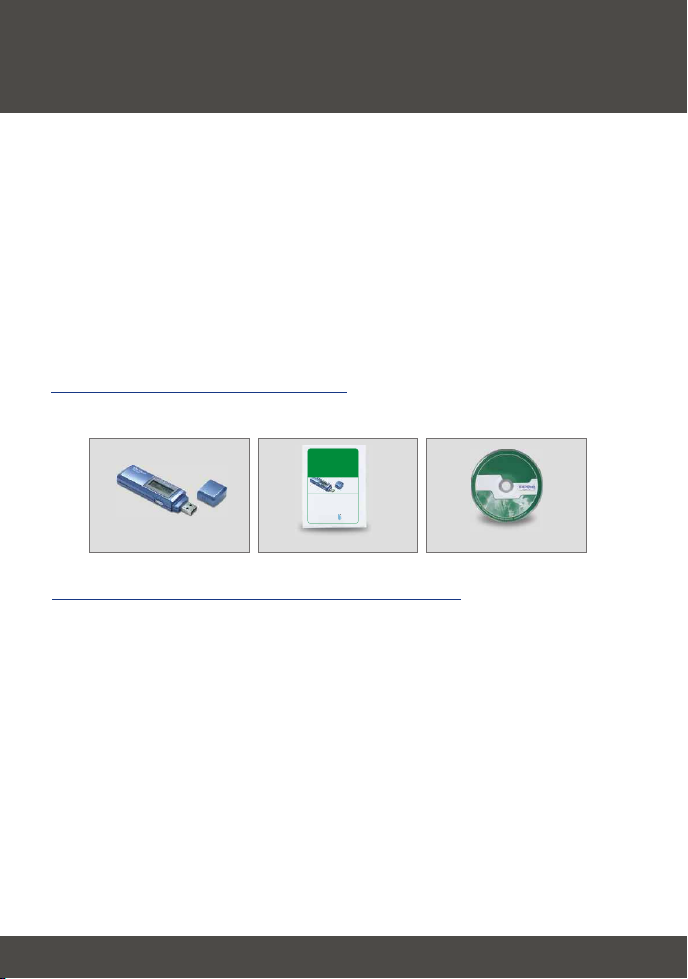
Verify Package Contents
Please make sure you have everything in the box:
TEW-429UB
802.11g Wireless USB 2.0 Adapter with WiFi Locator
Quick Installation Guide
Adaptateur USB 2.0 sans fil 802.11g avec localisateur WiFi
Guide d'installation rapide
Drahtloser 802.11g USB-2.0-Adapter mit WiFi-Locator
Kurzanleitung zur Installation
Adaptador USB 2.0 inalámbrico 802.11g con localizador WiFi
Guía de instalación rápida
Адаптер 802.11g Wireless USB 2.0 с локатором WiFi
Руководство по быстрой установке
Version 07.05.2005
TRENDnet
TRENDware, USA
What's Next in Networking
Copyright ©2005. All Rights Reserved. TRENDware International, Inc.
TEW-429UB
Minimum Hardware Requirements
Before installing this 802.11g Wireless USB Adapter, you should have a:
1. USB enabled computer
2. 300 MHz processor and 128 MB of memory (Recommended)
3. A minimum of 20MB of hard disk space.
4. CD-ROM drive
5. 802.11g or 802.11b Access Point (for Infrastructure Mode) or another
802.11g wireless adapter (for Ad-Hoc/Peer-to-Peer networking mode).
6. Windows 98SE/ME/2000/XP
Quick Installation Guide
CD-Rom
1
English
Page 4
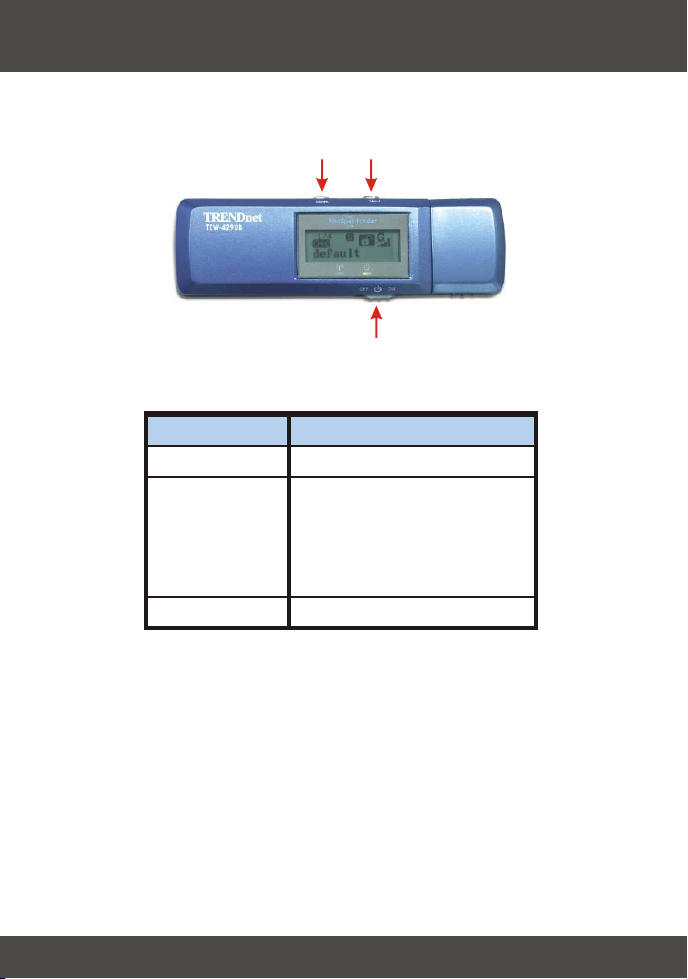
2. Using the Hot Spot Detector
The following table illustrates each button's function.
Seek
Next
Power
Button
Power
Seek
Next
Functions
Switch Power on/off
1. Press [Seek] to search
hotspots
2. Press and hold the [Seek]
button for 2 seconds to use
different scanning features
View the next access point
2
English
Page 5
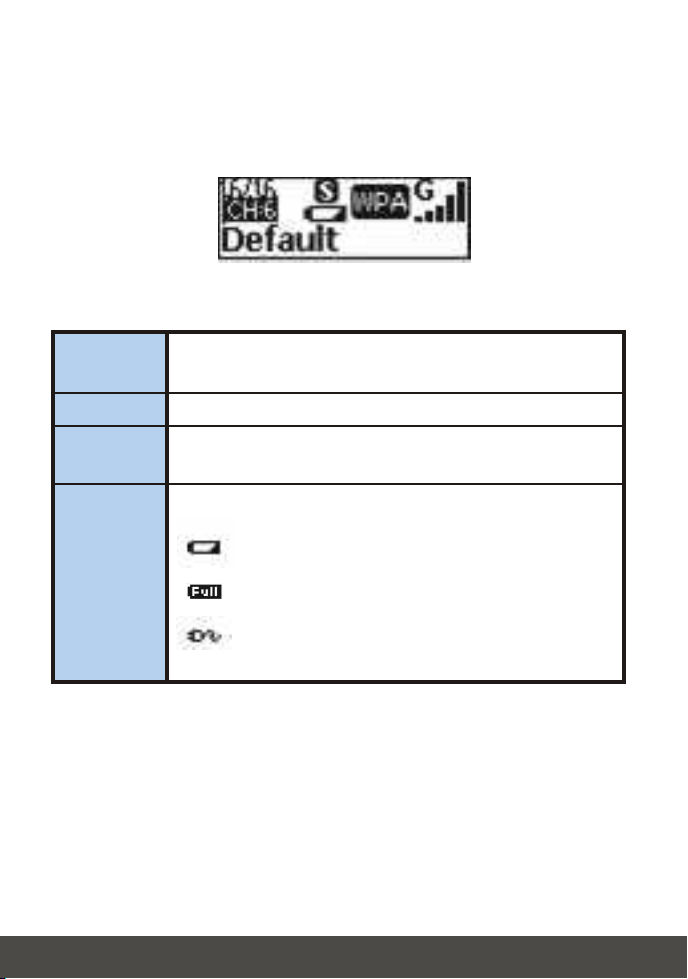
The following illustration explains the meaning for each symbol on the LCD
display.
SSID
Channel
Entry
Power
Displays the SSID of the access point. If the SSID is
longer than 16 characters, it will scroll horizontally.
Displays the channel in use.
Displays the current entry. The TEW-429UB can hold a
maximum of 16 entries.
Indicate the battery life status.
Battery low
Battery full
At “adapter” mode, or charging the battery through
USB port
3
English
Page 6
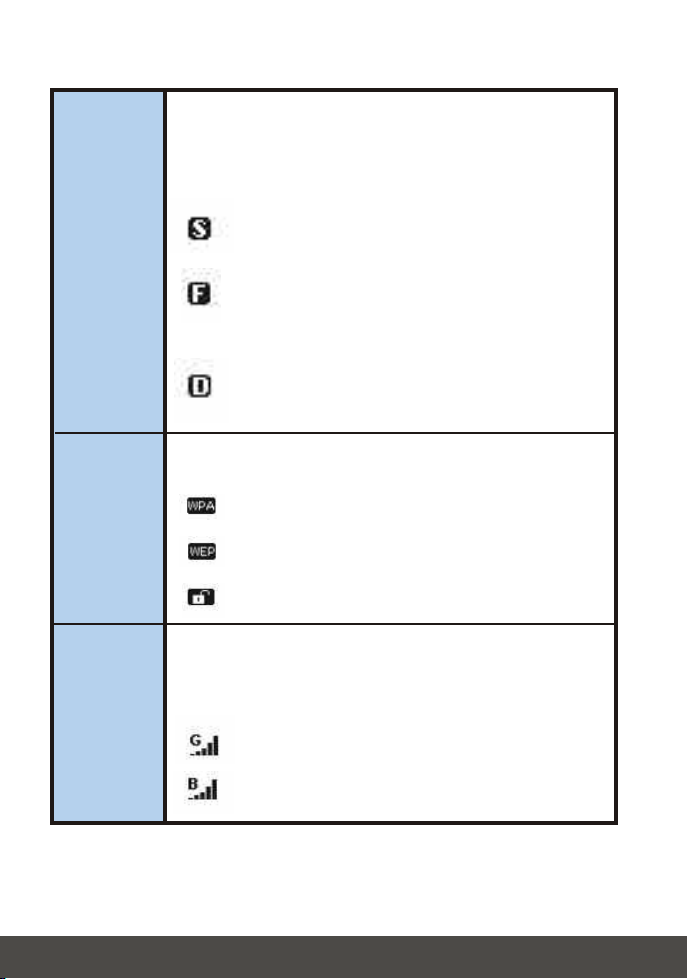
Scan
mode
Security
Signal
There are 3 scan modes (S, F and D mode). Hold the
“Seek” button to toggle between scan modes. After
switching to the desired scan mode, press “Seek” button
again to do a site survey.
[S] Mode: Ranks access points in the order of
signal strength.
[F] Mode: Lists all unecrypted access points
(access points without security) and ranks each
access piont in signal strength order.
[D] Mode: Locks onto one access point to test its
signal strength at different locations.
Indicates security setting of the wireless network.
WPA security is enabled
WEP security is enabled
Wireless security is disabled (no security)
Indicates the signal strength and the radio band
(802.11b/g) of wireless network. There are 5 levels of
signal strength.
802.11g mode at 2.4 GHz band
802.11b mode at 2.4 GHz band
4
English
Page 7

3. Install Wireless Configuration Utility
Windows 98SE/ME/2000/XP
1. Insert the TEW-429UB CD-ROM into your computer's CD-ROM drive; the
installation menu window will appear automatically. If the window does not
appear automatically, click Start, click Run, and type E:\Autorun.exe in the
text-field. Click OK.
Note: Replace "E" in "E:\Autorun.exe" with whichever letter is assigned
to your CD-ROM drive.
2. On the Installation Menu, click Install Utility.
3. Follow the Install Shield Wizard's instructions to install the wireless
configuration utility.
4. Click Next.
5
English
Page 8

5. Click Next.
6. Click Install.
6
English
Page 9

7. A warning message will tell you that the device you're installing has not yet
been certified for Windows XP compatibility. Click Continue Anyway. For
Windows 2000, click Yes.
8. Click Finish.
7
English
Page 10

4. Install Hardware
The TEW-429UB is hot-pluggable. You can connect or disconnect the
TEW-429UB while the computer is on.
Connect the TEW-429UB Wireless USB Adapter to your computer's USB port.
Note: you can use the included USB extension cable for your
convenience to extend the cable connection between your computer
and the TEW-429UB.
8
English
Page 11

5. Install Drivers
Windows 98SE/ME
After installing the utility software, connect the Wireless USB Adapter to your
computer's USB port.
1. Windows will automatically detect your new hardware and install the
appropriate driver.
Windows 2000
1. After installing the utility software, connect the Wireless USB Adapter to your
computer's USB port. Windows will detect new hardware and load the driver
automatically.
2. When the Digital Signature Not Found Window appears, click Yes to
continue.
9
English
Page 12

NOTE: TRENDnet's Wireless Adapters have been fully tested under all
supported Windows Operating Systems and have been approved for
their functionality.
3. After clicking Yes, the wireless icon will appear in your system tray (next to
the clock on the bottom right corner of your screen). If it does not appear,
restart your computer. Go to section 6 Wireless Configuration.
Windows XP
1. After installing the utility software, connect the Wireless USB Adapter to your
computer's USB port. The “Found New Hardware Wizard” will appear. Verify
that Install the software automatically is selected and that the
TEW-429UB CD-ROM is in your CD-ROM drive. Then click Next.
10
English
Page 13

2. A warning message will tell you that the device you're installing has not yet
been certified for Windows XP compatibility. Click Continue Anyway.
NOTE: TRENDnet's Wireless Adapters have been fully tested under all
supported Windows Operating Systems and have been approved for
their functionality.
3. The “Found New Hardware Wizard” will tell you that it has finished installing
the software for your TEW-429UB. Click Finish.
Note: After clicking Finish, the wireless icon will appear in your system
tray (next to the clock on the bottom right corner of your screen). If it
does not appear, restart your computer. Go to section 6 Wireless
Configuration.
11
English
Page 14

6. Wireless Configuration
Infrastructure Mode (PC-to-Access Point
connection)
1. Double-click the wireless computer icon in your system tray (next to the clock in the
bottom right corner of your screen).
2. Click Site Survey, click Refresh, and select the desired access point. Click
Connect.
3. Click OK.
12
English
Page 15

4. Please verify your connection status.
13
English
Page 16

Troubleshooting
I completed all the steps in the quick installation guide, but my wireless USB
Q1:
Adapter isn't connecting to my access point. What should I do?
First, you should verify that the Network SSID matches your wireless
A1:
router or access point's SSID. Second, you should check your TCP/IP properties
to ensure that Obtain an IP address automatically is selected. Third, you can
click on the Site Survey link to check and see if there are any available wireless
networks listed.
Windows is unable to recognize my hardware. What should I do?
Q2:
Make sure your computer meets the minimum requirements as specified in
A2:
Section 1 of this quick installation guide. Also, you must install the wireless
configuration utility (as described in Section 3) before connecting the wireless USB
Adapter.
I cannot open the wireless configuration utility. What should I do?
Q3:
Go to your device manager (control panel system) to make sure the
A3:
adapter is installed properly. If you see a networking device with a yellow question
mark or exclamation point, you will need to reinstall the device and/or the drivers.
If you still encounter problems, please refer to the User's Guide CD-ROM or contact
technical support.
Certifications
This equipment has been tested and found to comply with FCC and CE Rules.
Operation is subject to the following two conditions:
(1) This device may not cause harmful interference.
(2) This device must accept any interference received.
Including interference that may cause undesired operation.
14
Page 17

@
TRENDnet
TRENDware, USA
What's Next in Networking
Product Warranty Registration
Please take a moment to register your product online.
Go to TRENDware’s website at http://www.TRENDNET.com
TRENDnet Technical Support
US/Canada Support Center European Support Center
Contact
Telephone:
Fax:
Email:
Tech Support Hours
7:30am - 6:00pm Pacific Standard Time
Monday - Friday
1(310) 626-6252
1(310) 626-6267
support@trendnet.com
TRENDware International, Inc.
3135 Kashiwa Street. Torrance, CA 90505
Contact
Telephone
Deutsch : +49 (0) 6331 / 268-460
Français : +49 (0) 6331 / 268-461
Español : +49 (0) 6331 / 268-462
English : +49 (0) 6331 / 268-463
Italiano : +49 (0) 6331 / 268-464
Dutch : +49 (0) 6331 / 268-465
+49 (0) 6331 / 268-466
Fax:
Tech Support Hours
8:00am - 6:00pm Middle European Time
Monday - Friday
http://www.TRENDNET.com
Copyright ©2005. All Rights Reserved. TRENDware International, Inc.
 Loading...