

Page 1
Guia de Instalação Rápida
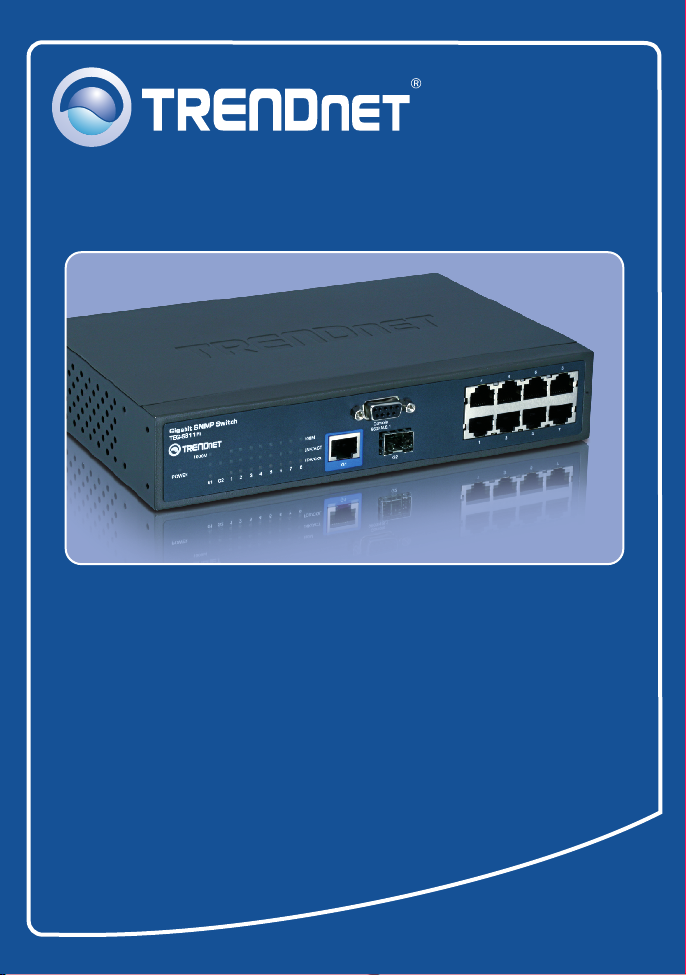
TEG-S811Fi
H/W: v1.0R
Page 2

Índice
Table of Contents
Português .................................................................................................
1. Antes de Iniciar
2. Como Instalar ............................................................................
3. Configurar o Switch .........................................................................
Troubleshooting ........................................................................................
................................................................................
1
1
2
4
5
Version 02.05.2008
Page 3
1. Antes de Iniciar
Conteúdo da Embalagem
TEG-S811Fi
?
?CD-ROM Guia do Usuário
?Guia de Instalação Rápida
?2 Suportes de Montagem com
parafusos
? Cabo RS-232
? Cabo de Alimentação
Requisitos do Sistema
Web Browser: Internet Explorer (6.0 ou superior)
?
?Computador com porta Serial
?Computador com conexão de Fibra ou um Conversor de Mídia
(ex: TFC-210MSC, TFC-2000MSC, TFC-2000S20)
?Cabo de Fibra Multi-Modo 50/125 ou 62.5/125 µm com conector tipo SC
para portas 100BaseFX
?Cabos de Fibra Multi-Modo ou Mono-Modo com conectores tipo LC para
módulos mini-GBIC (opcional)
?Módulo Mini-GBIC (ex.: TEG-MGBSX, TEG-MGBS10, TEG-MGBS40,
TEG-MGBS80, TEG-MGBS10D3_D5, TEG-MGBS40D3_D5) para slots
Mini-GBIC.
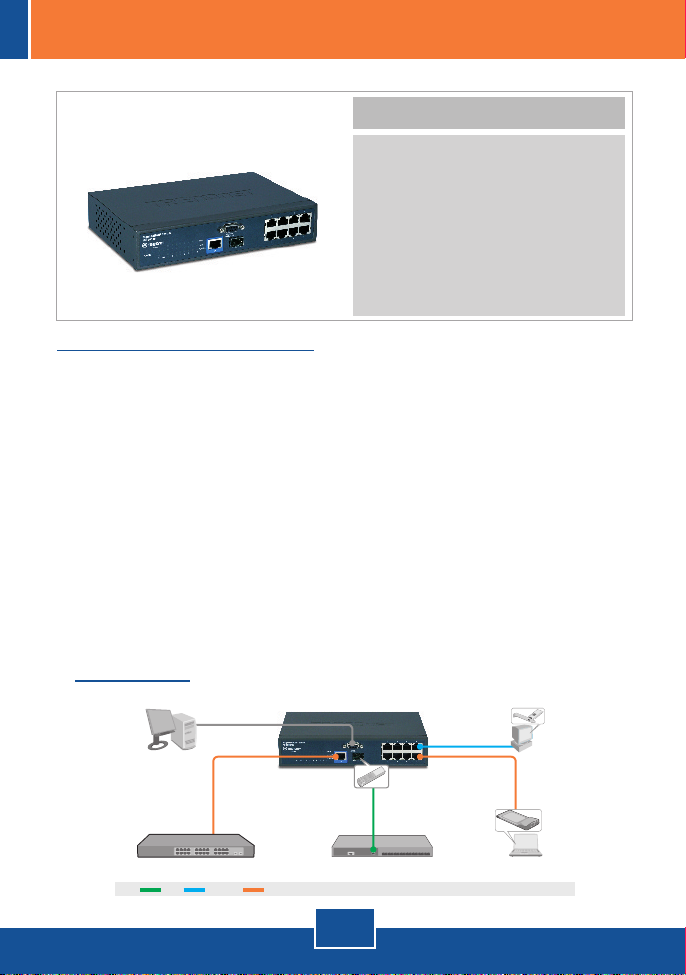
Rakendus
Workstation
24-port Gigabit Web Smart Switch
with Mini-GBIC slots
8-Port 10/100Mbps Layer 2 Managed Switch
with Gigabit Port and Mini-GBIC Slot
(TEG-240WS)
RS-232
(TEG-S811Fi)
8-Port 100Base-FX Layer 2
Managed Switch with Mini GBIC Slot
1000MbpsFiber 10/100Mbps
1
Português
(TEG-S081FMi)
Workstation with PCI Adapter
Multi-Mode Fiber
Mini-GBIC Modules
(TEG-MGBSX)
(TE100-PCIWA)
Laptop with PC Card
(TE100-PCBUSR)
Page 4
2. Como instalar
Nota: Após completar a instalação do hardware, use seu browser para
configurar o TEG-S811Fi. Veja Seção 3 Configurar seu Switch para mais
informações.
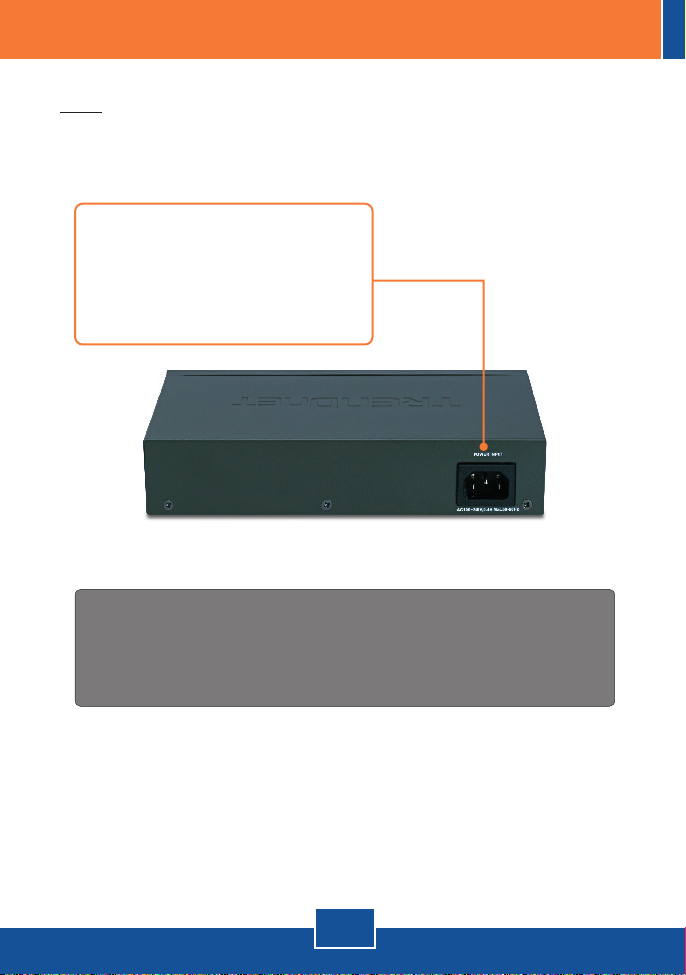
1. Conecte o Cabo de Alimentação
ao painel traseiro do TEG-S811Fi
e então a uma tomada elétrica.
Pressione a chave “power” para
ligar o switch.
Registre Seu Produto
Para garantir o alto nível do serviço e suporte ao consumidor,
por favor tire um minuto para
registrar seu produto Online em: www.trendnet.com/register
Agradecemos por ter escolhido TRENDnet
2
Português
Page 5

2. Insira um módulo mini-
GBIC TRENDnet no slot
mini-GBIC (opcional).
4. Conecte um cabo Ethernet RJ-45
3. Conecte um cabo de Fibra a uma
das portas do switch e a uma
conexão de fibra de sua rede
(opcional).
Nota:
1. Módulos mini-GBIC TRENDnet
têm conectores de fibra tipo LC.
Se sua conexão Gigabit de fibra
é tipo SC, você necessita de um
cabo de fibra LC para SC.
2. Módulos mini-GBIC TRENDnet
são exclusivamente Gigabit.
Sua conexão de fibra tem de ser
Gigabit para conectar a um
módulo mini-GBIC.
de uma das 8-portas do switch a
uma conexão Ethernet de sua rede
local.
3
Português
Page 6

3. Configurar o Switch
Browser Configuration
Browser Configuration
Nota: para que o Switch possa ser configurado, um endereço IP estático tem
de ser definido para o adaptador de rede de seu computador na sub-rede
192.168.16.x. Como o endereço IP padrão do Switch é 192.168.16.1,
certifique-se de que nenhum outro equipamento da rede esteja com este
endereço 192.168.16.1. (Recorra à seção Troubleshooting sobre como
efetuar as configurações TCP/IP em seu PC.)
1. Open your web browser, type
1. Abra seu web browser, digite
http://192.168.16.1
http://192.168.16.1 na barra de
bar, and then press Enter.
endereço, e pressione Enter.
2. Enter the User name and
2. Entre o nome de usuário (User
name) e senha (Password) e
Password, and then click OK.
clique OK. Por padrão:
By default:
User Name: root
User Name: root
Password: root
Password: root
in the Address
3. Clique System > IP Configuration.
Altere o endereço IP (IP Address)
para ficar na mesma sub-rede de
sua rede. Entre com a Máscara
(Subnet Mask) e Gateway para
adequar à sua rede. Então clique
Apply.
4
Português
Page 7

Troubleshooting
Após conectar o TEG-S811Fi a uma tomada elétrica, os LEDs não acendem.
P1:
P2: Como realizo as configurações TCP/IP em meu computador?
P3:
P4:
Verifique a conexão do cabo de alimentação no TEG-S811Fi e na tomada. Certifique-se
R1:
de que a tomada está eletricamente alimentada.
1. Vá ao Painel de Controle (Control Panel) e faça duplo clique no
ícone Conexões de Rede (Network Connections), a seguir
clique com o botão direito no ícone Conexão de Rede Local
(Local Area Connection) e então clique em Propriedades
(Properties).
2. Clique em Protoclo Internet (Internet Protocol (TCP/IP)) e
então em Propriedades (Properties). A seguir clique em Usar
o seguinte endereço IP (Use the following IP address), e
certifique-se de ter definido para seu adaptador de rede um
endereço IP na sub-rede 192.168.16.x.
Instalei o switch em minha rede, mas não consigo estabelecer conexão
Primeiro, confirme estar utilizando o cabo de fibra apropriado. Segundo, verifique se os
R3:
cabos TX e RX foram invertidos na conexão de fibra oposta. Terceiro, em conectando a
módulos mini-GBIC, sua conexão de fibra tem de ser Gigabit. Quarto, desligue o switch.
Aguarde 15 segundos, e então religue-o.
Como faço login no switch via porta console?
Siga as instruções abaixo:
R4:
1) Conecte o cabo RS-232 de uma porta serial de seu Windows PC à porta console de seu
computador.
2) Vá para Iniciar > Programas > Acessórios > Comunicações > HiperTerminal (Start >
Programs > Accessories > Communications > Hyperterminal)
3) Entre um nome, escolha um ícone e então clique OK.
4) Selecione a porta COM correta (ex. COM1, COM2) e então clique OK.
5) Entre com os dados abaixo, clique Apply e então clique OK:
Bits per second: 9600
Data bits: 8
Parity: None
Stop bits: 1
Flow control: None
6) Tecle Enter.
7) Digite o nome de usuário (user name) e senha (password) e tecle Enter. Por padrão user
name e password são root.
Favor recorrer ao Guia do Usuário para uma lista de comandos.
.
Se você ainda encontrar problemas ou tiver alguma pergunta referente ao ,
TEG-S811Fi
favor entrar em contato com o Departamento de Suporte Técnico da Trendnet
5
Português
Page 8

Limited Warranty
TRENDnet warrants its products against defects in material and
workmanship, under normal use and service, for the following lengths of
time from the date of purchase.
TEG-S811Fi - 5 Year Warranty
If a product does not operate as warranted above during the applicable
warranty period, TRENDnet shall, at its option and expense, repair the
defective product or part, deliver to customer an equivalent product or
part to replace the defective item, or refund to customer the purchase
price paid for the defective product. All products that are replaced will
become the property of TRENDnet. Replacement products may be new
or reconditioned.
TRENDnet shall not be responsible for any software, firmware,
information, or memory data of customer contained in, stored on, or
integrated with any products returned to TRENDnet pursuant to any
warranty.
There are no user serviceable parts inside the product. Do not remove
or attempt to service the product by any unauthorized service center.
This warranty is voided if (i) the product has been modified or repaired
by any unauthorized service center, (ii) the product was subject to
accident, abuse, or improper use (iii) the product was subject to
conditions more severe than those specified in the manual.
Warranty service may be obtained by contacting TRENDnet office within
the applicable warranty period for a Return Material Authorization (RMA)
number, accompanied by a copy of the dated proof of the purchase.
Products returned to TRENDnet must be pre-authorized by TRENDnet
with RMA number marked on the outside of the package, and sent
prepaid, insured and packaged appropriately for safe shipment.
6
Português
Page 9

WARRANTIES EXCLUSIVE: IF THE TRENDnet PRODUCT DOES NOT
OPERATE AS WARRANTED ABOVE, THE CUSTOMER'S SOLE
REMEDY SHALL BE, AT TRENDnet'S OPTION, REPAIR OR
REPLACEMENT. THE FOREGOING WARRANTIES AND REMEDIES
ARE EXCLUSIVE AND ARE IN LIEU OF ALL OTHER WARRANTIES,
EXPRESSED OR IMPLIED, EITHER IN FACT OR BY OPERATION OF
LAW, STATUTORY OR OTHERWISE, INCLUDING WARRANTIES OF
MERCHANTABILITY AND FITNESS FOR A PARTICULAR PURPOSE.
TRENDnet NEITHER ASSUMES NOR AUTHORIZES ANY OTHER
PERSON TO ASSUME FOR IT ANY OTHER LIABILITY IN
CONNECTION WITH THE SALE, INSTALLATION MAINTENANCE OR
USE OF TRENDnet'S PRODUCTS.
TRENDnet SHALL NOT BE LIABLE UNDER THIS WARRANTY IF ITS
TESTING AND EXAMINATION DISCLOSE THAT THE ALLEGED
DEFECT IN THE PRODUCT DOES NOT EXIST OR WAS CAUSED BY
CUSTOMER'S OR ANY THIRD PERSON'S MISUSE, NEGLECT,
IMPROPER INSTALLATION OR TESTING, UNAUTHORIZED
ATTEMPTS TO REPAIR OR MODIFY, OR ANY OTHER CAUSE
BEYOND THE RANGE OF THE INTENDED USE, OR BY ACCIDENT,
FIRE, LIGHTNING, OR OTHER HAZARD.
LIMITATION OF LIABILITY: TO THE FULL EXTENT ALLOWED BY LAW
TRENDnet ALSO EXCLUDES FOR ITSELF AND ITS SUPPLIERS ANY
LIABILITY, WHETHER BASED IN CONTRACT OR TORT (INCLUDING
NEGLIGENCE), FOR INCIDENTAL, CONSEQUENTIAL, INDIRECT,
SPECIAL, OR PUNITIVE DAMAGES OF ANY KIND, OR FOR LOSS OF
REVENUE OR PROFITS, LOSS OF BUSINESS, LOSS OF
INFORMATION OR DATE, OR OTHER FINANCIAL LOSS ARISING OUT
OF OR IN CONNECTION WITH THE SALE, INSTALLATION,
MAINTENANCE, USE, PERFORMANCE, FAILURE, OR INTERRUPTION
OF THE POSSIBILITY OF SUCH DAMAGES, AND LIMITS ITS LIABILITY
TO REPAIR, REPLACEMENT, OR REFUND OF THE PURCHASE PRICE
PAID, AT TRENDnet’S OPTION. THIS DISCLAIMER OF LIABILITY FOR
DAMAGES WILL NOT BE AFFECTED IF ANY REMEDY PROVIDED
HEREIN SHALL FAIL OF ITS ESSENTIAL PURPOSE.
Governing Law: This Limited Warranty shall be governed by the laws of
the state of California.
AC/DC Power Adapter, Cooling Fan, Cables and Power Supply carry a 1
7
Português
Page 10

Certificados
Este equipamento foi submetido a testes e provou ser aderente às Regras FCC e CE. Sua
operação está sujeitas às seguintes condições:
(1) Este dispositivo não pode causar interferência prejudicial.
(2) Este dispositivo deve aceitar qualquer interferência recebida. Isso inclui interferências que
podem causar operação indesejada.
Lixo de produtos elétricos e eletrônicos não deve ser
depositado em lixeiras caseiras. Favor reciclar onde há
disponibilidade. Verifique com sua Autoridade Local ou
Revendedor para obter informações sobre reciclagem.
NOTA: O FABRICANTE NÃO É RESPONSÁVEL POR QUALQUER INTERFERÊNCIA DE RÁDIO OU
TV CAUSADA POR MODIFICAÇÕES NÃO AUTORIZADAS NESTE EQUIPAMENTO. TAIS
MODIFICAÇÕES PODEM VIOLAR A AUTORIDADE DO USUÁRIO DE OPERAR O EQUIPAMENTO.
ADVERTENCIA
En todos nuestros equipos se mencionan claramente las caracteristicas del adaptador de alimentacón
necesario para su funcionamiento. El uso de un adaptador distinto al mencionado puede producir
daños fisicos y/o daños al equipo conectado. El adaptador de alimentación debe operar con voltaje y
frecuencia de la energia electrica domiciliaria existente en el pais o zona de instalación.
Page 11

TRENDnet Technical Support
Europe (Germany France Italy Spain Switzerland UK)
Toll Free Telephone: +00800 60 76 76 67
English/Espanol - 24/7
. . . . .
Worldwide
Telephone: +(31) (0) 20 504 05 35
English/Espanol - 24/7
Product Warranty Registration
Please take a moment to register your product online.
Go to TRENDnet’s website at http://www.trendnet.com/register
20675 Manhattan Place
Torrance, CA 90501
USA
Copyright ©2008. All Rights Reserved. TRENDnet.
 Loading...