

Page 1
Semi-Permanent Removable Threshold
Semi-Permanent Removable Threshold
Tools you might need for proper installation
• Pencil
• Grinder or Sander
• Mildew Resistant Bonding Silicone (white)
• Caulk Gun and White Caulk
• Tape Measure
• Two (2) 5”x 5” Cardboard Samples
• Removable Masking Tape
Installation Instructions
Installation Instructions
Available only in white
PRODUCT MATERIAL AND STRUCTURE –
Non-porous ABS cap mounted to a super strong
PVC substrate that will match both gelcoat and
acrylic bathware.
Thank you for purchasing the Praxis Semi-Permanent
Removable Threshold. For best results, please read
and follow all directions carefully.
CUSTOMIZING THE
SEMI-PERMANENT THRESHOLD
Step 1- Place the semi-permanent threshold into
shower to test fi t. Although the semi-permanent
threshold is pre-cut at the manufacturer, modifi cations
may be necessary for a custom fi t. (FIG.A)
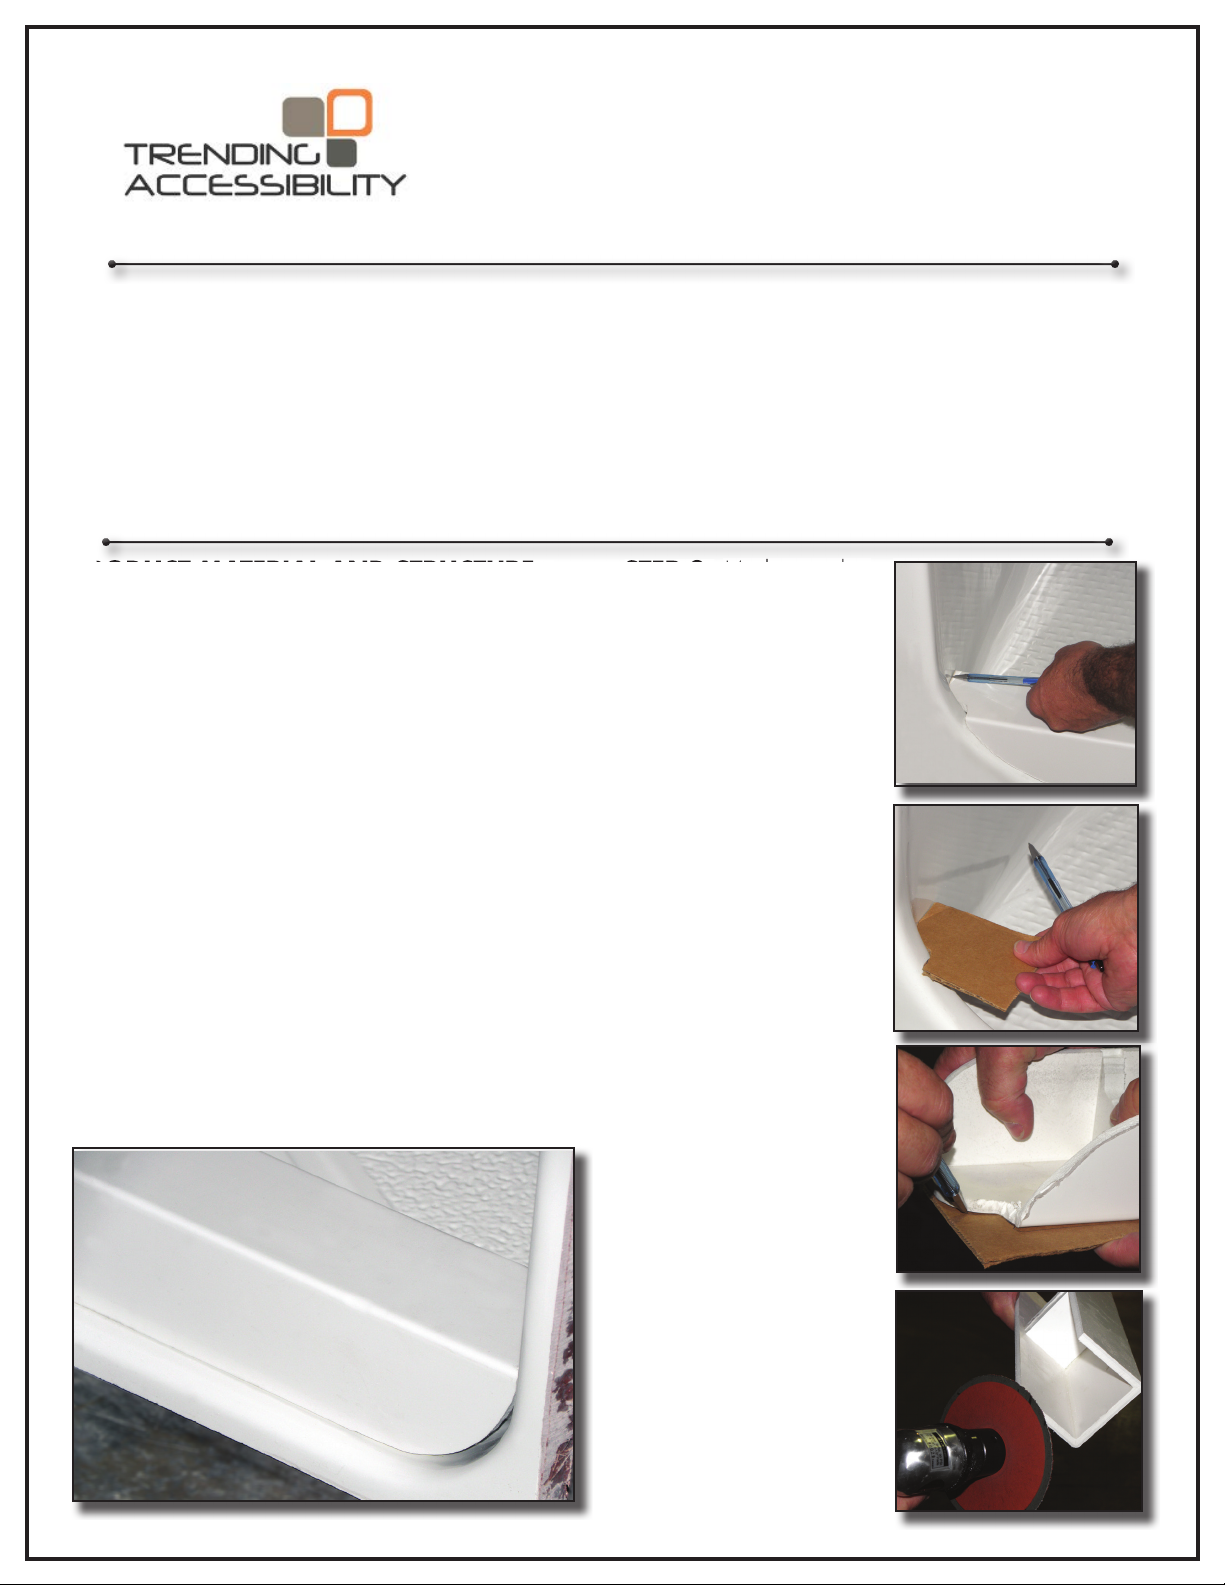
STEP 2- Mark area that
needs adjustment with
a pencil. (FIG. B) A
small piece of cardboard
can be used to trace
the radius of the area
and can then be used
as a template or guide
to modify the corners
of the semi-permanent
threshold to ensure a
good fi t. (FIGS. C-D)
Grinding or sanding
the corners will assure
a custom fi t and
installation. (FIG. E)
STEP3- After
making the necessary
modifi cations, place
the threshold back
into the shower to
ensure all modifi cations
are correct and dry
fi tting the threshold is
accurate.
FIG.B
FIG.C
FIG.D
FIG.A
STEP 4- You are
now ready to install
the threshold into the
shower.
Page 2
Semi-Permanent Removable Threshold
Installation Instructions
INSTALLATION OF
SEMI-PERMANENT THRESHOLD
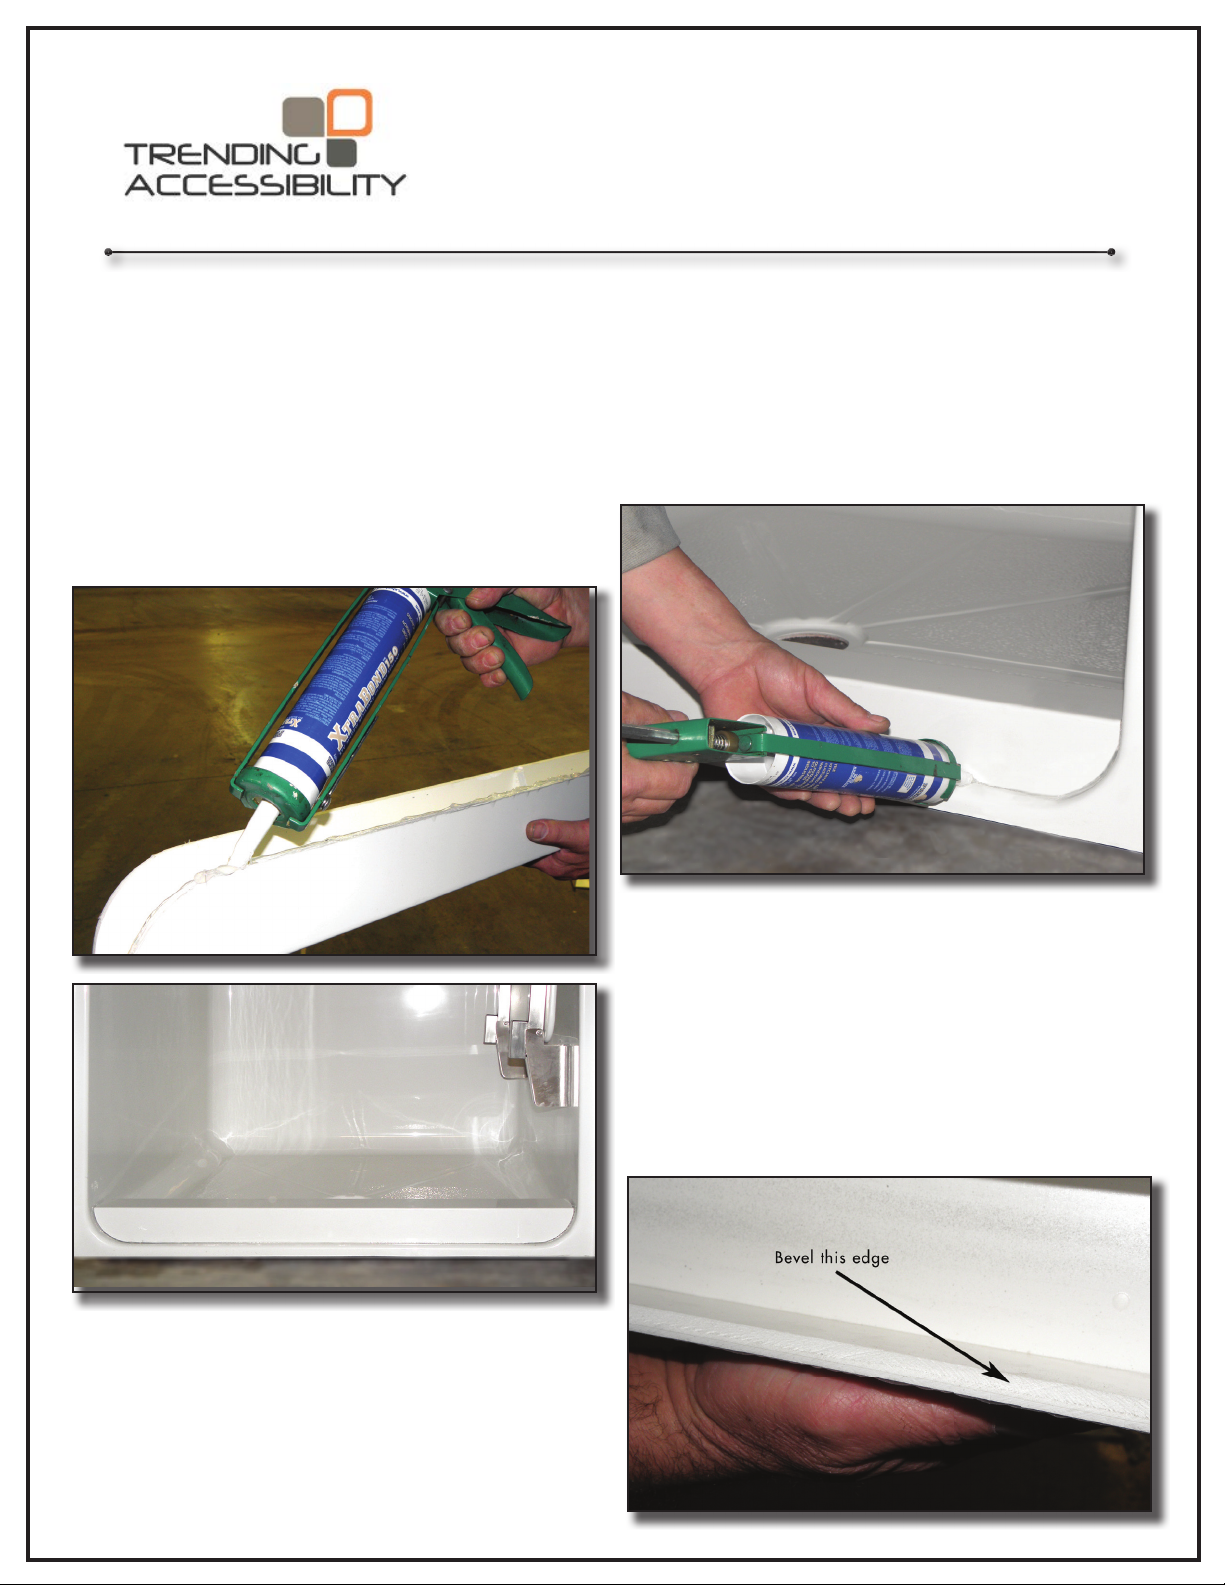
STEP 1- Using a Mildew Resistant bonding
silicone (white), place a bead of caulking around
the underside parameters of the threshold.(FIG. F)
Position threshold into place. (FIG. G) Remove
excess caulking and smooth with wet fi nger or
caulking pallet.
STEP 3 – Using the removable masking tape,
secure the threshold in place taking care not to shift.
Silicone will take 24 hours to dry and become fi rm.
Bathware should not be used during drying time.
(FIG. H)
(FIG. F)
(FIG. G)
STEP 2- Apply a thin bead of caulking around the
top side of the fi nished threshold to seal between the
shower and threshold. (FIG. H) The silicone used
in Step 1 is to seal and secure into place. Caulk
should be used for a more aesthetically pleasing
look.
ATTENTION:
On model numbers: A4136 or S4136 – You must
bevel the bottom inside of the threshold to allow it to
seat properly to the shower. (FIG. I)
For shower pans: The threshold will be cut to
length, however the corners will need to be slightly
rounded. (FIG. E)
(FIG. I)
856-488-9535 www.TrendingAccessibility.com
 Loading...