

Trending Accessibility PREMIUM LIBERTY CAREGIVER DOORS User Manual
PREMIUM LIBERTY CAREGIVER DOORS
Installation Guide
2012/11/05
SAFETY
• Please read these installation instructions carefully before proceeding.
• Keep guide for future reference
• If you are unsure about any part of the installation, please contact our
technical department on: 856-488-9535
• Incorrect installation will invalidate the warrantee
• Make sure there are no hidden pipes or cables in the fl oor or walls where
you intend to drill.
• Wear safety goggles, shoes and appropriate clothing.
www.TrendingAccessibility.com | 856-488-9535

'RRUKDQGOH
Installation - Premium Liberty Caregiver Doors
The Door System
%LIROGGRRUV
FRPSHQVDWRU
DGMXVWPHQW
'RRUODWF K
%LIROGGRRUFRPSHQVDWRU
FRPSHQVDWRU
DGMXVWPHQW
*Depending on your door size, handles may not be applicable.
www.TrendingAccessibility.com | 856-488-9535
Fitting Kit A2
2
Installation - Premium Liberty Caregiver Doors
(a) (b)
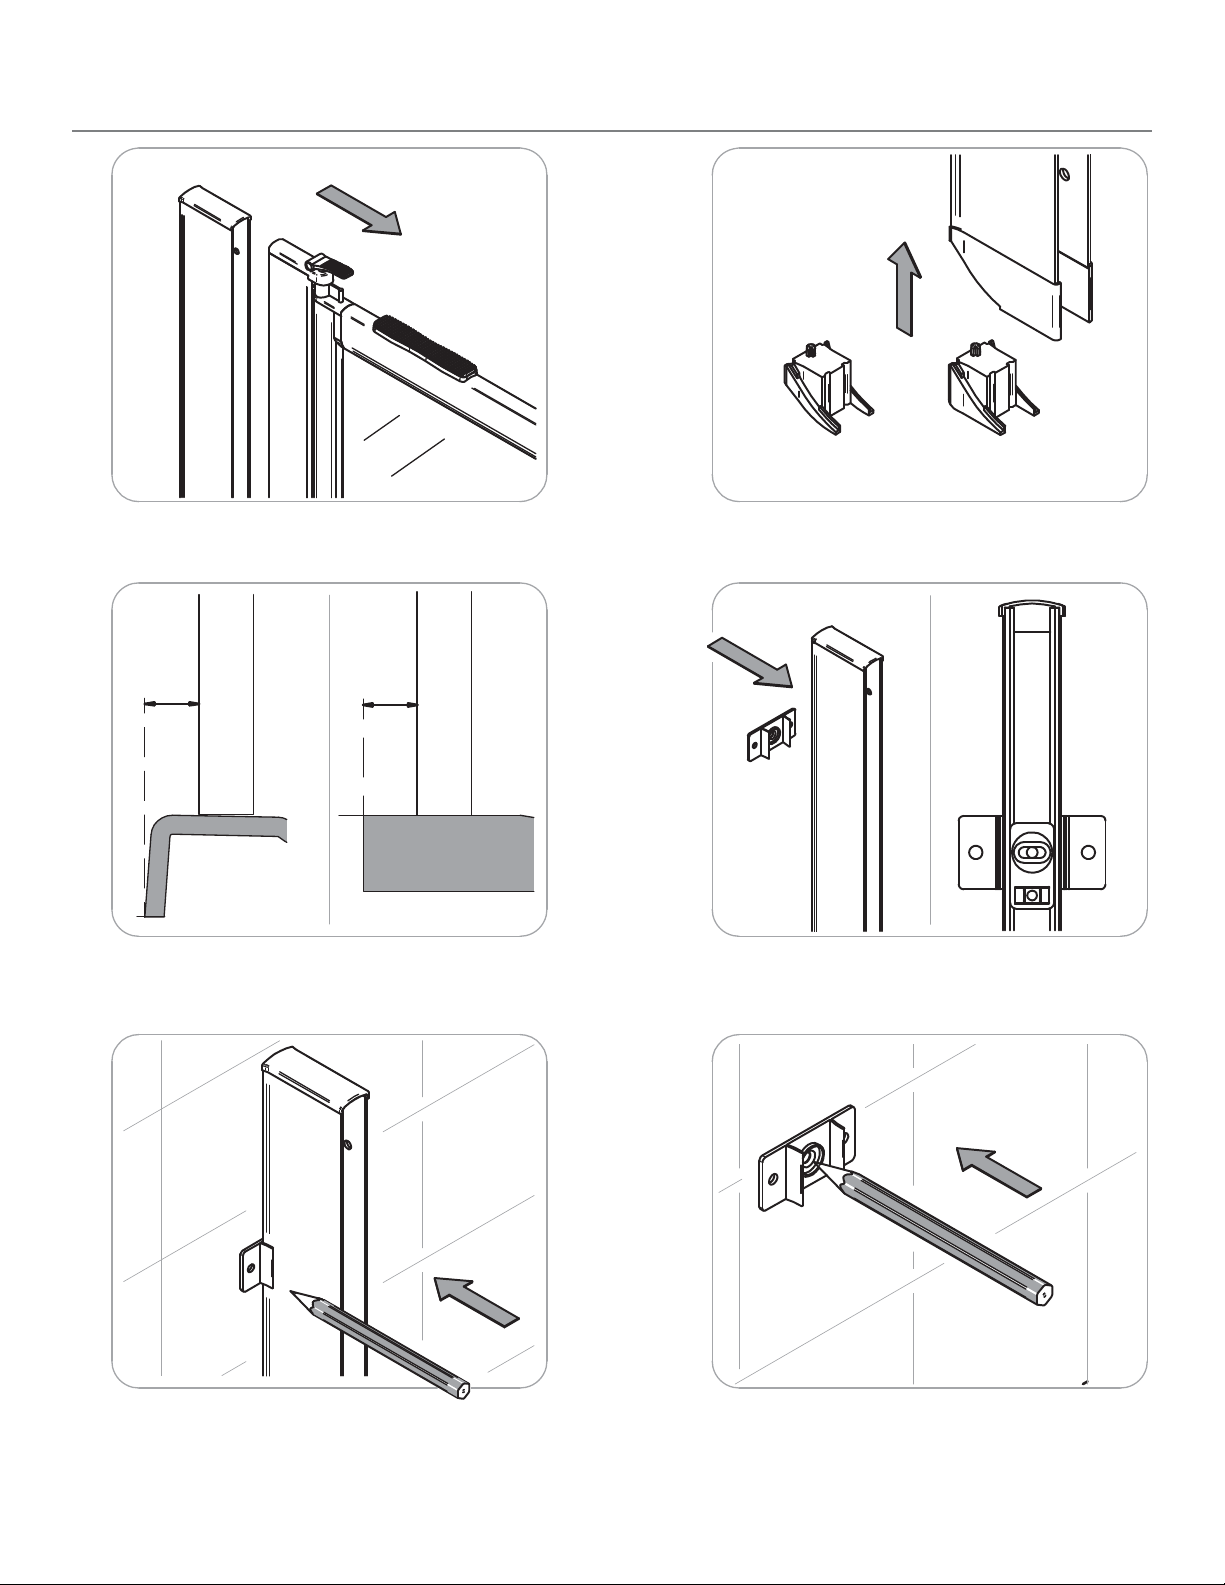
Remove door from compensator
1
.59” .59”
compensator channel
shower
pan
Position the compensator channel .59” inboard
from the edge of the pan as shown.
3
tiled fl oor
compensator channel
Select the correct curved foot for your installation:
(a) shower tray
2
(b) 1.18” - 1.38” wetrooms
(a) (b)
(a) Clip the two plastic locating plates in place.
(b) Align the spirit level bubble.
4
Mark the two alignment points, repeat for the lower
fastener. DO NOT DRILL MARKINGS
5
www.TrendingAccessibility.com | 856-488-9535
Unclip the marking plate and align with the
previously marked points. Mark the center hole
6
for drilling. DO NOT DRILL OUTER POINTS
3
 Loading...