

Page 1
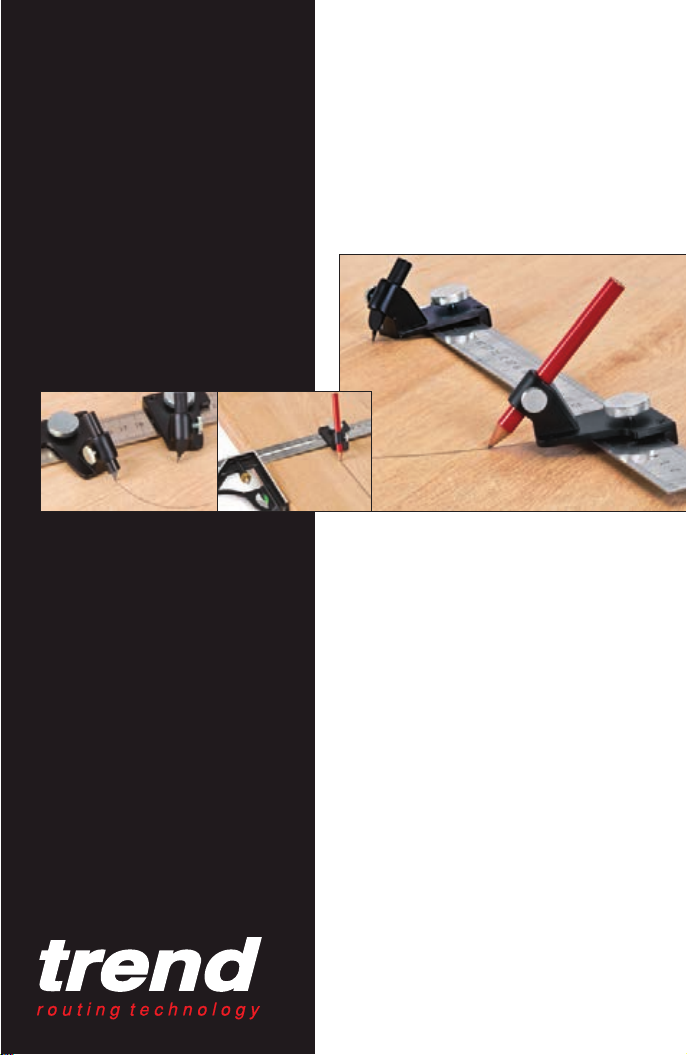
COMPLETE FLAT LYING
TRAMMELTRAMMEL SET
■
Self supporting flat lying clip
on compass.
■
Unrivalled marking, mortise
and panel gauge.
■
Quick and accurate to use with
full stability & control.
■
Interchangeable carbon steel
point, pencil and disposable
scribing blade.
Attach to rules & squares
when marking/cutting arcs,
circles & parallel lines.
TM
M/CFT01
Page 2
COMPLETE FLAT LYING
TRAMMEL SET
REF. M/CFT01
Thank you for purchasing this Trend product,
which should give lasting performance if
used in accordance with these instructions.
The following symbol is used throughout
these instructions.
Denotes risk of personal injury, loss
of life or damage to the tool in case
of non-observance of the instructions.
INTENDED USE
This accessory is intended to be used with a
minimum 152mm (6”) steel or aluminium rule
which has a blade width of less than 50mm
(1-31/32”) to cut circles in veneer when knife
blade fitted, or for marking circles with pencil
fitted. The accessory can also be fitted to Try
Squares for marking out or cutting.
SAFETY
PLEASE KEEP THESE INSTRUCTIONS IN
A SAFE PLACE.
Users must be competent in using
woodworking equipment before using our
products.
All cutting edges are very sharp and care
must be taken to prevent injury.
ITEMS REQUIRED
■ Steel or aluminium rule.
■ Try square.
ITEMS ENCLOSED &
DESCRIPTION OF PARTS
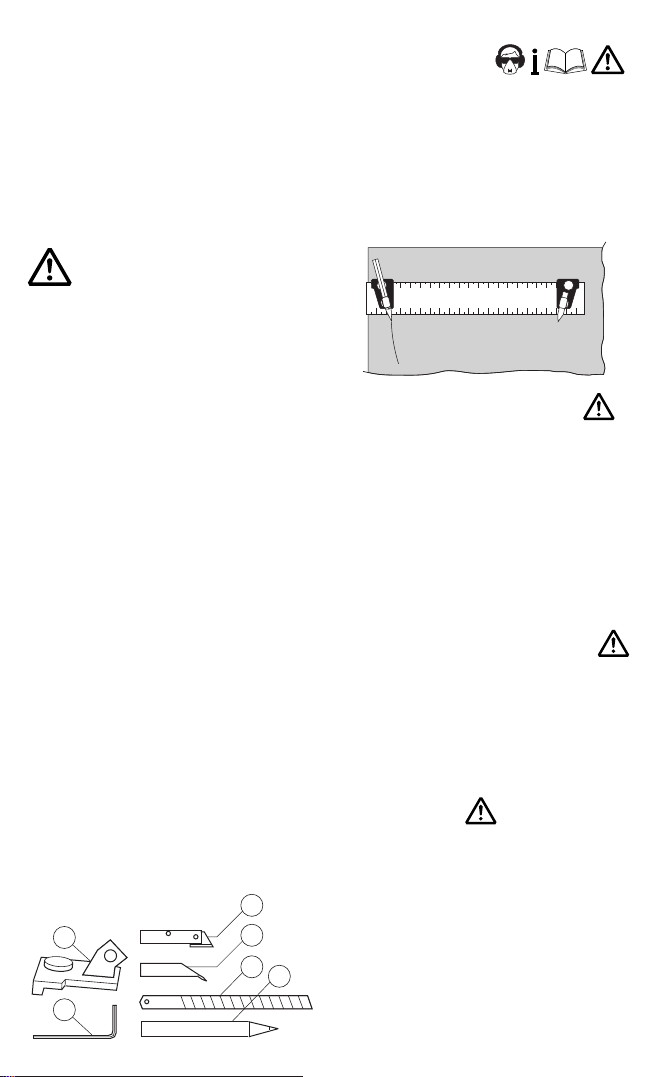
A. Trammel head & pinch bolts x2
B. Blade post x1
C. Scribe/pivot point post x1
D. Hyper fine blade x1
E. Pencil x1
F. Hex key 1.5mm A/F x1
B
A
F
C
D
E
OPERATION
Setting up the Trammel Heads to Strike
a Circle
Slot the trammel heads onto the top edge of
the rule ensuring that the straight sides of
the trammel heads face inwards towards
each other. Tighten each main large pinch
bolt onto the rule. Lie the assembly on a flat
surface, note the trammel heads will rest on
their chamfered underside.
Setting the Pencil and Pivot Point
Depth
Slide the pencil into the trammel head until
the pencil tip touches the work surface and
the underside of the trammel head rests on
it’s chamfer. This sets the contact angle of
the trammel head perfectly. Then tighten the
small pinch bolt to lock it in place. Repeat
this with the pivot point post (you’ll need to
slide it in from the under side of the trammel
head). Again rest the rule back on the
surface with the pivot point touching the
surface and tighten the pinch bolt.
Setting the Size of the Circle or Arc
Measure and mark out with a pencil the
dimensions and location of the desired circle.
Loosen the main pinch bolts on the trammel
heads and slide the trammel heads along the
rule so the pivot point and pencil tip rest on
the layout marks. Lock up the main pinch
bolts that secure the trammel heads to the
rule.
Striking the Line
Resting your fingers on the top of the
trammel heads strike the curve. You can
stop the strike at any time to reposition your
hands and the assembly remains in position.
Tip: If using the blade post and cutting a
circle out in light card, paper or veneer it is
advisable to tape the material down.
Page 3
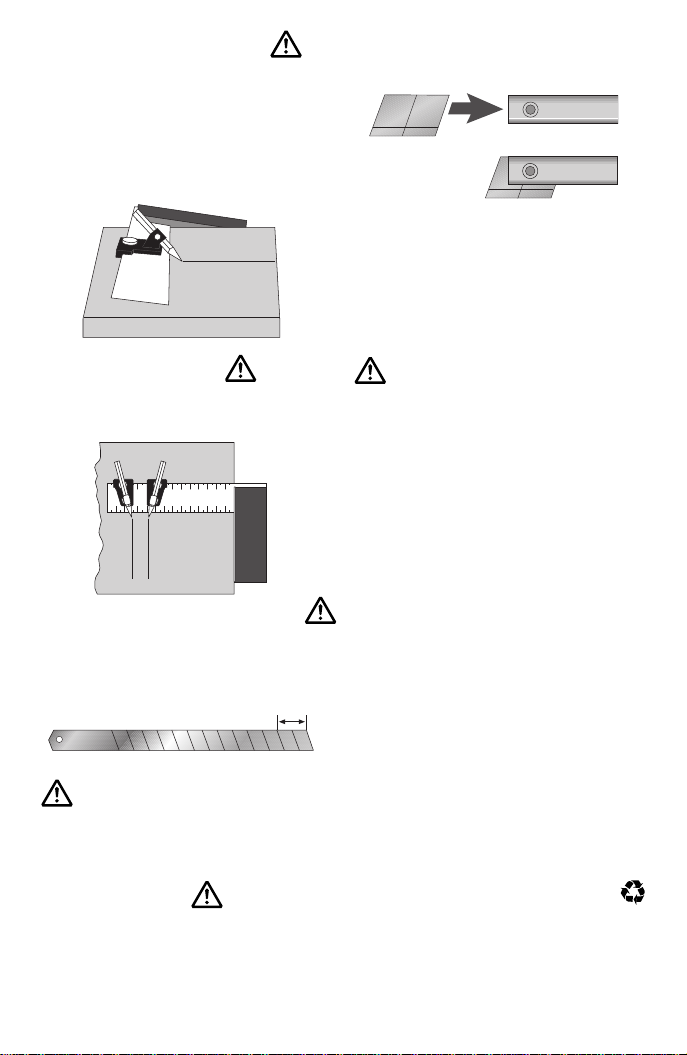
Gauge Marking a Parallel Line
with a Try Square
Slot the trammel head assembly onto the top
edge of the try square blade. Set the
trammel head assembly to the required
depth for the line strike and lock in position
with the large pinch bolt. Butt the try square
stock up against the edge of the board and
maintaining a gentle but constant pressure
slide the square down the board edge.
Gauge Marking 2 Parallel
Lines with a Try Square
Repeat the last operation with the second
trammel head assembly set to the required
position. A second pencil will be required.
Fitting Blade Post for Veneer Cutting
Fit the blade post into the trammel head
ensuring that the small pinch-bolt locates in
the recess on the side of the blade post. This
holds the blade at the correct angle for a
perfect cut.
DO NOT replace the blade until the blade
post is fitted into the trammel head.
Wear safety glasses.
Preparing the Blade
for Veneer Cutting
The blade length required is 2 x sections of
the bar of blades supplied. To snap the blade
off at this point put the blade section required
up to the line to be broken in a vice. Grip the
rest of the blade at the line with a pair of
pliers and gently snap off.
Slot the blade into the blade post with a pair
of long nose pliers, keeping the top of the
blade flat with the top of the blade post.
Ensure it is pushed fully into the slot before
pinching it up with the hex key provided. The
blade is fairly brittle, so tighten the grub
screw gently just to make contact and lock
with a single quarter turn of the hex key
(using the short end of the hex key as a
handle).
Over-tightening will shatter the blade.
Wear safety glasses.
Ensure the veneer is securely taped down in
position. Any cutting action should be
repeated 3-4 times until the cut is complete.
Tip: Dampening the veneer prior to cutting
reduces the chance of splitting.
MAINTENANCE
The accessory has been designed to
operate over a long period of time, with the
minimum amount of maintenance. Continual
satisfactory operation depends upon proper
tool care and regular cleaning.
Cleaning
■ Regularly clean accessory with a soft
cloth.
Lubrication
■ Your accessory requires no additional
lubrication.
Storage
■ Always return product to its packaging
after use.
ENVIRONMENTAL PROTECTION
Recycle raw materials instead of
disposing as waste.
Packaging should be sorted for
environmental-friendly recycling.
The product and its accessories at the end
of its life should be sorted for environmentalfriendly recycling.
Page 4
COMPLETE FLAT LYING
RECYCLABLE
TRAMMELTRAMMEL SET
TRAMMEL SET
Solves the problem found with
traditional compasses and trammels
which have a high centre of gravity,
and are therefore unstable and
entirely dependant on the operator
for their position.
M/CFT01
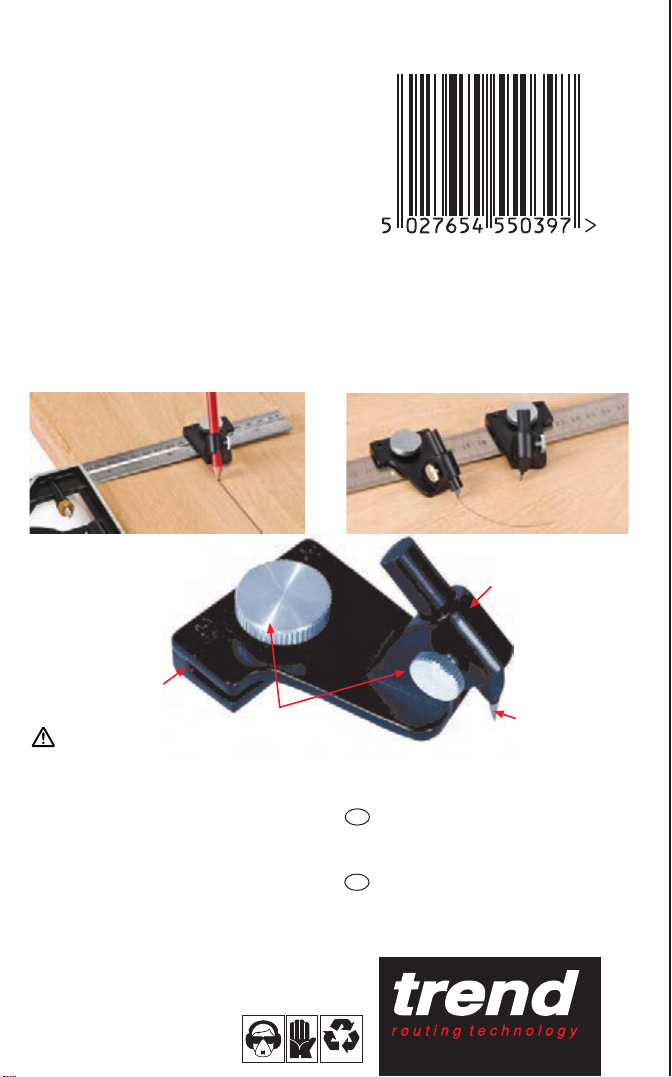
Deep Range Marking Gauge
Clip a trammel head onto any
Try Square or Combination Square
blade with blade width of less than
50mm (1-31/32”). Run the stock along
the board edge for a measured and
truly parallel line.
Slots on steel
or aluminium rules
and squares
Pinch bolts
WARNING Contains very sharp blade -
Cutting Circles
Fit to a steel or aluminium rule from 6”
(152mm) upwards with a blade width less
than 50mm
(1-31/32”) to cut circles in card or veneer.
Use the included hyper fine blade post
for a precision cut line to work to.
Holds carbon steel
point, scribing blade
or pencil
Carbon steel point
Handle with care.
Not to be sold to persons underage.
GB
GUARANTEE
All Trend products guaranteed against any
defects in either workmanship or material,
except products that have been damaged
due to improper use or maintenance.
Our policy of continuous improvements mean that
specifications may change without notice. Trend
Machinery & Cutting Tools cannot be liable for any
material rendered unusable or for any form of
consequential loss.
Manufactured by M-Power Tools Ltd
Made in Great Britain.
© Trend Machinery & Cutting Tools Ltd
2010. E&OE.
® All trademarks acknowledged.
TM.
Trend Machinery & Cutting Tools Ltd.
Tel: 0044(0)1923 249911
[email protected]
www.trend-uk.com
USA
Trend Routing Technology Inc.
Tel: 336 292 5051
technical@trend-usa.com
www.trend-usa.com
TM
PP C/M/CFT01 v1.0
 Loading...