

TreeGreen energyEGG User Manual

SO WHAT IS THE
energyEGG®
?
The
energyEGG®
is a wireless appliance controller. It makes switching o
appliances in a room - or around the home - simple. It automatically
switches o electrical equipment after you leave the room - saving energy,
time and reducing electric bills.
It has 3 main functions :
ROOM ON/OFF Pressing the Power Button (see Figure 1) switches
ON appliances. Pressing and holding the Power
Button for 2 seconds switches OFF appliances
connected to the Control Adaptor(s) (see Figure 3)
in a room.
Auto Room OFF When a room is empty for a preset time the
energyEGG®
(Figure 2) automatically switches
OFF connected appliances.
HOME OFF Pressing and holding the Power Button for 5 seconds,
while appliances are ON, switches OFF all connected
appliances around a home. Please note that the
maximum range of the
energyEGG®
may vary
depending on the building it is being used in .
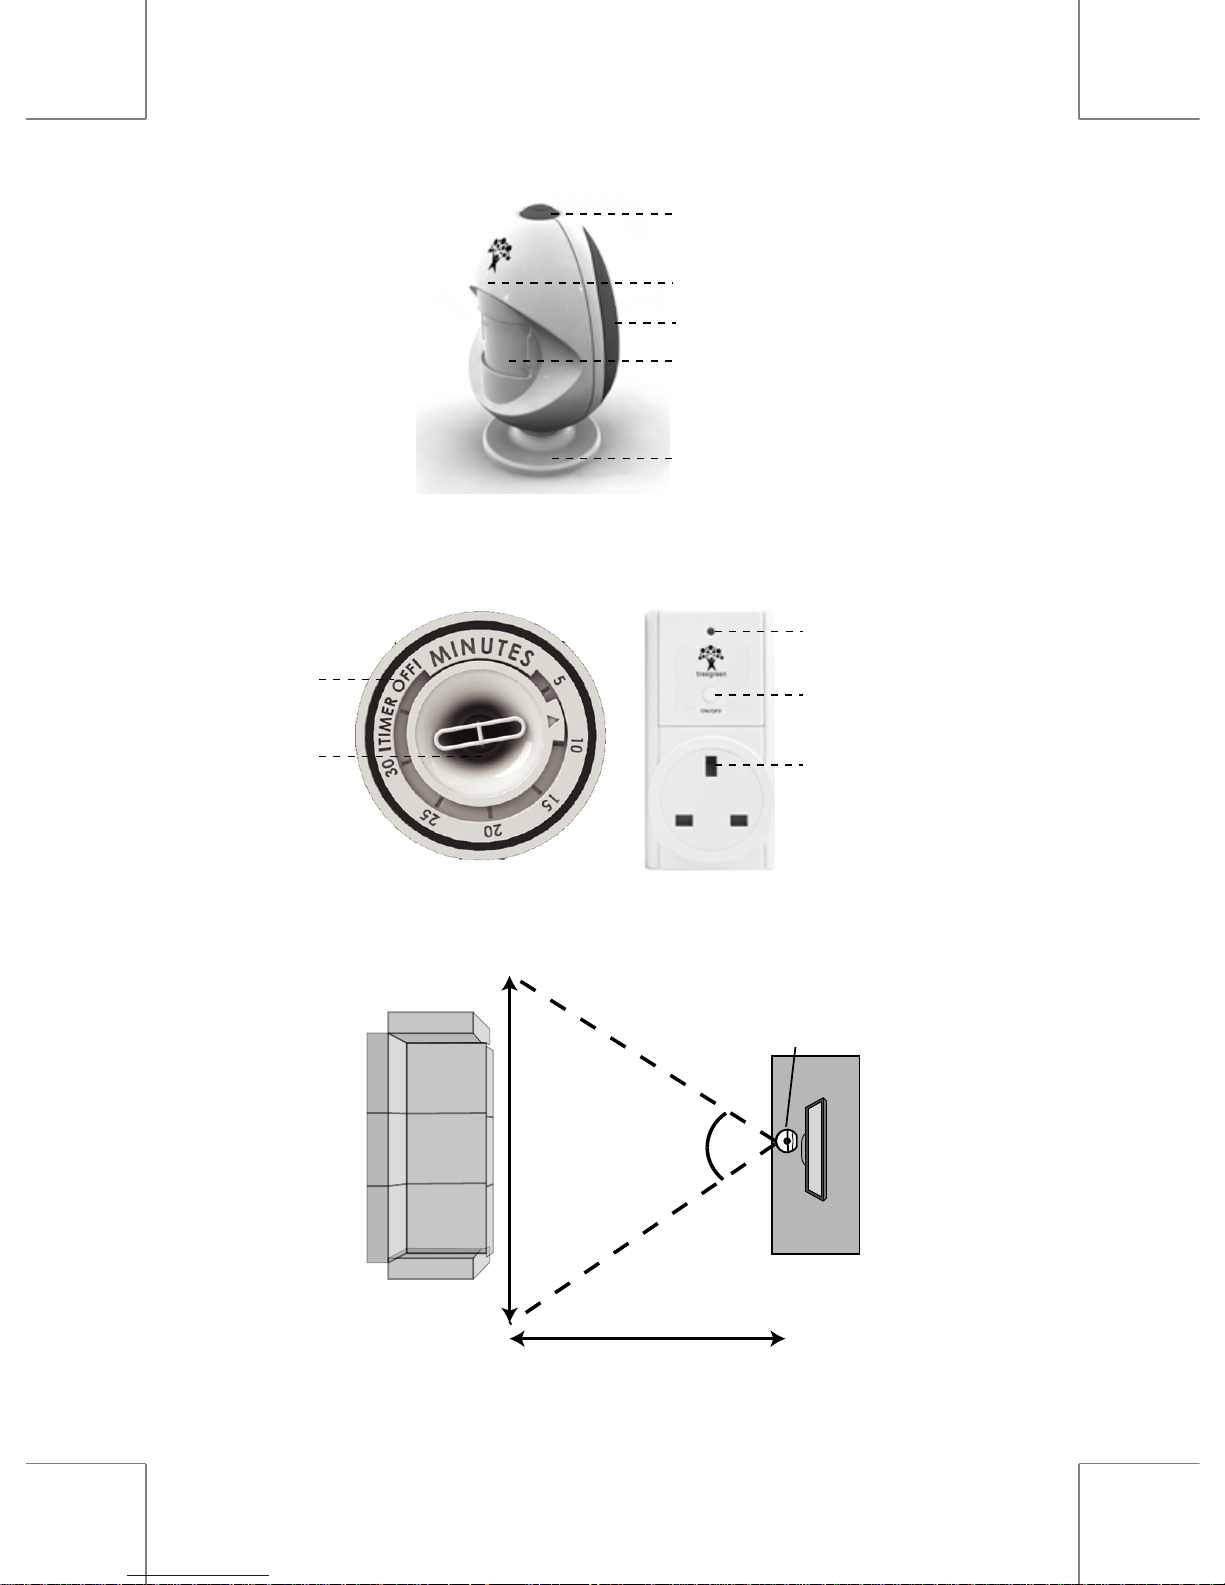
Power Indicator
Control Button
Socket
Figure 3 Control Adaptor
Power Button
LED Indicator
Battery Compartment
Smart Motion Sensor
Adjustable Timer on Base
Figure 1 The
energyEGG®
Figure 2 Timer Dial
Timer OFF
Setting
Dial
energyEGG®
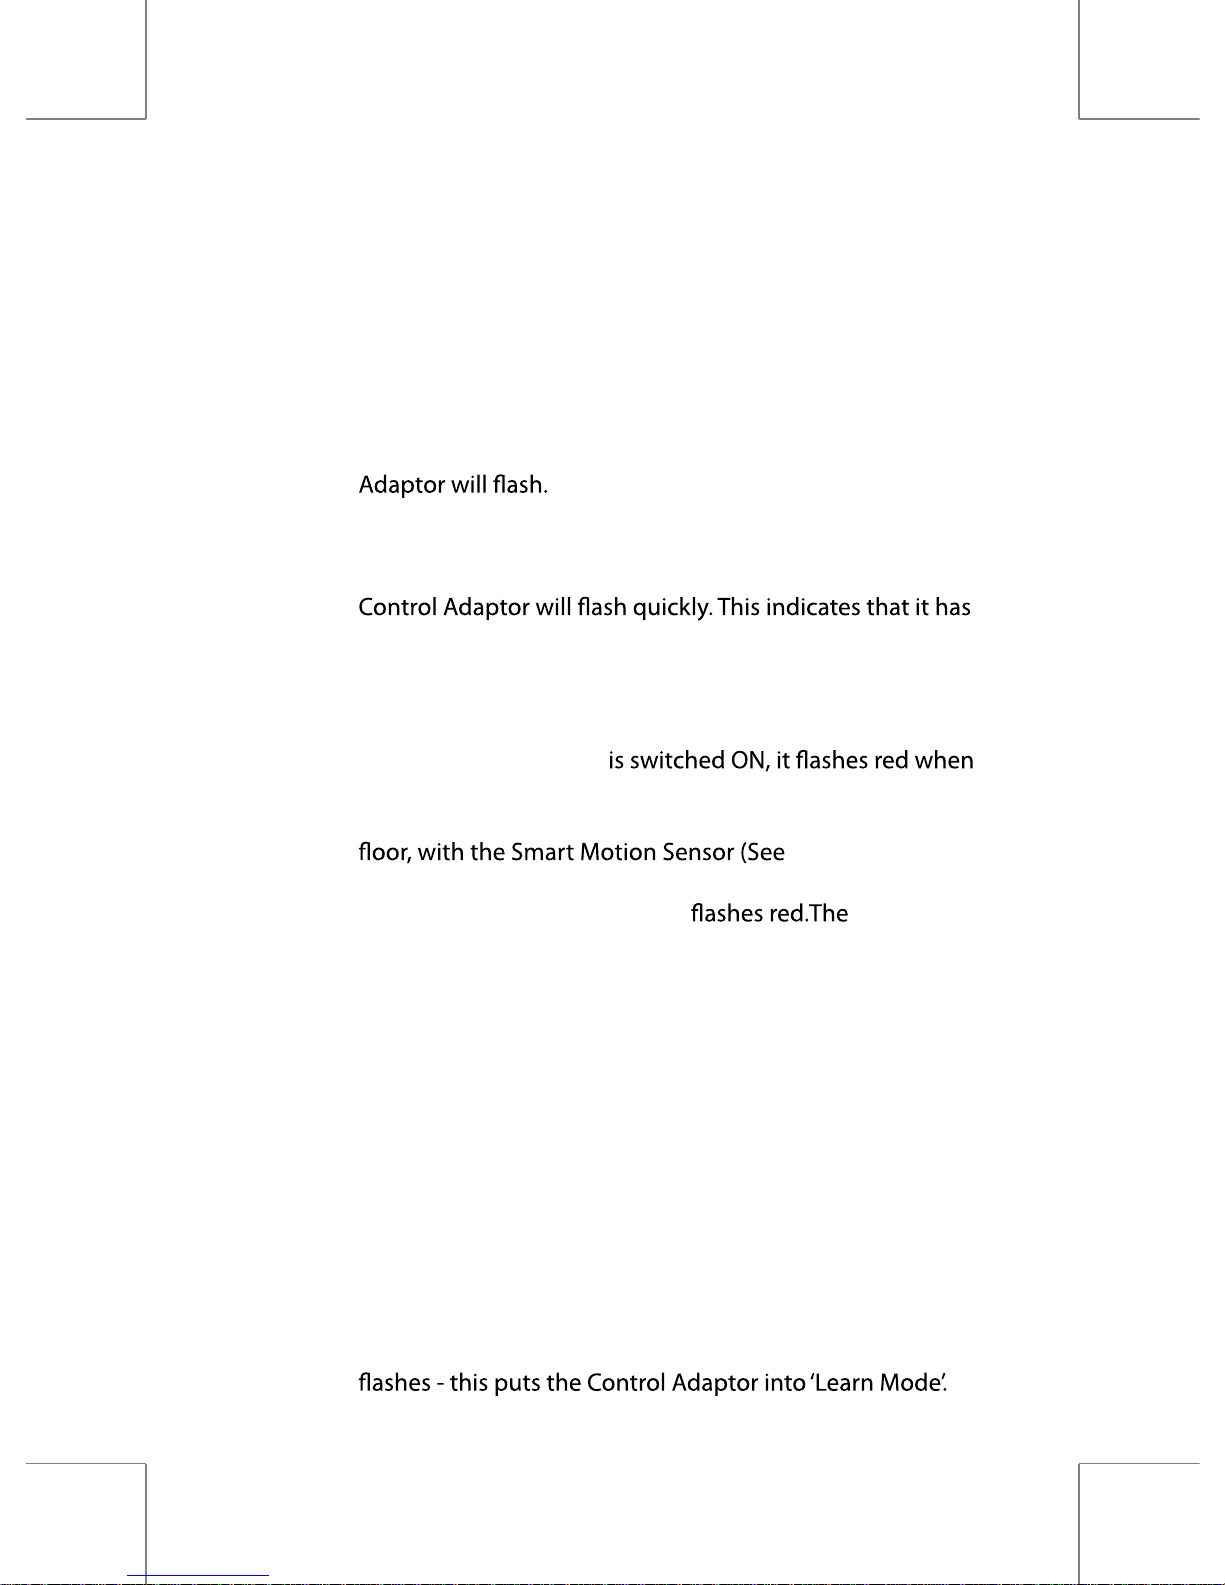
Figure 4: Positioning your
energyEGG®
100º
2.5m
3.5m
SET UP INSTRUCTIONS (ROOM CONTROL)
STEP 1 Plug the Control Adaptor into a mains socket, making sure
that the wall socket is switched on. The LED on the Control
STEP 2 Insert the battery into the
energyEGG®
. Press the Power
Button to signal the Control Adaptor. The LED on the
successfully linked with the
energyEGG®
. Test the Control
Adaptor by switching it ON and OFF using the
energyEGG®
Power Button.
STEP 3 When the
energyEGG®
it detects movement. Place your
energyEGG®
(See Figure 4)
up to 2.5m from where you usually sit, around 1m from the
Figure 1) facing you.
Test the
energyEGG®
position by waving your hand and
checking that the
energyEGG® energyEGG®
works best when it is not placed in direct sunlight.
STEP 4 Plug in an appliance or power strip to the Control Adaptor.
Switch OFF appliances by pressing and holding the button
for 2 seconds - the
energyEGG®
will beep twice to indicate
that you can release the button. The 2 second button delay
helps prevent accidental switch OFF.
STEP 5 To connect an additional Control Adaptor to the
energyEGG®
,
simply repeat these steps. Experiment with the best position
for the
energyEGG®
to signal all Control Adaptors.
Note : To connect an extra
energyEGG®
to a control adaptor, press
and hold the button on the Control Adaptor until the light
Now press the button on the
energyEGG®
to connect it.
 Loading...