

Treasure Cove Fast Action TC-1018 Owner's Manual

OWNER’S MANUAL
Please read before using this equipment
Treasure Cove TC-1018
Fast Action Sand & Surf
Metal Detector
www.treasure-cove.com/support
Register your purchase for warranty coverage
Questions that cannot be answered by this manual.
Replacement parts

2
FEATURES
With your Fast Action TC-1018 Metal Detector, you can hunt for coins,
relics, jewelry, gold, and silver just about anywhere. This metal detector
is versatile and easy to use.
The detector’s features include:
Three Operation Modes: ALL METAL, DISC, PINPOINT
ALL METAL—lets you search for all kinds of metal with auto ground
balance and high sensitivity. It’s the best operation mode.
DISC—discriminates what kind of metal being detected.
PINPOINT
---Lets you find the location of the target being detected
accurately.
Volume—to adjust the volume level of speaker and headphone
Headphone Jack – lets you connect stereo headphones (not supplied)
to the detector in private.
View meter and Pointer – The meter pointer swings to the right if metal
is found.
Water proof Search Coil – lets you search for metal objects under
shallow water. Note: The search coil is waterproof, but the control
housing is not waterproof.
Adjustable Stem – lets you adjust the detector’s length for comfortable
use. Note: Your metal detector requires two 9V alkaline batteries (not
supplied).
3
PREPARATION
ASSEMBLING THE DETECTOR
Assembling the detector is easy and requires no special tools. Just follow
these steps.
1. Unscrew the knobs on the search coil and remove the knobs and
the connector. Insert the smaller stem and align the holes on the
search coil bracket and the stem. Push the connector through the
holes, then replace and tighten the knobs.
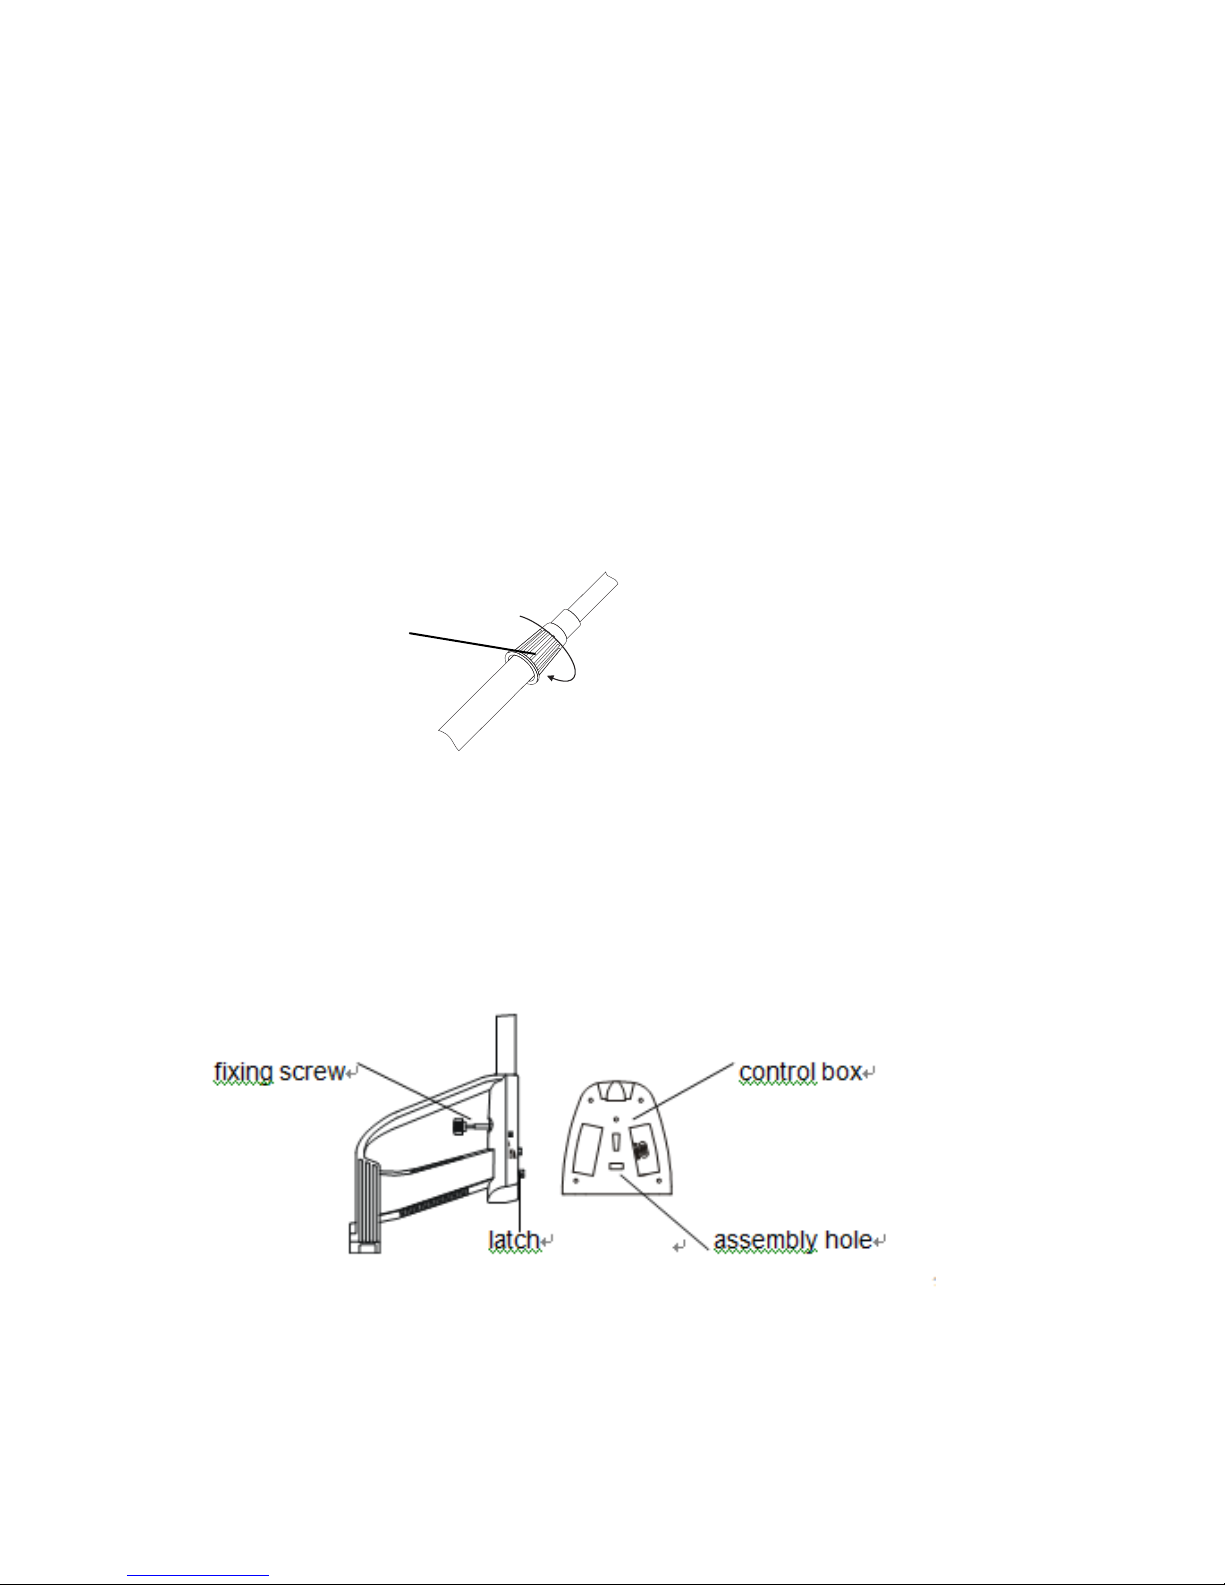
2. Loosen the stem’s (connected with the handle) lock nut in the direction
of the arrow. Then insert the smaller stem into the big stem connected
with the handle. Turn the stem’s lock nut in the reverse direction of the
arrow to lock it in place.
3. Insert the latch on the top of the handle into the assembly hole on
the bottom of the control box. Then slightly push the control box in the
direction of IN on the handle to fix the latch in place.
4. Tighten the fixing screw properly.
Lock nut
4
5. Insert the search coil cable plug into the five pin jack on the back
control box’s housing.
6. Lengthen or shorten the stem, so when you stand upright with the
detector in your hand, the search coil is level with and about 1~5cm
above the ground. After that tighten the lock nut.
Caution:
The search coil cable plug fits into the connector only one way. Do
not force the plug or you could damage it.
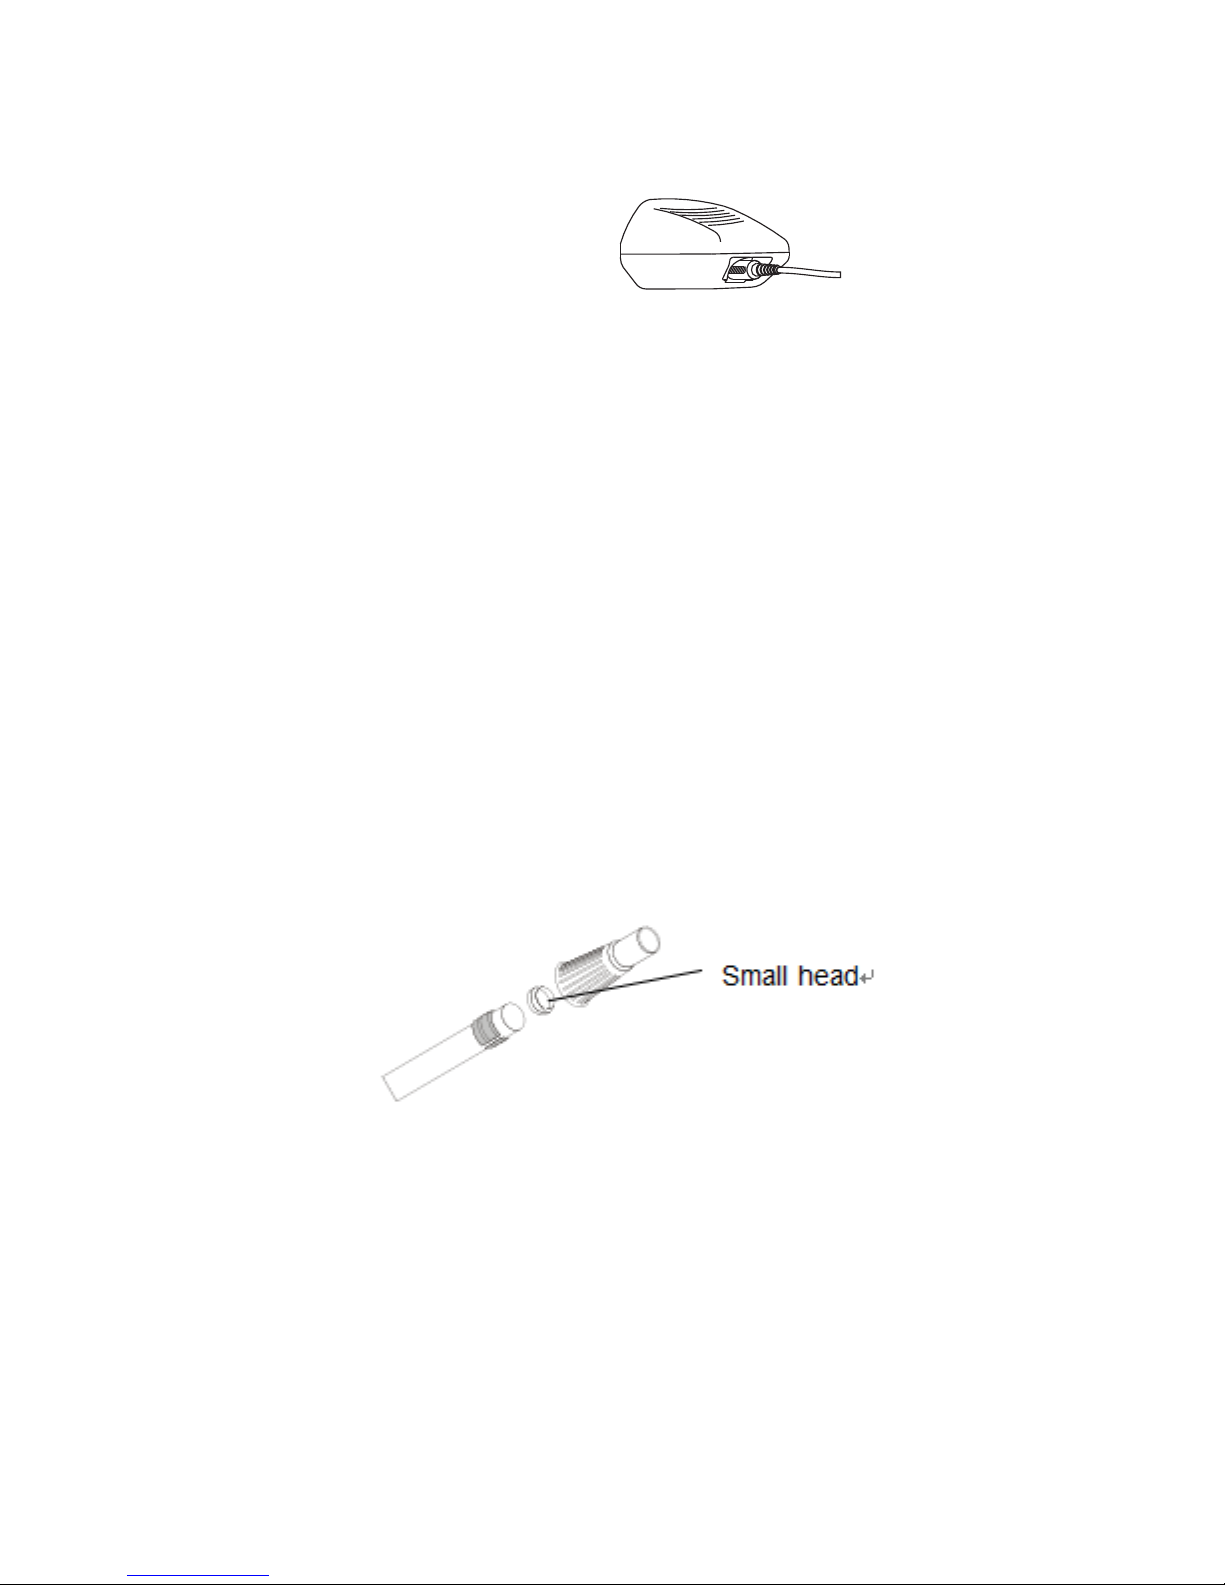
You don’t need to disassemble the stem lock nut. In case you
disassemble it carelessly, place the washer on the top of the stem
connected with the handle with the small head of the washer
upwards. Then hitch the stem lock nut on the washer then tighten it
to lock it in place.
ADJUSTING THE SEARCH COIL
Loosen the knobs at the search coil’s end, then adjust the search coil to
the desired angle. (The search coil should be parallel with the ground.)
Tighten the knobs just enough to keep the search coil from rotating or
wobbling.
 Loading...