

TreadTracker PFTK001 Instruction Manual

(c) Rotation Wheel
• The Rotation Wheel helps to prevent the sensor from toppling over which
can happen if TreadTracker is not pointing in the same direction as the
treadmill.
Model No.: PFTK001
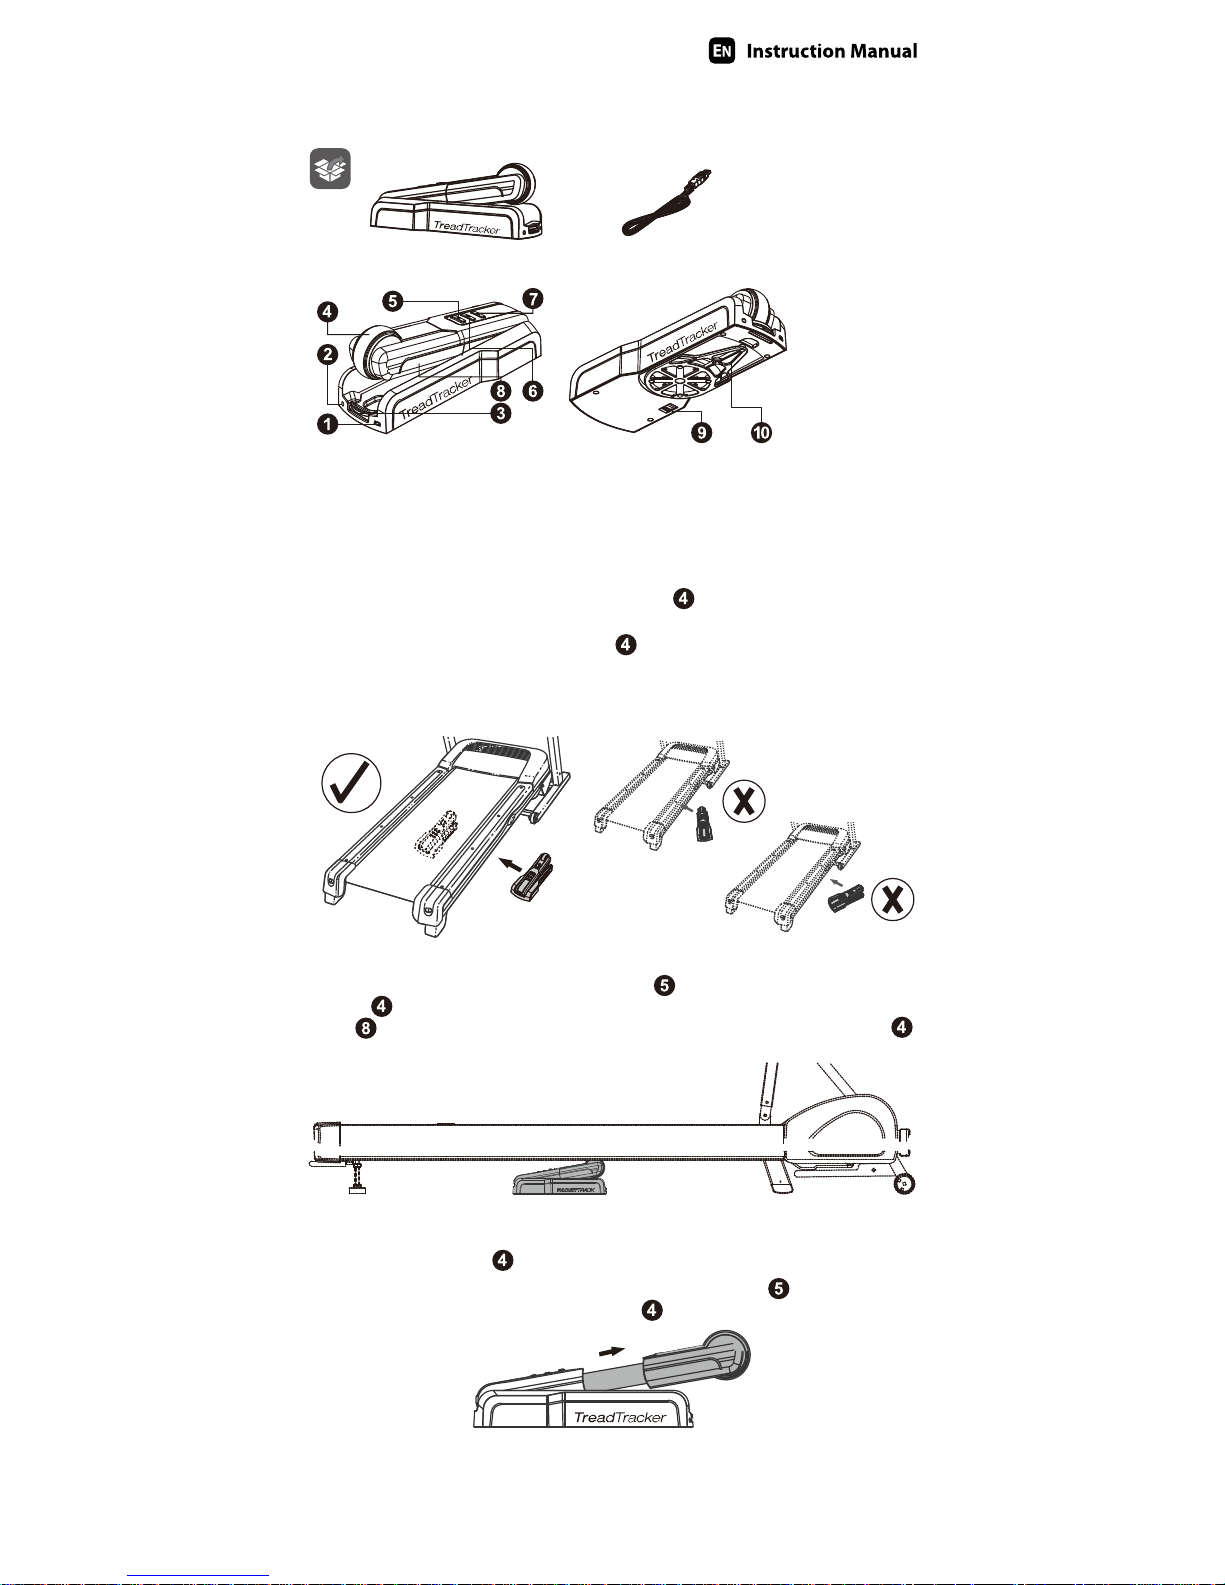
4
1. USB port
2. Jack Input
3. Security Bar
4. Main Wheel
5. Release Button
6. Charging Light
7. Bluetooth Light
8. Arm
9. Power Switch
10. Rotation wheel
0
(Micro USB cable x 1)
1. Installation
(a) Placing the sensor
WARNING:
Before placing TreadTracker in position, ensure treadmill track is not moving.
Place TreadTracker on the floor directly underneath mid-section of the
treadmill where the TreadTracker Main Wheel can clearly access the
treadmill track underside.
IMPORTANT: Ensure the Main Wheel is only in contact with the tread
and is not too close to the treadmill frame or the front or rear of the treadmill.
IMPORTANT: Ensure the TreadTracker is placed in the same direction as
the treadmill track which means it's not at an angle.
(Sensor x 1)
(b) Releasing arm and adjusting for height
Once in position, press the Release Button . This will cause the Main
Wheel to swing upwards and make contact with the treadmill track. The
Arm should not have to swing to its maximum height for the Main Wheel
to make contact.
If more height is required
• Pull the Main Wheel block to extend the Arm until the Release Button clicks.
• To restore Arm length, simply press the Release Button and shorten
the Arm length holding the Main Wheel .
Awesome! You've got the TreadTracker. It's going to make your digital running
experience even better. While it’s kind of obvious how the sensor works do read
this quick guide so you get the best out of it.
TREADTRACKER
 Loading...