

Page 1
World HQ
Neocom Software
8th Line 29, Vasilyev s ky Island
St. Petersbur g, 199004, Russia
US Office
Neocom Software
15200 Jog Roa d, Suite 202
Delray Beach, FL 33446, USA
Internet
Email: info@trbonet.com
WWW.TRBONET.COM
Telephone
EMEA: +44 203 608 0598
Americas: + 1 872 222 8726
APAC: +61 28 6078325
TRBOnet Swift DT500
User Guide
Page 2

Notices
This document is for informational purposes only. Neocom software, Ltd offers no
warranties, express or implied, in this document.
Neocom and the Neocom logo, TRBOnet and the TRBOnet logo are either registered
trademarks or trademarks of Neocom software, Ltd.
MOTOROLA, MOTO, MOTOROLA SOLUTIONS and the Stylized M logo are trademarks
or registered trademarks of Motorola Trademark Holdings, LLC.
Microsoft, Windows, SQL Server and the .NET logo are either registered trademarks or
trademarks of Microsoft Corporation in the United States and/or other jurisdictions.
Other product or company names mentioned herein may be trademarks of their
respective owners.
© 2017 by Neocom software, Ltd. All rights reserved.
Last revised on November 7, 2017.
Page 3

ii TRBOnet Swift DT500 – User Guide
Contents
1 Introduction ........................................................................................................................................................1
1.1 About This Guide ................................................................................................................................1
1.2 About TRBOnet Swift .........................................................................................................................1
1.3 Contacts ..................................................................................................................................................1
2 About Swift DT500 ...........................................................................................................................................2
2.1 Advantages ............................................................................................................................................2
2.2 Functionality .........................................................................................................................................2
2.3 Licensing .................................................................................................................................................3
2.4 Panels ......................................................................................................................................................4
2.5 Connectors ............................................................................................................................................5
2.6 Glossary ..................................................................................................................................................6
3 Connections ........................................................................................................................................................7
3.1 Precautions ............................................................................................................................................7
3.2 Connecting a Computer ...................................................................................................................7
3.3 Connecting External Hardware ......................................................................................................7
3.4 Connecting a Radio ............................................................................................................................9
4 Setup................................................................................................................................................................... 11
4.1 Installing Software ........................................................................................................................... 11
4.2 Installing a Driver ............................................................................................................................. 11
4.3 Updating Firmware .......................................................................................................................... 12
4.4 Activating Features .......................................................................................................................... 13
4.5 Loading Configuration ................................................................................................................... 15
5 Demo Mode ..................................................................................................................................................... 17
5.1 Using Demo Mode with Activated Features .......................................................................... 17
Page 4
Introduction
1
1 Introduction
1.1 About This Guide
This document is intended for engineers responsible for building MOTOTRBO radio
networks and programming two-way radios for end users.
1.2 About TRBOnet Swift
TRBOnet Swift is a family of hardware products by Neocom Software, Ltd designed
for use in MOTOTRBO radio networks. The TRBOnet Swift family hardware is
presented by RoIP gateways A001/002 and A200, option boards ST001 and ST002, the
DT500 data transfer module.
For more information on the TRBOnet Swift family products, refer to our website.
1.3 Contacts
Region Phone Email & Support
EMEA +44 203 608 0598
info@trbonet.com
— general and
commercial inquiries
support@trbonet.com — technical
support
http://kb.trbonet.com — online
knowledge base
Americas +1 872 222 8726
APAC +61 28 607 8325
Page 5

2 TRBOnet Swift DT500 – User Guide
2 About Swift DT500
TRBOnet Swift DT500 is an external programmable controller connectable to a
MOTOTRBO digital two-way radio.
2.1 Advantages
• Small size and weight
• High-performance processor
• Built-in memory (8 Mb)
• Interfaces that allow various connections:
7 VIO contacts (active level GND, up to 200 mA per contact)
Serial ports RS232 and RS485
USB port for a MOTOTRBO radio or a computer
• Support for MOTOTRBO 3000/4000 series digital two-way mobile radios
• Quick and easy connection and setup
• Programmable via USB (RJ45)
• Configurable Swift Event Logic on board
2.2 Functionality
Swift DT500 supports the following operations:
• Receives events and data from external devices
Receives GNSS coordinates from the radio’s built-in navigation tracker.
Handles region events (region entered, left, region border crossed) from the
radio’s built-in navigation tracker.
• Controls a connected MOTOTRBO radio
Sends a MOTOTRBO alarm (with the indicated event).
Sets a different zone and a channel on the radio.
Manages the volume of the tone played back on the radio
Plays back the tones on the radio.
Plays back voice messages on the radio (messages are preconfigured in
MOTOTRBO CPS).
Sends text messages to other radios and talk groups.
Shows predefined text on the radio’s display.
• Controls internal functions
Stores GNSS and other data in memory.
Creates and sends GNSS and other reports on the radio channel.
At runtime, sets parameters for creating and sending reports.
Controls the VIO contacts located on the rear panel.
• Receives internal events
Registers an event when powered on/off and at change of a VIO contact
state.
Receives and transmits data on the RS-232 and RS-485 ports.
Page 6
About Swift DT500
3
Note: The availability of a particular feature depends on the loaded firmware and
configuration, activated features, connected hardware, and the model of a
connected MOTOTRBO radio.
2.3 Licensing
Swift Event Logic features are provided on terms of commercial licensing. The
following licenses are available for purchase for Swift DT500:
Table 1: Licenses available for Swift DT500
License Description Licensed features
Tracker This license enables getting GNSS data
from the radio.
GNSS reports
Speed Limit
GeoZones This license enables monitoring of the
radio’s location in the predefined
geographical regions.
GeoRoaming
GeoFencing
DataPort This license enables data transfer on the
RS-232 port.
Communication with external
devices over the RS-232 interface
Page 7
4 TRBOnet Swift DT500 – User Guide
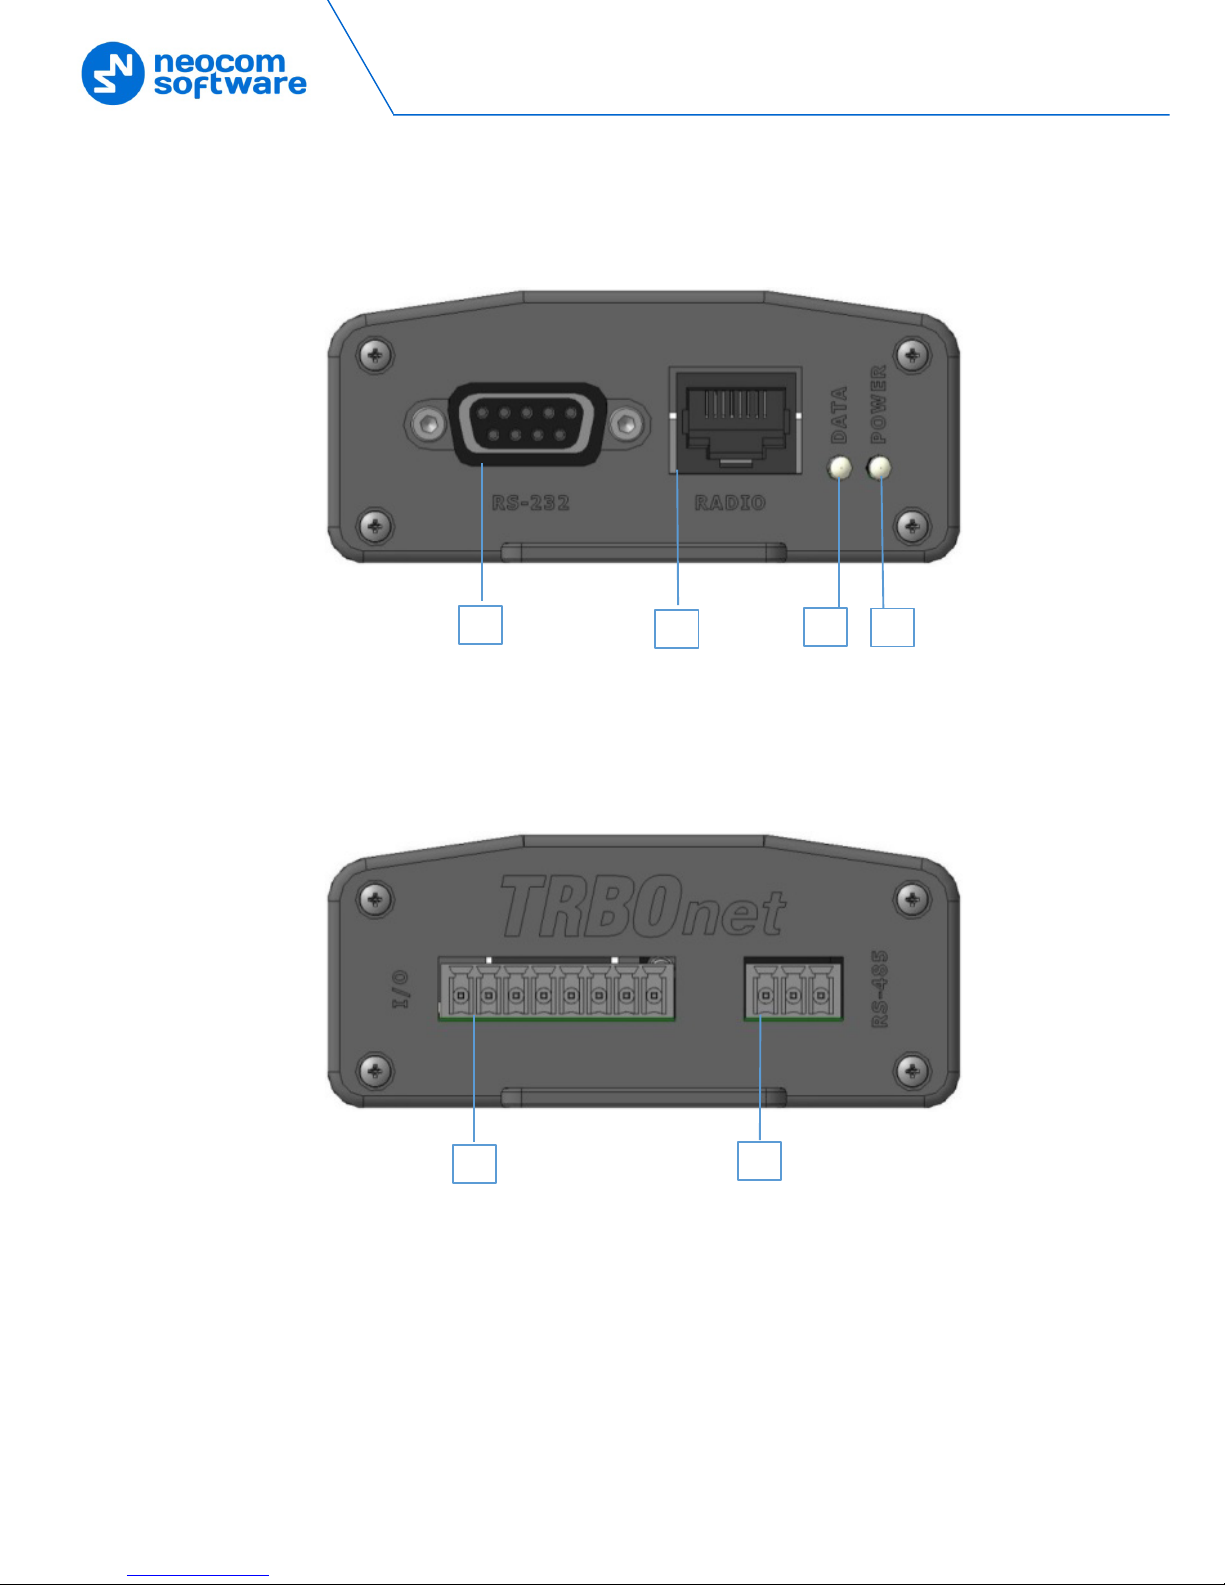
2.4 Panels
FRONT PANEL
1. RS-232: The DB9 connector for connecting external hardware.
2. RADIO: The RJ45 connector for connecting a radio or a computer.
3. DATA: The data receive/transmit indication.
4. POWER: The power indication.
REAR PANEL
1. I/O: The contact group connector for VIO input/output.
2. RS-485: The contact group connector for connecting external hardware.
2 1 3 4 2
1
Page 8

About Swift DT500
5
2.5 Connectors
Table 2: Connector pinouts
RS-232 connector RADIO connector
1. Not used
2. Received Data (RXD)
3. Transmit Data (TXD)
4. Not used
5. Ground (GND)
6. Not used
7. Request To Send (RTS)
8. Clear To Send (CTS)
9. Not used
1. Ground (GND)
2. USB OTG
3. Ground (GND)
4. USB Data +
5. USB Data -
6. USB VBUS
7. Not used
8. PWR IN – Input power (12 V)
I/O connector RS-485 connector
1 2 3 4 5 6 7 8
1 2 3
1. VIO 1
2. VIO 2
3. VIO 3
4. VIO 4
5. VIO 5
6. VIO 6
7. VIO 7
8. Ground (GND)
1. RS485 A
2. Ground (GND)
3. RS485 B
Page 9

6 TRBOnet Swift DT500 – User Guide
2.6 Glossary
Table 3: Terms and abbreviations
Term Description
CAN Controller Area Network
CPS Customer Programming Software
DT Data Transfer
GeoFencing A radio network feature that enables tracing of the radio’s staying within
or crossing the border of certain geographical regions, with a subsequent
execution of tasks defined by the user.
GeoRoaming A radio network feature that enables automatic switching of the radio
between the programmed channels and zones when entering or leaving
a particular region.
GND Ground
GNSS Global Navigation Satellite System
GPS Global Positioning System
I/O Input/output
IP Internet Protocol
Report A dataset that Swift DT500 creates and sends to TRBOnet Server on the
radio channel. A report typically includes GNSS data from the radio
and/or data from VIO contacts.
Swift Event
Logic
A unified programmable environment that enables flexible configuration
of logic on TRBOnet Swift family products and MOTOTRBO GOB
connectable to MOTOTRBO digital two-way radios. A configured device
turns into a full-featured controller that can manage events and
connected hardware.
USB Universal Serial Bus
Page 10

Connections
7
3 Connections
This section describes how to connect Swift DT500 to external devices.
3.1 Precautions
IMPORTANT: To connect Swift DT500 to a radio or a computer, use the cables
specially designed for Swift DT500 by Neocom Software, Ltd. Use of
any other cables not intended for Swift DT500 may cause damage to
Swift DT500 and to the hardware connected using a non-compliant
cable.
IMPORTANT: Connect Swift DT500 to a MOTOTRBO digital radio only when the
radio is powered OFF. When the radio is powered on, connecting or
disconnecting the cable presents a high risk of the USB interface
damage on the radio.
3.2 Connecting a Computer
Use the programming cable by Neocom Software, Ltd to connect the radio slot of
your Swift DT500 to a USB slot of a computer.
Figure 1: Pinout diagram of the programming cable
3.3 Connecting External Hardware
Swift DT500 provides interfaces for serial communication with external hardware and
VIO contacts that can be connected each to an external device for data input or
output. For instance, input VIO contacts can be used for monitoring states of
connected sensors, and output VIO contacts can be used for controlling external
hardware.
3.3.1 Connecting Swift DT500 for Serial Communication
To connect external hardware to serial ports RS-232/RS-485 of Swift DT500, use a
cable recommended by the hardware manufacturer. Connect external hardware only
when Swift DT500 is disconnected from the radio.
3.3.2 Connecting VIO Contacts for Input
An input VIO contact shall be connected to the ground (GND) to register ground
potential.
Page 11

8 TRBOnet Swift DT500 – User Guide
Figure 2: Connecting a VIO contact for input
For an input VIO contact to register positive potential, an additional relay shall be
used.
3.3.3 Connecting VIO Contacts for Output
An output VIO contact shall be connected to the ground (GND).
Figure 3: Connecting a VIO contact for output
To handle the load of greater than 200 mA, an additional relay with consumption of
not greater than 200 mA shall be used.
Figure 4: Connecting an output VIO contact for handling the load of greater than 200 mA
To handle the load voltage greater than 12V, additional relays connected to the source
of 12V shall be used.
Page 12

Connections
9
Figure 5: Connecting an output VIO contact for handling the load voltage of greater than 12V
3.4 Connecting a Radio
You can connect Swift DT500 to a MOTOTRBO digital two-way mobile radio for IP or
non-IP communication.
Non-IP communication with a peripheral device requires preliminary setup on the
radio.
To setup the radio for non-IP communication with a peripheral device:
1. Disconnect peripherals from the radio.
2. Connect the radio to a computer and run the MOTOTRBO CPS software.
3. Read the radio settings.
4. Go to the Accessories section and set Cable Type to Rear Data Accessory.
5. Write the new settings to the radio.
Note: If the radio has a display and changing the cable type through the radio menu
is allowed, you can make the same changes without using the MOTOTRBO CPS
software.
To connect Swift DT500 to a MOTOTRBO radio:
1. Power off the radio.
2. Connect Swift DT500 to external hardware (if required).
3. Use the service cable by Neocom Software, Ltd to connect the radio port of
your Swift DT500 to the service port of the radio. The service cable is supplied
with Swift DT500 in the delivery kit.
Figure 6: Pinout diagram of the radio cable for non-IP communication
Page 13

10 TRBOnet Swift DT500 – User Guide
Figure 7: Pinout diagram of the radio cable for IP communication
Note: Connection to a radio for IP communication may require special
firmware loaded to Swift DT500 and a service cable without the jumper
between contacts 5 and 8.
4. Power on the radio.
Page 14

Setup
11
4 Setup
To prepare Swift DT500 for operation, perform the following steps.
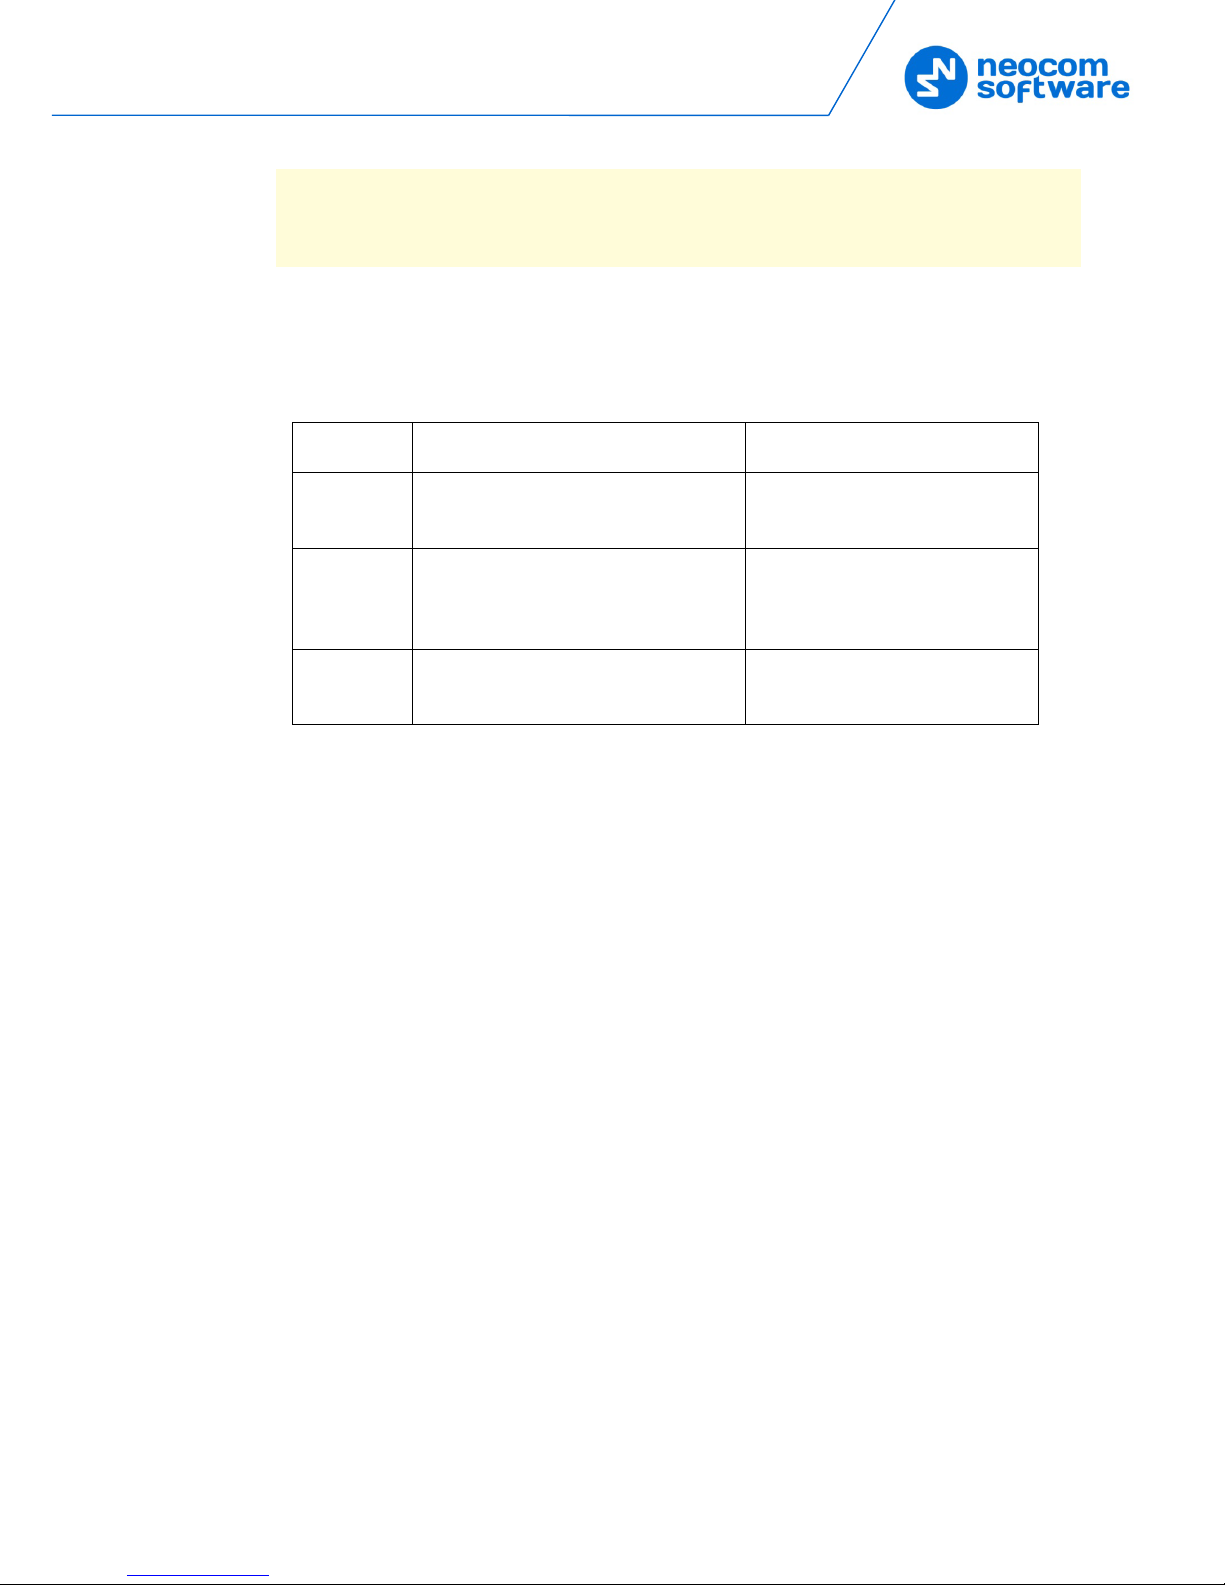
Table 4: High-level steps to prepare Swift DT500 for operation
# Step Note
1 Install the required software on your
computer.
Find the details in Installing Software.
2 (Optional) Install a USB driver on your
computer.
Find instructions in Installing a Driver.
3 Connect Swift DT500 to your computer. Find instructions in Connecting a Computer.
4 (Optional) Update the firmware version
on Swift DT500.
Find instructions in Updating Firmware.
5 Activate purchased features on Swift
DT500.
Find instructions in Activating Features.
6 Load an Event Logic configuration on
Swift DT500.
Find instructions in Loading Configuration.
7 Disconnect Swift DT500 from your
computer.
8 Connect all peripherals to Swift DT500. Find instructions in Connecting External
Hardware.
9 Connect Swift DT500 to a MOTOTRBO
radio.
Find instructions in Connecting a Radio.
10 Power on the radio.
4.1 Installing Software
To load a configuration and activate the licensed features on your Swift DT500, Install
the following software on your computer:
• TRBOnet Swift CPS
• TRBOnet Swift License Manager
The distribution packages of the required software are available for download at
www.trbonet.com
.
4.2 Installing a Driver
To detect Swift DT500 connected to a USB port, your computer needs a hardware
driver. Windows 10 includes a generic driver for USB connected devices. For an earlier
version of Windows, install the driver that comes with the TRBOnet Swift CPS software.
Page 15

12 TRBOnet Swift DT500 – User Guide
Note: TRBOnet Swift CPS needs to be installed on your computer prior to installing
the driver. Refer to Installing Software for details.
To install the driver:
1. If you are running a 64-bit version of Windows, disable the driver signature
enforcement in any preferred way. This is necessary because the provided
driver is not signed.
For instance, you can restart Windows with the S
HIFT key pressed. At the boot
prompt, select the Disable driver signature enforcement option or keep F7
pressed.
3. Go to the Swift CPS installation folder and open the Driver folder located
inside. Right-click the swift-vcom.inf file and select Install from the context
menu.
4. (Optional) If the warning window is displayed, select to install the driver
anyway and complete the installation.
4.3 Updating Firmware
The firmware version loaded to your Swift DT500 may require an update. The Swift
CPS software provides the latest firmware version for Swift DT500.
Note: Firmware update clears configuration from device memory. We recommend
that you save the current configuration to a file before updating firmware on
your device. Information about activated features is not affected by firmware
update.
To load the latest firmware on Swift DT500:
1. Connect Swift DT500 to a computer.
2. Launch the Swift CPS application. If you need to install this software, refer to
Installing Software
for details.
Swift CPS automatically detects the connected device and shows the
information about detected connections in the status bar.
Note: If Swift CPS fails to detect a connected DT500, make sure that you have
installed the USB driver as described in Installing a Driver.
3. Select Update in the Device menu.
The Firmware Update window displays the actual firmware version for each
connected device in section Info about device. The latest available firmware
version appears in the Firmware section.
Page 16

Setup
13
Figure 8: Updating the firmware version on Swift DT500
4. If firmware update is necessary, select your device and the latest firmware
version. Click Update to load the latest firmware version.
4.4 Activating Features
To enable Swift Event Logic features on a device, you need to purchase a license. Then
you need to activate the purchased features on your device using the license key.
Note: If configuration loaded to a device includes purchased but not activated
features, such features do not work on the device at runtime.
To activate purchased features:
1. Connect Swift DT500 to a USB port of a computer. The computer must have
access to the Internet during the activation of features.
2. Launch the Swift License Manager application on your computer. If you need
to install this software, refer to Installing Software
for details.
3. Select the Activate products option and enter the license key in the edit box.
Click Next and again Next.
4. On the Connection to Device page, click Swift DT500, then click the tab with
the device information. The Next button becomes available. Click Next.
Page 17

14 TRBOnet Swift DT500 – User Guide
Figure 9: Selecting a connected device
5. On the Products Activation page, select the purchased features that you want
to activate on your Swift DT500. Click Activate Products.
Figure 10: Activating licensed features on Swift DT500
6. Close the wizard.
To verify the activated features, do any of the following:
• In the Swift License Manager application, select the Look products on a device
option and click Next. Click Swift DT500 and view the activated features in the
tab with the device information.
• Launch the Swift CPS application and read configuration of your Swift DT500.
The License Information section in the opened tab displays all activated features
as Purchased.
Page 18

Setup
15
Figure 11: Verifying the license information on Swift DT500
4.5 Loading Configuration
To use Swift Event Logic, a brand new Swift DT500 needs to be configured. A
configuration defines all events monitored on a device, conditions evaluated for a
triggered event, and actions executed for a triggered event.
To obtain a configuration that meets your business case, you have options as follows:
• Create your configuration in the Swift CPS software.
The user guide for the TRBOnet Swift CPS software describes step by step how
to create a configuration for any type of hardware. This document is available
for download on www.trbonet.com
.
• Order your configuration from the manufacturer of your device.
The manufacturer can provide a configuration that uses standard Event Logic
features, or a configuration with extended capabilities. To order a configuration,
contact our support. Find the contact details for your region in the Contacts
section of this document.
When you have the required configuration, load it to your Swift DT500.
4.5.1 Loading a Configuration with Standard Features
To load a configuration with standard features to Swift DT500:
1. Connect Swift DT500 to the USB port of your computer.
2. Launch the Swift CPS application.
The application automatically detects the connected Swift DT500 and shows the
information about all detected connections in the status bar.
3. Open the desired configuration in Swift CPS:
To open the configuration file, select Open File in the Device menu. Select
the file and confirm the choice.
Page 19

16 TRBOnet Swift DT500 – User Guide
To open the configuration from another device connected to your computer,
select Read in the Device menu. Select the configured device and confirm
the choice.
The configuration appears in a separate tab.
4. Select Write in the Device menu. If multiple devices are connected to your
computer, select your Swift DT500 and confirm the choice.
The configuration from the opened tab is loaded to your Swift DT500.
5. To verify the result, select Read in the Device menu. If necessary, select the
just configured Swift DT500 and confirm the choice.
The current configuration of your Swift DT500 appears in the DT500 - COM3
tab.
4.5.2 Loading an Extended Configuration
An extended configuration includes configuration settings not supported by the Swift
CPS software. For this reason, you cannot open an extended configuration in Swift
CPS using commands Open File and Read.
To load an extended configuration to Swift DT500:
1. Connect Swift DT500 to the USB port of your computer.
2. Launch the Swift CPS application.
3. Select Write logic to device in the Device menu. Select the configuration file
provided by the manufacturer of your device and confirm the choice.
Page 20

Demo Mode
17
5 Demo Mode
The demo mode enables you to test all Event Logic features on your device without
purchasing a license.
If you did not activate any features on your device, it enters the demo mode
automatically when you power on the connected radio. To indicate the demo mode
on a connected device, the radio plays back the tone. If the radio has a display, a demo
mode notification appears.
The demo mode lasts for two hours. After that, the radio displays a warning message
and continues to play back the tone until powered off.
• To continue testing, power on the radio and use the demo mode for the next
two hours.
• To use your device in the normal mode, purchase the required features and
activate them on your device. Find the instructions in Activating Features
.
5.1 Using Demo Mode with Activated Features
If you have activated features on your Swift DT500, you can use the demo mode
whenever necessary.
To activate the demo mode on Swift DT500:
1. Connect your Swift DT500 to a computer.
2. Launch the Swift License Manager software.
3. Select the Activate products option and enter the license key in the edit box.
Click Next and again Next.
4. On the Connection to Device page, click Swift DT500, then click the tab with
the device information. The Next button becomes available. Click Next.
5. On the Product Activation page, click Activate Demo-mode.
Page 21

18 TRBOnet Swift DT500 – User Guide
Figure 12: Forcing the demo mode on a device with activated features
The wizard displays a message about the demo mode successfully activated.
6. Close the wizard window.
If you now connect your Swift DT500 to the powered off radio and then power the
radio, your device enters the demo mode.
When forced to use the demo mode, a device preserves the information about all
activated features in memory. When necessary, you can restore the activated features
without incrementing the license count and continue to use your device in the normal
mode.
To restore the activated features:
1. Power off the radio.
2. Reconnect your Swift DT500 to a computer.
3. Launch Swift License Manager software.
4. Select the Activate products option and enter the license key in the edit box.
Click Next and again Next.
5. On the Connection to Device page, click Swift DT500, then click the tab with
the device information. The Next button becomes available. Click Next.
6. On the Product Activation page, select the previously activated features in
the list. Click Restore products.
Page 22

Demo Mode
19
Figure 13: Restoring activated features on a device
The wizard displays a message about the activated features successfully
recovered.
7. Close the wizard.
If you now connect your Swift DT500 to the powered off radio and then power on the
radio, your device will enter the normal mode.
 Loading...