

Page 1
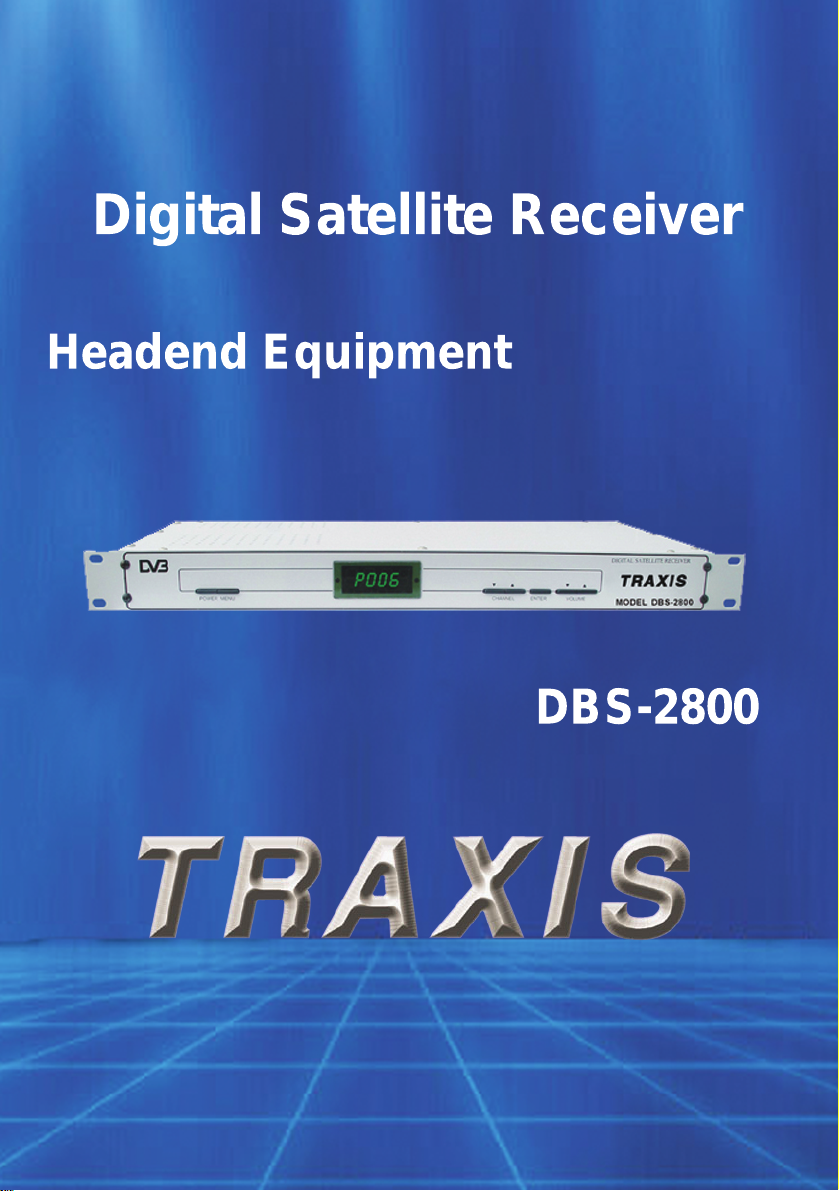
Digital Satellite Receiver
1
http://www.traxis.co.uk
Headend Equipment
DBS-2800
Page 2

CABLE OF CONTENTS
2
http://www.traxis.co.uk
1. Safety/Precaution........................................................................................1
1.1 Safety.........................................................................................................1
1.2 Precaution.................................................................................................1
2. Check Points before Use
2.1 Ac cessories...............................................................................................2
3. Description & Installation
3.1 Front panel................................................................................................3
3.2 Rear panel.................................................................................................4
4. System connec tion......................................................................................5
5. Main Menu
5.1 TV Channel...............................................................................................6
5.2 Radio Channel...........................................................................................9
5.3 Installation.................................................................................................10
5.4 OSD.........................................................................................................22
5.5 About DVB...............................................................................................23
6. EN TER......................................................................................................24
7. Technical specification...............................................................................25
Page 3
1
3
http://www.traxis.co.uk
1.1 Safety
Be sure to read to the user’s manual before starting the operation of the unit.
Never open the cover. It is very dangerous to touch the inside of the unit due to
possible electric shock.
When you do not use this unit for a long time, make sure that power cord is pulled out
from the outlet. Also do not use a damaged power cord that may cause fire or electric
shock.
Do not touch the power cord with wet hand. that may cause electric shock.
Place the unit in the well ventilated and no heat environment.
1.2 Precaution
If the receiver antenna is not working properly, consult your dealer. Professional in-
stallation is r equired for a correct direction and angle.
Install the unit horizontally. Unleveled installation may cause the unit by to be damaged.
Safety/Precaution
Safety/Precaution
Do not put heavy objects such as a TV on the unit. T hat may cause the unit to be
damaged.
Do not install the unit:
Subject to vibrating influence
Exposed to the direct sunrays
In excessive humidity
Where temperature is too high or too low
Without ventilation
When the unit is suddenly moved to a hot area from a cold area, it may cause problems by dew forming. In that case, turn off the power, and after one or two hours turn
on the power.
1
Page 4

2
4
http://www.traxis.co.uk
Check Points before Use
User’s manual: 1
Cable: 1
2.1 Accessories
2
Page 5
3
5
http://www.traxis.co.uk
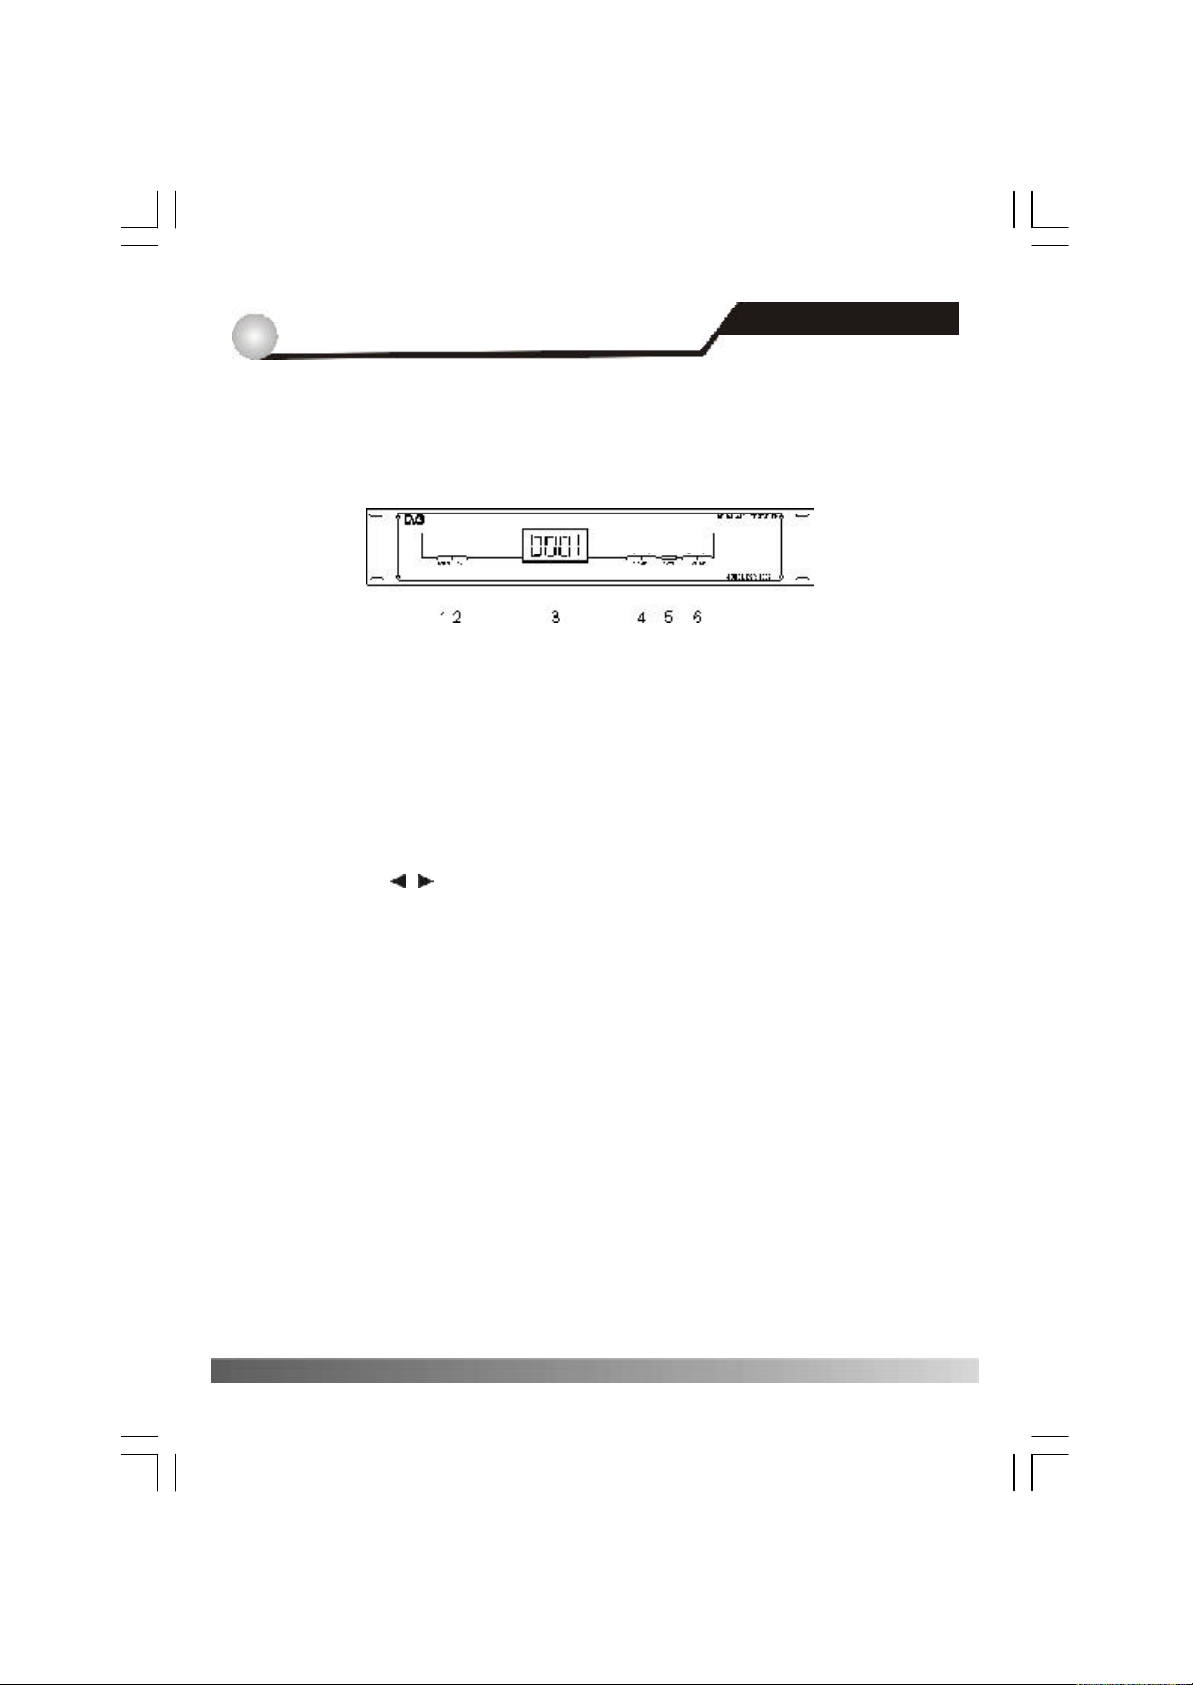
1. POWER: To switch the receiver power ON/OFF.
2. MENU: To enter into the Main Menu or exit from menu.
3. Display (4-Digit/7-Segment): Indicates operating status of the receiv er.
4. CHANNEL ▲ /q: To change channels, or to move cursor in the menu.
5. EN TER: To select an item in the menu and confirm it.
6. VOLU ME / : To adjust the volume level.
D escription&Installation
3.1 Front panel
3
Page 6
3
6
http://www.traxis.co.uk
D escription&Installation
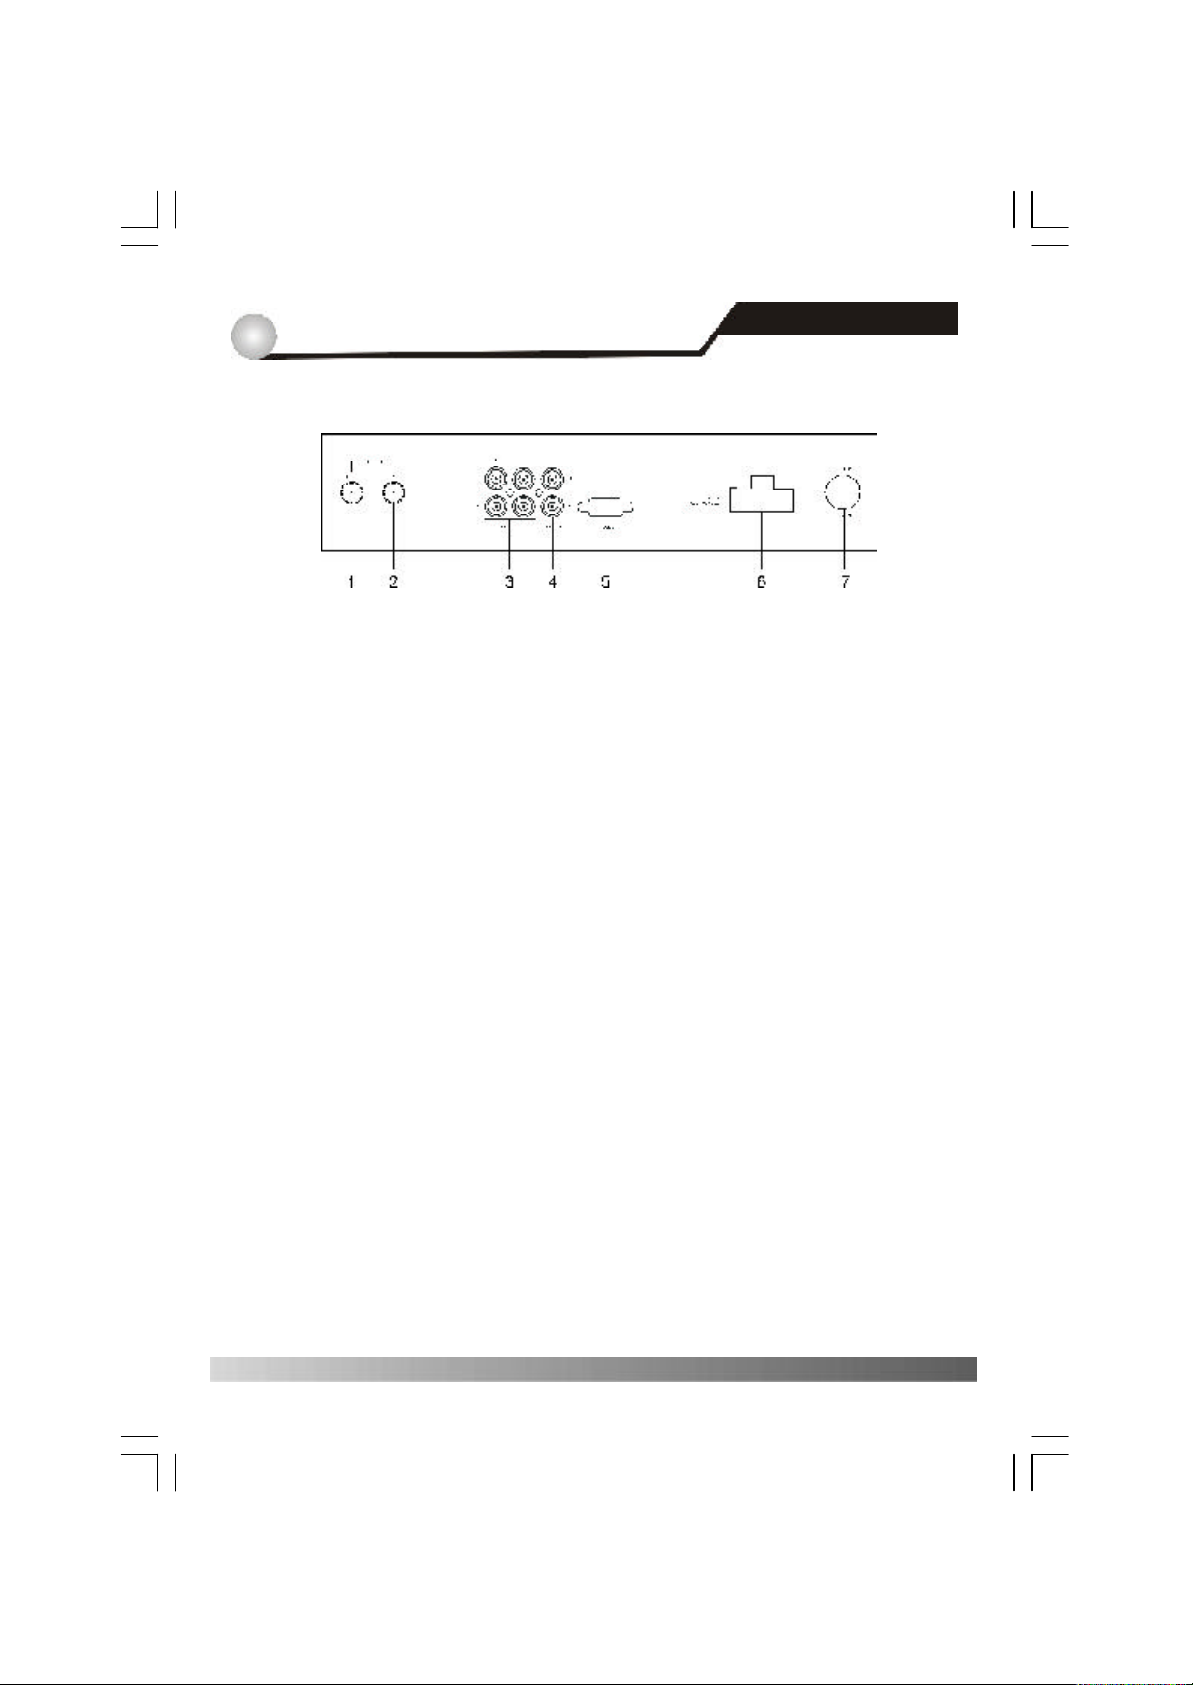
SA TELLITE OUT: IF input from LNB to digital tuner.
1.
SA TELLITE IN: IF output from LNB to other digital tuner.
2.
AUDIO R/L
3.
VID EO
4.
RS-232: Serial port to upgrade software.
5.
AC POWER OUT PUT.
6.
AC POWER INPUT.
7.
3.2 Rear panel
4
Page 7
4
7
http://www.traxis.co.uk
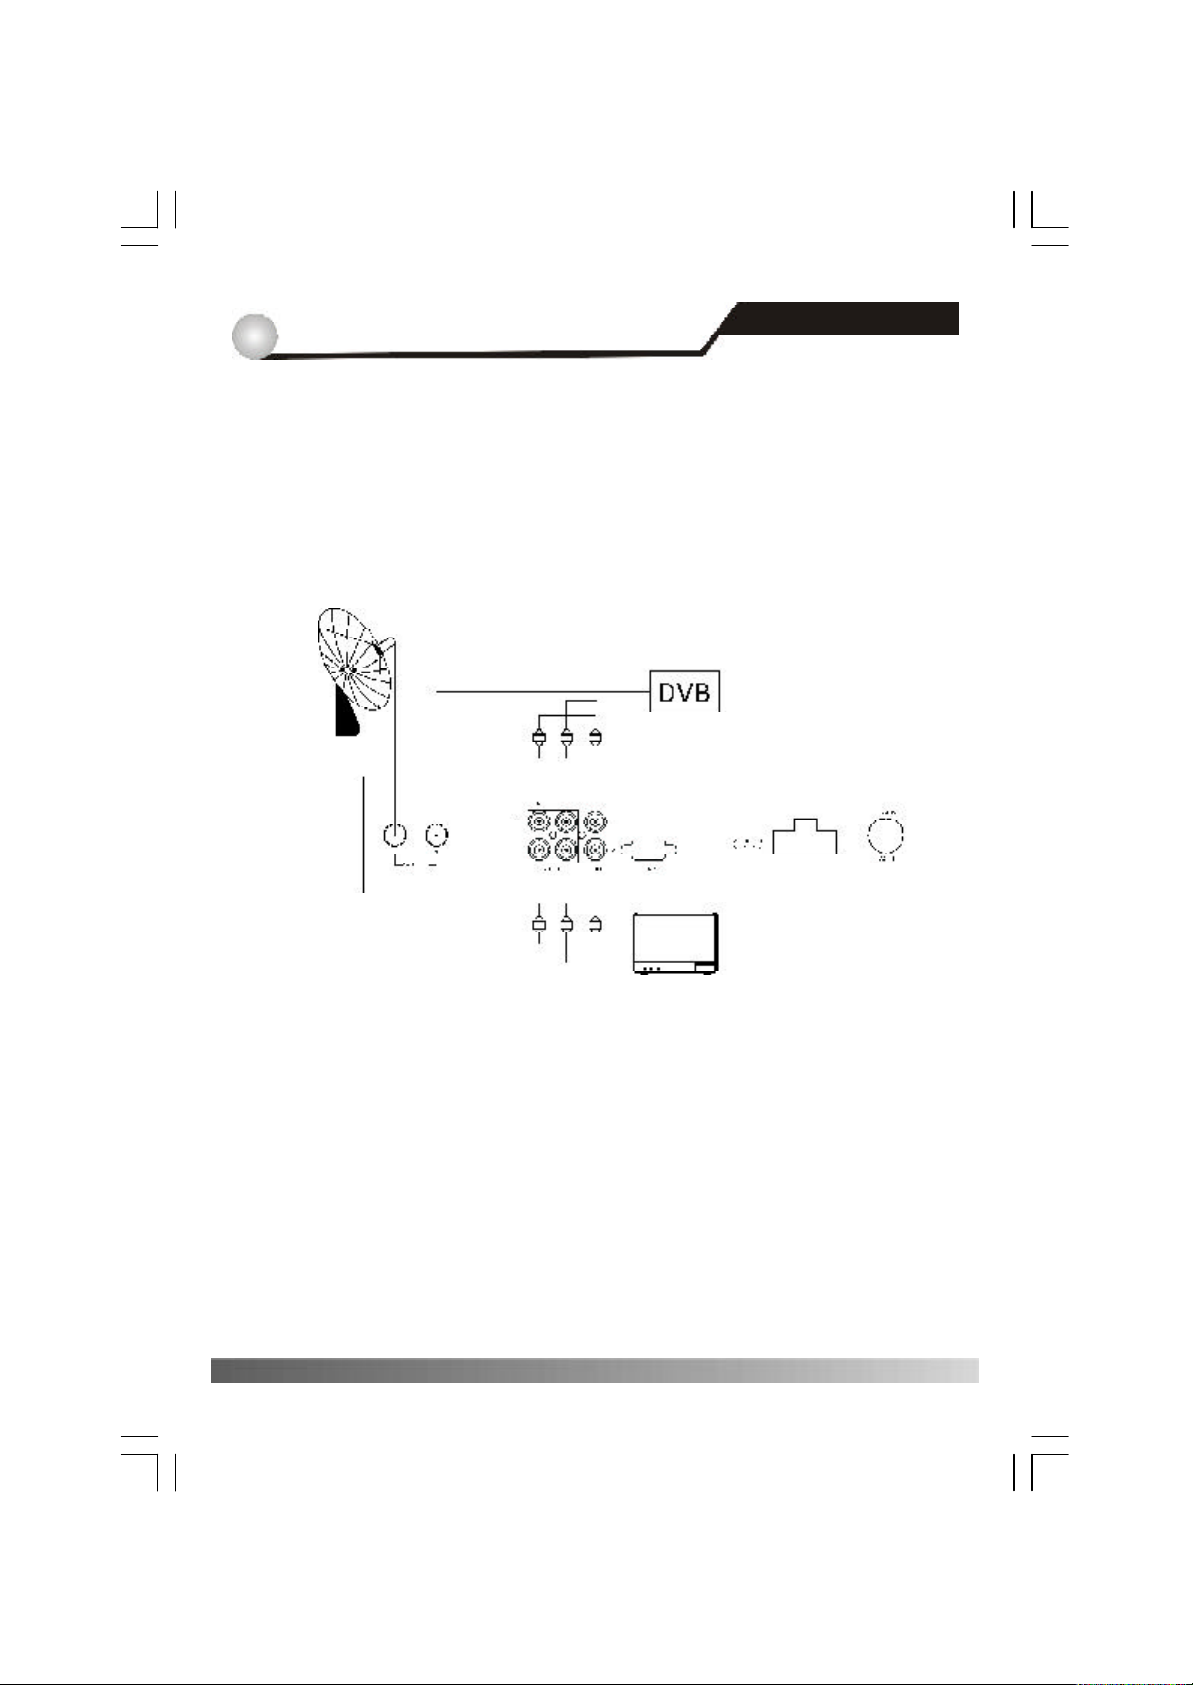
The following figure shows cable connections required for satellite LNB, TV and etc.
as may, different equipment configurations are possible.
If you need any assistance for specific equipment connection, please contact your
local distributor.
System Connection
System Connection
5
Page 8
5
8
http://www.traxis.co.uk
Main Menu
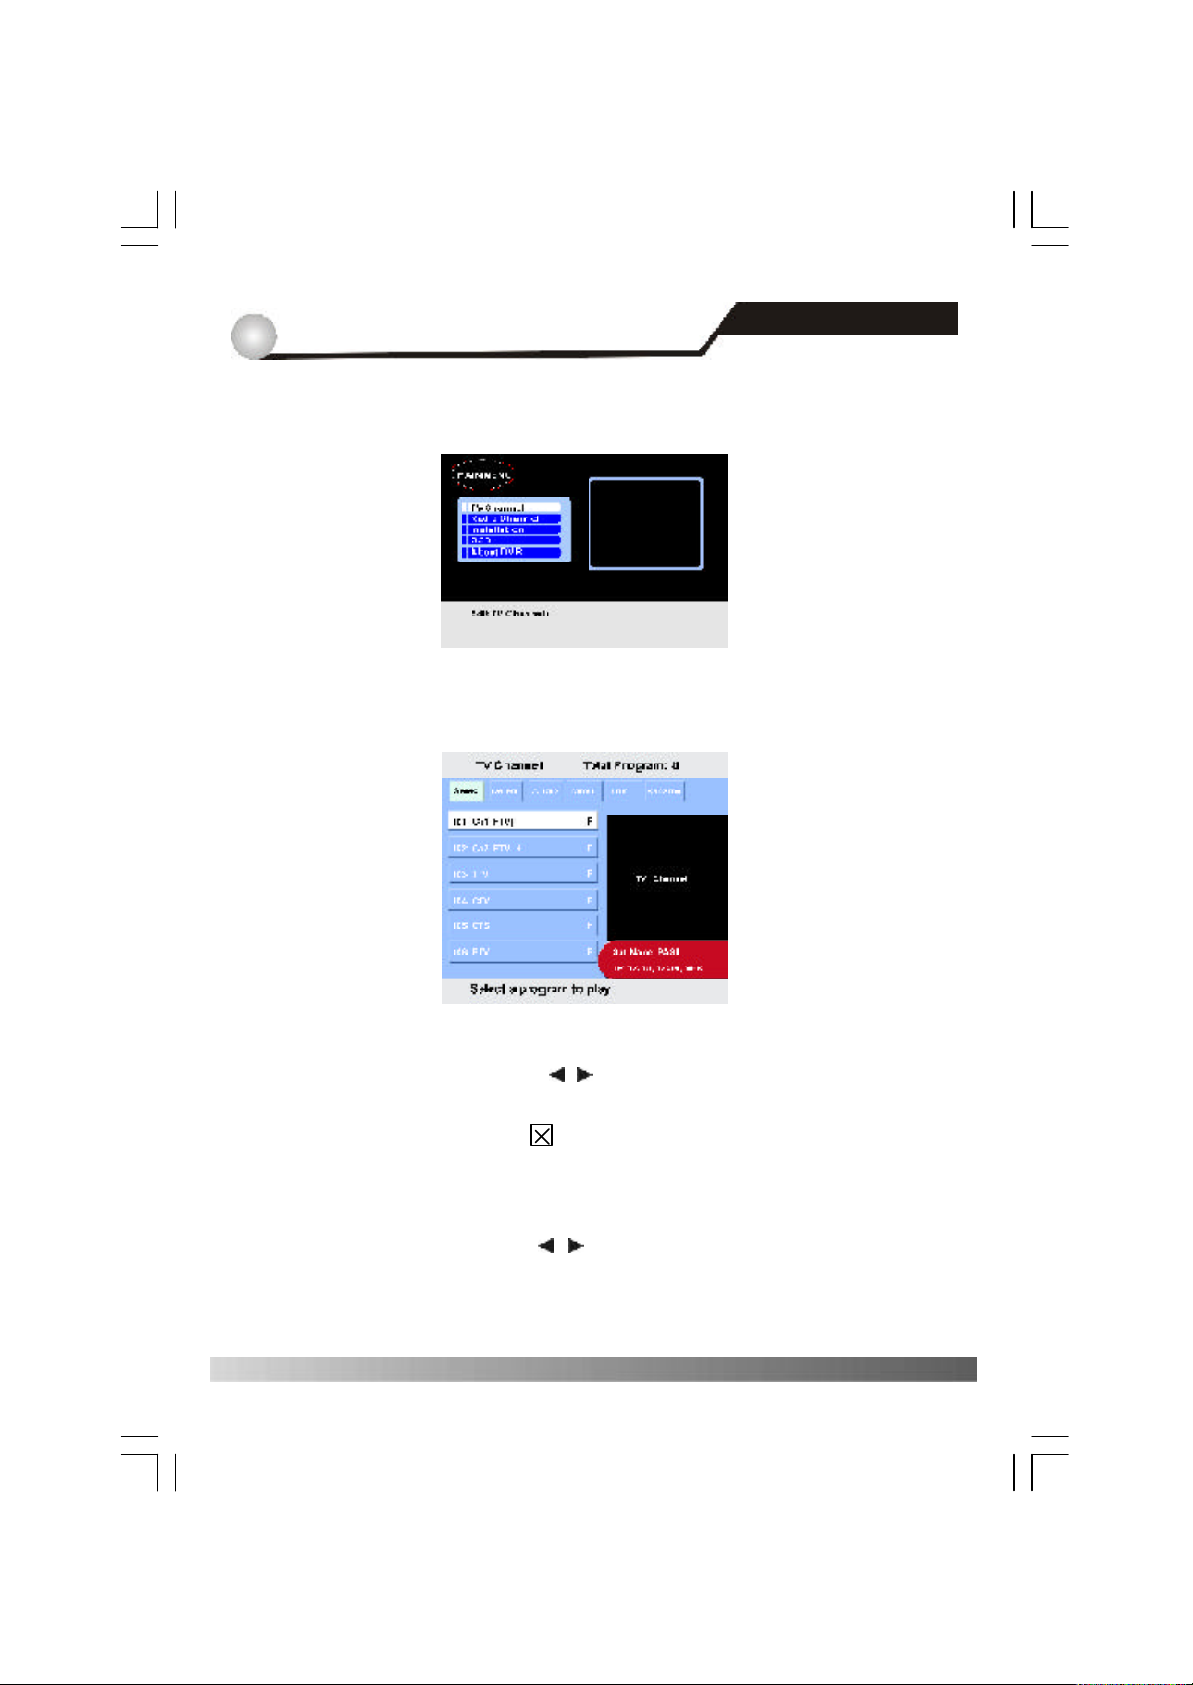
Press MENU On the front panel, the main menu will display:
Select <TV Channel> in main menu with CHANNEL ▲ / q , and press ENTER, you
will see the sub-menu as shown in the following figure.
5.1 TV Channel
① Delete
a. Select <Delete> with VOLUME / On the front panel.
b. Select a channel you want to delete with CHANNEL ▲ /q , and press ENTER,
the channel will marked with . Cancel your selection, press ENTER again.
c. The channel will be deleted when you exit from the menu in the Notes menu.
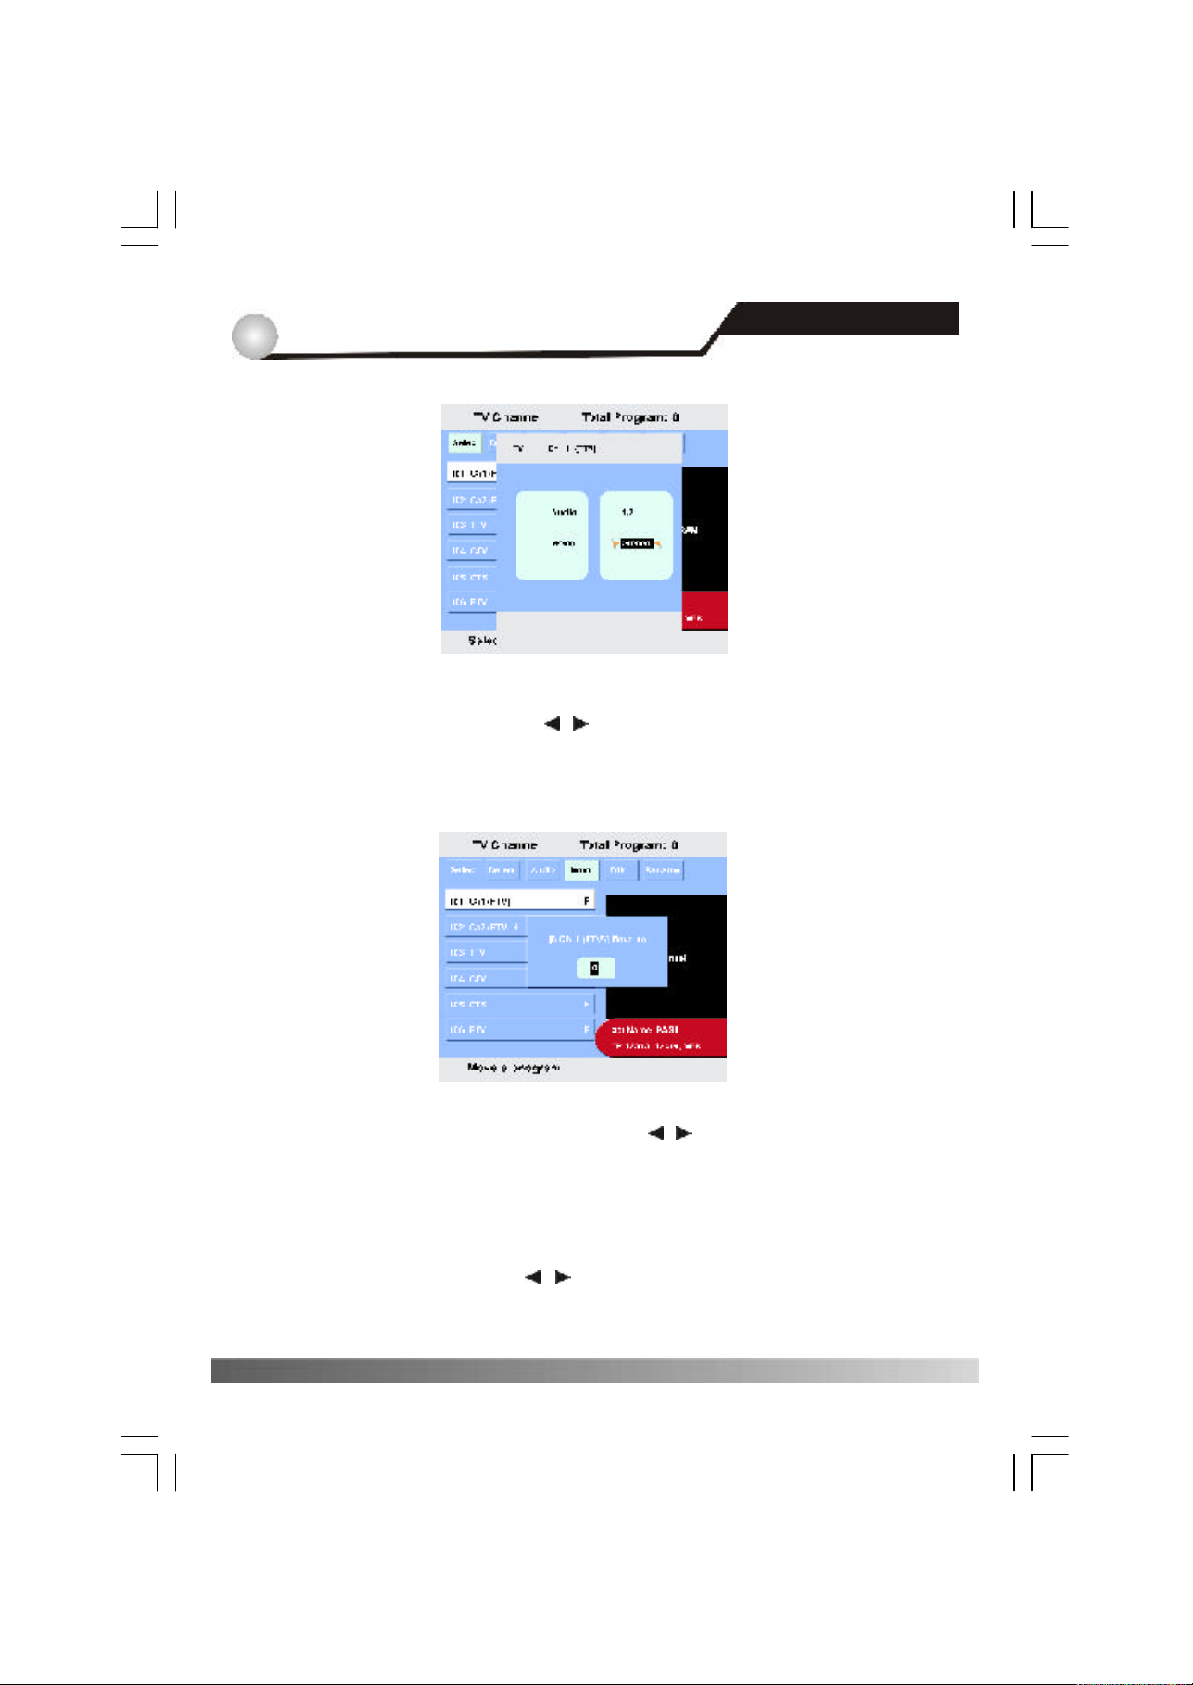
② Audio
a. Select <Audio> with VOLUME / On the front panel.
b. Select a channel you want to Audio with CHANNEL ▲ / q , and press ENTER, you
will see the sub-menu as shown in the following figure.
6
Page 9
6
9
http://www.traxis.co.uk
③ Move
a. Select <Move> with VOLUME / On the front panel.
b. Select a channel you want to move with CHANNEL ▲ /q , and press ENTER, you
will see the sub-menu as shown in the following figure.
Main Menu
5.1 TV Channel
c. Press CHANNEL ▲ /q and VOLUME / On the front panel, then press
ENTER, you can move it to the new position.
d. Press MENU to return to the previous menu.
④ Edit
a. Select <Edit> with VOLUME / On the front panel.
b. Select a channel you want to edit with CHANNEL ▲ /q , and press ENTER, you
7
Page 10
5
10
http://www.traxis.co.uk
will see the sub-menu as shown in the following figure.
c. Adjust the PID data with CHANNEL▲ /q and VOLUME / .
d. Press ENTER to confirm it.
Notes: Video, Audio PCR and Teletext PID are mandatory, and you can
find PID values from satellite information resources.
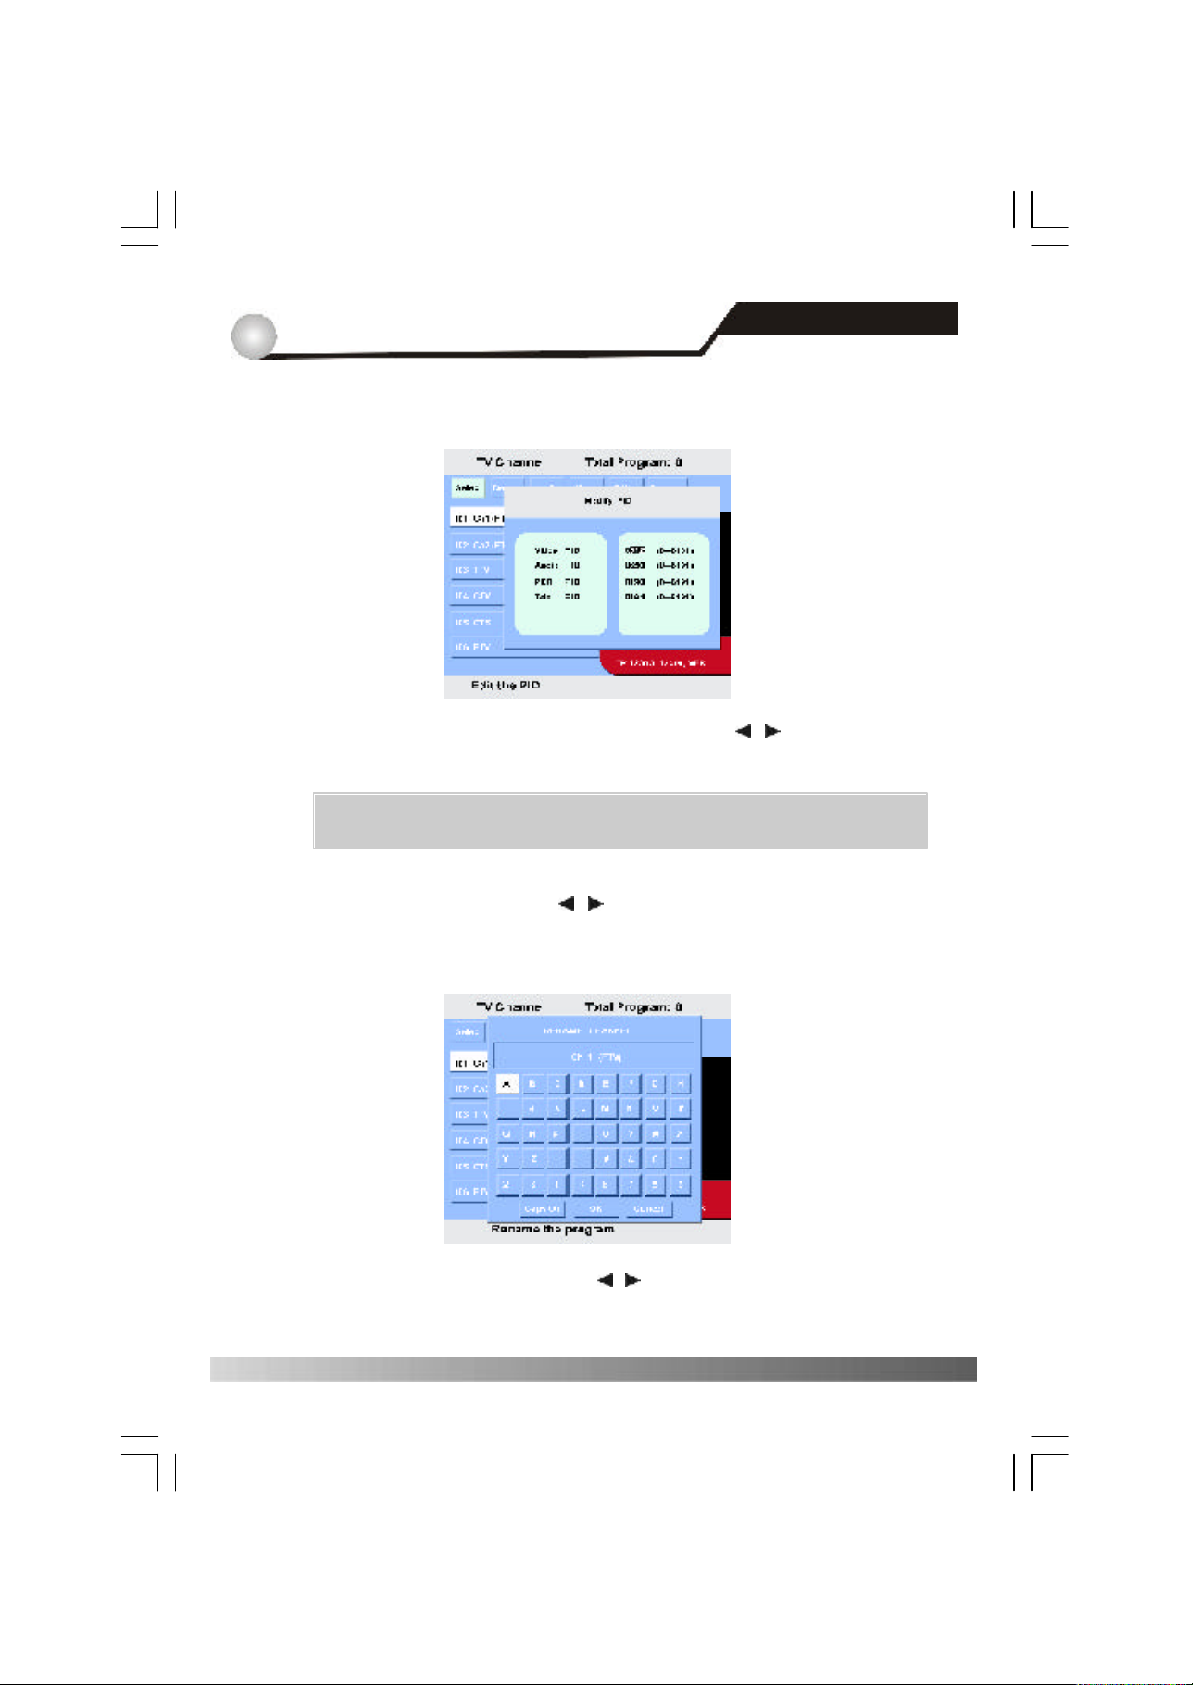
⑤ Rename
a. Select <Rename> with VOLUME / On the front panel.
b. Select a channel you want to rename with CHANNEL ▲ / q , and press ENTER,
you will see the sub-menu as shown in the following figure.
Main Menu
5.1 TV Channel
c. Pr ess CHANNEL ▲ / q or VOLUME / and press ENTER to confirm it.
d. Pr ess MENU to return to the previous menu.
8
Page 11
5
11
http://www.traxis.co.uk
Main Menu
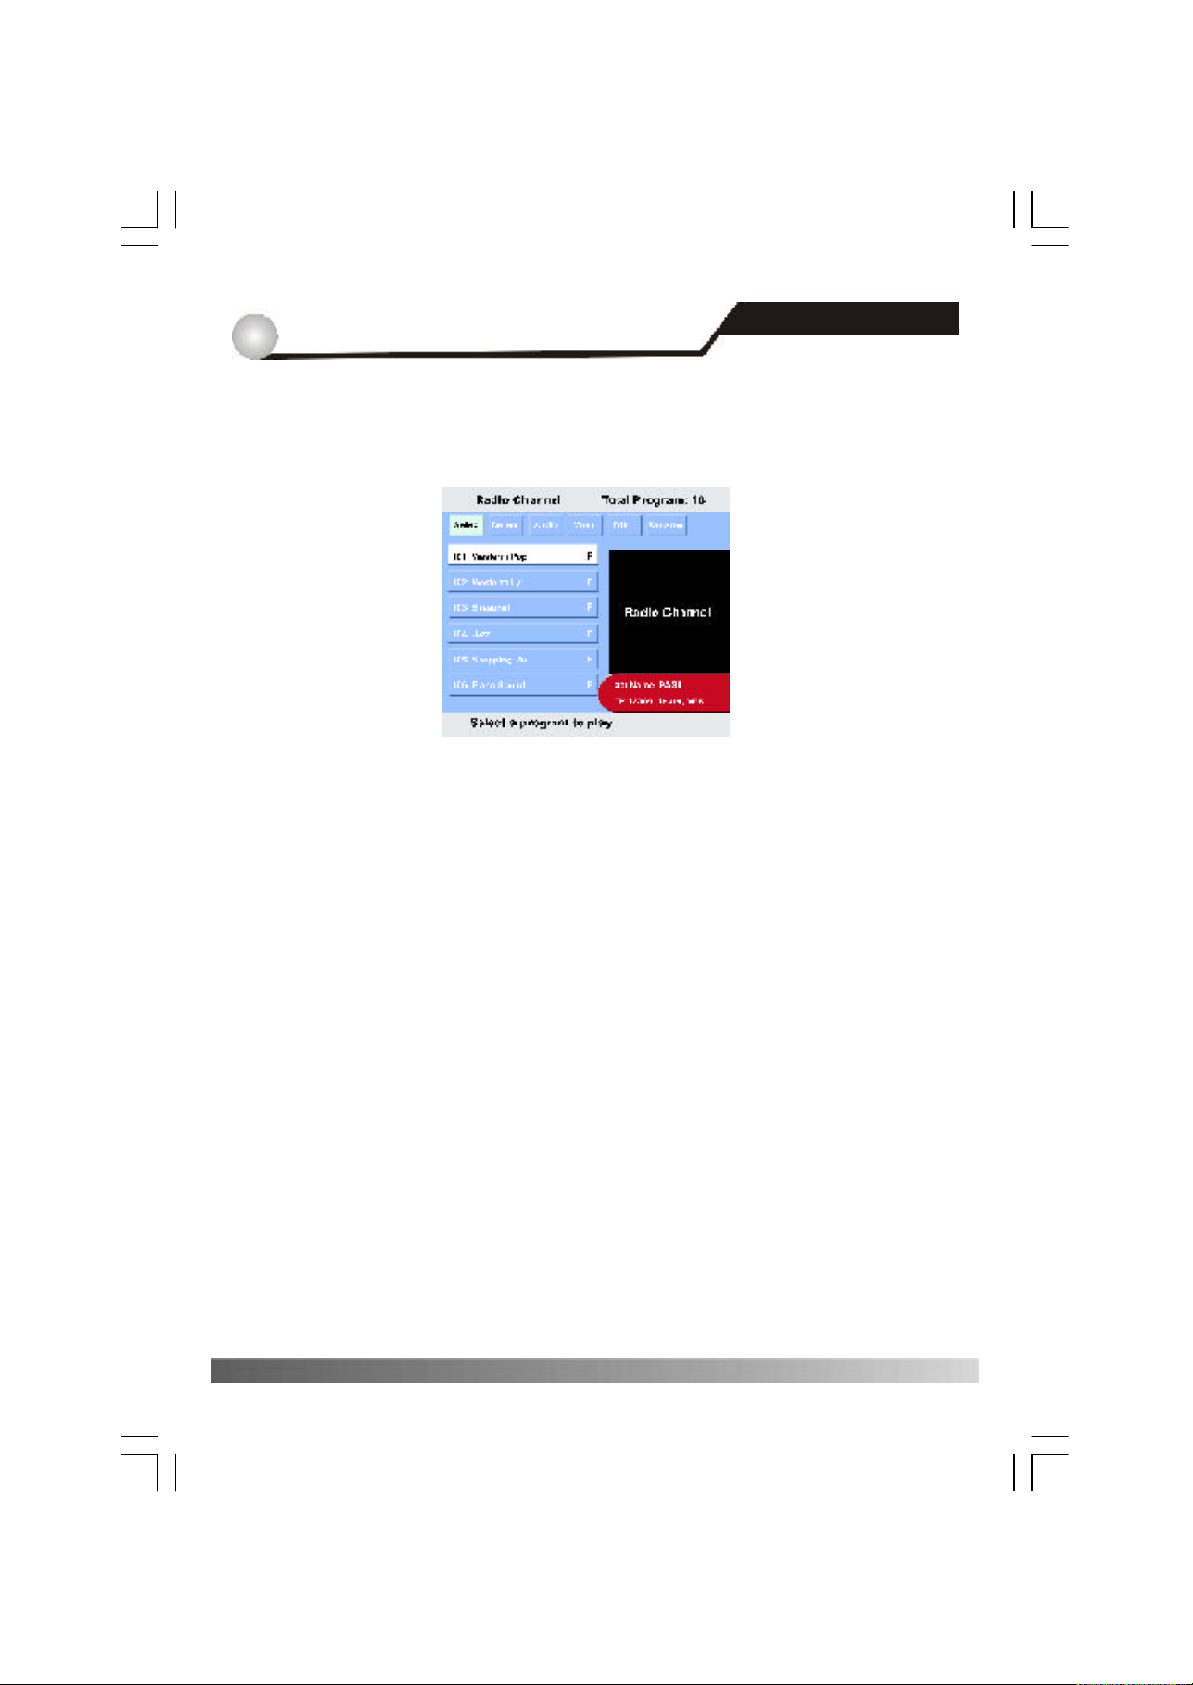
Select <Radio Channel> in main menu with CHANNEL▲ / q, and press ENTER,
Select <Radio Channel> in main menu with CHANNEL▲ / q, and press ENTER,
you will see the sub- menu as shown in the following figure.
you will see the sub- menu as shown in the following figure.
The oper ation for the Radio Channel is the same as TV Channel.
5.2 Radio Channel
9
Page 12
5
12
http://www.traxis.co.uk
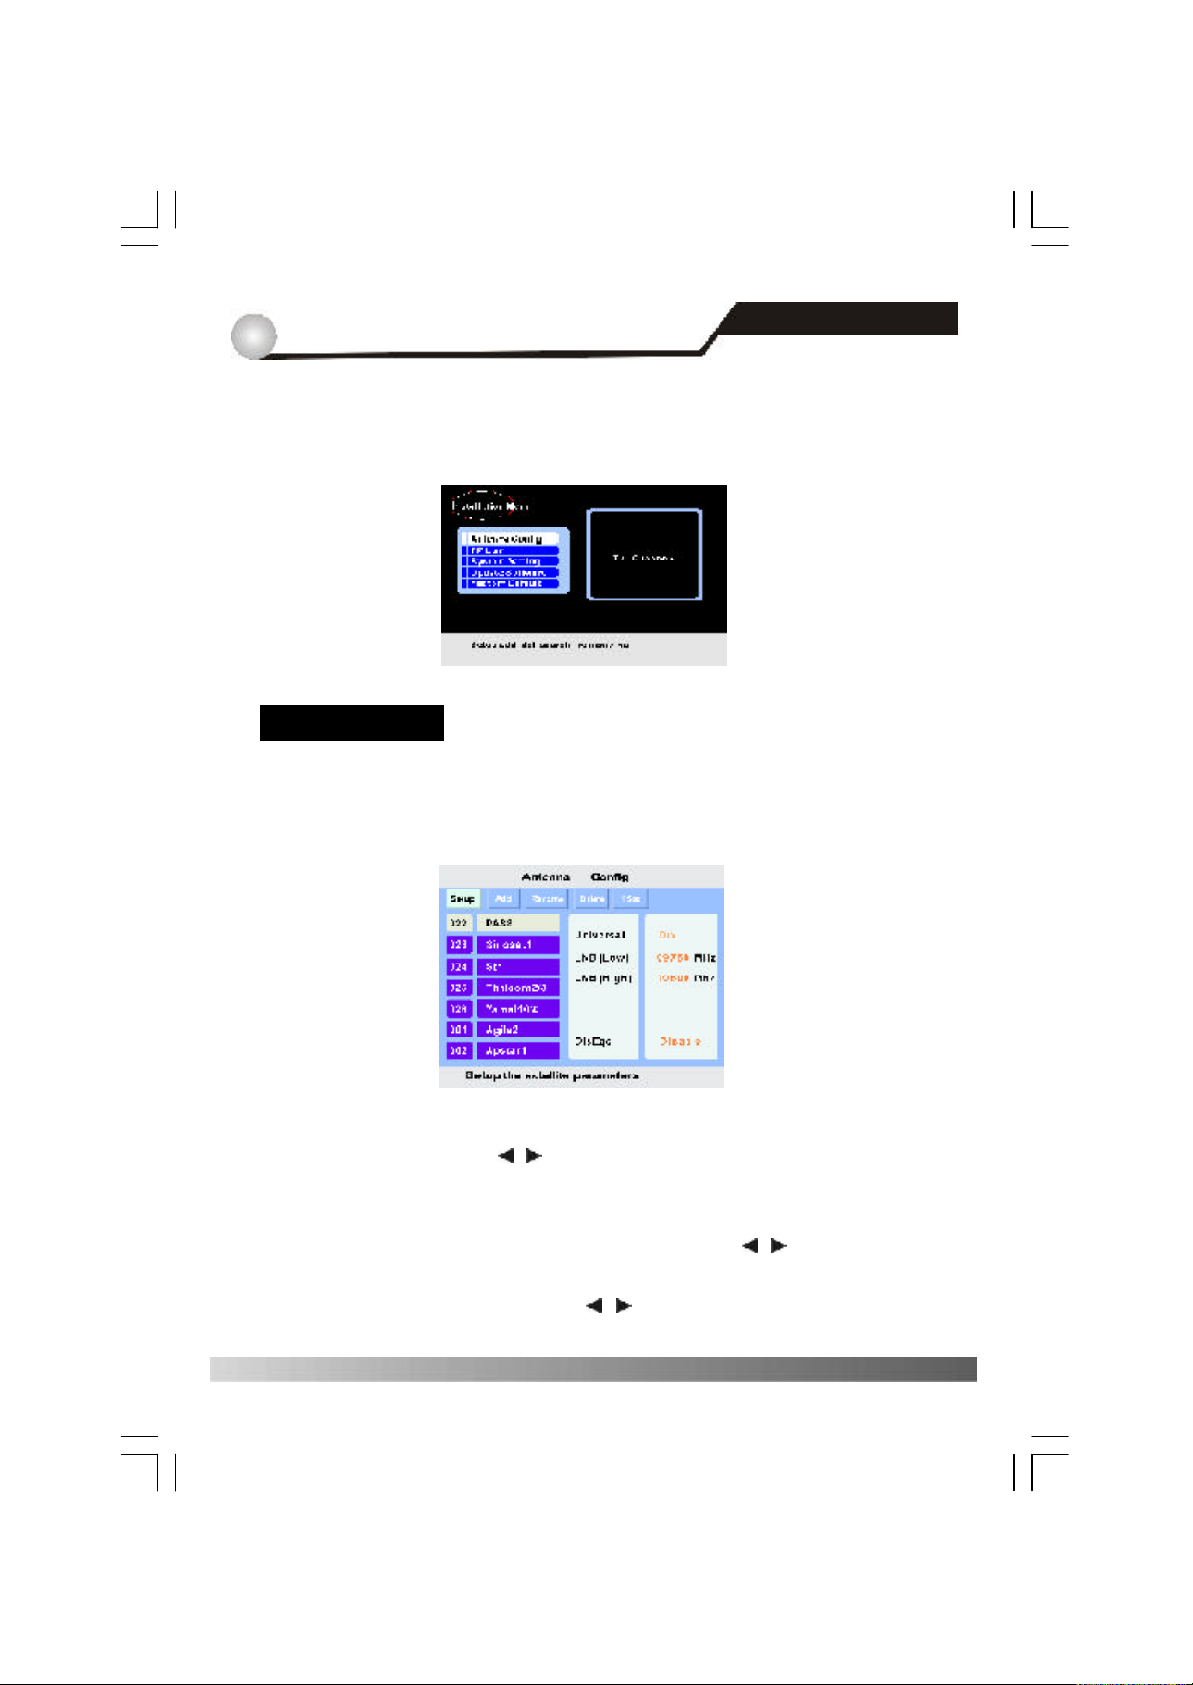
Select <Installation> in main menu with CHANNEL ▲ /q , and press ENTER, you
will see the sub-menu as shown in the following figure.
Antenna Config
Select <Antenna Config> with CHANNEL▲ / q, and press ENTER, you will see
the sub-menu as shown in the following figure.
Main Menu
5.3 Installation
① Setup
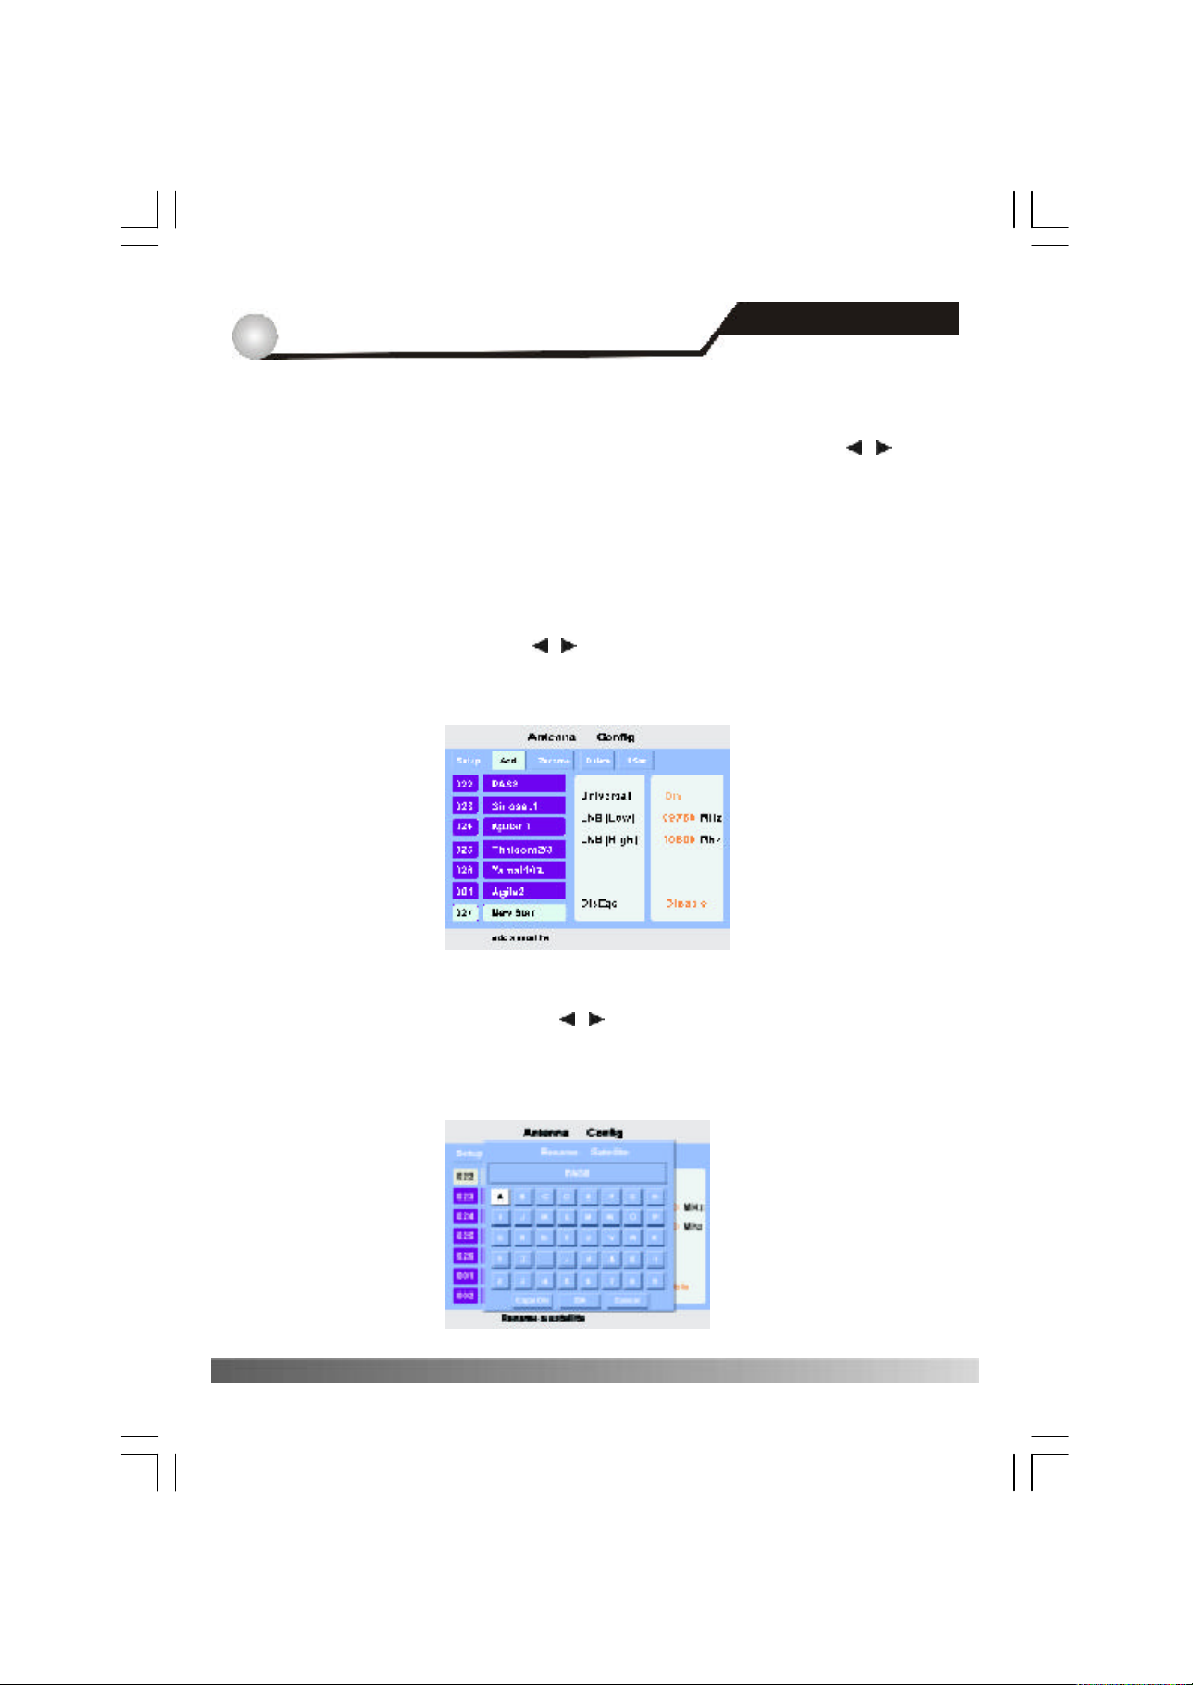
Select <Setup> with VOL / , select a satellite you want with CH▲ / q , and
press ENTER.
a. Universal
In case you are using universal LNB, select<On>with VOL / , LNB (low) and
LNB (high) will display default (9750MHz and 10600MHz). To change LNB frequency,
when univer sal select <Off> with VOL / .
10
Page 13
5
13
http://www.traxis.co.uk
b. LNB Power
In case you need to supply 13/18V DC to LNB, Select (13/18V) with VOL / .
d. DiSEqC
If the DiSEqC box is DiSEqC 1.0, positioner should be set Disable, then select an
tenna input DiSEqC A~DiSEqC D,Butst A or Bur st B. If the DiSEqC box is DiSEqC
1.2, positioner should be set Enable, then select Moto to set some data.
② Add
a. Select <Add> with VOLU ME / On the front panel, and press ENTER, the new
satellite will be displayed:
Main Menu
5.3 Installation
③ Rename
a. Select <Rename> with VOLUME / On the front panel.
b. Select a satellite you want to Rename with CHANNEL ▲ / q , and press ENTER,
you will see the sub-menu as shown in the following figure.
11
Page 14
5
14
http://www.traxis.co.uk
c. Pr ess CHANNEL ▲ / q or VOLUME / , and pr ess ENTER to confirm it.
d. Pr ess MENU to return to the previous menu.
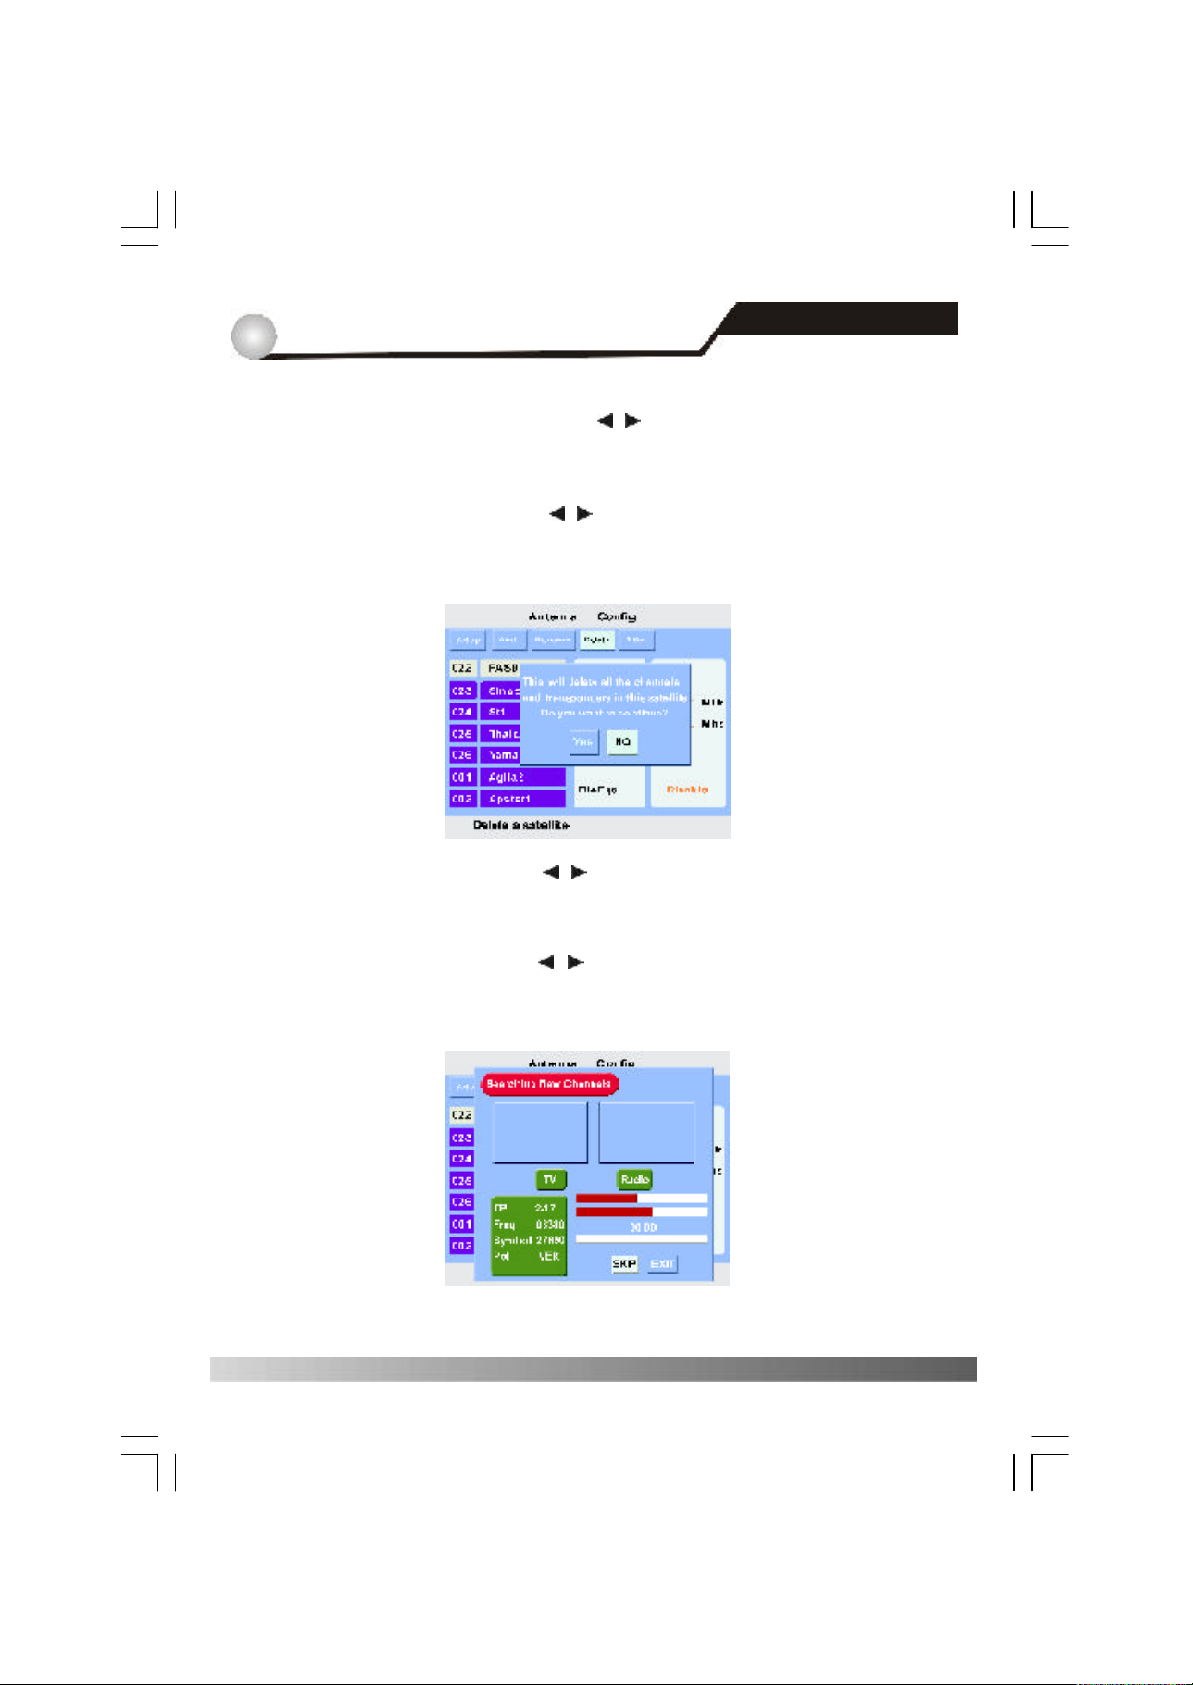
④ Delete
a. Select <Delete> with VOLUME / On the front panel.
b. Select a satellite you want to delete with CHANNEL ▲ / q , and press ENTER, you
will see the sub-menu as shown in the following figure.
c. If Select <Yes> with VOLUME / , and press ENTER,then delete the satellite,
else cancel operation.
⑤ 1Sat (Search all transponders from one satellite)
a. Select <1Sat > with VOLUME / On the front panel.
b. Select a satellite with CHANNEL▲ / q, and press ENTER, you will see the sub-
menu as shown in the following figure.
Main Menu
5.3 Installation
c. During searc hing, you can press ENTER to skip the transponder, press MENU to exit the menu.
12
Page 15
5.3 Installation
15
http://www.traxis.co.uk
5
Main Menu
TP List
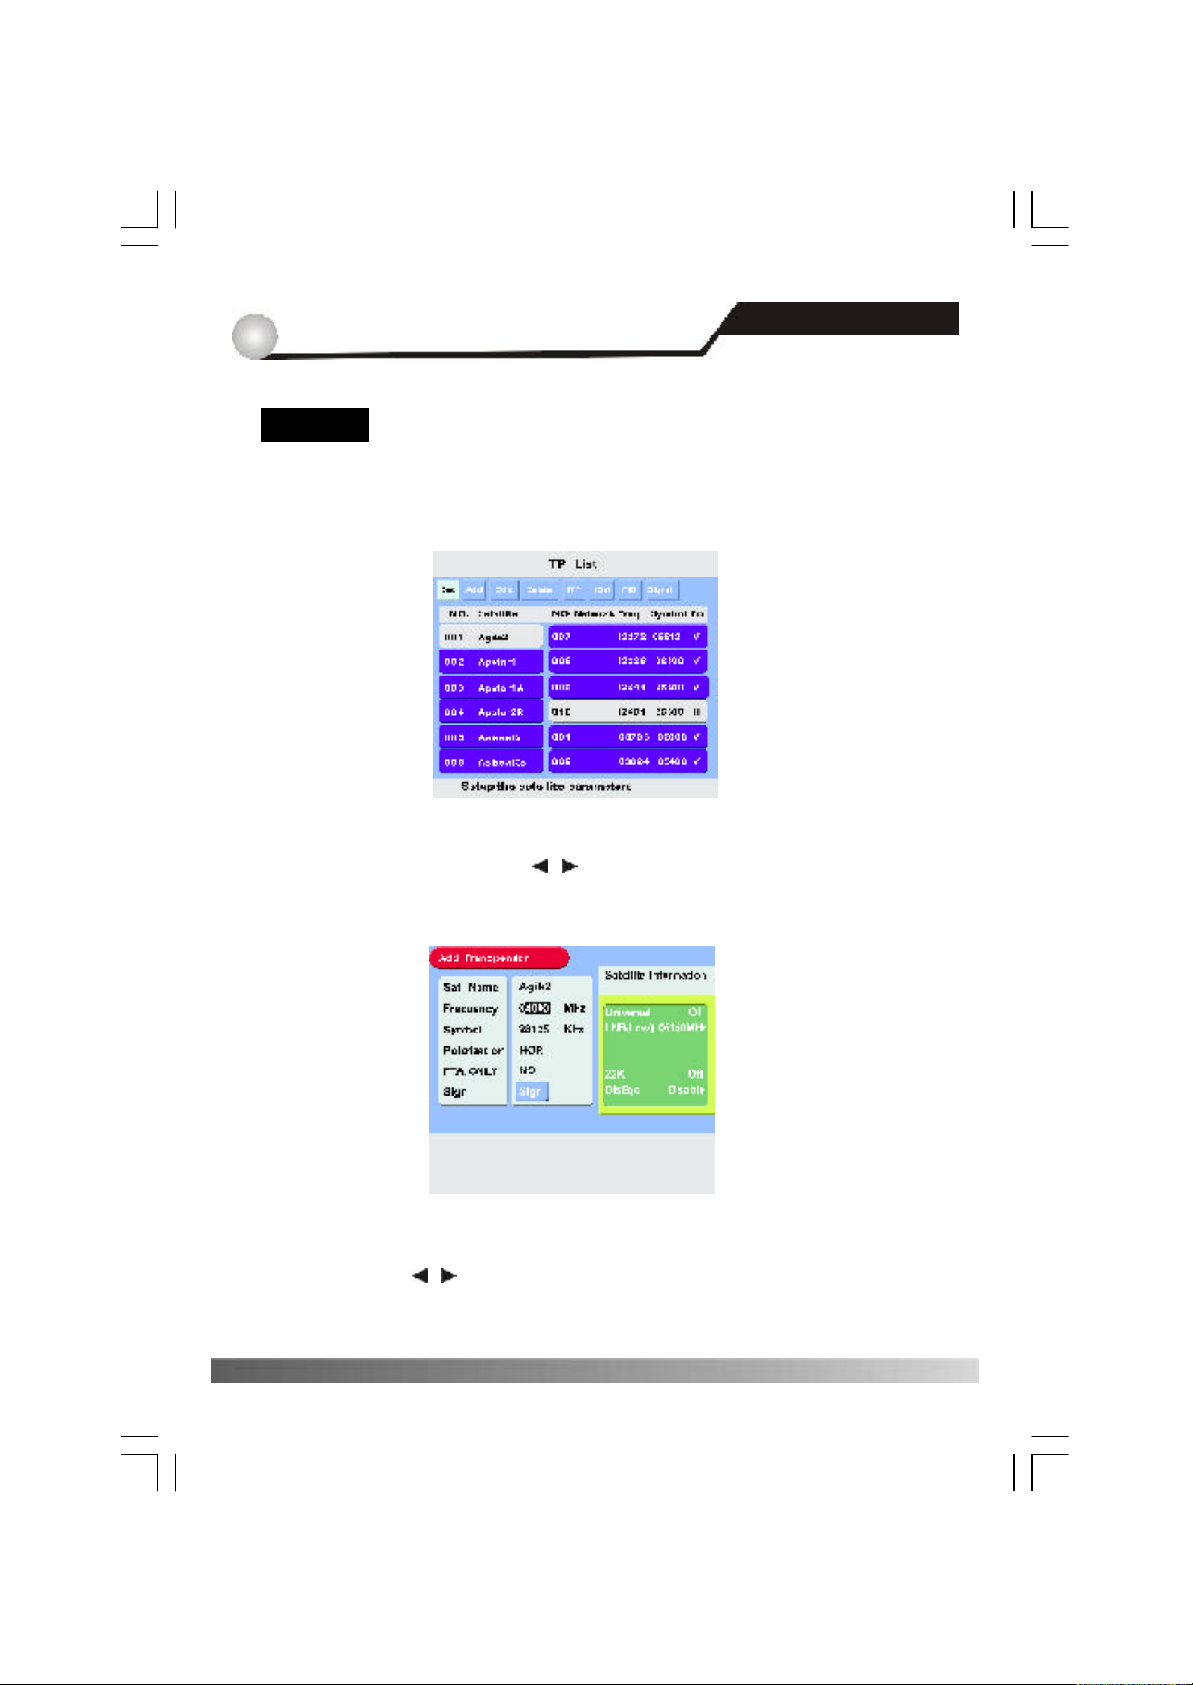
Select <TP List> with CHANNEL ▲ /q , and press ENTER, you will see the sub-
menu as shown in the following figure.
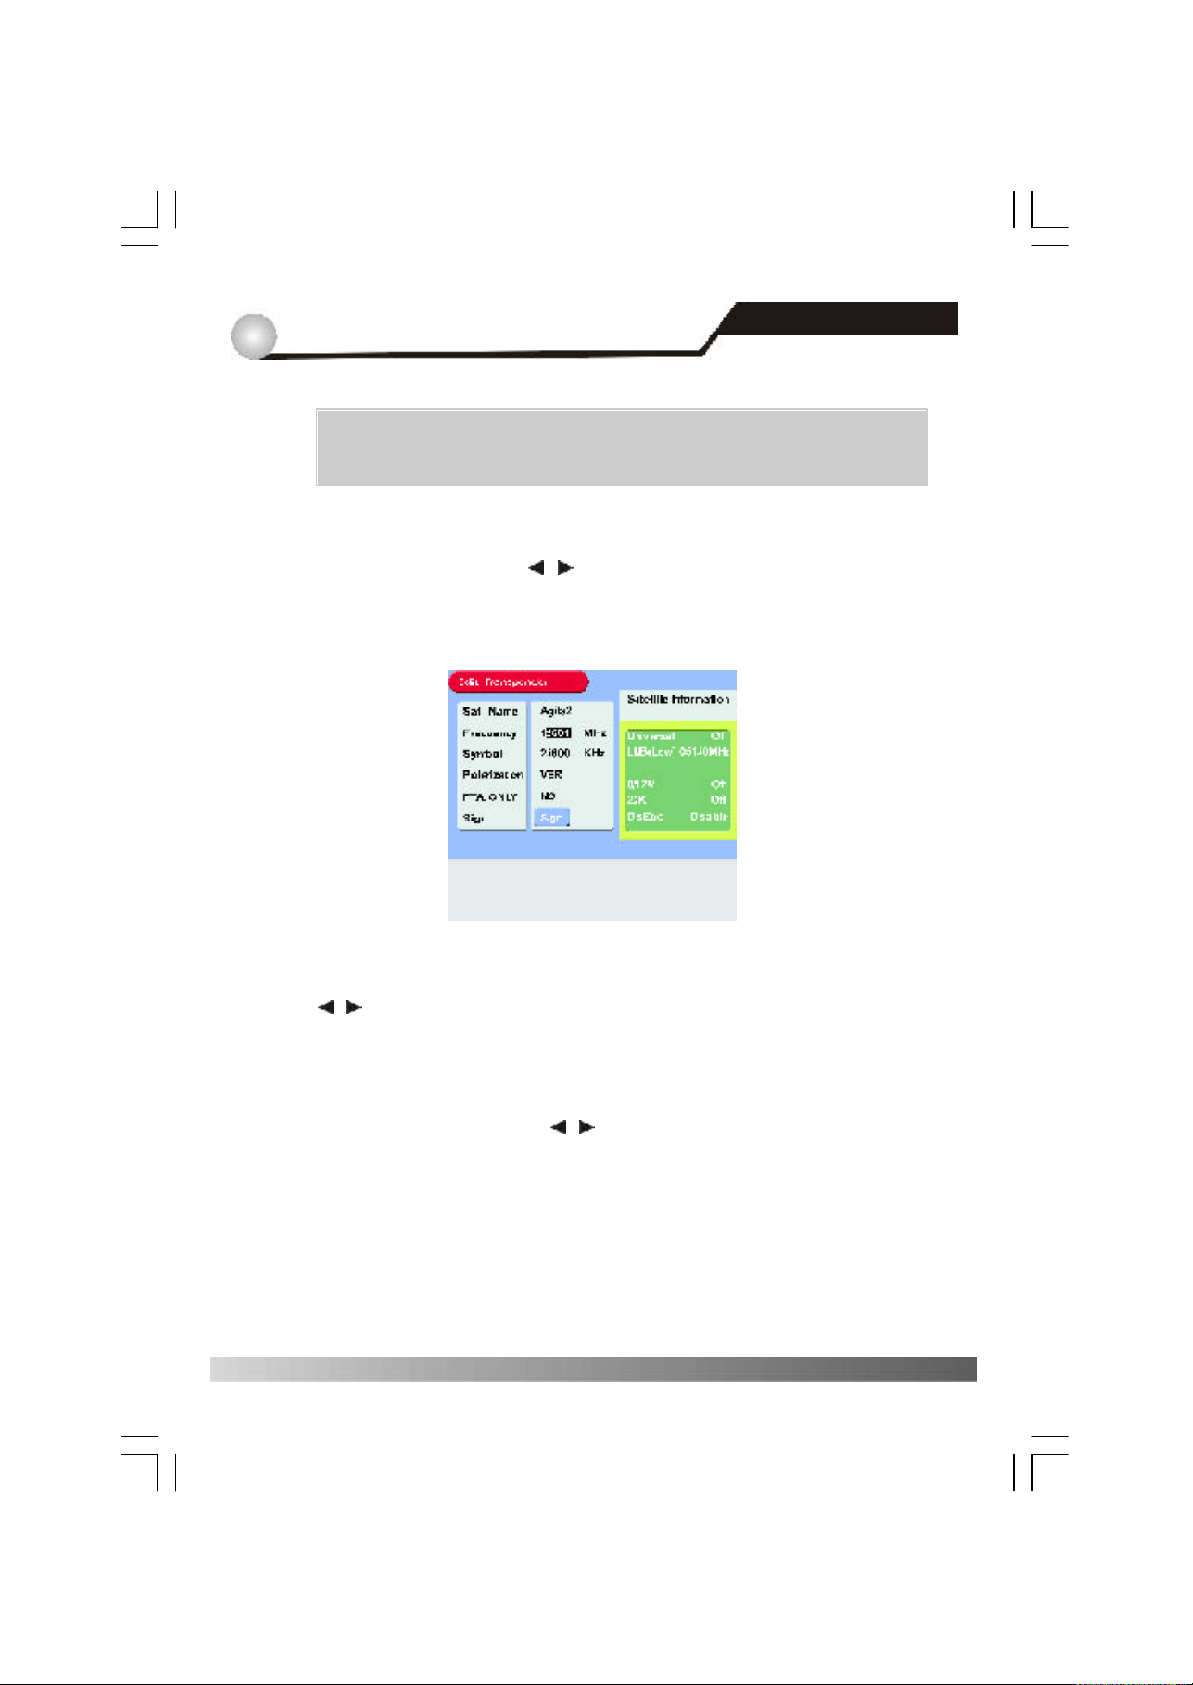
① Add
Select <Add> with VOLUME / On the front panel, and press ENTER, the
screen w ill display:
a. Input frequency,symbol rate, polarization and FTA ONLY with CHANNEL ▲ /q
or VOLUME / On the front panel.
b. Pr ess ENTER , then add a TP, else cancel operation.
13
Page 16
5
16
http://www.traxis.co.uk
Notes: FTA<Free to air> Only NO: Search all channels.
FTA ONLY Yes: Search free to air channels.
② Edit
a. Select <Edit> with VOLUME / On the front panel.
b. Select a TP you want to edit with CHANNEL ▲ / q , and press ENTER, you will see
the sub-menu as shown in the following figure.
Main Menu
5.3 Installation
b. Adjust frequency, Symbol, polarization, FTA ONLY with CHANNEL ▲ / q , VOLUME
/ .
c. Press ENTER, then edit the TP, else cancel the operation.
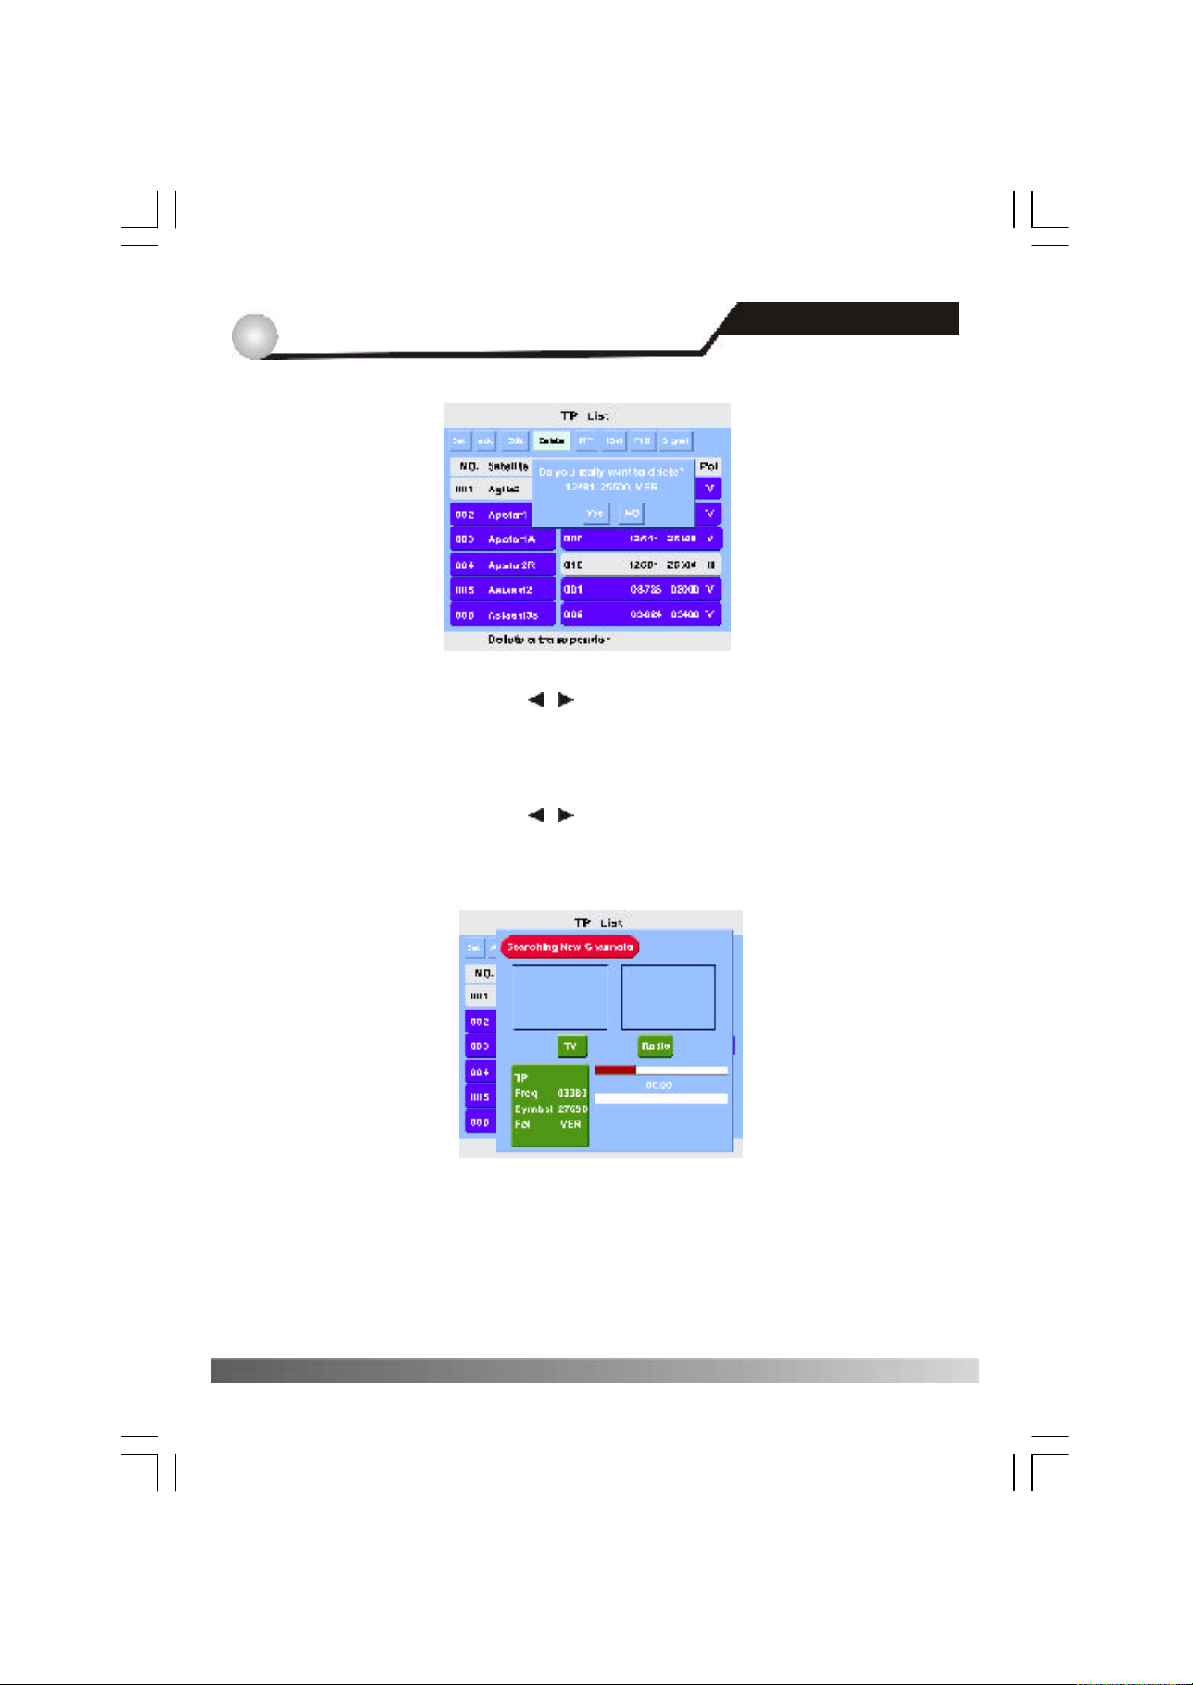
③ Delete
a. Select <Delete> with VOLUME / On the front panel.
b. Select a TP you want to delete with CHANNEL ▲ / q , and press ENTER, you will
see the sub-menu as shown in the following figure.
14
Page 17
5
17
http://www.traxis.co.uk
c. If select <Yes> with VOLUME / , press ENTER, then delete the TP, else cancel
oper ation.
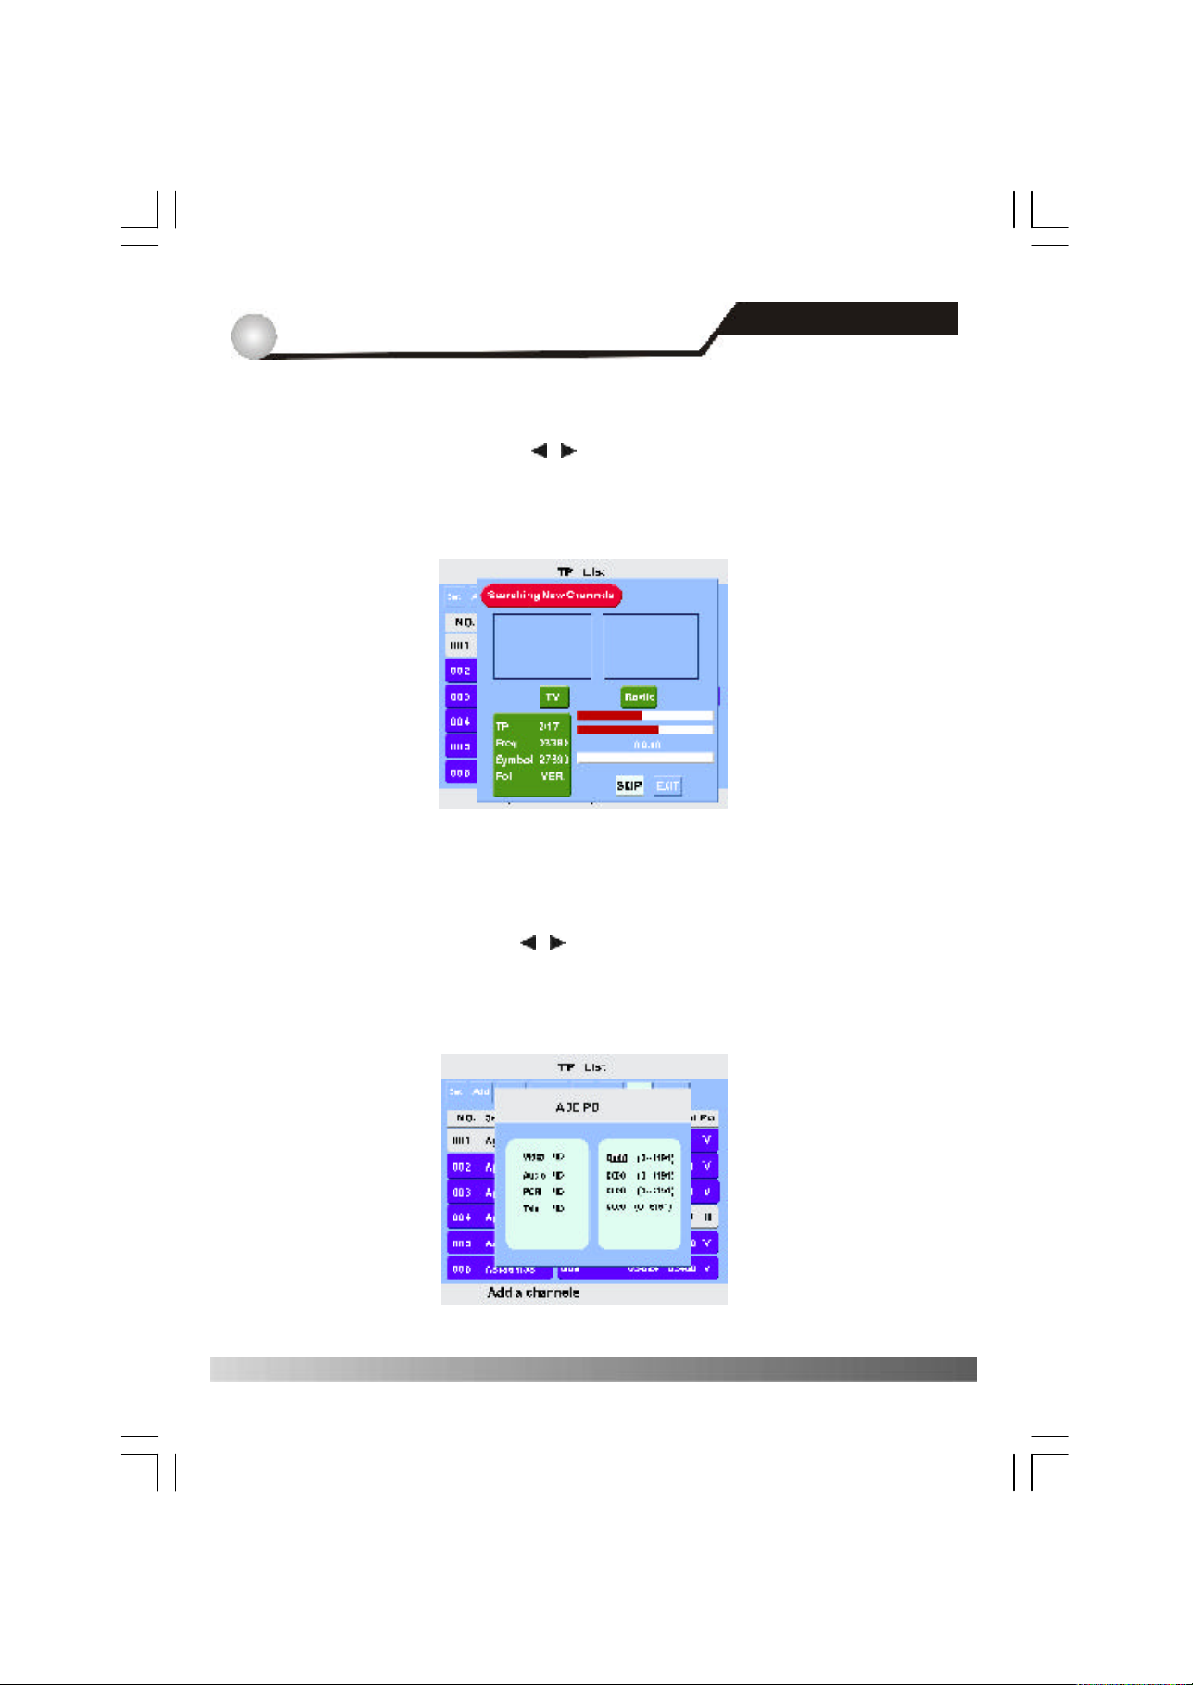
④ 1TP
a. Select <1T P> with VOLUME / .
b. Press ENTER to start channel searching, you will see the sub-menu as shown in the
following figure.
Main Menu
5.3 Installation
c. When channel sear ching is done, press MEN U to exit.
15
Page 18
5
18
http://www.traxis.co.uk
⑤ 1Sat (Search all transponders from one satellite)
a. Select <1Sat > with VOLUME / .
b. Select a satellite with CHANNEL▲ / q, and press ENTER, you will see the sub-
menu as shown in the following figure.
c. When satellite searching is done, press MENU to exit.
Main Menu
5.3 Installation
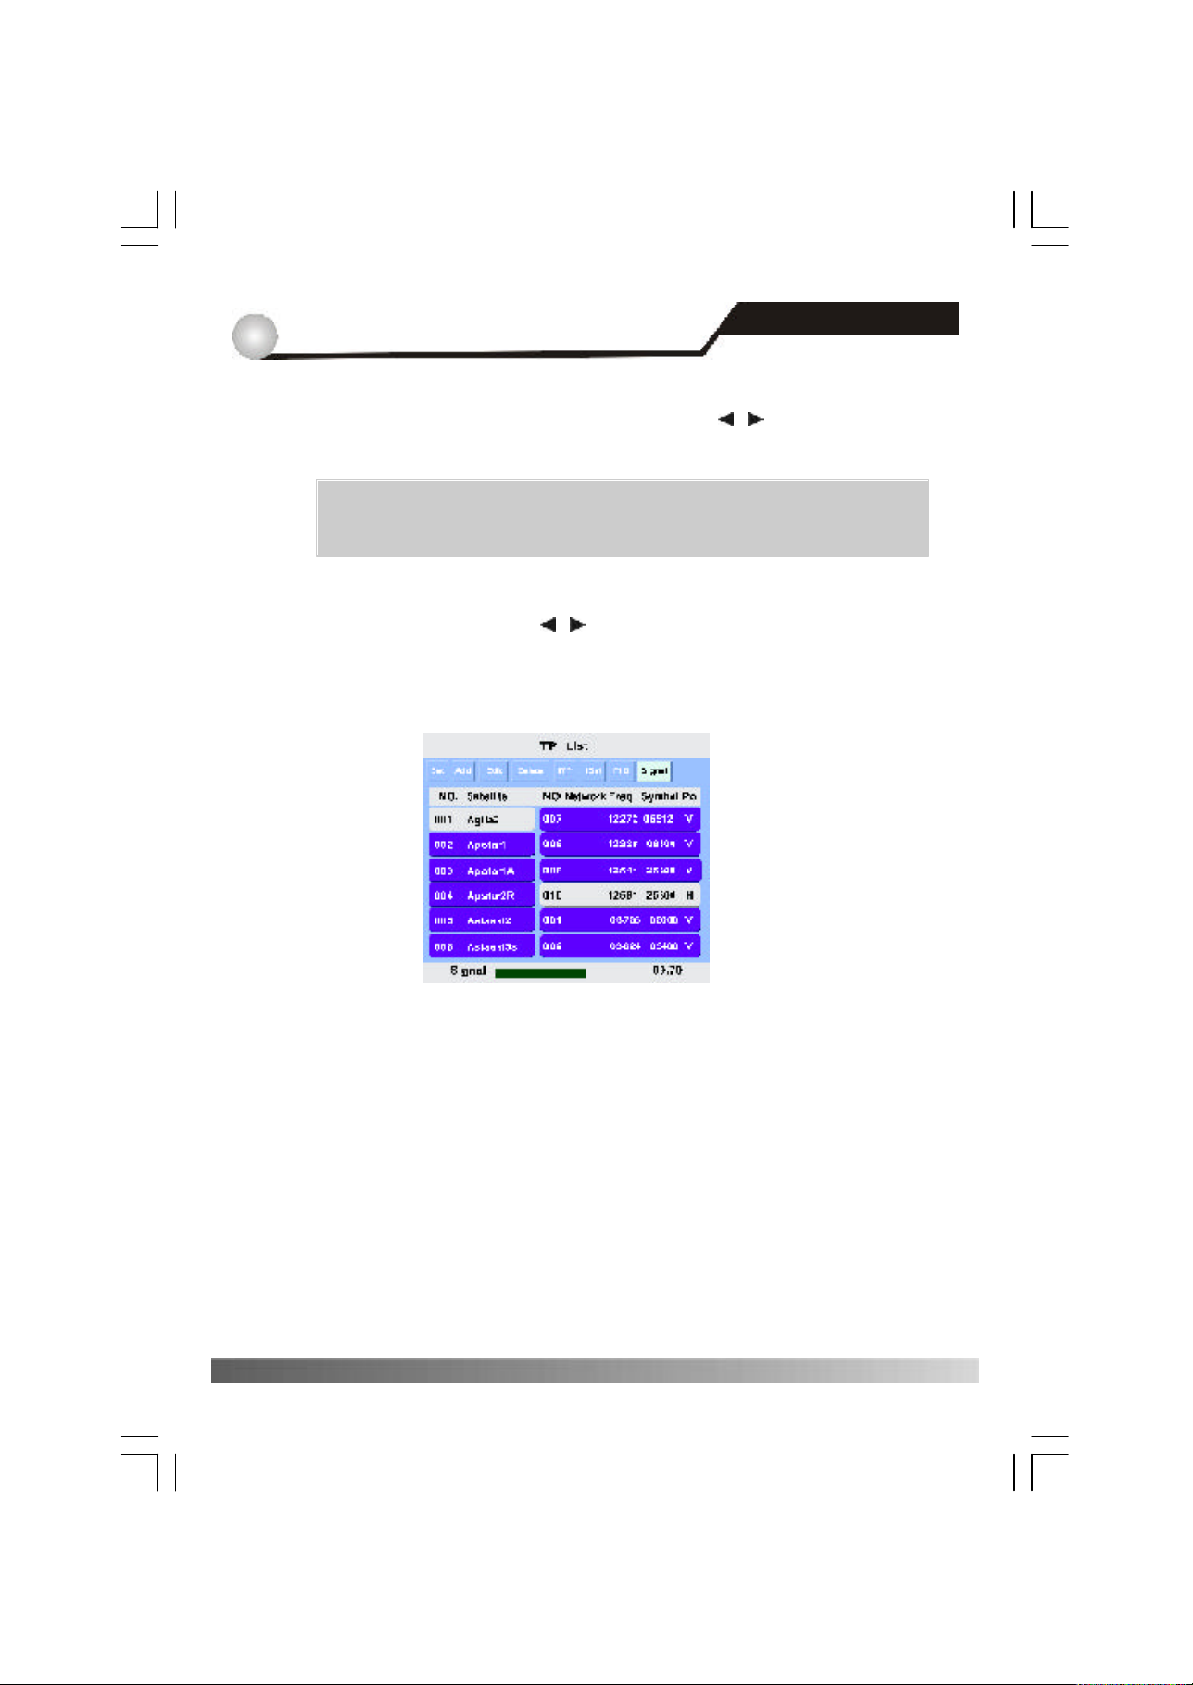
⑥ PID
a. Select <PID> with VOLUME / .
b. Select a TP you want with CHANNEL ▲ / q .
c. Press ENTER, you will see the sub-menu as shown in the following figure.
16
Page 19
5
19
http://www.traxis.co.uk
d. Adjust the PID data with CHANNEL▲ / q, VOLUME / .
e. Press ENTER, you will add a program.
Notes: Video, Audio PCR and Teletext PID are mandatory, and you can
find PID values from satellite information resources.
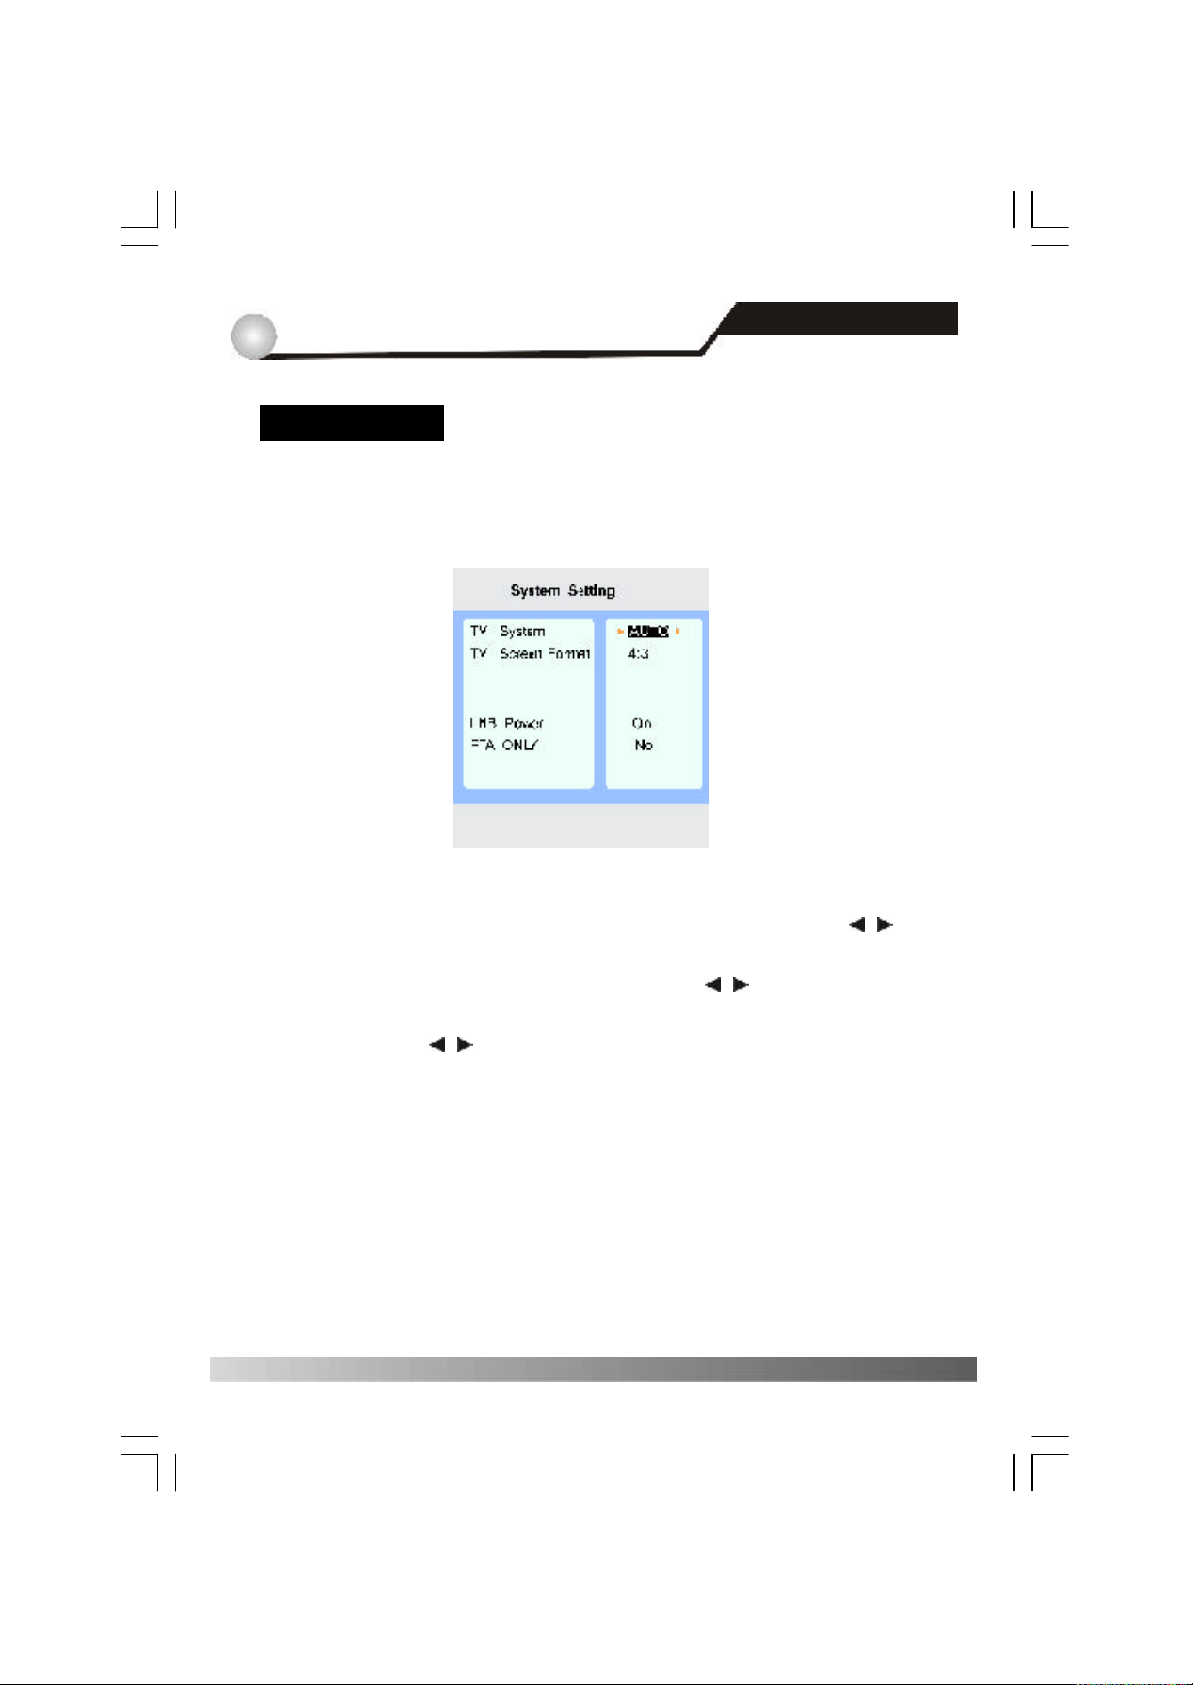
⑦ Signal
a. Select <Signal> with VOLUME / .
b. Press ENTER to check signal strength of the TP you have chosen, you will see the
sub-menu as shown in the following figure.
Main Menu
5.3 Installation
c. Pr ess MENU to return to th e prev ious menu.
17
Page 20
5
20
http://www.traxis.co.uk
Main Menu
5.3 Installation
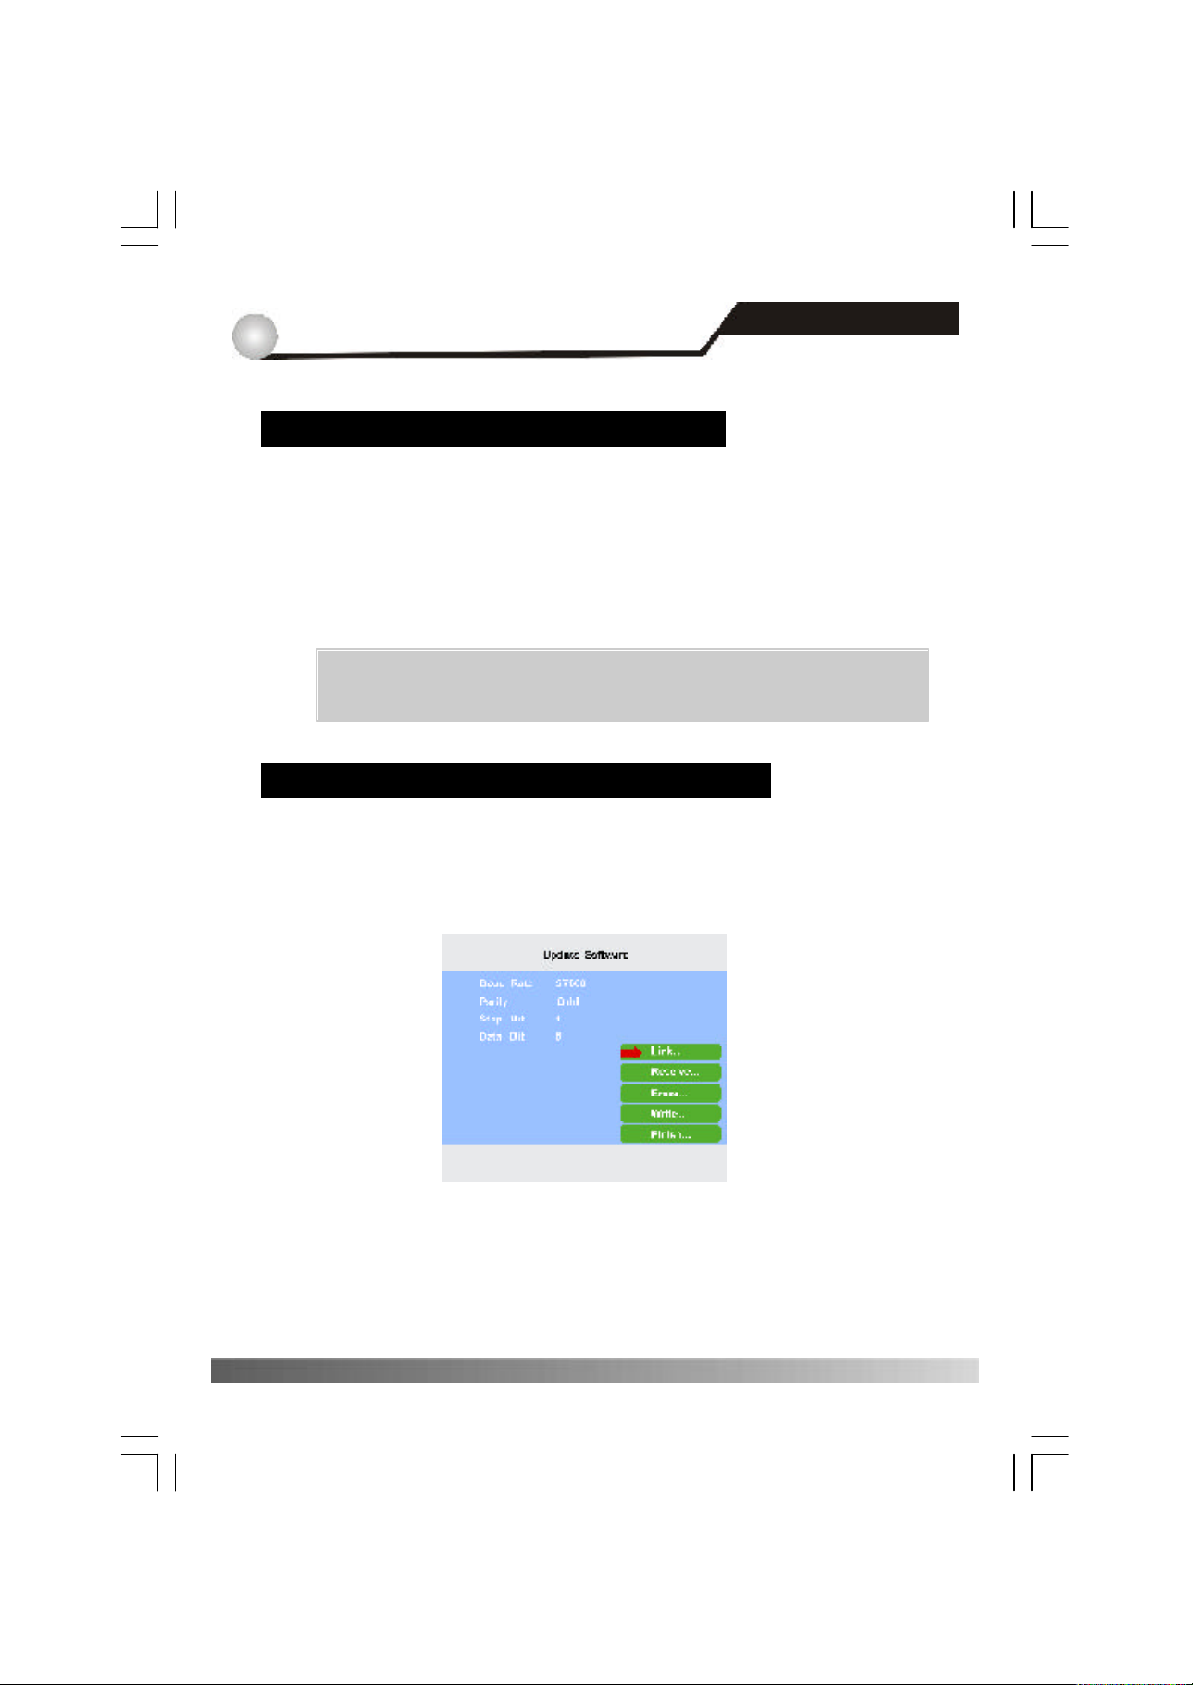
System Setting
Select <System Setting> with CHANNEL ▲ /q , and press ENTER, you will see
the sub-menu as shown in the following figure.
① TV System
Select your TV type among NTSC, PAL, SECAM and Auto with VOLUME / .
② TV Screen Format
Select your TV aspect ratio 4:3 or 16:9 w ith VOLUME / .
③ LNB Power
With VOLUME / select ON/OFF.
④ FTA Only
FTA Only <Yes>: Search only free to air channels.
FTA Only <No>: Search all channels.
18
Page 21
5.3 Installation
21
http://www.traxis.co.uk
5
Main Menu
Update software (receiver to receiver without television)
① Connect master and slave receive with twisted RS-232C cable.
② Pow er on the master receiver.
③ After start successfully, turn on slave receiver to begin update.
④ After update, it will display “End” or “OK” on each panel.
⑤ Turn off slave receiver, remove twist RS-232C cable and restart it.
Notes: You need a 9-pin twisted RS-232C cable(pin-2 to pin-3,
pin-3 to pin-2, pin-5 to pin-5).
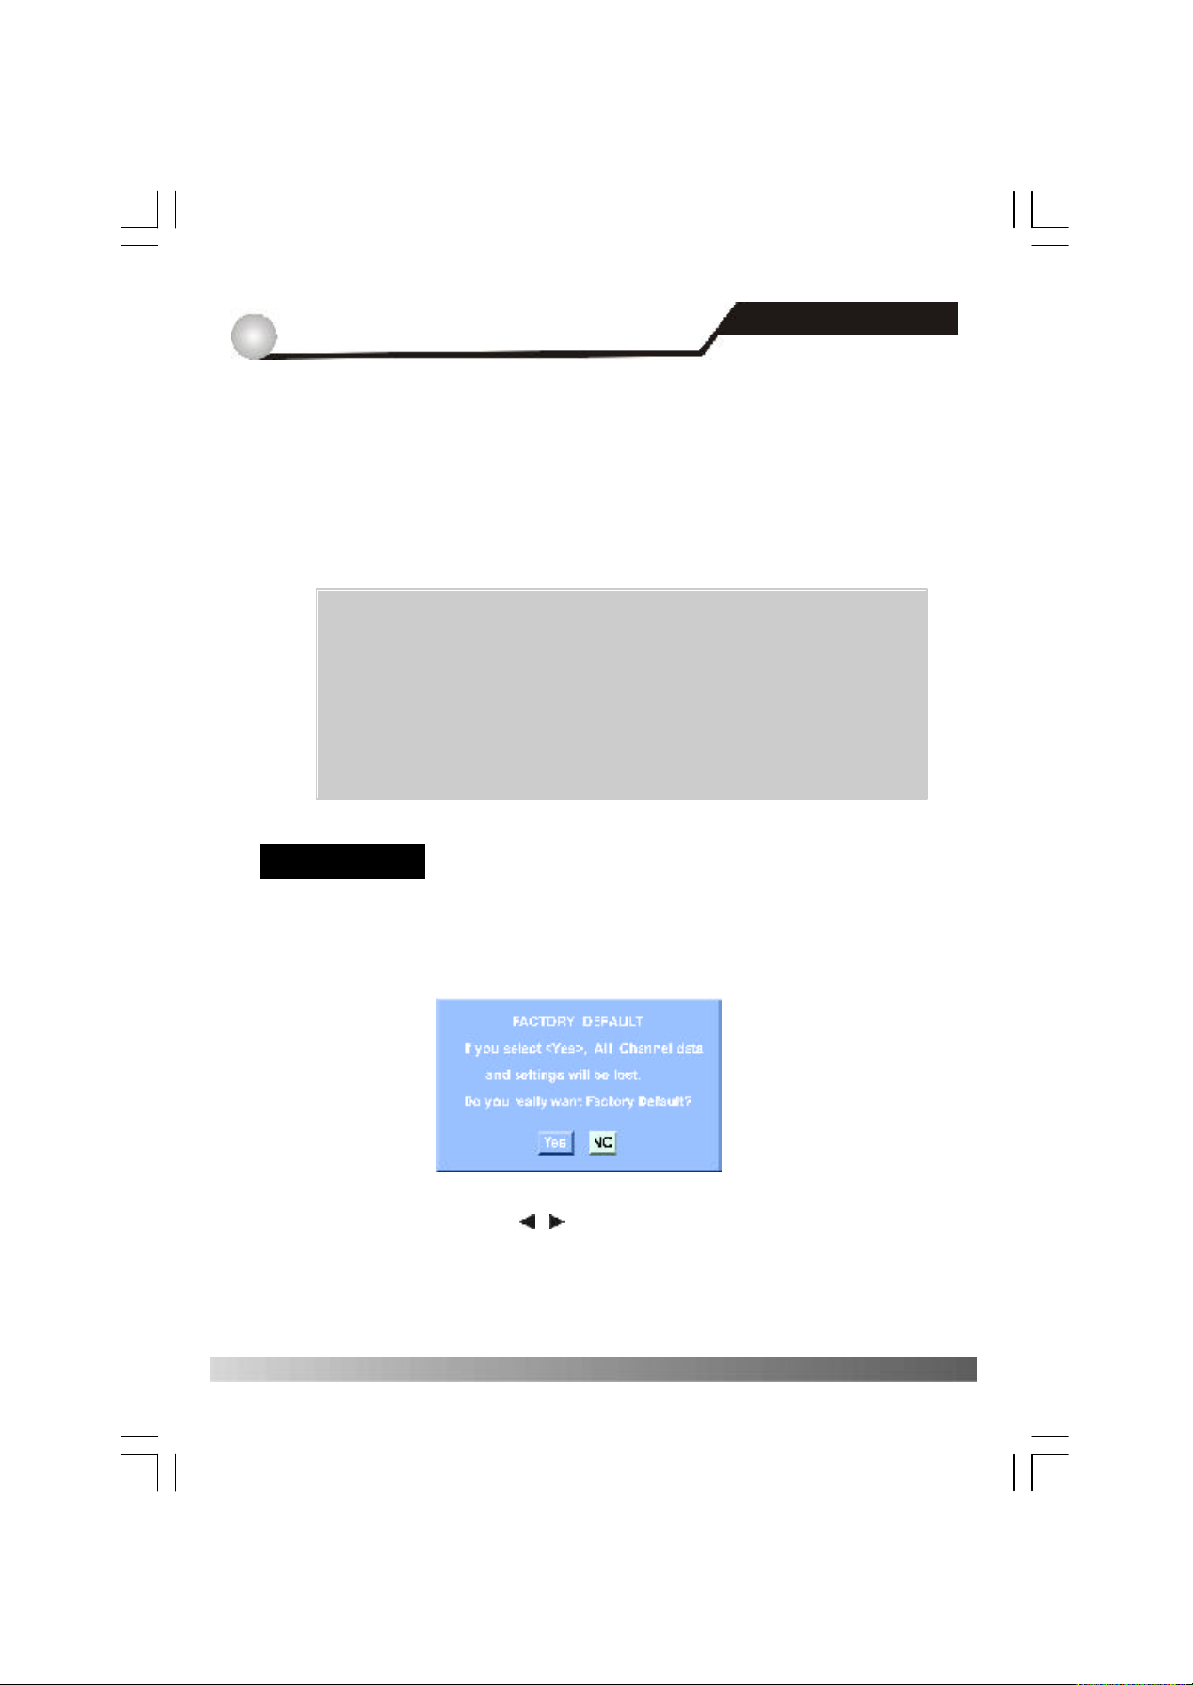
Update software (computer to receiver with television)
① Connect your PC and receiver with RS-232C cable.
② Turn on the receiver select <Update software> in <Installation>, press ENTER, y ou
will see the sub-menu as shown in the following figure.
19
Page 22
5
22
http://www.traxis.co.uk
③ Startup the software of “DVB5518UART.exe” on your PC , press <Select> and
select “*.hex”, then select port. Select <Yes> on TV screen and press <OK>, press
“Transmit” on your PC, Upgrade will begin.
④ After upgr ade, the receiv er will display “End” on pannel.
⑤ Turn off the receiver, cut twisted RS-232C Cable and restart it.
Notes:
* You need a 9-pin RS-232C cable(pin-2 to pin2, pin-3 to pin-3,
pin- 5 to pin-5). Contact your local distributor for upgrade software,
and find the attached instruction for detailed upgrade procedure.
* After update, power on receiver, make your receiv er restore system
default(operate “Reset System”), then power off receiver and restart
it again.
Main Menu
5.3 Installation
Factory Default
20
Select <Factory Default> with CHANNEL▲ / q , and press ENTER, you will see
the sub-menu as shown in the following figure.
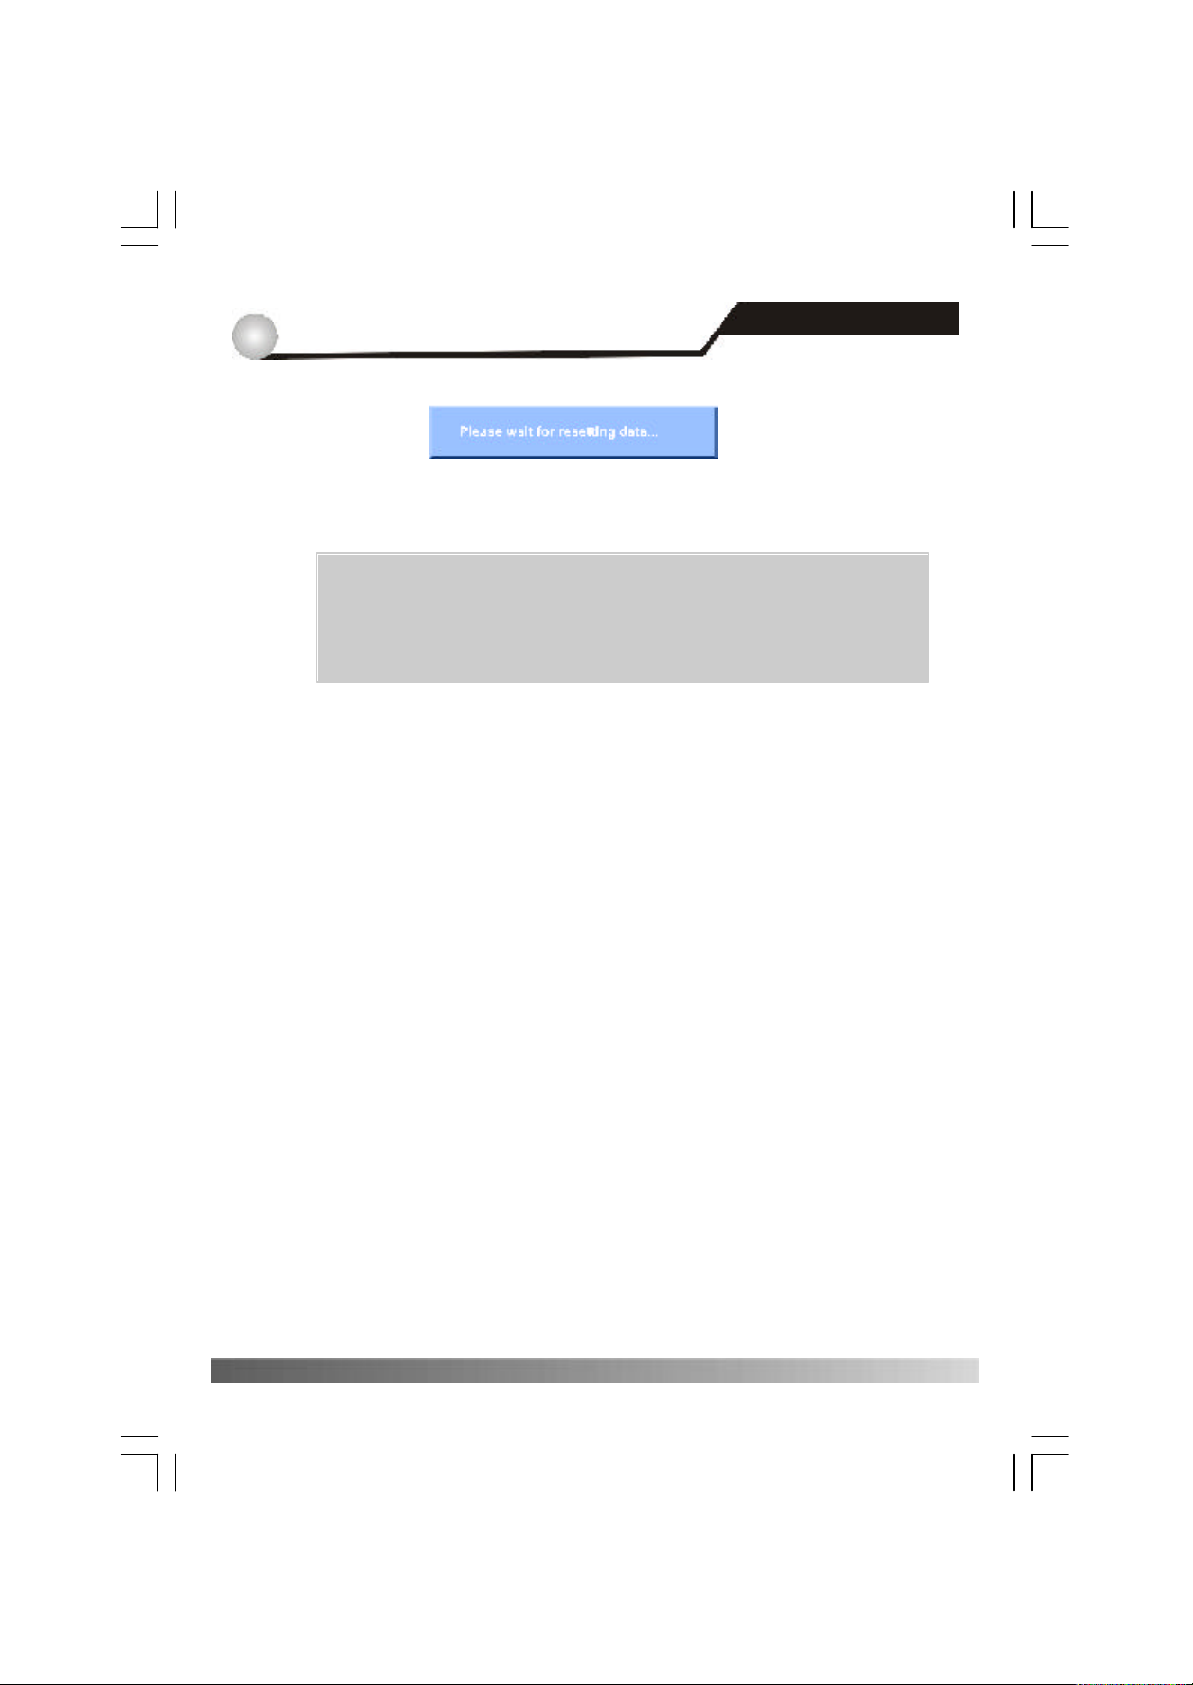
Select <Yes> with VOLUME / , you will see the sub-menu as shown in the
following figur e.
Page 23
5
23
http://www.traxis.co.uk
Main Menu
Select <Yes>, All channel data and settings will be lost.
Notes: If your operation is wrong or system has no respondence,
please power off receiver, and restart it. make your receiver
restored system default (operate “Reset System”), then
pow er off r eceiver and restart it again.
5.3 Installation
21
Page 24
5
24
http://www.traxis.co.uk
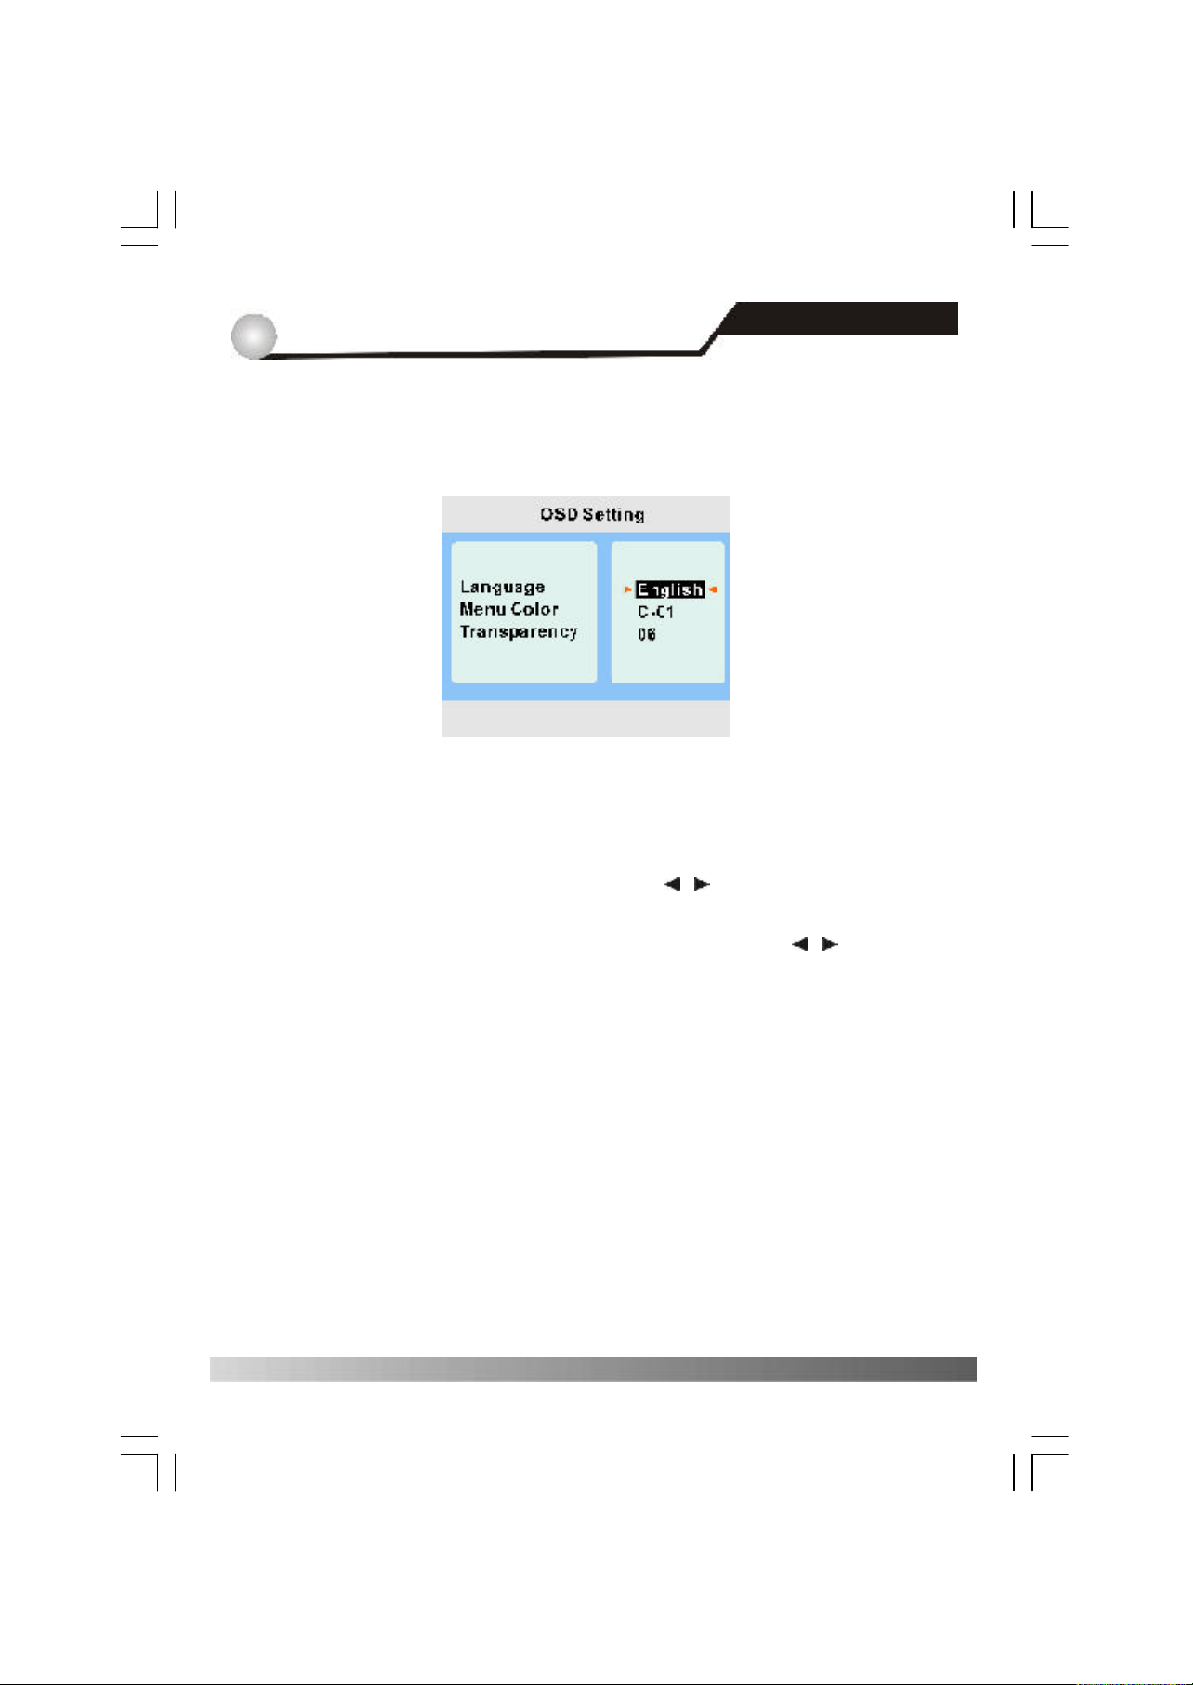
Select <OSD> in main menu with CHANNEL ▲ /q , and press ENTER, you will
see the sub-menu as shown in the following figure.
① Language
English, Deutsch, France, Spanish, Portuguese, Italian.
② Menu Color
Select your favorite color of OSD with VOLUME / .
③ Tr ansparency
Select the transparency of OSD between 1 and 11 with VOLUME / .
Main Menu
5.4 OSD
22
Page 25
5
25
http://www.traxis.co.uk
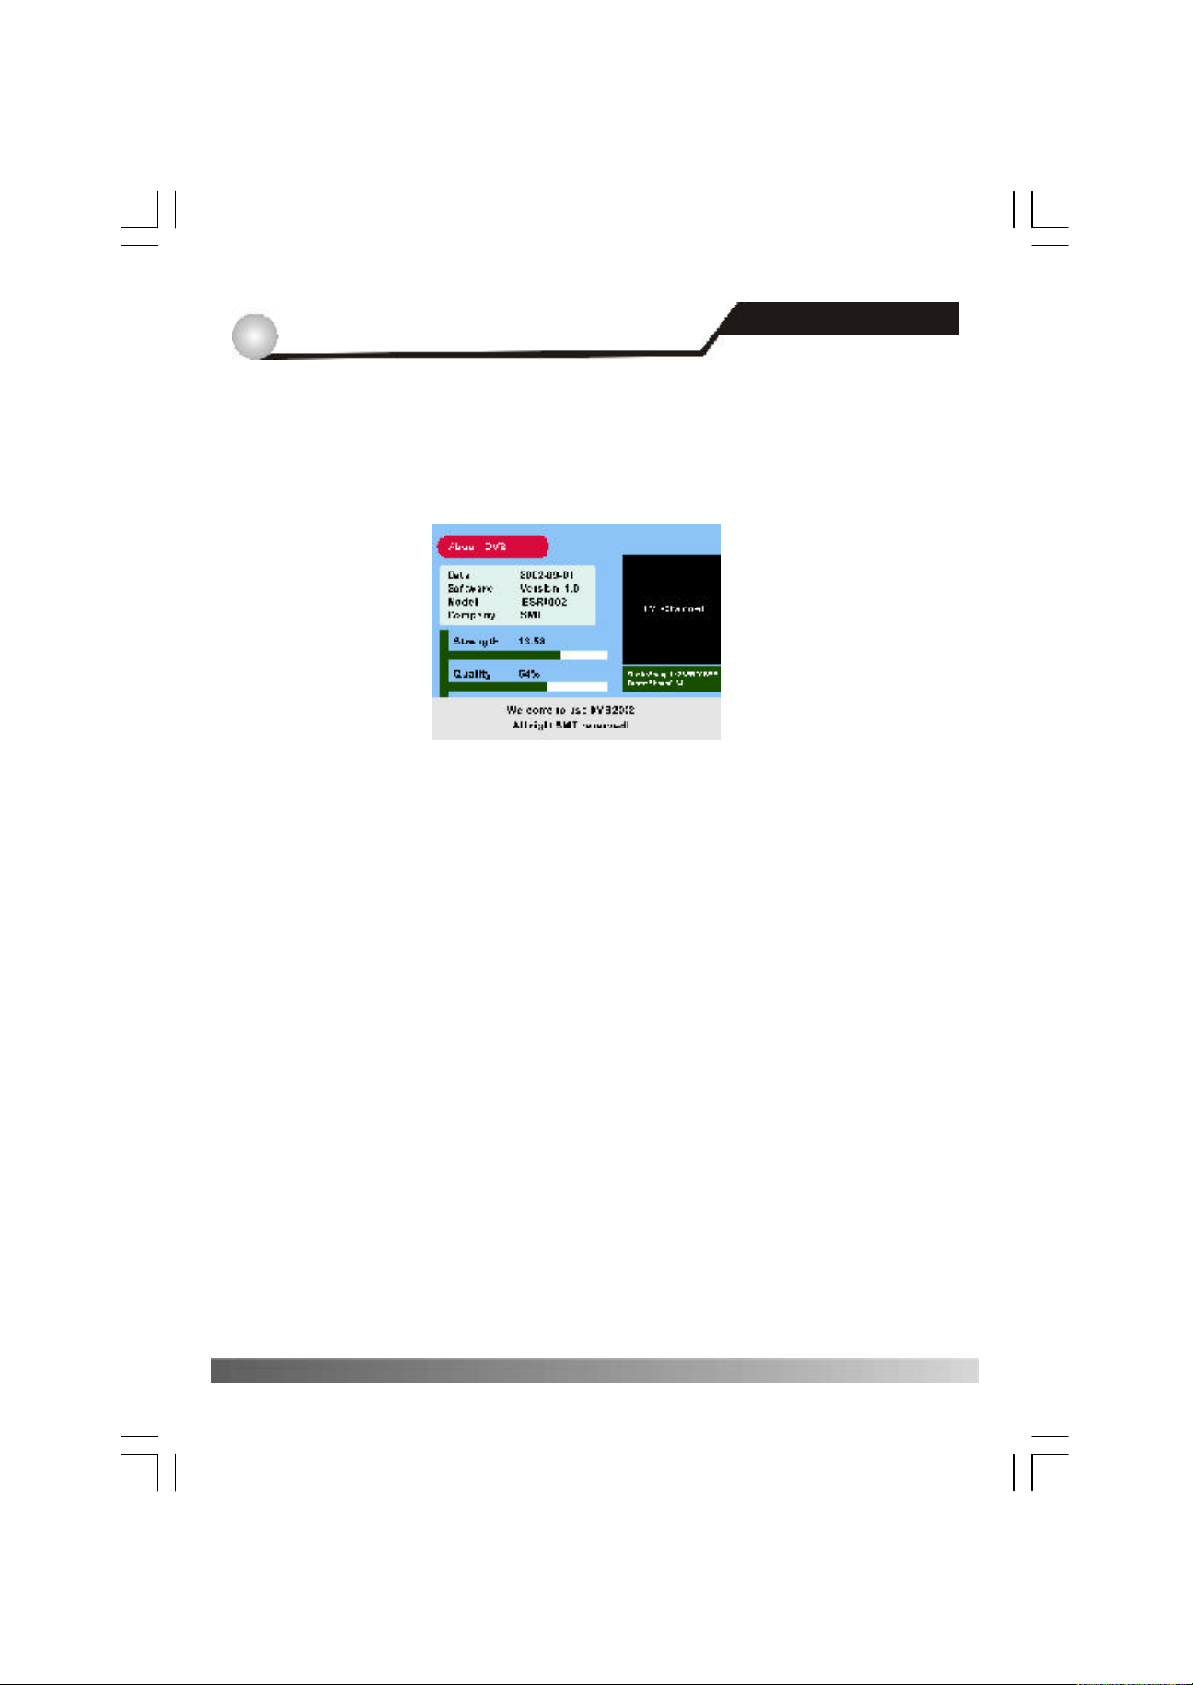
To check the version of your receiver’s hardware and software, select <About DVB> in main
menu with CHANNEL ▲ / q, and press ENTER, you will see the sub-menu as shown in
the following figur e.
Press MEN U to return to the previous menu.
About DVB
5.5 About DVB
23
Page 26
6
26
http://www.traxis.co.uk
ENTER
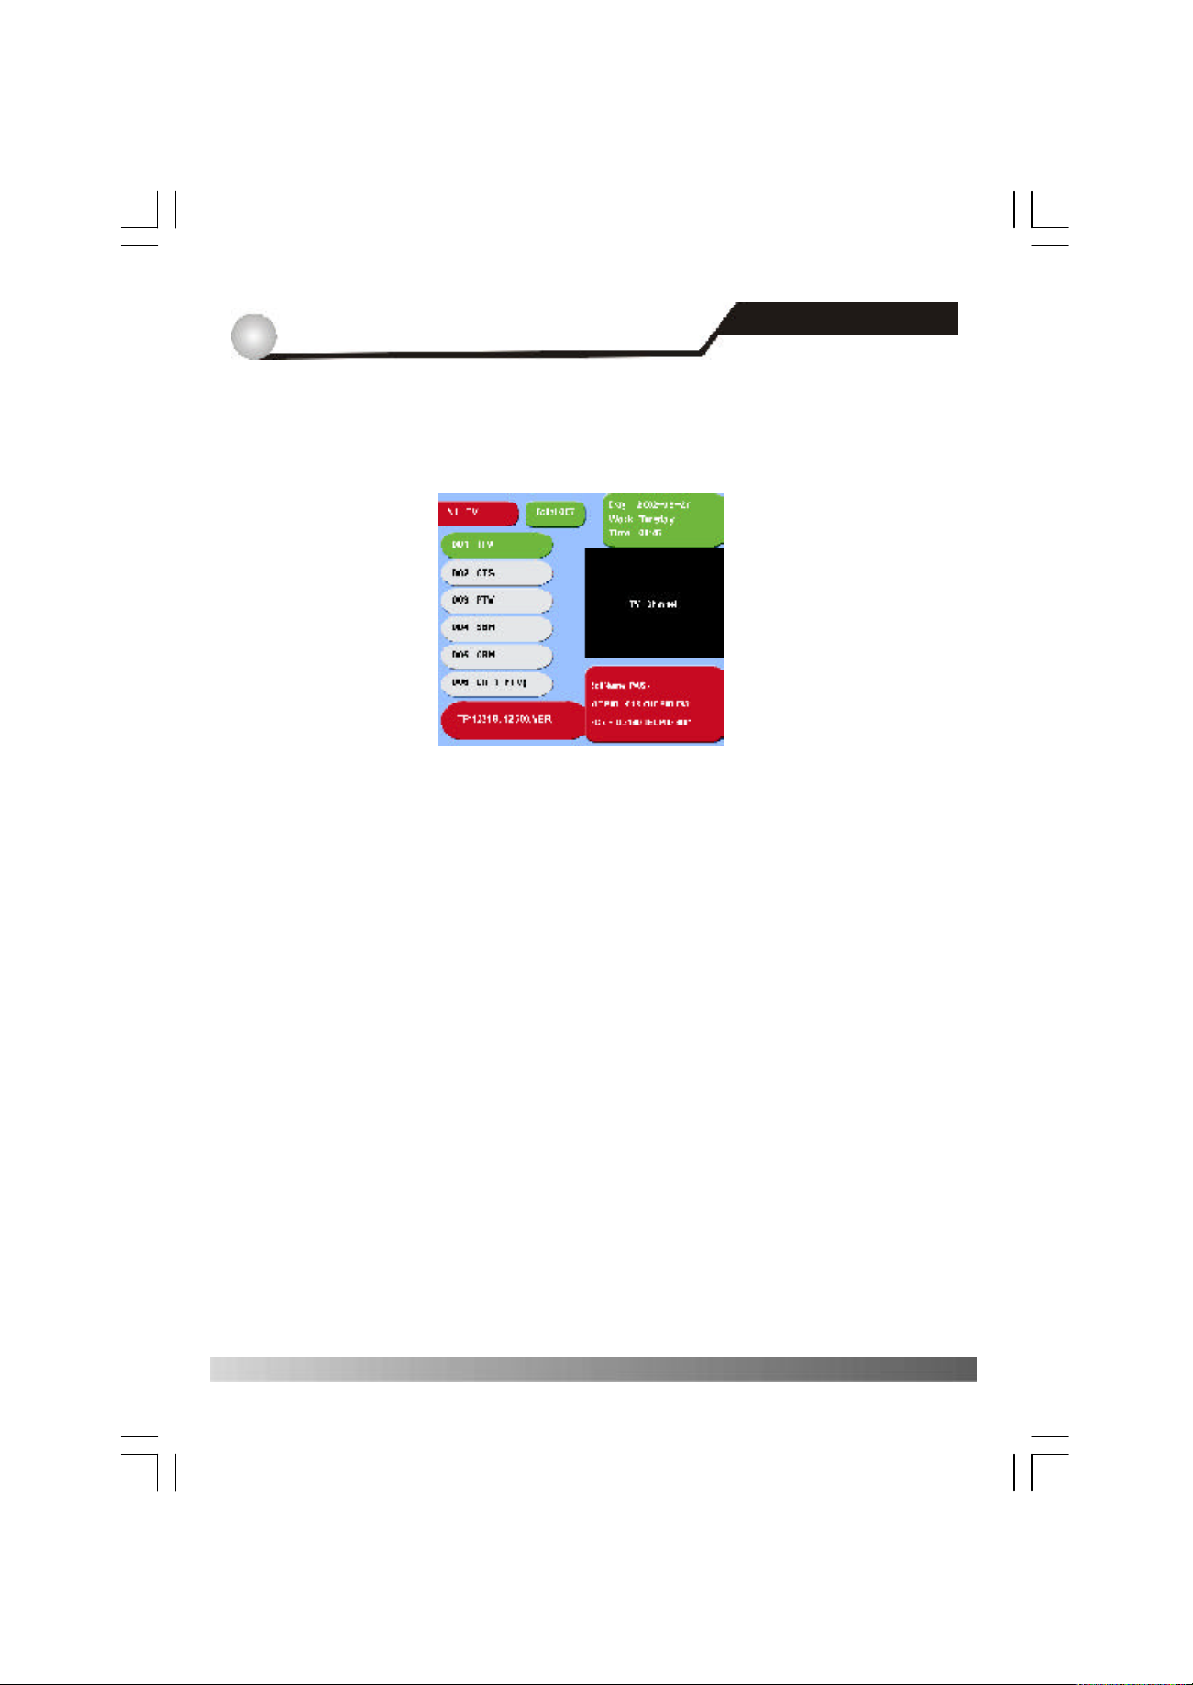
Exit all menus, Press ENTER On the front panel, you will see the sub-menu as
shown in the following figure.
Select TV with CHANNEL ▲ /q , Press MEN U to return.
ENTER
24
Page 27
7
27
http://www.traxis.co.uk
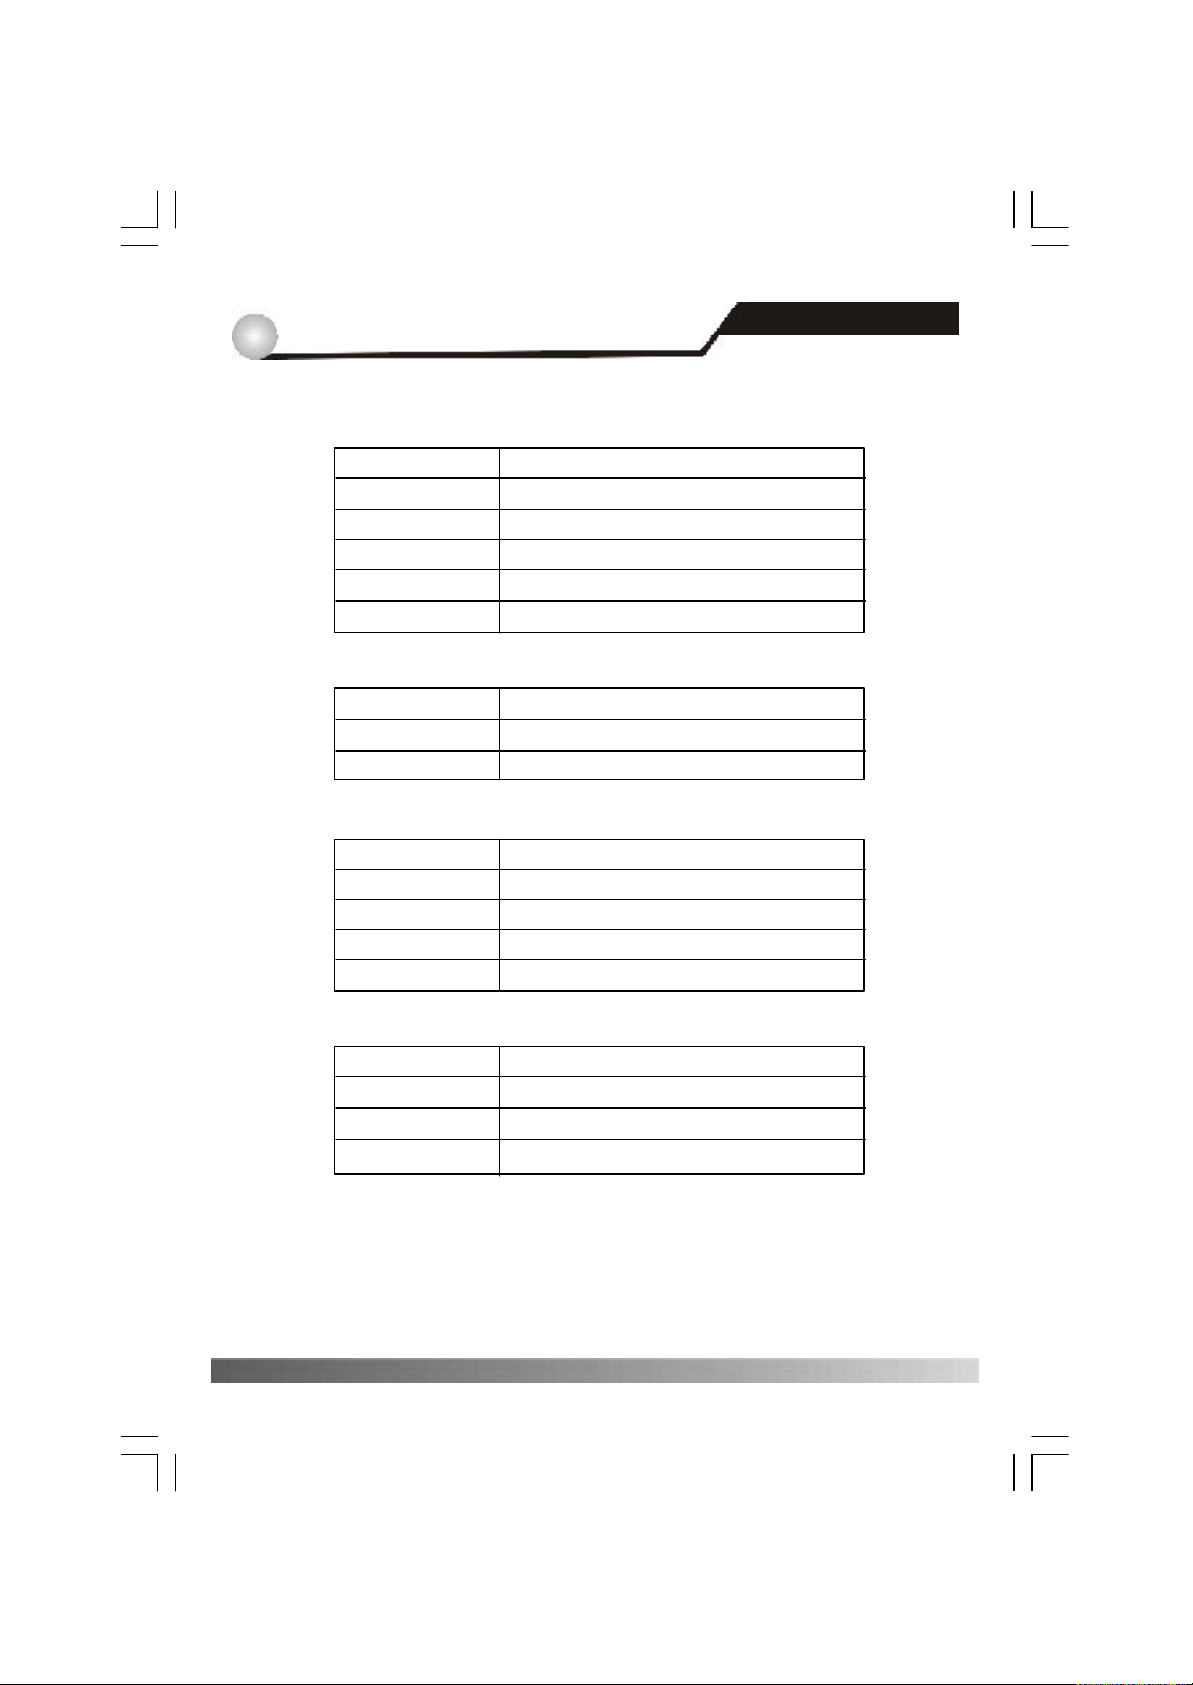
Technical S pecification
VID EO
Decoding
Bit rate
Output
Aspect ratio
Active pixel
Output connector
AUD IO
Decoding
Mode
Bit rate
DEM ODULATOR
Demodulation
Symbol rate
Outer code
Inner code
Energy dispersion
MPEG-2 & MEPG-1 compatible
Max 15Mbps
NTSC /PAL/SECAM
4 :3, 16:9
720x480 @ 30fps; 720x576 @25fps
RCA
MPEG-2/MPEG-1 layer Ⅰ & Ⅱ
Mono,Dual, Stereo, Joint stereo
Max 384Kbps
Qpsk
SCPC/MCPC
RS (204, 188, 8)
ALL DVB rates
DVB-S recommendation
Technical specification
INPUT SIGNAL
Frequency
Input level
Channel bandwidth
Input socked
950MH z~2150MHz
-65dBm ~ -25dBm
36M Hz
F- type connector
25
Page 28
7
28
http://www.traxis.co.uk
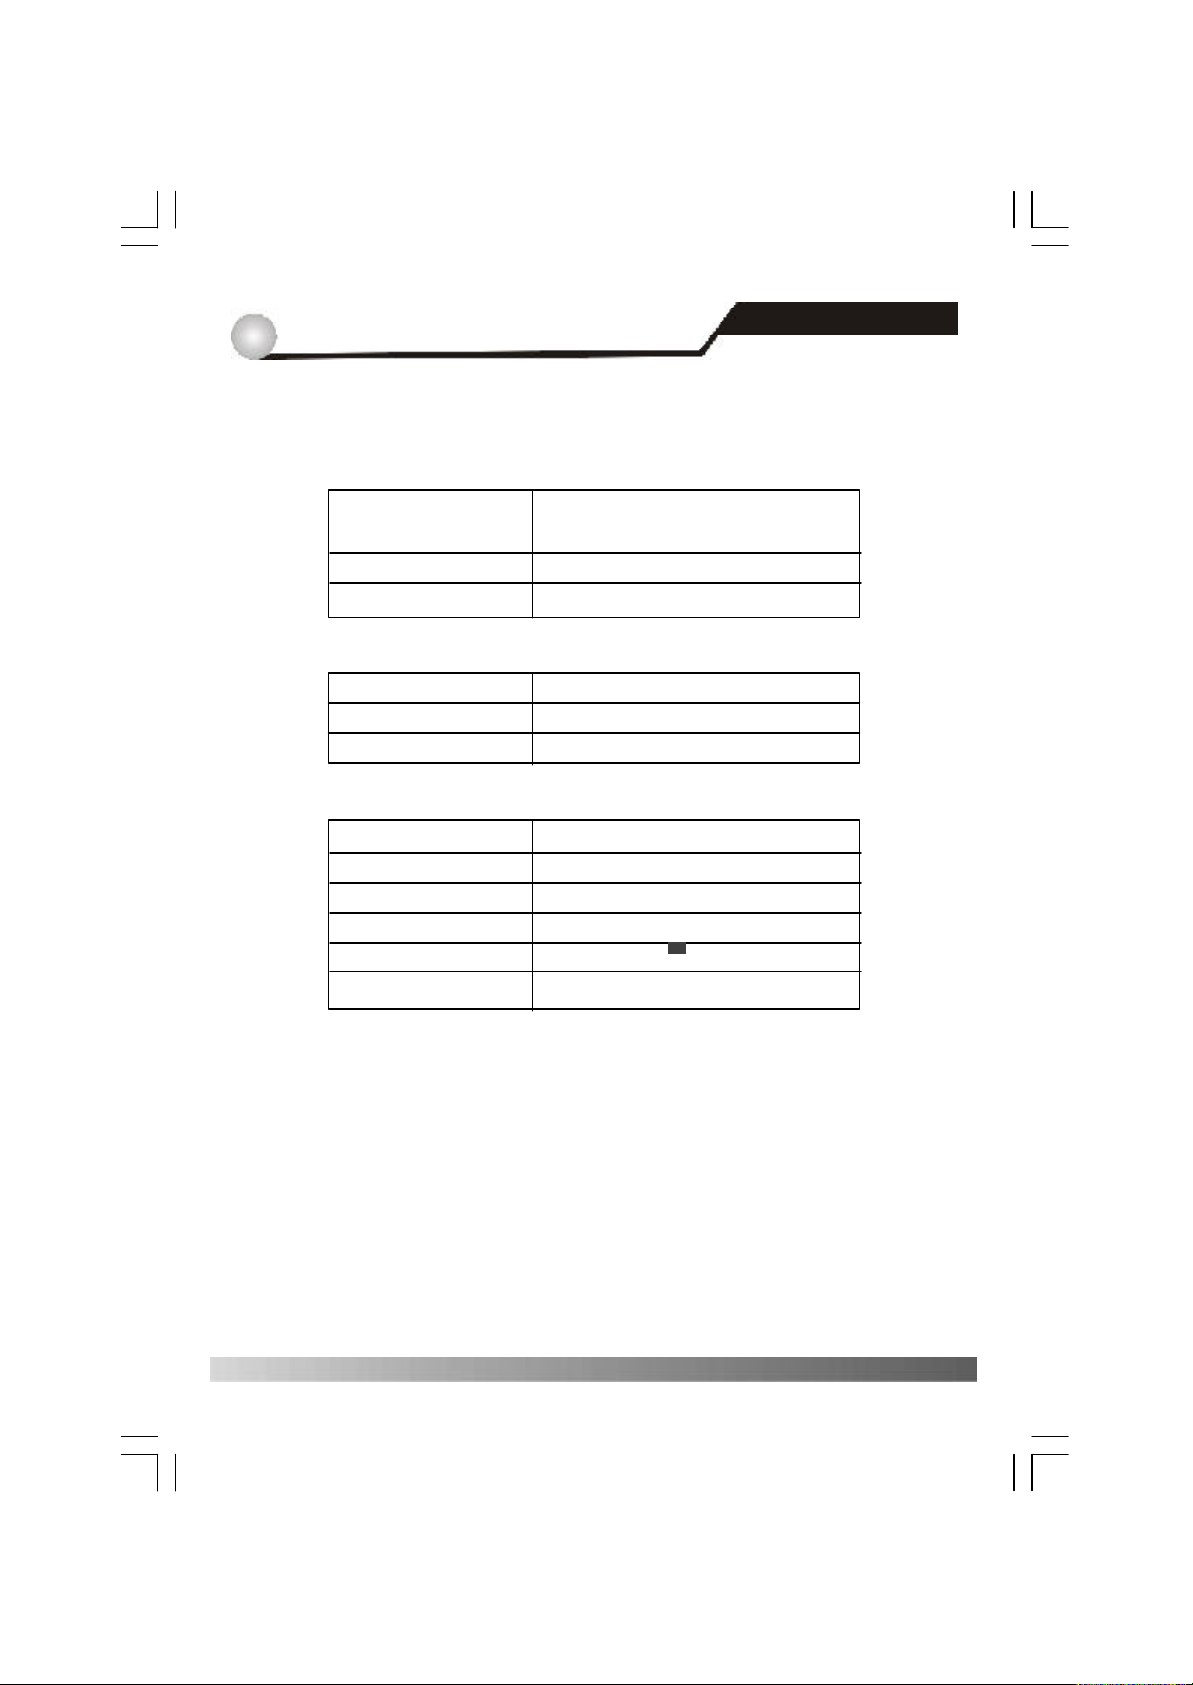
Technical S pecification
LNB CONT ROL
Pow er supply
Polarized control
DiSEqC control
Data Port
Connector
Pr otocol
Data Rate
MISCELLANEOUS
Supply voltage
Power consumption
Operation temperature
Storage temperature
Dimension( WxDx H)
Weight
13/18V( 500mA max) polarization with
short circuit pr otection
13/18V polarization (vertical/horizontal)
DiSEqC 1.0
9 Pin D-sub Type
Rs232 Asynchronous
Max 57.6 Kbps
85~260VAC 50~60Hz
21 watts max
+5℃ to +40℃
-20℃ to +70℃
480x245x41 mm
3.2Kg
Technical specification
26
 Loading...