

TRAPEZA AB.8/DX, TR.8/DX, GR.8/DX Operation And Maintenance Manual
AB.8/DX ● TR.8/DX ● GR.8/DX
TRITACARNE E GRATTUGIA
MEAT MINCER AND GRATER
HACHE-VIANDE ET RAPE
FLEISCHWOLF UND REIBE
PICADORA DE CARNE Y RALLADORA
MOEDOR DE CARNE E RALADOR
МЯСОРУБКА И ТЕРКА
Manuale d’ uso e manutenzione
Operation and maintenance manual
Manuel d’ emploi et d’ entretien
Betriebs- und Wartungsanleitung
Manual de uso y mantenimiento
Manual de uso e manutenção
Инструкции по использованию и техобслуживанию
MOD038V00

AB.8/DX ● TR.8/DX ● GR.8/DX
TRITACARNE E GRATTUGIA
INDICE
1 INFORMAZIONI GENERALI
Descrizione delle macchine...…………………...
Caratteristiche tecniche………………………….
Dimensioni d’ ingombro………………………….
2 INFORMAZIONI SULL’ INSTALLAZIONE
Imballo e disimballo………………………………
Zona d’ installazione……………………………..
Collegamento elettrico…………………………...
4
4
4
5
5
5
3 INFORMAZIONI SULL’ USO E LA PULIZIA
Uso della grattugia………………………………...
Uso del tritacarne…..……………………………..
Smontaggio gruppo macinazione……………….
ALLEGATI
Schema elettrico
6
6
6
4
INFORMAZIONI
GENERALI
1
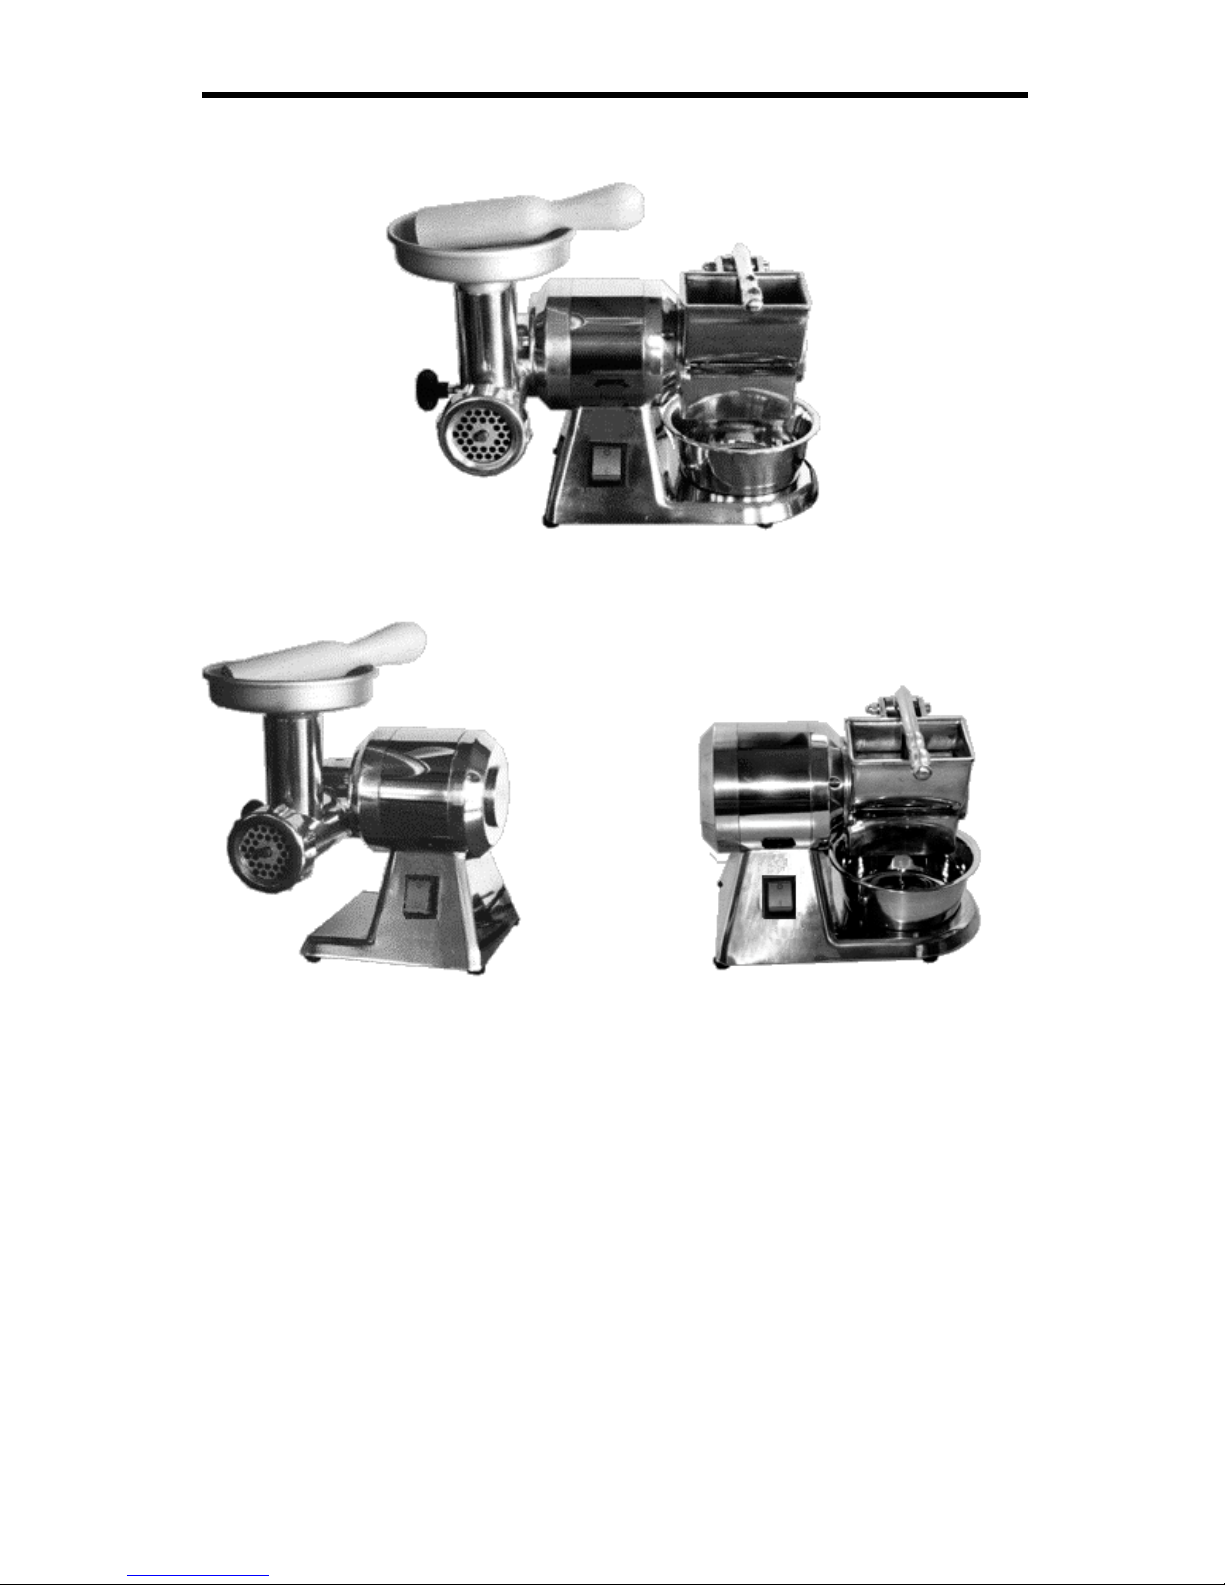
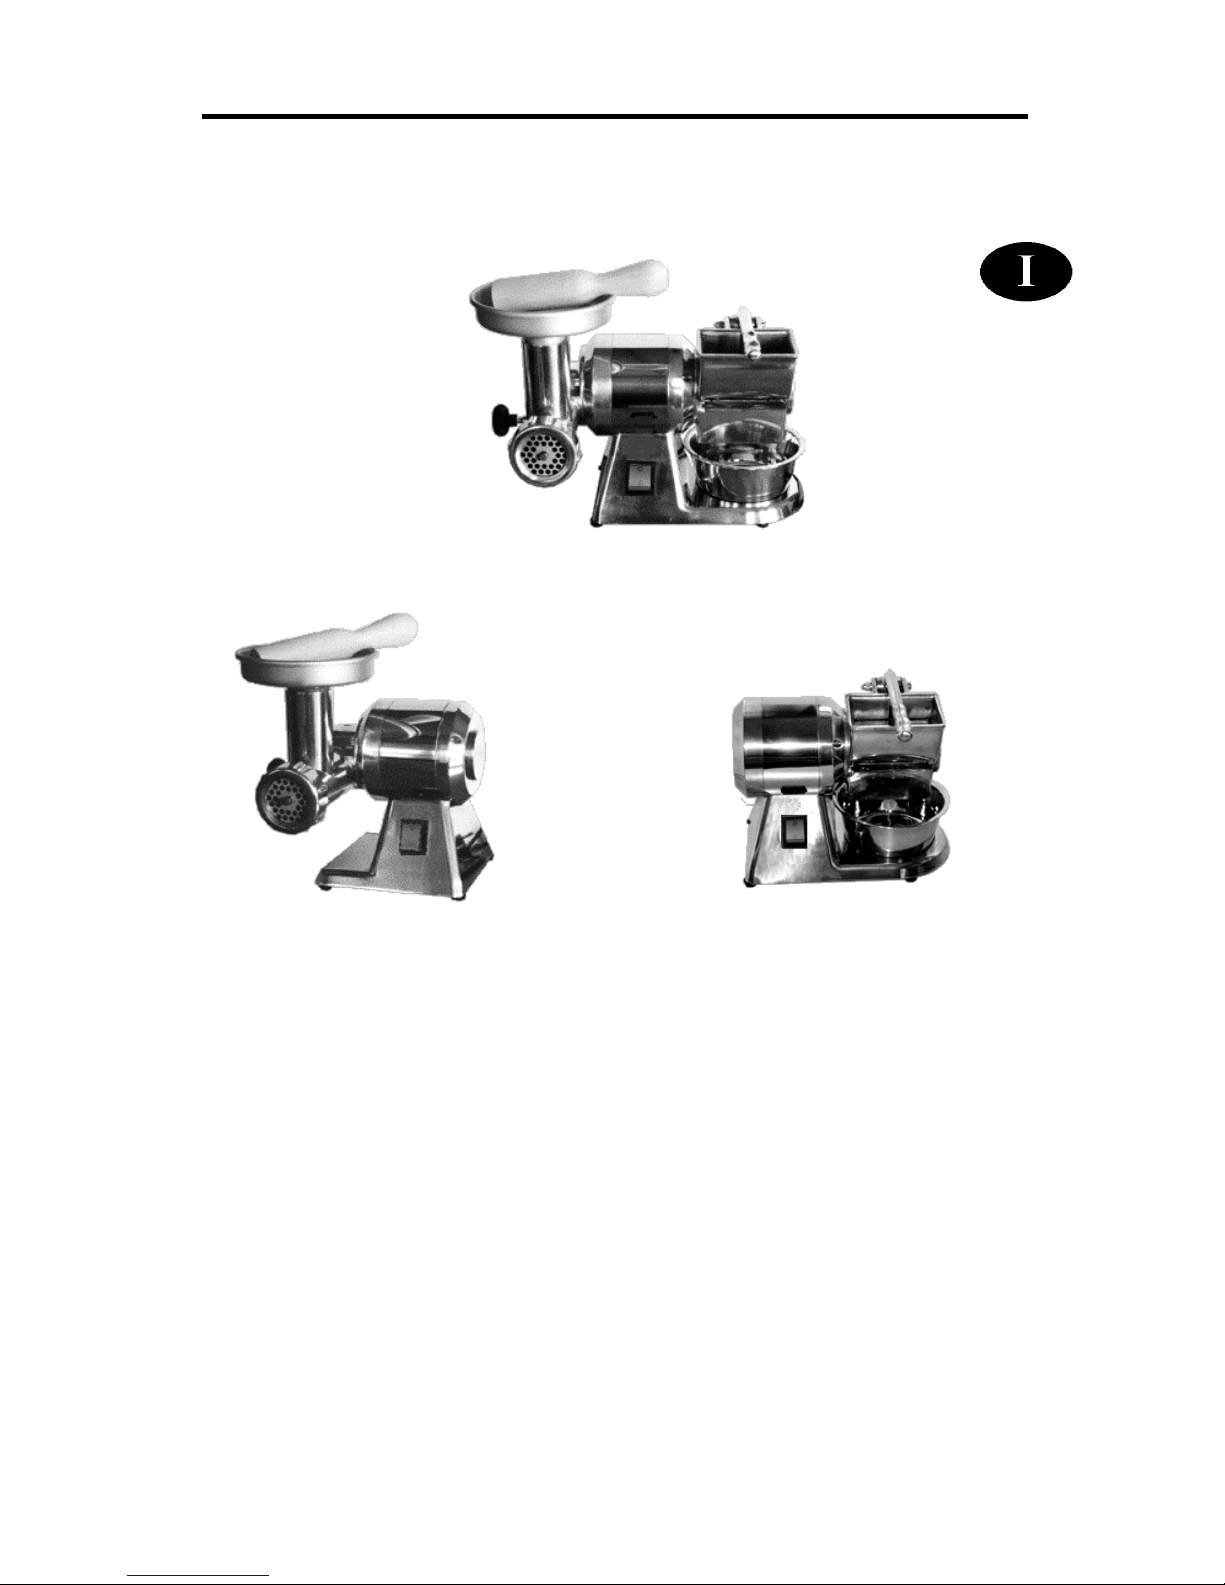
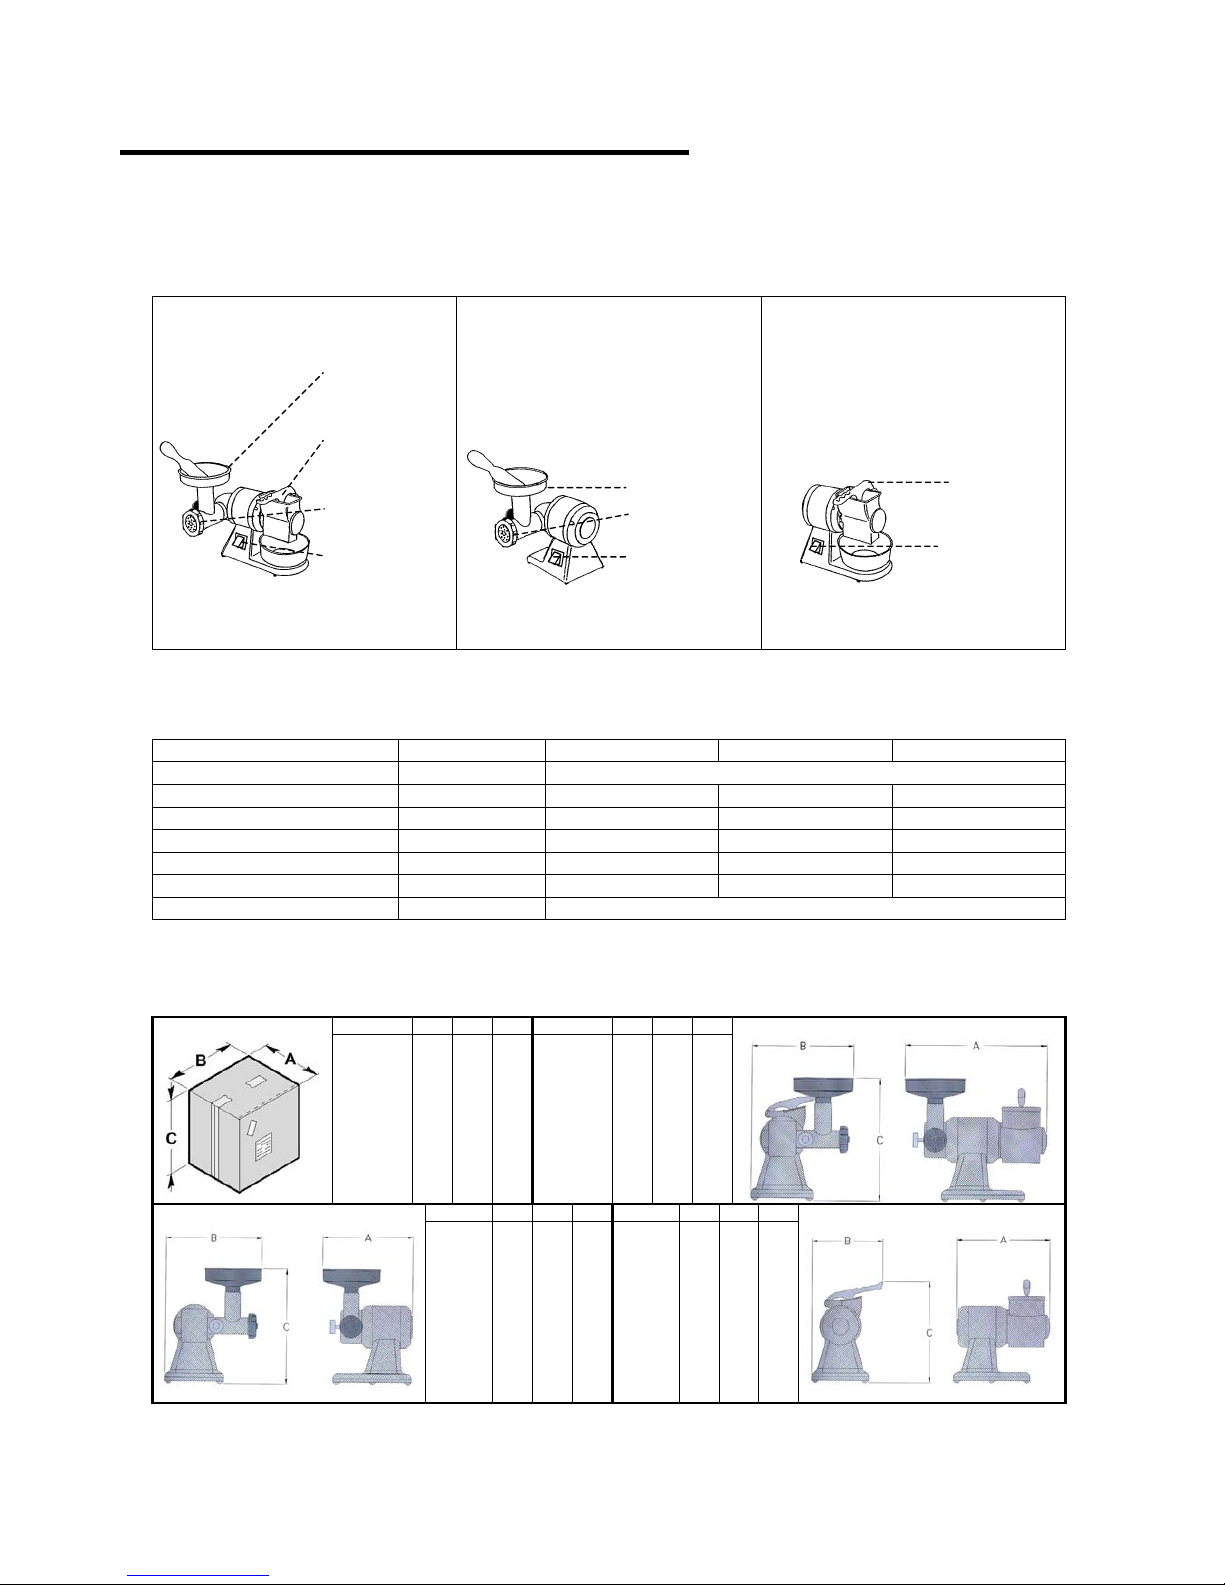
Descrizione delle macchine
MOD.AB.8/D MOD.8/D MOD.GR.8/D
Tramoggia
Leva grattugia
Volantino
Quadro
comandi
Tramoggia
Volantino
Quadro
comandi
Leva grattugia
Quadro
comandi
Caratteristiche tecniche
Descrizioni Unità di misura AB.8/D TR.8/D GR.8/D
Alimentazione di energia
elettrica
V Hz Ph 230V 50Hz 1Ph
Potenza kW (HP) 0.37 (0.5) 0.37 (0.5) 0.37 (0.5)
Produzione oraria tritacarne Kg 50 50 /
Produzione oraria grattugia Kg 20 / 20
Peso netto Kg 11 9.5 8.5
Peso con imballo Kg 12 10.5 9.5
Installazione Su banco
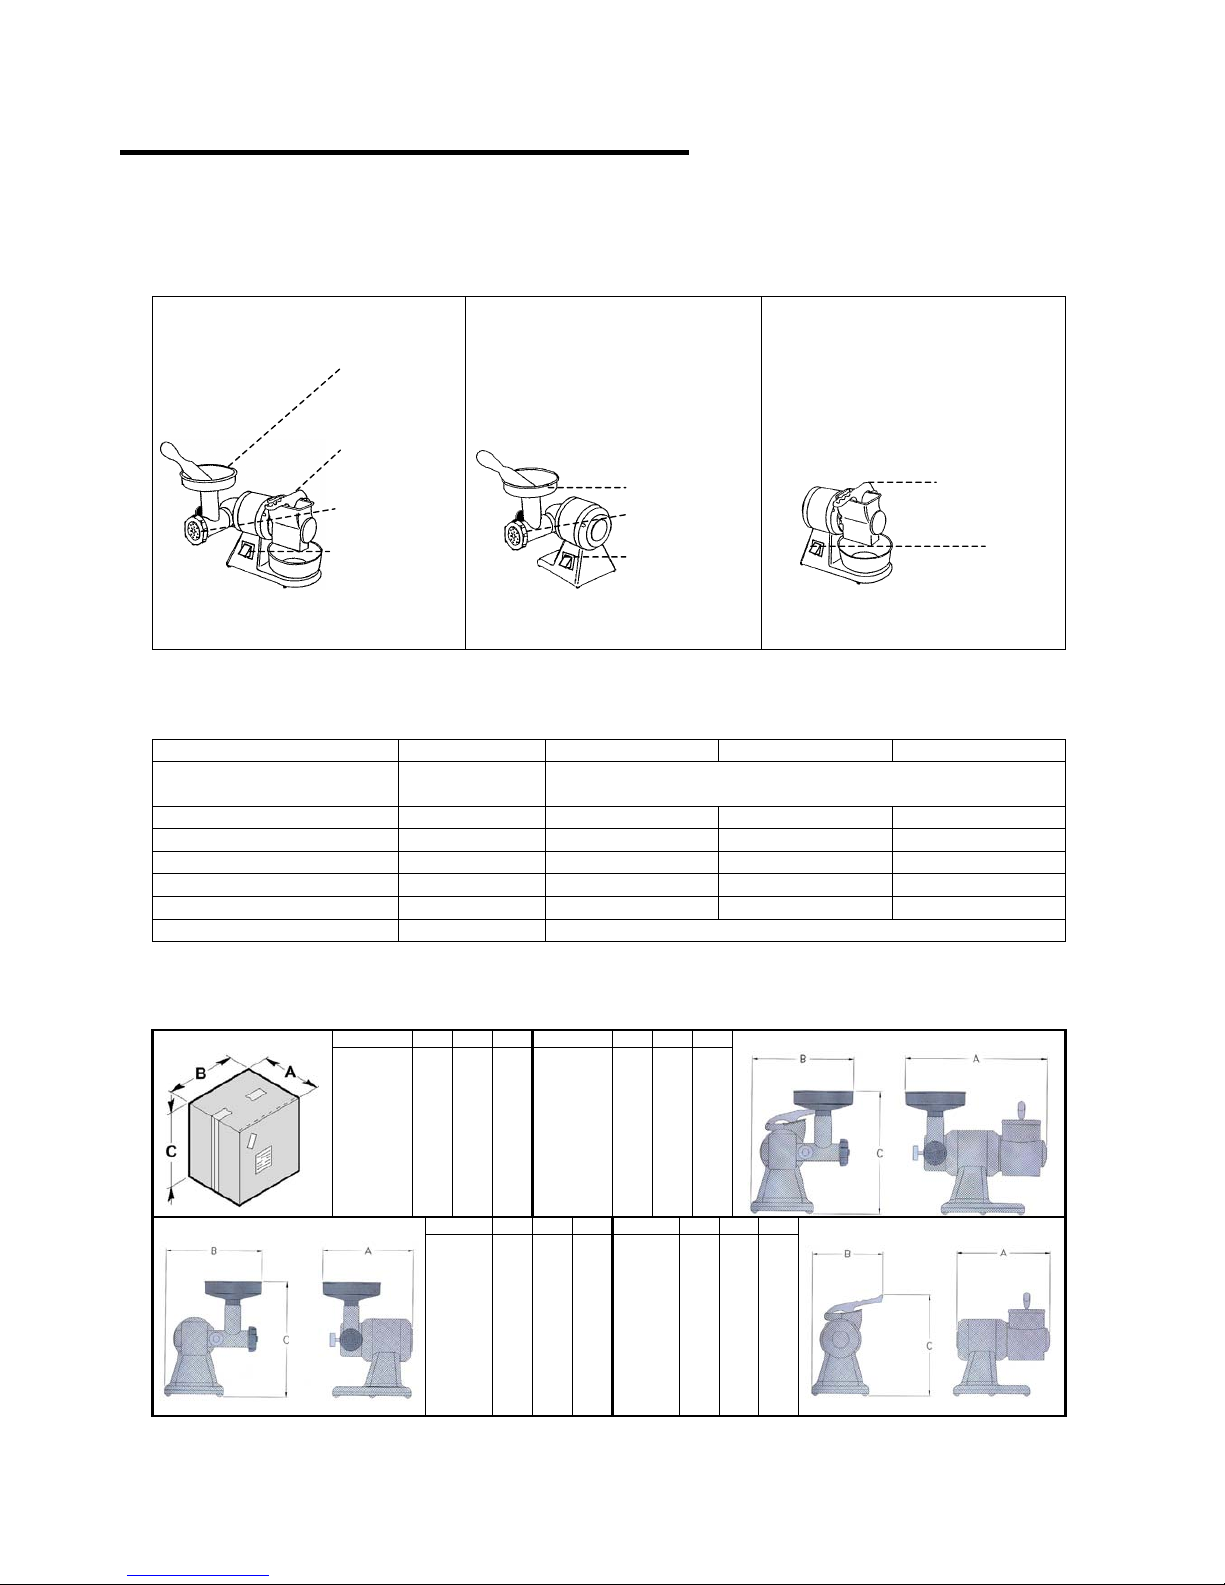
Dimensioni d’ ingombro
mm.
ABC
mm.
ABC
AB.8/D
TR.8/D
GR.8/D
450
300
300
350
350
350
400
400
400
AB.8/D
450 330 360
mm.
ABC
mm.
ABC
TR.8/D
300 330 360
GR.8/D
270 230 310
5
INFORMAZIONI
SULL’ INSTALLAZIONE
2
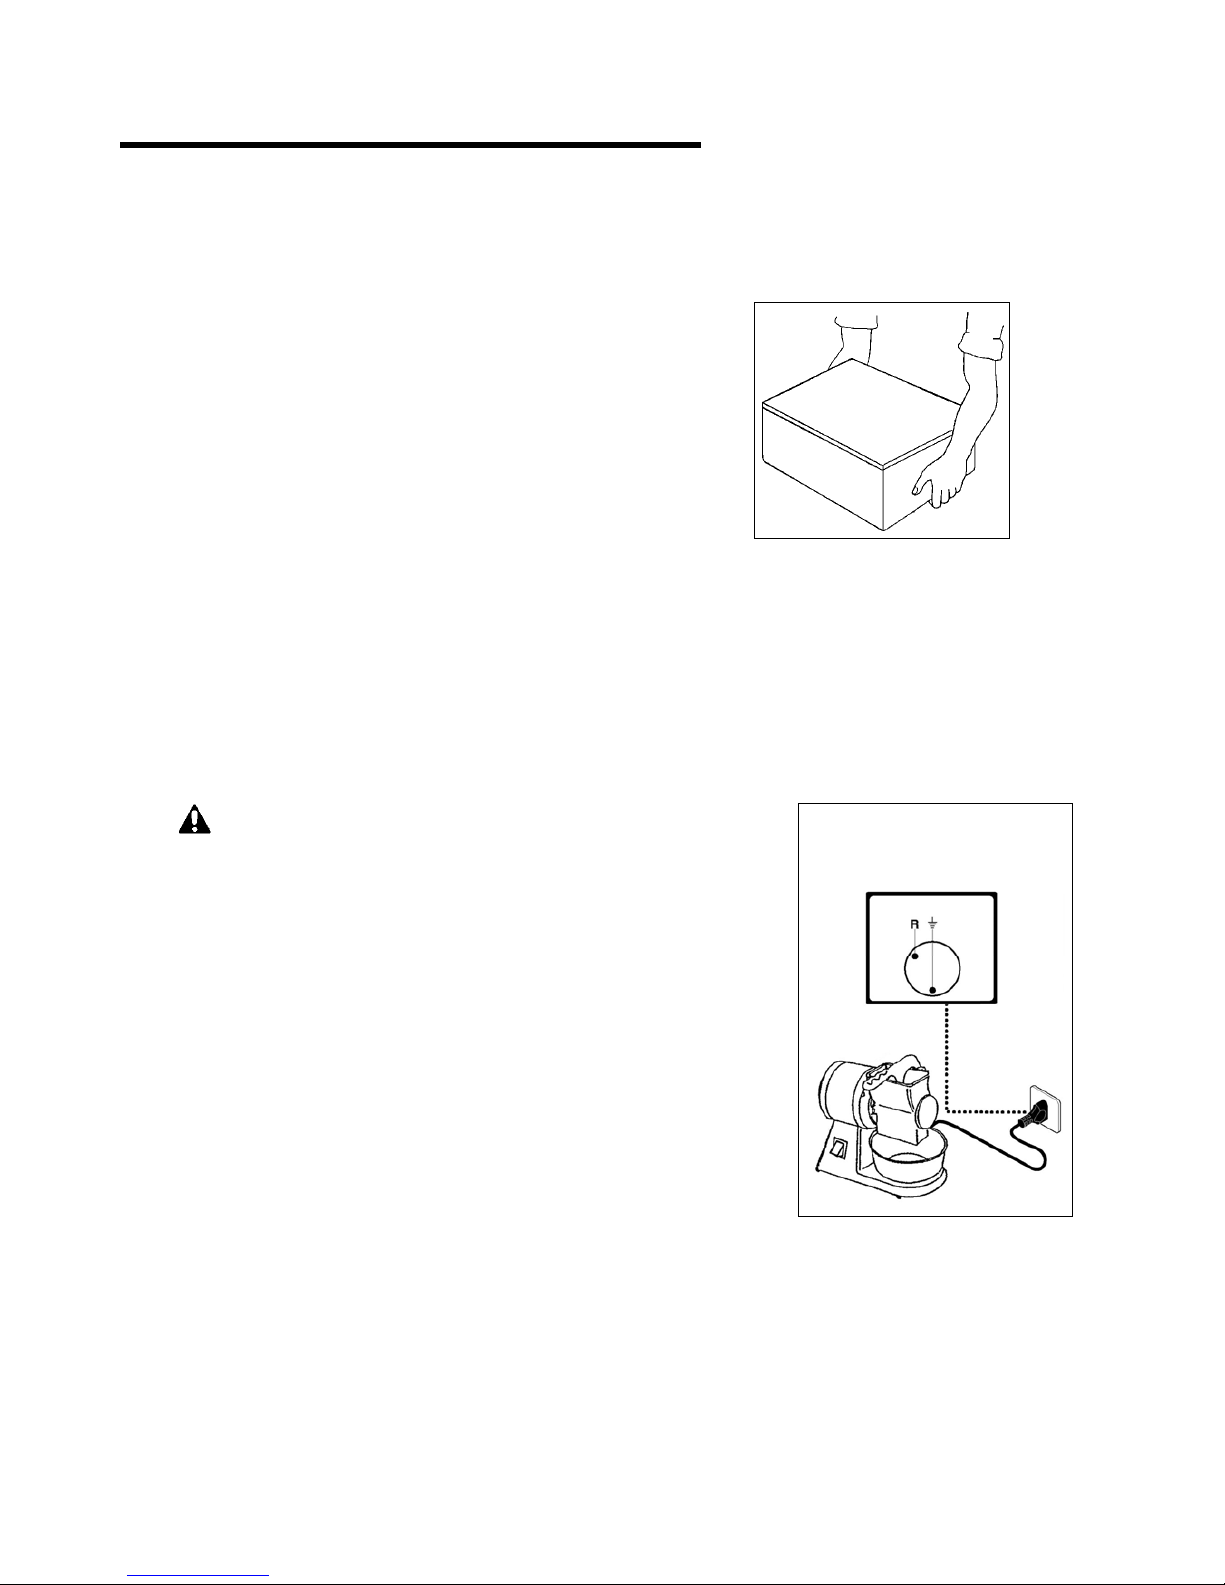
Imballo e disimballo
La macchina è imballata in cartone con l’ inserimento di
poliestere espanso per garantire la perfetta integrità durante il
trasporto.
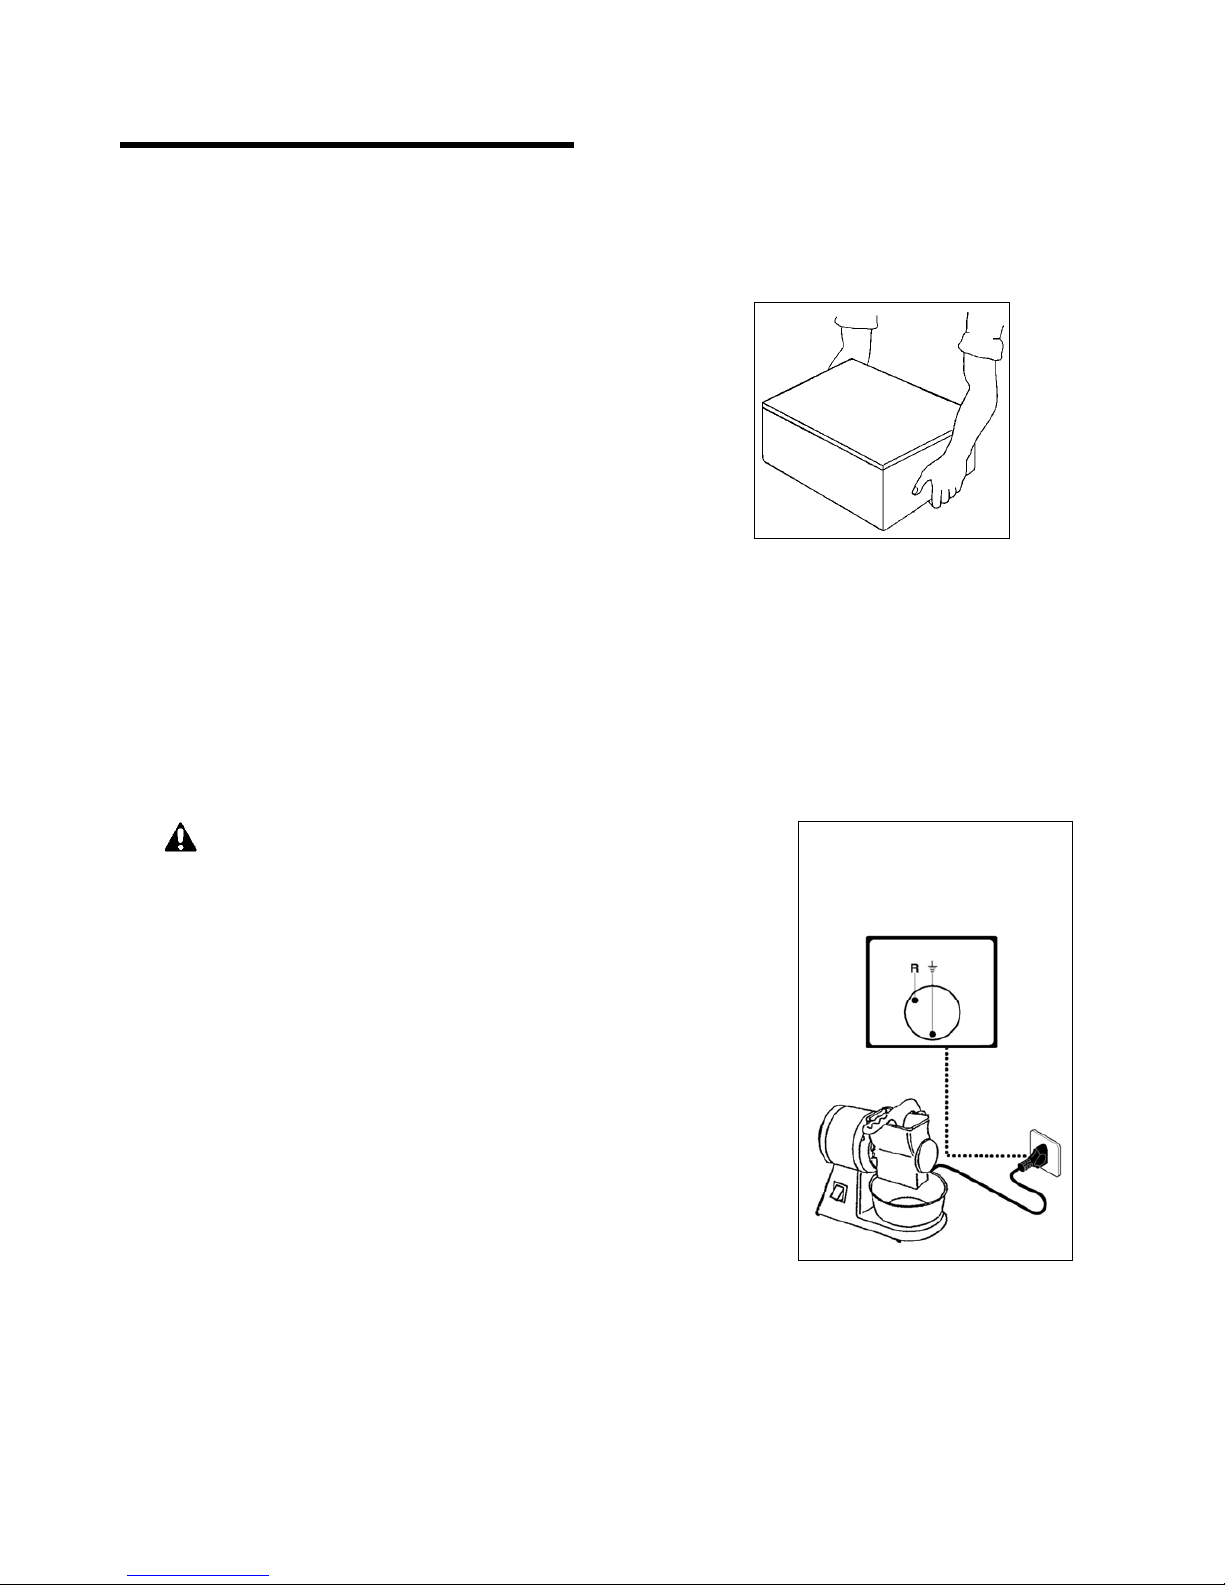
• Movimentare l’ imballo rispettando le istruzioni.
• Aprire l’ imballo e verificare l’ integrità di tutti i componenti.
Conservare l’ imballo per futuri traslochi.
• Effettuare il sollevamento della macchina come indicato e
posizionarla nella zona adibita all’ installazione.
Zona d’ installazione
La zona prestabilita dovrà essere adeguatamente illuminata e dovrà disporre di presa di distribuzione dell’
energia elettrica. Il piano di appoggio deve essere sufficientemente ampio, ben livellato e asciutto. L’
installazione deve avvenire in ambienti con atmosfera non esplosiva. In ogni modo, l’ installazione deve
essere eseguita tenendo conto anche delle leggi vigenti in materia di sicurezza sul lavoro.
Collegamento elettrico
PERICOLO – ATTENZIONE: Il collegamento elettrico alla
rete di alimentazione deve essere eseguito da personale
specializzato.
Collegamento monofase
230V – 1Ph
Accertarsi della perfetta efficienza dell’ impianto di messa a terra dello
stabilimento. Verificare che la tensione di linea (V) e la frequenza (Hz)
corrispondano a quelli della macchina (Vedere la targhetta di identificazione
e lo schema elettrico). La macchina è dotata di cavo elettrico al quale
collegare una spina multipolare. La spina è da collegare ad un interruttore a
muro provvisto di differenziale.
6
INFORMAZIONI SULL’ USO
E LA PULIZIA
3
Uso della grattugia
• Nei modelli abbinati grattugia-tritacarne smontare i gruppi macinazione prima di utilizzare la grattugia.
• Alzare la leva grattugia e immettre il prodotto all’ interno della bocca grattugia.
• Abbassare la leva grattugia e premere l’interruttore sulla posizione “I”.
• Premere progressivamente la leva fino all’esaurimento del prodotto.
• Arrestare la macchina premendo l’interruttore sulla posizione “0”.
• Al termine della lavorazione sollevare la leva ed immettere altro prodotto nella bocca grattugia; riabbassare la
leva e premere l’interruttore sulla posizione “I”.
• Al termine della lavorazione premere l’interruttore sulla posizione “0”.
• Alla fine del ciclo di lavoro pulire il rullo grattugiando un pezzo di pane duro oppure con l’ apposito pennello.
Uso del tritacarne
• Nei modelli abbinati grattugia-tritacarne abbassare la leva grattugia.
• Serrarre il pomello bocchettone.
• Serrare leggermente, senza bloccarlo, il volantino presente sulla bocca d’ uscita del tritacarne.
• Avviare la macchina premendo l’ interruttore sulla posizione “I”.
• Introdurre il prodotto all’interno della bocca superiore del tritacarne e comprimere quest’ ultimo con il pestello
in dotazione.
• Al termine della lavorazione premere l’interruttore sulla posizione “0”.
• Alla fine del ciclo di lavoro smontare il gruppo macinazione e lavarlo con detergenti idonei in acqua calda o in
lavastoviglie.
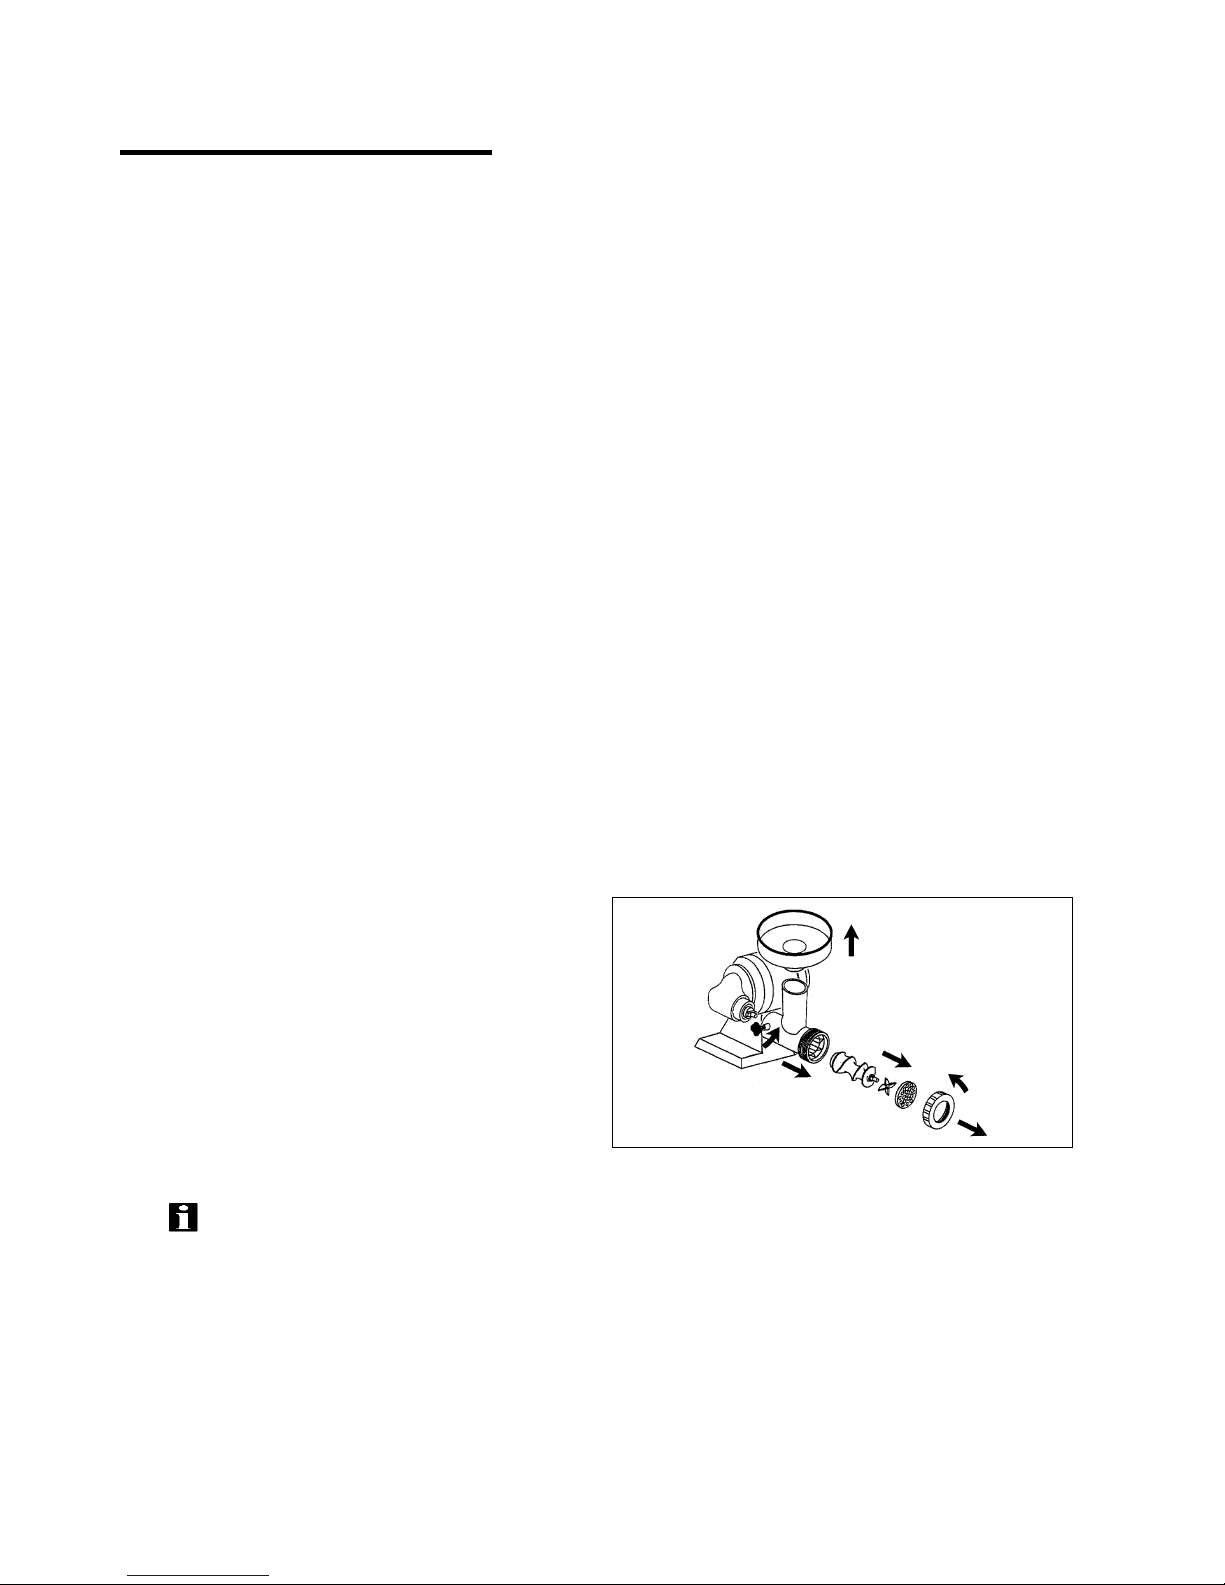
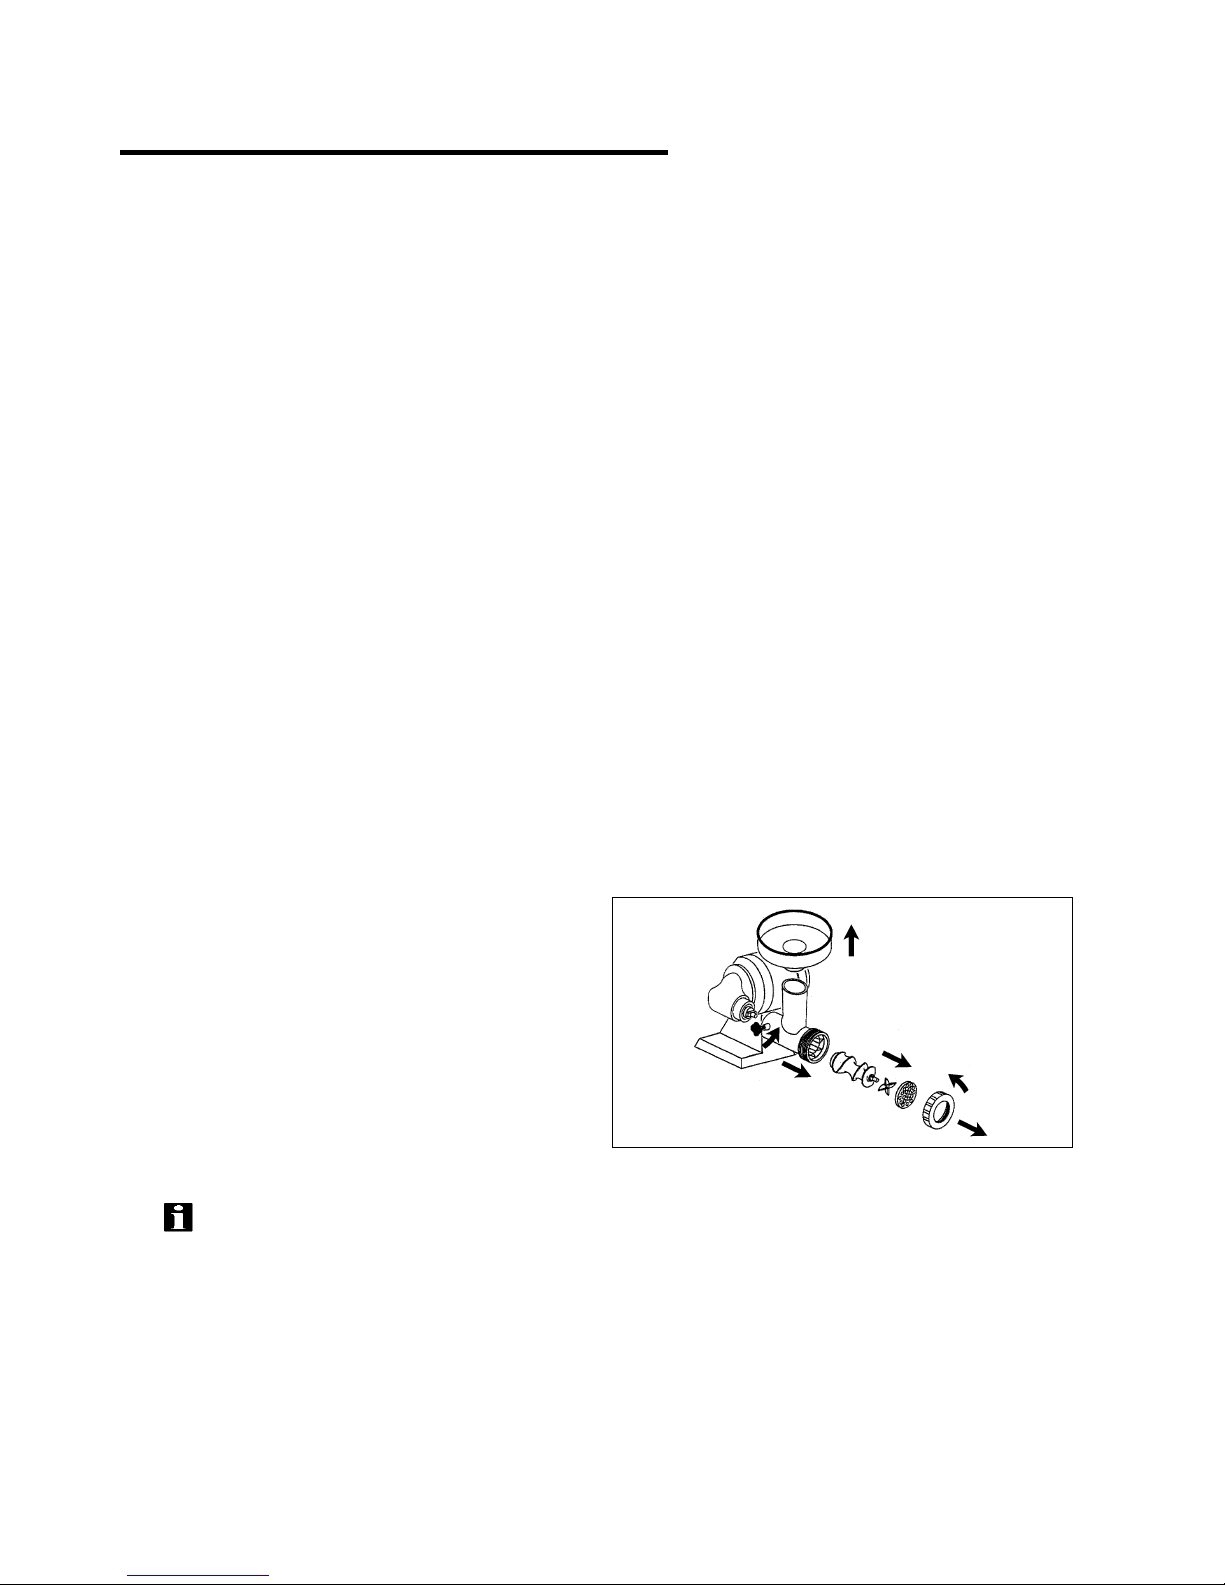
Smontaggio gruppo macinazione
Mod.AB.8/D – TR.8/D:
• Estrarre la tramoggia dalla bocca superiore.
• Ruotare in senso antiorario il volantino.
• Estarre in successione:
- la piastra forata
- il coltello
- la coclea
• Svitare il pomello bocchettone in senso antiorario
ed estrarre il bocchettone tritacarne.
• Eseguire le operazioni inverse per rimontare il
gruppo macinazione.
INFORMAZIONI: Prima di ogni ciclo di lavoro verificare che le parti amovibili siano serrate
solidalmente alla macchina.

AB.8/DX ● TR.8/DX ● GR.8/DX
MEAT MINCER AND GRATER
CONTENTS
1 GENERAL INFORMATION
Machine description...………………….………...
Specifications………………………….………….
Overall dimensions……………………………….
2 INSTALLATION
Packing and unpacking………..…………………
Installation area……….…………………………..
Electric connection…..…………………………...
4
4
4
5
5
5
3 OPERATION AND CLEANING
Using the grater……………………………….…..
Using the mincer…..………………………………
Dismantling the mincing set……………………...
ANNEXES
Electrical wiring diagram
6
6
6
4
GENERAL
INFORMATION
1
Machine description
MOD.AB.8/D MOD.TR.8/D MOD.GR.8/D
Hopper
Grater lever
Handwheel
Control panel
Hopper
Handwheel
Control panel
Grater lever
Control panel
Specifications
Description Unit of measure AB.8/D TR.8/D GR.8/D
Electric power input V Hz Ph 230V 50Hz 1Ph
Power kW (HP) 0.37 (0.5) 0.37 (0.5) 0.37 (0.5)
Mincer output Kg 50 50 /
Grater output Kg 20 / 20
Net weight Kg 11 9.5 8.5
Packaged weight Kg 12 10.5 9.5
Installation On the table
Overall dimensions
mm.
ABC
mm.
ABC
AB.8/D
TR.8/D
GR.8/D
450
300
300
350
350
350
400
400
400
AB.8/D
450 330 360
mm.
ABC
mm.
ABC
TR.8/D
300 330 360
GR.8/D
270 230 310
5
INSTALLATION
2
Packing and unpacking
The machine will come packaged in a carton with foamed
polyester inserts to guarantee perfect safety during transport.
• Handle the carton in compliance with the instructions.
• Open the carton and make sure that all components are
intact. Keep the carton for any future machine removal.
• Lift the machine according to the instructions and place it
in its selected setting for installation.
Installation area
The selected machine work setting must be sufficiently lit and have an electric power outlet. The worktop must be
sufficiently large, perfectly level and dry. The machine should be installed in non-explosive environments. In any
case, installation should be carried out by taking into account any applicable industrial safety regulations in force.
Electric connection
DANGER – CAUTION: Electric connection to the power
mains should be executed by skilled engineers.
Single-phase connection
230V – 1Ph
Check for the perfect effeciency of the plant grounding system. Make sure
that the line voltage (V) and frequency (Hz) correspond to the machine
ratings (refer to the machine identification plate and wiring diagram). The
machine comes equipped with an electric cable to which a multipolar plug
should be connected. Plug the machine into a main wall switch with
differential.
6
OPERATION AND
CLEANING
3
Using the grater
• In combined mincer-grater models, remove the mincer set before using the grater.
• Lift the grater lever and place the product to be processed inside the grater mouth.
• Lower the grater lever and press the switch on position “I”.
• Gradually press the lever until the product is finished.
• In order to stop the machine, press the switch on position “0”.
• At the end of processing lift the lever and introduce more product into the grater mouth; lower the lever
once more and press the switch on position “I”.
• At the end of the work session press the switch on position “0”.
• At the end of the work cycle, grate a piece of hard bread or use the appropriate brush to clean the roller.
Using the mincer
• In combined grater-mincer versions, lower the grater lever.
• Tighten the filler knob.
• Tighten the handwheel on the output mouth of the mincer without blocking.
• Start-up the machine by pressing the switch on position “I”.
• Place the product inside the upper mincer mouth and press it down using the pestle supplied.
• At the end of the work session press the switch on position “0”.
• At the end of the work cycle remove the mincer set and wash using suitable detergents in hot water or in
the dishwasher.
Dismantling the mincer set
Mod.AB.8/D – TR.8/D:
• Remove the hopper from the upper mouth.
• Rotate the handwheel anti-clockwise.
• Extract:
- the mincing plate;
- the blade;
- and the volute, in sequence
• Unscrew the filler knob by turning anti-clockwise
and extract the mincer filler.
• Perform operations in reverse order to
reassemble the mincer group.
INFORMATION: Prior to each work cycle ensure that the removable parts are properly fixed
to the machine.

AB.8/DX ● TR.8/DX ● GR.8/DX
HACHE-VIANDE ET RAPE
INDEX
1 INFORMATIONS GENERALES
Description des machines...………………….….
Caractéristiques techniques……………………..
Dimensions d’ encombrement…………………..
2 INFORMATIONS SUR L’ INSTALLATION
Emballage et déballage………………………….
Zone d’ installation………………………………..
Branchement électrique………………………….
4
4
4
5
5
5
3 INFORMATIONS SUR L’UTILISATION ET
LE NETTOYAGE
Utilisation de la râpe……………………………....
Utilisation du hache-viande………………………
Démontage groupe hachoir………………………
ANNEXES
Schéma électrique
6
6
6
 Loading...