

Page 1
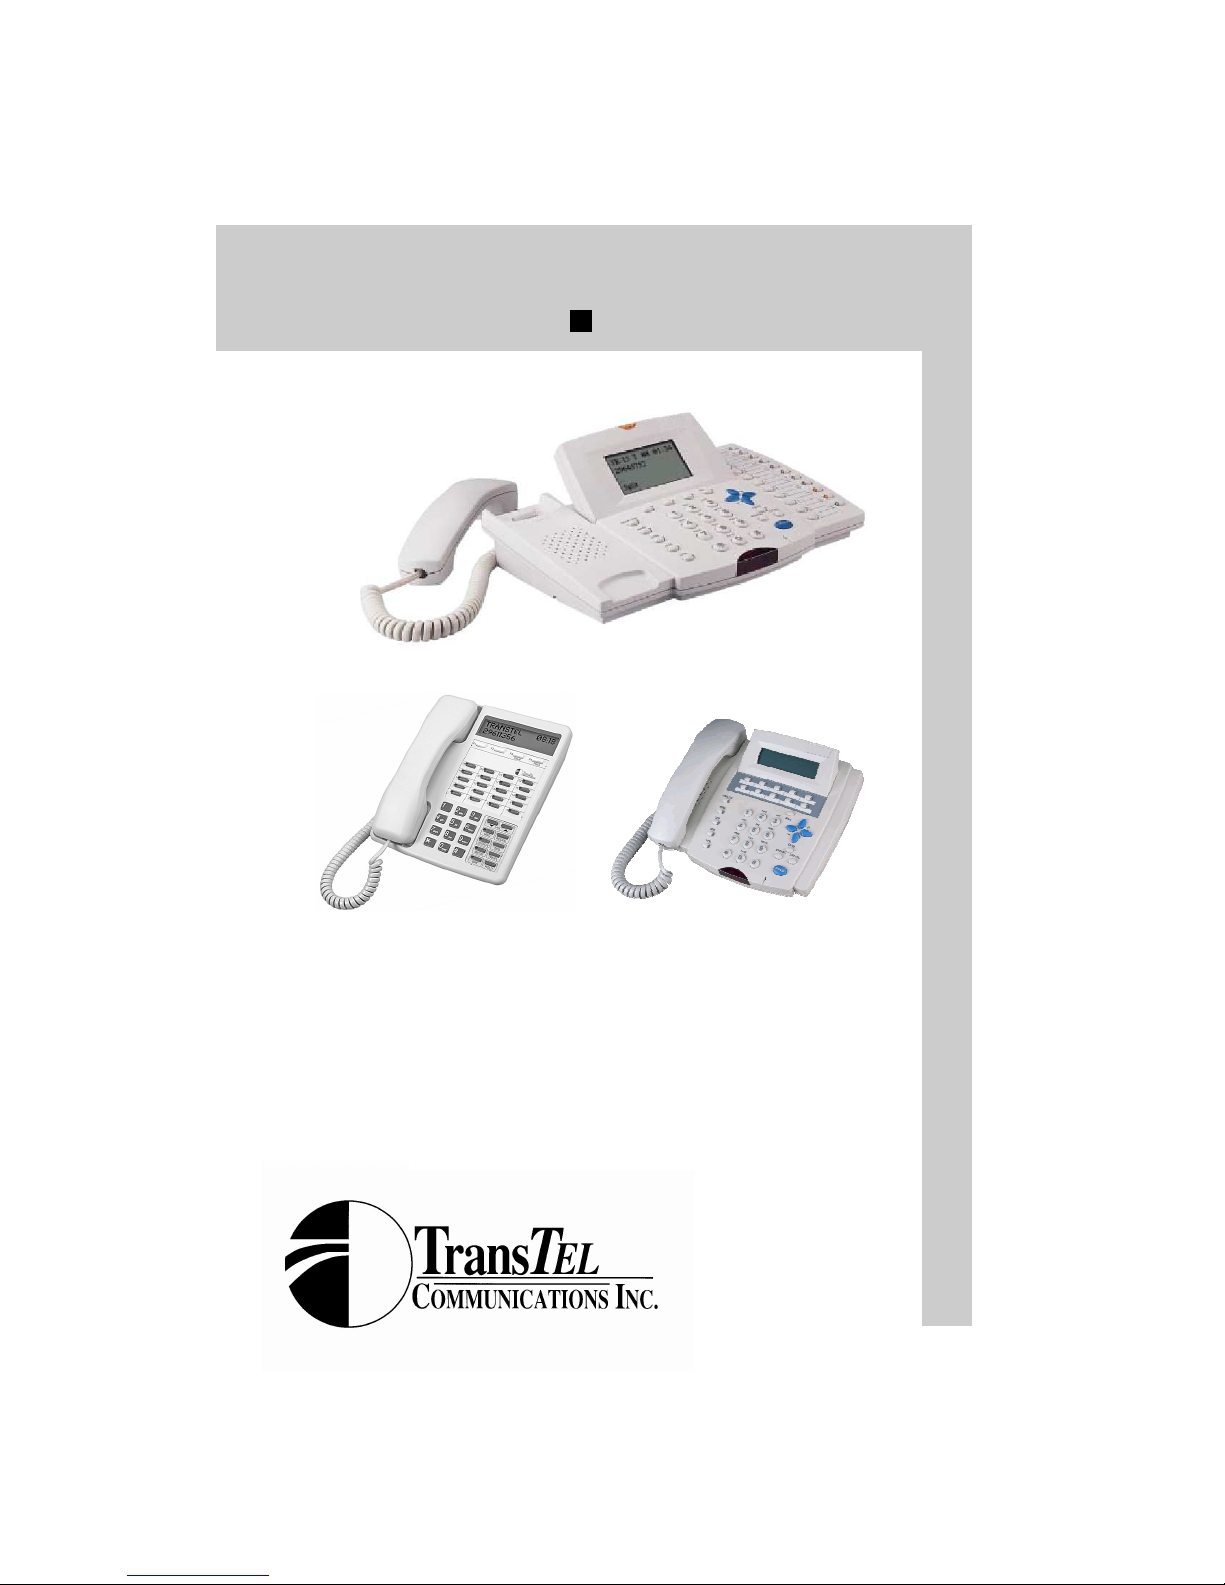
Digital Series
TD-824i TD-1648i
Station User Guide
Digital Telephone Sets
DK1 / DK2 / DK3
Page 2

NOTIFICATION
Notification is hereby given that TransTel Communications
Inc.reserves the right to modify, change update or revise this document from time to time as required without the prior obligation to
notify and person, company or organization. Further, TransTel
makes no warranty or representation, either expressed or implied,
with respect to merchantability, or fitness of it’s products for a particular purpose. TransTel disclaims any and all liabilities from errors, omissions or erroneous interpretations made from the contents of this document.
© 2001-2006 TransTel Communications Incorporated
This document or any parts thereof are not to be reproduced or
transmitted in any form or by any means, electronic or mechanical,
including photocopying, recording, or information storage and retrieval systems for any purpose whatsoever without the express
written consent and permission of TransTel Communications Inc.
Page 3

IMPORTANT SAFETY INSTRUCTIONS
When using your telephone equipment, basic safety precautions
should always be followed to reduce the risk of fire, electric shock and
injury to persons, including the following:
1. Read and understand all instructions.
2. Follow all warnings and instructions marked on the product.
3. Unplug this product from the wall outlet before cleaning. Do not
use liquid cleaners or aerosol cleaners. Use a damp cloth for
cleaning.
4. Do not use this product near water, for example, near a bath tub,
wash bowl, kitchen sink or laundry tub, in a wet basement, or near
a swimming pool.
5. Do not place this product on an unstable cart, stand, or table. The
product may fall, causing serious damage to the product.
6. Slots and openings in the cabinet and the back or bottom are
provided for ventilation, to protect it from overheating, these
openings must not be blocked or covered. The openings should
never be blocked by placing the product on the bed, sofa, rug or
other similar surfaces. This product should never be placed near
or over a radiator or heat register. This product should not be
placed in a built-in installation unless proper ventilation is
provided.
7. This product should be operated only from the type of power
source indicated on the marking label. If you are not sure of the
type of power supply to your home or office, consult your dealer or
local power company.
8. The product is equipped with a three wire grounding type plug, a
plug will only fit into a grounding type power outlet. Contact your
Page 4

electrician to replace your obsolete outlet. Do not defeat the
safety purpose of the grounding type plug.
9. Do not allow anything to rest on the power cord. Do not locate
this product where the cord will be abused by persons walking on
it.
10. Do not overload wall outlets and extension cores as this can result
in the risk of fire or electric shock.
11. Never push objects of any kind into this product as they may
touch dangerous voltage points or short out parts that could result
in a risk of fire or electric shock. Never spill liquid of any kind on
the product.
12. To reduce the risk of electric shock, do not disassemble this
product, but take it to a qualified service technician when service
or repair work is required. Opening or removing covers may
expose you to dangerous voltages or other risks. Incorrect
reassembly can cause electric shock when the appliance is
subsequently used.
13. Unplug this product from the wall outlet and refer servicing to
qualified service personnel under the following conditions:
A. When the power supply cord or plug is damaged or frayed.
B. If liquid has been spilled into the product.
C. If the product has been exposed to rain or water.
D. If the product does not operate normally by following the
operating instructions. Adjust only those controls that are covered
by the operating instructions because improper adjustment of
other controls may result in damage and will often require
extensive work by a qualified technician to restore the product to
normal operation.
E. If the product has been dropped or the cabinet has been
damaged.
F. If the product exhibits a distinct change in performance.
14. Avoid using a telephone (other than a cordless type) during an
electrical storm. There may be a remote risk of electric shock
from lightning.
15. Do not use the telephone to report a gas leak in the vicinity of the
leak.
SAVE THESE INSTRUCTIONS
Page 5
TransTel TD-824i / TD-1648i Digital Telephone Set
User Guide
Table Of Contents
Introduction...............................................................................7
DK-1 Telephone Layout.............................................................8
DK-2 Telephone Layout.............................................................9
DK-3 Telephone Layout.............................................................9
Setting Up Your Telephone .....................................................10
1A2 Emulation/Privacy ............................................................11
Account Codes - Client............................................................12
Advisory Messages.................................................................13
Answering Calls ......................................................................14
Automatic Callback..................................................................16
Automatic Line Access............................................................16
Automatic Last Number Redial................................................17
Automatic Redial.....................................................................17
Background Music...................................................................18
Barge In (Override)..................................................................18
Caller ID Features...................................................................19
Call Pickup..............................................................................20
Call Split/Swap........................................................................21
Call Transfer............................................................................22
CO Line Callback....................................................................23
Calling the Doorphone.............................................................23
Call Forwarding.......................................................................24
Camp On.................................................................................25
Check In - Check Out..............................................................26
Page 6

Table Of Contents (Continued)
Conference.............................................................................27
Conversation Monitor ..............................................................28
Date and Time Setting.............................................................29
Day - Night Service Switching..................................................30
Dial By Name..........................................................................32
Do Not Disturb.........................................................................33
Environment Monitor ...............................................................33
Flash.......................................................................................34
Forced Account Code..............................................................35
Handsfree Operation...............................................................36
Hold........................................................................................37
Intercom Dialing......................................................................38
Immediate CO Line Access.....................................................39
Individual Line Access.............................................................39
Last Number Redial.................................................................40
Macro Keys.............................................................................41
Message Waiting.....................................................................42
Mute........................................................................................43
Paging.....................................................................................43
Paging (Answer)......................................................................44
Privacy/Privacy Release..........................................................44
Pulse To Tone Conversion......................................................44
Saved Number Redial .............................................................45
Saved Number Redial (Supersave)..........................................46
Station Lock - Unlock...............................................................47
Station Reminder.....................................................................48
Station Reminder (Console Set)..............................................49
System Reminder....................................................................49
System Speed Dialing.............................................................51
Personal Speed Dialing...........................................................53
Room Monitor..........................................................................55
Voice Mail Access...................................................................56
Voice Mail Live Call Recording................................................56
Voice Mail Message Retrieval..................................................57
Voice Mail Transfer Key...........................................................57
Volume Control.......................................................................58
Wake Up Call..........................................................................59
System Speed Dial Entries......................................................60
Personal Speed Dial Entries....................................................62
6
Issue 1.2 April 2006
Page 7

Introduction
Congratulations on your purchase and welcome to the TransTel
Digital Series Key Telephone Set. The TransTel Digital Telephone
Sets were specifically designed with you in mind to help make you
more productive in communicating with customers, vendors, and
fellow business associates. We at TransTel believe that you should
not require extensive training to effectively use your telephone set,
and as such, have taken great care in developing one of the most
"user friendly" telephones available in the market today. Please
take a moment to review this guide. Just as each person's job
function differs, so do their telephone requirements. Pay particular
attention to those features which will be most helpful for you. Since
each telephone can be customized for your specific needs, your
TransTel Authorized Dealer will be happy to make sure your
telephone set is configured to your requirements.
Accessories
For your reference and convenience the following accessories and
replacement parts are available from your Authorized TransTel
Dealer.
Item Part
Description
Number
TD-HND/I
TD-HND/G
TD-HNDC/I
TD-HNDC/G
TD-Label Kit/DS 30001090 Label Kit for Display and Speakerphone
TD-Label Kit/B 30001091 Label Kit for Basic model. DK1-B
30001083
30001084
30001085
30001086
Standard Handset for all Digital model
sets. Specify Ivory or Charcoal.
Handset Cord (10 Ft.) Ivory
Handset Cord (10 Ft.) Charcoal
models. DK1-D and DK1-S
7
Page 8

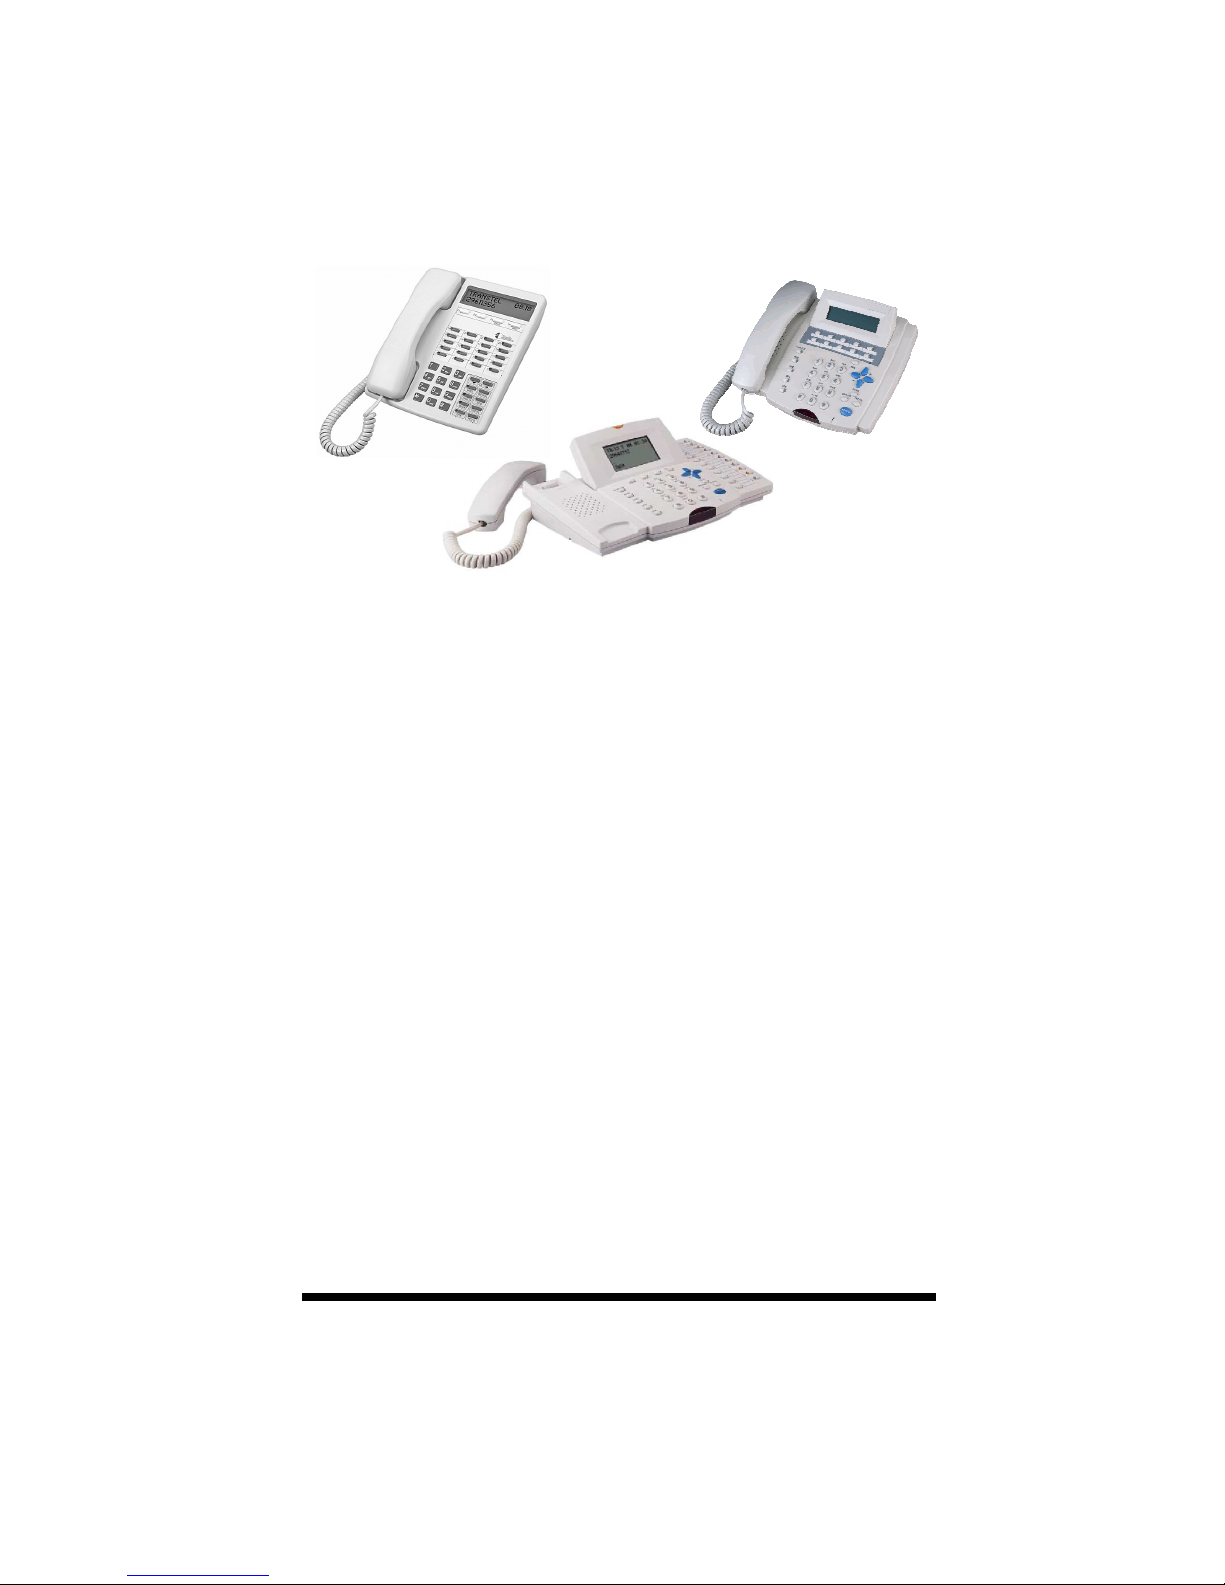
Telephone Layout
LCD Display
Speaker
Handset
Programmable Feature Keys
Microphone
Fixed Feature Keys Dialpad
The figure above indicates the default key placement for TransTel
Digital Telephone sets. While this figure illustrates a telephone set
equipped with LCD display, it is also representative of TransTel
Digital Telephone Sets that are not equipped with LCD display. The
similarity in key layout for the two telephones are designed to allow
you to more easily use a set that is different from your own.
Key Assignments for the DSS, Speed Dial, Feature Access and CO
Line keys will be determined by your installation requirements. This
user guide is designed to give you detailed instructions for all station
features that are available to you.
The operation of all listed functions within this user guide are the
same on DK-1, DK-2 and DK-3 telephone sets.
8
Issue 1.2 April 2006
Page 9

LCD Display
S
peaker
Ringing LED
Fixed Feature
Keys
DK2 Layout
Programmable
Feature Keys
Microphone
Dialpad
DK3 Layout
9
Page 10

Setting Up Your Telephone Set
Description: Take a moment to familiarize yourself with the
telephone set features and various keys. Start by
programming the telephone to your desired settings.
The volume of the Ringer, Speaker, and Handset as
well as other features may be programmed for each
digital station. The volume settings may also be
changed for individual calls without affecting the
programmed levels.
Adjustments:
1. Ring Volume 5. Ring Frequency
2. Speaker Volume 6. Microphone Level
3. Handset Volume 7. Camp On Tone Volume Level
4. Increase Ring Level Gradually
Permanent Programming:
1. While your station is idle, press [PRG], [6].
2. If your station is equipped with LCD,
the display will show: Set: 1:Ring 2:Spk
3:Handset More:#
3. Select the item that you want to program, (1, 2, or 3) or press the
# key for more options. (See adjustments above)
4. Press [VOL↑↑↑↑] to increase the volume or [VOL↓↓↓↓] to decrease.
5. Press [SAVE] to save the programming and exit to idle status.
Note: Each setting has eight discrete levels. LCD sets will show the
level number in the lower right corner of the LCD display. You
will also hear an audible indication to allow you to select the
most desireble level. It is suggested to leave the microphone
level at default.
Temporary Volume Adjustment:
1. While you are using your handset, your speaker, or your
telephone is ringing, you may:
2. Press [VOL↑↑↑↑] to increase the volume or press [VOL↓↓↓↓] on the
device (handset, speaker, ringer) that is operational.
3. If you are using your handset or speaker, the levels will revert to
permanent programming as soon as you hang up or turn off the
speaker. Ringing volume will revert to permanent programming
on the next call.
10
Issue 1.2 April 2006
Page 11

1A2 Emulation / Privacy Release
Description: This feature allows station users to join a conversation
in progress with outside lines and other station users.
A station user must have a class of service option
enabled in order to join a call in progress. You may
temporarily invoke privacy to reject others attempts to
join your conversation, if desired, through the use of a
privacy release key. This feature may be activated on
all lines, or only specific lines as required.
To join in on a conversation:
1. Dial desired party and hear busy tone
2. Press desired [CO] line key. Your telephone set will be
connected to the call in progress on that line.
To invoke privacy:
1. If you are on a conversation and you would like the conversation
to remain private, press the privacy key. The privacy key will
light indicating the call’s status as private.
Note: In system programming individual lines may or may not be
permitted 1A2 Emulation. Also, individual stations may be
allowed the ability to invoke the feature by pressing the line
and entering into the conversation. Certain station users may
elect to invoke call privacy by pressing the privacy key.
11
Page 12

Account Codes - Client
Description: During a conversation you may enter an account code
for billing purposes. The system will output a call
record to an external device for tracking purposes of
billable time spent with a specific client.
During a conversation
1. Press [SAVE] followed by [MSG]
2. Enter Account Code (up to 8 digits)
3. Press [SPK] to end.
12
Issue 1.2 April 2006
Page 13

Advisory Messages
Description: Digital Telephones (DK1-D) equipped with LCD
displays have the capability to leave Advisory
Messages that can be read by other stations.
These are most often placed on stations during
temporary absences from telephone locations.
Some messages may be appended with a time or
date indicator to show your expected return time or
date.
Setting up a message:
1. Press [PRG],[MSG] . LCD will display:
Message Select
0 to 9 or Cancel
2. Enter the number of the message that you want to display (See
list below).
Note: You may scroll forward through the messages by pressing
[VOL↑↑↑↑] or scroll backwards through the messages by
pressing [VOL↓↓↓↓].
3. If appropriate, enter the time or date that you expect to return.
Press * to enter a colon (:) or # to enter a backslash.
4. Press [SAVE]. Your telephone will provide confirmation tone.
5. To return your telephone to the idle state, press [SPK].
6. Your LCD will display your selected message. Any station that
calls your station will have the message echoed to its display.
Turn off a message:
1. Press [PRG], [MSG]. LCD will display:
Message Select
0 to 9 or Cancel
2. Press [SPK]. The message will clear from your display.
Messages:
0. On Vacation 5. Leave Voice Mail
1. Will Be Back 6. Call STN
2. At Lunch 7. Gone For The Day
3. In a Meeting 8. Out Of Town
4. Call 9. (Blank display)
13
Page 14

Answering Calls
Description: There are several ways that you may answer calls
at Your telephone. Depending on the particular type
of call and the system programming, calls may
require different actions in order to answer them.
Intercom Calls
Voice Announce Call:
If the system is programmed for Voice Announce calls, you will hear
a quick tone. The calling party will then be routed to your speaker.
To answer the call and have the ability to talk back to the caller,
press [MIC] (if your telephone is equipped with a speakerphone) or
lift the handset .
Note: If your telephone is programmed for Auto Answer, your
microphone will activate automatically upon a voice
announce call. It is not necessary to press any buttons to
answer a call if your station is in the Auto Answer mode.
Tone Signal Call:
If the system is programmed for Tone Signaling on Intercom calling,
or if you are called by a Voice Mail Port, you will hear a double ring
that repeats until you answer the call. You may answer the call by
pressing [SPK] if your telephone is speakerphone equipped or
answer by lifting the handset.
External Calls Ringing Your Telephone Set
For outside line calls that ring at your telephone, lift the handset or
press [SPK]. You will be connected to the call.
External Calls Not Ringing At Your Set
Calls With CO Line Appearance:
Incoming calls on a line that appears on your set may be picked up
by pressing the flashing CO line key. You will be connected to the
call.
Note: This feature depends on system programming. On some
systems this option may be disabled. If that is the case, this
procedure will not work.
14
Issue 1.2 April 2006
Page 15

Answering Calls (Continued)
Calls That Do Not Appear on Your Telephone Set:
If an incoming call is not ringing on your telephone set and it does
not appear on a line button on your telephone set, you may answer
the call by one of several methods, depending on the way the call is
presented.
Please see Call Pickup for further explanation if necessary.
Line is ringing at a station within your pickup group:
Press the Group Pick Up key on your telephone set or
1. Press [*].
2. The LCD on your telephone (if equipped) will display:
Pick Up _
3. Press [0]. You will be connected to the call.
Line is ringing at a station in a pickup group other than your
own:
Press the Group Pick Up key on your telephone set or
1. Press [*].
2. The LCD on your telephone (if equipped) will display:
Pick Up _
3. Press [8].
4. Dial the group where the call is ringing (1-8). You will be
connected to the call.
OR
Press [*] followed by [9] to pick up any ringing telephone assigned
to any ringing group.
15
Page 16

Automatic Callback
Description: When dialing another station that is busy, you may
activate an automatic callback. When the busy
station becomes free, your telephone set will ring.
When you answer the callback, the other station’s
telephone will ring and you will be connected.
To initiate a Callback:
1. Dial desired party and hear busy tone
2. Press [MSG]. Your telephone set will return to an idle condition.
To respond to a Callback:
1. If you are on a conversation and a callback has been left on
your telephone and you have an LCD display it will indicate in
the lower portion of the LCD: MSG ST:XX Also, your
Message key will flash. This tells you who is leaving the callback
message.
2. You may place your existing call on hold and hang up or simply
hang up. The originator of the callback will be called and upon
answer, your telephone will ring. Answer and you will be
connected.
Automatic Line Access
Description: Automatic Line Access allows a station to gain
access to a telephone line without pressing a
specific CO line button. It is also known as Dial 9
access.
1. Dial [9].
2. Outside CO line dial tone will be returned from the first available
CO line in your Dial 9 group. If no outside lines in your group
are available, you will hear a Busy signal.
Note: In some systems, you must dial [0] instead of [9] depending
on the country where you are located. Please check with
your system administrator for the applicable access code.
16
Issue 1.2 April 2006
Page 17

Automatic Last Number Redial
Description: Automatic Last Number Redial allows you to
repeatedly dial the last external number dialed from
your telephone. This feature is most commonly used
when calling a telephone number that is continously
busy.
1. Place an outside CO line call.
2. Hang Up.
3. Press [SPD], [REDIAL].
4. The system will access a CO line and dial the number that was
previously dialed from your telephone.
5. The system will remain off hook for a pre-programmed period. If
you do not lift the handset, the telephone will automatically hang
up.
6. The system will periodically repeat steps 4 and 5 until either the
number of attempts has been satisfied (as per system
programming) or until you lift the handset while an attempt is in
progress.
Automatic Redial
Description: Automatic Redial allows you to save a telephone
number for use at a later time. This feature is in
addition to Last Number Redial.
1. You have dialed an outside call. The number does not answer or
is busy.
2. Press [SAVE].
3. The lower portion of the LCD
(on display telephones) will display: Auto Save
4. You may hang up.
5. You may make other calls if you wish.
6. While your telephone is idle, press [SAVE].
7. The telephone will access an available line, turn on your speaker
and redial the saved number.
8. If you take no action, the system will monitor the call for a
programmable period of time and then disconnect the call and
return your telephone to idle.
9. The telephone set will periodically access a CO line and continue
to redial the saved number. Steps 7 and 8 will continue for a
programmed number of times or until you lift the handset while an
attempt is in progress.
Note: If you place another call while Auto Redial is active, your
telephone will wait until you have finished the call and resume
the Auto Redial mode.
17
Page 18

Background Music
Description: If your system is equipped with background music
or music on hold capabilities, you may choose to
have the music play over your telephone's speaker
when your set is idle. Background music will
automatically be interrupted whenever you initiate a
telephone call or receive a call.
1. While your set is idle, press [#]. The [SPK] button will light.
Background music will be heard through your telephone
speaker.
2. You may discontinue background music by pressing [#] or by
pressing the lit [SPK] key.
Barge In (Override)
Description: Depending on system programming, you may be
able to barge in on another station's conversation.
When you perform a Barge In, the station(s) being
interrupted receive an audible tone to inform them
that an intrusion is about to occur. Barge In may
also be performed on a CO line.
1. You call another station. It is busy.
2. Press [0]. If you are authorized, the station and whoever that
station is in conversation with will hear a tone.
3. When the tone stops, you will be admitted to the conversation.
You will be able to converse with both parties in the
conversation.
4. If equipped with LCD, the telephone(s) involved in the original
conversation will show your identity and indicate that you are
overriding the call.
5. Your telephone, if equipped with LCD, will provide indication that
you have invoked the override, or barge function.
6. When you hang up, the two parties can resume their normal
conversation.
Note: Barge In capability is assigned by class of service level. A
station may Barge In on any conversation where all parties
are at an equal or lesser level than your telephone set. It is
for this reason that you may be able to barge in on some
stations, and not others. Not all stations will have the
capability to Barge In. Class of service Barge In levels are
assigned in system programming.
18
Issue 1.2 April 2006
Page 19

Caller ID Features
Description: The Caller ID feature on the TD-824i system allows
you to identify incoming callers before you answer
the call. This feature is available only to digital
telephone sets equipped with an LCD display.
While your telephone set is ringing with an incoming call:
1. Your LCD will display: TK: XX
TransTel
Note: Caller ID information will appear on your LCD with incoming
calls, held calls, transferred calls, and recalls back to your
station. You will also ger Caller ID information if you are
talking on an outside line and another calls rings in to your
telephone set.
To review Caller ID records:
1. Press the lit Caller ID key on your telephone set.
Press [VOL ↑↑↑↑] or [VOL ↓↓↓↓] to scroll back and forth through the
records.
To view Date and Time:
1. While reviewing a record you may also view the date and time by
pressing the [MIC] key.
Redial Caller ID Number:
1. Press the [REDIAL] key. The system will place the call for you
automatically. The current Caller ID record will be dialed back.
Delete Caller ID Record:
1. While reviewing a Caller ID record, you may delete it by pressing
the [TRF/FL] key.
To exit Caller ID Review Mode:
1. Press the [SPK] key.
19
Page 20

Call Pickup
Description: Call Pickup lets you answer a call that is ringing at
another telephone. Call Pickup can be
accomplished by dialing an access code or by
pressing a programmed pick up key on your
telephone set.
Call Forward Types: Station Group Pickup
Individual Station Pickup
Departmental Pickup
All Pickup
Station Group Pickup
To answer a call that is ringing within a specific station group:
1. Press [Group Call Pickup] key or press [* 8].
2. LCD Display (if equipped) will show:
Pick Up _
3. Enter the group number that you wish to pick up (1-8).
4. You will be connected to the call ringing at a station in the
selected group. If more than one telephone within the group is
ringing, you will be connected to the oldest call in the group. If
there is not a call ringing in the group, you will hear busy tone.
Individual Station Pickup
To answer a specific ringing station:
1. Press [*].
2. LCD Display (if equipped) will show: Pick Up _
3. Enter the station number that you wish to pick up. If the station
is ringing, you will be connected to the caller that is ringing the
station. If the station is idle, you will receive busy tone.
Departmental Pickup
Departmental Pickup allows you to answer a call ringing at another
station within your own station group.
1. Press [Your Group Pickup] key or press [*].
2. LCD Display (if equipped) will show: Pick Up _
3. Press [0]. You will answer the call that was ringing within your
pickup group. If no station was ringing in your group, you will
20
Issue 1.2 April 2006
Page 21

Call Pickup (Continued)
hear a busy tone.
All Pickup
All Pickup allows you to pick up the oldest ringing call in the system,
without regard for the station number or type of call.
2. Press [PICKUP ALL] key or press [*].
3. LCD Display (if equipped) will show: Pick Up _
4. Press [9].
You will answer the oldest call that was ringing anywhere within your
system. If no call was ringing, you will hear a busy tone.
Call Split/Swap
Description: Call Split/Swap allows you to quickly alternate
between two different calls in the system.
Note: If your station does not have a pre-programmed [SPLIT/
SWAP] button you should substitute [SPD], [#] in its place.
1. Establish the first call (either intercom or external CO call).
2. Press [HOLD]. The first call is on Hold.
3. Establish the second call (either intercom or external CO call).
4. Press [SPLIT/SWAP]. The second caller is on Hold. You are
connected to the first caller.
5. You may continue to alternate between the two callers as many
times as you wish. Each time you wish to alternate, press
[SPLIT/SWAP].
21
Page 22

Call Transfer
Description: Call Transfer permits you to route a call directly to
another station.
Types: Unscreened Transfer
Screened Transfer
Camp-On (Call Waiting)
External Transfer (See Unsupervised Conference in this
document)
Unscreened Transfer
1. You are in conversation with another station or CO line.
2. Press [HOLD] or [DSS] of desired party.
3. Dial the station number where you wish to transfer the call.
4. When it rings, press [TRF/FL]. The call is transferred.
Screened Transfer
1. You are in conversation with another station or CO line.
2. Press [HOLD] or [DSS] of desired party.
3. Dial the station number where you wish to transfer the call.
4a. If the system is programmed for tone signaling or you are
transferring to a single line telephone set, wait for the station to
answer.
4b. If the system is programmed for voice announce signaling you
will hear a tone indicating that you are on the called station's
speaker.
5. Announce the call. Press [TRF/FL]. The call has been
transferred.
Camp-On (Call Waiting)
1. You are in conversation with another station or CO line.
2. Press [HOLD].
3. Dial the station number where you wish to transfer the call.
4. The station number called is busy.
5. Press [TRF/FL]. The call is camped-on to the busy station. If
the busy station is a single line telephone, it will hear a tone in
the handset to indicate that a call is waiting. (This is a function
of system programming and may not occur on all systems). If
the station is an electronic set, it will hear a tone through the
telephone's speaker indicating that there is a call waiting.
22
Issue 1.2 April 2006
Page 23

(Line queuing) CO Line Callback
Description: When you attempt to access an outside CO line and
it is busy, you may choose to be notified when it
becomes available.
1. Dial [9] or press a CO line button. The line is busy.
2. Press [MSG]. Hang up (if you were using the [SPK], your
telephone will become idle as soon as you press the [MSG]
button).
3. When the line or line group that you attempted to access
becomes free, your telephone will ring.
4. When you answer, you will be connected to outside CO line dial
tone.
5. You may dial your call normally.
Note: If you do not answer your telephone in Step 4 above, the
system will automatically cancel the callback feature after
approximately 25 seconds.
Calling the Doorphone
Description: The TD-824i Digital Telephone system is equipped
to support a doorphone. If your system is equipped
with a doorphone, you may place a call to it.
1. Dial [8],[8] to call the doorphone or Press the [DOORPHONE]
key.
2. You will be connected to the doorphone dialed if it is not already
connected to another station. While you are connected to the
doorphone, you may press [0] to activate a door strike release.
If there is not a door strike relay programmed for the system,
this will have no effect on the doorphone. If you have a door
phone key programmed on your telephone, you may activate the
strike release relay by pressing it, instead of [0].
Note: You cannot place a doorphone on Hold, conference a
doorphone, or transfer a call to a doorphone.
23
Page 24

Call Forwarding
Description: Call Forwarding allows you to re-route calls that
normally ring at your telephone set. The TD-824i
system supports four variants of Call forwarding;
Always Forward, Busy Forward, Busy/No Answer
and External Call Forward.
If you are the Console Operator, you may forward other stations in
the system as well as your own.
For Console Operators:
1. Press [PRG], [FWD] .
2. LCD (if equipped) will show: Enter Sta Number
Enter the station number you want to forward
3. Press the number corresponding to the desired type of
forwarding. LCD (if equipped) will show: 1=All
2=Busy 3= BSY/No Answer
4. Enter the station number where you want your calls forwarded.
5. If your station is equipped with a Call Forward button, it will flash
to indicate that call forwarding is in effect on your station.
Note: Stations with Call Forwarding buttons may deactivate Call
forwarding by pressing the button. Once programmed, the button
becomes a toggle, alternately enabling and disabling call forwarding.
It is only necessary to re-program Call Forwarding if you change the
type of forwarding or the forwarding destination.
Deactivating:
1. Repeat steps 1, 2, and 3 listed above for any programming.
2. Enter your own station number or forwarded station number.
3. Call forwarding is deactivated.
For Non Console Operators:
Follow the above procedure. You will not be prompted for the
Station Number.
24
Issue 1.2 April 2006
Page 25

Call Forwarding (Continued)
External Call Forwarding
Note: External Call Forwarding works ONLY with Call Forward
ALL Calls.
1. Set up a personal speed dial number under one of your DSS
keys by Pressing [PRG], [SPD], [8] and selecting one of the
DSS keys 1 through 22 on your telephone set. Enter the outside
number where you want to forward your calls.
Press [SAVE]. Set Ring Frequency is displayed. This is for use
with the caller id feature of the system.
If you want this number when it rings your telephone to have a
unique frequency, enter that frequency now 1 - 8. Otherwise,
Press [SAVE]. Press [SPK]. Your external number has been
saved.
2. To activate. Press [PRG], [FWD], [1], DSS key where you stored
the outside number.
Your Call Forward key will flash indicating the feature and
forwarding is active. You may toggle the feature on and off by
pressing the FWD key.
Camp-On (Call Waiting)
Description: Camp-On provides the ability to transfer a call to a
station that is on another call. It provides audible
notification and will provide visual indication of the
camping caller on sets equipped with LCD display .
Camping a Call To a Busy Station:
1. You are in a conversation with a party on an outside line.
2. Press [HOLD] or the DSS of the station you want to transfer to,
or
Dial the station where you wish to transfer the call. It returns
busy tone.
4. Press [TRF/FL]. The outside call is camped-on to the busy
station.
Note: If the camped station does not answer the call within a pre-
programmed time (under system software control) the
camped on caller will re-ring your telephone set.
25
Page 26

Camp-On (Call Waiting)
(Continued)
Answer a Call That Is Camped-On To Your Station:
1. You will hear a double ring on the telephone speaker indicating
a camped caller. If your set is LCD equipped, the display will
show the source of the party that is camped on, (i.e., LN 1,
Local, etc.).
2. To answer the camp on you may:
3a. Finish the call that you are on and hang up. The camped-on call
will ring your telephone set. You may answer normally.
OR
3b. You may place your existing call on HOLD and Hang Up. The
camped on call will ring your telephone set. You may answer
normally.
Note: The volume level of the camp on tone may be adjusted to
your desired setting.
(Operator Function) Check In - Check Out
Description: Check In - Check Out allow an operator station to
change the dialing restriction of a telephone. This is
commonly used in Hotel applications where there is
a need to “turn off” dialing capabilies of individual
room telephones. This function is only available to
system operators.
Note: The use of Check In - Check Out requires that function keys
are programmed on the telephone set.
Check In:
1. Press [Hotel] and the digit 1.
2. Dial the extension number to be unrestricted.
3. Press [SAVE].
4. Press [SPK] to return the set to idle.
Check Out:
1. Press [Hotel] and the digit 2.
2. Dial the extension number to be restricted.
3. Press [SAVE].
4. Press [SPK] to return the set to idle.
26
Issue 1.2 April 2006
Page 27

Conference
Description: Conference allows you to create a conversation
between yourself and two or more parties. Up to 3
conferences of 5 members or a single conference
with up to 15 parties are permitted.
Types: Station Controlled Conference
Unsupervised Line Conference
Station Controlled Conference
To establish a conference:
1. Establish first telephone call (either CO or intercom call).
2. Press [HOLD]. The first caller is on system hold.
3. Establish second call (either CO or intercom call).
4. Press [DND/CN].
5. The first and second caller are now in conference with you.
6. Steps 2 through 5 may repeated to a maximum of fifteen other
parties in the conference.
Unsupervised Line Conference
1. You have established a conference via the station controlled
conference above.
2. The conference consists of two or more outside CO lines and no
other internal stations.
3. Press [DND/CN] and hang up the telephone.
4. Your station is returned to idle and the outside lines are
connected together. The outside line LED’s will be lit steady,
indicating they are still in conference.
Note: Remaining members are granted up to 4 additional minutes
of time to converse in an unsupervised conference. A
warning tone is provided 10 seconds prior to the expiration
of the conference period. Any conference member may
press a digit on their telephone 0 - 9 to extend the time
period up to an additional 4 minutes.
Rejoining an unsupervised conference:
1. Press a CO line button that is involved in the conference. You
will hear busy tone.
2. Press [DND/CN]. You will be readmitted to the conference.
27
Page 28

Conference (Continued)
To exit and terminate a conference:
1. During the conference, simply hang up the telephone set. All
parties will be terminated.
To remove a party from a conference call:
1. During the conference, press the CO line of the party you
would like to remove.
2. You will be connected to this line and removed from the
conference. Other parties will continue in the conference.
3. Disconnect the desired party by hanging up.
4. To return to the original conference, simply press one the CO
line keys followed by [DND/CN].
To confer with members privately in a conference call:
For a 3 party conference (i.e yourself and 2 CO lines):
1. During the conference, press the CO line you wish to confer
with. The other party goes on hold.
2. To alternate to the other party, press hold followed by the
apropriate CO line key.
3. To re-establish the conference, simply press the [DND/CN]
key.
For conferences with 4 parties or more (including yourself):
1. During the conference, press the CO line you wish to confer
with. The other parties will continue in conference.
2. You may alternate freely and privately between conference
members by pressing their associated CO line or station key.
3. To rejoin the conference, simply press the [DND/CN] key.
NOTE: 1. A CFC conference card is needed for this feature in
the TD-824i.
2. In order to provide the capability to extend time on the
unsupervised conference, the TD-824i must be
equipped with either Single Line Station Card (SLC-8)
or a Voice Service Care (VSC)
The unsupervised conference period is programmable
from 1 minute to 4 minutes in one minute increments.
28
Issue 1.2 April 2006
Page 29

Conversation Monitor
Description: Depending on system programming, you may have
the ability to monitor another station's conversation.
The station(s) being monitored will receive no
notification of the monitor.
1. You call another station. It is busy.
2. Press [#]. If you are authorized, you will be allowed in to the
conversation. The microphone on your telephone handset or
Speakerphone is muted. You will be able to listen to the
conversation, without a talk path into the conversation. No
notification is given to the station you are monitoring.
3. Your telephone, if equipped with LCD, will show both parties that
are involved in the conversation that you are monitoring.
4. At any time you may exit the monitor function by replacing the
handset or pressing the [SPK] button.
Note: Monitor capability is assigned by Class of Service Level in
system programming. You may monitor any station with a
lower number than your telephone set. It is for this reason
that you may be able to monitor some stations, and not
others. Not all stations may have the ability to monitor.
Date and Time Setting (Operator Function)
Description: While the system clock is highly accurate, it may be
desirable at certain times to set the date and time
on the system. Any station that is defined as a
system console (operator) may set the time as per
the directions below.
1. Press [PRG], [HOLD],[7] [SAVE].
2. LCD will display: 11-01 Date/Time
mm dd yy hh mm D
Where mm-dd-yy is month (01-12) - day (01-31) - year (00-99) and
hh:mm is hour (00-24) : minute (00-59) and D is Day of Week
Day of Week: 1=Monday, 2=Tuesday, 3=Wednesday,
4=Thursday, 5=Friday, 6=Saturday, 7=Sunday
3. Enter the information for all fields and press [SAVE] .
4. Your LCD will update with the next use of your phone.
Note: If you are not defined as a system console, the above
procedures will allow you to set a Wake Up or Station
Reminder for your own station.
29
Page 30

Day - Night Service Switching
Description: The TD-824i System offers both day service and night
service operation. The primary purpose of Day and
Night Service is to define where incoming calls are
routed during normal business hours and where to
route them when the office is closed. During the day
mode you may want calls answered by a live person.
You may opt for Voice Mail at night. The TD-824i
System offers two methods for placing your system in
the night mode.
Manual Operation- In the manual mode of operation a Night key is
programmed on your telephone set. To turn Night Service on and
off, simply press the key. If your company has flexible hours of
operation, this method may be appropriate for you.
Automatic Operation- If your business operating hours are well
defined, you may elect for the system to automatically place itself in
the night and day mode at the times you define. A programmable
schedule provides for times to be determined for each day of the
week. Automatic Operation requires system program number 20 to
be set up which defines the day and night periods.
Manually Switching Between Day and Night Service
:
1. Press [NIGHT]. The system will toggle between Day Service
and Night Service with each press of the button. The Night LED
will flash and NIGHT will be displayed in the upper right corner
of LCD Telephones.
System Console Operators may select whether the TD-824i system
provides automatic Day-Night Service Switching or manual
switching.
Selecting Manual or Automatic Switching:
1. Press [PRG], [NIGHT] or [PRG], [TRF/FL]. LCD display will
depend on the mode that is currently in operation on the system.
Display will be one of the following:
Day Status If the system is presently in Day Service
with Day/Night Switching set to manual.
30
Issue 1.2 April 2006
Page 31

Day - Night Service Switching (Continued)
DAY TIME hhmm If the system is in Automatic Day/Night
hh:mm To hh:mm Switching Mode.
Night Status If the system is in Night Service with
manual switching.
Night Transfer If you are in the process of changing the
Auto switching type.
or
Night Transfer
Manual
2. Press [*] to toggle between the switching modes, either
Automatic or Manual.
Note: This setting does not switch the system between Night And
Day service unless you change from manual to automatic
switching and the time period dictates that the mode is
opposite of what is presently operational. In other words, if
you are in Day Service mode with manual switching and you
change to Automatic Switching, if the system is programmed
for Night Service to be active at that time, the system will
switch into Night Service. Only Telephone Sets programmed
as the Console Operator can switch between automatic and
manual modes of operation.
Also note that when a change occurs between Night Service
and Day service, the LCD will not update and discontinue
the NIGHT indication until the station has been cycled off
hook and on hook.
31
Page 32

Dial By Name
Description: Dial by name allows you to use your TransTel
DK1-D LCD equipped telephone set to dial intercom
calls, personal speed dial calls, and system speed
dial calls by name rather than by number.
Note: In order to utilize Dial By Name, your telephone must be
equipped with LCD and a programmed Directory button.
1. Press [DIR].
2. The LCD will display: 1= Intercom
2= Speed Dial
3. Select the directory that you want to utilize by pressing either
[1], or [2].
Note: Depending on how your system is programmed, steps 2 and
3 may not appear.
4. The LCD will display: ENTER LETTER
5. Using the numbers on the keypad, enter the first letter of the
name that you want to dial.
Key 1 = Q Z (Blank Space) 1
Key 3 = D E F 3
Key 5 = J K L 5
Key 7 = P R S 7
Key 9 = W X Y 9
Key * = - / ! *
Key 2 = A B C 2
Key 4 = G H I 4
Key 6 = M N O 6
Key 8 = T U V 8
Key 0 = . : & 0
Key # = ( ) $ #
6. When the letter that you want is displayed in the lower left
corner of the LCD, press [VOL↑↑↑↑]. The lower portion of the
display will show the first matching name. If that is not the name
you want, you may press [VOL↓↓↓↓] again to scroll through the
names. When the end of the list is found, the system will "wrap
around" and present the first name on the list again.
7. When you see the name that you want, lift the handset or press
[SPK]. The call will be automatically dialed.
Note: System program 05-05-05 must be enabled beforehand in
order for Dial By Name to operate.
32
Issue 1.2 April 2006
Page 33

Do Not Disturb
Description: When invoked, Do Not Disturb prevents other
people from calling your station. Outside calls will
not cause your telephone to ring. Anyone that is
using a TransTel telephone set with LCD will see on
their display that your telephone is in Do Not Disturb.
Activate Do Not Disturb
:
1. Press [DND/CN]
2. Your telephone set will display: DND
3. Any other telephone that attempts to call you will receive Do Not
Disturb (Fast Busy) tone. Other telephones equipped with LCD
will receive a display indicating that you are in Do Not Disturb
Mode.
De-activate Do Not Disturb
:
1. Press [DND/CN]
2. Your LCD display will return to a normal idle display. Do Not
Disturb is now de-activated on your station.
Environment Monitor
Description: Environment Monitor allows you to "listen in" on
another station. If allowed, you may activate the
monitor on any station equipped with a
speakerphone while that station is idle. While you
are monitoring, the station being monitored receives
no indication that it is being monitored.
1. Dial [7], [7], [4], and the station number that you want to
monitor.
2. Your LCD if equipped will display: Listen ST:XX
Where XX is the station number.
3. The monitor will remain in place until you terminate it by
disconnecting from it (hang up or turn off speaker) or the station
being monitored goes off hook or presses speaker.
Note: This function is assigned by level in system programming. It
is possible that you may monitor some stations and not
others. Your system may be programmed so that this
feature is unavailable to you. Remember that unlike
conversation monitor, using this feature allows you to
monitor a room, for example a stock room or secured area.
The telephone you are monitoring is not in use. You are
simply using the microphone of the station you are
monitoring.
33
Page 34

Feature Menu
Description: Digital LCD telephones allow you to select, activate
and program most system features even if you do
not have all the keys that are required to program.
This is called the feature menu.
1. Press [PRG],[0] . The LCD will begin scrolling through the
feature menu. Each menu item will be displayed for two
seconds. The system will then scroll to the next menu item.
2. You may press [*] to step the display backwards or press [#] to
move the display forward. At any time you may press [0] to
access the feature that is displayed on the LCD.
3. Feature programming or activation continues according to the
individual descriptions in this features guide.
Note: The feature menu also lists the keystrokes required in order
to invoke or program a function within the Superkey system.
Flash
Description: Flash provides a timed temporary disconnection
while on a CO line. Depending on your particular
installation, the Flash will be programmed for either
Centrex/PABX operation or CO disconnect
operation. Only one will apply to your system.
Types: Centrex/PABX Flash.
CO disconnect operation.
Centrex/PABX Flash
1. Flash only operates while you are connected to an outside line.
2. While on an outside call press [TRF/FL].
3. You will hear Centrex or PABX "Special" or "Transfer" dial tone.
4. You may now transfer the call as per the directions for your
Centrex or PABX system.
CO Disconnect Operation
1. Flash only operates while you are connected to an outside line.
2. While on an outside call press [TRF/FL].
3. You will be disconnected from the previous call.
4. You will then be connected to Central Office dial tone and
allowed to make another telephone call.
34
Issue 1.2 April 2006
Page 35

Forced Account Code
Description: Forced Account Codes provide the means to secure
telephones from toll abuse. A restricted station may
enter a forced account code and make a call free of
toll control.
1. Telephone set should be idle (on hook, speaker off).
2. Press [PRG], [4].
3. Enter your forced account code.
4. If the account code is accepted, the system will selct an outside
line for you and allow you to dial the call.
Note: There are 48 total account codes available in the system.
Account codes are assigned in System Program 17. In
Program 40, stations can be assigned to a specific account
code whereby ONLY entry of this assigned account code will
permit outside dialing unrestricted. Also, stations can be
granted permission to use ANY of the assigned account
codes.
35
Page 36

Handsfree Operation
Description: All TransTel Digital Telephone sets may be used in
the Handsfree mode for On Hook Dialing and
receiving calls handsfree. Models DK1-D and DK1-S
offer conversation "Hands Free" on both internal and
outside calls. The DK1-B offers handsfree
conversations on intercom calls only.
Placing Intercom Calls:
1. Dial the station number that you wish to reach or press the
station's [DSS] button.
2. Your station will automatically enter the handsfree
speakerphone mode. You will be able to hear call progress
tones through the telephone speaker.
3a. If the party answers, you may lift the handset to begin the
conversation.
3b. You may begin the conversation or lift the handset and begin the
conversation.
Handsfree Dialing (External):
1. Press a [CO] line button or dial [9]. The [SPK] follwed by the
[MIC] button will light and you will be connected to an outside
line.
2. Dial the number that you wish to reach. You will hear all call
progress over the telephone's internal speaker.
3a. If the party answers, you may lift the handset to begin the
conversation.
3b. If you have a speakerphone, you may talk handsfree.
Alternating Between Handset and Handsfree:
1. While in the Handsfree mode, you may lift the handset to
change to the handset mode of operation.
2. While in the handset mode, you may change to the handsfree
mode by pressing [SPK]. This will allow you to hang up the
handset and utilize the built in speaker in the system.
3. These steps may be repeated as many times as you like.
Note: All speed dial functions, including Dial by Name may be
accessed in the Handsfree mode. For more information,
see System Speed Dialing, Personal Speed Dialing, and
Dial by Name in this document.
36
Issue 1.2 April 2006
Page 37

Hold
Description: System Hold allows you to temporarily disconnect
from a telephone call, yet retain the ability to reconnect with the call at a later time. While the caller
is on hold, he may be connected to a music source
so that he is certain he has not been disconnected
from your system.
Exclusive Hold provides a greater degree of
ownership of a held call than system hold and may
be subject to different timing parameters than a call
placed on system hold. Exclusive Hold only applies
to CO lines. Internal calls may not be placed on
Exclusive Hold.
Types: System Hold
Exclusive Hold
System Hold
Placing a call on Hold:
1. You are in conversation with another party (intercom or
external).
2. Press [HOLD]. The other party is on hold. You may use your
telephone normally.
Retrieving a held call with a DSS appearance on your phone:
1. Press the flashing [DSS] or [CO] key that is associated with the
station or CO line that is on hold.
2. You will be connected with the held caller.
Retrieving a station or line not appearing on your phone:
1. Lift Handset or press [SPK].
2. Press the [TRF/FL] key. You will be connected to the station
that you previously held.
Exclusive Hold
Placing a Call on Exclusive Hold:
1. You are in conversation with an external party.
2. Press [HOLD] twice (two times). The other party is on exclusive
hold. You may use your telephone normally. All other stations
with an appearance of the line will continue to see the line as
busy (solid Red light). If your phone has an appearance of the
CO line, the LED will be green and "double wink" while you have
37
Page 38

Hold (Continued)
the call on Exclusive Hold.
Retrieving your own call from Exclusive Hold:
1a. Press the flashing line button. You will be connected to the call.
1b.If you do not have an appearance of the line on exclusive hold,
lift the handset and press the [TRF/FL] key and you will be
connected to the call.
Retrieving another station's Exclusive Hold:
1. Press the [CO] button for the line you wish to retrieve.
2. Press [HOLD]. You will be connected to the call.
Note: You must have an appearance of the CO line that you wish
to retrieve from Exclusive Hold.
Intercom Dialing
Description: Intercom calling allows two stations to speak directly
with each other.
Types: Station Dialing
DSS
Directory Dialing.
Station Dialing:
Dial station number of station desired.
DSS:
Press button of desired station.
In either condition above, the called station either RINGS, returns
BUSY tone or DO NOT DISTURB tone, depending on the status of
the called station. LCD equipped stations will receive confirmation
of the status of a called station.
38
Issue 1.2 April 2006
Page 39

Immediate CO Line Access
Description: Automatic Line Access will connect you to the first
available line in your Dial 9 Group when you lift the
handset while in an idle state.
To Enable/Disable:
1. Press [7], [7], [1].
2, If Auto Line Access was previously disabled, it is now enabled.
If it was previously active, it is now disabled.
Note: Automatic Line Access is only applicable when the handset
is lifted. Activation of the [SPK] button will still provide
intercom dial tone. You may still place intercom calls by
pressing the DSS button of the desired party.
Individual Line Access
Description: Central Office (CO) lines can be directly selected by
a station user.
Types: DSS key selection.
Access Code Selection.
DSS Key Selection:
1. Press a Central Office Line button. If access is allowed, you will
receive Central Office Dial tone.
2. You may dial a call over the connected line.
Access Code Selection:
1. Dial [8], plus the line number (between 01 and 08. If access is
allowed you will receive Central Office Dial tone.
2. You may dial a call over the connected line.
39
Page 40

Last Number Redial
Description: Last Number Redial automatically stores the last
number that was dialed from your telephone.
1. Place an outside CO line call.
2. Hang Up.
3. Press [REDIAL]. The system will access a CO line and dial the
number that was previously dialed from your telephone.
Note: Last Number Redial is updated every time you access a CO
line and dial at least one digit. If you access a line and dial
no digits, Last Number Redial is not updated.
Last Number Redial does not store intercom numbers.
40
Issue 1.2 April 2006
Page 41

Macro Keys
Description: In some installations, it may be desirable to allow
you to program some keys to satisfy your own
functions, rather than the standard key
programming that applies to all stations. For that
reason you may be allowed to override Keys 15-22
to program your own "functions." These flexible
functions may be composed of up to five (5)
keystrokes of any key that appears on your
telephone. This way, you can custom tailor your
telephone set to satisfy your own personal
requirements.
To Program a Key:
1. Press [PRG].
2. Press the [DSS] button of the key you wish to program. Key 15
through 22 on your telephone set.
3. Continue to press the keys that you wish to store up to a total of
5 buttons.
4. When you have entered all valid buttons that you wish to
program, press the [DSS] button again to save your entry.
To Return a Flexible Function Key to Default Status:
1. Press [PRG]
2. Press the [DSS] button of the key you wish to return to default.
3. Press the [DSS] button again.
4. The key is now the original function as was assigned during
system programming.
To Use a Flexible Function Key
1. Press the programmed button. The flexible function that is
stored will be activated.
Note: [VOL↑↑↑↑] and [VOL↓↓↓↓] cannot be stored as part of a macro.
You can only assign a maco function to a key that is
currently a station DSS or a CO Line. You cannot program a
macro key if it has previously been assigned as a feature
key in system programming.
41
Page 42

Message Waiting
Description: Message Waiting lets you to notify another station
that you attempted to contact them. If their
telephone is LCD equipped, they will also know who
called and the time the message was left.
To Set Message Waiting:
1. Call another station, either by dialing the station number or
pressing [DSS] button for their station.
2. You may press [MSG] if the station does not answer.
3. The [MSG] button will flash at the station where you left the
message.
If the station is equipped with an LCD, the display will show:
XX MESSAGES
To Respond to Messages Waiting
:
From LCD equipped set:
1. When a message is left at your telephone your [MSG] button will
flash. The top portion of the display will show:
XX MESSAGES
2. Press [MSG]. The display will show:
Call
xx Name
This tells you who left the message (Station Name), their station
number (xx).
3a. To call that station, lift the handset or press [SPK]. The party
that left the message will be called.
3b. To cancel the message without returning the call, press [#].
3c. To scroll through to other messages (if you have more than one)
press [VOL↑↑↑↑] or [VOL↓↓↓↓]. You may return any call by using step
3a, above.
From non-display set:
1. When a message is left at your telephone your [MSG] button will
flash.
2. Lift Handset or press [SPK]. Press [MSG]. You will call the
station that left the message.
Note: If you hang up after you have contacted a station by the
steps listed above and the [MSG] continues to flash, you
have more messages waiting on your station. Your [MSG]
key may also flash while you are in conversation to indicate
to indicate an automatic callback that has been placed on
your telephone set. For details see Automatic Callback.
42
Issue 1.2 April 2006
Page 43

Mute
Description: You may temporarily disable the transmitter on your
telephone handset or microphone so that you may
converse without the other party hearing your
conversation.
Handset Mute:
1. While using your handset on a call, press [MIC]. The button will
flash rapidly. This indicates that your telephone transmitter is
temporarily disabled. You will still be able to hear your party.
2. Press [MIC] again. The button will go dark. This indicates that
the transmitter has been turned back on.
These steps can be repeated as many times during a
conversation as you wish.
Speakerphone Mute
:
1. While in the Speakerphone mode, the [MIC] button indicates
that status of the speakerphone's microphone. If the button is
lit, the microphone is active. If it is flashing, the microphone is
inactive.
2. You may alternate between active and inactive (muted) as many
times as you wish by pressing the [MIC] button.
Paging
Description: Paging allows you to make voice announcements
through externally provided paging systems and
internal telephone speakers.
To access paging:
1. Lift the handset or press [SPK].
2. Press [#] or [PAGE] if equipped.
3. Press the access code for the type of paging you want to use:
[0]=Internal and External All Page
[1]=Internal All Page
[2]=Internal Zone Page (you must also dial the zone number 1-
8).
[3]=External Zone Page
[9]=External All Page (opens all external zones).
Note: If Paging is common in your business, you may assign one or
more Page keys on your telephone set for convenient access.
43
Page 44

Paging (Answer)
Description: Answer Page allows you to speak directly with a
person that is paging.
1. Lift the handset or press [SPK].
2a. Press [#],[*]. You will be connected to the party that is making
the page.
Note: This function will pick up the station that is using ANY
paging function, internal, external, or all page. You may also
program an Answer Paging key on your telephone set if
desired.
Privacy/Privacy Release
Description: Privacy/Privacy Release allows a user to permit or
exclude other stations from entering into an existing telephone
conversation. It’s use is in conjunction with the implementation of
1A2 Emulation within the TD-824i telephone system.
Please see 1A2 Emulation elsewhere in this book.
Pulse To Tone Conversion
Description: In some situations, your local CO lines may accept
only pulse dialing to place calls. However, it may be
desirable to be able to output DTMF tones after the
call is connected (such as voice mail, answering
machines, automated banking services, etc.). In
such instances, the Pulse to Tone function will be of
use to you.
1. Select a CO line and dial a call (the CO line is a pulse or rotary
line).
2. Press [MSG]. All digits dialed after this point will be DTMF.
44
Issue 1.2 April 2006
Page 45

Saved Number Redial
Description: Saved Number Redial allows you to save a
telephone number for use at a later time. This
feature is in addition to Last Number Redial.
Automatic Save:
1. You have dialed an outside call. The number does not answer
or is busy.
2. Press [SAVE].
3. The lower portion of the LCD (on display telephones) will
display:
Auto Save
4. You may hang up.
5. Make other calls if you wish.
6. While your telephone is idle, press [SAVE].
7. The telephone will access an available line, turn on your
speaker and redial the saved number.
8. If you take no action, the system will monitor the call for a
programmable period of time and then disconnect the call and
return your telephone to idle.
9. The telephone set will periodically access a CO line and
continue to redial the saved number. Steps 7 and 8 will
continue for a programmed number of times or until you lift the
handset or press [SPK] while the system is on the line or until
you make another call.
Note: If you lift the handset or press [SPK] immediately before
step 6 above, the system will dial the number without the
automatic redial functions taking effect.
45
Page 46

Saved Number Redial (Supersave)
Description: You are on an outside call and you need to save a
number for dialing later. Supersave provides a way
for you to save the number to your telephone set so
that you can dial it later.
SuperSave:
1. You are on an outside call.
2. Press [SAVE].
3. Dial the new telephone number that you wish to save.
4. You may hang up.
5. Make other calls if you wish.
6. While your telephone is idle, press [SAVE].
7. The telephone will access an available line, turn on your
speaker and redial the saved number.
8. If you take no action, the system will monitor the call for a
programmable period of time and then disconnect the call and
return your telephone to idle.
9. The telephone set will periodically access a CO line and
continue to redial the saved number. Steps 7 and 8 will
continue for a programmed number of times or until you lift the
handset or press while the system is on the line or until you
make another call.
46
Issue 1.2 April 2006
Page 47

Station Lock - Unlock
Description: Station lock lets you secure your telephone so
unauthorized calls cannot be made from your
station. While your station is locked, only numbers
that are in the locked toll class and System Speed
Dial Unrestricted can be dialed. All others are
denied.
To Lock Your Station:
1. Press [PRG],[9] .
2. LCD (if equipped ) will display: Security Code
3. Enter a three digit code.
4. Press [SAVE]. Press [SPK]. Your station is now locked. The
LCD will display in the upper right hand corner:
Lock
Note: It is important that you remember the code used to lock your
telephone. You must use it to unlock your telephone. If you
forget, the telephone can only be unlocked by the attendant
or through system programming.
To Unlock Your Station
:
You may unlock your station by repeating the same steps that lock
it. The Lock will disappear from your LCD display.
To Temporarily Unlock Your Station:
1. Press [PRG], [#].
2. LCD (if equipped ) will display:
Security Code
3. Enter the three digit code used to lock the telephone set.
4. If the code matches the code used to lock the set, you will be
connected to an outside line. You may place a call.
5. As soon as you disconnect from the outside line, the telephone
set will revert back to its original locked status.
47
Page 48

Station Reminder
Description: As a station user, you may program your station to
provide a reminder at a pre-determined time every
day. A daily, repeating event is called a station
reminder. When programmed, your telephone will
provide background music over the speaker to
alert you at the programmed time.
Note: This function may also be accessed from the feature menu.
Programming:
1. Your telephone must be idle (on hook, speaker off).
2. Press [REDIAL].
3. Enter your Extension number.
4. Enter the time (in 24 hour format) that you wish the wake up
call to activate and 01-98 to specify the duration of the
reminder.
5. Press [SAVE], [SPK].
6. The LCD display will show the programmed time in the center
of the top row of the display.
Note: If the duration is set to 99, the reminder is a self-
cancelling reminder that will ring your set at the
programmed time. It will automatically cancel.
Cancelling a Station Reminder:
To cancel a station reminder, the procedure is the same as
programming a station reminder, except that the time and type
must all be entered as zeros (00 00 00).
48
Issue 1.2 April 2006
Page 49

Station Reminder (Console Set)
Description: The attendant console(s) are allowed to program
Station Reminders, including wake up calls.
Station Reminders allow you to provide a common
audilble indication (background music) to a
specific Superkey Electronic Telephone set at a
pre-determined time or to ring a Superkey Set or
Single line telephone set at a pre-determined time
(wake up). Station Reminders occur at the same
time every day. Wake up calls will cancel after
they are invoked.
Note: Only stations programmed as consoles have this ability.
1. Press [PRG] [REDIAL]. LCD will display:
2. SYS REMINDER *
OR DIAL STN #
2. Dial Station number.
4. Display will show: XX hh:mm dd
Where XX is the station selected and hh:mm is the starting time of
the reminder (24 hour clock)
dd is the duration of the reminder in minutes (01-99).
01-98 denote a repeating station reminder.
99 indicates a self cancelling Auto Wake Up Call.
If the time and type is 00:00 00, no reminder is set.
5. Enter the start time of the reminder (24 hour format) and the
duration in minutes (01-99).
Press [SAVE]. LCD will return to idle.
Note: If a wake up call is not answered, and a console has a
wake up key, the wake up key will flash, to indicate the
presence of an unanswered wake up call. Pressing the
key will cause the LCD to display the identity of the
unanswered call. The operator can lift the handset to
immediately recall the station, or press the button again to
cancel the wake up call.
49
Page 50

System Reminder
Description: The attendant console(s) are allowed to program
System Reminders. System Reminders allow you
to provide a common audilble indication
(background music) to all Superkey Electronic
Telephone sets at a pre-determined time. System
Reminders occur at the same time every day. Up
to ten system reminders may be set on any
system.
Note: Only stations that are programmed as consoles have this
ability.
1. Press [PRG] [REDIAL]. LCD will display:
SYS REMINDER *
OR DIAL STN#
2. Press [*]. LCD will display: Alarm Clock
Schedule __
3. Select the reminder number that you wish to program (01-10).
4. Press [SAVE].
1. Enter the start time of the reminder (24 hour format) and the
duration on minutes (01-98).
2. Press [SAVE]. Press [SPK].
3. The LCD will display:
IMMEDIATE BACKUP
PRESS -> to SAVE
8. Press [SAVE]. Your display will return to idle.
50
Issue 1.2 April 2006
Page 51

System Speed Dialing
Description: System Speed Dialing allows telephone numbers to
be stored in the system and made available for use
by all stations. All stations may have access to
system speed dial. A station's toll classification may
govern the actual ability to dial system speed dial
numbers.
Note: The actual number of speed dial numbers in the system is
dependant upon the system mix of personal speed dial
numbers and whether the system is programmed for a
system directory.
Types: Dial by Name (Directory) Access
Numeric (Bin) Access
Dial By Name (Directory) Access
Note: Dial By Name is only available to stations equipped with
LCD Displays. [DIR] must be programmed on the system in
order to utilize the Directory Function.
1. Press [DIR] button.
2. Press [2].
Display Shows: ENTER LETTER
3. Press the button containing the first letter of the desired speed
dial name. Continue to press the number until the desired letter
appears in the lower left corner of the display.
When the desired letter is shown in the display, press [VOL↑↑↑↑].
Key 1= Q Z (Blank Space) 1 Key 2=A B C 2
Key 3=D E F 3 Key 4=G H I 4
Key 5=J K L 5 Key 6=M N O 6
Key 7=P R S 7 Key 8=T U V 8
Key 9=W X Y 9 Key 0= . : & 0
Key *= - / ! * Key #=( ) $ #
51
Page 52

System Speed Dialing
(Continued)
4. The display will show the first name that matches. If that is not
the name desired, press [VOL↑↑↑↑] again until the display shows the
proper name. If the end of the list is reached, the system will
begin again at the first name in the list.
7. If there is no match, the display will show:
NO ENTRIES
TRY AGAIN.
You may return to step 5 above and continue with a valid entry or
lift the handset and return to an idle state.
8. When the desired name is found, you may lift the handset or
press [SPK] and the call will be automatically placed.
Numeric (Bin) Access
1. Press [SPD] button.
LCD will display: Speed Code
2. Enter three digit speed dial entry.
3 The speaker will activate and the number will be dialed.
4. You may speak handsfree if equipped with a speakerphone or lift
the handset when the other party answers.
52
Issue 1.2 April 2006
Page 53

Personal Speed Dialing
Description: Personal Speed Dialing allows you to save numbers
on your telephone set that are for your exclusive use.
You have a total of 20 personal speed dial numbers,
depending on system programming and options
selected like Dial By Name which take memory
locations when activated. Your 20 personal numbers
are stored either on keys on your telephone set, or 10
can be programmed on your telephone set and
another 10 as numeric entries on your dialpad.
Note: Personal Speed Dial numbers are subject to your station's
toll programming.
Types: Speed Dial by numeric keypad.
Speed Dial by DSS button.
Speed Dial by Numeric Keypad
1. Press [SPD].
2. LCD Display (if equipped) will show: Speed Code
3. Press [0], plus the personal location (0-9). The system will
access the line programmed and dial the telephone number
stored. If no line was selected when the number was
programmed, the system will access the first available line in
your Dial 9 group and dial the digits.
Speed Dial by DSS button
1. Press [SPD].
2. LCD Display (if equipped) will show: Speed Code
3. Press one of the programmed [DSS] buttons (1-10).
4. The system will access the CO line stored with the speed dial
number.
Note: You may bypass pressing [SPD] and only have to press the
[DSS] key provided you dedicate the key to personal speed dial
in system programming. Program 07, FN:00.
Programming
1. Press [PRG]. Press [SPD].
2. LCD Display (if equipped) will show: User Spd Select
0 to 9, DSS 1-10
53
Page 54

Personal Speed Dialing
(Continued)
3. Enter the storage location by dialing through for numeric or by
pressing button 1 through 10.
4. If you want your call to go out on a specific line, press the [MIC/
AT] and enter the line number. Press [MIC/AT] again and enter
the desired telephone number. If you want the call to go out on
any available line, just enter the desired telephone number.
The LCD Display will show the type of Speed Dial you are
storing by either Spd:Dxx if a DSS button (xx is the button
number selected from 01-10) or Spd:Nxx if a numeric entry (xx
is the keypad number 00-09).
If you selected a CO line, the display will show TK:xx (xx= the
CO line that you selected 01-40) or if the Dial 9 group, TK:00.
7. Enter the actual telephone number that you want to store, (up to
30 digits, including PAUSES [HOLD], FLASH [TRF/FL], or tone
dialing conversion [MSG].
8. Press [SAVE].
9. If your telephone is equipped with an LCD Display it will show:
Set Ring Freq.
0
This is a function of Caller ID. The purpose is to give you the
opportunity to identify specific numbers ringing your telephone
with a unique ring. For example, if you store your home
telephone number in personal speed dial and would like to have
a unique ring whenever someone from home dials your
telephone, select a frequency from 1 to 8. For normal ringing
simply enter [SAVE] and do not enter a specific frequency.
Note: Personal Speed Dial is subject to any toll control assigned
to your station.
54
Issue 1.2 April 2006
Page 55

Room Monitor
Description: Room Monitor allows you to use a speakerphone for
surveillance. When a speakerphone is set up for
Room Monitor, it is placed in the auto answer mode.
The difference between Room Monitor and Auto
Answer is that no audible tone is given to the Room
Monitor station to indicate a call.
Note: The station to be monitored must be a speakerphone.
At the station that is to be monitored:
1. Press [7], [7], [0]. The LCD will display: XX Room Monitor
Where XX is the station number.
From any other station:
1. Dial the number of the telephone in Room Monitor Mode.
2. You will hear confirmation tone to indicate that you are connected
to the station.
3. You now have a two way voice path to the station.
4. This connection will remain in place until you hang up or until the
station programmed as a room monitor goes off hook and then on
hook.
To remove a station from Room Monitor mode:
1. Lift handset or press [SPK].
2. Hang Up handset or press [SPK].
Note: The station that is programmed as a room monitor will remain
in the Room Monitor mode until it is removed from the mode.
Any number of stations may call the monitor (one at a time)
and may monitor for any required amount of time.
55
Page 56

Voice Mail Access
Description: A Voice Mail Access Key is typically programmed on
each telephone set of each station user. This Voice
Mail Access Key represents the total number of voice
mail ports in your system. The voice mail ports are
assigned in system programming into a hunt group.
By pressing the Voice Mail Access Key, you are
making a call in a hunting or rollover fashion to the
available voice mail ports in the system.
To access voice mail ports
1. Press the voice mail access key and listen for the voice
prompts. An available voice mail port will be accessed. If the
auto login feature is enabled, you will be asked for your security
code.
2. Enter your security code.
3. You are logged in to the voice mail system and may use various
features that are spoken to you by the voice mail system.
Voice Mail Live Call Recording
Description: Live Call Recording allows you to record a
conversation directly into your mailbox for retrieval at
a later time.
During a Conversation:
1. Press the Record key on your telephone set. The voice mail
system will be notified of your request to record the conversation
automatically. At the end of your conversation, the voice mail
system will light your MSG key, indicating you have a new
message.
To Stop a Recording without Ending the call:
1. Press the [HOLD], placing the caller on hold. Then retrieve the
call from hold. Live call recording is terminated when you place
the caller on hold.
56
Issue 1.2 April 2006
Page 57

Voice Mail Message Retrieval
Description: When messages have been left in your voice mailbox,
you will notice a flashing MSG key on your telephone
set. LCD equipped digital telephones will also have an
indication of xx Messages.
To retrieve your messages:
1. While the MSG key is flashing, press the [MSG] key.
2. Call XX (Voice Mail Port Name)
if programmed will display. Either lift the handset or press [SPK]
to automatically call the Voice Mail System. If you have messages
from other station users, you may scroll through the messages by
pressing [VOL↑↑↑↑] or [VOL↓↓↓↓] until you come to the Voice Mail
Message, then press [SPK] or lift the handset to make the
connection.
3. If the auto login feature is enabled you will be prompted to enter
your security code. After entering your security code, proceed with
the voice prompt instructions to retrieve your messages.
Voice Mail Transfer Key
Description: The Voice Mail Transfer Key allows user’s the ability to
transfer outside callers directly to the personal mailbox
greeting of the desried station user.
For example, a call comes into the system and the
caller would like to leave a voice message for John
Smith. The Operator knows that John Smith is out of
the office and can use the Voice Mail Transfer Key to
send the caller to directly to his mailbox.
During a conversation with an outside party:
1. Press the Voice Mail Transfer Key. The line goes on hold
automatically.
2. Press desired [DSS] key or enter the station number. Hang up.
57
Page 58

Volume Control
Description: The volume of the Ringer, Speaker, and Handset may
be programmed for each digital station. The volume
settings may also be changed for individual calls
without affecting the programmed levels.
Types: 1: Ring Volume
2: Speaker Volume
3: Handset Volume
4: Increase Ring Level Gradually
5: Ring Frequency
6: Microphone Level
7: Camp On Tone Volume Level
Permanent Programming:
1. While your station is idle, press [PRG], [6].
2. If your station is equipped with LCD, the display will show:
Set: 1:Ring 2:Spk
3:Handset More:#
3. Select the item that you want to program, (1, 2, or 3) or press the
# key for more options. (See types above)
4. Press [VOL↑↑↑↑] to increase the volume or press [VOL↓↓↓↓] to
decrease.
5. Press [SAVE] to save the programming and exit to idle status.
Note: Each setting has eight discrete levels. LCD sets will show the
level number in the lower right corner of the LCD display. As
well you will hear an audible indication to allow you to selct
the most desireble level. It is suggested to leave the
microphone level at default.
Temporary Volume Adjustment:
1. While you are using your handset, your speaker, or your
telephone is ringing, you may:
2. Press [VOL↑↑↑↑] to increase the volume or press [VOL↓↓↓↓] on the
device (handset, speaker, ringer) that is operational.
3. If you are using your handset or speaker, the levels will revert to
permanent programming as soon as you hang up or turn off the
speaker. Ringing volume will revert to permanent programming
on the next call.
58
Issue 1.2 April 2006
Page 59

Wake Up Call
Description: As a station user, you may program your station to
provide a reminder at a pre-determined time. A
single, non-repeating event is called a wake up call.
When programmed, your telephone will ring to alert
you at the time you have programmed.
Programming:
1. Your telephone must be idle (on hook, speaker off).
2. Press [PRG] [REMIND] Enter YOUR station number.
3. Your LCD display will show: User Alarm
hh:mm dd
Where hh:mm indicates the alarm time (will be 00:00 if no
alarm is set). dd will be 99 if a wake up call, 00 if inactive.
4. Enter the time (in 24 hour format) that you wish the wake up call
to activate and 99 to program it as a wake up call.
6. Press [SAVE]
7. The LCD display will show the programmed time in the center of
the top row of the display.
Note: If the duration is set to any value other than 99, the reminder
is a non-cancelling reminder that will activate the
background music function on your set for the time period
programmed under the value (1 - 98 minutes). It will repeat
daily until it is deactivated.If you have a key, you may press
it to deactivate the reminder without removing the
programming. You may reactivate it at any time by pressing
the button again.
Cancelling a Wake Up Call:
Cancel a Wake Up Call by using the same steps as programming a
wake up call. In the time and duration, you should enter all zeros
(00 00 00) to cancel.
59
Page 60

System Speed Dial Entries
100 126
101 127
102 128
103 129
104 130
105 131
106 132
107 133
108 134
109 135
110 136
111 137
112 138
113 139
114 140
115 141
116 142
117 143
118 144
119 145
120 146
121 147
122 148
123 149
124 150
125
60
Issue 1.2 April 2006
Page 61

System Speed Dial Entries
61
Page 62

Personal Speed Dial Entries
Numeric
Dialpad
DSS
Button
1 1
2 2
3 3
4 4
5 5
6 6
7 7
8 8
9 9
0 10
62
Issue 1.2 April 2006
Page 63

Station
Number
Station
Name
Notes
11 Outside Line Numbers
12 1.
13 2.
14 3.
15 4.
16 5.
17 6.
18 7.
19 8.
20 Voice Mail Access Code
21
22 Fax Number
23
24 Operator
25
26
27
28
29
30
31
32
33
34
Page 64

P/N 93000016
Issue 1.2 / April 2006
 Loading...