

Transporter GL Owner's Manual And Warranty

D82008305 REV A 1/26/09

2 D82008305 REV A 1/26/09
All rights reserved. No part of this publication may be reproduced, stored in a
retrieval system, or transmitted in any form by any means, electronic, mechanical,
photocopying, recording or otherwise, without the prior written permission of
HOVEROUND CORPORATION.
Neither HOVEROUND CORPORATION nor its affiliates shall be liable to the purchaser
of this product or third parties for damages, losses, cost or expenses incurred by
purchaser or third parties as a result of accident, misuse, or abuse of this product
or unauthorized modifications, repairs, or alterations to this product.
HOVEROUND is a registered trademark of the HOVEROUND CORPORATION. Other product names used herein are for identification purposes only and may be trademarks
of their respective owners. HOVEROUND disclaims any and all rights in those marks.
Specifications and equipment subject to change without notice.

Table Of Contents
Chapter 1 Rules For Safely Operating Your Scooter. . . . . . . . . . . . . . . . . . 4-5
Chapter 2 Getting To Know Your Scooter. . . . . . . . . . . . . . . . . . . . . . . . 6-10
Chapter 3 Free-Wheeling Your Scooter . . . . . . . . . . . . . . . . . . . . . . . . . . . 11
Chapter 4 Learning To Get Around. . . . . . . . . . . . . . . . . . . . . . . . . . . . 12-15
Chapter 5 Disassembling And Reassembling Your Scooter . . . . . . . . . . 16-17
Chapter 6 Batteries And Battery Charging . . . . . . . . . . . . . . . . . . . . . . 18-21
Chapter 7 Care And Maintenance. . . . . . . . . . . . . . . . . . . . . . . . . . . . . 22-24
Chapter 8 Trouble Shooting . . . . . . . . . . . . . . . . . . . . . . . . . . . . . . . . . 25-26
Chapter 9 EMI Warning . . . . . . . . . . . . . . . . . . . . . . . . . . . . . . . . . . . . 27-28
Chapter 10 Specifications. . . . . . . . . . . . . . . . . . . . . . . . . . . . . . . . . . . . . . . 29
Appendix A: Record Of Service . . . . . . . . . . . . . . . . . . . . . . . . . 30
Limited Warranty. . . . . . . . . . . . . . . . . . . . . . . . . . . . . . . . . . . . 31
D82008305 REV A 1/26/09 Table Of Contents 3

4 Chapter 1: Rules For safely Operating Your Scooter D82008305 REV A 1/26/09
Chapter 1
Rules For Safely Operating Your Scooter
Your scooter is a powerful electric vehicle. Please read the following notes carefully
to ensure safety at all times and prevent personal injury. Always make certain your
scooter is in full working order before use.
The “Dos And Do Nots”
1. Do not ride your scooter without reading and understanding this instruction
manual first.
2. Do not climb or drive on slopes greater than 8 degrees.
3. Do not carry passengers or exceed the maximum weight capacity:
Transporter GL 300 pounds.
4. Do not mount or dismount your scooter unless it has come to a full stop and
is turned off.
5. Do not switch your scooter on with the forward/reverse lever depressed.
6. Do not mount or dismount your scooter unless the speed adjustment dial is
set to minimum, and power is turned off.
7. Do not back up your scooter onto uneven inclines or surfaces.
8. Do not drive your scooter in a confined space unless the speed adjustment
dial is set to minimum.
9. Do not turn suddenly at full speed, especially on uneven or hilly ground.
Failure to observe this may result in tipping of your scooter.
10. Do not drive your scooter unless the seat and tiller are locked into the driving
position.

11. Do not drive your scooter over deep, soft terrain (Examples: soft dirt, deep
grass, loose gravel.)
12. Do not operate your scooter when under the influence of alcohol or certain
drugs, which may impair your safety.
13. Do not climb onto curbs or curb cut-outs that exceed your scooter’s capability.
Do not turn when negotiating curbs. Always approach curb cut-outs at low
speed and straight on.
14. Always come to a full stop before changing direction (forward or reverse).
15. Always keep your feet on the scooter when driving.
16. Always proceed carefully while riding your scooter, especially when
approaching a ramp or a hill.
17. Always proceed carefully while riding on uneven surfaces.
18. Do not sit on your scooter while being transported in a moving vehicle.
Always tie your scooter down and sit in a vehicle seat.
19. Do not drive your scooter through deep water or leave exposed to heavy rain.
20. Do not drive your scooter if the rear anti-tip wheels are damaged or removed.
21. Do not clean your scooter with a high pressure spray.
Hoveround Corporation is not responsible for any damage or injury due to improper
or unsafe use of its scooters.
D82008305 REV A 1/26/09 Chapter 1: Rules For safely Operating Your Scooter 5
6 Chapter 2: Getting To Know Your Scooter D82008305 REV A 1/26/09
Chapter 2
Getting To Know Your Scooter
Congratulations on your purchase of a Hoveround scooter. This scooter offers a
combination of style and comfort, and a wheelbase designed for easy maneuverability both indoors and outdoors. Direct drive rear wheels and electro-mechanical
brakes provide a safe comfortable ride.
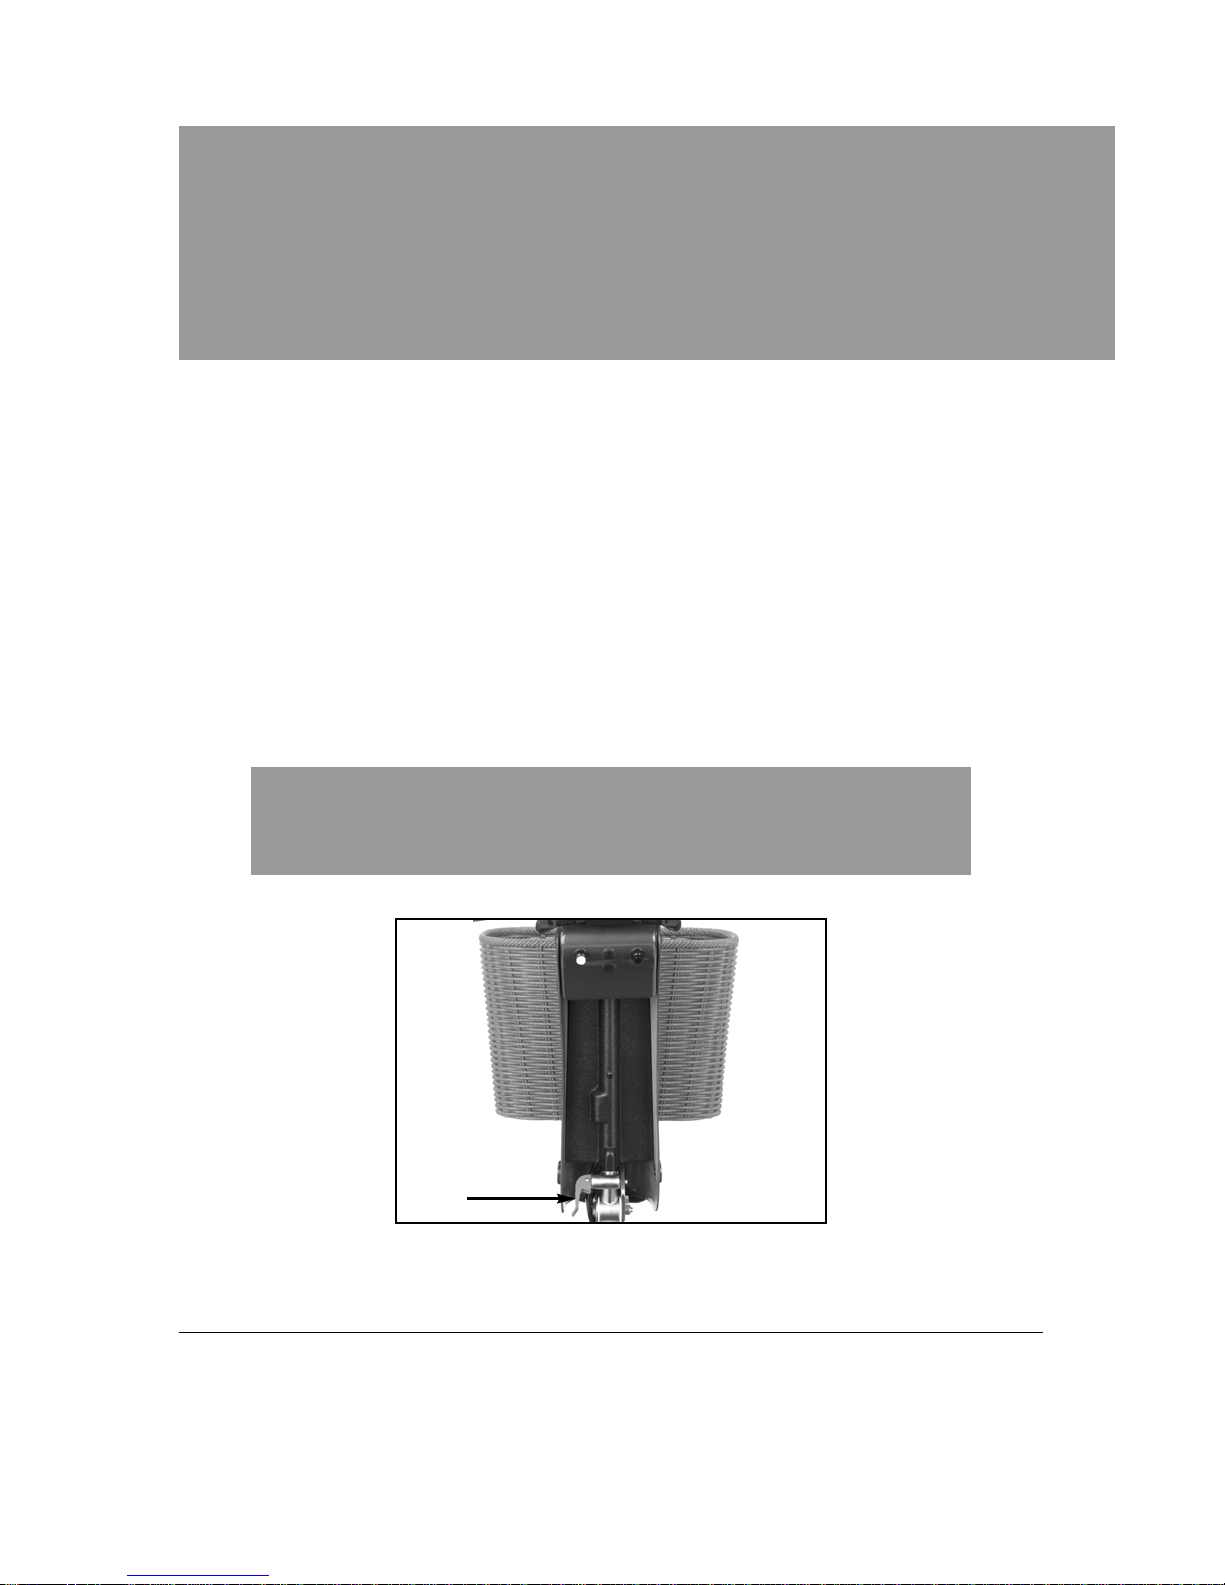
Adjusting Your Tiller
The tiller can be placed in one of five upright positions or folded down for transport. To release the tiller, push the red tiller-locking lever, located on the lower left
side of the tiller console, from left to right. When the tiller is in the desired position, release the lever to lock the tiller in place. Make sure the tiller is securely
locked in place before driving, (See Figure 2A, Below).
FIGURE 2A
Tiller
Locking
Lever
WARNING: Always make sure the tiller is in the upright position and
the safety knob is fully engaged before driving your scooter.
Control Features
Please use this section to familiarize yourself with the controls. See Chapter 4 for
important information on how to operate and drive the scooter.
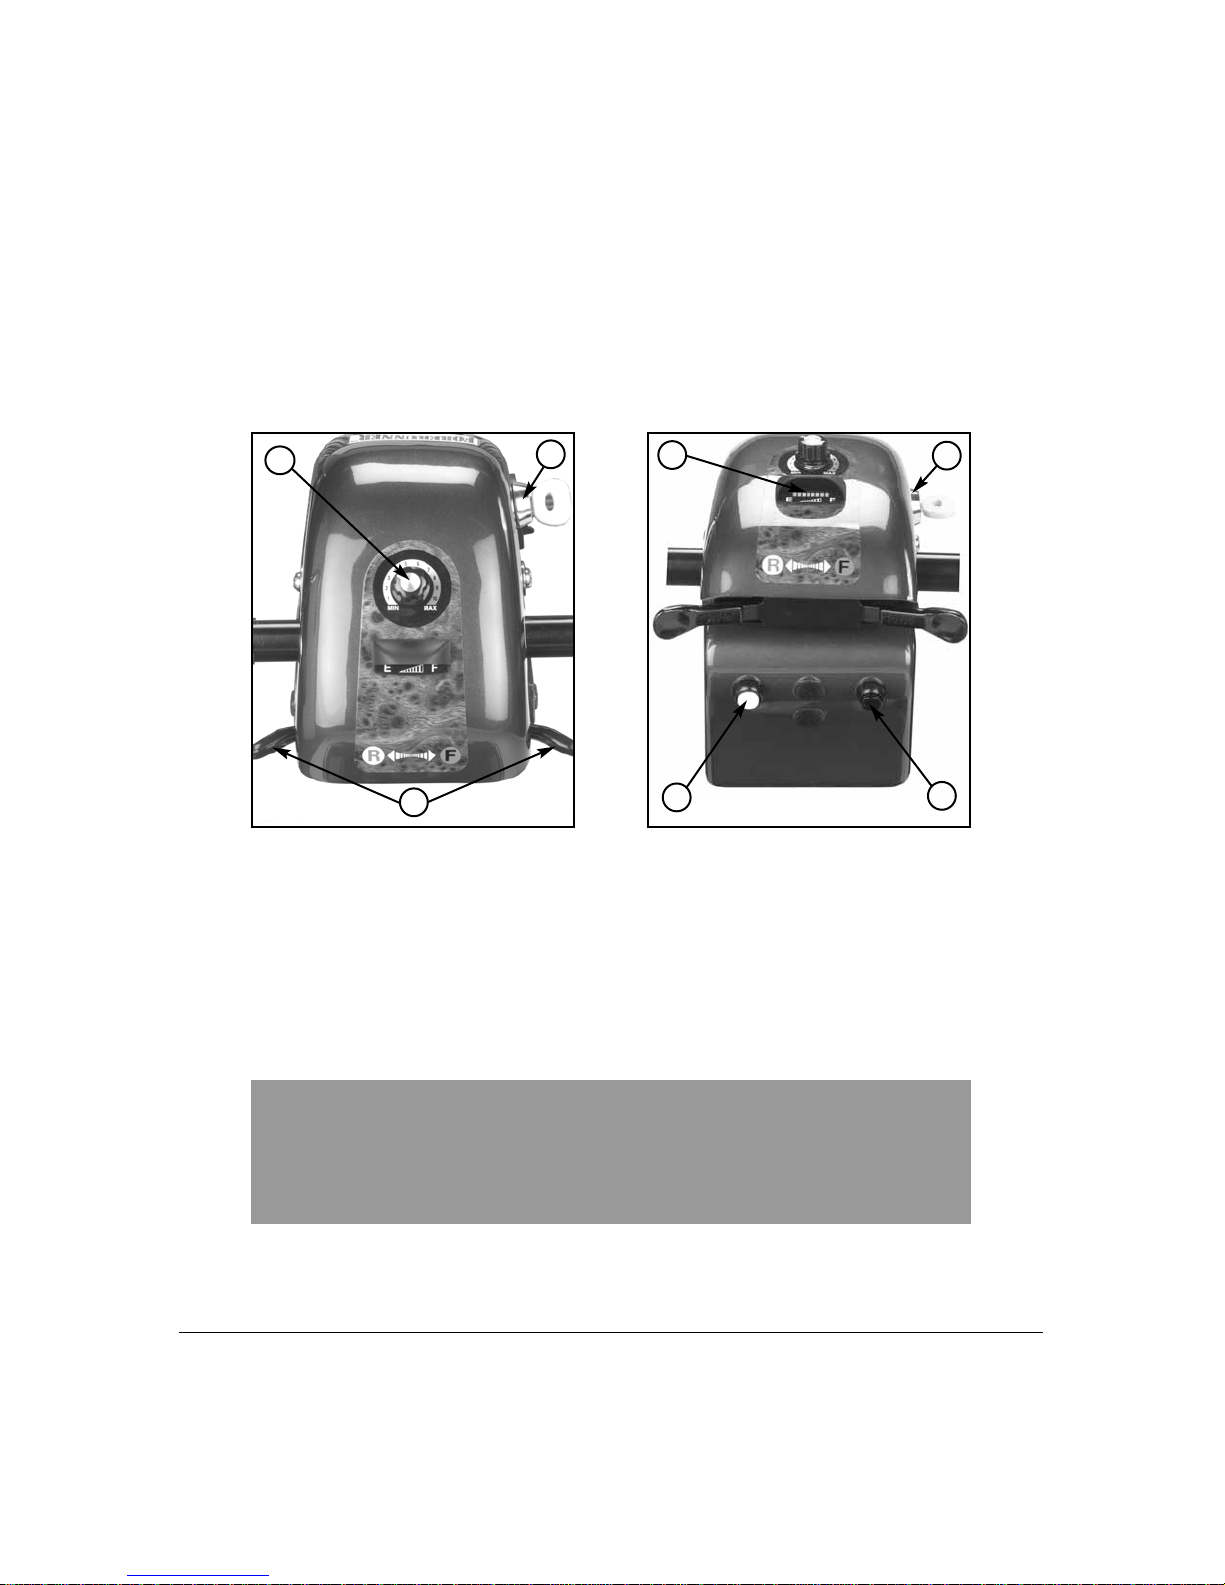
Your controls are located on the handlebar console, (See Figures 2B and 2C).
FIGURE 2B FIGURE 2C
1. On-Off Key Switch: Located at the right hand side of the control console. To
turn “on” insert the key and turn to the right (clockwise).
To switch “off” your scooter, turn the key counter clockwise. Make sure to
remove the key when the vehicle is unattended.
D82008305 REV A 1/26/09 Chapter 2: Getting To Know Your Scooter 7
2
1
3
1
5
6
4
CAUTION: Do not switch to “off” when scooter is moving. Doing so
will result in the sudden application of the motor brake, a dangerous
situation.

8 Chapter 2: Getting To Know Your Scooter D82008305 REV A 1/26/09
When the scooter is in motion, you should ONLY switch “off” in the case of an
emergency. Continual use in this mode may cause undue stress to the drive system and damage the main electronic speed control unit. Be extremely cautious on
slopes. Sit upright in your seat or your scooter may become less stable.
2. Battery Indicator Gauge: (Figure 2C) Located at the top of your console.
When your scooter is switched on, the bar on the gauge will move across the
scale from the left to right, indicating fully charged batteries. As the power is
used up, the bars will move left indicating the level of charge. When the
batteries are fully charged all bars are illuminated.
3. Speed Adjustment Dial: (Figure 2B) Used to pre-select your desired speed,
this dial is proportional to speed and can be set anywhere between 1 and 10.
Tur n the knob counter-clockwise to “minimum” for gentle operation, and
clockwise towards “maximum” to increase speed.
NOTE: When attempting to climb slopes, you may need to set the dial to a
high setting. Remember the higher the number you set your speed dial,
the faster your scooter will travel.
4. Speed Control Lever: (Figure 2B) This lever controls forward and reverse
speed. Pushing the right thumb lever moves your scooter forward and
controls the speed by the amount of pressure applied.
Pushing the left thumb lever moves the scooter in backward and controls the
speed by the amount of pressure applied. When released, both levers will
return to the neutral position and you will stop gently.
Note: You can reverse this procedure by pulling the levers backwards.
5. Light Switch: (Figure 2C) Pressing this blue button turns the lights on and off.
6. Horn: (Figure 2C) Press the yellow button to sound horn.
Seating Adjustments
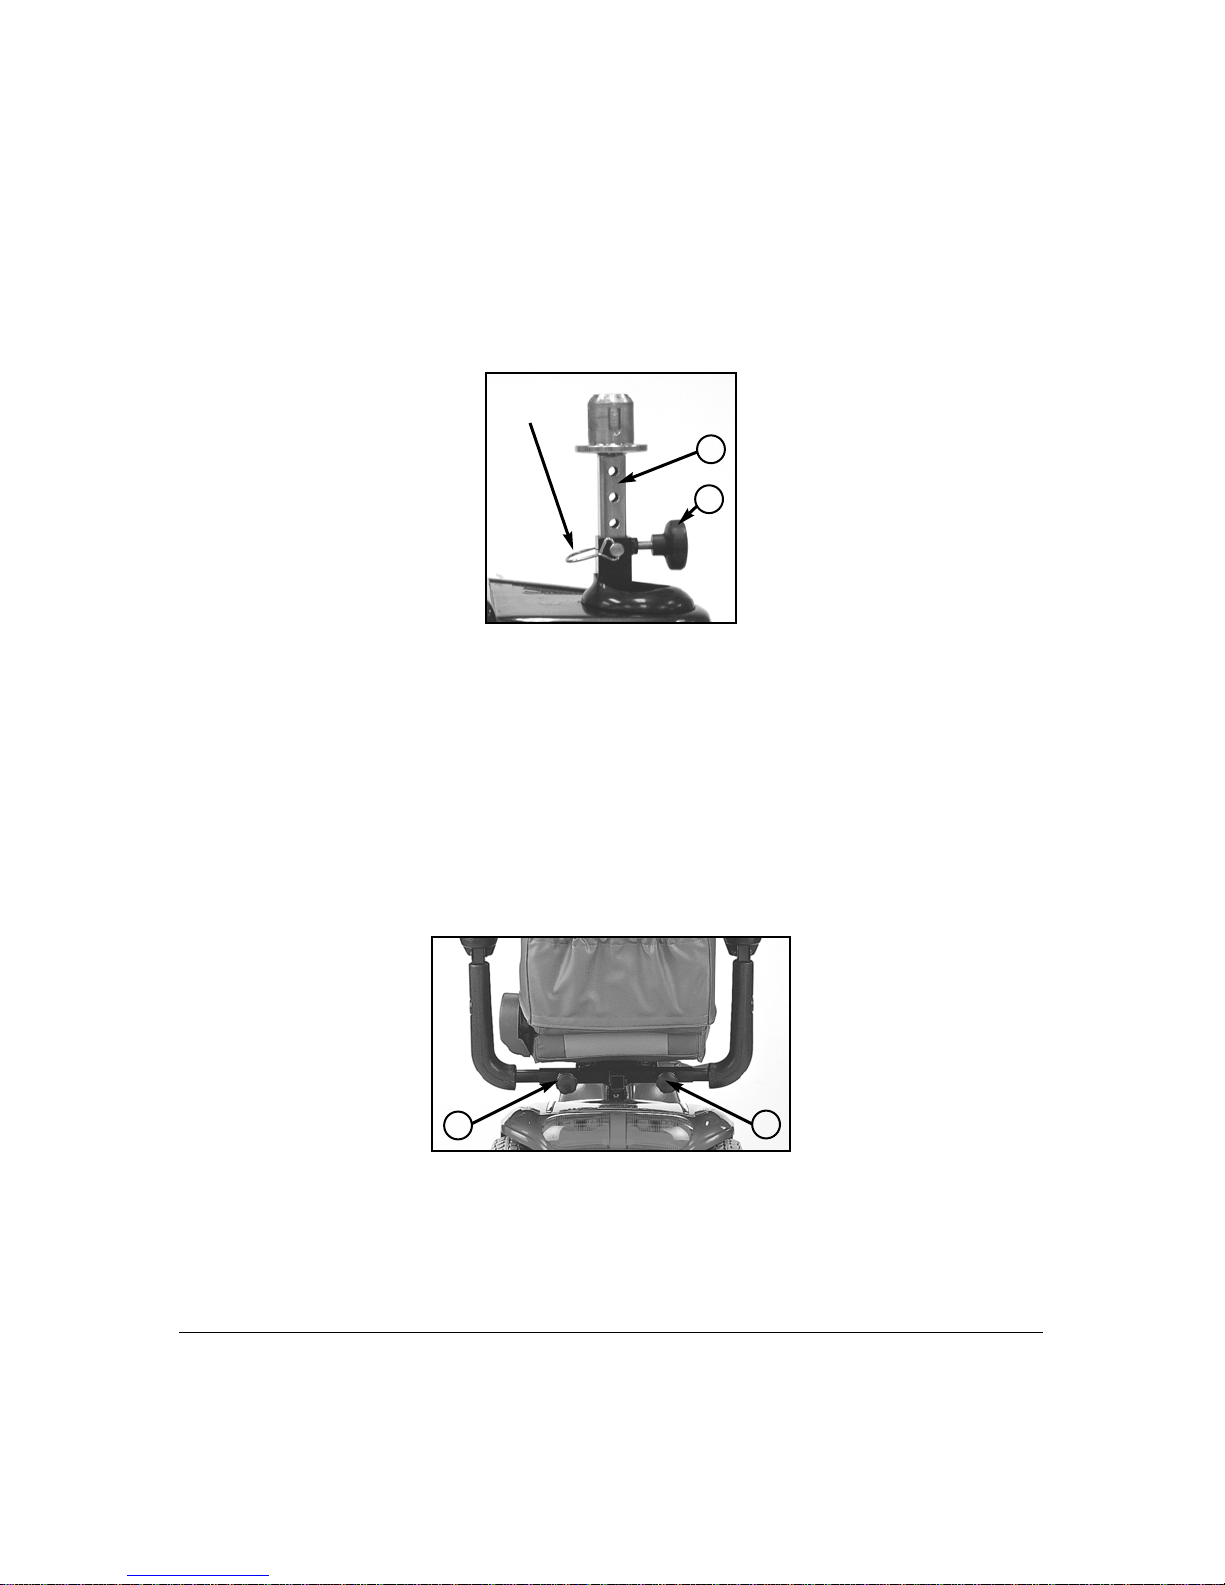
1. Seat Height Adjustments (Figure 2D, Below)
Located on the main frame, the post holding the seat has height adjustment
holes. To change the seat height, fit the locking pin in any of the holes.
FIGURE 2D
2. Seat Post Tension Adjustment (Figure 2D, Above)
To ensure maximum stability and reduce side-to-side motion, tighten the
tension knob on the seat post. Note: The knob is not for adjusting the seat
height.
3. Armrest Width Adjustment (If so equipped) (Figure 2E, Below)
Loosen the armrest knob to adjust the space between armrests. Retighten the
knob to secure. The arms can be removed for transport but do not use the
scooter without the arms in place and both knobs tightened.
FIGURE 2E
D82008305 REV A 1/26/09 Chapter 2: Getting To Know Your Scooter 9
Locking
Pin
2
3
3
1

10 Chapter 2: Getting To Know Your Scooter D82008305 REV A 1/26/09
4. Armrest Angle Adjustment (If so equipped) (Figure 2F, Below)
For easy seat access, flip the armrest up by pulling up on the end. To adjust
the angle, loosen the bolt and lock nut under the arm rest. Re-tighten to hold
the angle in place.
5. Armrest Pad Length Adjustment (If so equipped) (Figure 2G, Below)
To extend the armrest, adjust the knob underneath. Tighten to hold in place.
6. Seat Slide Adjustment (If so equipped) (Figure 2G, Below)
Adjust your seat forward or back by pulling up on the lever and moving the
seat in the desired direction. As soon as you release the lever, the seat will
lock in the new position.
FIGURE 2F FIGURE 2G
7. Seat Swivel Adjustment (If so equipped) (Figure 2F, Above)
To swivel and lock the seat into one of four positions, pull up and hold the
spring loaded lever under the right side of the seat.
8. Captain Seat Backrest Angle Adjustment (If so equipped) (Figure 2F, Above)
To adjust the back rest angle up to a maximum of 12 degrees, adjust the
screw and lock nut on each side of the base. The back also has an adjustable
headrest. The back folds down on to the seat for storage.
4
7
5
6
8
 Loading...